


How to Install LDAP server on Ubuntu


This article applies to: ER605 v2; Omada Controller v5.8 and above.
This article describes how to install OpenLDAP on Ubuntu. There are detailed installation instructions on the Ubuntu website, please refer to: https://ubuntu.com/server/docs/service-ldap
1. LDAP server installation
After entering the following command, there will be some installation options to choose from.
sudo apt install slapd ldap-utils
sudo dpkg-reconfigure slapd
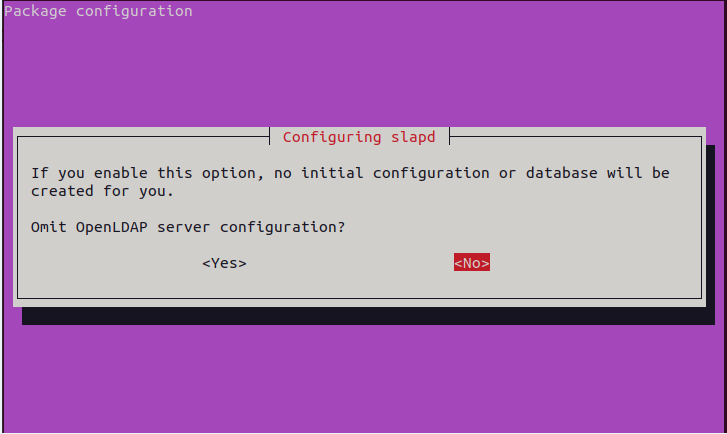
(1) Select No in the following screen.
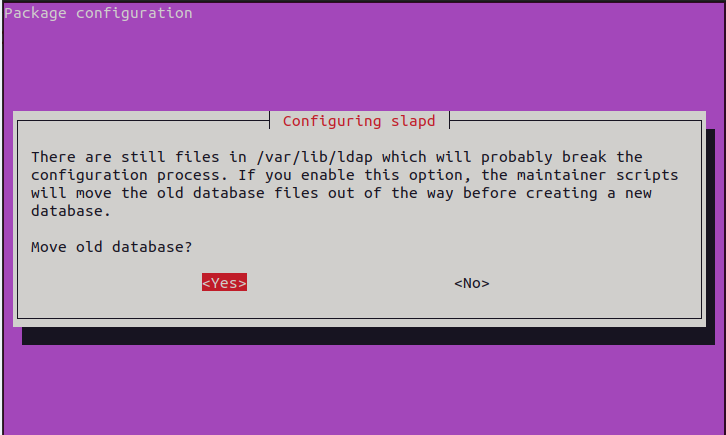
(2) After configuring the DNS domain-name and administrator password, choose to move old database.
(3) You can modify the domain name in the database with the following command.
Here we change the BASE to dc=tplink, dc=com. URI is the IP address of this PC. So the administrative user for this suffix is cn=admin, dc=tplink, dc=com and its password is the one selected during the installation of the slapd package
nano /etc/ldap/ldap.conf

(4) Check that LDAP Server is functioning properly.
netstat –an| grep 389

2. Populating the Directory
Ubuntu's installation instructions create the People and Group nodes and the information they belong to in the same file, which may cause problems when subsequently adding the created content to the ldap and only adding People nodes. We can create these four sections in separate files and add them separately. As shown below.
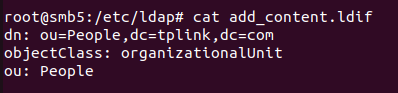
(1) Create add_content.ldif belonging to People node.
(2) Add this content to the ldap server.
ldapadd -x -D cn=admin,dc=example,dc=com -W -f add_content.ldif
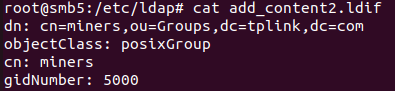
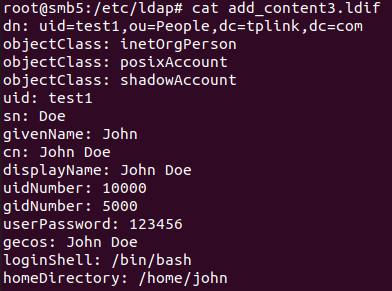
(3) Create add_content1.ldif, add_content2.ldif, add_content3.ldif, fill in the corresponding contents and add them to the ldap server.

(4) Use the following command to query the added information.
ldapsearch -x

(5) Use the following command to check that this information is being added correctly. For example, let's search for the john entry and ask for the cn and gidnumber attributes.
ldapsearch -x -LLL -b dc=tplink,dc=com '(uid=john)' cn gidNumber

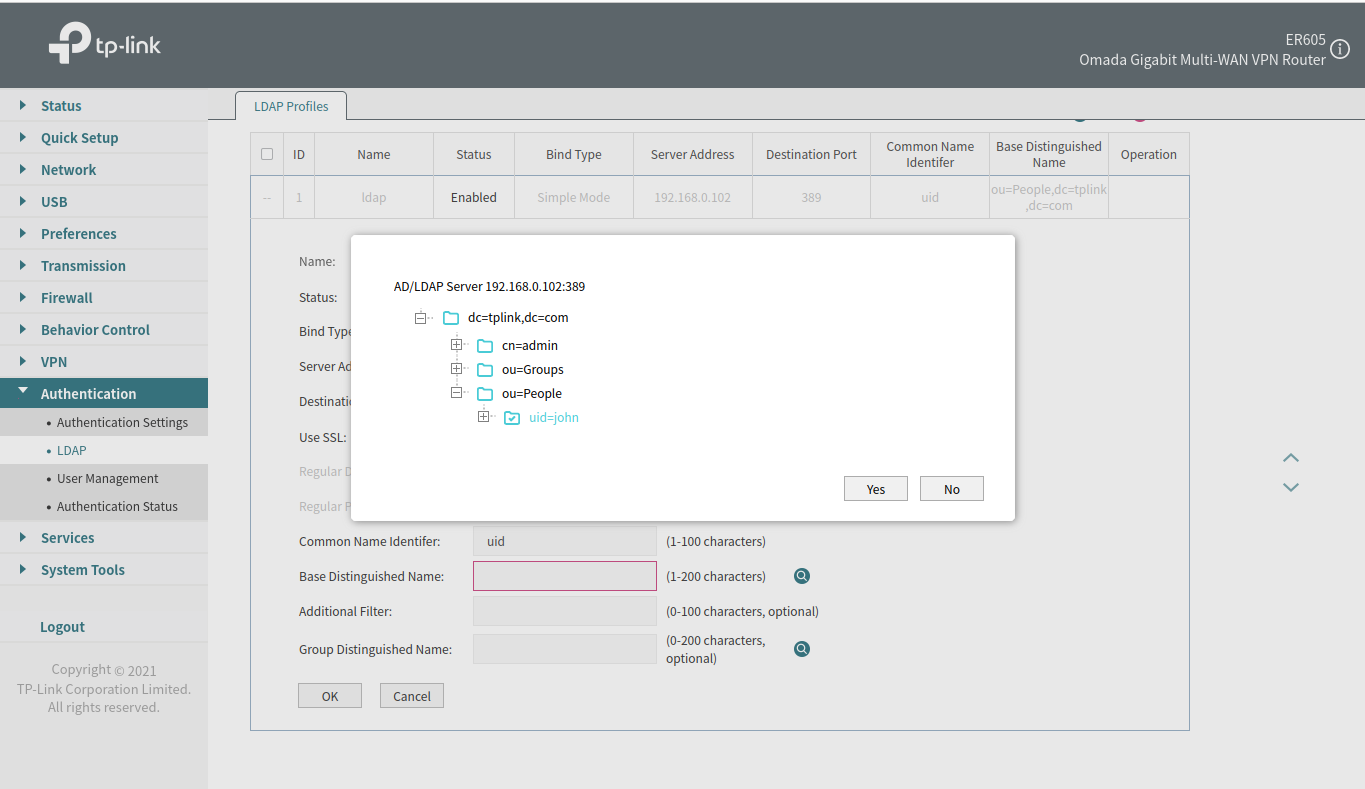
3. Configuring LDAP profiles on the Omada Router
After entering the IP address and port of the LDAP server, click Search on the right to bring up the contents of the configured directory. Please note that the default Bind Type is anonymous. For detailed configuration for use with Omada Router, please refer to: How to create LDAP server on Windows and work with Omada Router to achieve unified account management?
Get to know more details of each function and configuration please go to Download Center to download the manual of your product.
