


How to Recover or Reset the Password for Omada Cameras and NVRs


Contents
Recover a forgotten password for an Omada camera or NVR
Manage password and password recovery settings for an Omada NVR
Manage password and password recovery settings for an Omada camera
Introduction
Forgot the password for an Omada Camera or Omada NVR? This guide explains how to recover access using email verification, QR code verification, or security questions. It also covers how to change device passwords and manage password recovery settings, helping maintain secure and uninterrupted access to Omada video surveillance systems.
Requirements
- Omada NVRs
- Omada Cameras
Password recovery
Recover a forgotten password for an Omada camera or NVR
Omada Cameras and Omada NVRs support the following password recovery methods:
- Email Verification
- QR Code Verification
- Security Question Verification
Note:
- To recover an Omada NVR password, select Forgot Password on the NVR login page.
- To recover an Omada Camera password, navigate to the Devices Found list in the NVR interface and select the Forgot Password icon for the target camera.
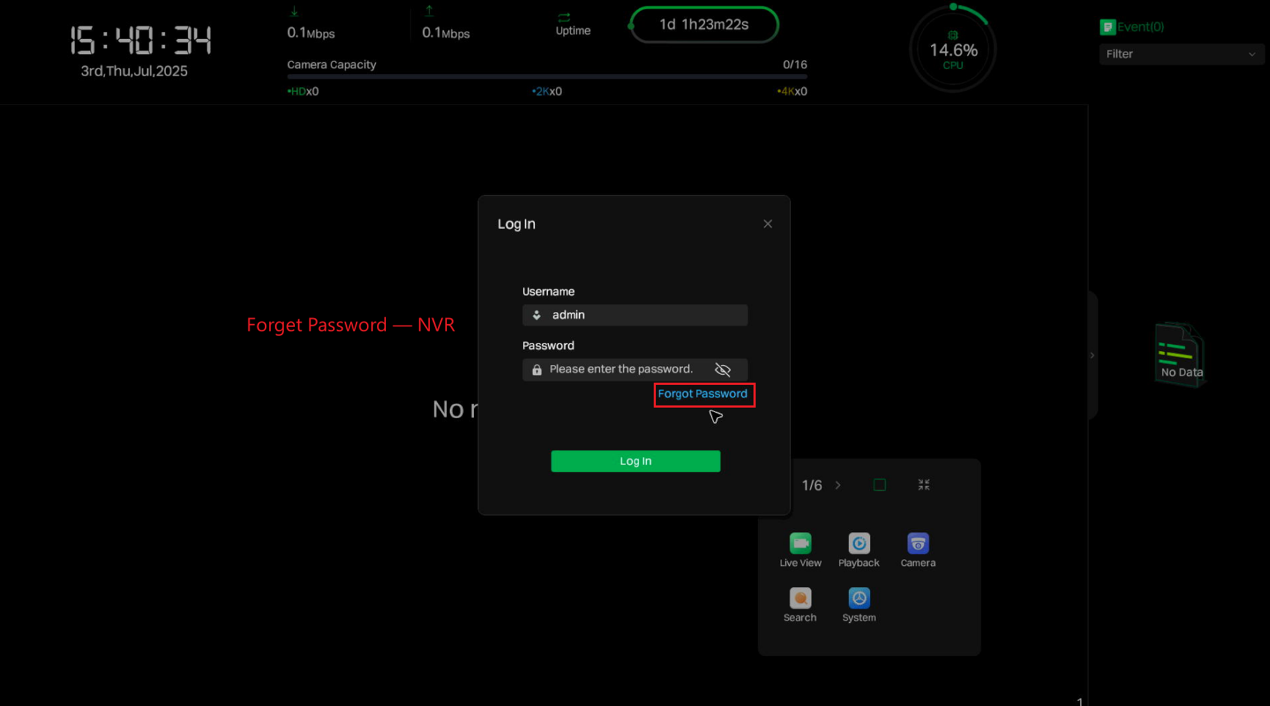
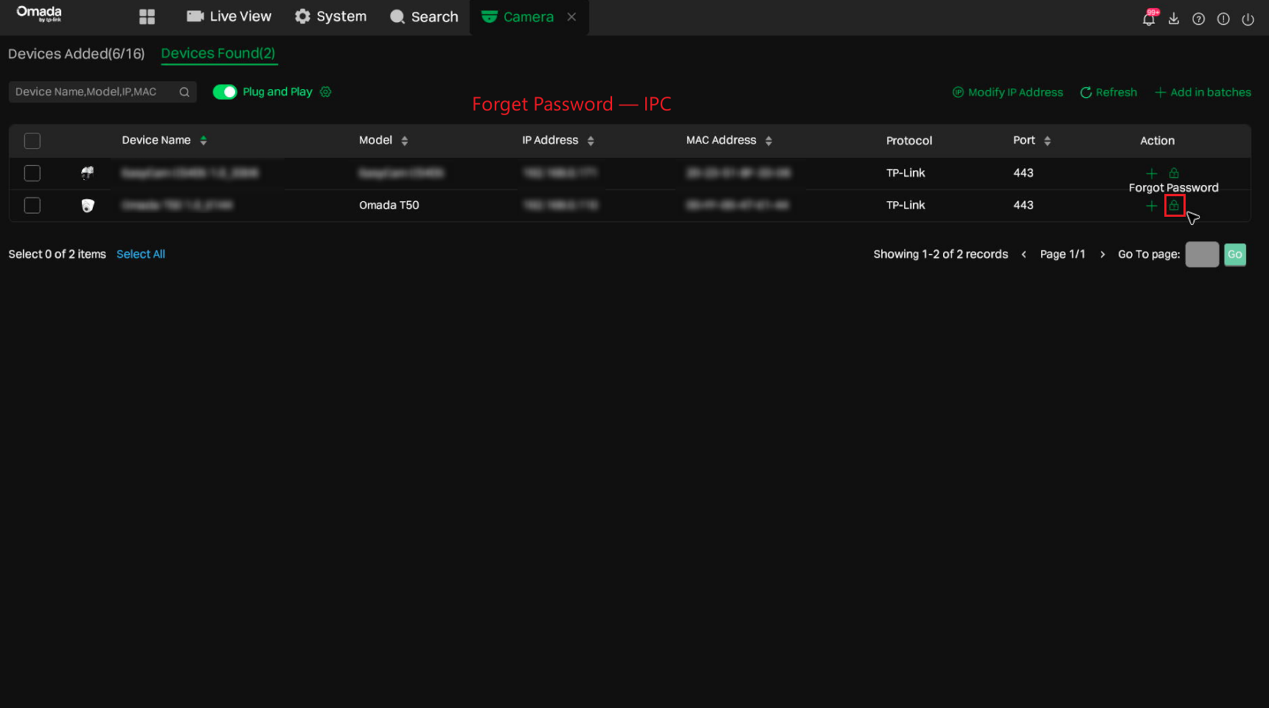
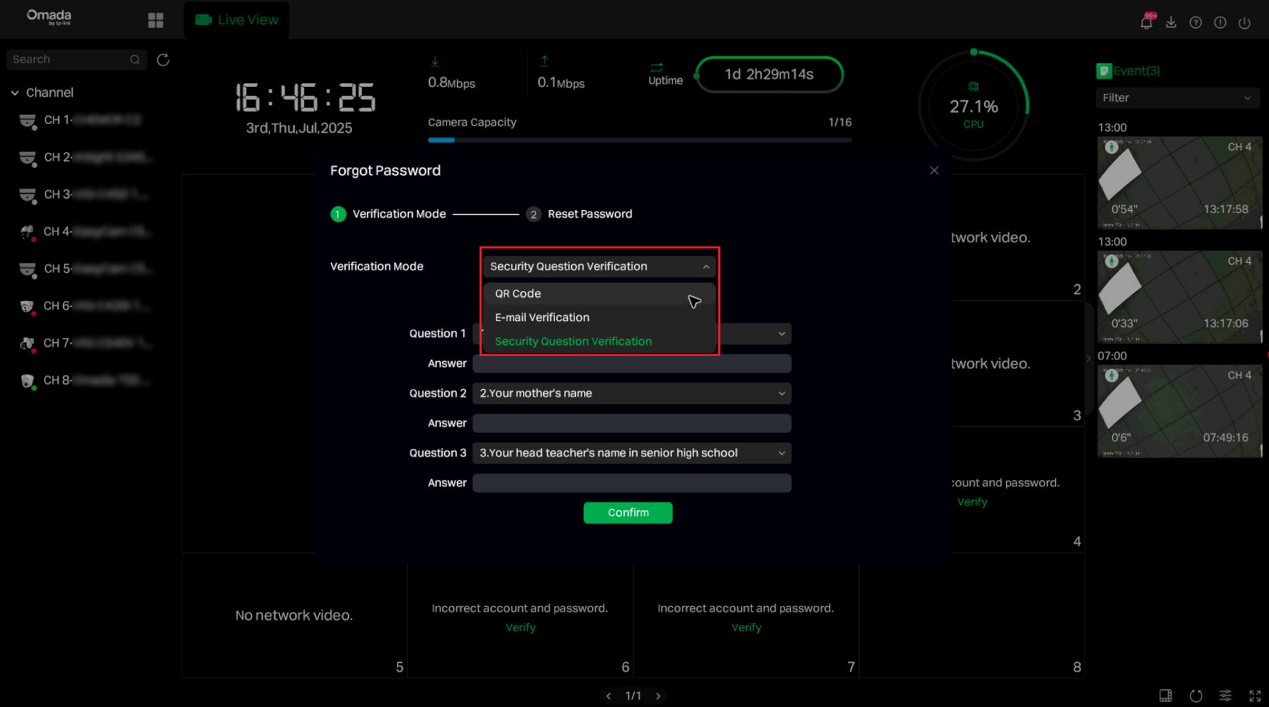
Step 1. Select a verification method.
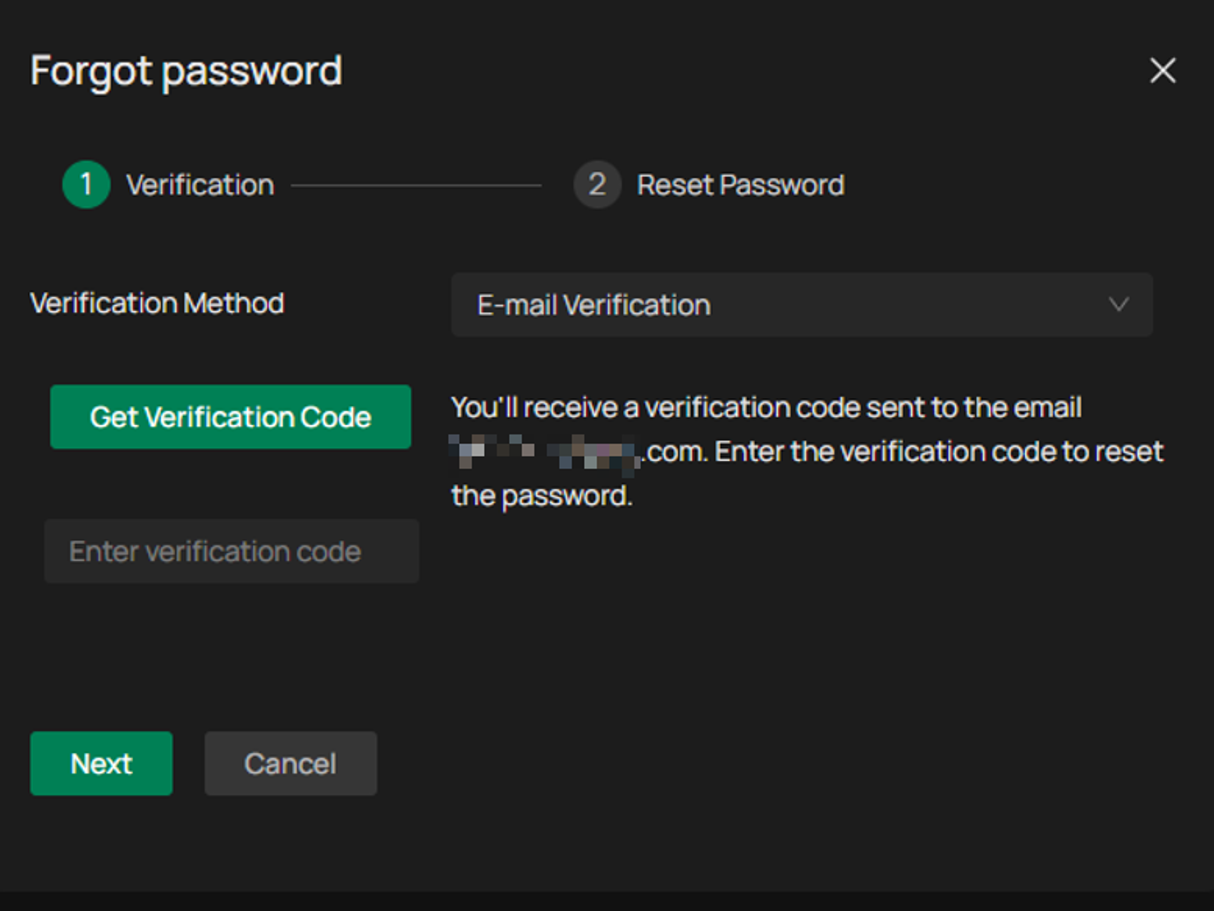
E-mail verification
Note: Email Verification and Security Question Verification are only available if the corresponding password recovery settings have been configured in advance.
If the device has Internet access:
-
- Select Email Verification.
- Click Send Verification Code.
- A verification code will be sent to the configured Password Reset Email address.
If the device does not have Internet access:
- Install the Omada Guard App from the App Store or Google Play.
- Scan the QR code displayed on the password recovery page using the Omada Guard App.
- A verification code will be sent to the configured Password Reset Email address.
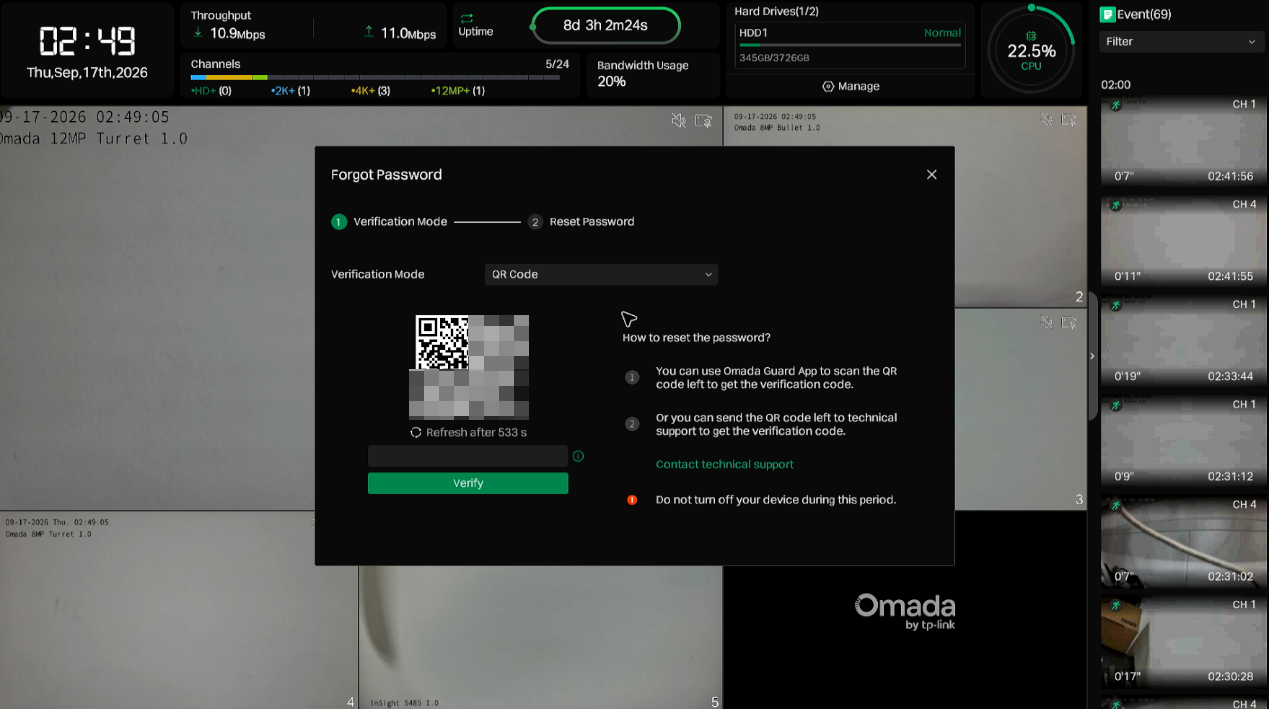
QR Code verification
If the device has been bound to a personal account (My Guard) in the Omada Guard App:
Open the Omada Guard App and scan the QR code displayed on the password recovery page.
- The App will generate a verification code.
- Enter the verification code on the device.
- Create and save a new password.
If the password cannot be recovered through My Guard:
Note: This requirement applies regardless of whether the device has been bound to a personal account, enterprise account, or has not been bound at all.
- Click Contact Technical Support on the password recovery page.
- Provide the QR code information displayed on the device to TP-Link Technical Support.
- Obtain a verification code and enter it on the device.
Security question verification
Enter the answer to the previously configured security question to complete verification.
Step 2. Complete verification.
Enter the verification code and click Verify.
Step 3. Create a new password.
Enter and confirm the new password, then save the configuration.
Password management
Manage password and password recovery settings for an Omada NVR
The Password Reset Email is used to receive verification codes during the password recovery process. Both password and password recovery settings can be configured from the User Management page.
Step 1. Open User Management.
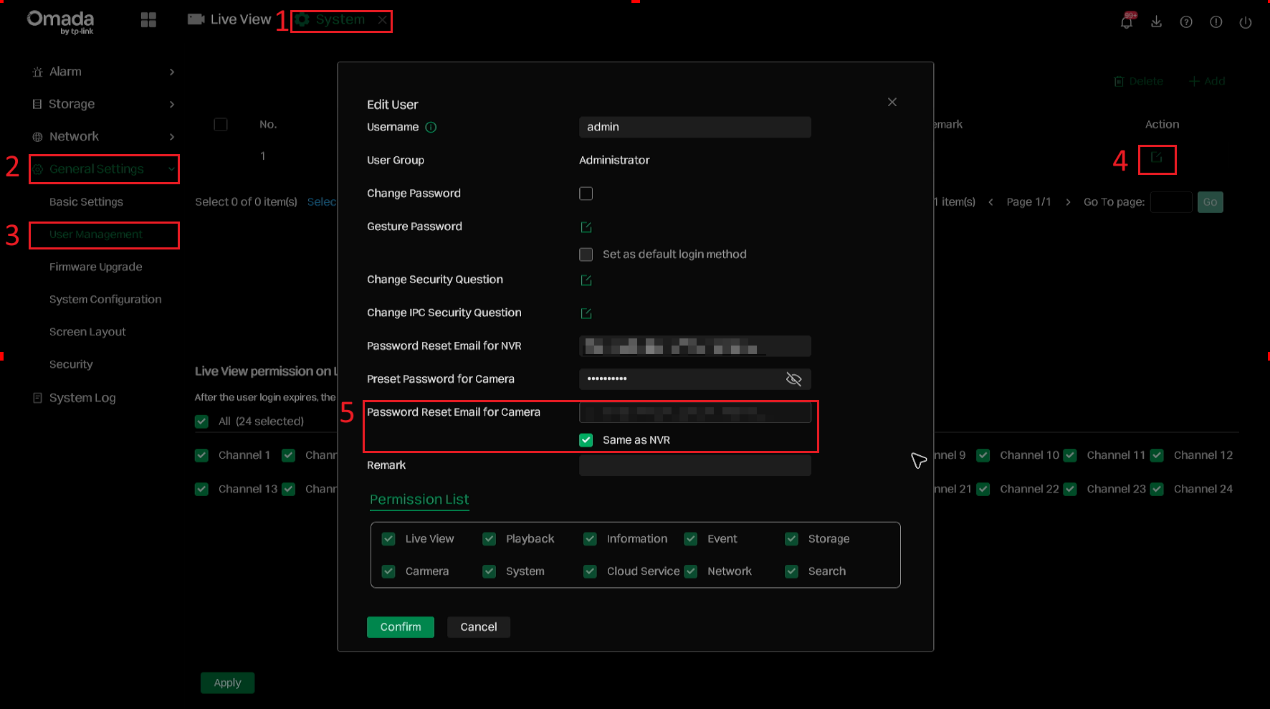
Navigate to Systems > General Settings > User Management. Select the admin account and click Edit.
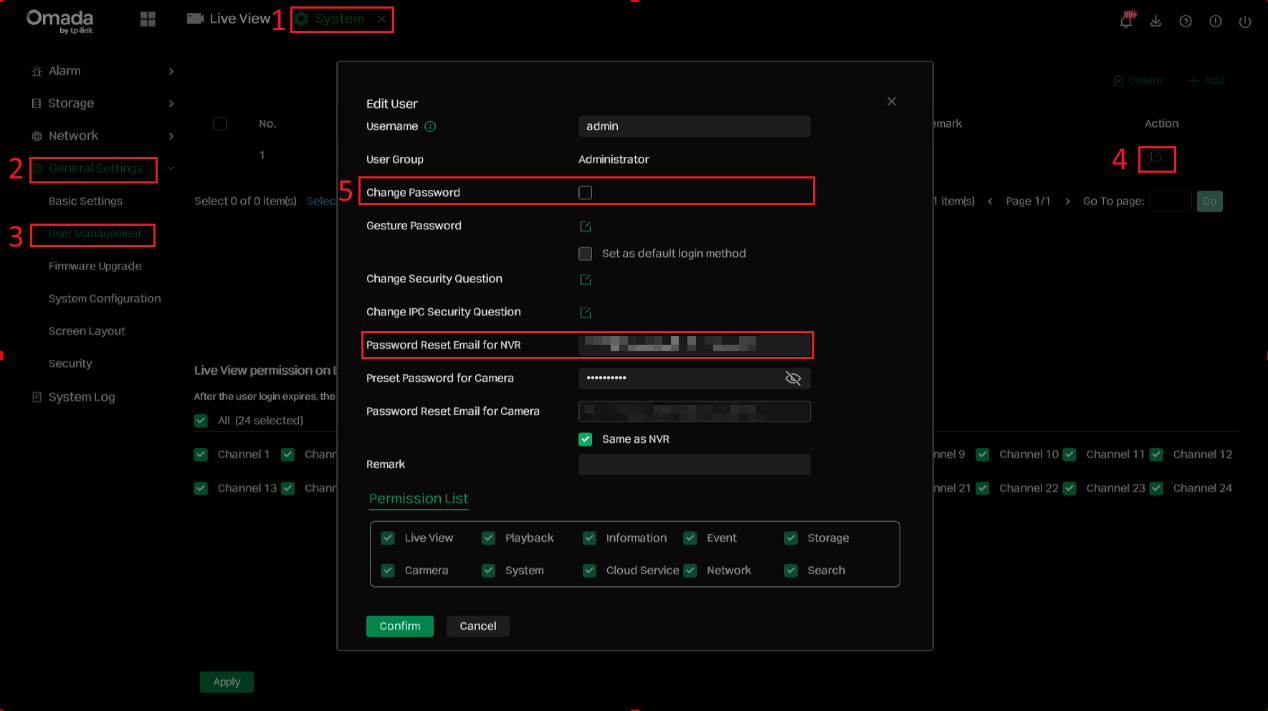
Step 2. Update the desired settings as needed:
- To change the NVR password, enable Change Password, enter the current password and new password, and then click Save.
- To update the Password Reset Email for NVR, enter the new email address and save the changes.
- The same page also allows configuration of the Preset Password for Camera and Password Reset Email for Camera.
Manage password and password recovery settings for an Omada camera
Camera password and password recovery settings can be managed through the Omada NVR interface.
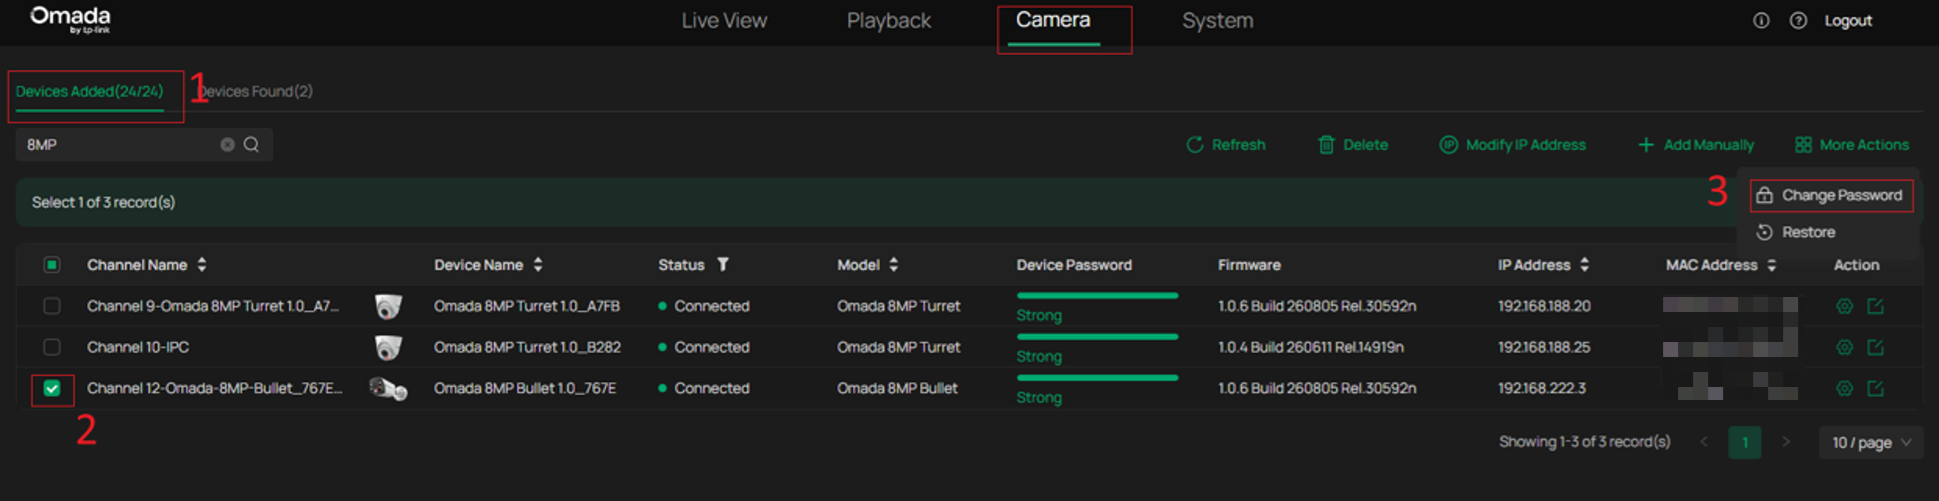
Step 1. Navigate to Cameras > Devices Added and select the target camera.
To change the camera's actual login password, click More Actions > Change Password.
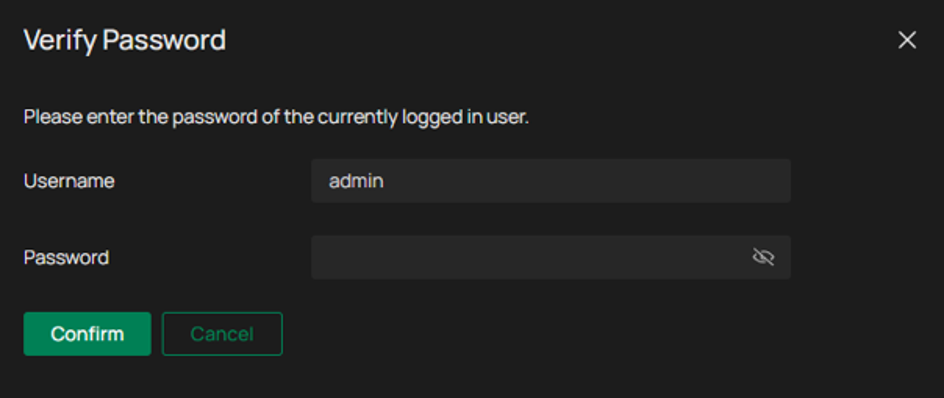
Step 2. Enter the NVR administrator password for verification. The camera password can only be changed after the verification is successful.
Step 3. In the Change Password window, enter and confirm the new password. Optionally configure a Password Reset Email, then click Next.
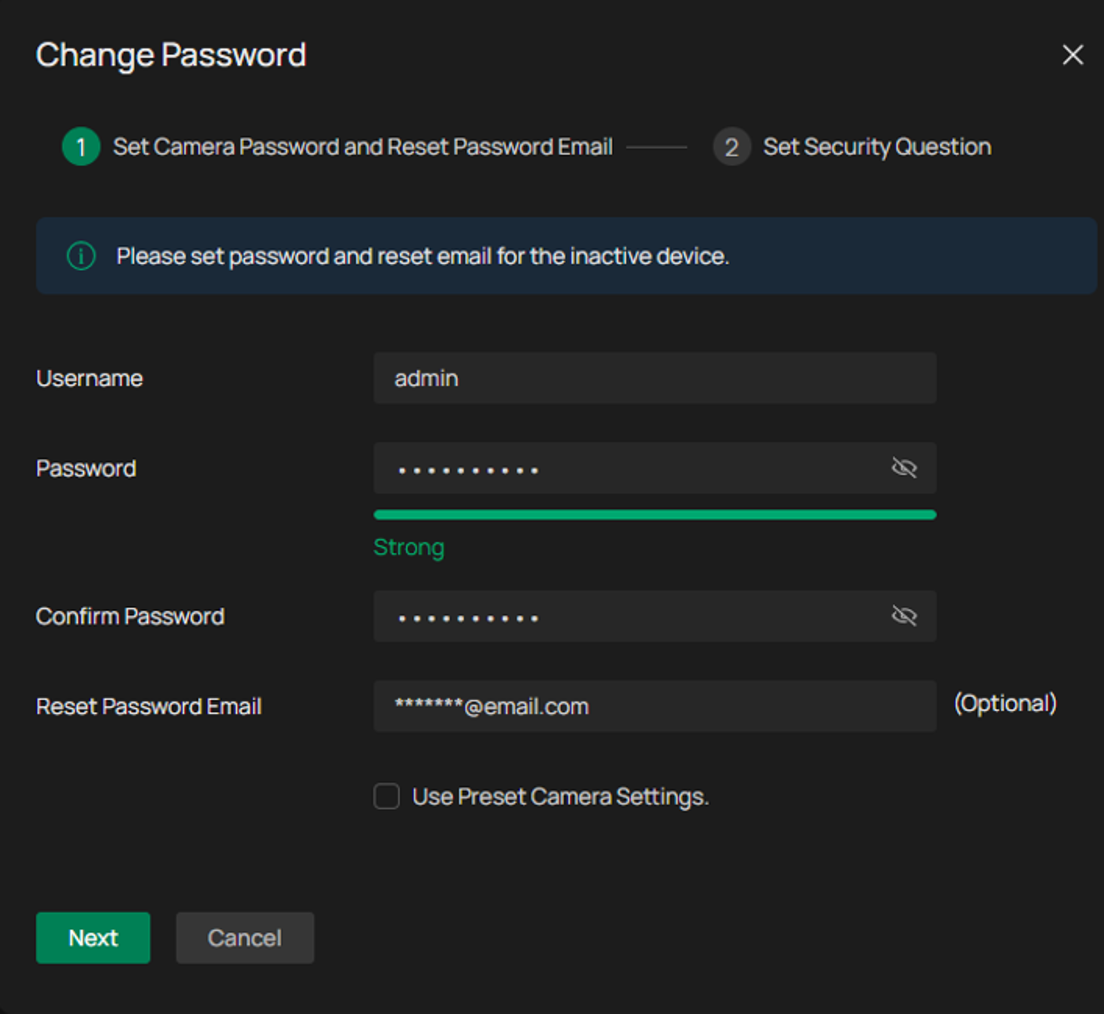
If Use Preset Camera Settings is selected, the Password Reset Email and related password recovery settings configured under User Management will be synchronized to the camera.
Step 4. Optionally configure or modify the Security Questions, then click Confirm to complete the configuration.
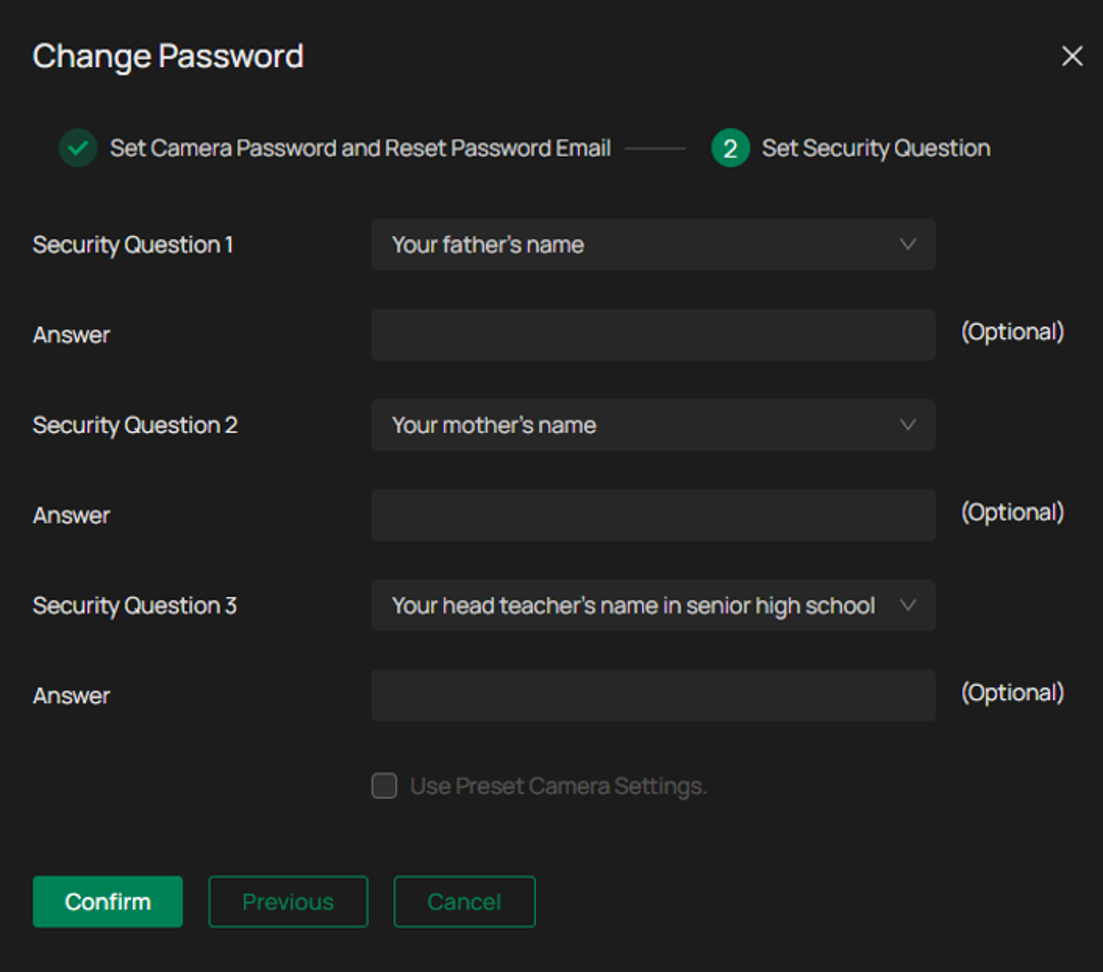
If Use Preset Camera Settings is selected, the preset security question settings configured in User Management will also be synchronized to the camera.
Step 5. To update the camera's Password Reset Email, navigate to System > General Settings > User Management, select the admin account, and click Edit.
Update the Password Reset Email for Camera field and save the changes.
Note:
Changes made to the Password Reset Email for Camera setting are not automatically synchronized to cameras that have already been added and initialized.
To modify a camera's password reset settings, use the Change Password function described above.
Conclusion
Password recovery and account management are essential for maintaining secure access to Omada Cameras and Omada NVRs. By configuring Password Reset Email addresses, keeping security information up to date, and knowing the available recovery methods, administrators can quickly regain access to devices when login credentials are forgotten or lost.
To learn more about each function and configuration, please visit Support Home to download or check the manual for your product.
