


Contents
Introduction
This document outlines the requirements when establishing an external web portal server. In standalone mode, External Web Portal can only be used when the portal authentication type is External Radius Server.
Requirements
- Omada EAP
Configuration
The below picture depicts the workflow among the wireless client, Omada EAP, External Web Portal and the Radius Server. It will help you get a better understanding of the requirements for establishing an External Web Portal server.
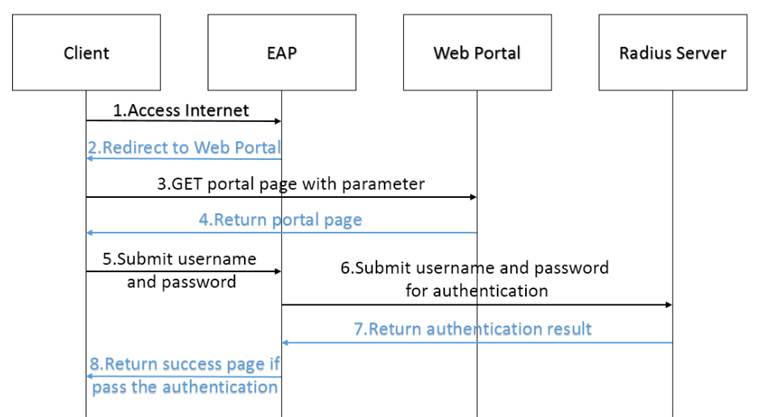
Step 1. Wireless client is connected to the SSID of the wireless network and try to access the internet. EAP device redirects the client’s request to the external web portal by replying a HTTP response with status code 200 Found to the client.
Step 2. Client sends HTTP GET request to external web portal with parameter “target=target_ap_ip&clientMac=client_mac”. For example, 192.168.10.104/?target=192.168.10.102&clientMac=38:71:de:31:7d:67.
Step 3. External web portal server should be able to get the value of the target, clientMac parameters. Then external web portal server should return a page with a form. This form will collect the information of username, password, clientMac.
For example:
<form id="form" method="post">
<div><span>username:</span><input type="text" name="username"/> </div>
<div><span>password:</span><input type="password" name="password"/> </div>
<div style="display:none"><span>clientMac:</span><input type="text" id="cid" name="clientMac" /></div>
Note: the “id” of these elements in your form should be the same as this example. The method to get the value of “username” and “password” can be defined by yourself, but the value of “cid” must be obtained from the Http Request’s URL.
Step 4. The form should be POST to http://target_ap_ip/portal/auth after submit.
Step 5. EAP communicates with radius server to verify the username and password.
Step 6. If the authentication is passed, i.e., Access-Accept is received from radius server, EAP will return a built-in success page or a predefined webpage according to the configuration.
The below html template is a simple demo for you to develop your External Web Portal working with EAP:
<!DOCTYPE html PUBLIC "-//W3C//DTD XHTML 1.0 Transitional//EN" "http://www.w3.org/TR/xhtml1/DTD/xhtml1-transitional.dtd">
<form id="form" method="post">
<div><span>username:</span><input type="text" name="username"/> </div>
<div><span>password:</span><input type="password" name="password"/></div>
<div style="display:none"><span>clientMac:</span><input type="text" id="cid" name="clientMac" /></div>
<button type="submit">submit</button>
</form>
<script type="text/javascript">
var submitUrl = "http://" + getQueryString("target") + "/portal/auth";
document.getElementById("form").action = submitUrl;
document.getElementById("cid").value = getQueryString("clientMac");
function getQueryString(name) {
var reg = new RegExp("(^|&)" + name + "=([^&]*)(&|$)", "i");
var r = window.location.search.substr(1).match(reg);
if (r != null) return unescape(r[2]); return null;
}
</script>
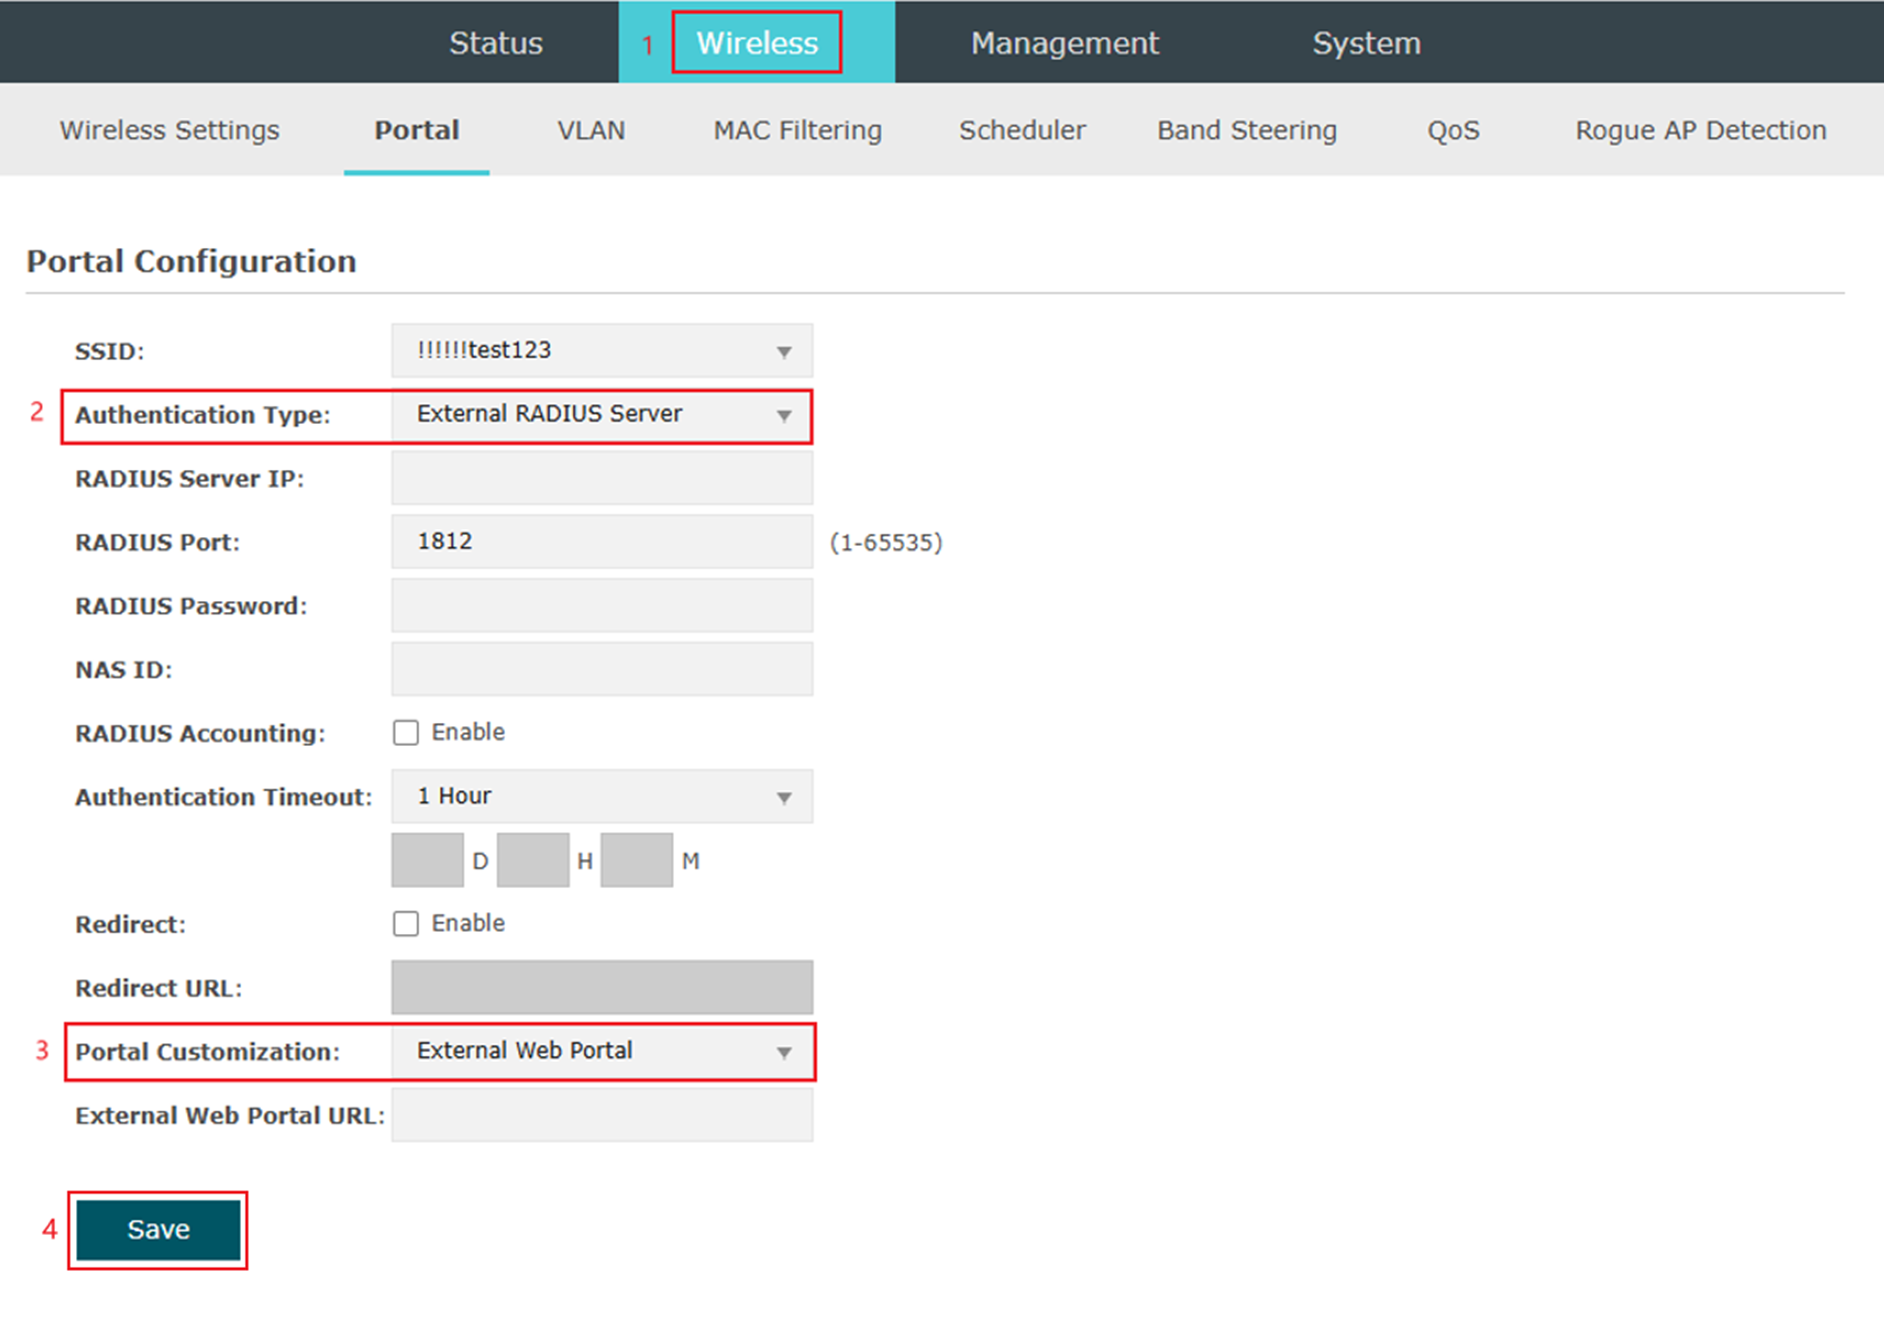
Step 7. In the standalone interface of the EAP, configure the portal by selecting External Portal Server as the authentication type and External Web Portal as the portal customization option. Then enter the RADIUS address and save the settings.
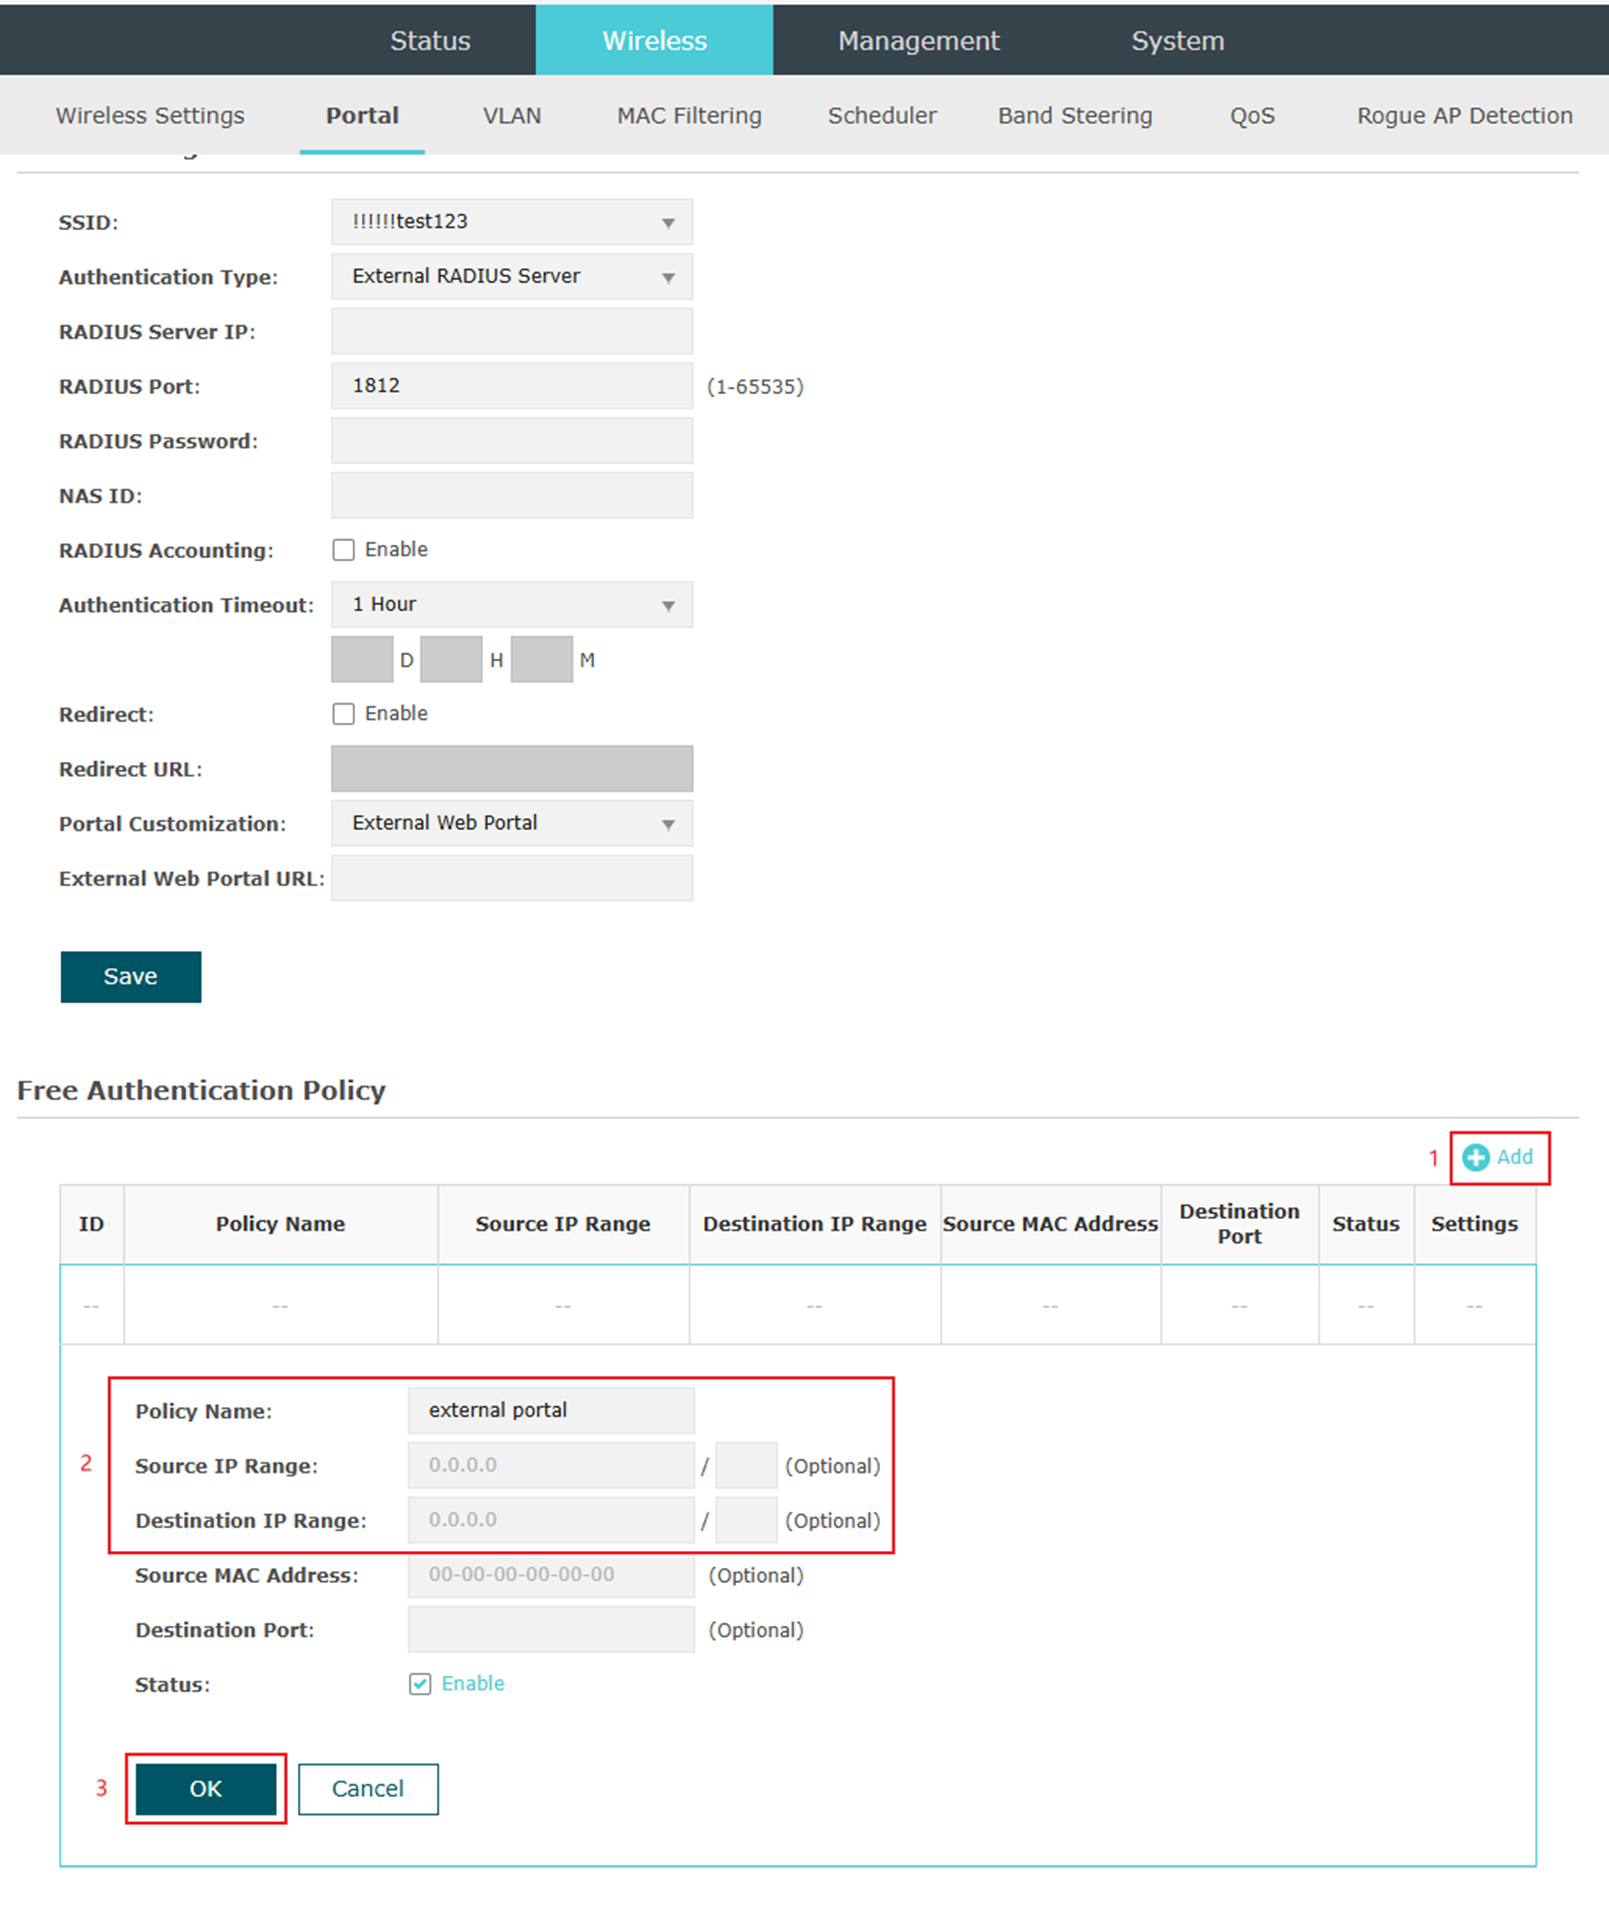
Note: When you use External Radius Server in standalone mode, please add the external web portal to Free Authentication Policy.
Conclusion
This article introduces how to configure the External Web Portal in AP's standalone mode and provides a code template.
Get to know more details of each function and configuration please go to Download Center to download the manual of your product.
