


How to Add Omada Devices to Cloud-Based Controller via Omada APP


Contents
Objective
This article provides guidance for how to add devices to the Cloud-Based Controller via the Omada APP.
Requirements
- Omada APP
- Omada AP/Switch/Gateway
- Omada Central (Cloud-Based Controller)
- Omada Discover Utility
Introduction
The Omada APP enables you to easily and quickly add devices to the Omada controller.
The Omada APP provides multiple ways to add Omada devices:
- Scan to Find
- Scan the barcode of the S/N or QR code of the Device Key
- Manually enter S/N
- Upload a photo with the barcode of the S/N or QR code of the Device Key
- Auto Find
- Configure Inform URL via Web UI
- Configure Inform URL via Omada Discover Utility
Configuration
Scan to Find
Scan the SN code and QR code to add a device. Adding offline devices is supported. This method enables you to easily and quickly add devices to the Omada controller.
Step 1. Open the Omada APP, choose the organization you want to add your devices to. On the Devices page, click the "+" icon.

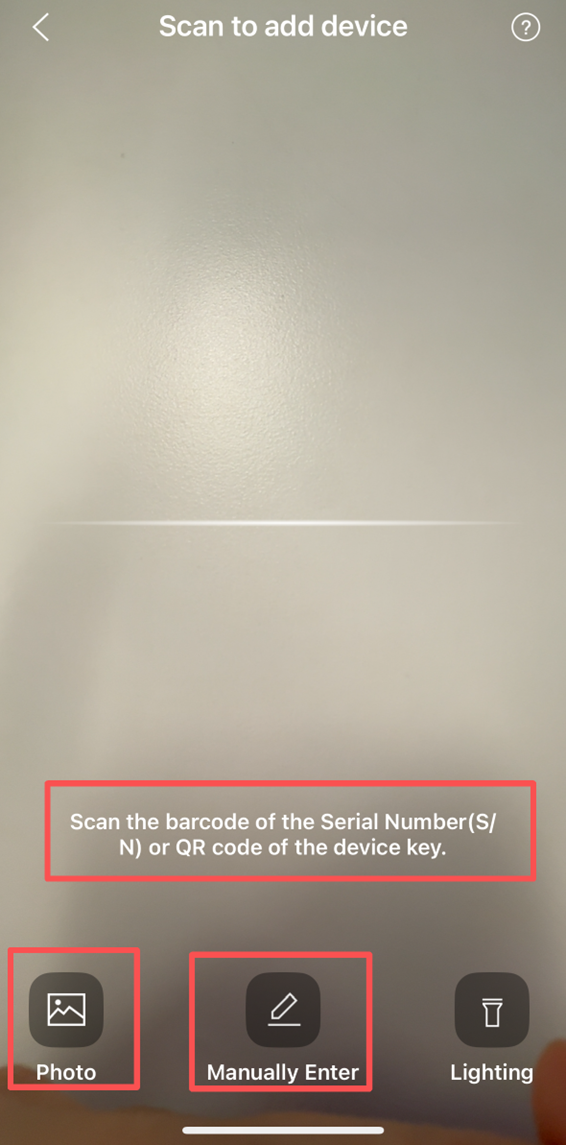
Step 2. Click Scan to Add. Then, scan the label attached to your devices, or manually enter the device’s S/N, or upload a photo with the barcode of the S/N or QR code of the Device Key.
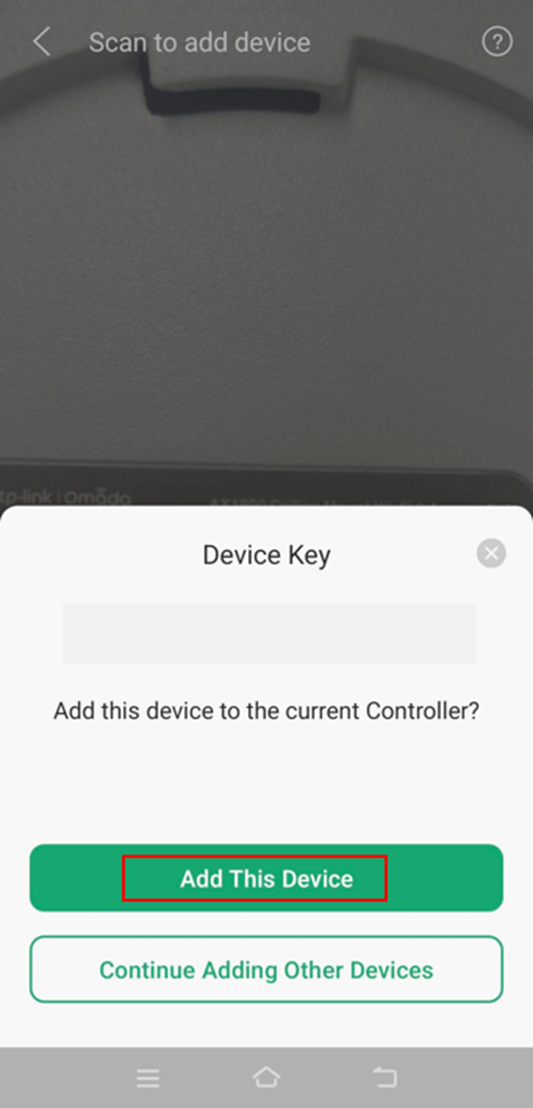
Then the device will pop up. Click Add This Device.
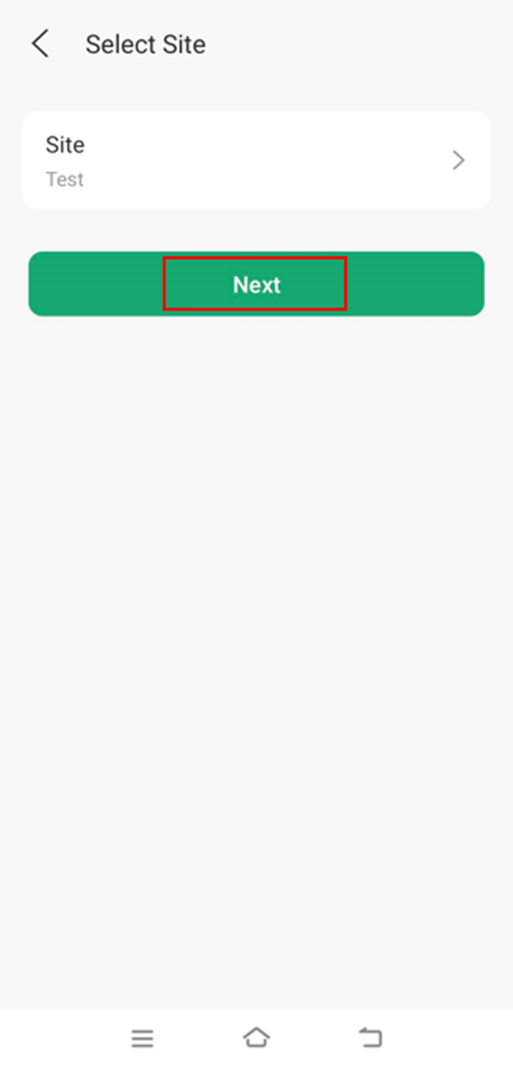
Step 3. Select the site to add the device and click Next.
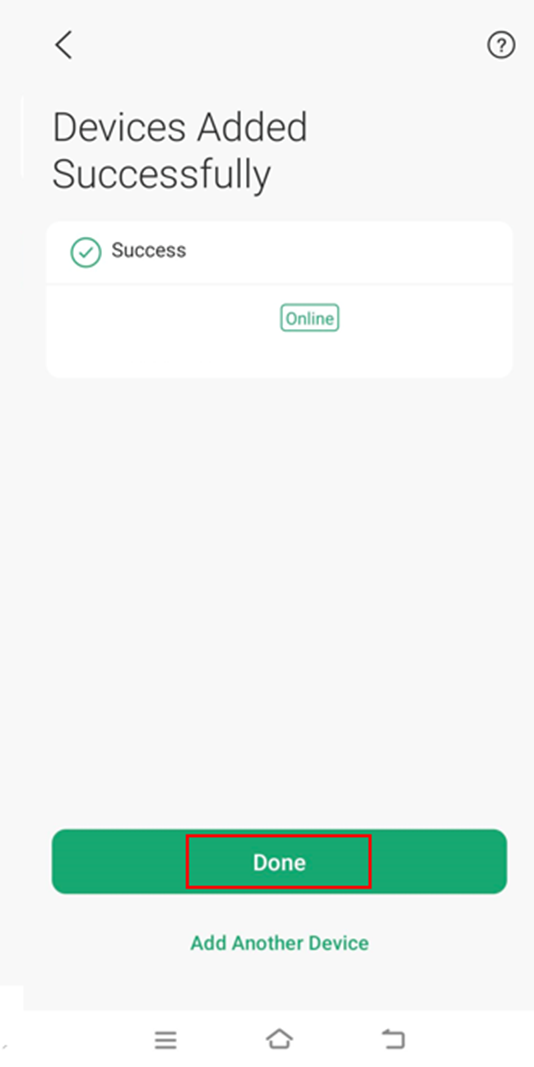
Step 4. There will be a notification saying that your device has already been added to Omada Central. Then click Done.
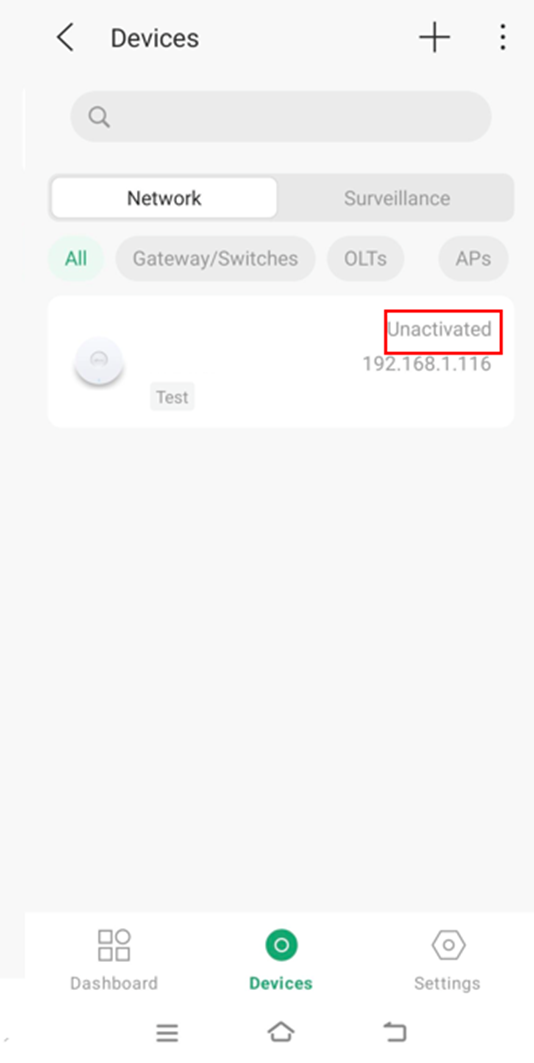
Step 5. You can check the added device in the device list. If the device is not connected to the internet, it will be in the Preconfigured state.
After the device is connected to the internet, Omada Central will automatically adopt the device, and the device status will change to Unactivated.
Auto Find
Automatically find the Omada devices with the Inform URL configured to add them. You can configure the Inform URL via the Web UI and the Omada Discover Utility
![]()
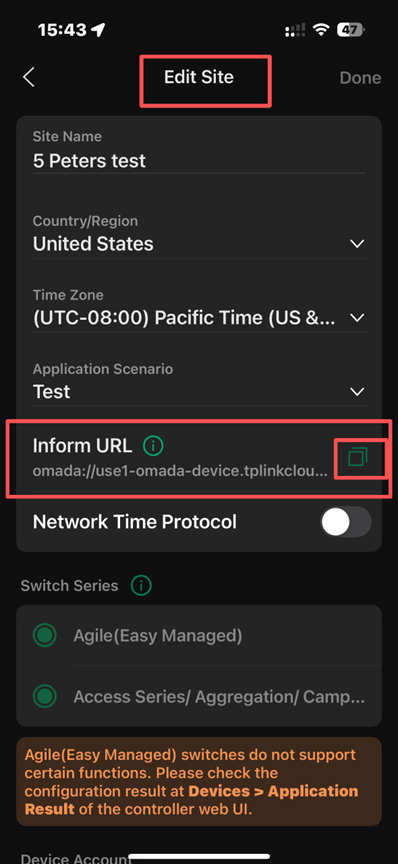
- Log in to the Omada APP and go to Site View > Settings > Site Settings. Click on Copy Inform URL button to copy the site’s URL.
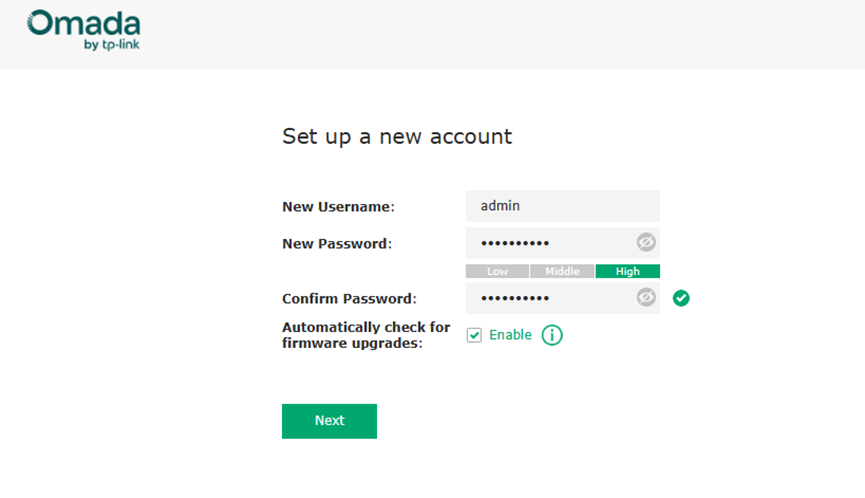
Step 2. Enter the IP address of the device to be managed in the browser address bar and log in to the device web management page. The device username/password for the first login is admin/admin. You need to set up a new account before you can log in.
Step 3. Configure the Inform URL on the Omada device. The following sections will describe how to configure the Inform URL using both the web UI and the Omada Discovery Utility.
1) Configure Inform URL via Web UI
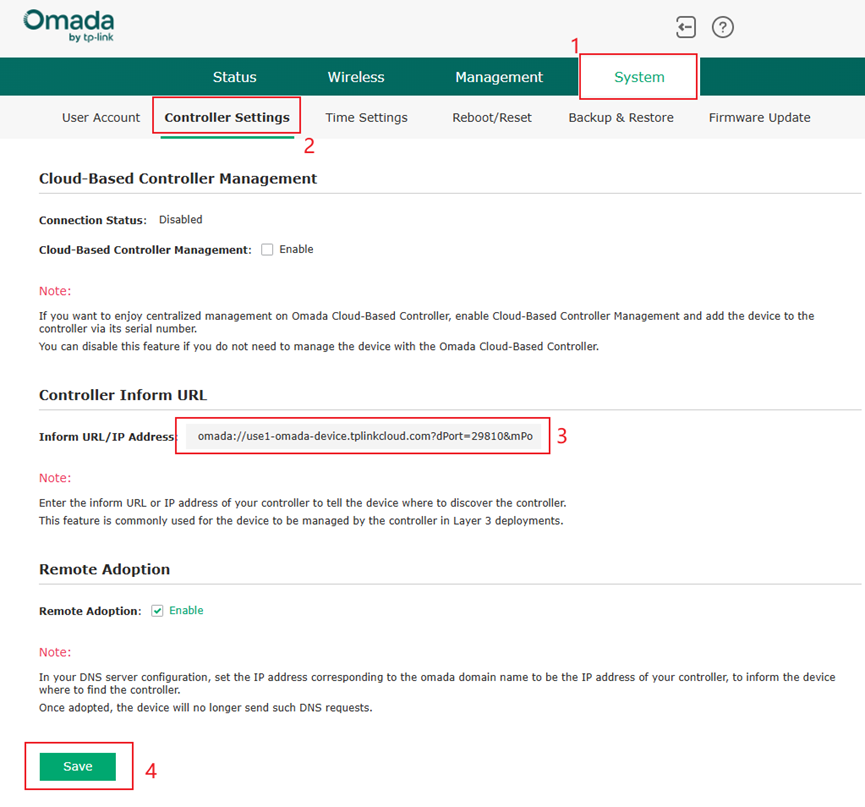
On the web management page, go to System > Controller Settings, paste the Inform URL copied from the Omada Central in the Inform URL/IP Address field, and click Save to complete the device addition.
2) Configure Inform URL via Omada Discover Utility
Download the latest Omada Discovery Utility from the TP-Link official website. After opening it, the Utility will automatically search for all network devices in the LAN. For instructions about how to install Omada Discovery Utility, please refer to How to Install TP-Link Omada Discovery Utility on Windows and macOS PCs.
Select the devices you want to add, then click Batch Setting.
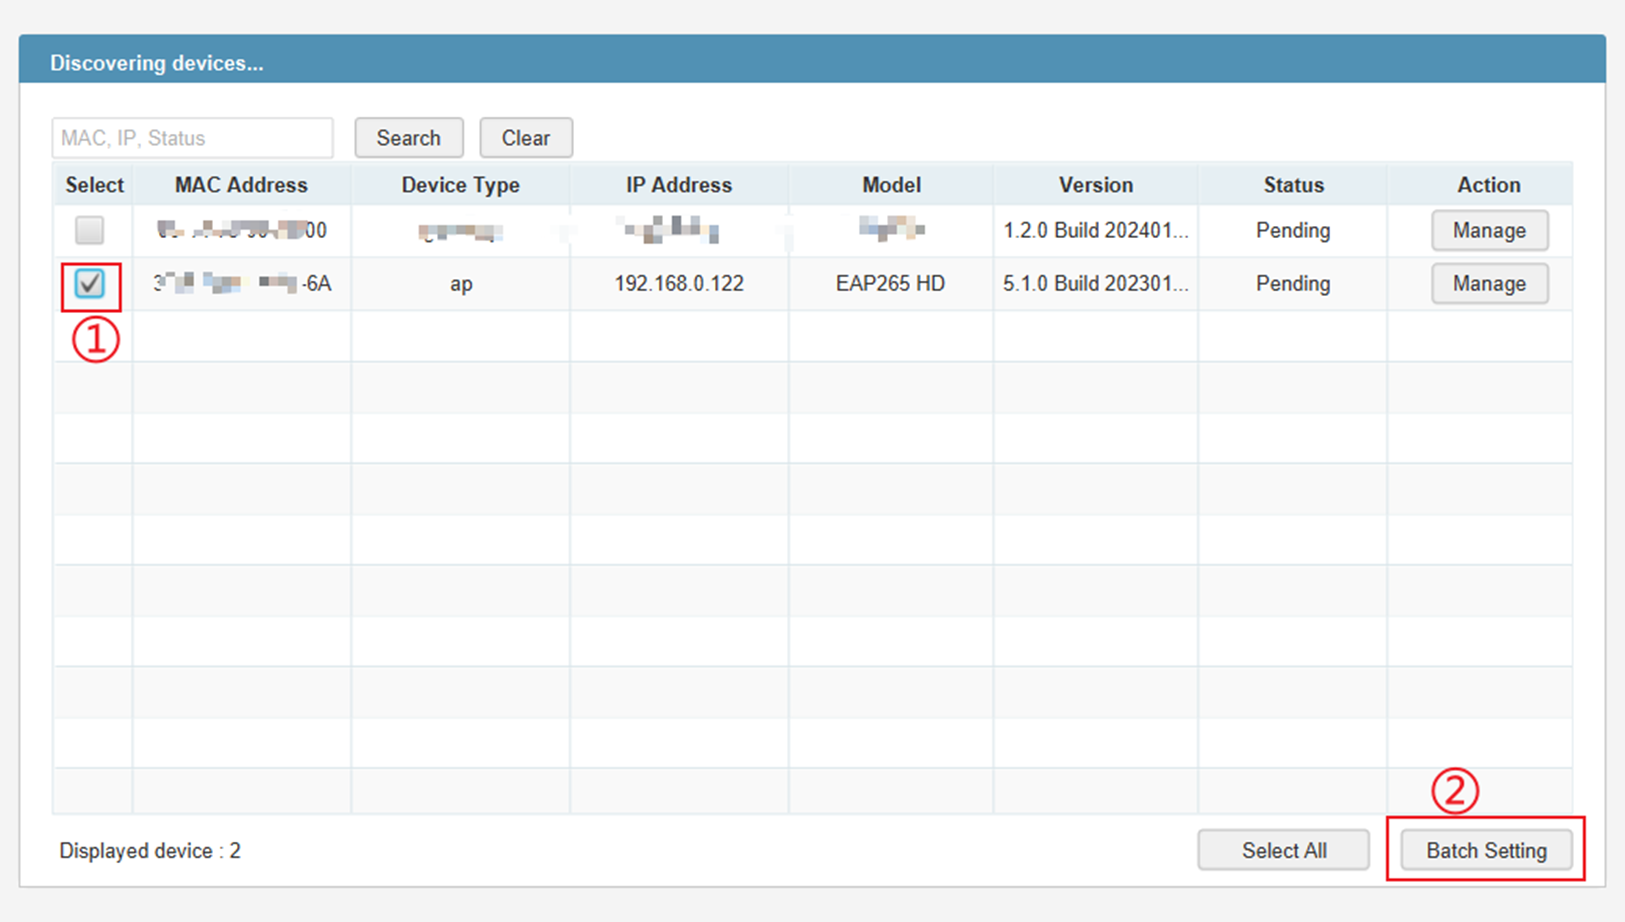
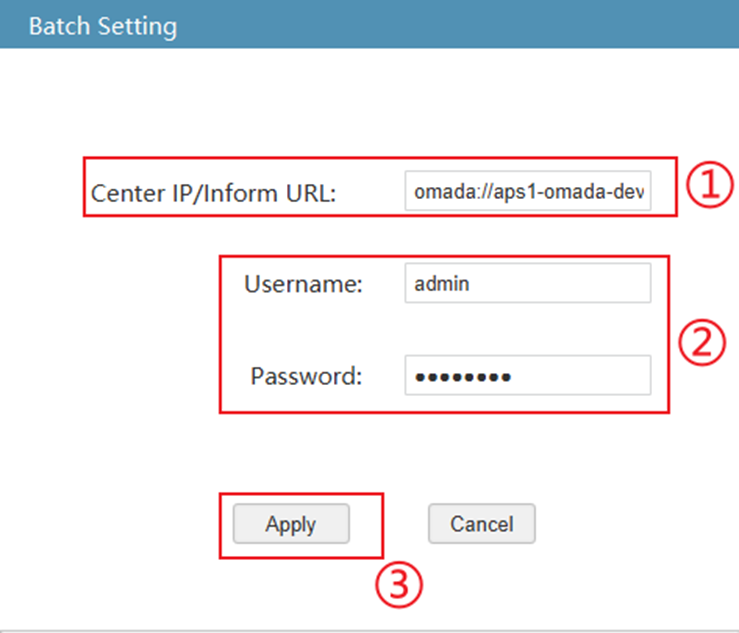
In the Center IP/Inform URL field, enter the URL you copied, enter the device username and password, and click Apply to add the device.
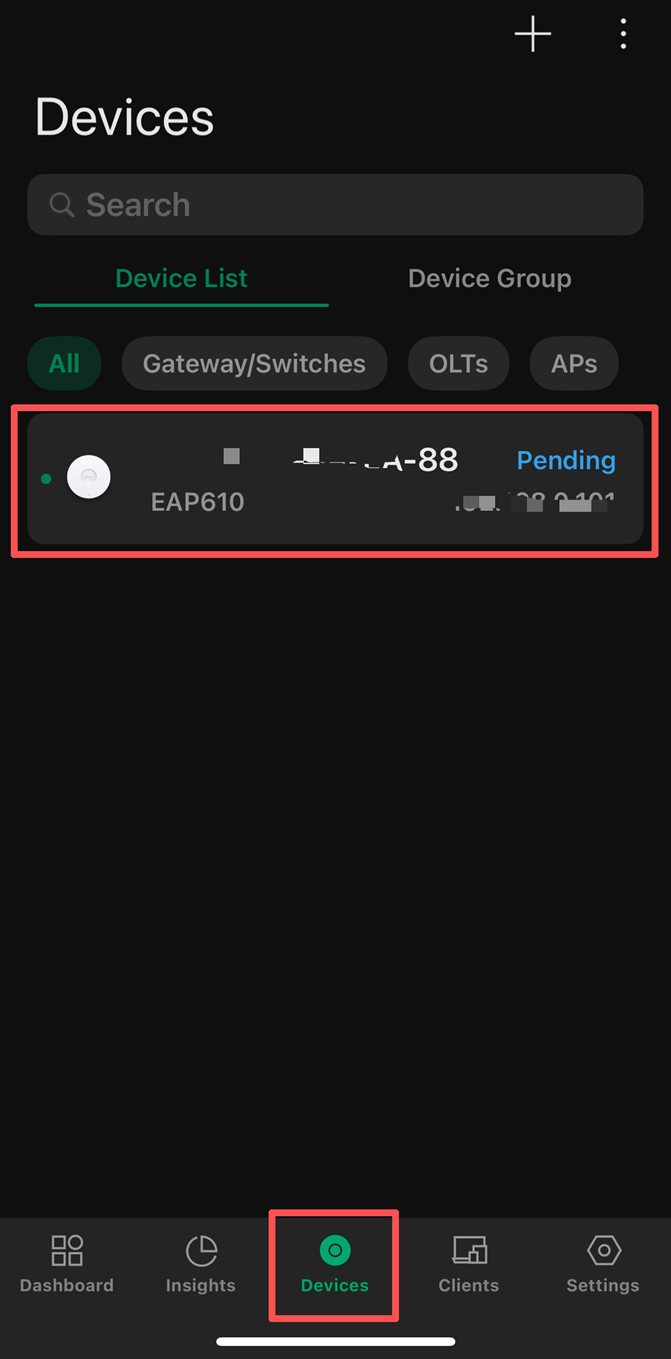
Step 4. Open Omada APP, choose the organization you want to add your devices. You can see the added device in the PENDING state and adopt it.
Conclusion
With the steps above, you can add your Omada devices to cloud-based controller via Omada APP successfully.
Get to know more details of each function and configuration please go to Download Center to download the manual of your product.
