


Contents
Introduction
Omada Controller v6.2.10 modifies the original Quick Setup to speed up the initial deployment. This change affects all Local Controller with 6.2.10 and above.
Requirements
- Omada Software Controller
- Omada Hardware Controller
Configuration
This article uses Controller version 6.2.10.5 installed in Windows as an example. The Quick Setup process for other Controller versions is similar. If you have any questions about this process for other versions, you can also use this as a reference. Before you begin the Quick Setup process, please check the router's DHCP list to locate the Controller's IP address. For a hardware controller, use the device's IP to access it. For a software controller, the local login IP is the computer's IP address.
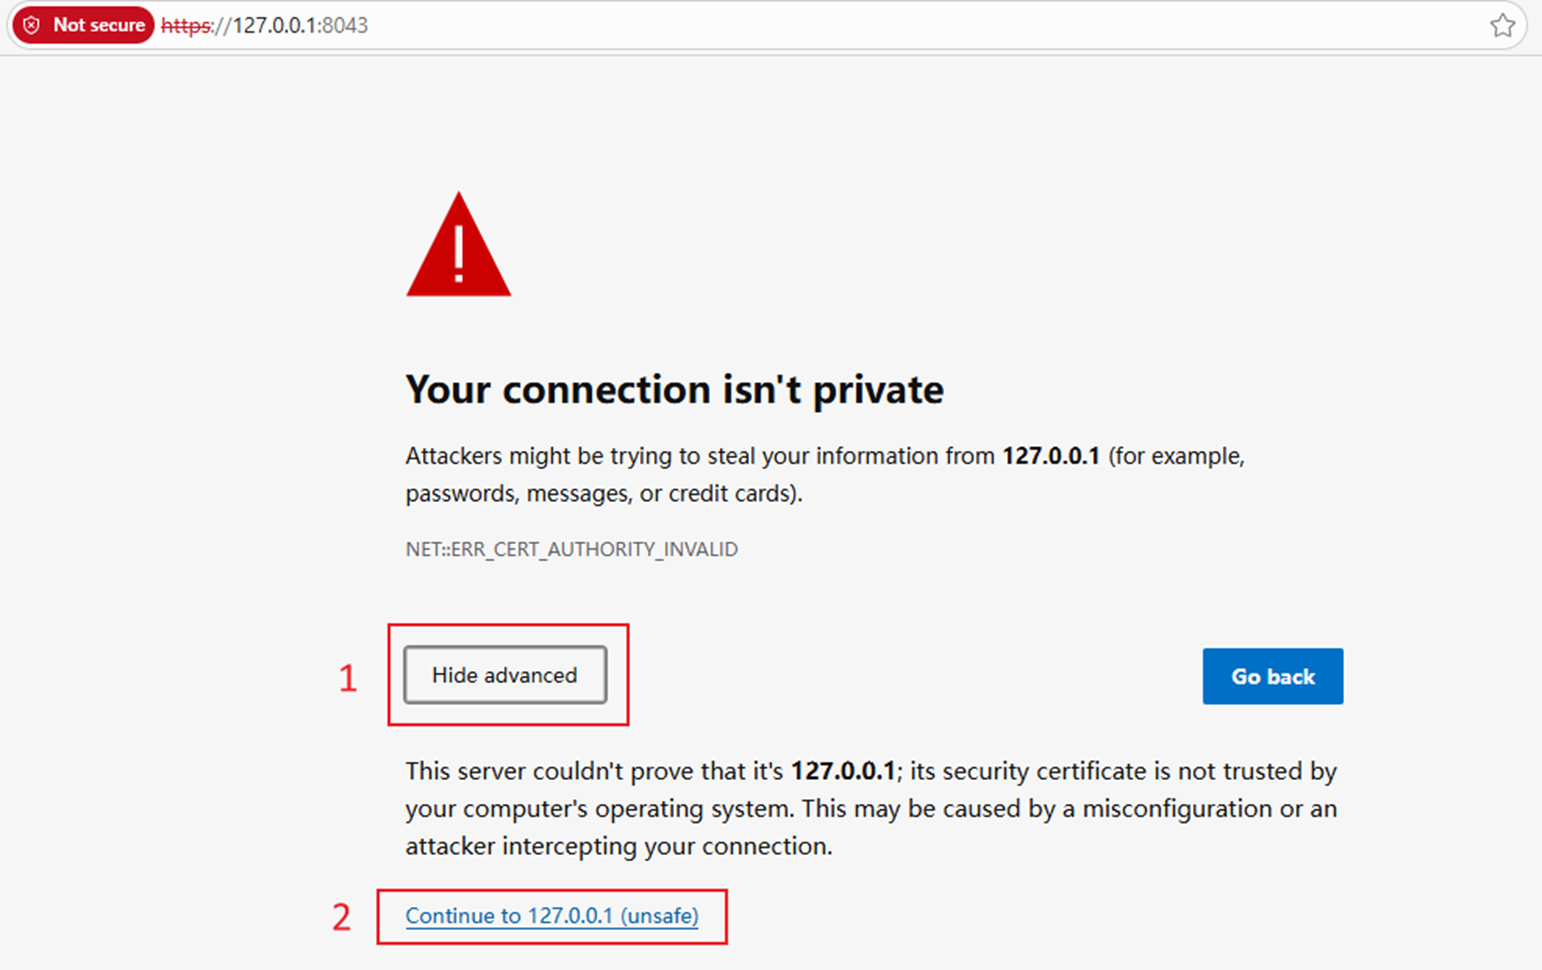
Step 1. Ignore certificate warnings for now.
After installation, the installer will automatically open the web page in your browser. The browser may show a security warning due to an unrecognized HTTPS certificate, this can be resolved by adding the certificate. We’ve just installed the Controller, so let’s ignore this warning for now.
Step 2. Create Account.
The first thing you’ll see is the account creation page, which will be slightly different from the previous one.
- If the Omada Controller has internet access, it will display a page for sign in with TP-Link ID. You can log in using your TP-Link ID, or you can create a new ID directly here.
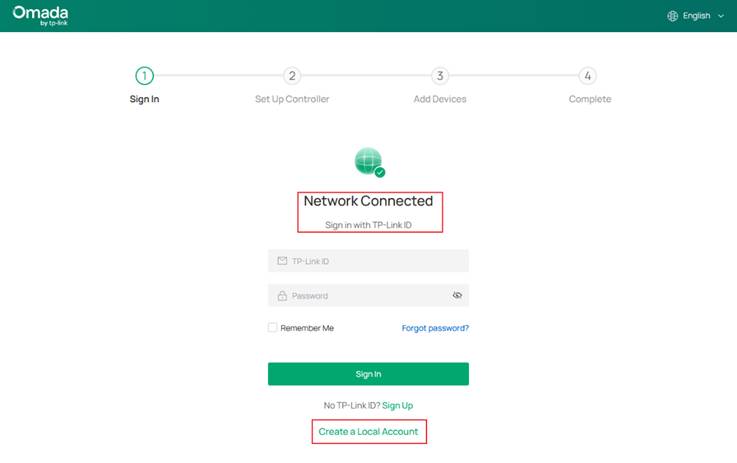
Note: This step looks very different from previous versions. If you are used to previous versions, you can understand it like this: when logging in with TP-Link ID, the Controller automatically binds this TP-Link ID to Cloud Access and creates a Local account with the same name and password.
if you cannot use the TP-Link ID for any reason, you can also click the button below to create a local account and log in directly.
- If the controller cannot access the internet, the account creation page might look like this.

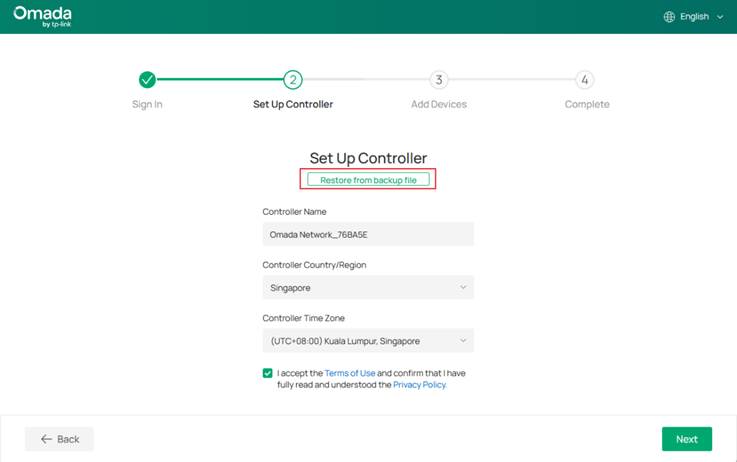
Step 3. Set Up Controller.
After you create your account, the Controller will guide you through creating your own Controller. The page looks roughly like the image below. Note that you can perform a Restore operation here.
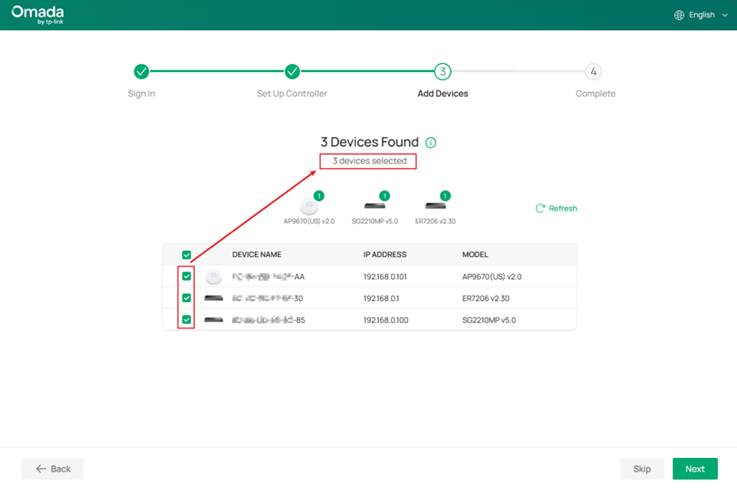
Step 3. Add Devices
Quick Setup can adopt devices in their factory default settings. You can also adopt the device after completing Quick Setup.
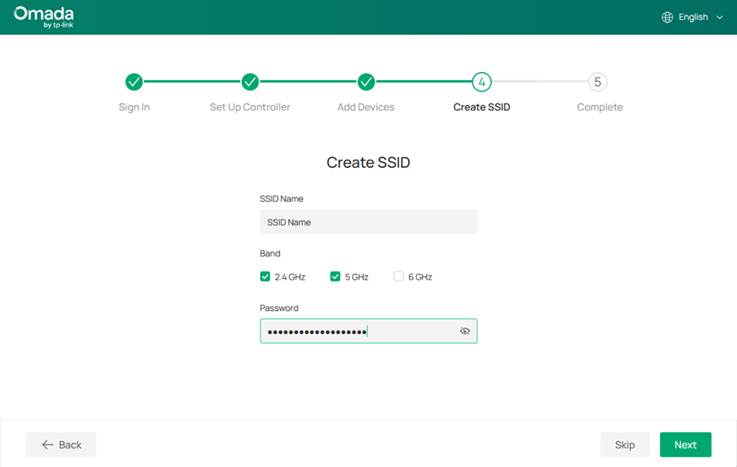
Step 4. Create SSID
If you added an AP in the previous step like me, this will bring up the SSID creation page. You can skip this step, of course.
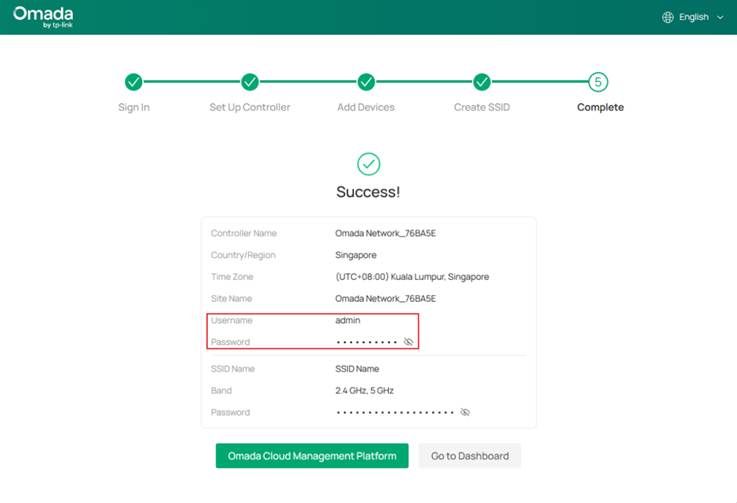
Step 5. Confirm configuration
As I mentioned in step 2, I created an account using my TP-Link ID. At this point, the Controller is already linked to Cloud Access, so a green button will appear here that says "Omada Cloud Management Platform". You can then remotely access this controller using your TP-Link ID.
Conclusion
At this point, you have completed all the steps of Quick Setup. The Quick Setup steps may vary slightly depending on the type of controller.
Get to know more details of each function and configuration please go to Download Center to download the manual of your product.
QA
Q1: Where do I configure WAN port settings?
A1: You can find the WAN-related configurations in this path: Site View > Network Config > Network Settings > Internet
Q2: I've already completed Quick Setup by creating a Local account. Can I still link my TP-Link ID?
A2: You can find the Cloud Access switch in Global View > Settings > Cloud Access, turn it on and log in to bind your TP-Link ID.
Q3: Where do I change the device's management account and password?
A3: Once a device is adopted, its management account and password will be changed. You can view or modify them at Site View > Network Config > Site Settings > Device Account. Note that these changes will apply to all devices under the Site.
