


How to Create and Manage User Roles in Omada Controller


Contents
Introduction
By configuring users and roles on the Omada Controller, you can assign specific access and operational rights to different accounts, thereby improving the security of the Controller.
These are the four default roles: Owner, Super Admin, Admin, Viewer.
-
Owner
The Owner role can access all features in the corresponding view, including the privilege to transfer permissions.
-
Super Admin
Super Admin role can also access all features in the corresponding view but does not include the privilege to transfer permissions.
-
Admin
Admin can access most features in the corresponding View, but some modules are restricted. For instance, they do not have permission to perform Controller migrations or automatic data backups, and they have view-only access to license management and custom account roles.
-
Viewer
Viewers can view the status and settings of certain features in the corresponding View.
You can view the detailed permissions of each role in Global View> Account > Role. There are three permission levels: Modify, View Only, and Block.
Note: Some functions, such as, Logs Page, Role Page, SAML User Group Page, Webhooks Page, SAML SSO Page, and Cluster can only be accessed and used by the Owner and Super Admin
- Modify: Grants read and write permissions to the page. For some pages, you can control whether to include specific features.
- View Only: Grants read-only permissions to the page.
- Block: Deny access to the page.
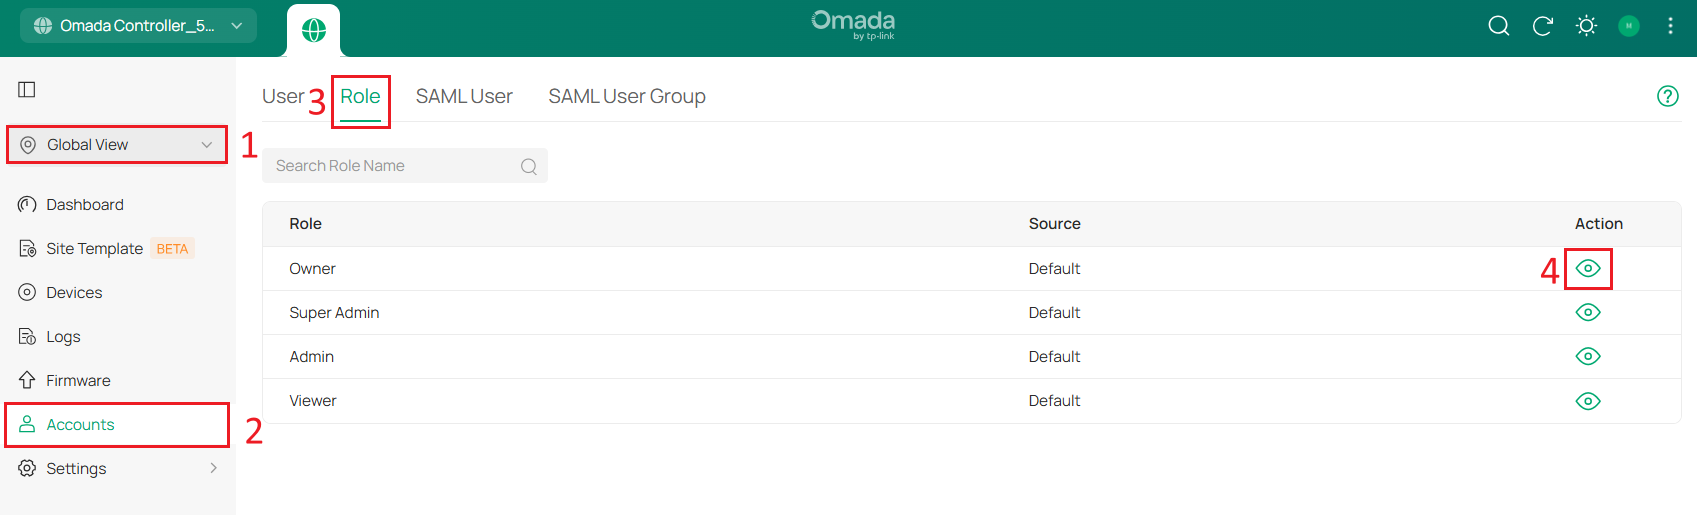
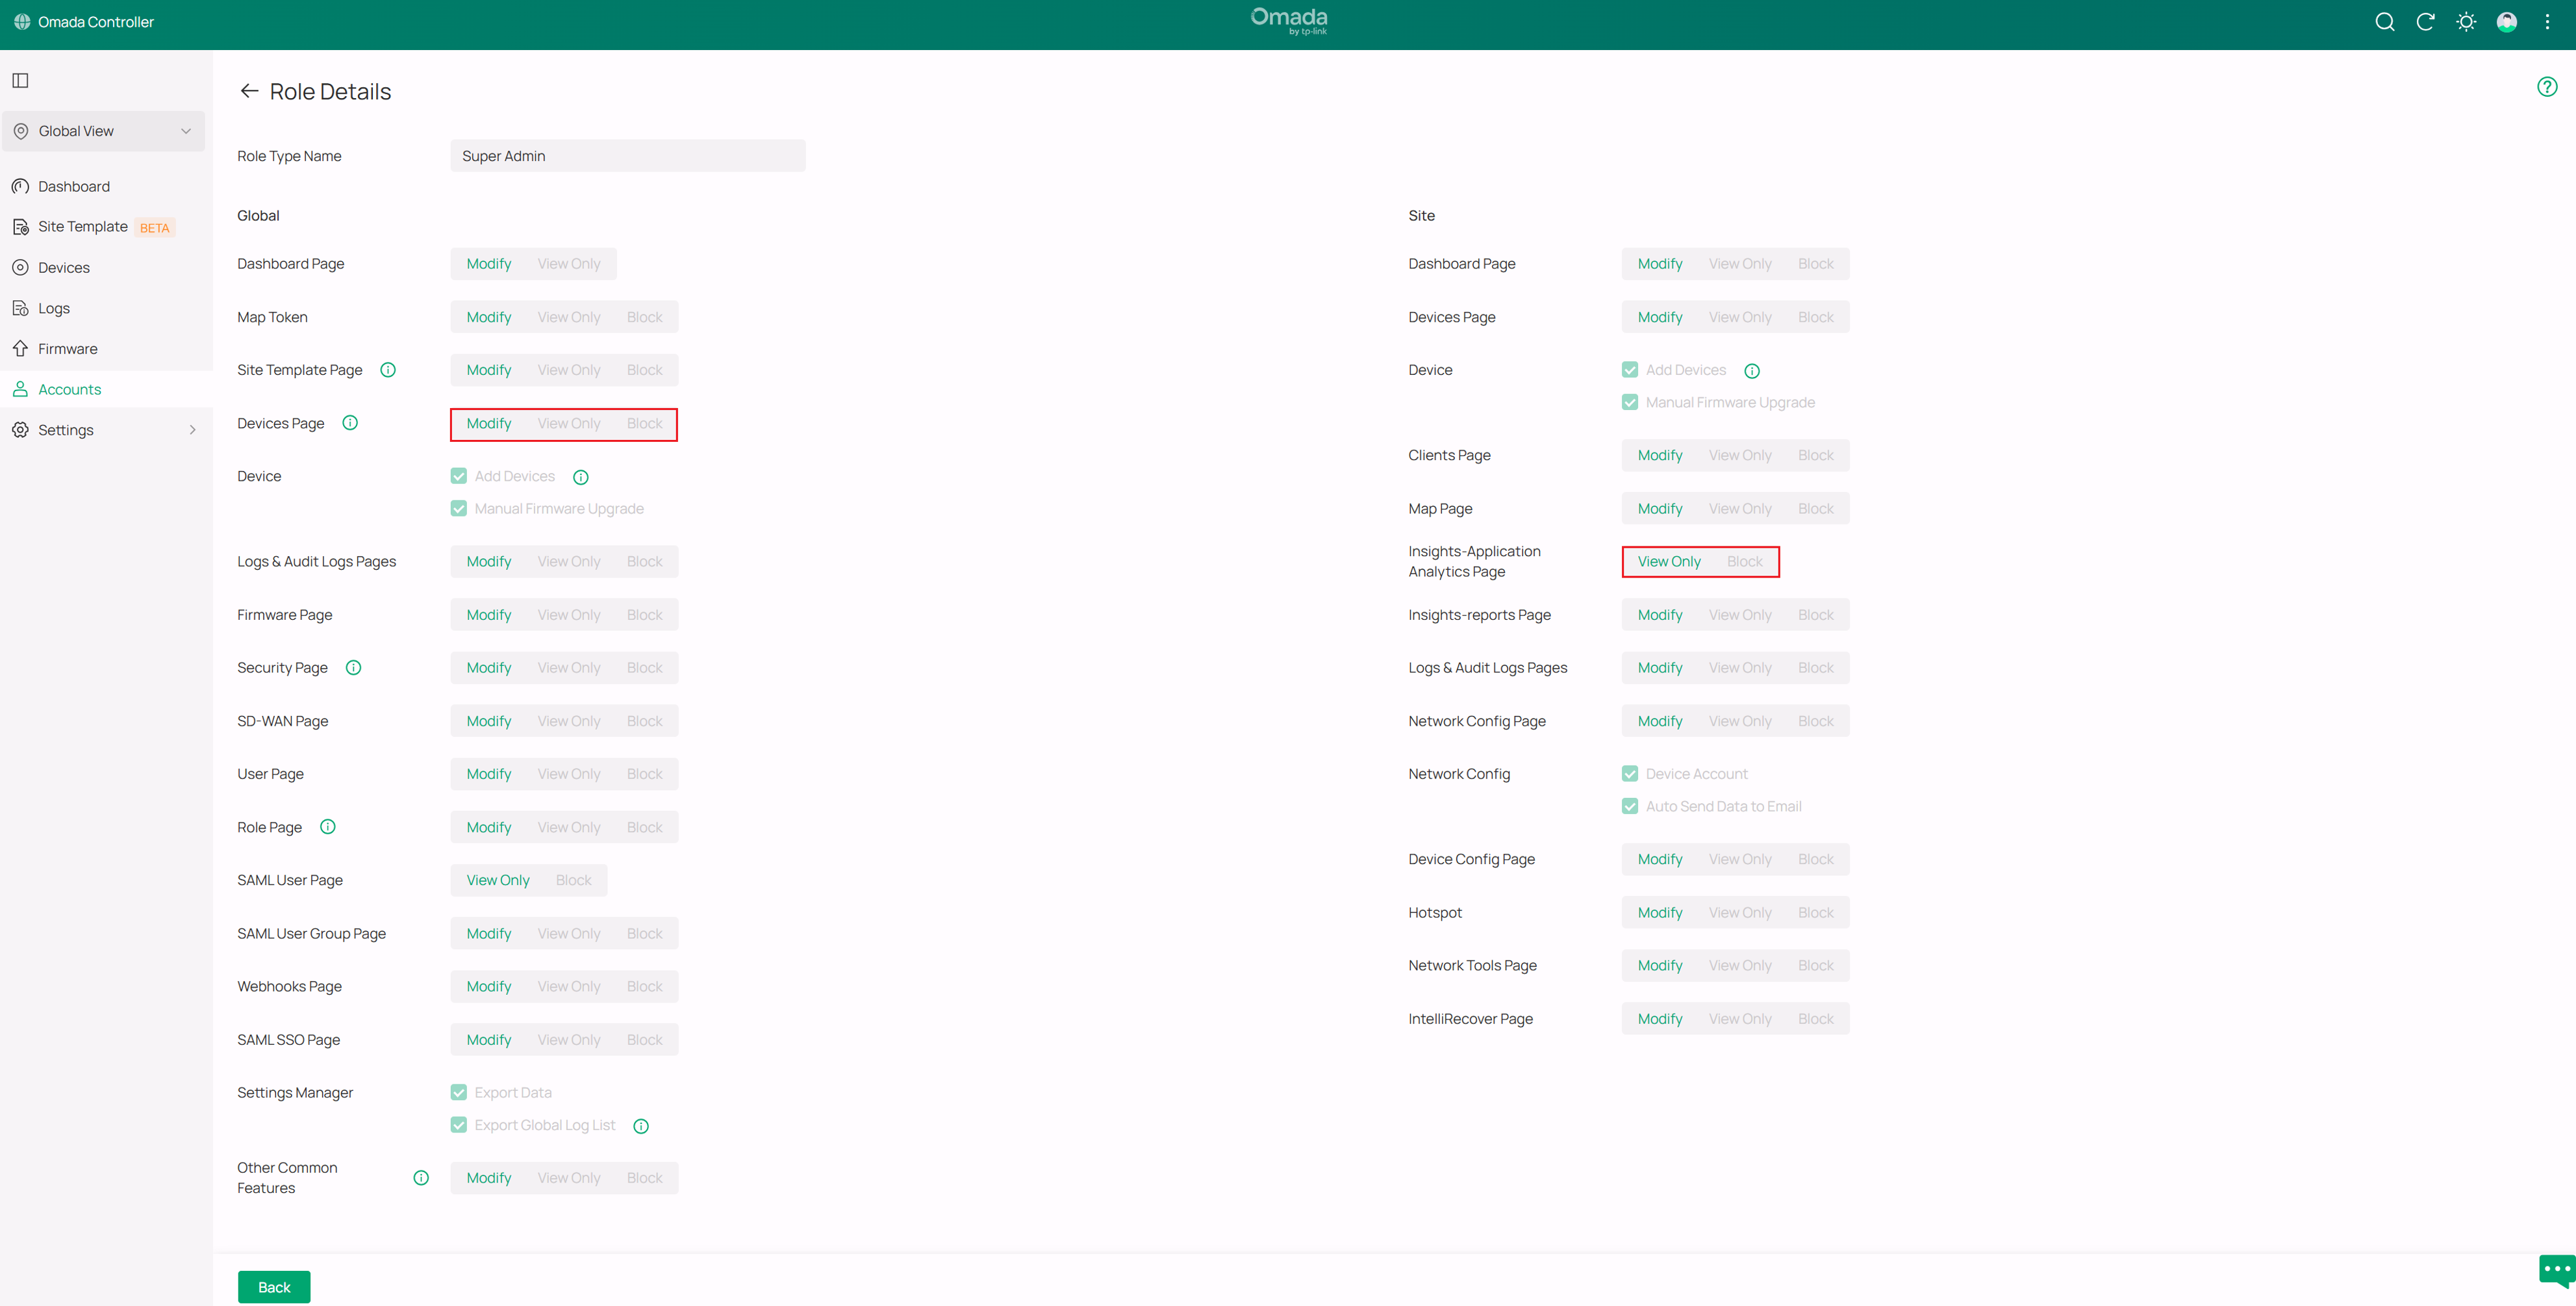
Note: To help users successfully log in to the Site, the Site list can be viewed even if the Global Dashboard page permission is set to Block.
If the default roles do not meet your requirements, you can create a custom role and assign it to users to better control account permissions. This article will guide you step by step how to create a role and assign it to users.
Requirements
- Omada Software Controller / Cloud-Based Controller / Hardware Controller
Configuration
Using the web interface
Step 1. Create a custom role
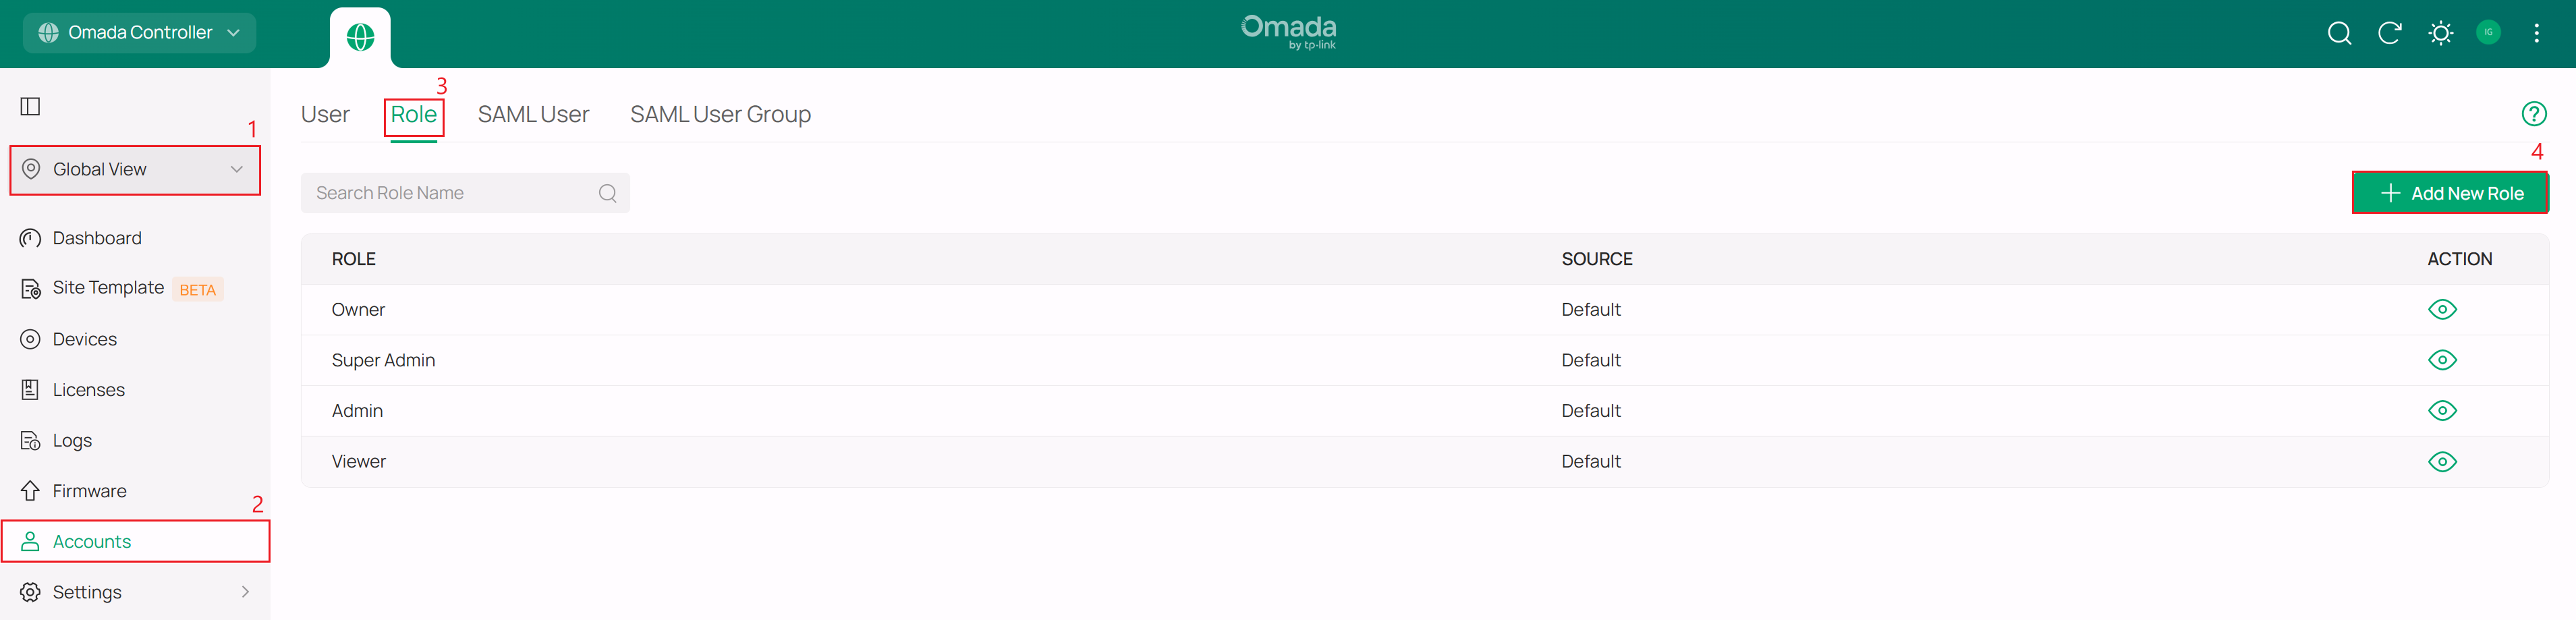
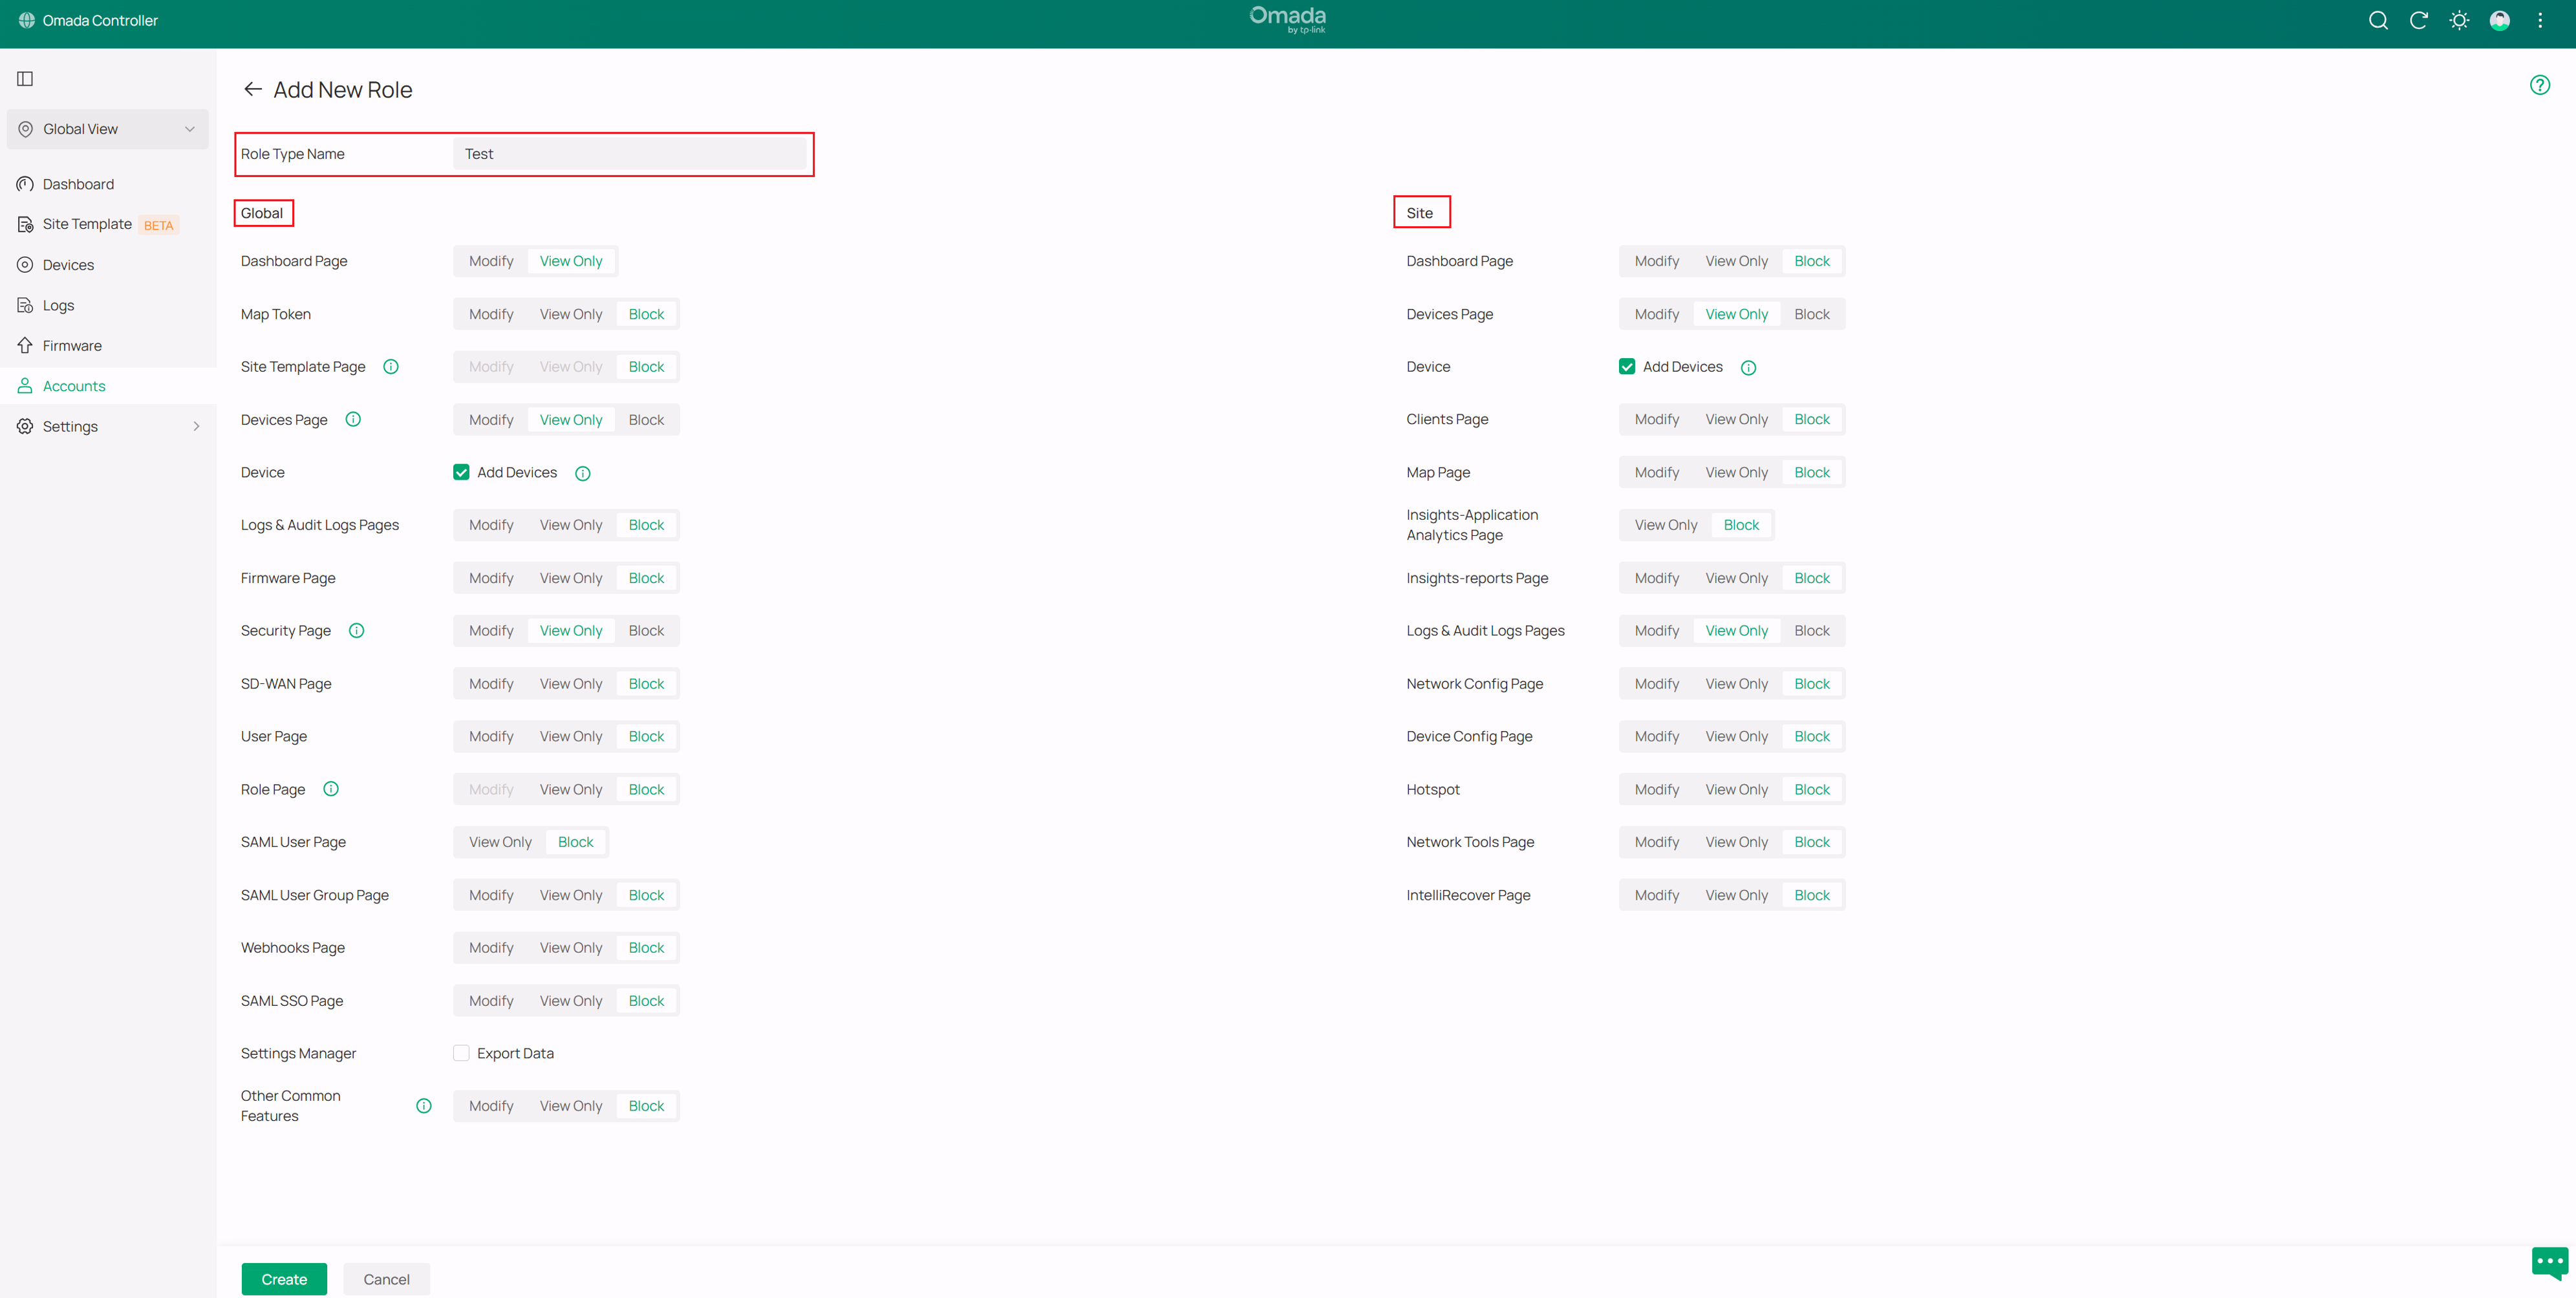
First log in to the Omada Controller, go to Global View > Account > Role, and click Add New Role. Then, enter the role name and set permissions for the different views.
Step 2. Add new user to assign the role
Go to Global View > Account > Account, and click Add New User.
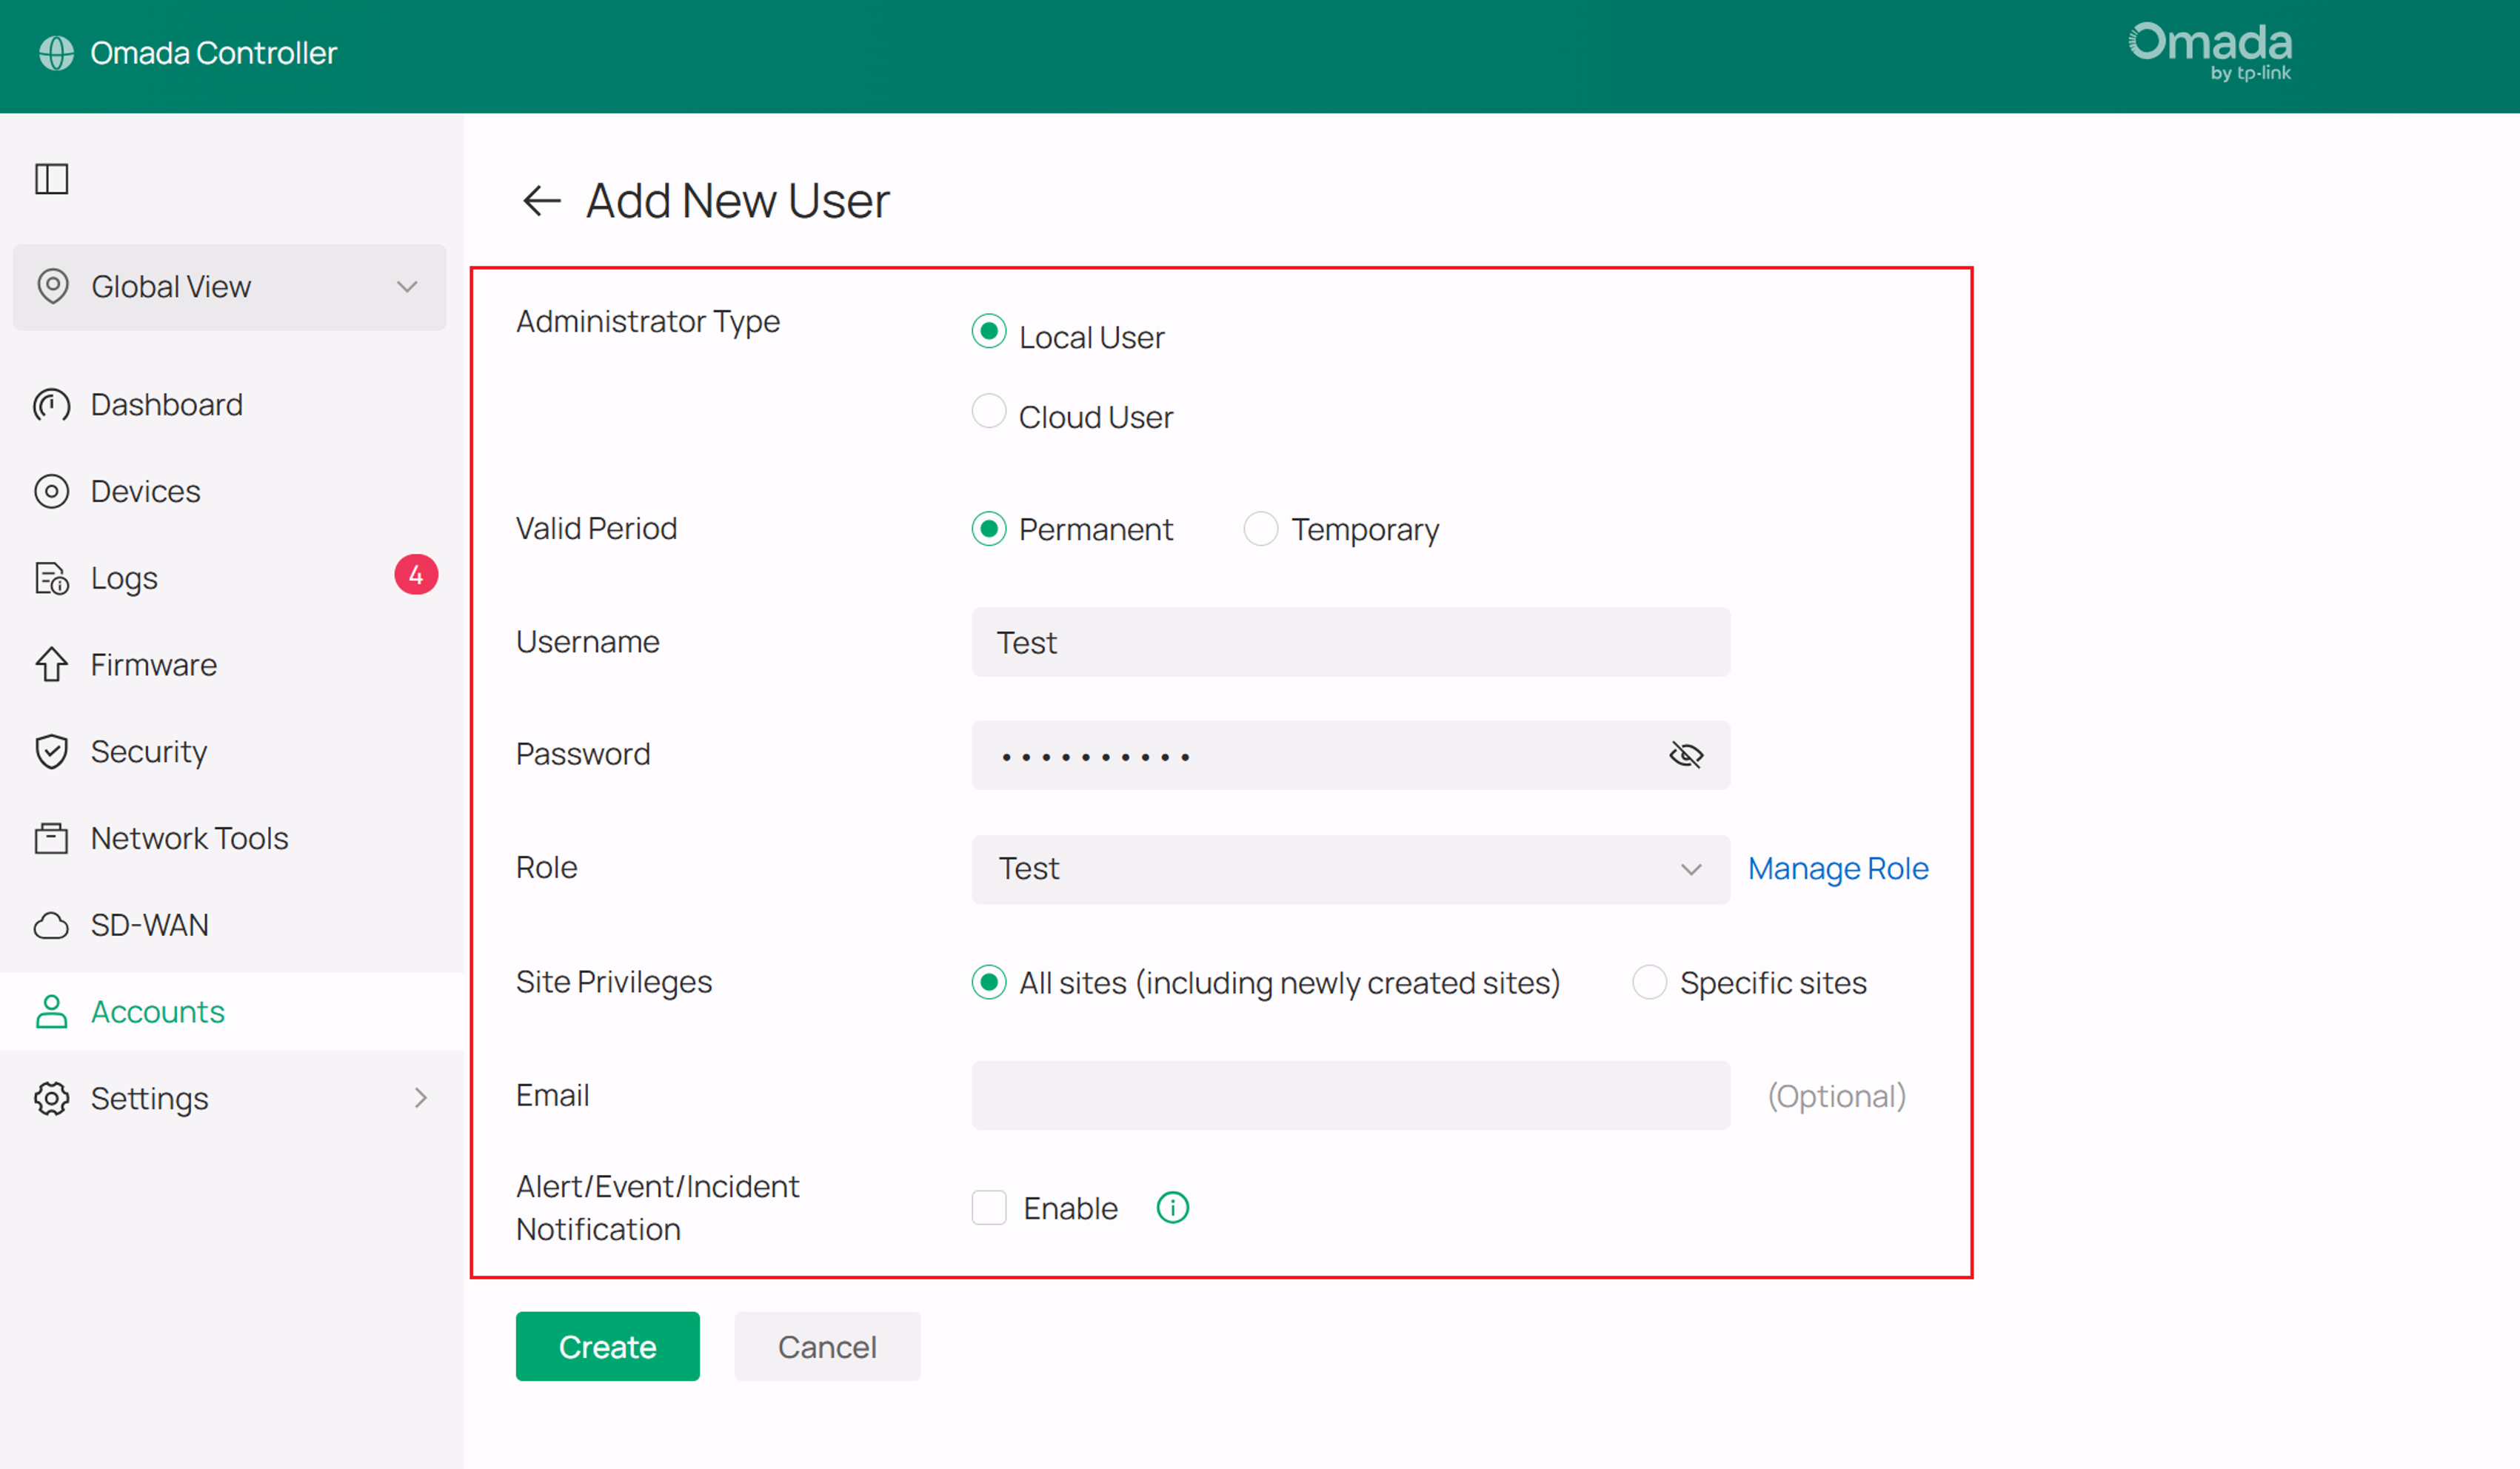
Users can be added as either local users or cloud users. In this example we are using a local user.
Enter the username and password and select the role you have created.
In Site Privileges, configure the user's site permissions to limit the scope of sites that the user can access. All Sites is selected by default, and you can manually select sites according to your needs. Enter the Email and Alert Email to receive the generated operation logs and alert logs.
Click Create once completed.
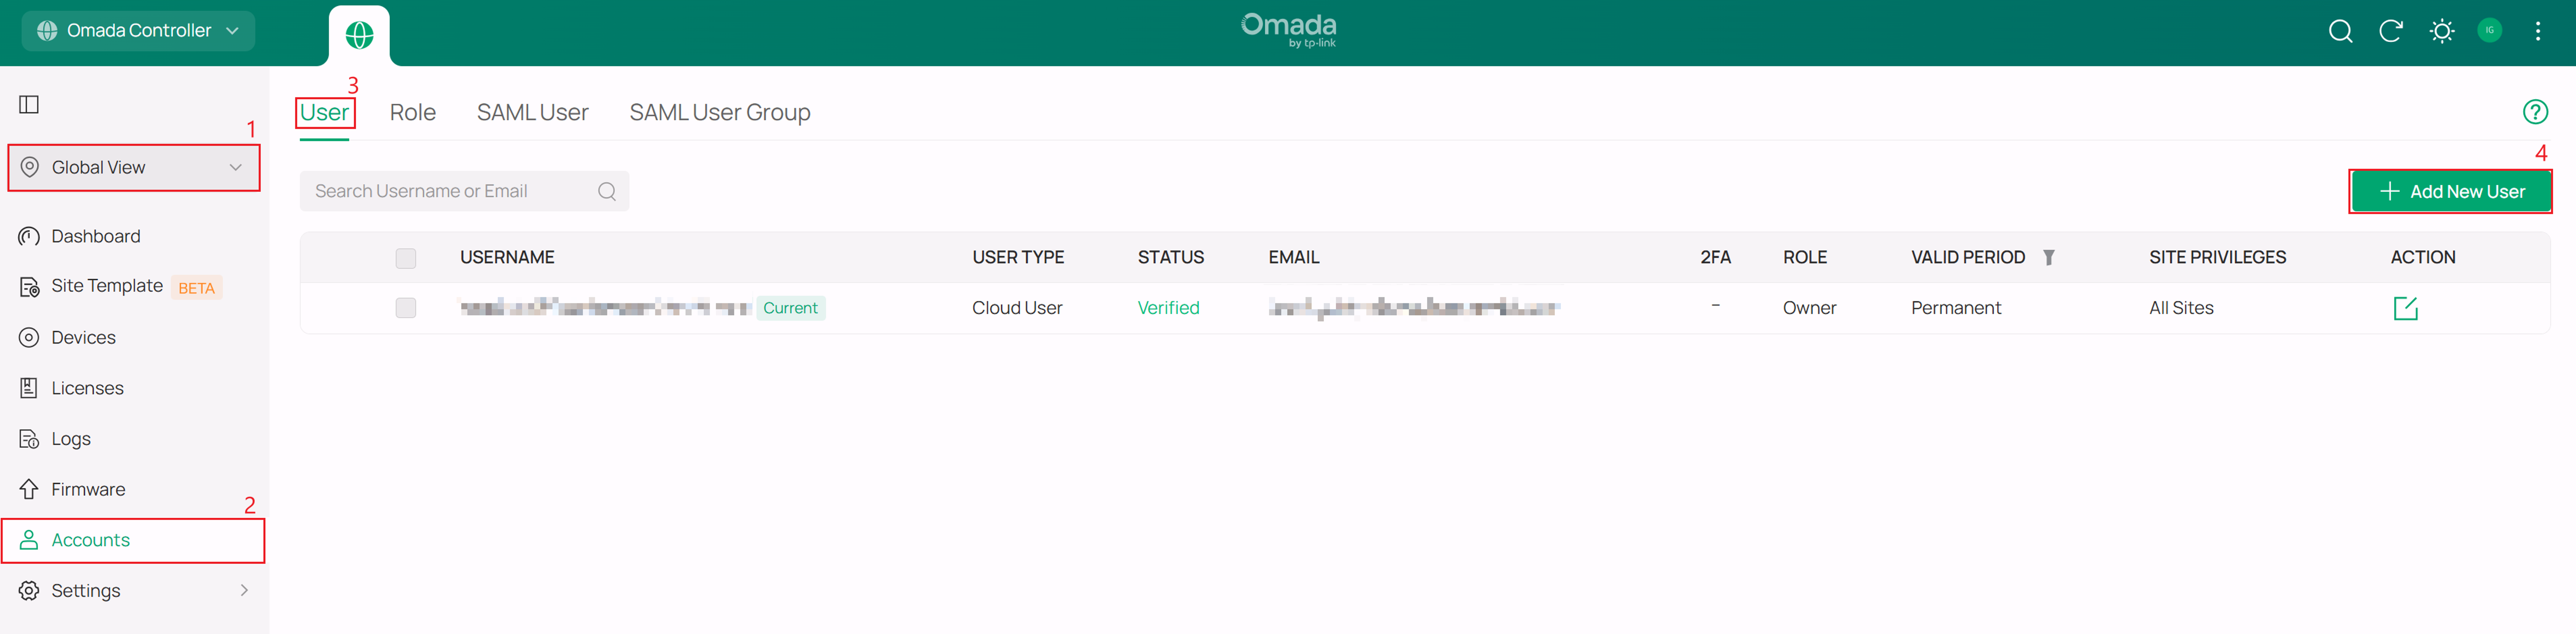
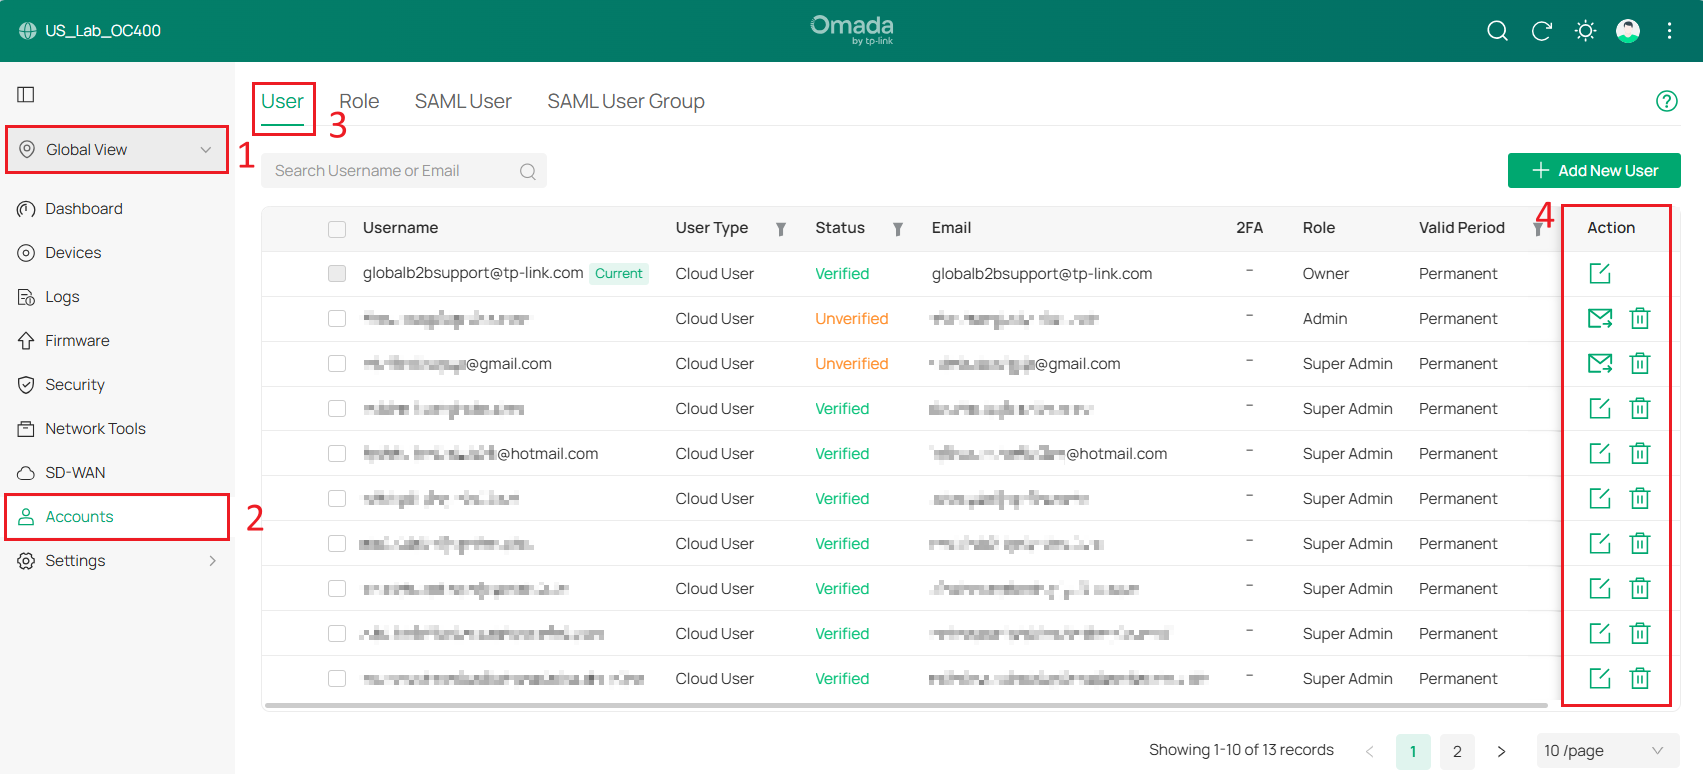
Step 3. Manage all users under Global View > Accounts > Users page.
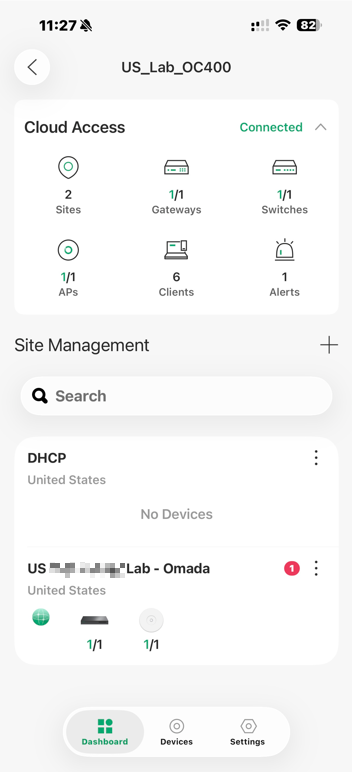
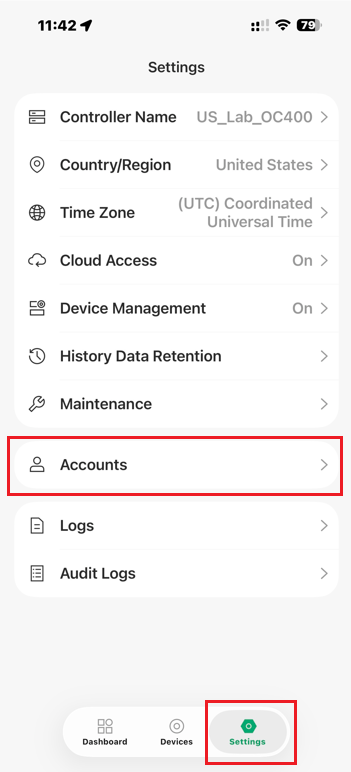
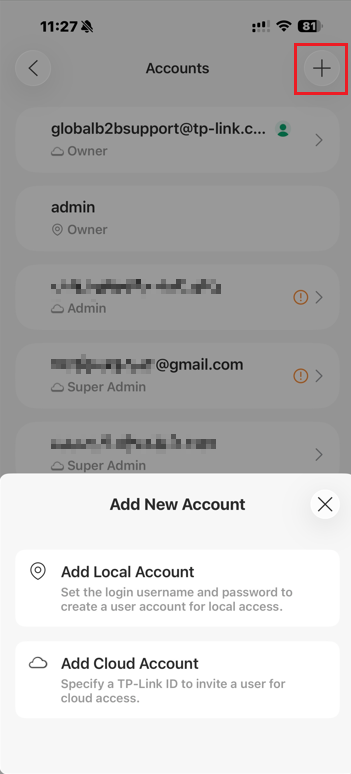
Step 2. In Global View, go to Settings > Accounts and tap “+” in the upper right corner to add the account.
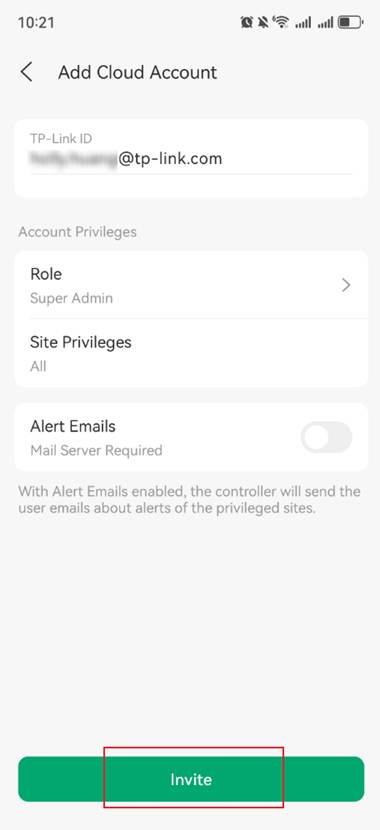
Local accounts require devices to be on the same network. Cloud accounts support remote login. Here we take the Cloud Account as an example. Then enter the TP-Link ID you want to invite. You can also choose the account Role and Site Privileges as your needs. After that, please click the Invite button.
Note: Custom roles can only be created and managed through the Omada Controller web interface. The Omada App currently supports assigning existing roles but does not support creating custom roles.
Step 3. The email address associated with the new TP-Link ID will receive a verification request. After clicking “Accept Invitation,” you can log in to the Omada app using your new TP-Link ID. And you will see the controller displayed in the list under Controller Mode.
Conclusion
You have now created a new user account and assigned a custom role to manage it’s access permissions.
To learn more about each function and configuration, please visit Support Home to download or check the manual for your product.
QA
Q1: What is the difference between the Owner and Super Admin roles on the Omada Controller?
A1: The Owner role can access all features in the corresponding view, including the privilege to transfer permissions. The Super Admin role can also access all features in the corresponding view but does not include the privilege to transfer permissions.
