


EAP100-Bridge KIT_Instalation Guide


Package Contents
The kit contains a Main AP and a Client AP, which can be distinguished by the role switch on the AP.
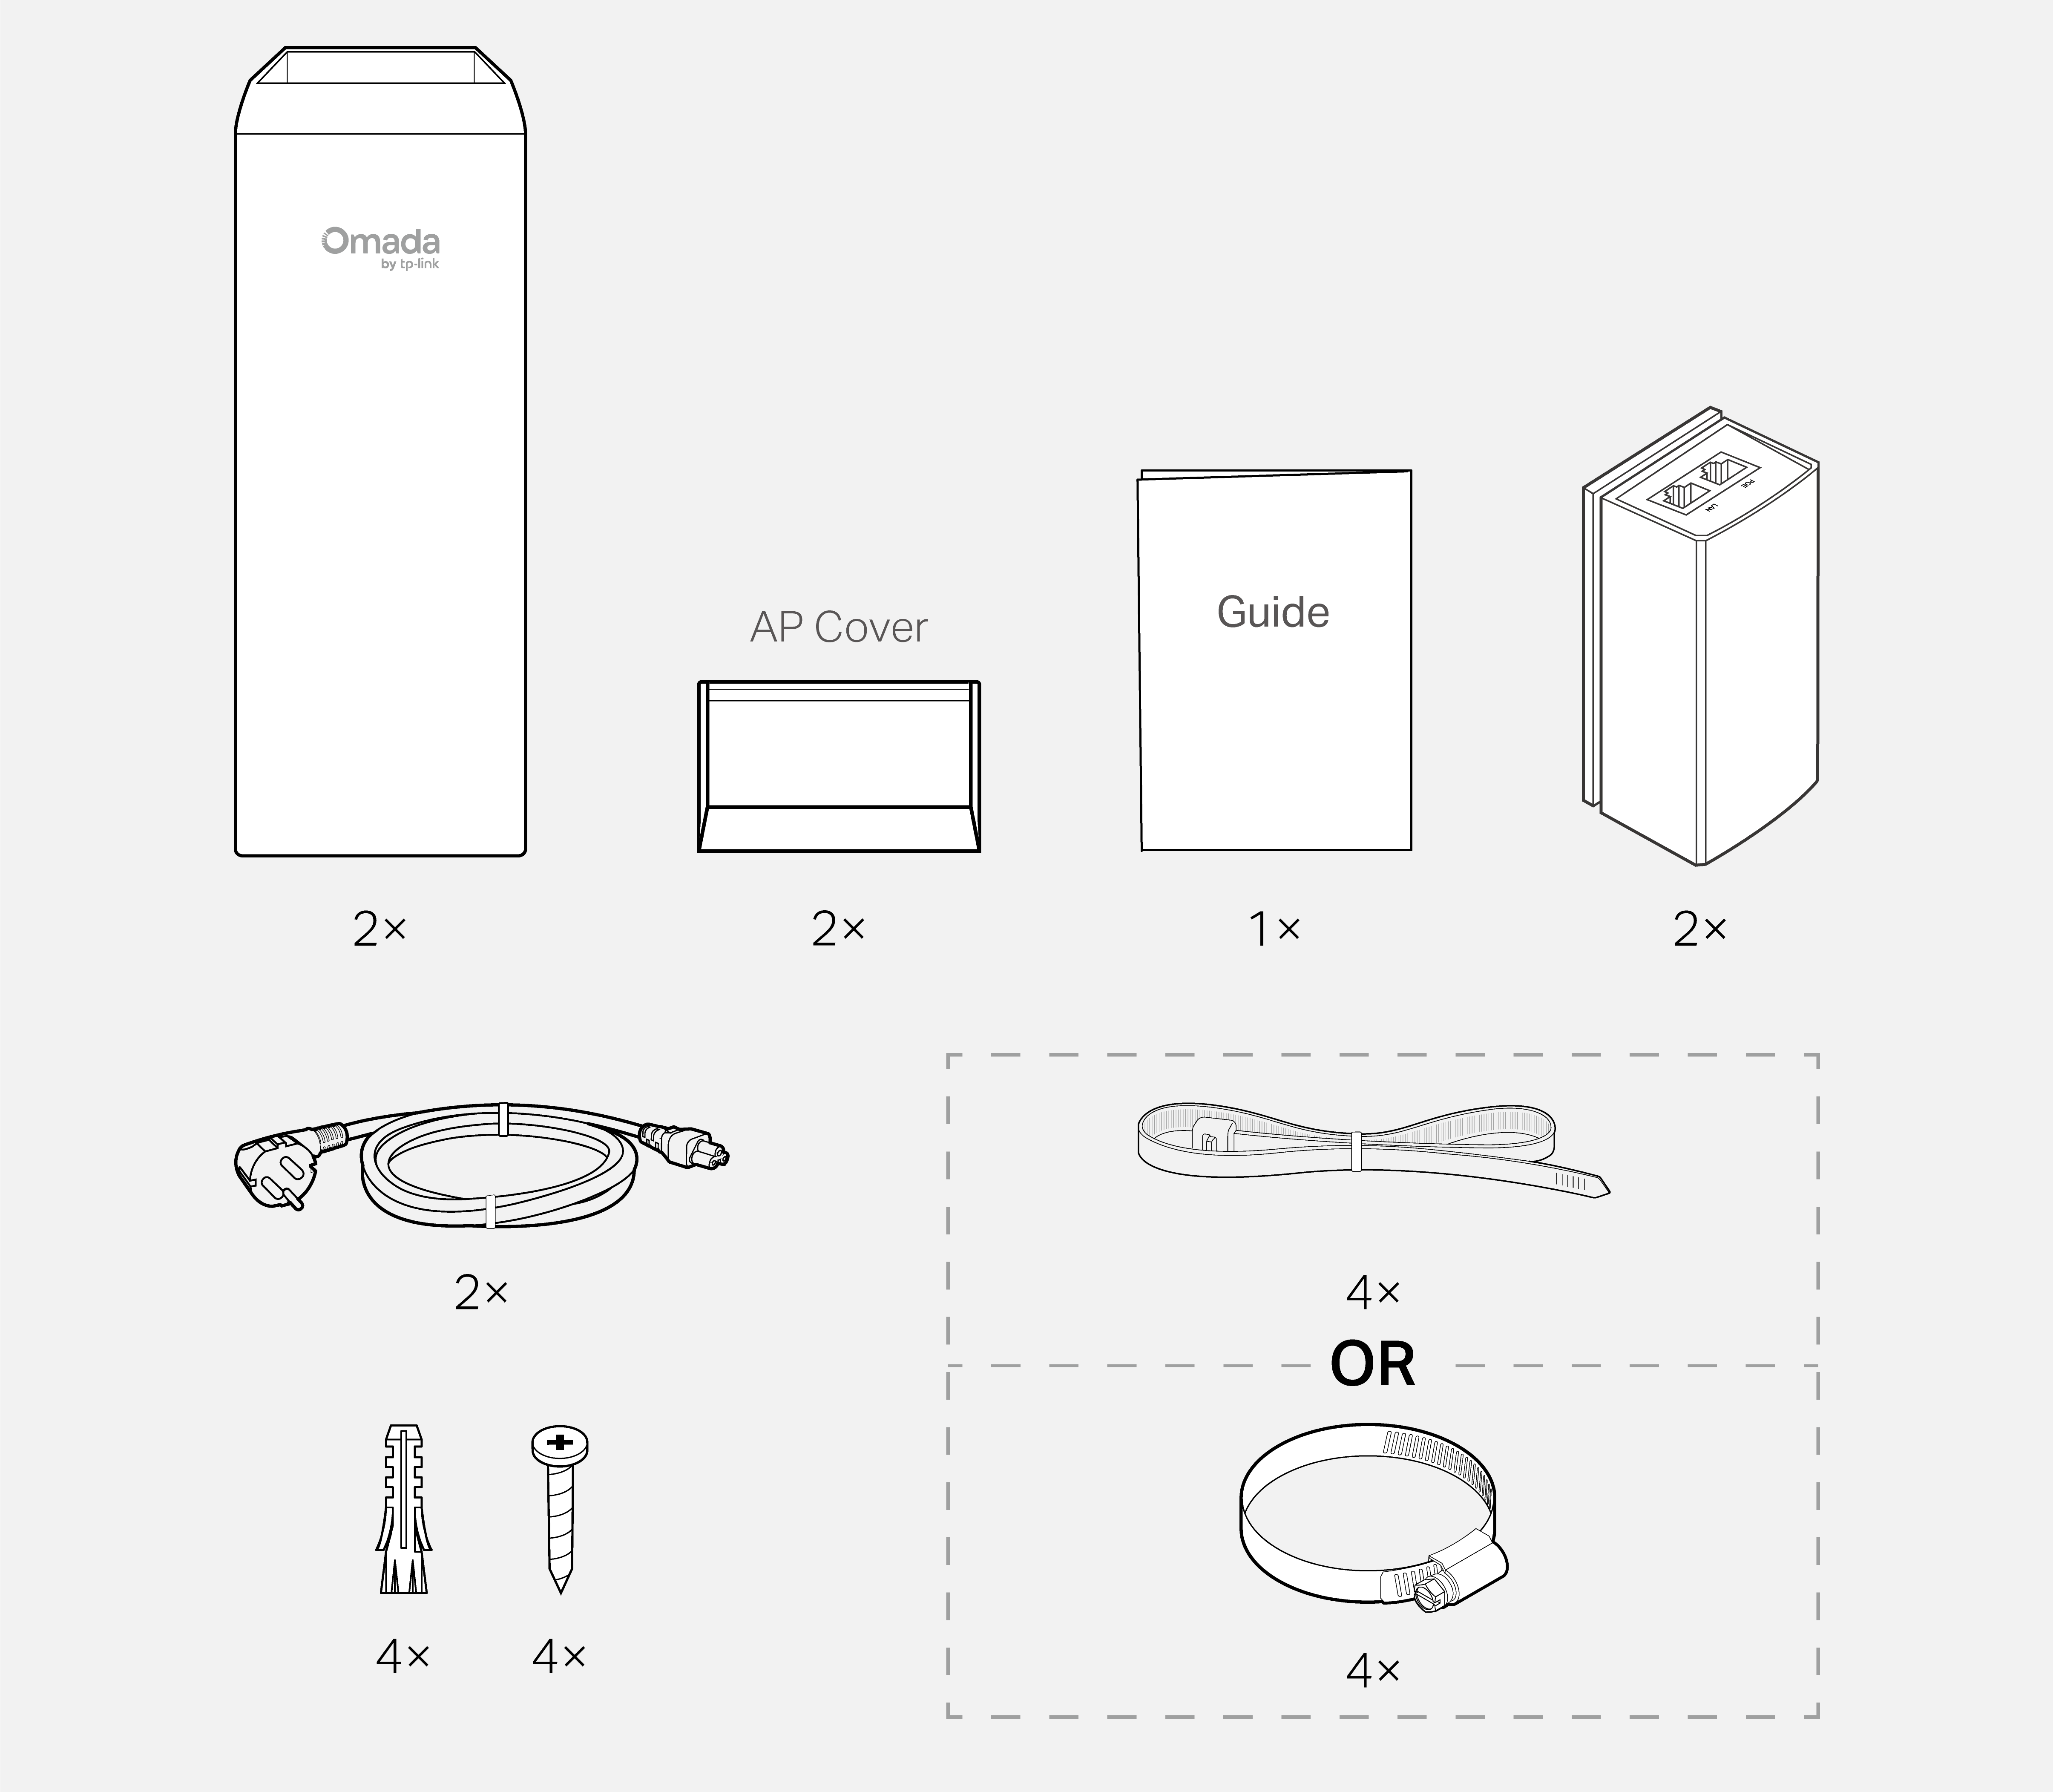 Note: Accessories may vary by region and model.
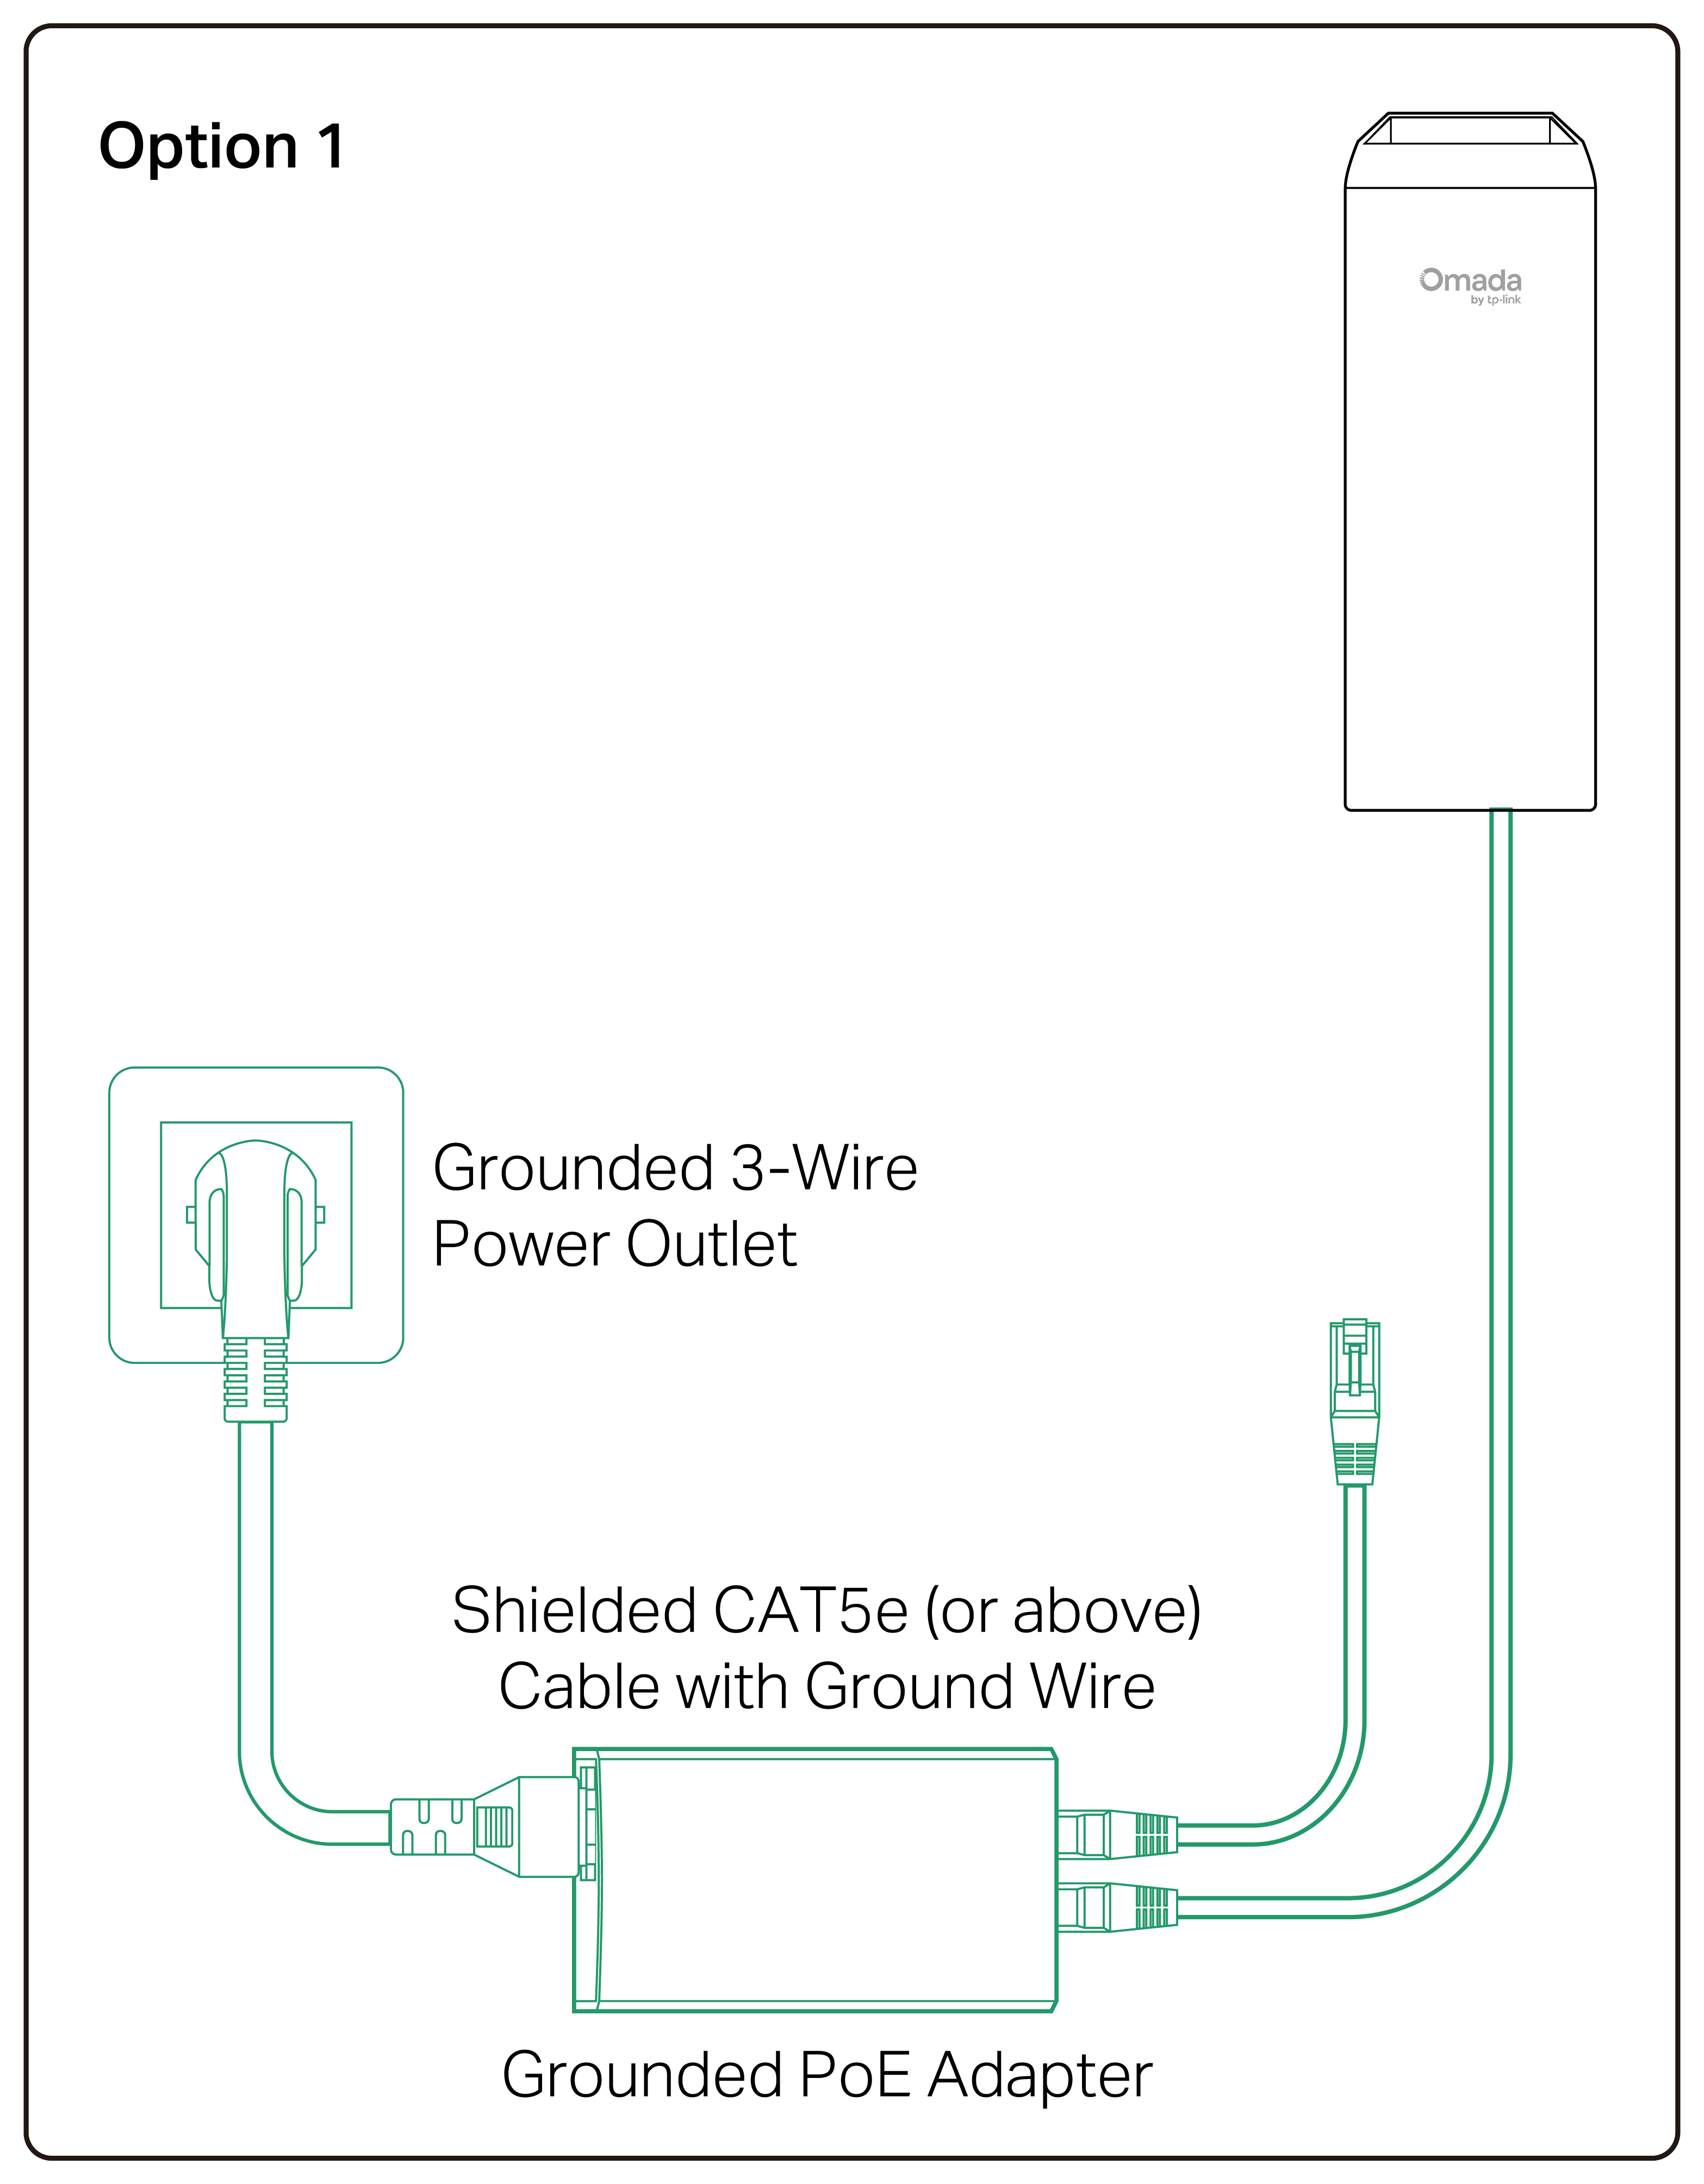
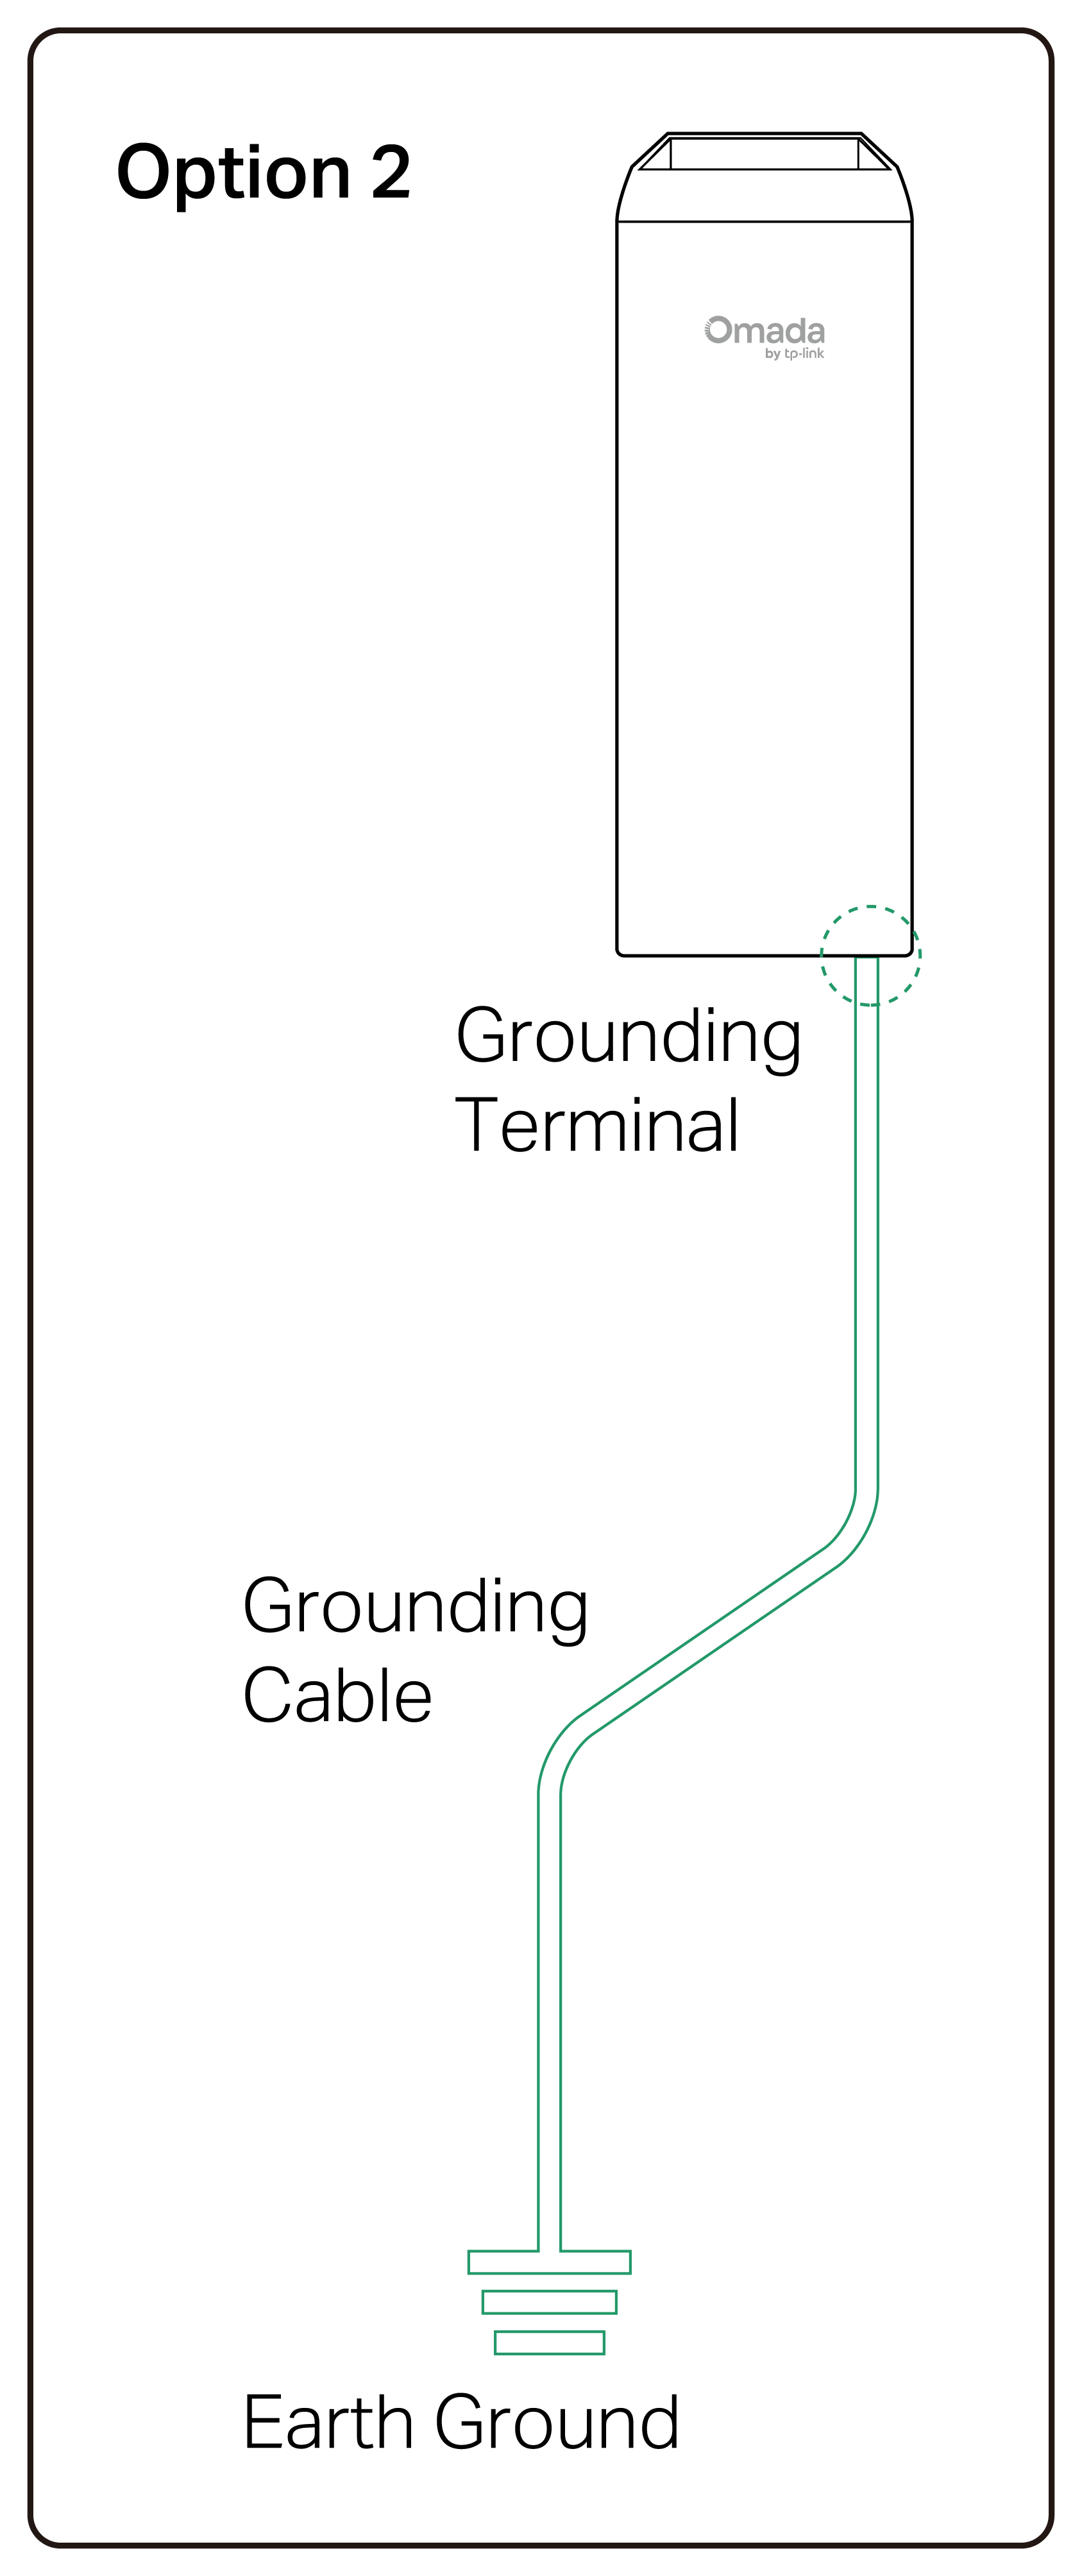
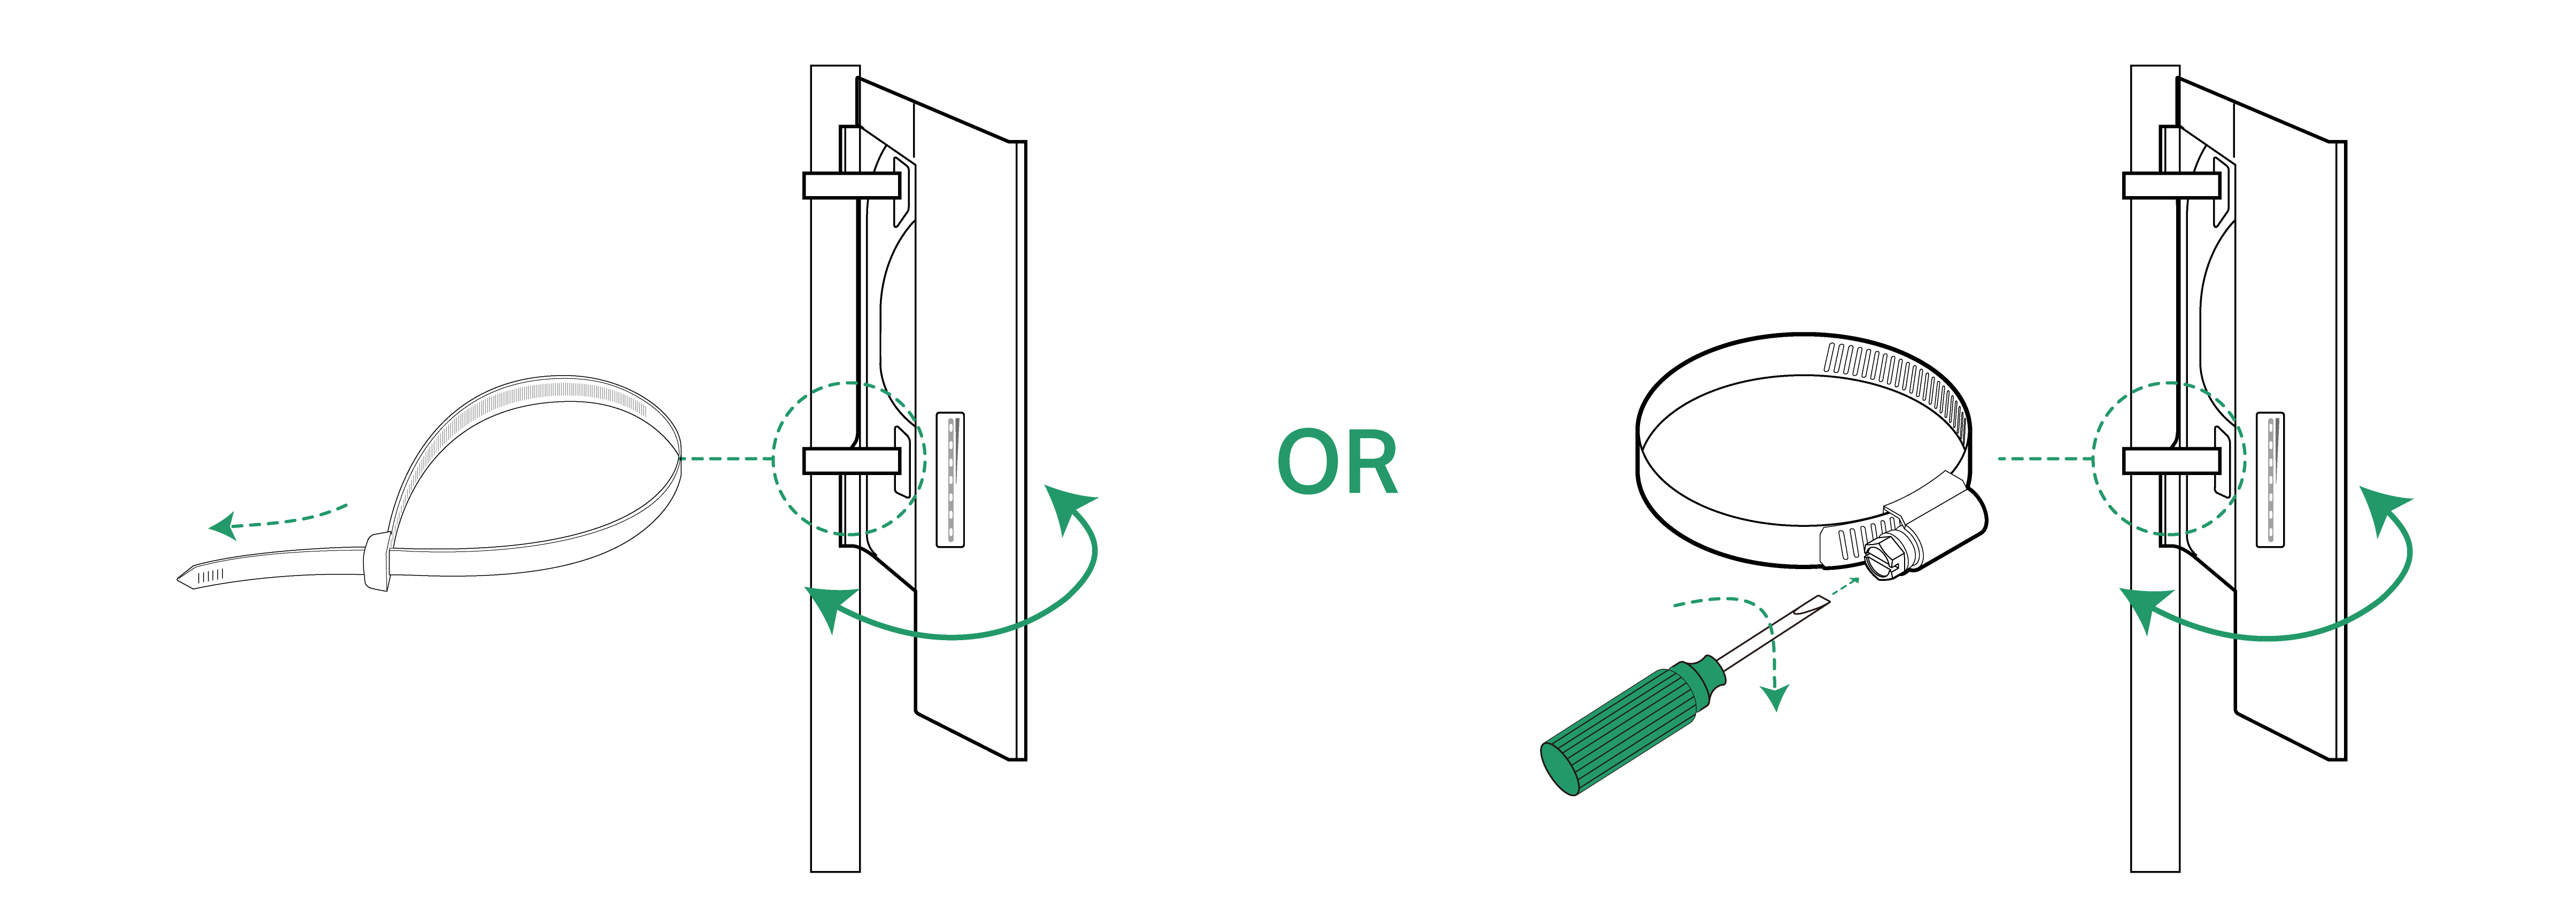
Grounding
Choose a grounding method according to site requirements:
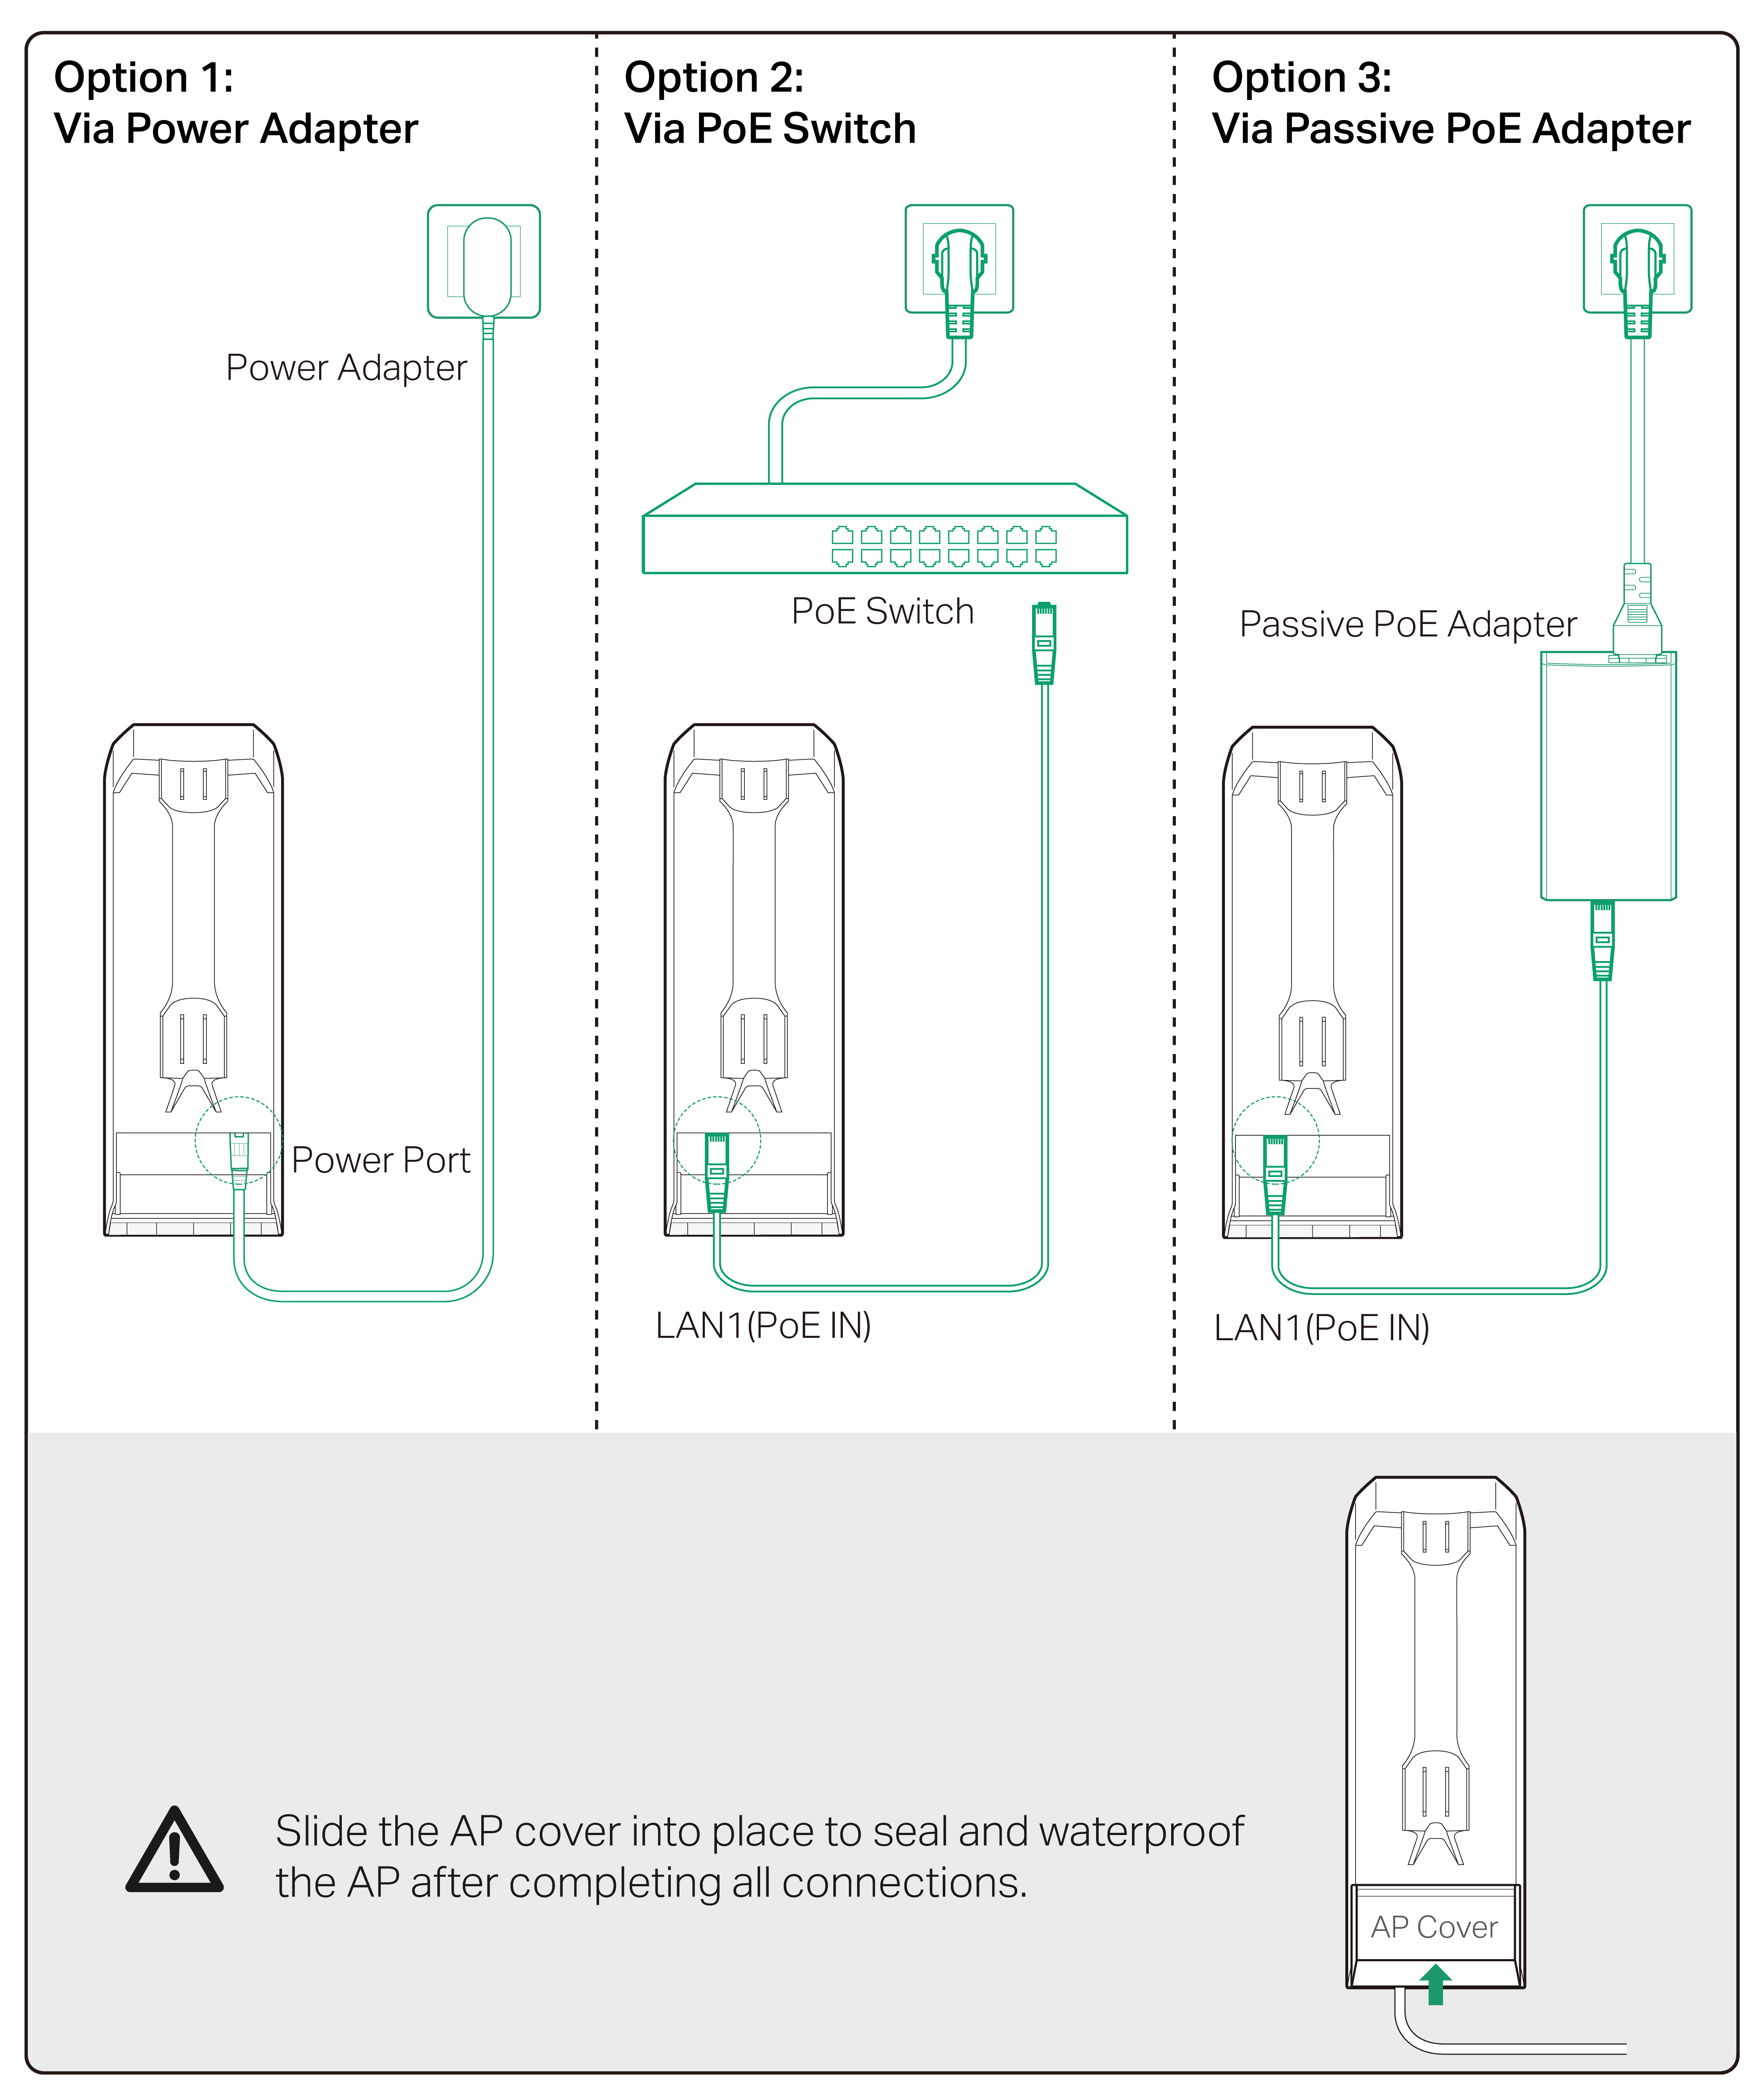
Power On
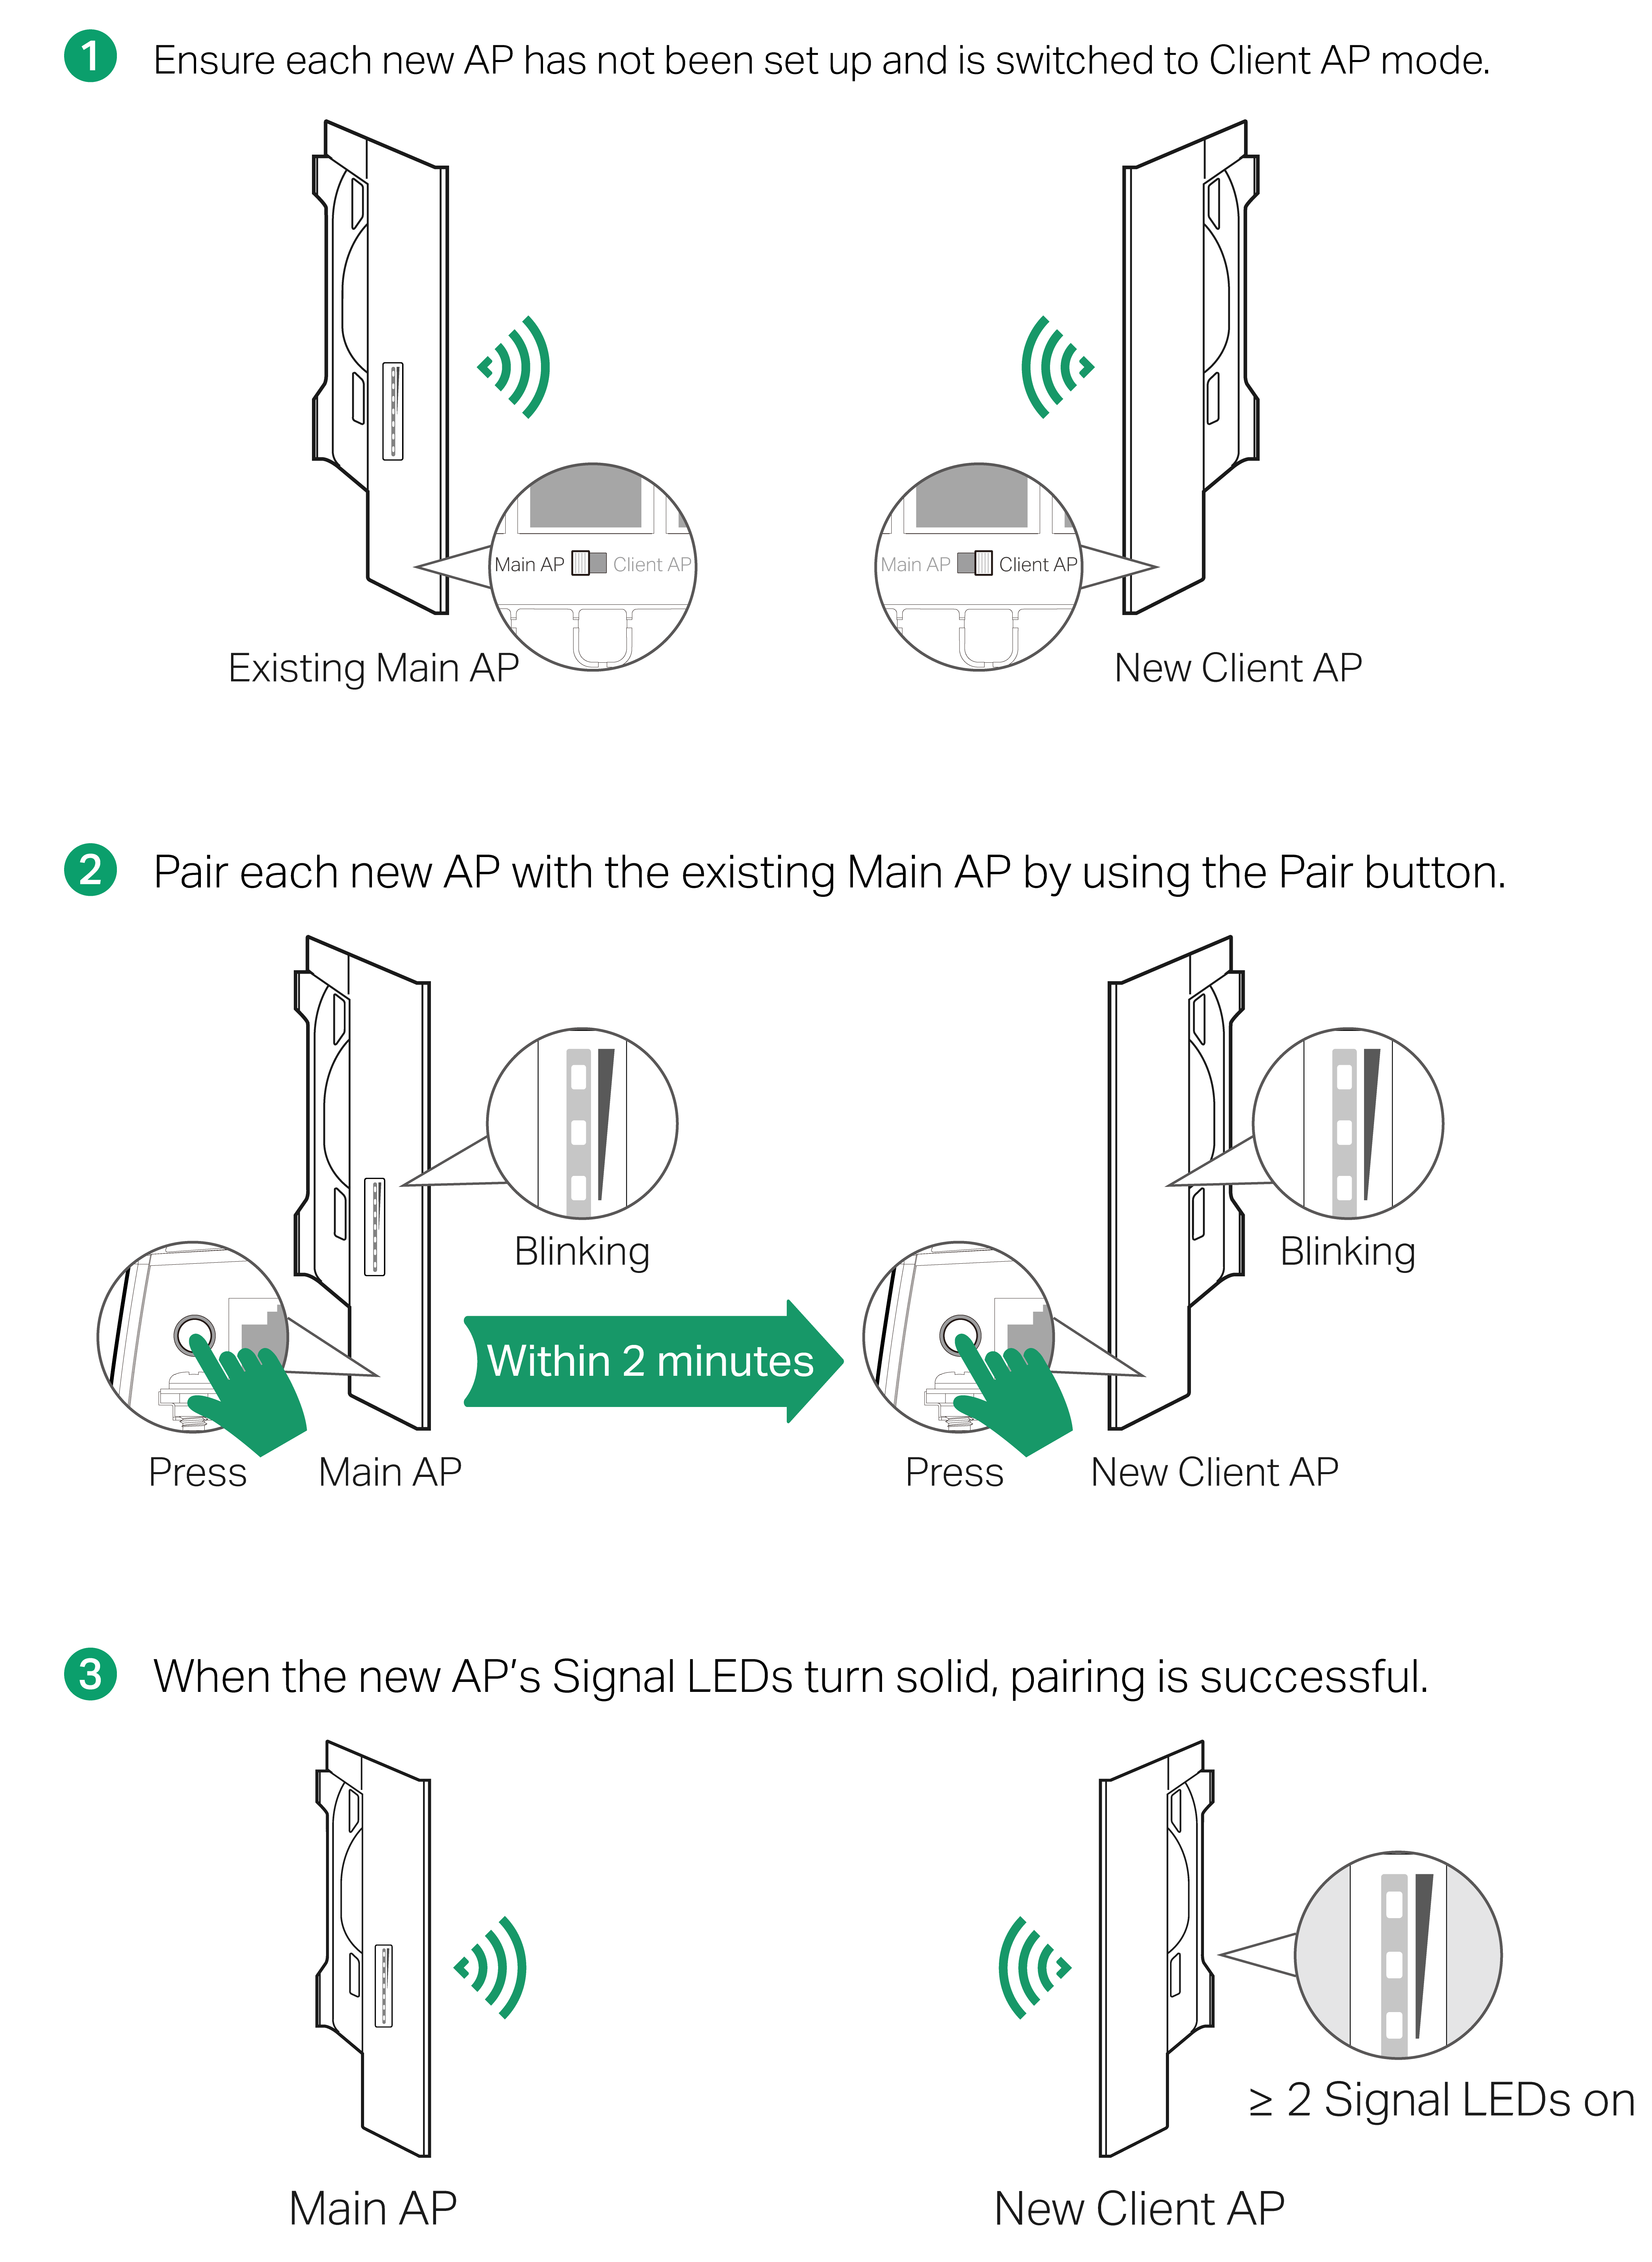
Pairing
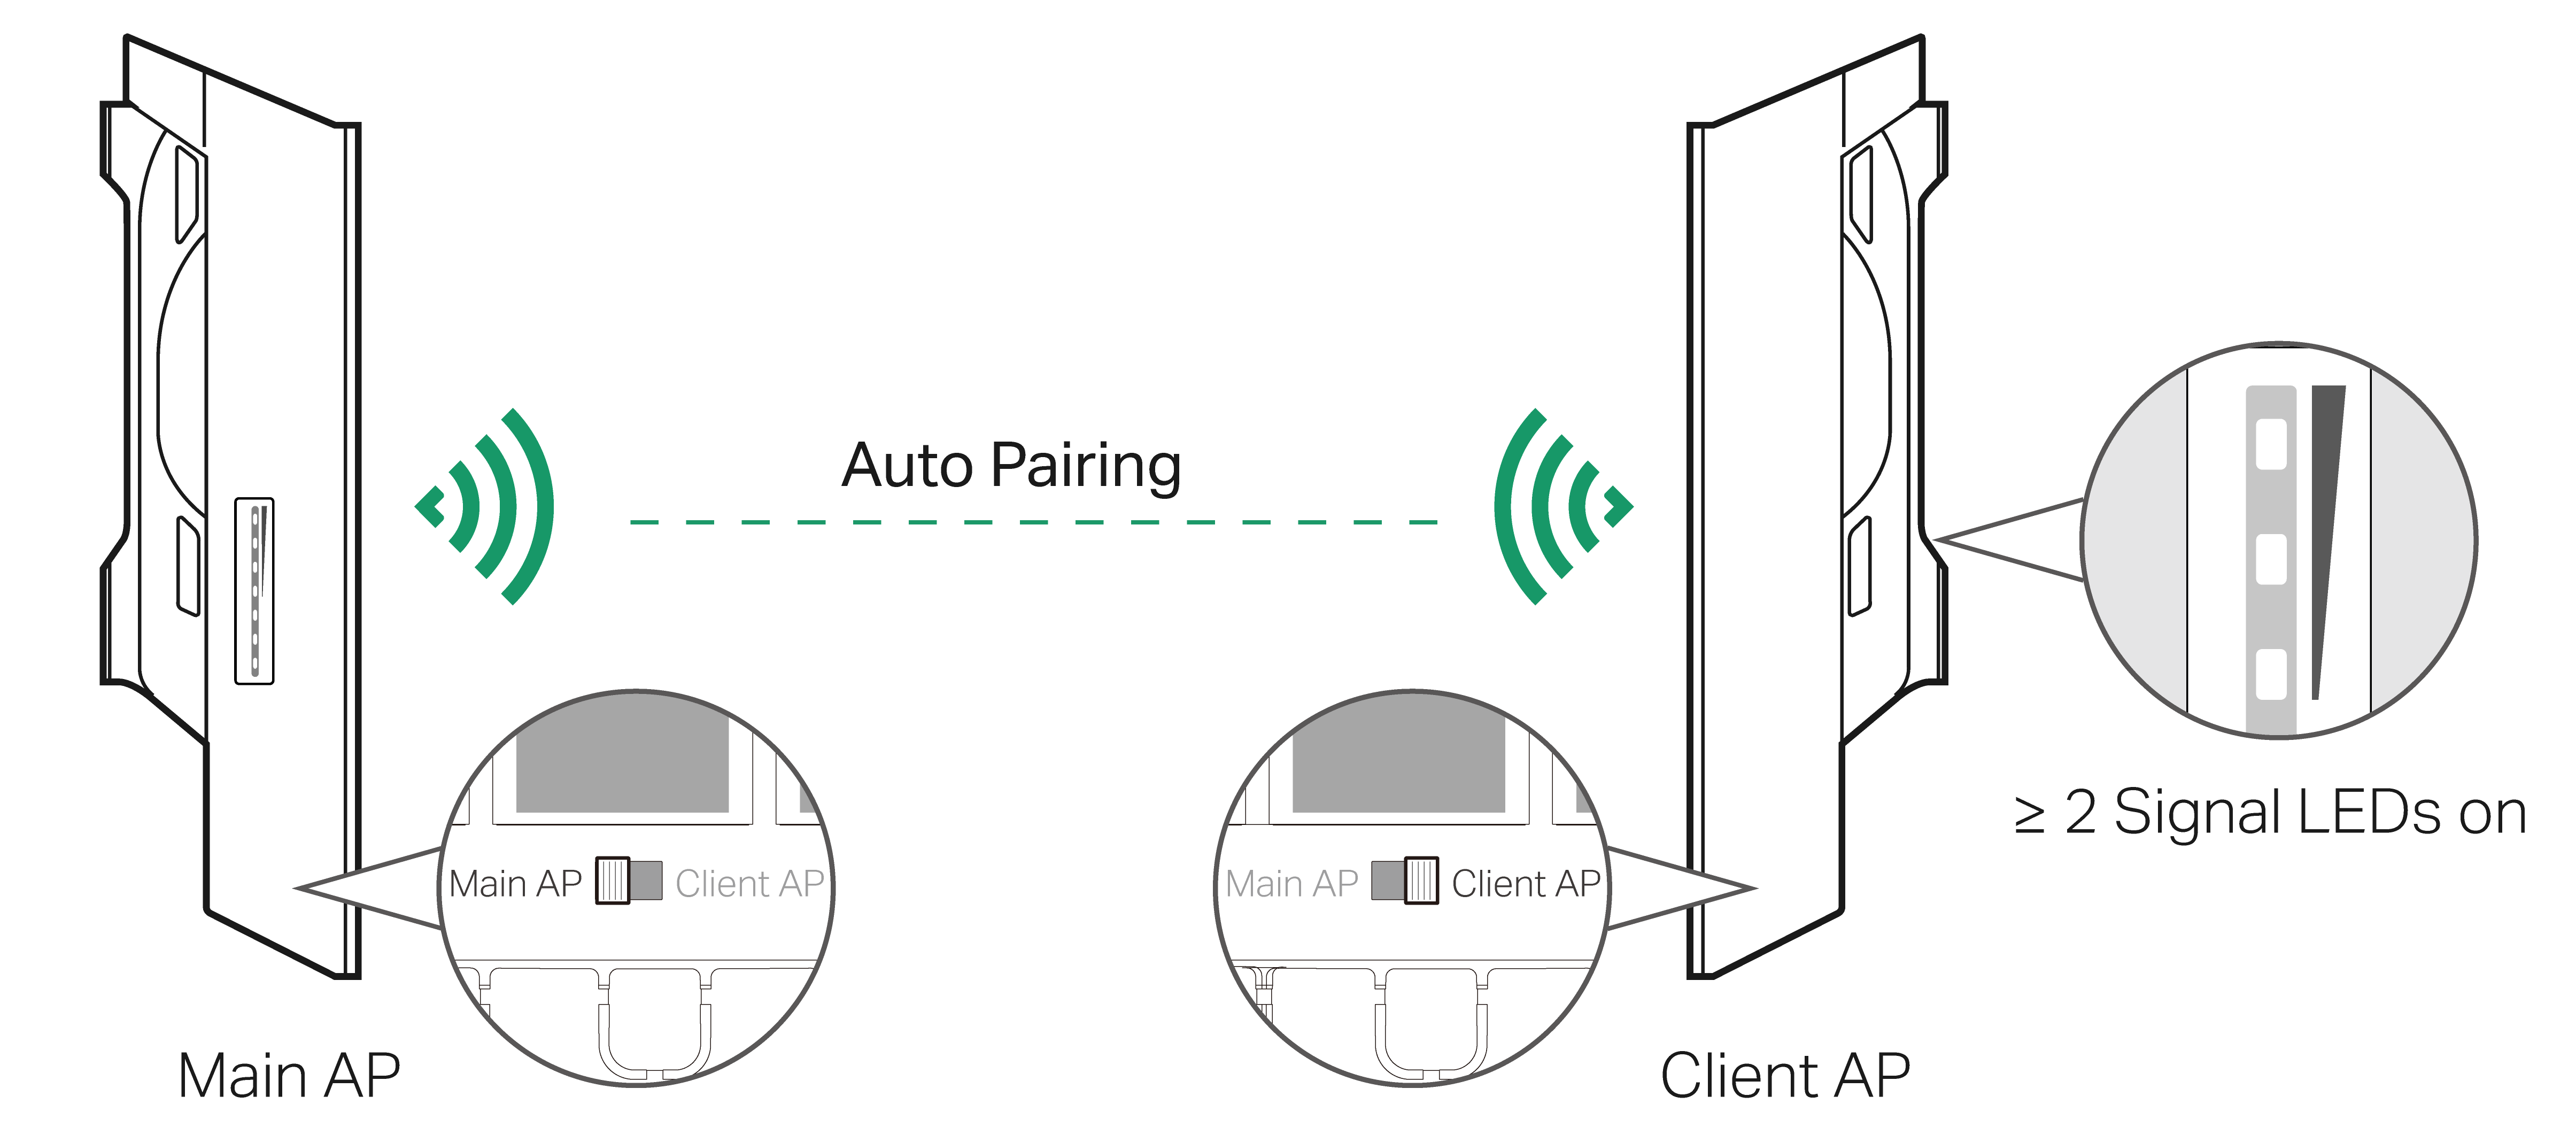
Auto Pairing
The Main AP and Client AP in the same kit will automatically form a bridge network after powering on.
Note:
1. Check the role switch to ensure you connect the Main AP and Client AP in the network correctly. You can toggle the role switch to change the AP’s role if needed.
2. The default SSID on the product is only for device access and management. If you need an SSID to access the internet and service networks, refer to the Network Management section to set up the AP.
3. In a network without a DHCP Server, the Main AP will use the DHCP fallback IP address 192.168.0.254 and assign IP addresses to Client APs.
PtMP Pairing
If needed, you can pair multiple Client APs with the Main AP to form a PtMP network.
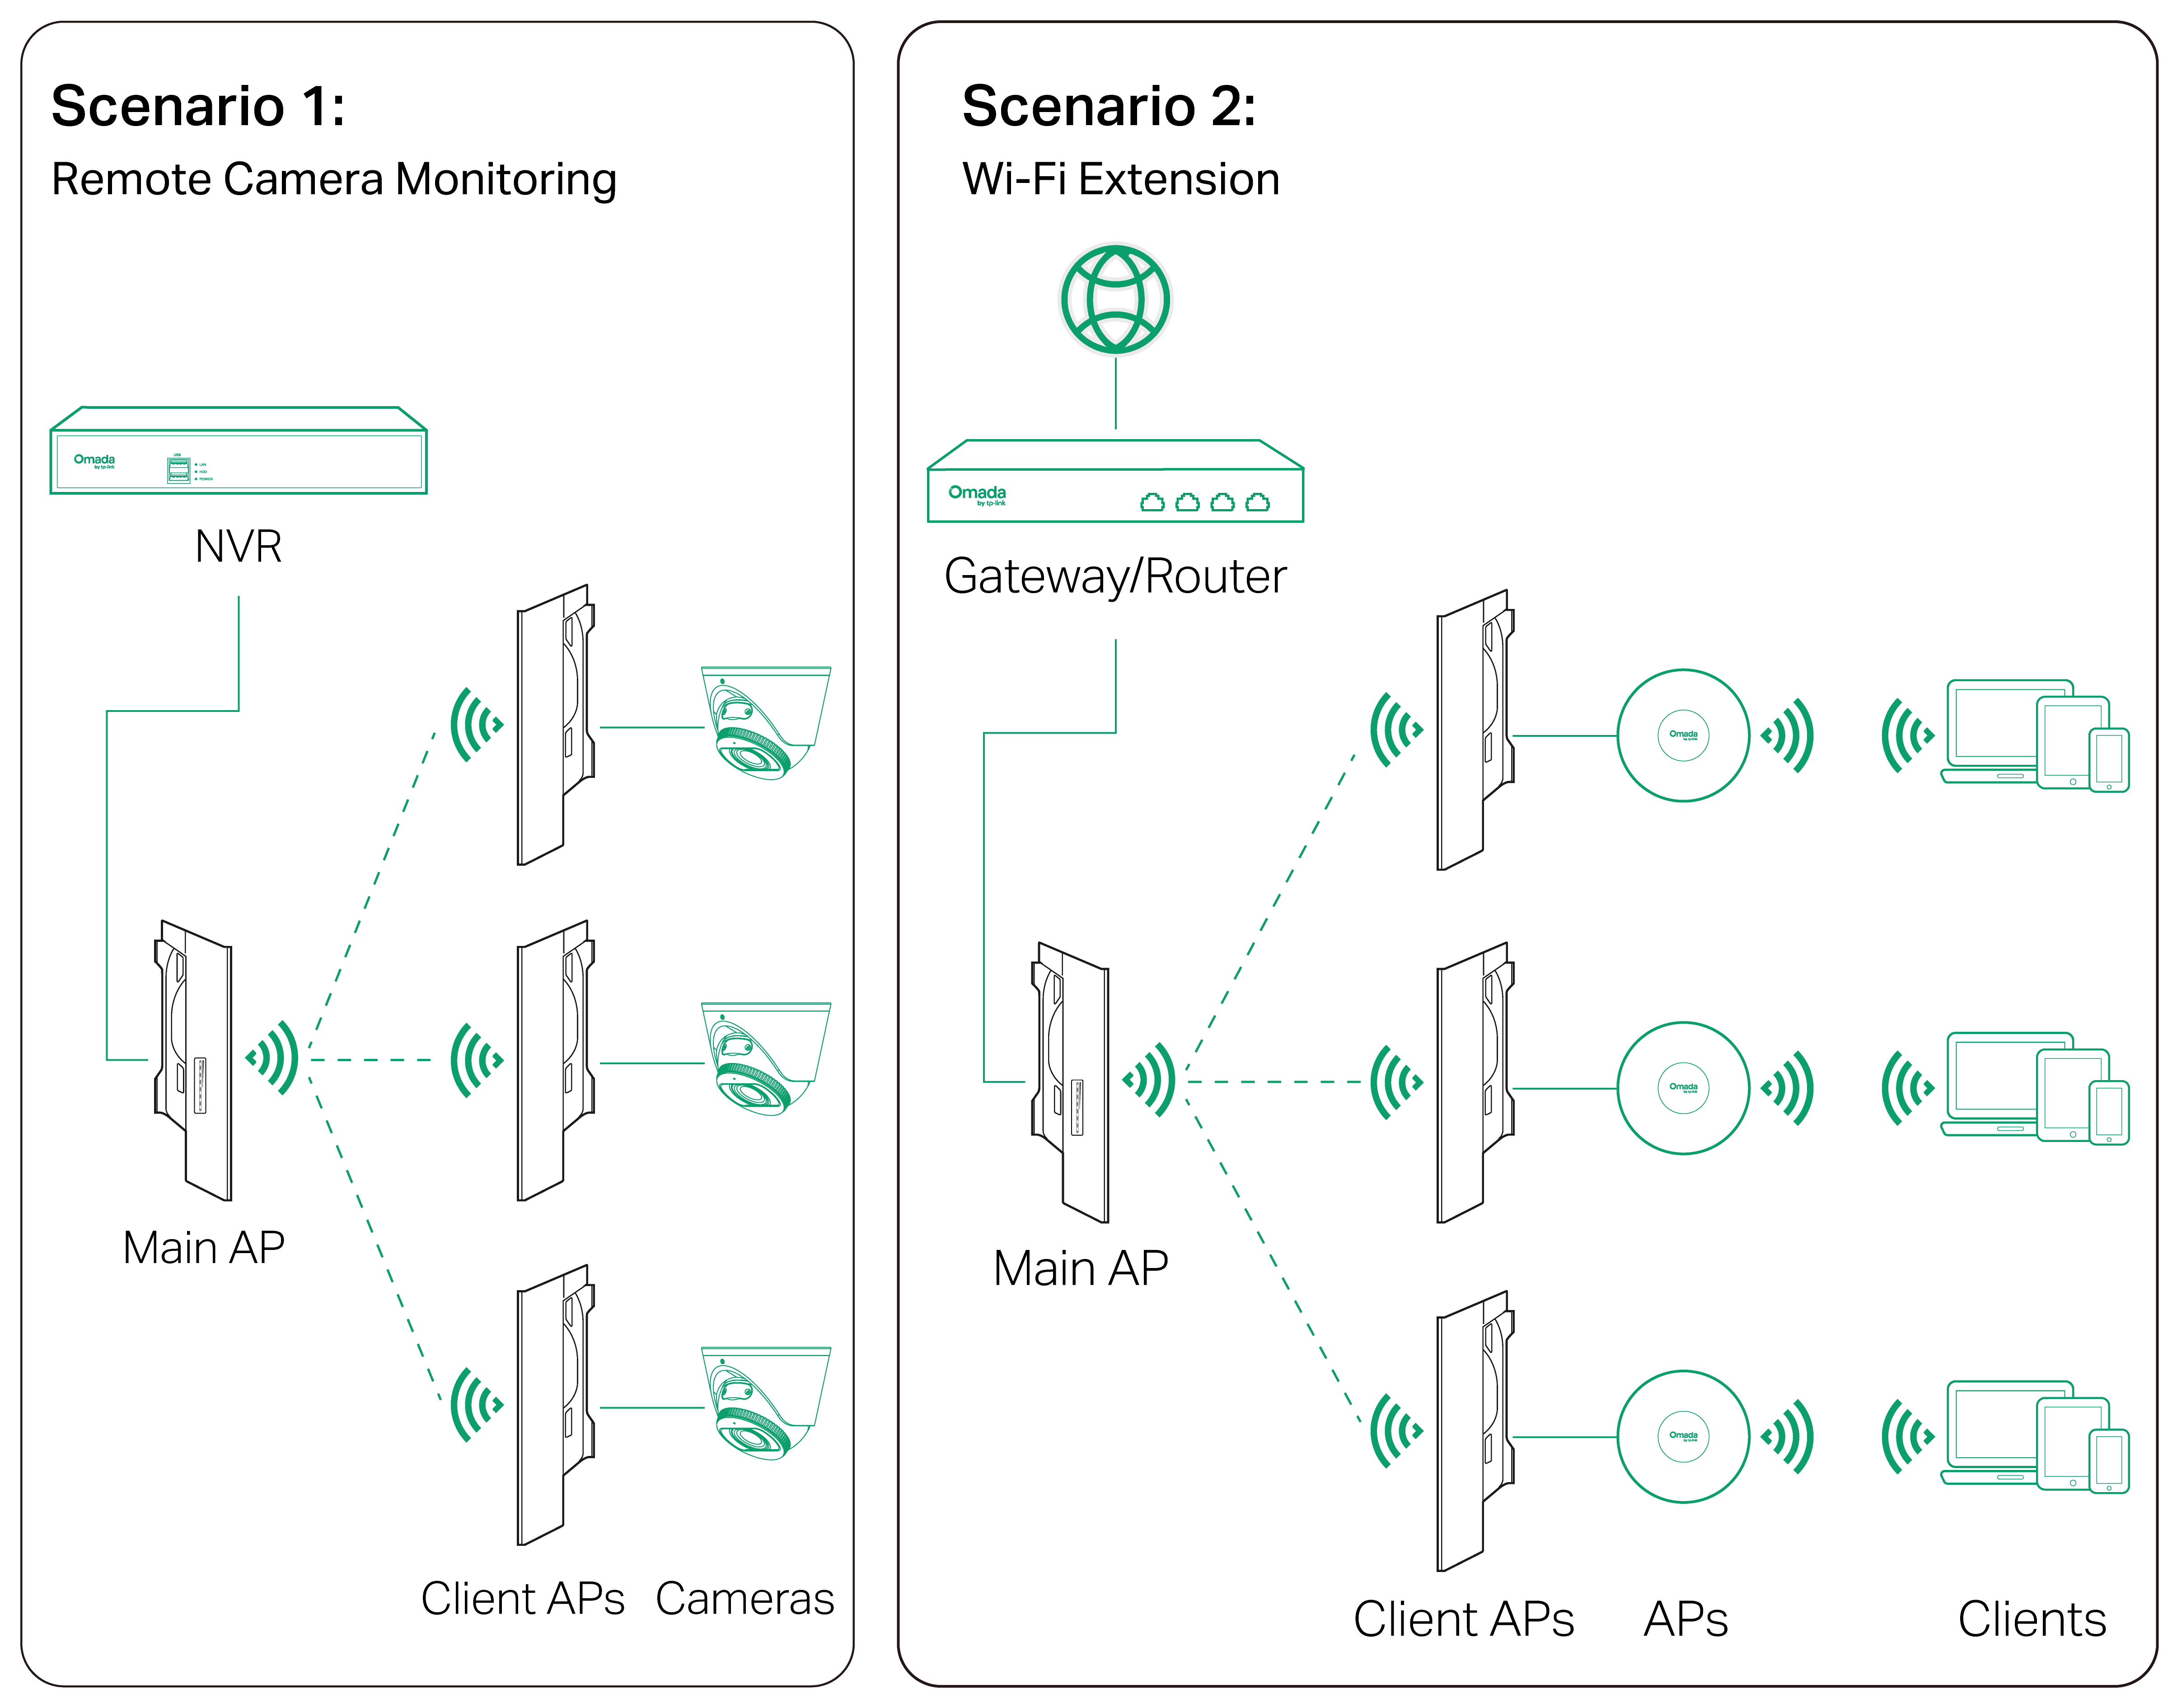
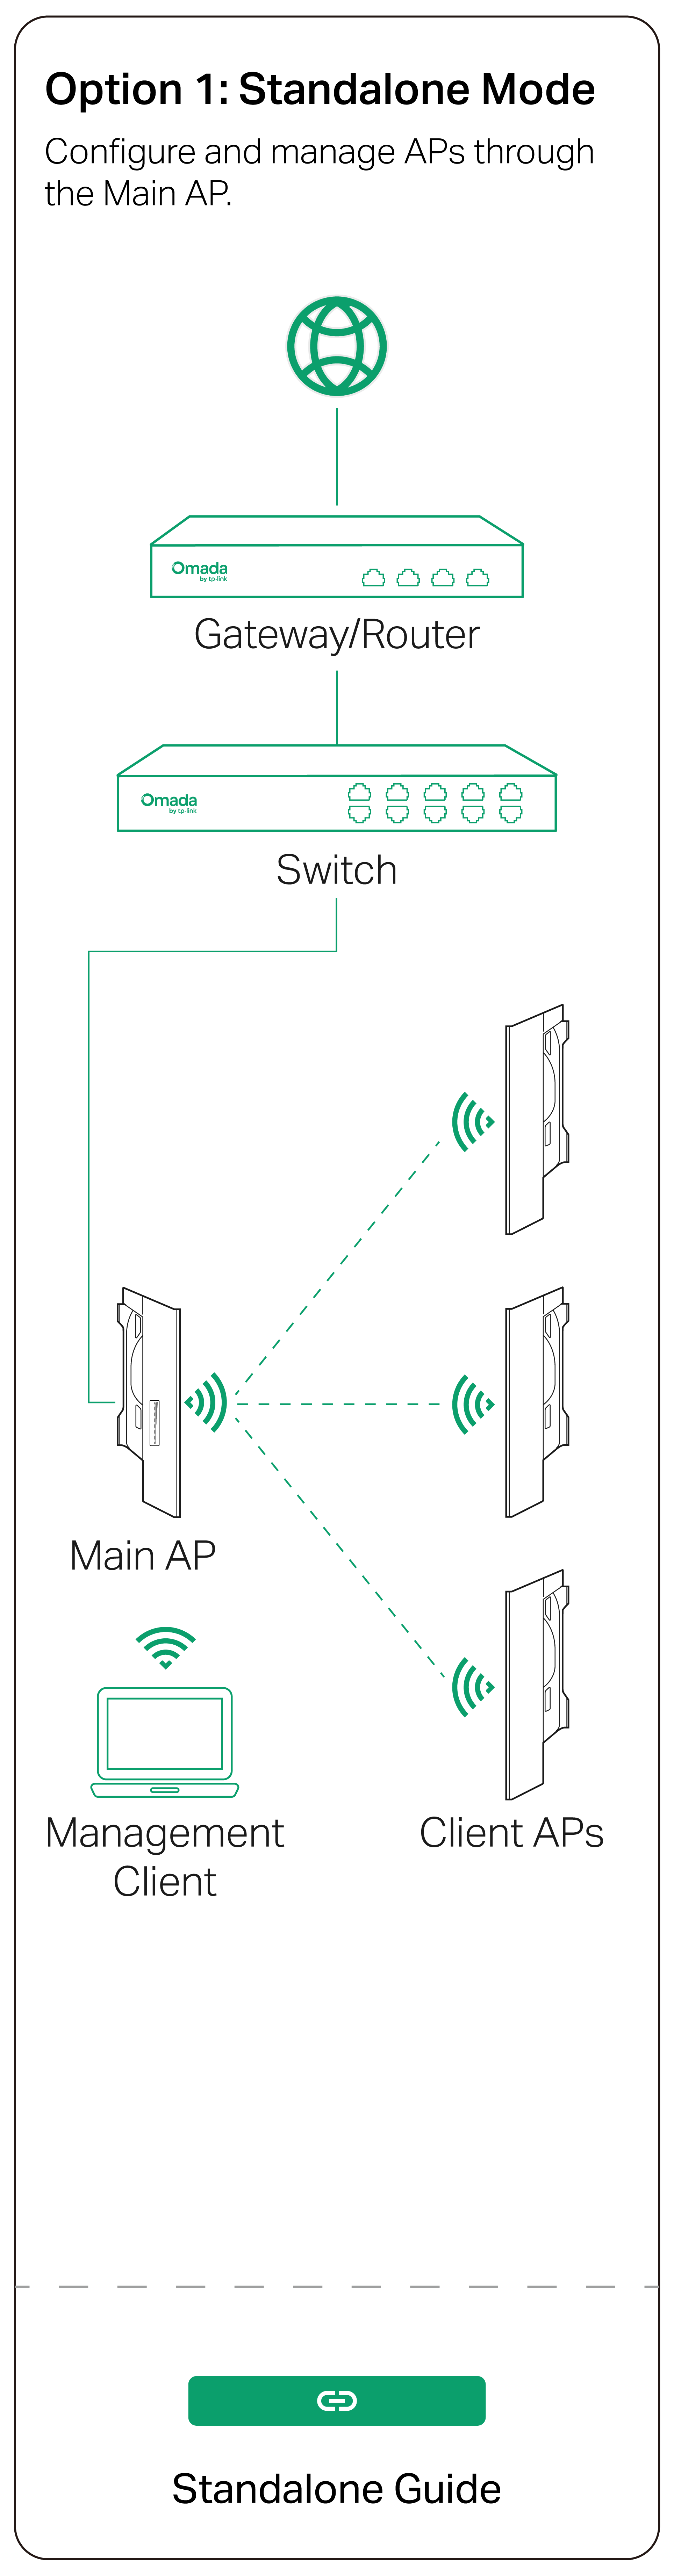
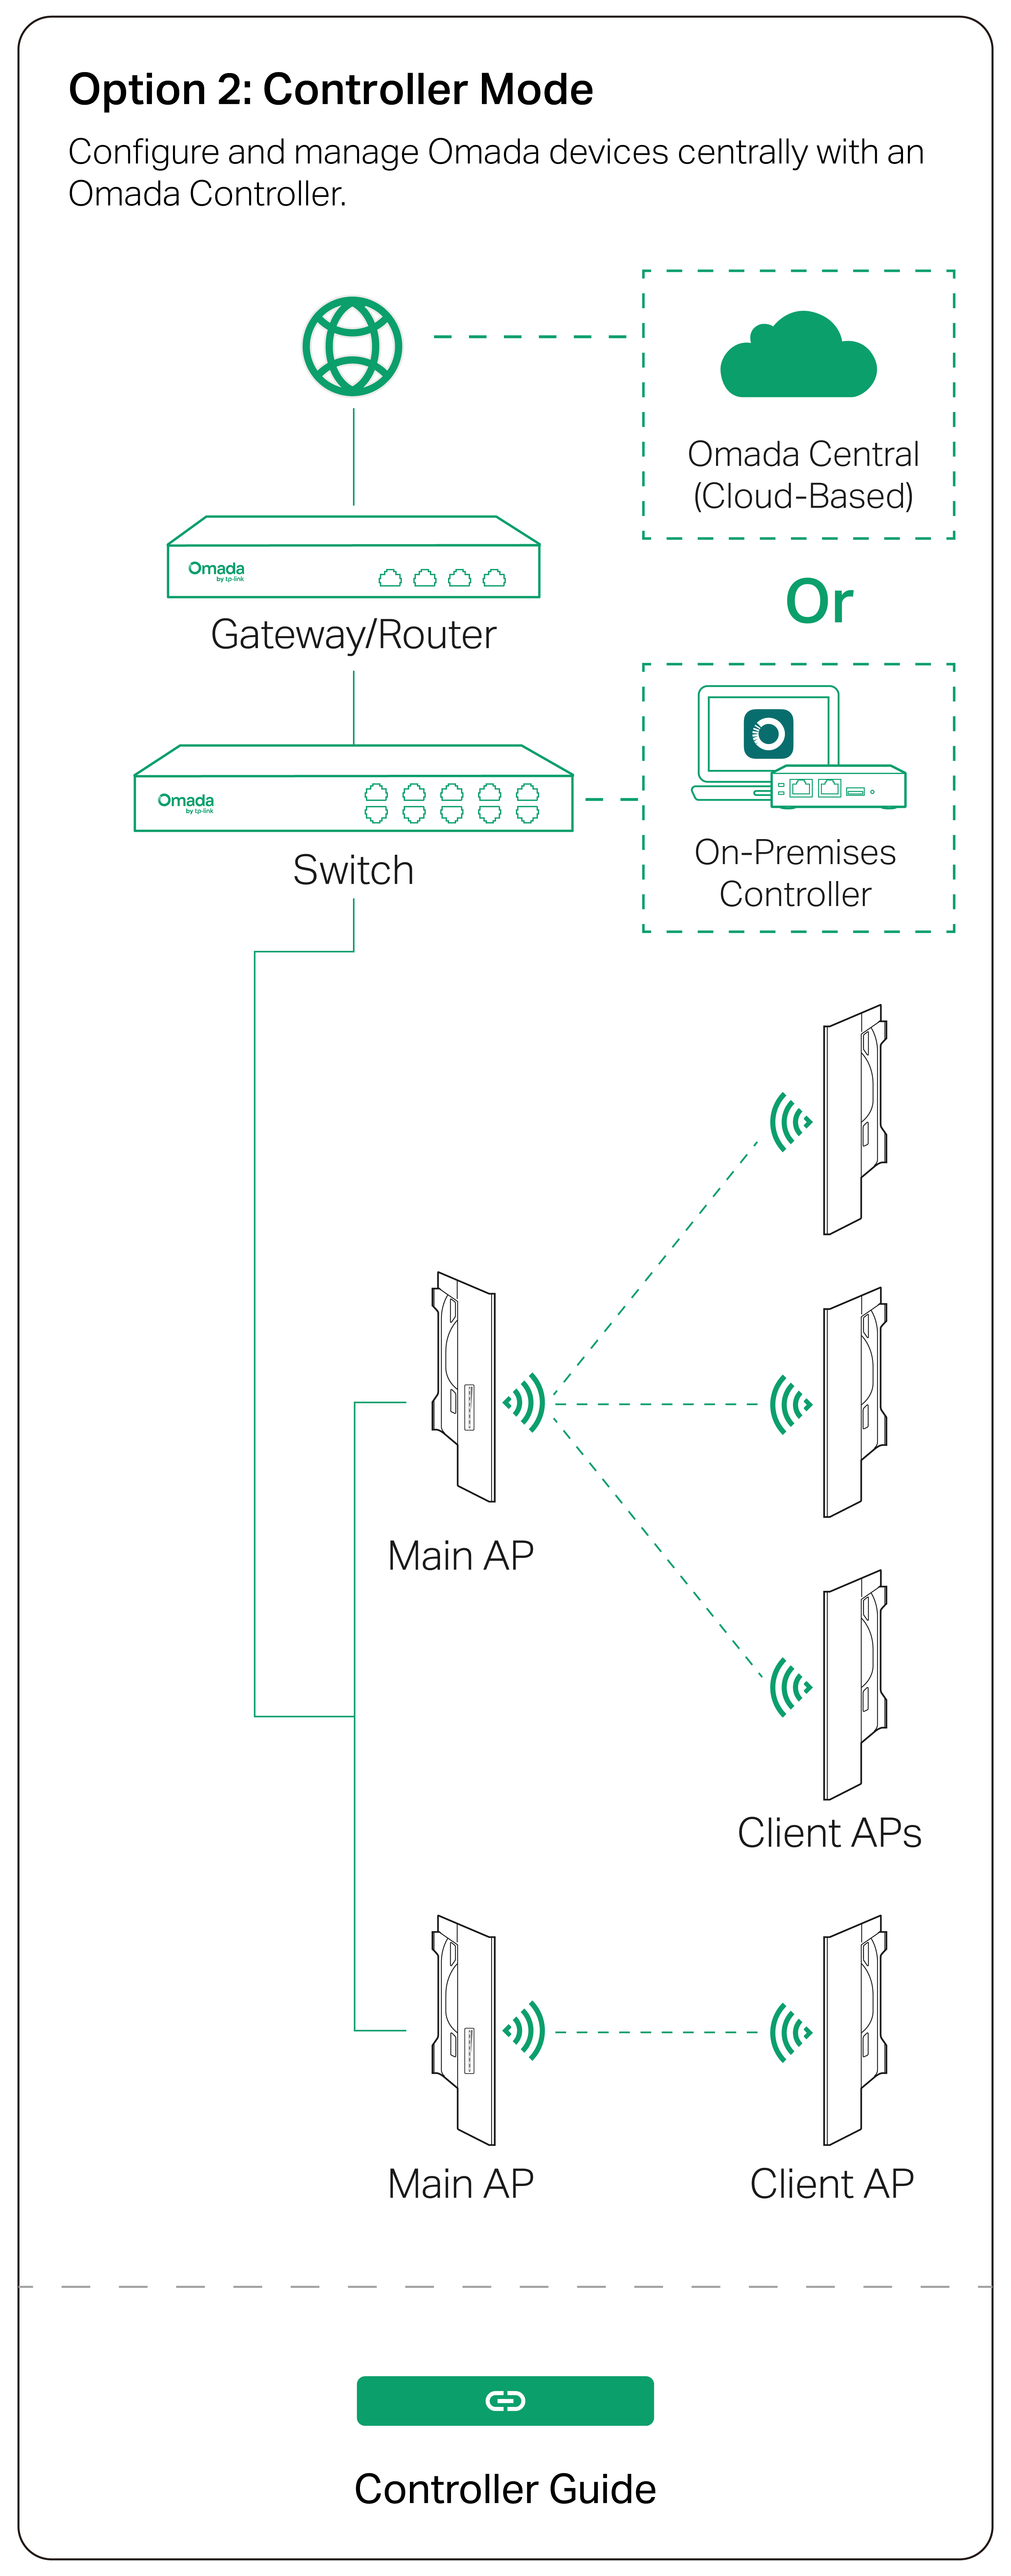
Typical Topology
Note: For EAP100-Bridge, it is recommended to use PtP instead of PtMP networking.
Mounting
At the selected site, mount the AP and align the AP to the approximate direction that you have oriented.
Network Management
Omada App


Mount the Power Adapter (optional)
_画板_1_20251214044843b.png)
