


How to use an Omada gateway to restrict specific clients from visiting specific URLs


Contents
Configuration for Controller mode
Configuration for Standalone mode
Introduction
A URL (Uniform Resource Locator) is a web address used to identify and locate resources on the internet, such as web pages or images. It typically includes a protocol, domain name, path, and optional query parameters — for example, https://support.omadanetworks.com — providing the browser with the information needed to retrieve the specified content.
Sometimes, we may need to restrict certain clients behind the gateway from accessing specific URLs. Omada gateways provide a feature called URL Filtering to help manage and control web access in such cases.
Requirements
- Omada Gateway
- Omada Network System v6.1 and above
Configuration
We will detail below how to utilize URL filtering of an Omada gateway to restrict a specific client group from accessing specific websites in both controller mode and standalone mode.
Configuration for Controller mode
Step 1. Create an IP group for target clients. (If all clients in a created LAN network are target clients, skip Step 1.)
We need to create a user group first (even if there is only one user to be restricted), the members of the group could be one or more, and all these members within the group will have the same authority in URL access.
Go to Network Config > Profile > Groups, click Create New Group.

Here we use 192.168.10.1/26 as an example. Don't forget to click Apply.
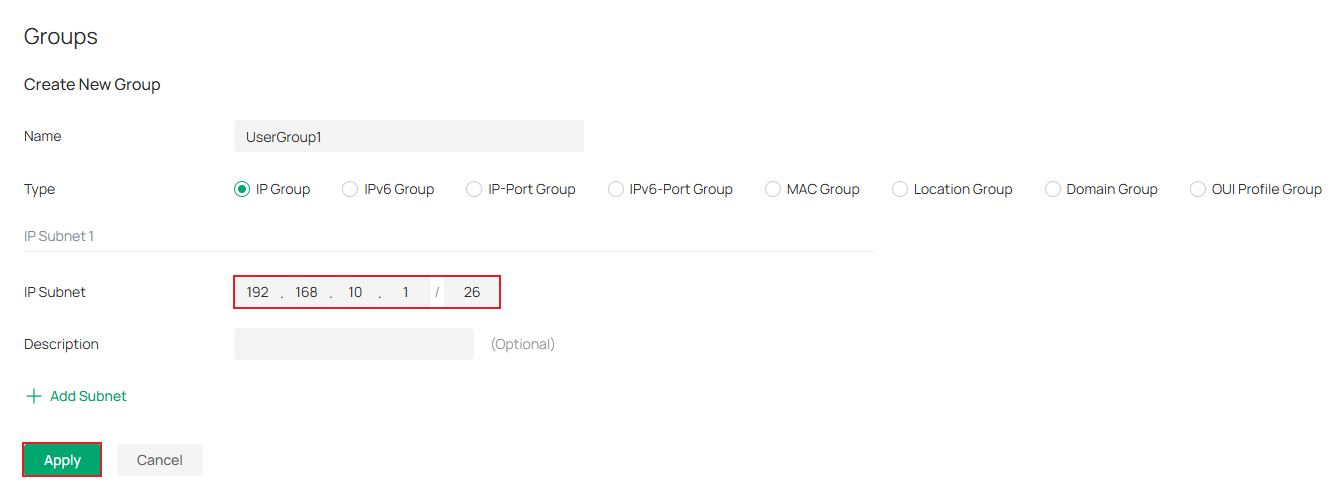
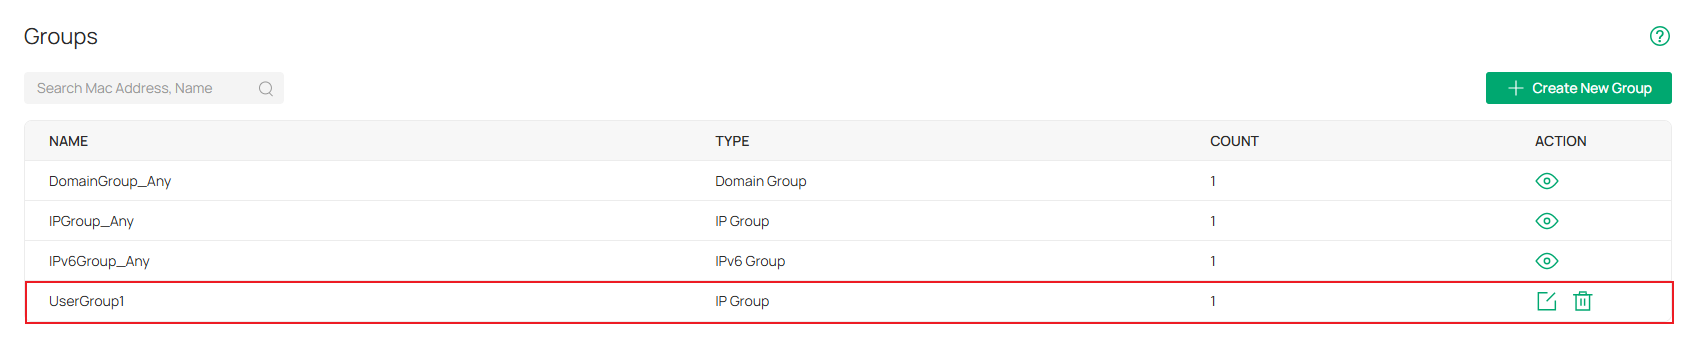
We have now completed the creation of an IP group containing the clients for whom we are going to restrict URL access.
Step 2. Create URL Filtering rules.
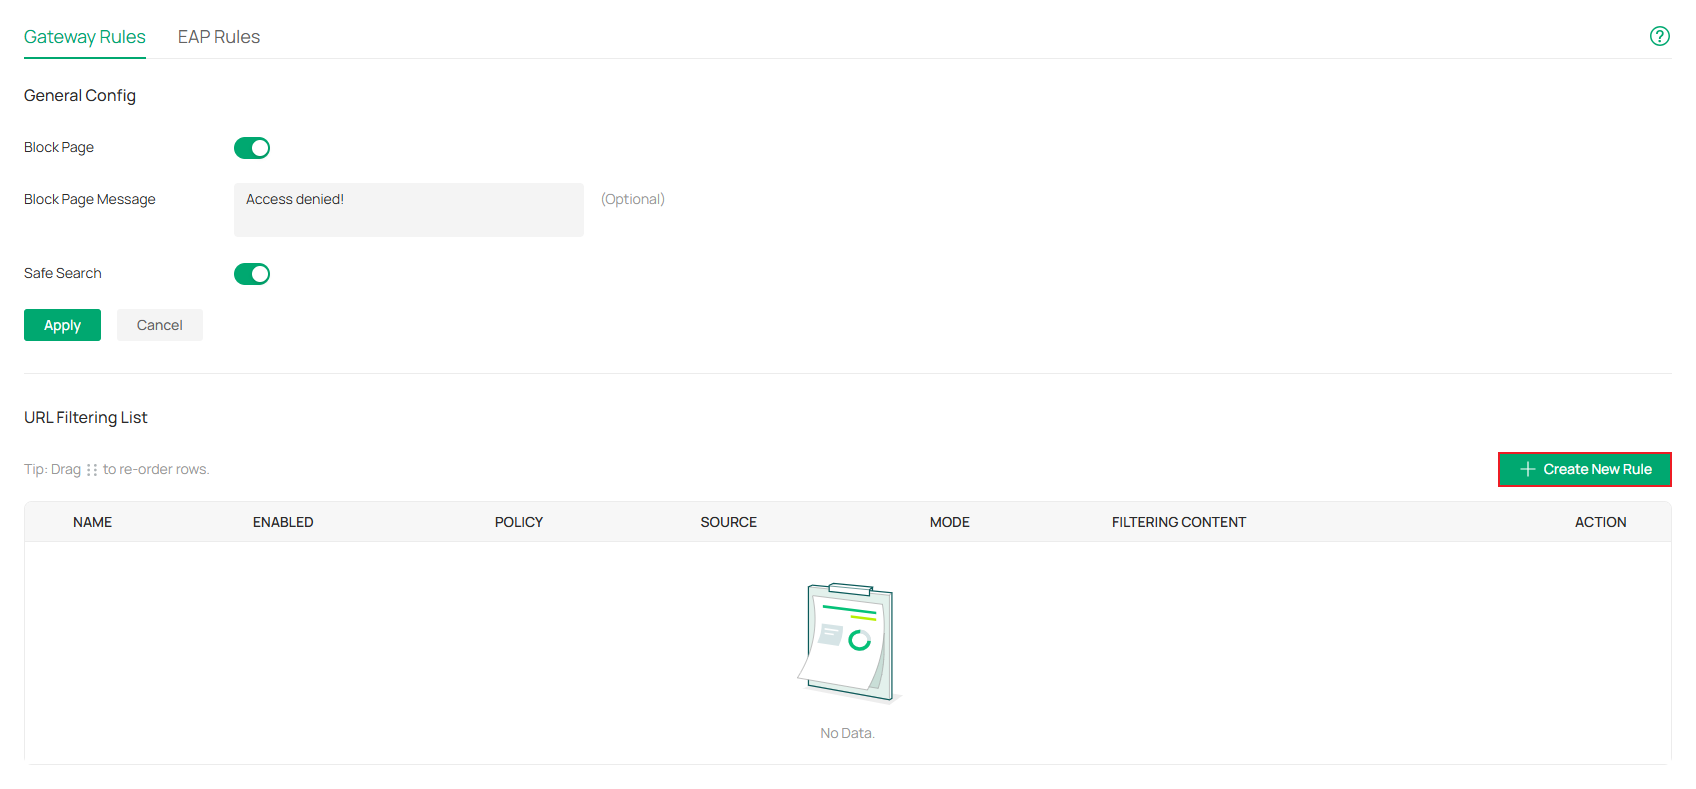
Go to Network Config > Security > URL Filtering > Gateway Rules.

Enable Block Page and Safe Search as needed. Then click Apply.
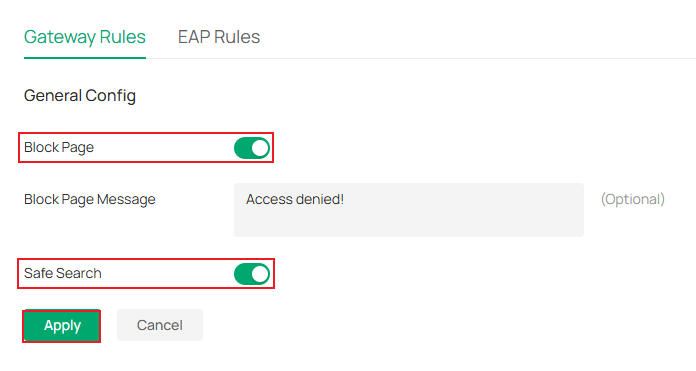
- Block Page: When enabled, users attempting to access blocked websites will be redirected to a specific page indicating that the website is blocked by the access policy.
- Block Page Message: When a user tries to access a blocked URL, the block page message will display to clients. This can effectively remind users to comply with network usage regulations.
- Safe Search: Check this option to enable Safe Search globally. This feature can filter search results to block inappropriate content. It is suitable for families and educational environments.
Click Create New Rule to create a new rule.
Here we will first introduce these terms shown on this page.
- Name: Enter a name to identify the URL filtering rule.
- Status: Click the checkbox to enable the URL filtering rule.
- Policy: Select the action to be taken when a packet matches the rule.
- Deny: Discard the matched packet, and the clients cannot access the URLs.
- Permit: Forward the matched packet, and the clients can access the URLs.
- Source Type: Select the source of the packets to which this rule applies.
- Network: With network selected as the source type, choose the LAN network we have created from the drop-down list below. The gateway will filter the packets sourced from the selected network. If no networks have been created, we can select the default network (LAN), or go to Network Config > Network Settings > LAN to create one.
- IP Group: With IP Group selected, choose the IP Group we have created from the drop-down list below. The gateway will examine whether the source IP address of the packet is in the IP Group. If no IP groups have been created, click + Create New IP Group on this page or go to Network Config > Profile > Groups to create one.
- Time Schedule: When enabled, we can set schedules for filtering rules based on needs.
- Mode: Choose a mode for the filtering content to match the URL.
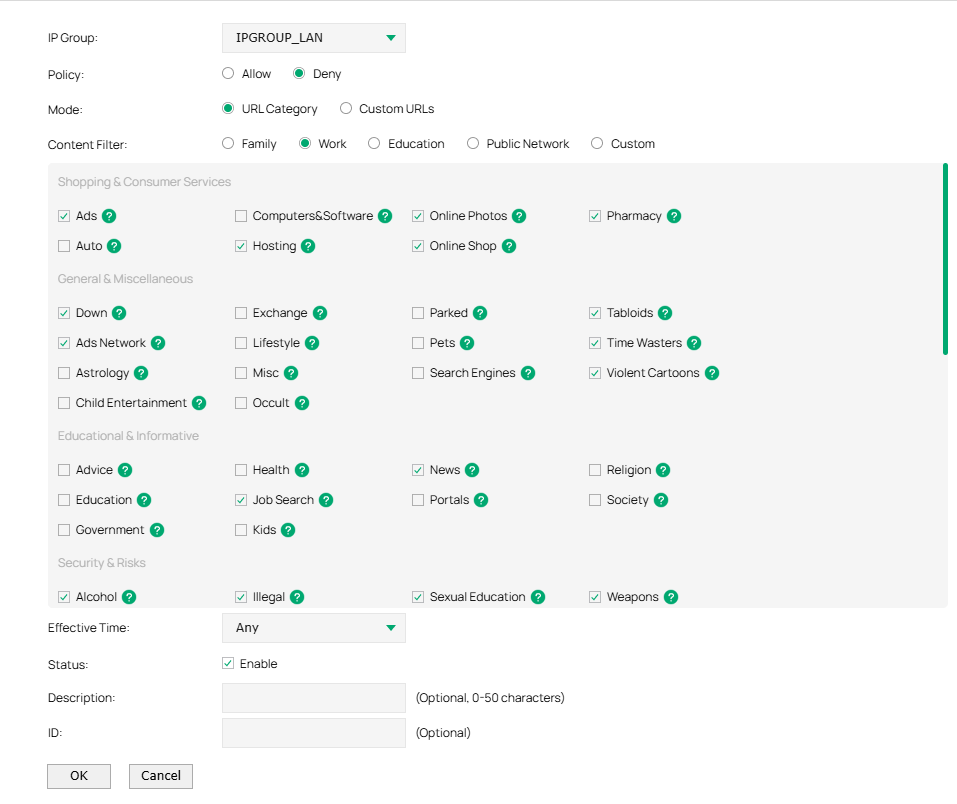
- URL Category: Frequently used URLs, such as news, entertainment, and shopping, are divided into different categories. This mode is suitable for most common scenarios, but if we find that the required URLs are not in the filtering category, we can add the specific URLs in the custom URL mode.
- Custom URLs: Manually enter the URL we want to filter. This mode lets us precisely control content access.
- Content Filtering: With URL Category chosen as the Mode, we can select a preset scenario, each of which comes with a preconfigured set of URLs.
- URLs Mode: With Custom URLs chosen as the Mode, we can choose a mode for the filtering content to match the URL.
- URL Path: If a URL is the same as any of the entire URL rules specified in the filtering content, the filtering rule will be applied to this URL.
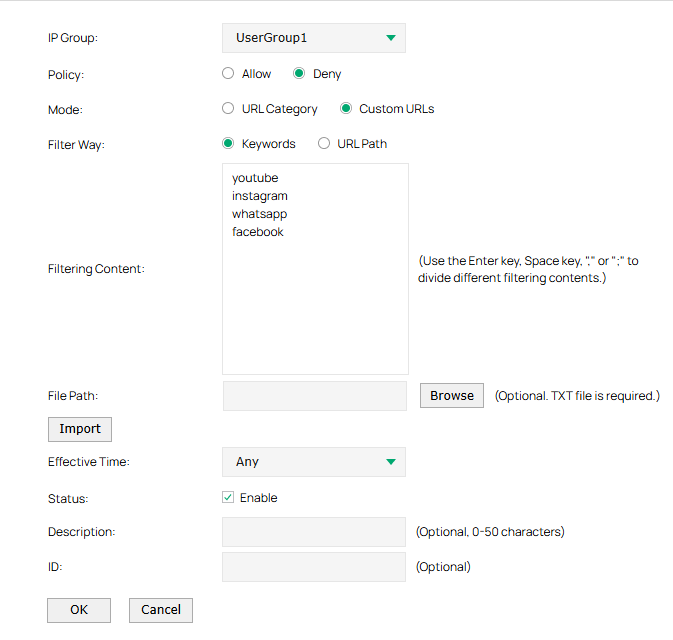
- Keywords: If a URL contains any of the keywords specified in the filtering content, the filtering rule will be applied to this URL.
Now let’s go through two configuration examples as follows:
Example 1.
Restrict all employees from accessing websites unrelated to work.

Example 2.
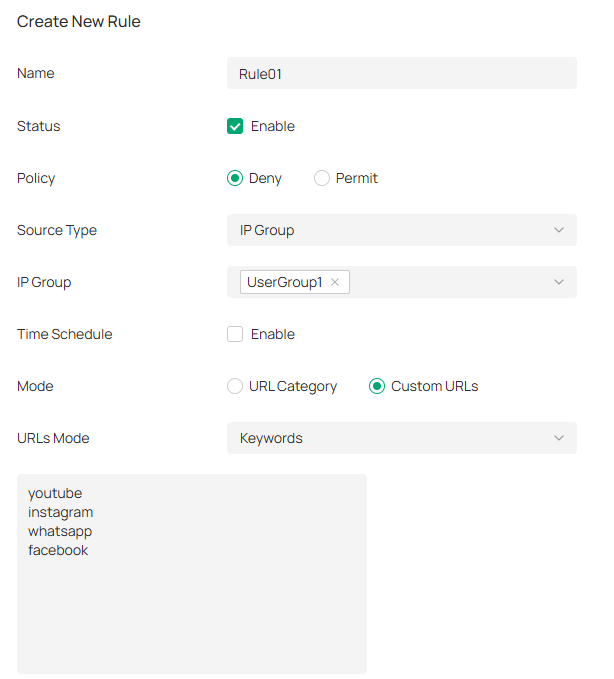
Restrict specific clients from accessing a few social websites like YouTube, Instagram, WhatsAPP and Facebook.
Configuration for Standalone mode
Step 1. Create an IP group for target clients. (If all clients in the LAN network are target clients, skip Step 1.)
We need to create a user group first (even if there is only one user to be restricted), the members of the group could be one or more, and all these members within the group will have the same authority in URL access.
Go to Preference > IP Group > IP Address and click Add to set an IP range.
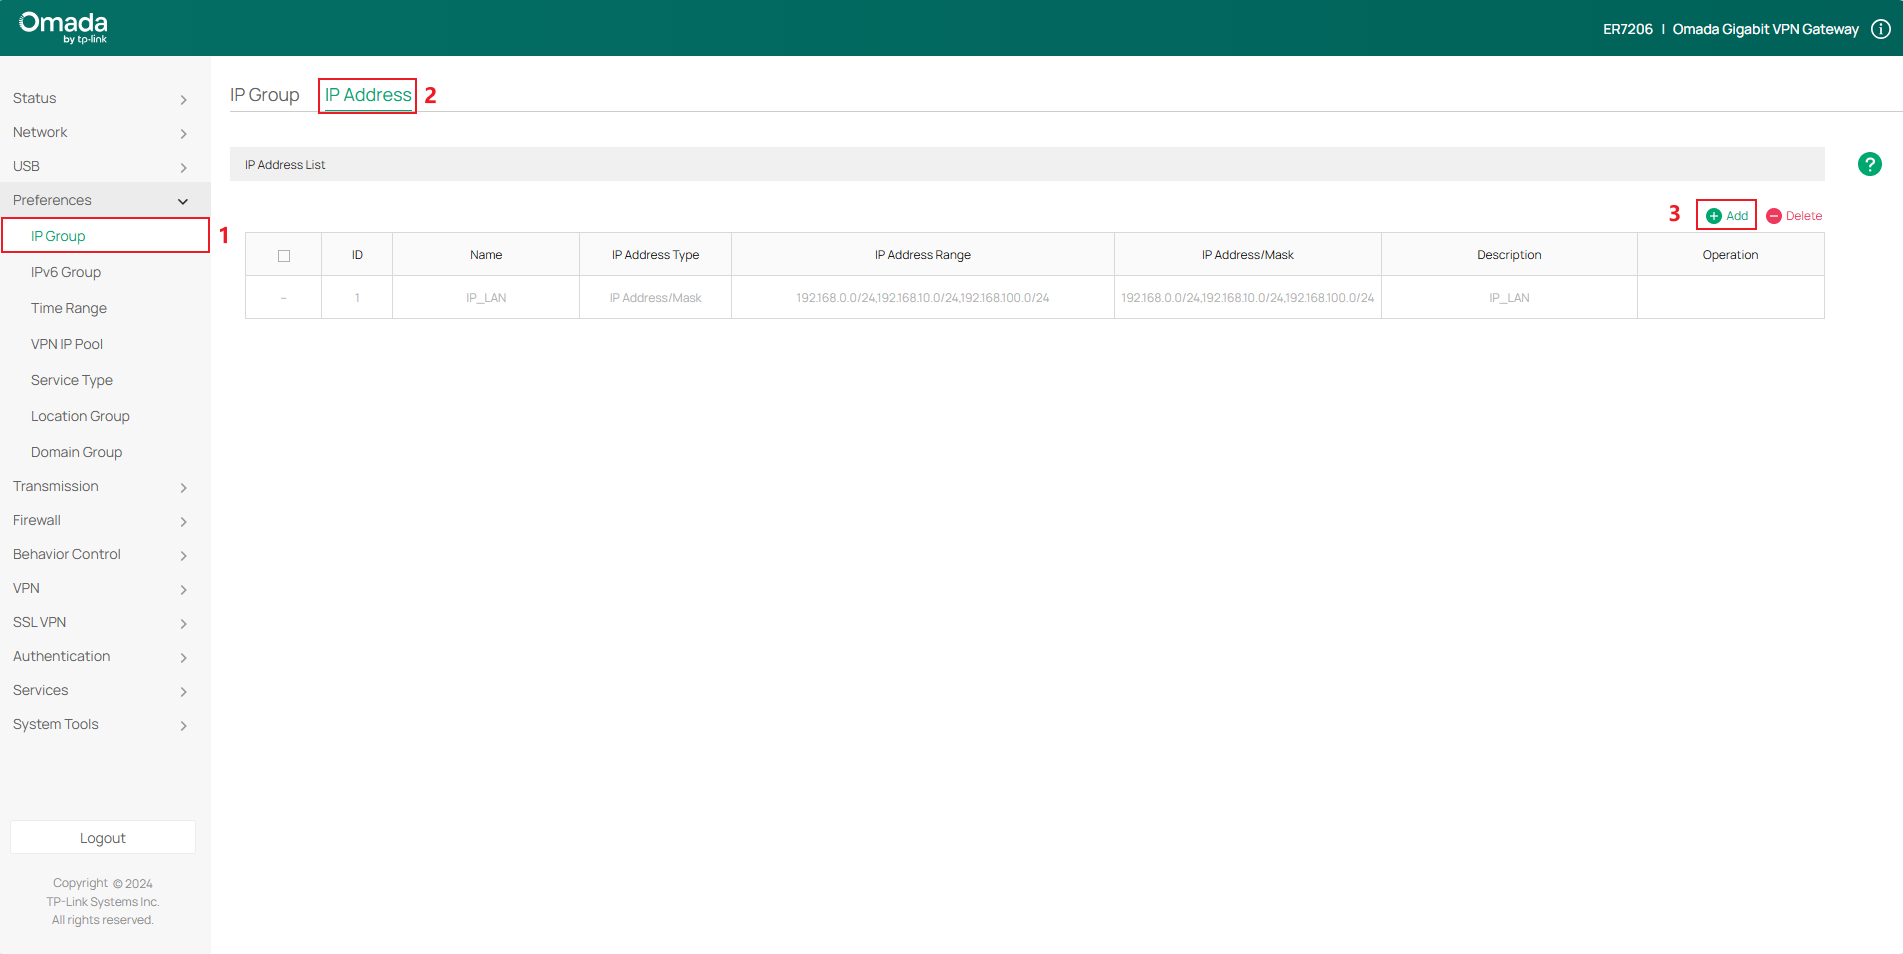
Here we use 192.168.0.100-192.168.0.150 as an example. Don't forget to click OK.
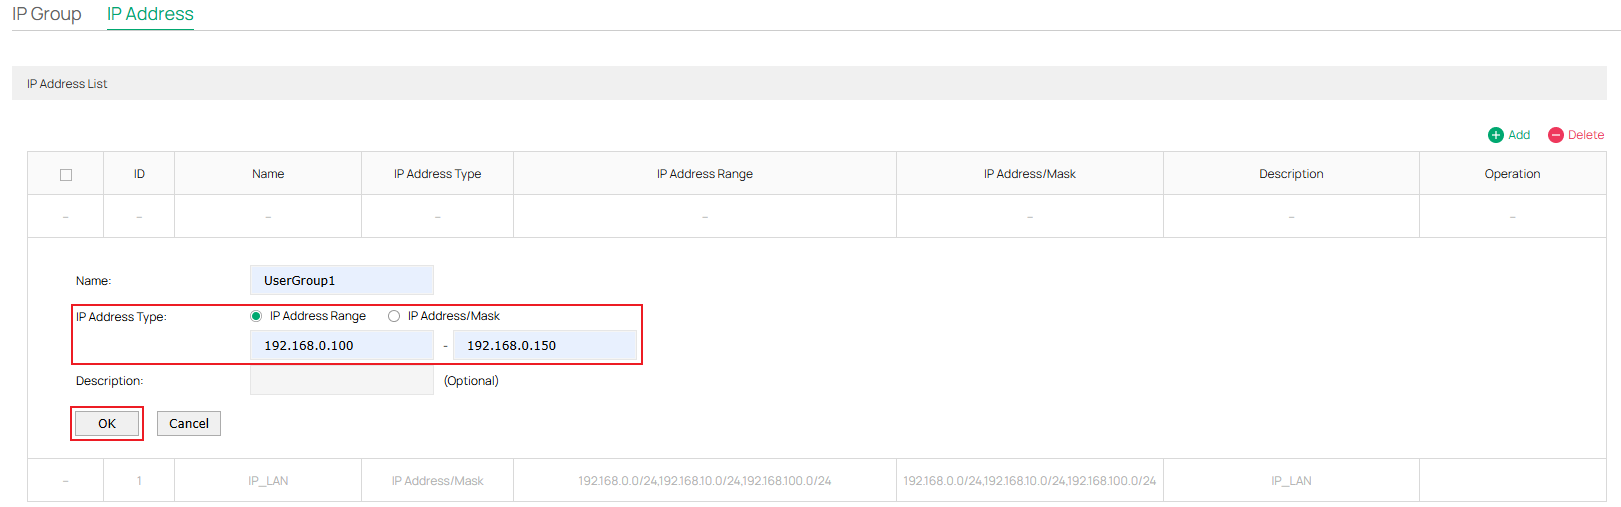
Now we have set an IP range.

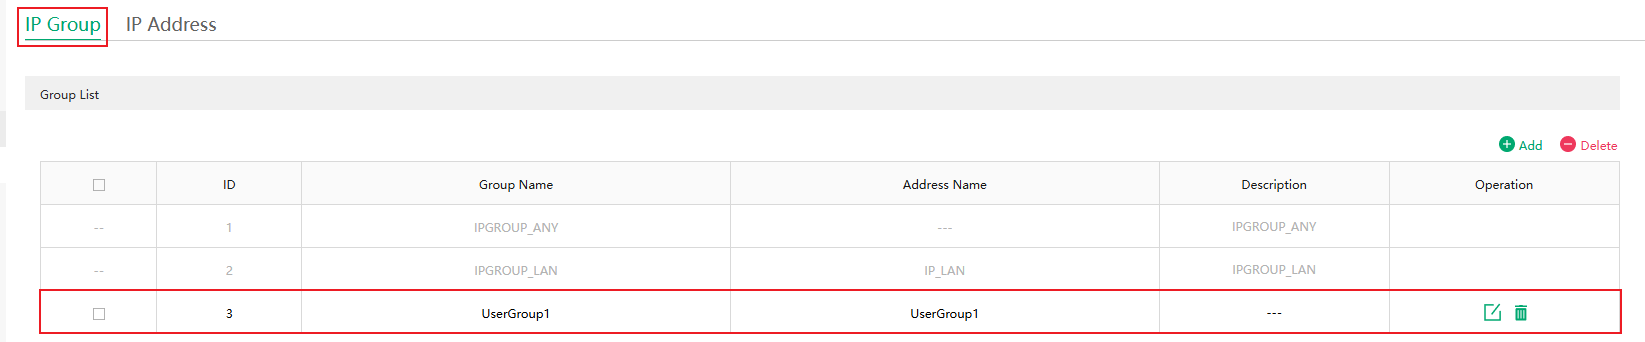
Then go to IP Group. And click Add to create a new IP group.

Set a Group Name for the new IP Group and select the Address Name as the IP range we just created.
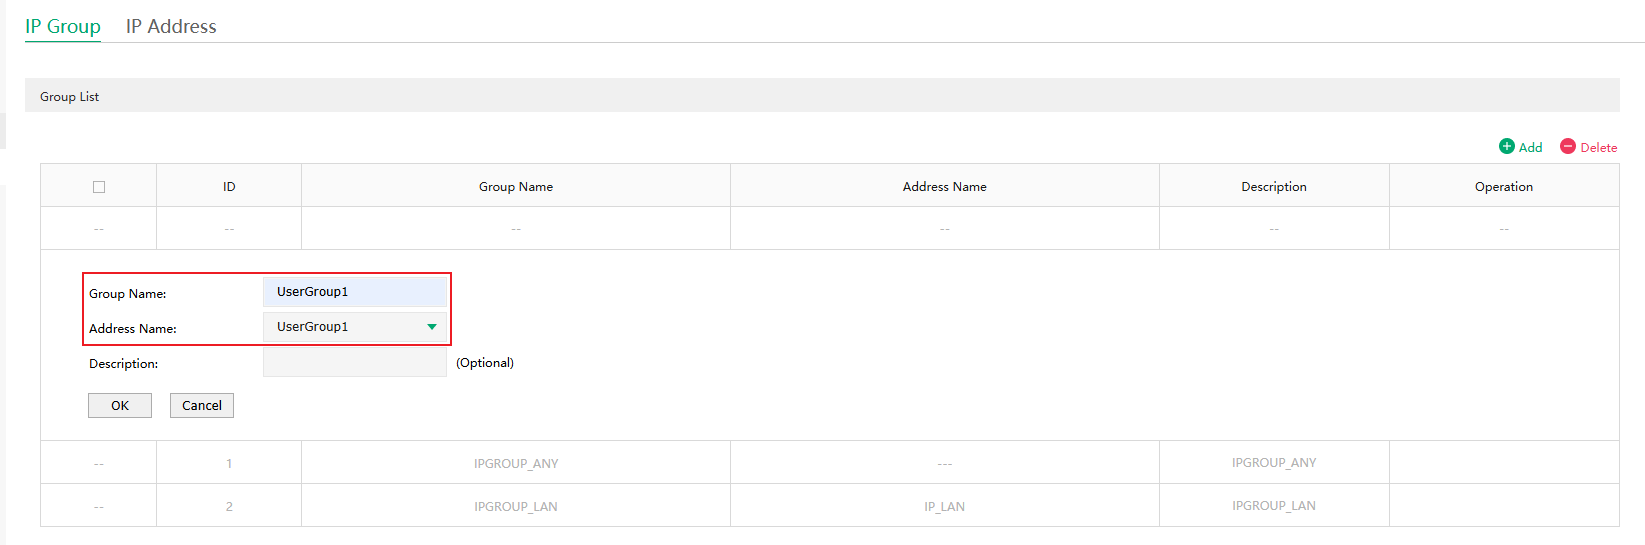
Now we have set the IP group.
Step 2. Create URL Filtering rules.
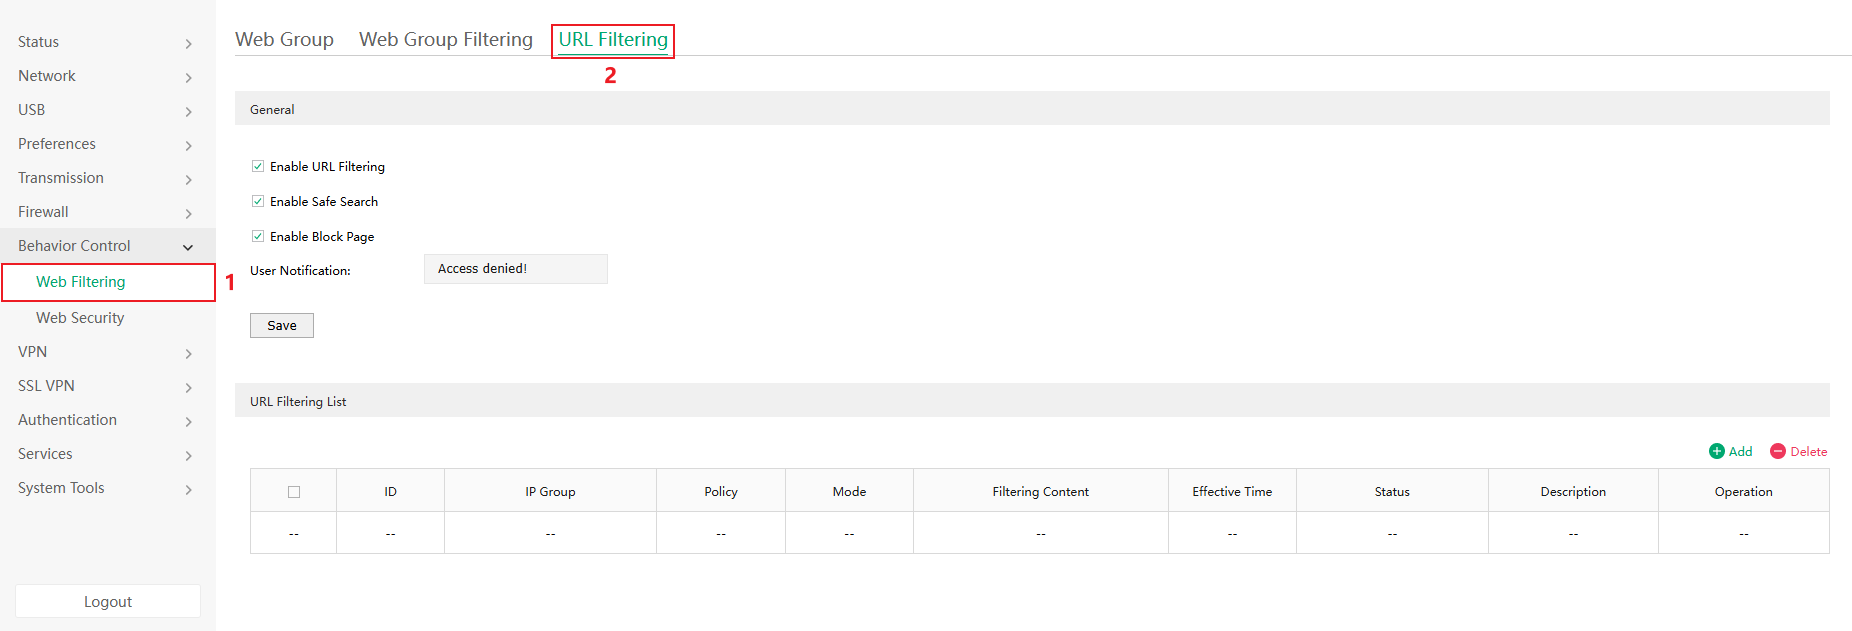
Go to Behavior Control > Web Filtering > URL Filtering.
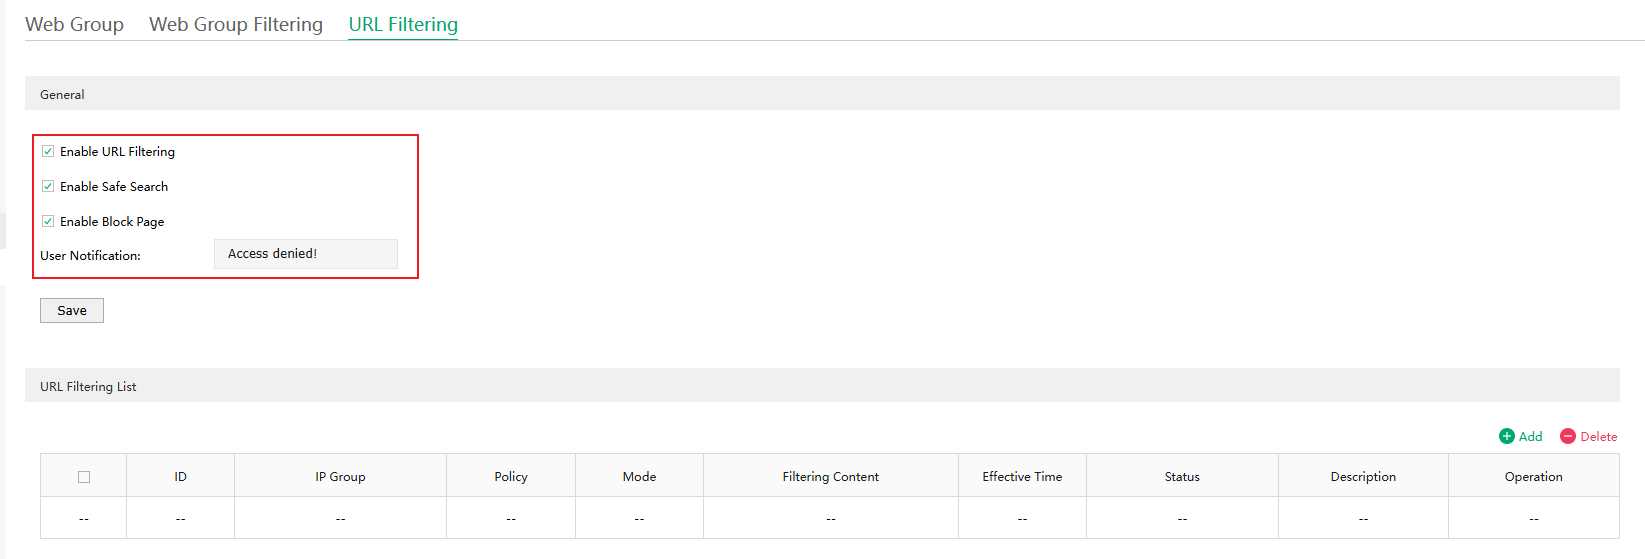
- Safe Search: Check this option to enable Safe Search globally. This feature can filter search results to block inappropriate content. It is suitable for family and educational environments.
- Block Page: When enabled, users attempting to access blocked websites will be redirected to a specific page indicating that the website is blocked by the access policy.
- User Notification: When a user tries to access a blocked URL, the user notification will display to clients. This can effectively remind users to comply with network usage regulations.
Enable URL Filtering and enable Block Page and Safe Search as needed. Then click Apply.
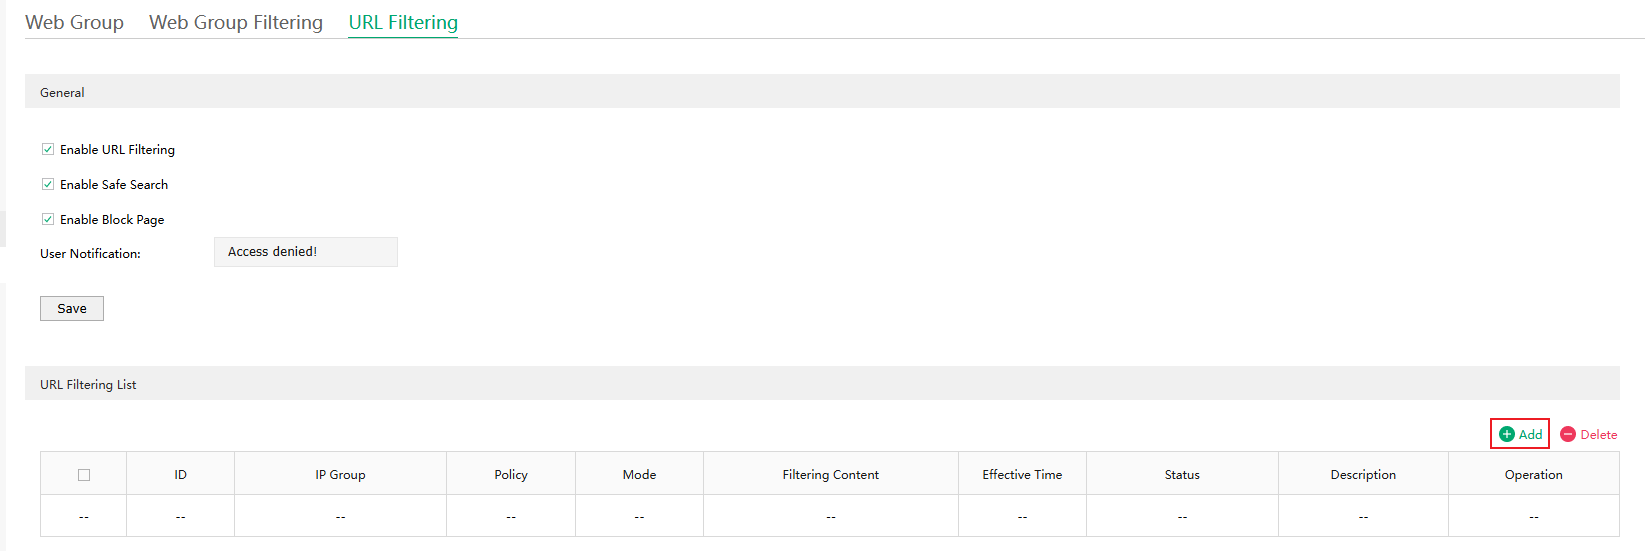
Click Add to start configuring URL Filtering rules.
Here we will first introduce these terms shown on this page.
- IP Group - Select an IP group for the filtering rule. The filtering rule only effects the hosts in the IP group. IP groups can be divided according to departments or user types, such as family members, employees or students. To configure IP group, go to Preferences > IP Group.
- Policy - Choose whether to allow or block access to the URLs which match the filtering content. We can configure different policies as needed.
- Mode - Choose a mode for the filtering content to match the URL.
- URL Category: Frequently used URLs such as news, entertainment, and shopping are divided into different categories. This mode is suitable for most common scenarios, but if we find that the required URLs are not in the filtering category, we can add the specific URLs in the custom URL mode.
- Custom URLs: Manually enter the URL we want to filter. This mode let us precisely control content access.
- Filter Way - With Custom URLs chosen as the Mode, we can choose a mode for the filtering content to match the URL.
- Keywords: If a URL contains any of the keywords specified in the filtering content, the filtering rule will be applied to this URL.
- URL Path: If a URL is the same as any of the entire URL rules specified in the filtering content, the filtering rule will be applied to this URL.
- Content Filter - With URL Category chosen as the Mode, we can select a preset scenario, each of which comes with a preconfigured set of URLs.
- Filtering Content - With Custom URLs chosen as the Mode, we can add the filtering content here. Use the Enter key, Space key, "," or ";" to divide different entries of the filtering content. "." means that this rule will be applied to any URL. For example, if we want to allow URL A and deny other URLs, we can add an Allow rule with the filtering content "A" and add a Deny rule with the filtering content ".". Note that the "." rule should have the largest ID number, which means that it has the lowest priority.
- File Path - With Custom URLs chosen as the Mode, we can batch import keywords or URL paths to the Filtering Content box through a txt file. The content format in the txt file should be the same as Filtering Content. A txt file can import up to 200 keywords or URL paths, and each keyword or URL path can contain up to 64 characters.
- Effective Time - Select the time range when the filtering rule takes effect. To configure the time range, go to Preferences > Time Range.
- Status - Check the box to enable the filtering rule.
- Description - Enter a brief description for the filtering rule
- ID - Specify an ID for the filtering rule. A smaller ID means a higher priority. This value is optional. A newly added rule with this field left blank will get the largest ID among all rules, which means that the newly added rule has the lowest priority.
Now let’s go through two configuration examples as follows:
Example 3.
Restrict all clients in the LAN network from accessing websites unrelated to work.
Example 4.
Restrict specific clients from accessing a few social websites like YouTube, Instagram, WhatsAPP and Facebook.
Verification
Using Example 4 as an illustration.
Step 1. Connect a computer to the Omada Gateway's default LAN network and configure the computer's IP address as a static IP of 192.168.0.100/24.
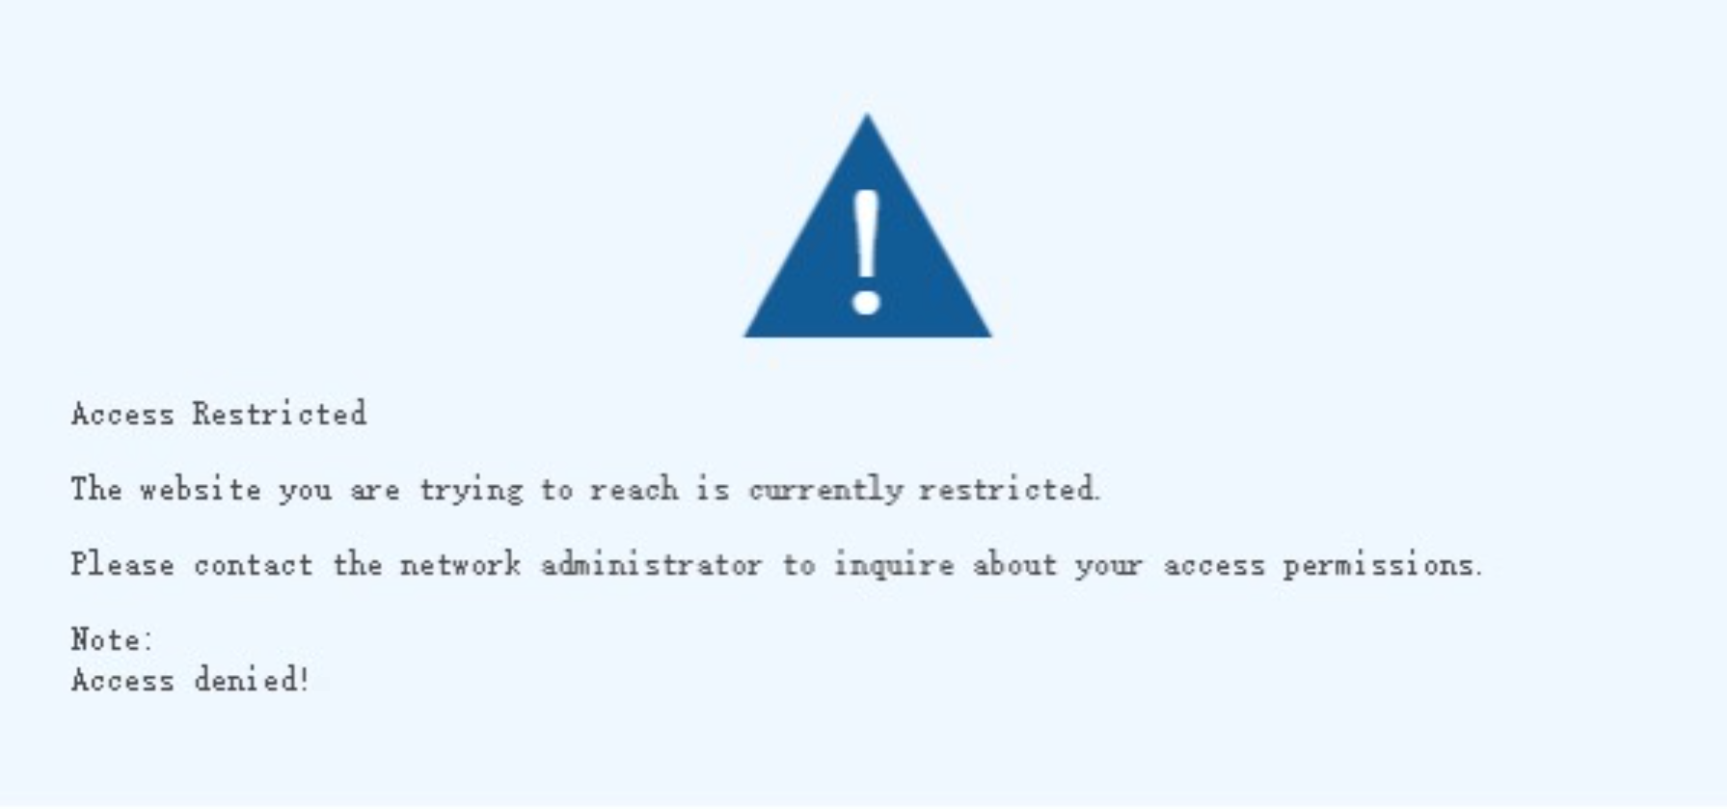
Step 2. Try visiting www.facebook.com using any browser. Then we will see the following prompt:
Conclusion
Now we've finished introducing how to use an Omada gateway to restrict specific clients from visiting specific URLs in both the controller mode and the standalone mode. In addition to manually configuring a series of URLs, Omada Gateway provides pre-configured URL Categories for our convenience. We commonly refer to this feature as “Content Filtering.”
Get to know more details of each function and configuration please go to Download Center to download the manual of your product.
QA
Q1: What should I do if I still cannot prevent clients from accessing a specific website after configuring a rule of URL Category?
A1: In fact, we can configure URL Category together with Custom URLs rules. That is, use URL Category rules to cover the majority of URLs within a category, then use Custom URLs rules to cover the other URLs we want to block.
