


How to configure LLDP & LLDP-MED on Omada Switches


Contents
Configuration via the Omada Controller
Configuration via the standalone mode
Introduction
Link Layer Discovery Protocol (LLDP) provides a standard link layer discovery mechanism, allowing devices from different manufacturers to discover and exchange their respective system and configuration information in the network. The LLDP-MED TLVs (Type-Length-Values) offer many advanced features for VoIP, including basic configuration, network policy configuration, address information, and directory management, meeting the requirements of different VoIP device manufacturers in terms of high return on investment, easy deployment, and easy management. It also solves the problems in deploying voice devices in Ethernet networks, providing convenience for VoIP device manufacturers, sellers, and users.
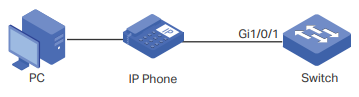
A typical application scenario for LLDP-MED is as follows. LLDP-MED allows the switch to send its Auto-VoIP information to IP phones for automatic configuration. In this example, LLDP-MED needs to be enabled on port 1/0/1 of the switch.
This article introduces how to configure LLDP and LLDP-MED on Omada Switches via the Omada Controller and standalone mode.
Requirements
- Omada Software/Hardware/Cloud-Based Controller V5.0 and above
- Omada L2+/L3 Switches
Configuration
Configuration via the Omada Controller
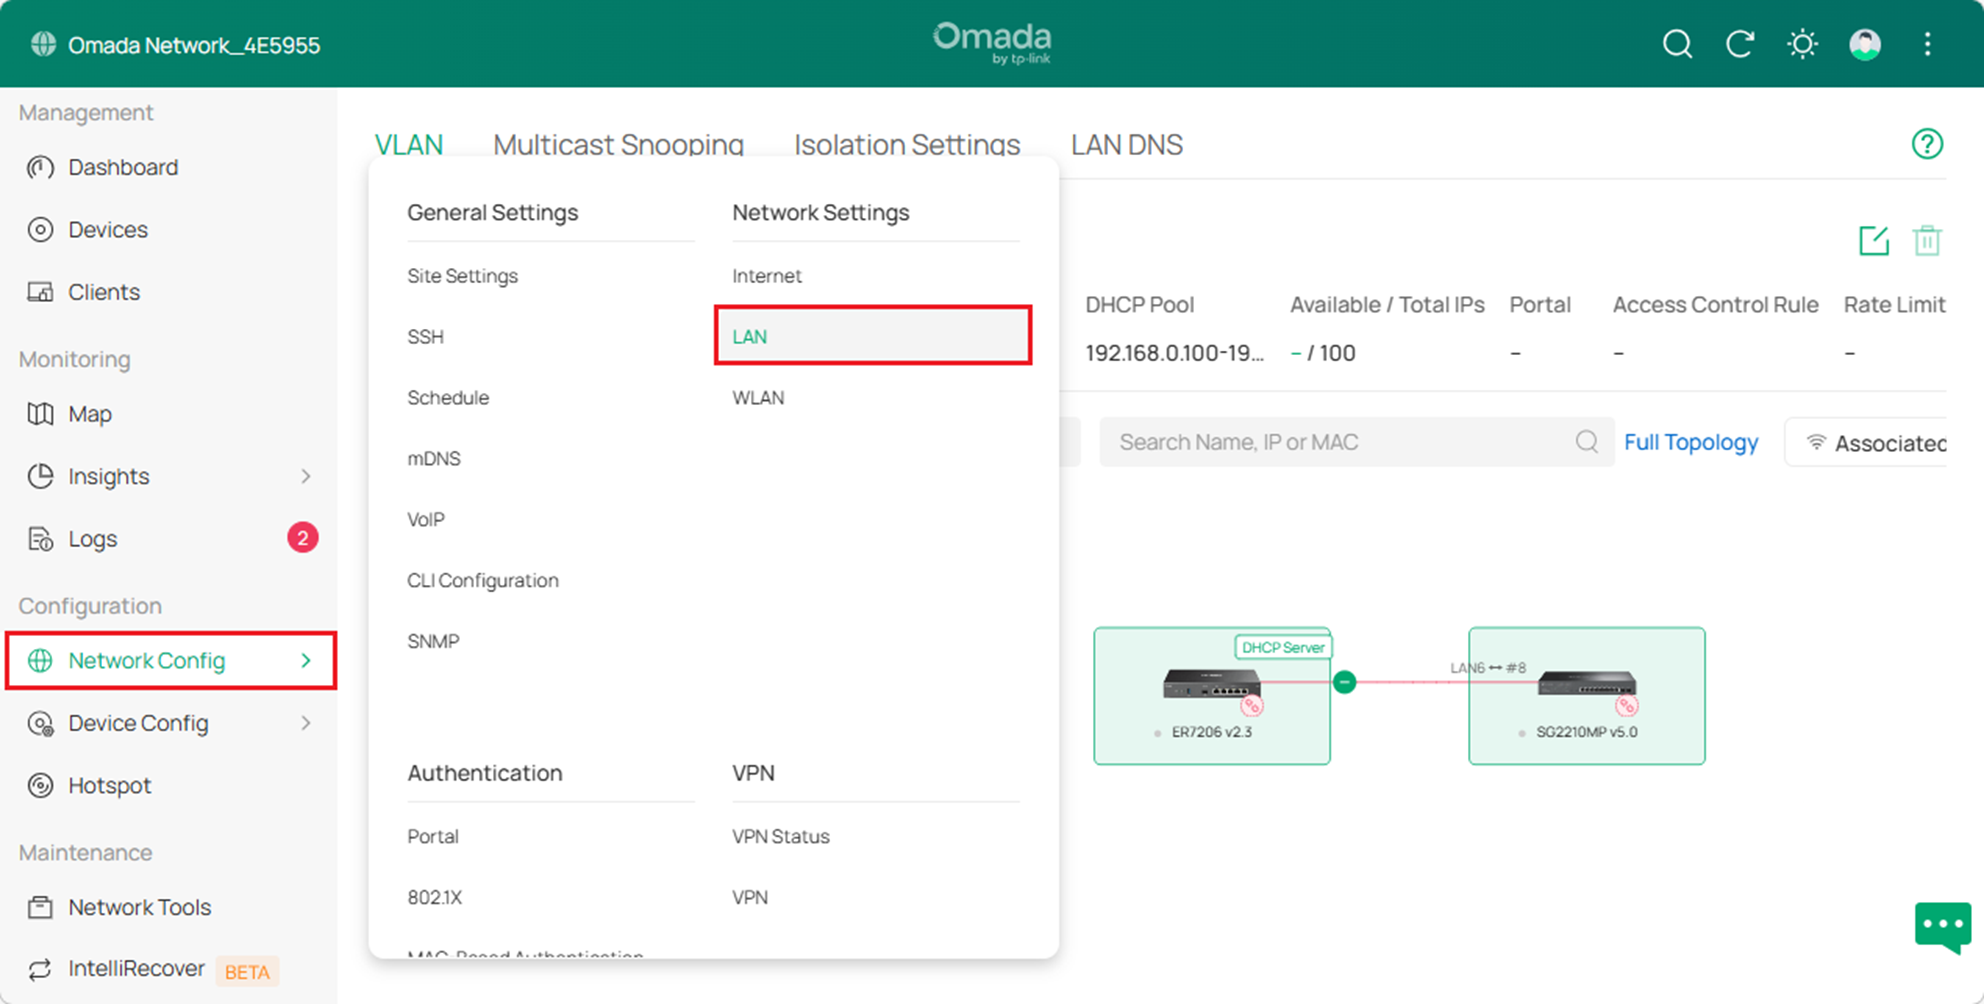
Step 1. Log in to the Omada Controller. Go to Site View > Network Config > LAN > Networks and click Add.
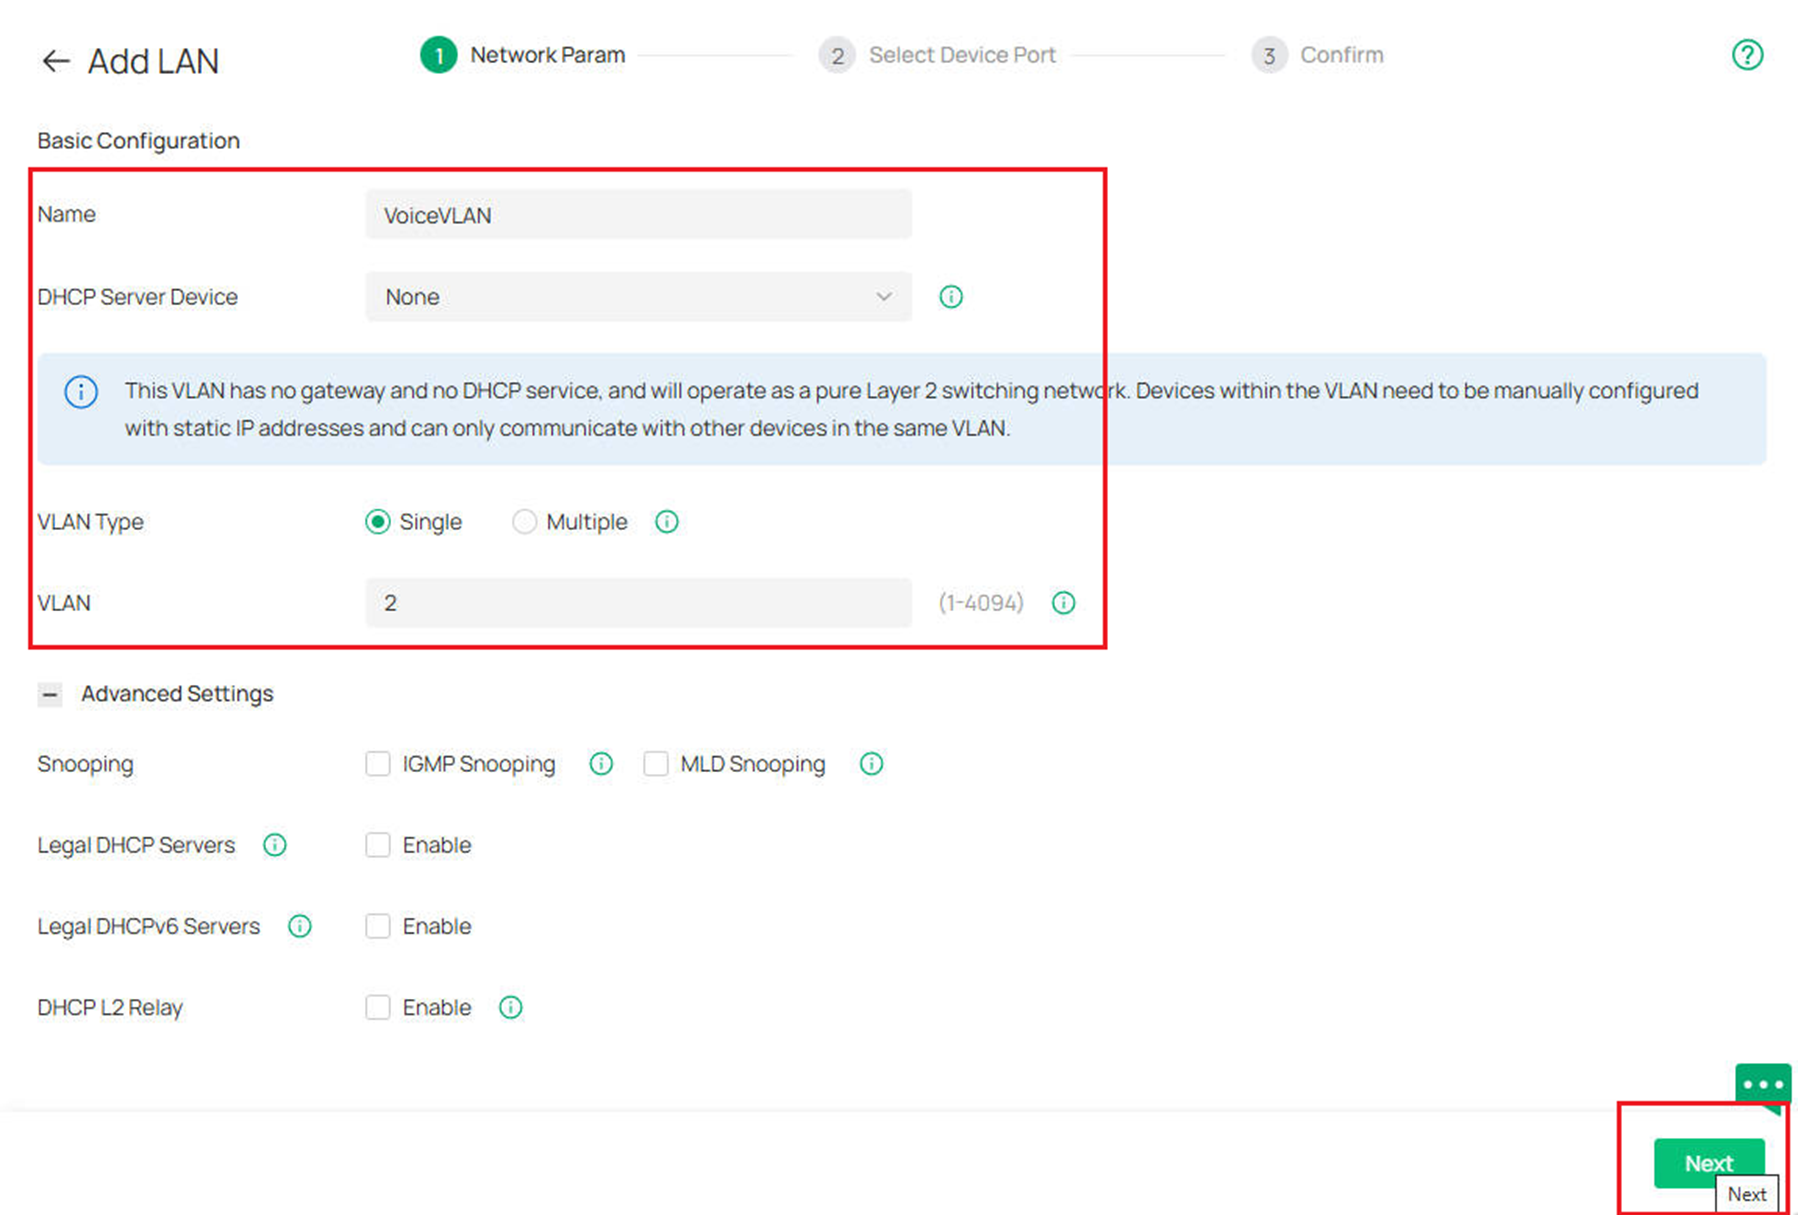
Step 2. Create a VLAN as the Voice VLAN and click Next to send the VLAN configuration to the switch.
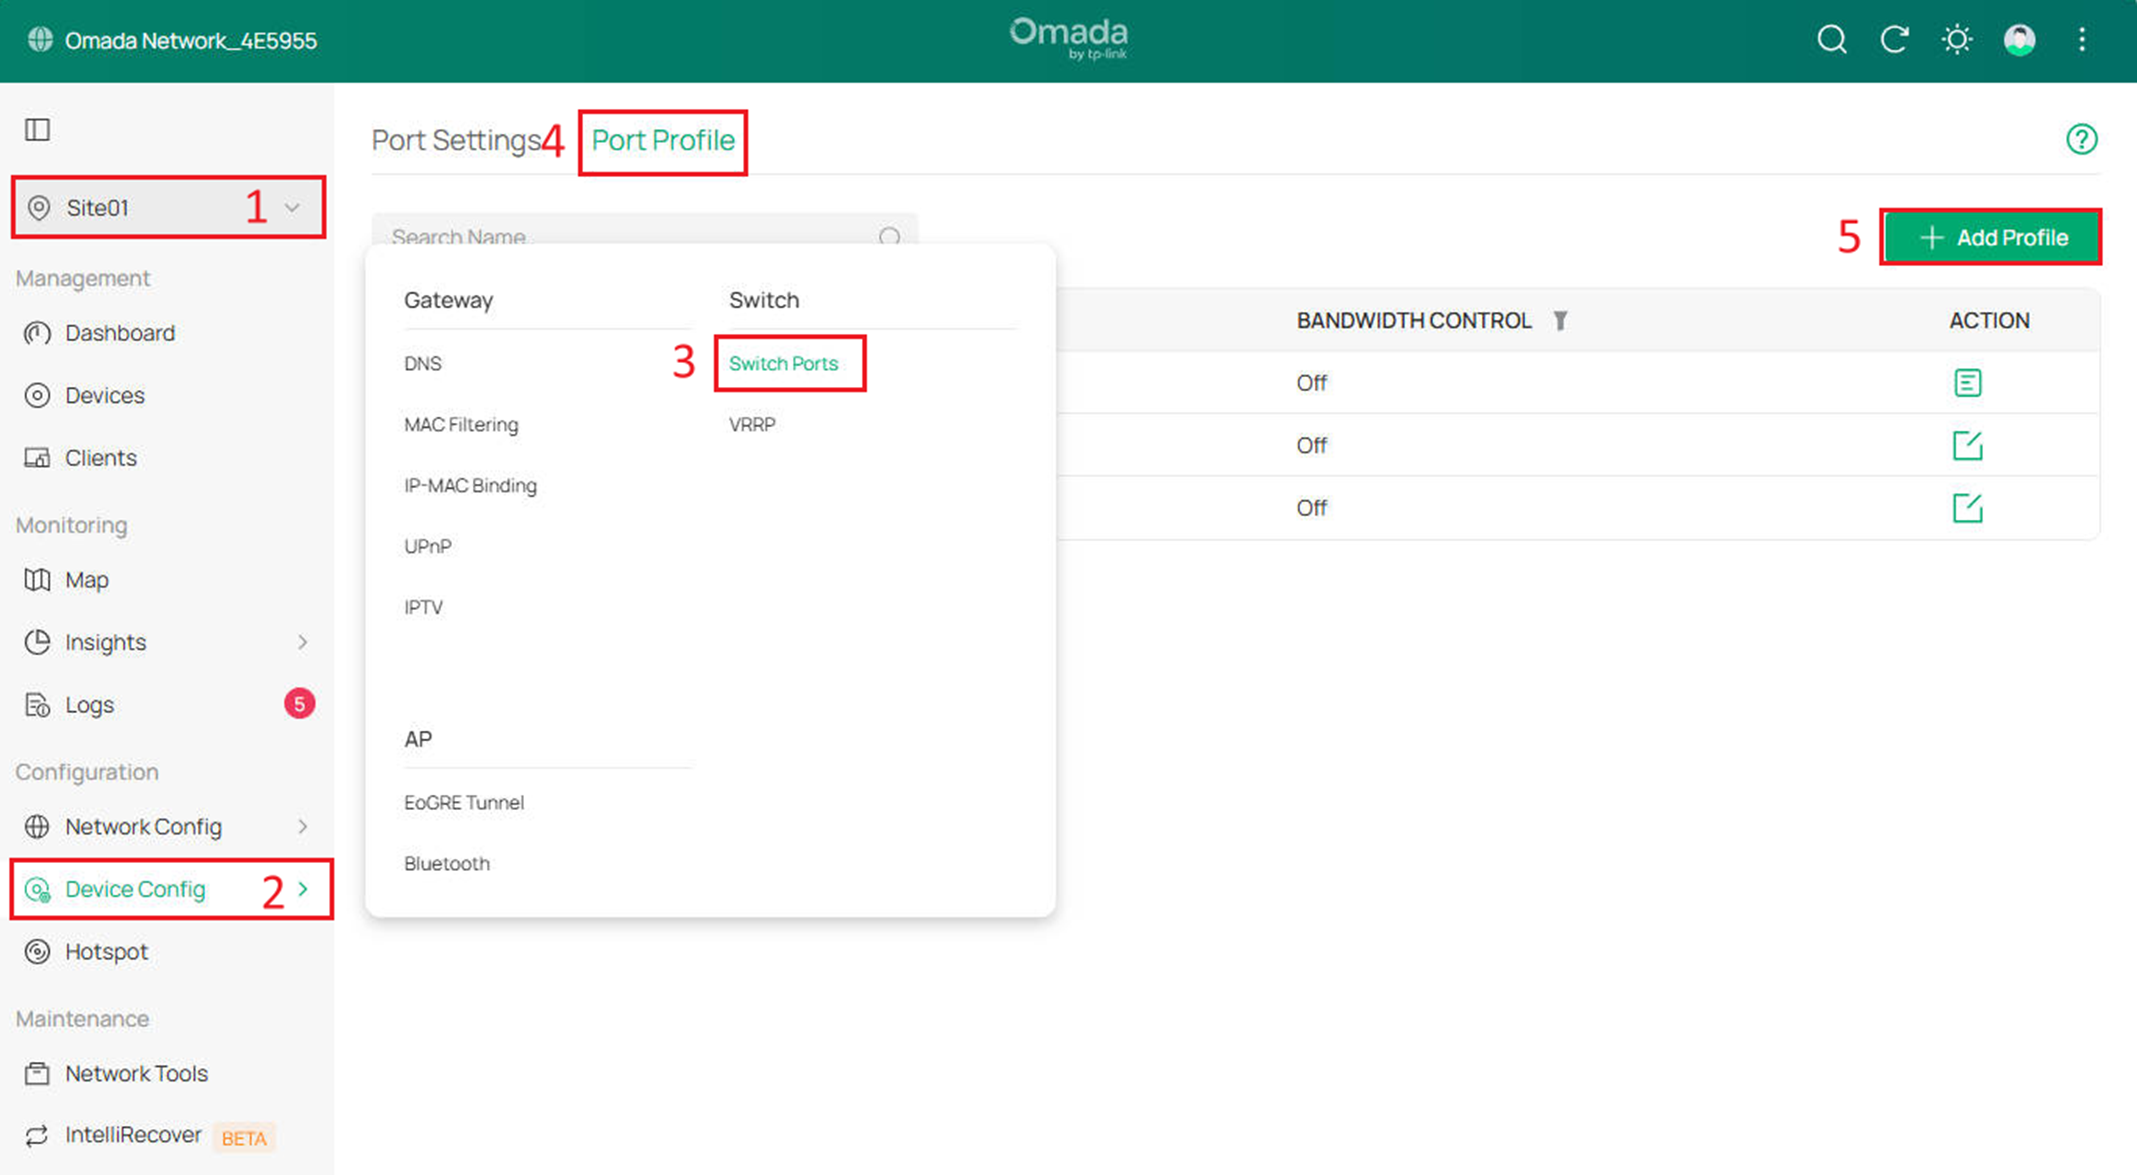
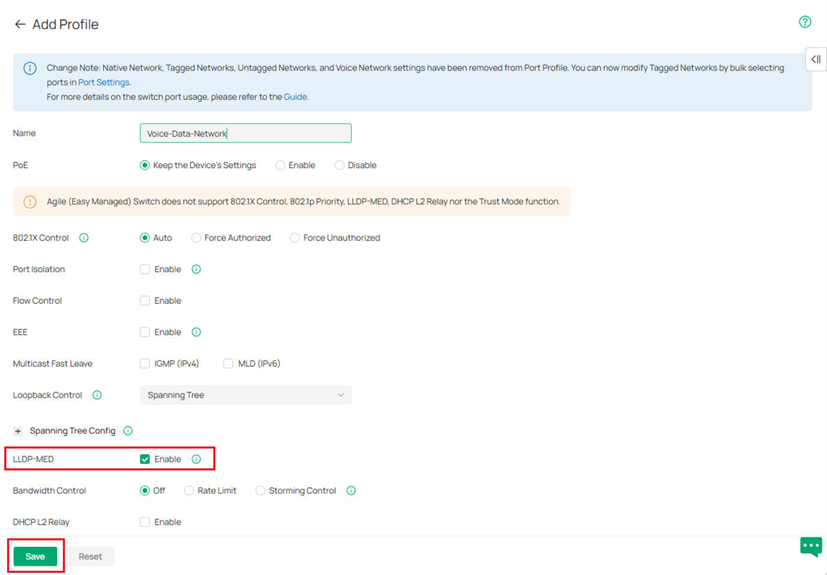
Step 3. Go to Site View > Device Config > Switch Ports > Port Profile and click Add Profile
Step 4. Create a Voice-Data-Network profile and enable the LLDP-MED
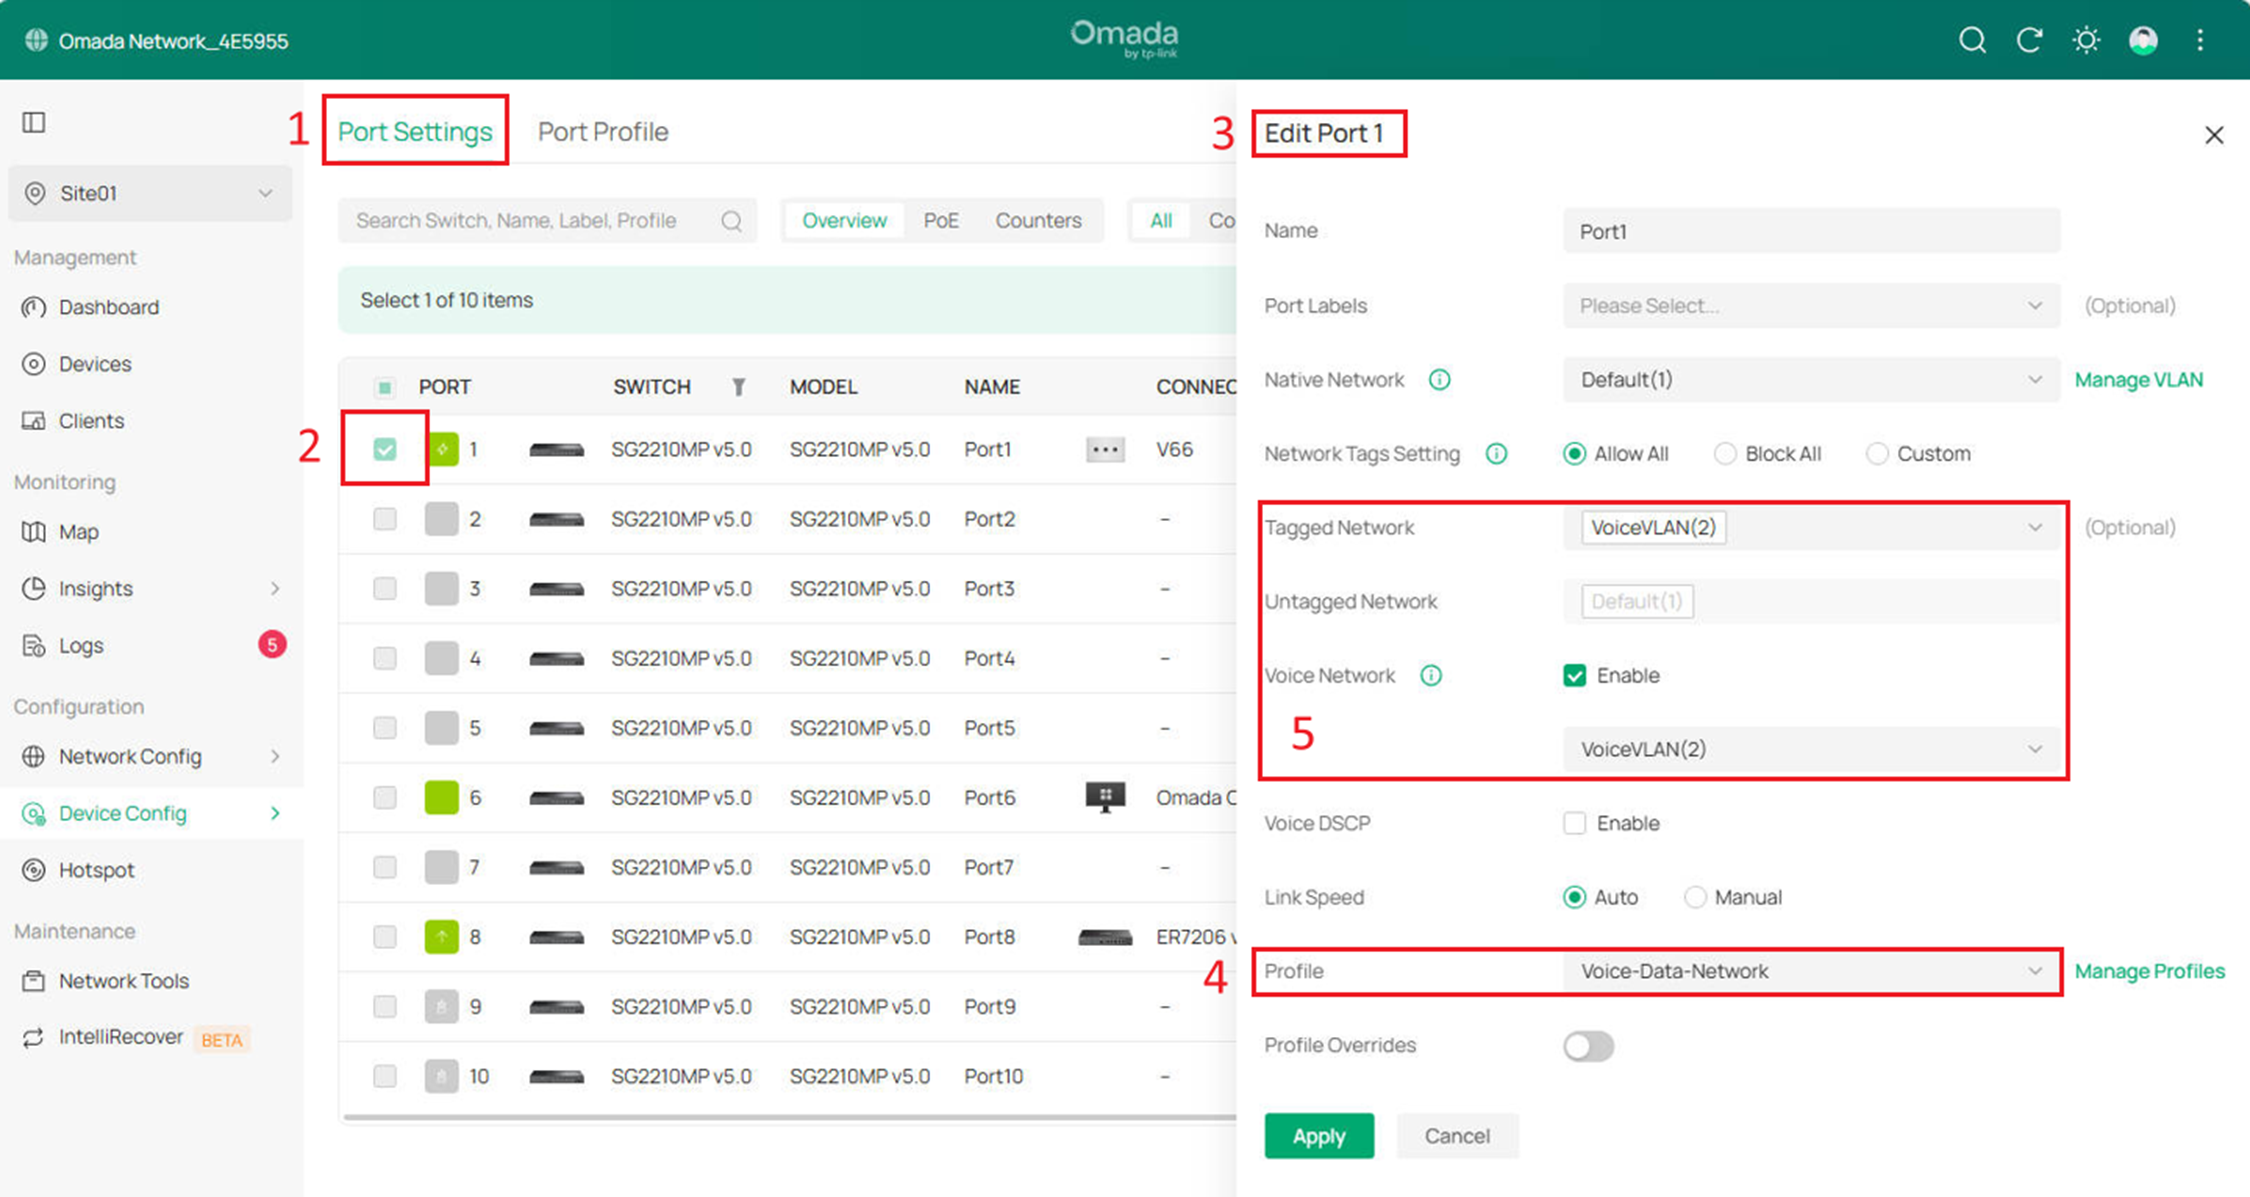
Step 5. Edit switch port settings, you can edit the switch ports you want to configure on the device details page or under Site View > Device Config > Switch Ports > Port Settings. Select the VLAN we created before as the Voice Network, select the Voice-Data-Network as the port Profile to enable LLDP-MED.
Configuration via the standalone mode
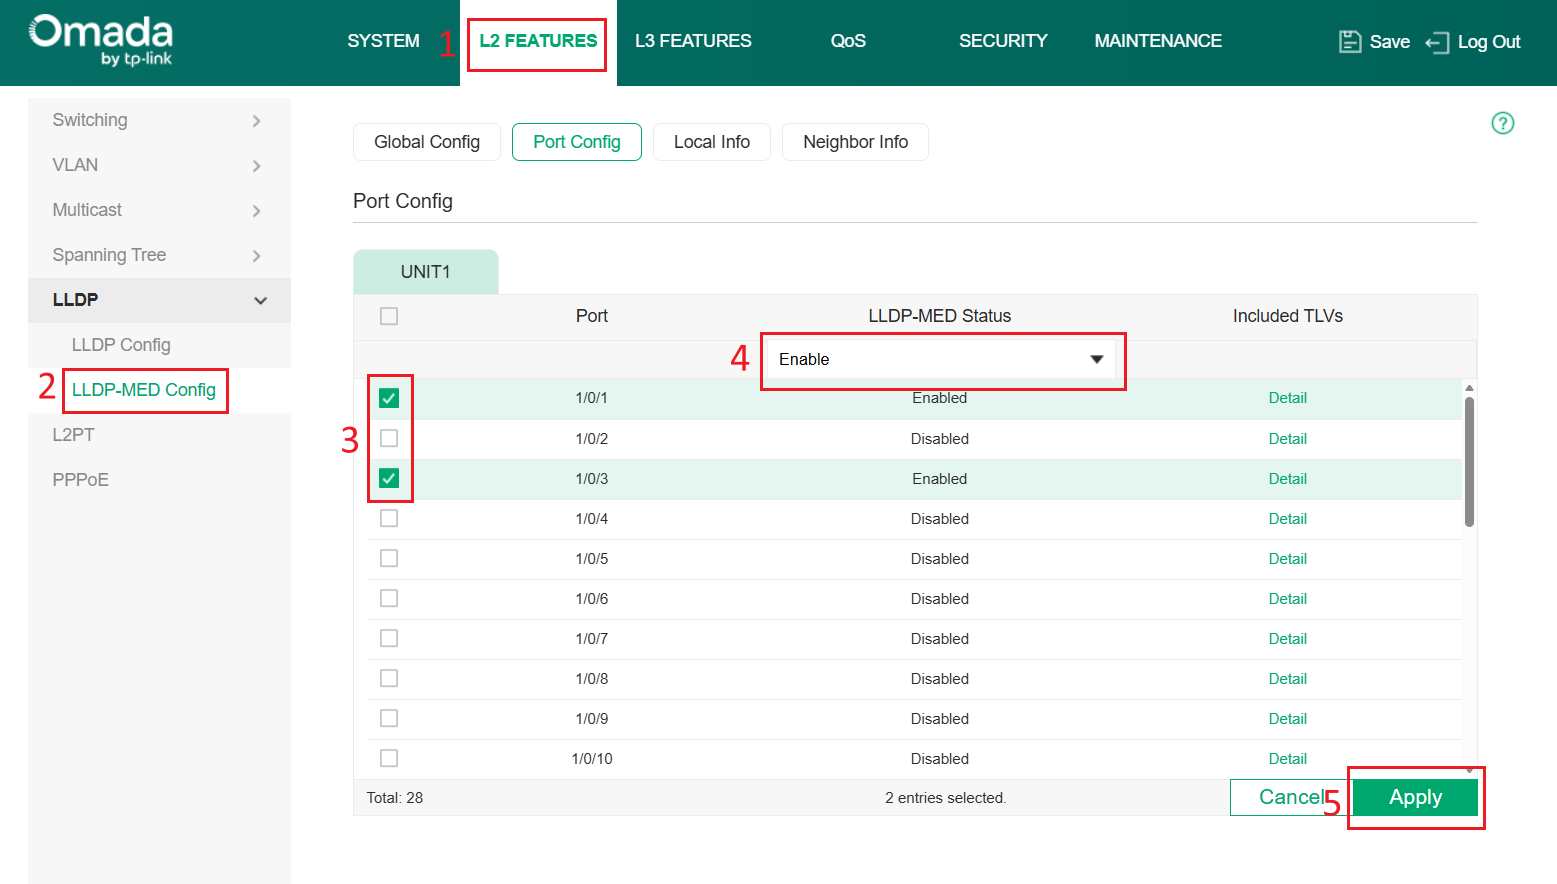
Step 1. In Standalone mode, LLDP-MED is disabled by default, so you need to enable it on the port where you want to configure VoIP.
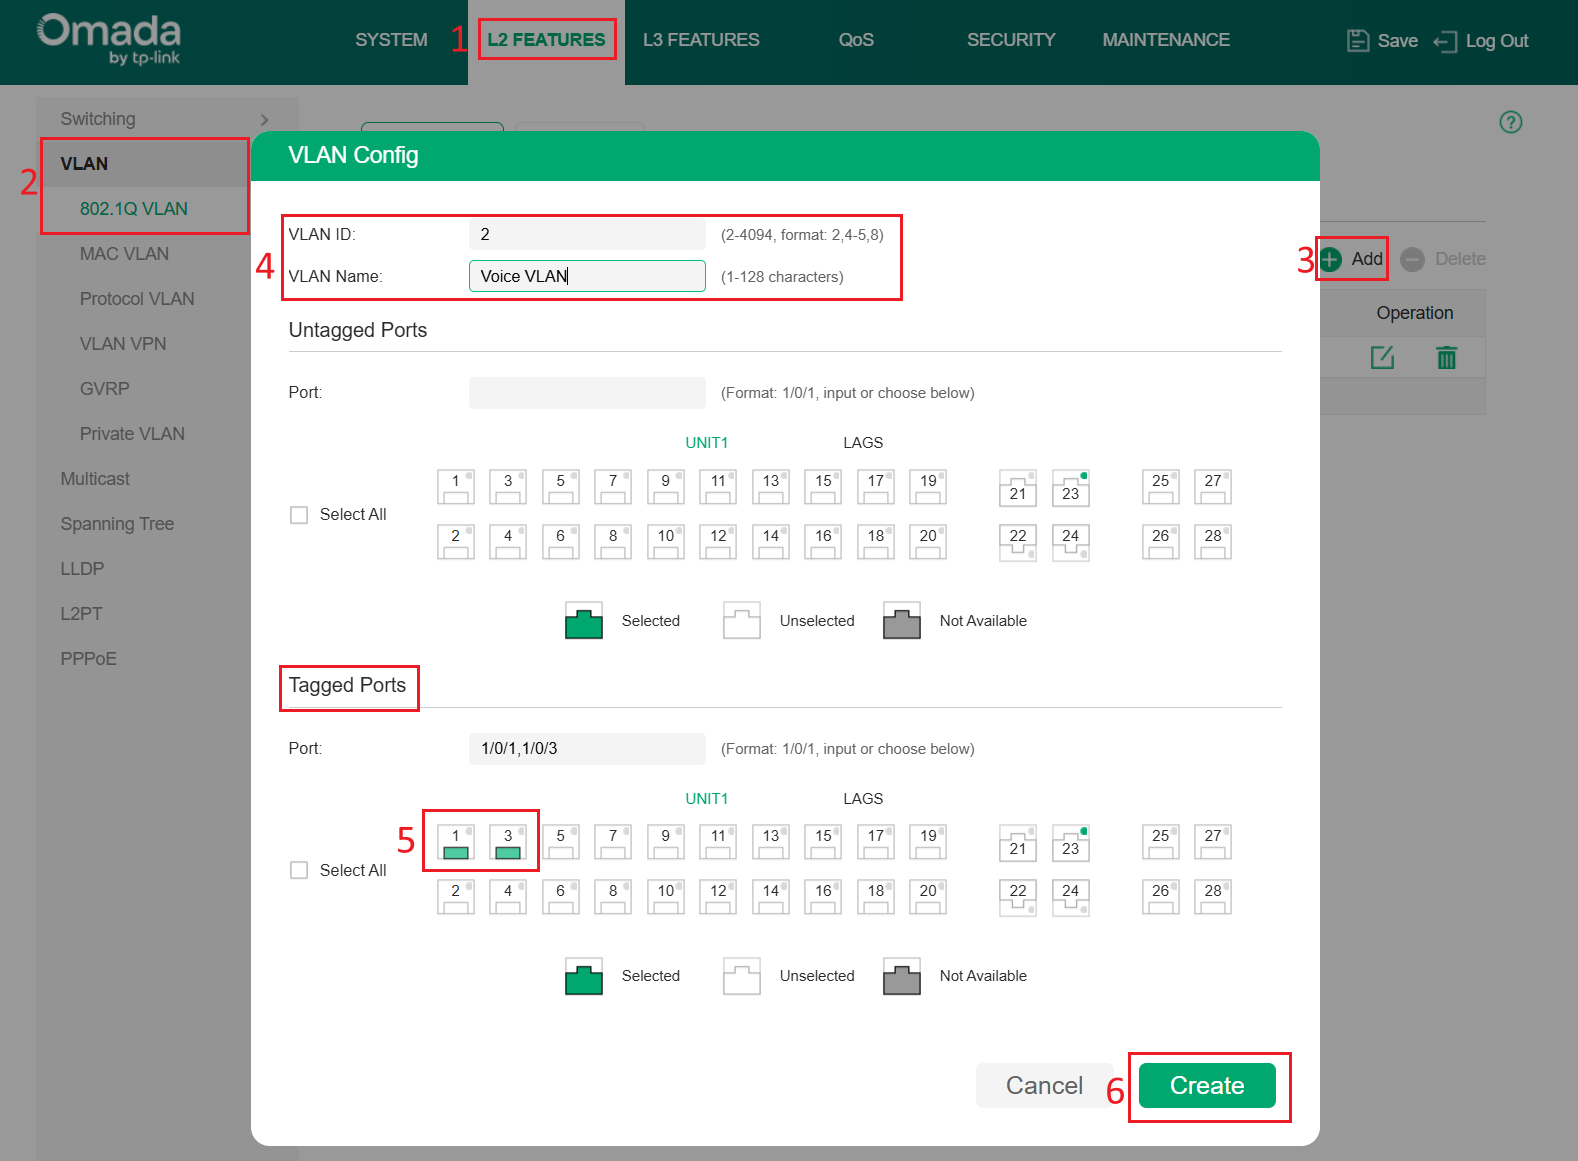
Step 2. Navigate to L2 FEATURES > VLAN > 802.1Q VLAN > Add and create a VLAN for voice traffic.
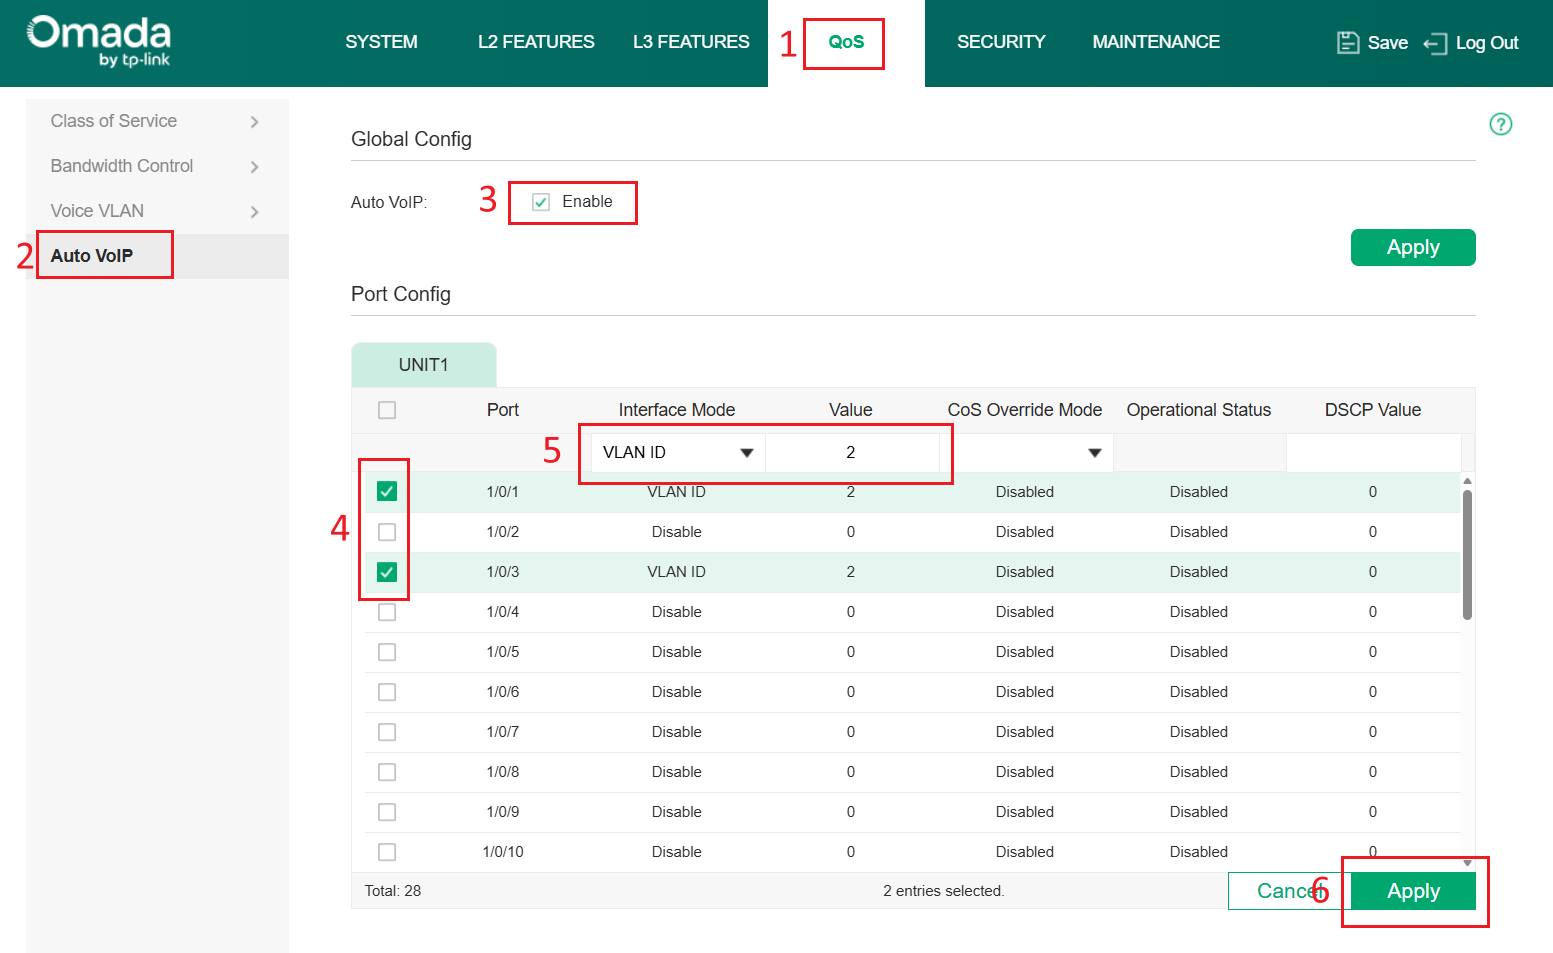
Step 3. Navigate to QoS > Auto VoIP and enable Auto VoIP on these ports
Verification
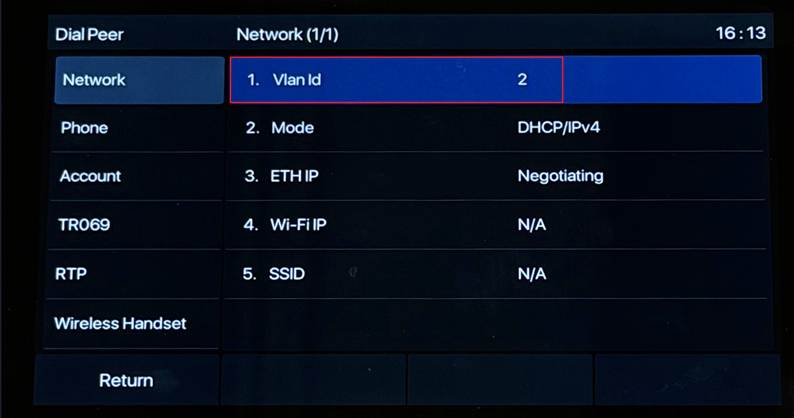
You can connect an IP phone to the Switch, and you'll see that the IP phone automatically uses the voice VLAN we configured.
Conclusion
You have successfully configure LLDP and LLDP-MED.
Get to know more details of each function and configuration please go to Download Center to download the manual of your product.
