


How to configure Webhook on the Omada Controller


Contents
Introduction
The webhook feature enables the Omada Controller to automatically push real-time notifications to a user-specified URL whenever predefined events occur—such as a device coming online or an alert being triggered. By eliminating the need for continuous polling, it delivers instantaneous visibility into network state changes, facilitating seamless monitoring, alerting, and workflow automation.
Requirements
- Omada Software/hardware Controller or Omada Central
- Webhook Server
Configuration
The demonstration will proceed in the following steps to verify proper webhook operation: prepare a webhook server, enable the webhook feature in the Omada Controller, trigger an event so that the corresponding log is transmitted to the server, and then examine the received data on the webhook server.
Step 1. Prepare a webhook server
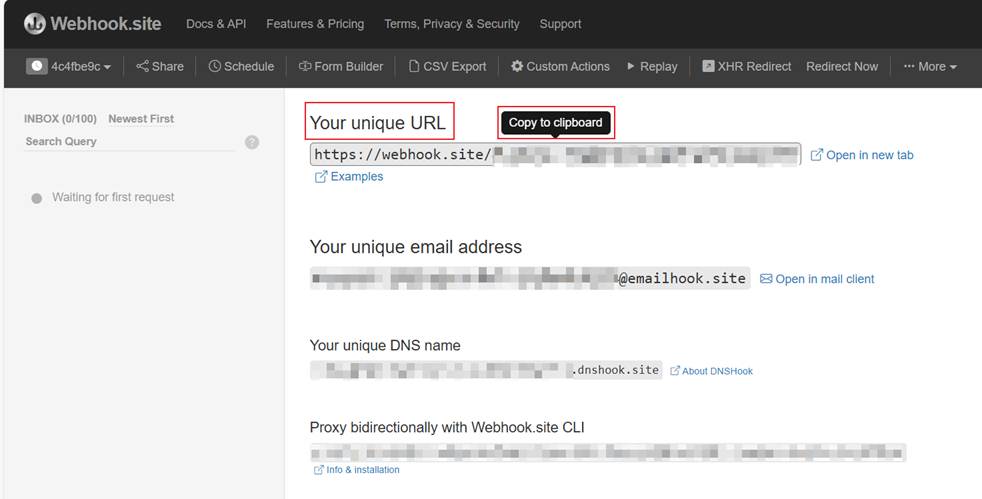
You need a server capable of receiving and processing the webhook data. For this demonstration, we will use the temporary URL service provided by https://webhook.site/. Please navigate to the website, click the generated URL, and copy it to your clipboard.
Step 2. Configure the address of the webhook server in the Controller.
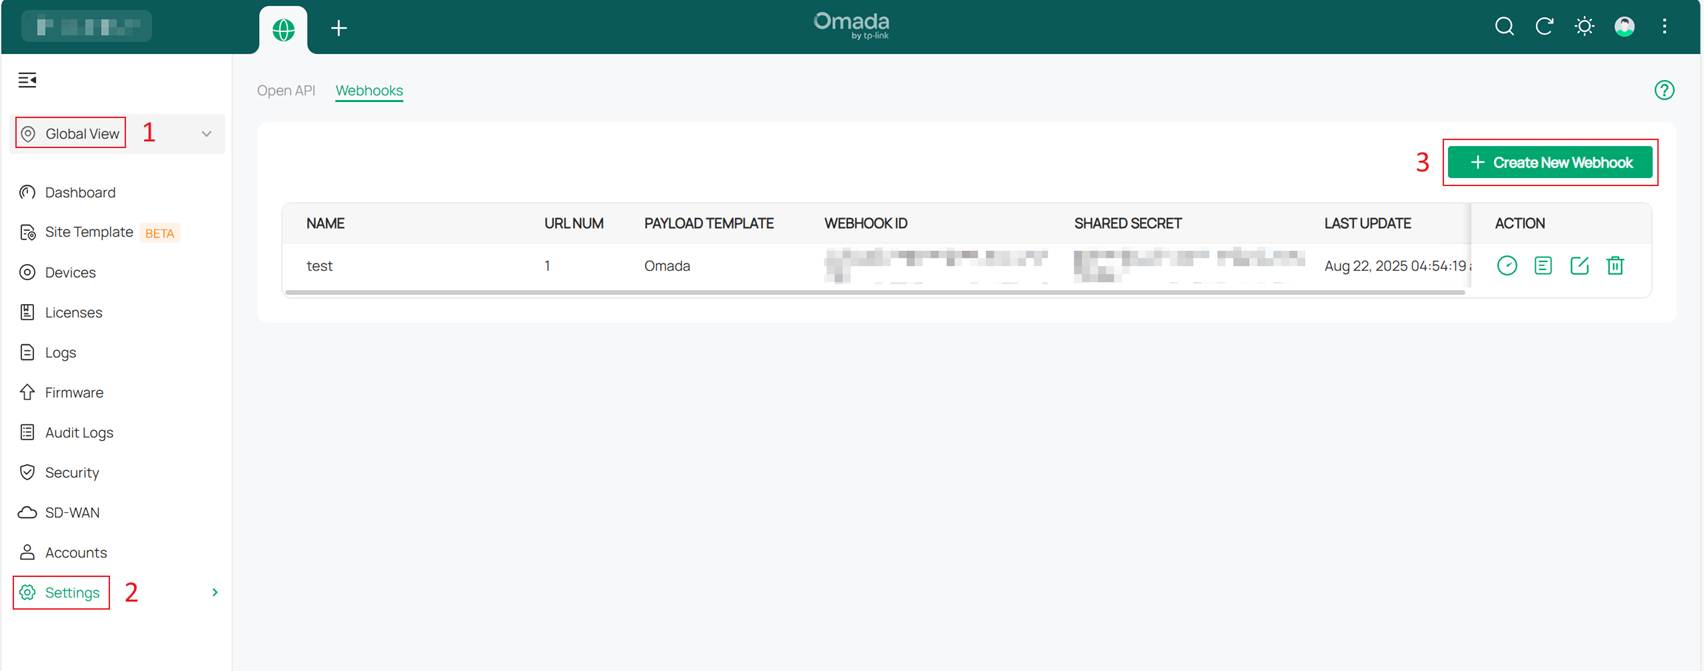
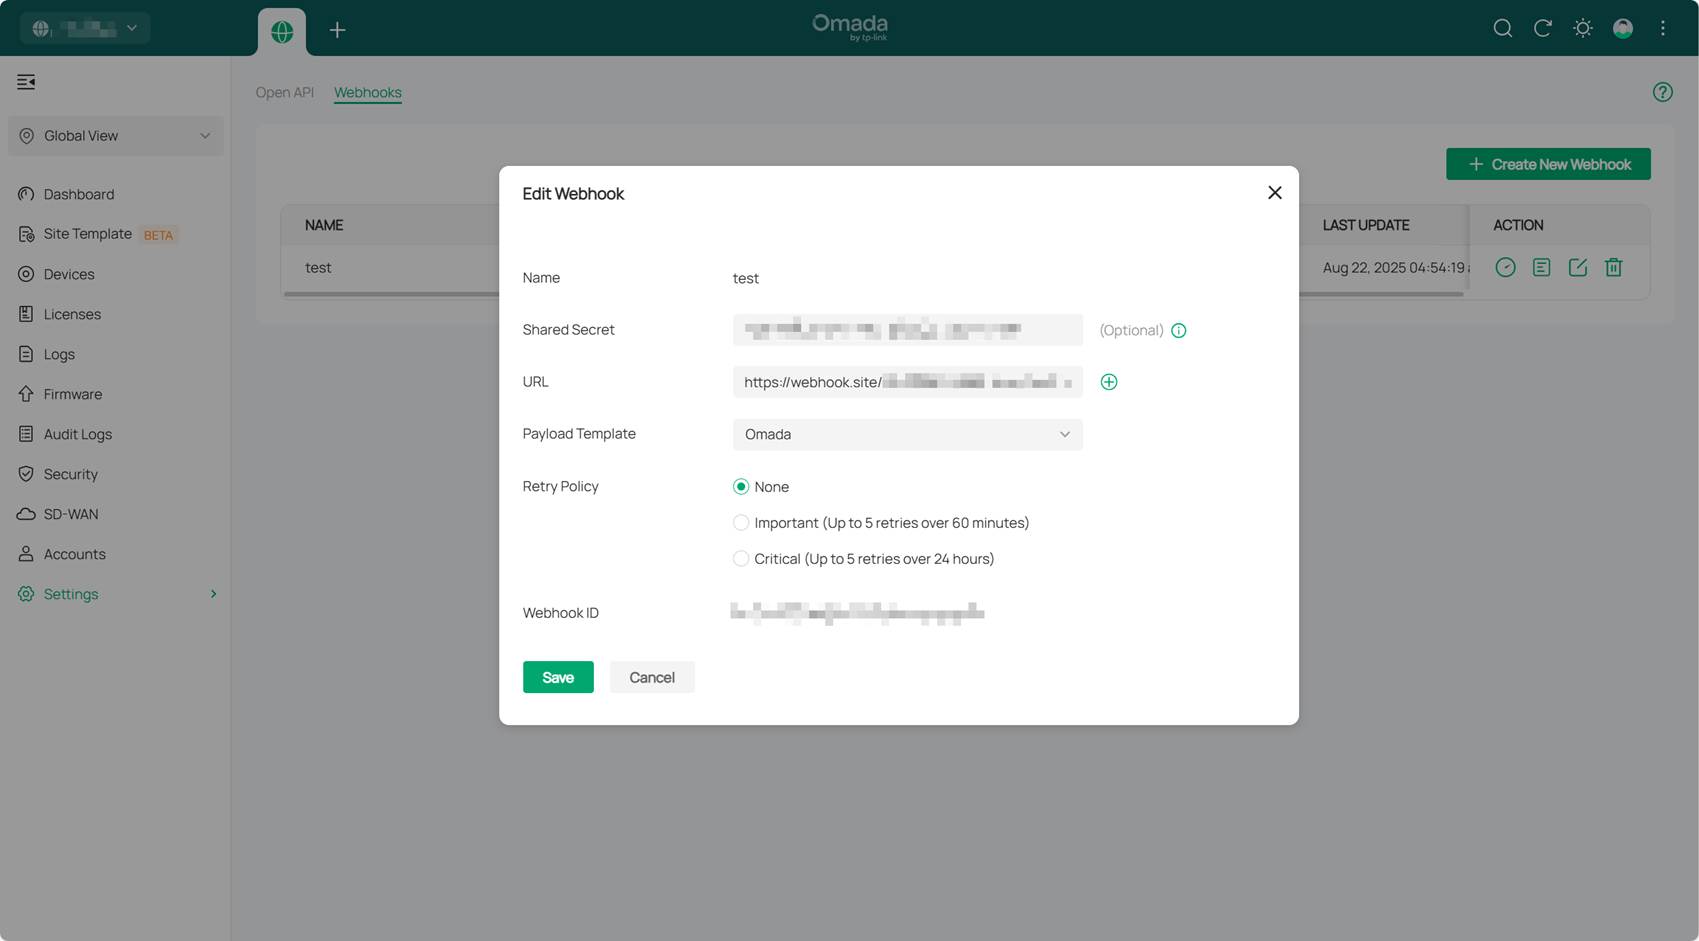
Next, configure the webhook server address in the Omada Controller. Navigate to Settings > Platform Integration > Webhooks under the Global view. Enter the URL you obtained from the webhook website, select the desired payload format, and optionally define a Retry Policy to govern retransmission attempts if delivery fails.
Note:
- Payload Template: Refers to the data format and structure you want the Omada Controller to use when sending webhook notifications. Currently, two options are supported: Omada and Google Chat.
- Retry Policy: Determines how the Omada Controller should respond when it attempts to send event notifications to the specified webhook server address but fails due to reasons such as network issues. None means sending the webhook notification only once, regardless of success or failure. Important means the Controller will retry up to 5 times within a maximum duration of 60 minutes. Critical means the Controller will retry up to 5 times within a maximum duration of 24 hours.
Step 3. Set up webhook notifications for specific alerts or events.
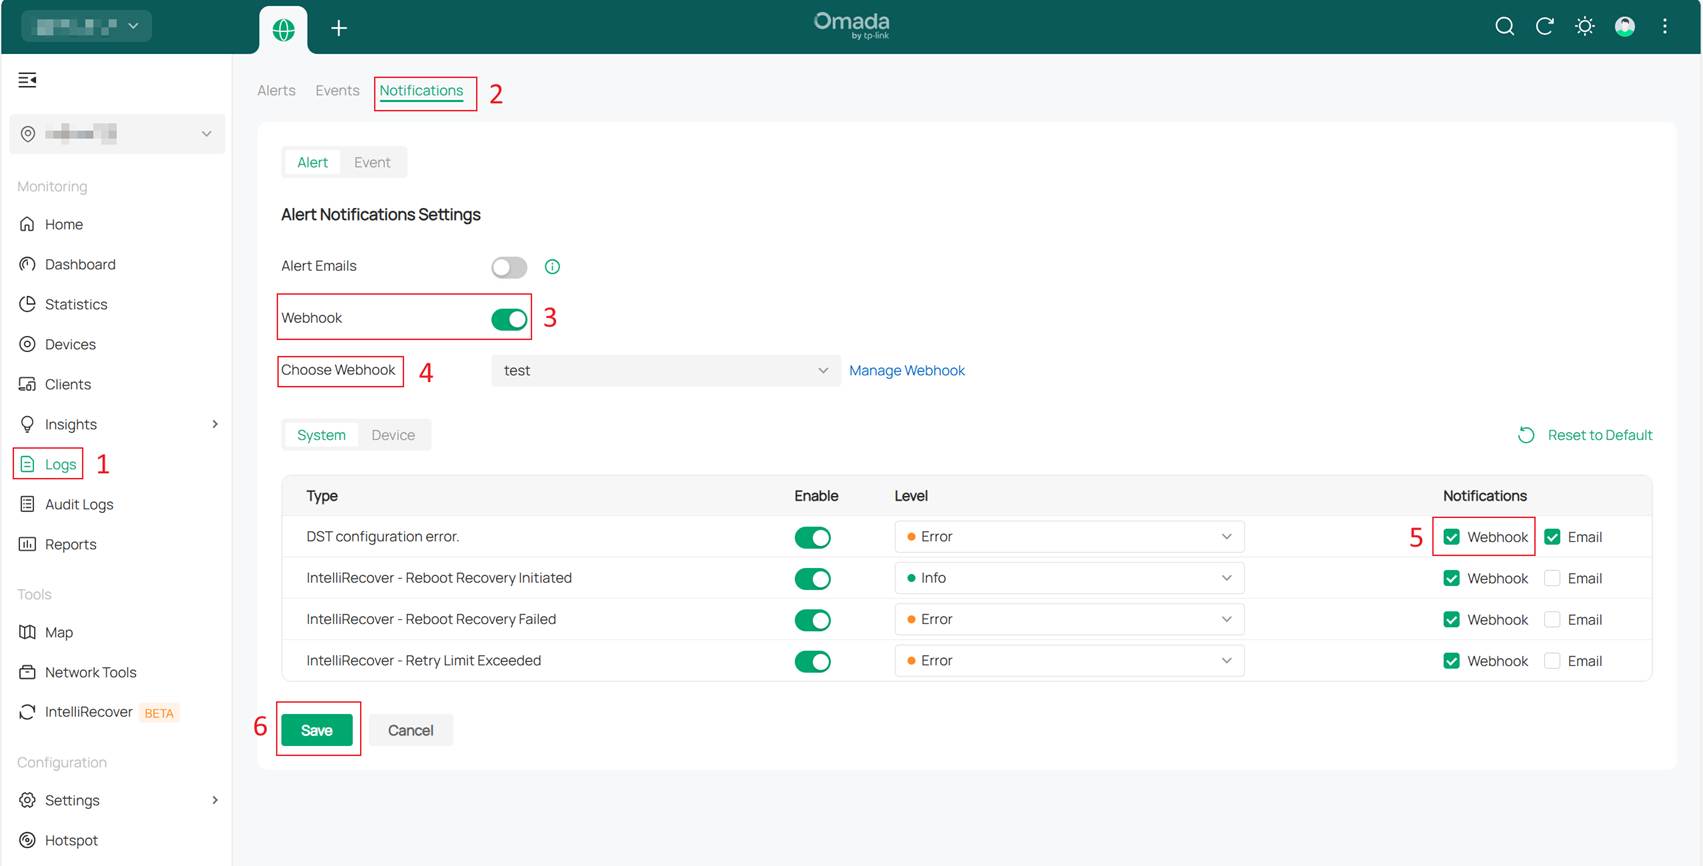
In the site view of the controller, navigate to the Logs tab and locate Notifications. Follow the steps illustrated in the figure below to configure whether to enable webhook notifications for different Alerts or Events according to your requirements. At this point, the process of configuring webhooks in the controller is complete.
Verification
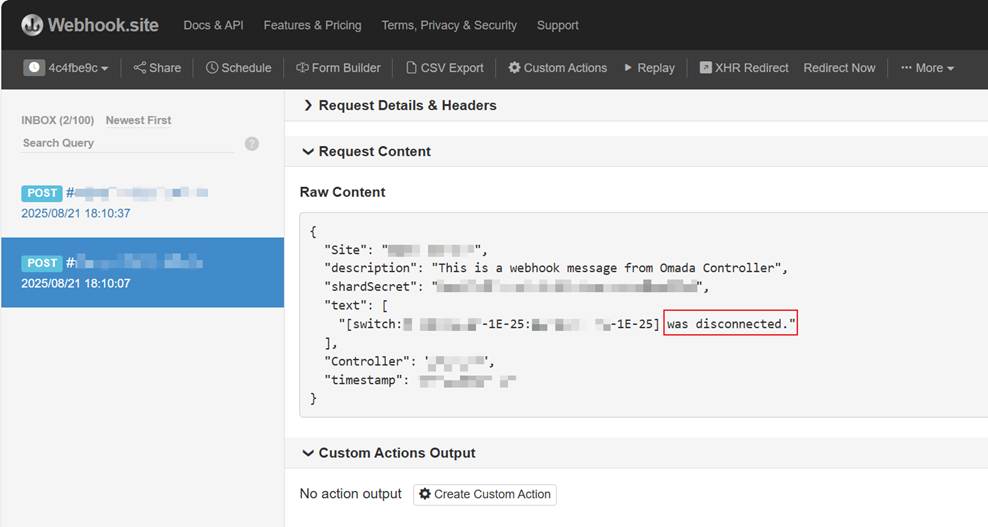
After configuring webhook notifications for Device Connected and Device Disconnected events, following Steps 1-3, we disconnected the power from a device that was shown as "connected" in the Controller. After a while, the device was re-powered and successfully re-adopted by the Controller. Upon checking the webhook server, two notifications were observed: one reporting that the device was disconnected, and another indicating that the device was connected.
Conclusion
By configuring the webhook feature of the Omada Controller, you can seamlessly transition network management from "passive querying" to "active awareness." This feature is straightforward to configure yet powerful, serving as a critical component in building an intelligent and automated network operation system.
Get to know more details of each function and configuration please go to Download Center to download the manual of your product.
