


Contents
Configuration for OpenVPN Server
Configuration for OpenVPN Client
Introduction
OpenVPN provides secure remote access and site-to-site connectivity through encrypted VPN tunnels. Omada Gateways support both OpenVPN Server and OpenVPN Client deployments, allowing remote users and branch networks to securely access network resources through Omada Controller.
This guide explains how to configure OpenVPN on Omada Gateways using Omada Controller and introduces High-Performance Mode (OpenVPN DCO), a new feature available in Omada Controller v6.4 on supported Fusion Gateways. DCO acceleration can improve VPN throughput and reduce CPU utilization by processing encrypted OpenVPN traffic in the kernel.
Requirements
- Omada Gateway Series, Omada Fusion Gateway Series
- Omada Software Controller, Hardware Controller, or Cloud-Based Controller
Configuration
Configuration for OpenVPN Server
OpenVPN Server
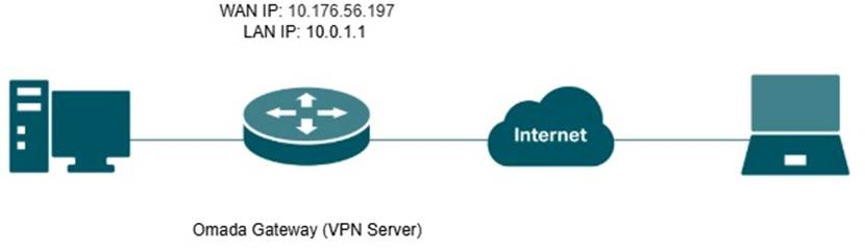
Omada Gateway acts as an OpenVPN server, enabling clients to securely access the intranet or the internet.
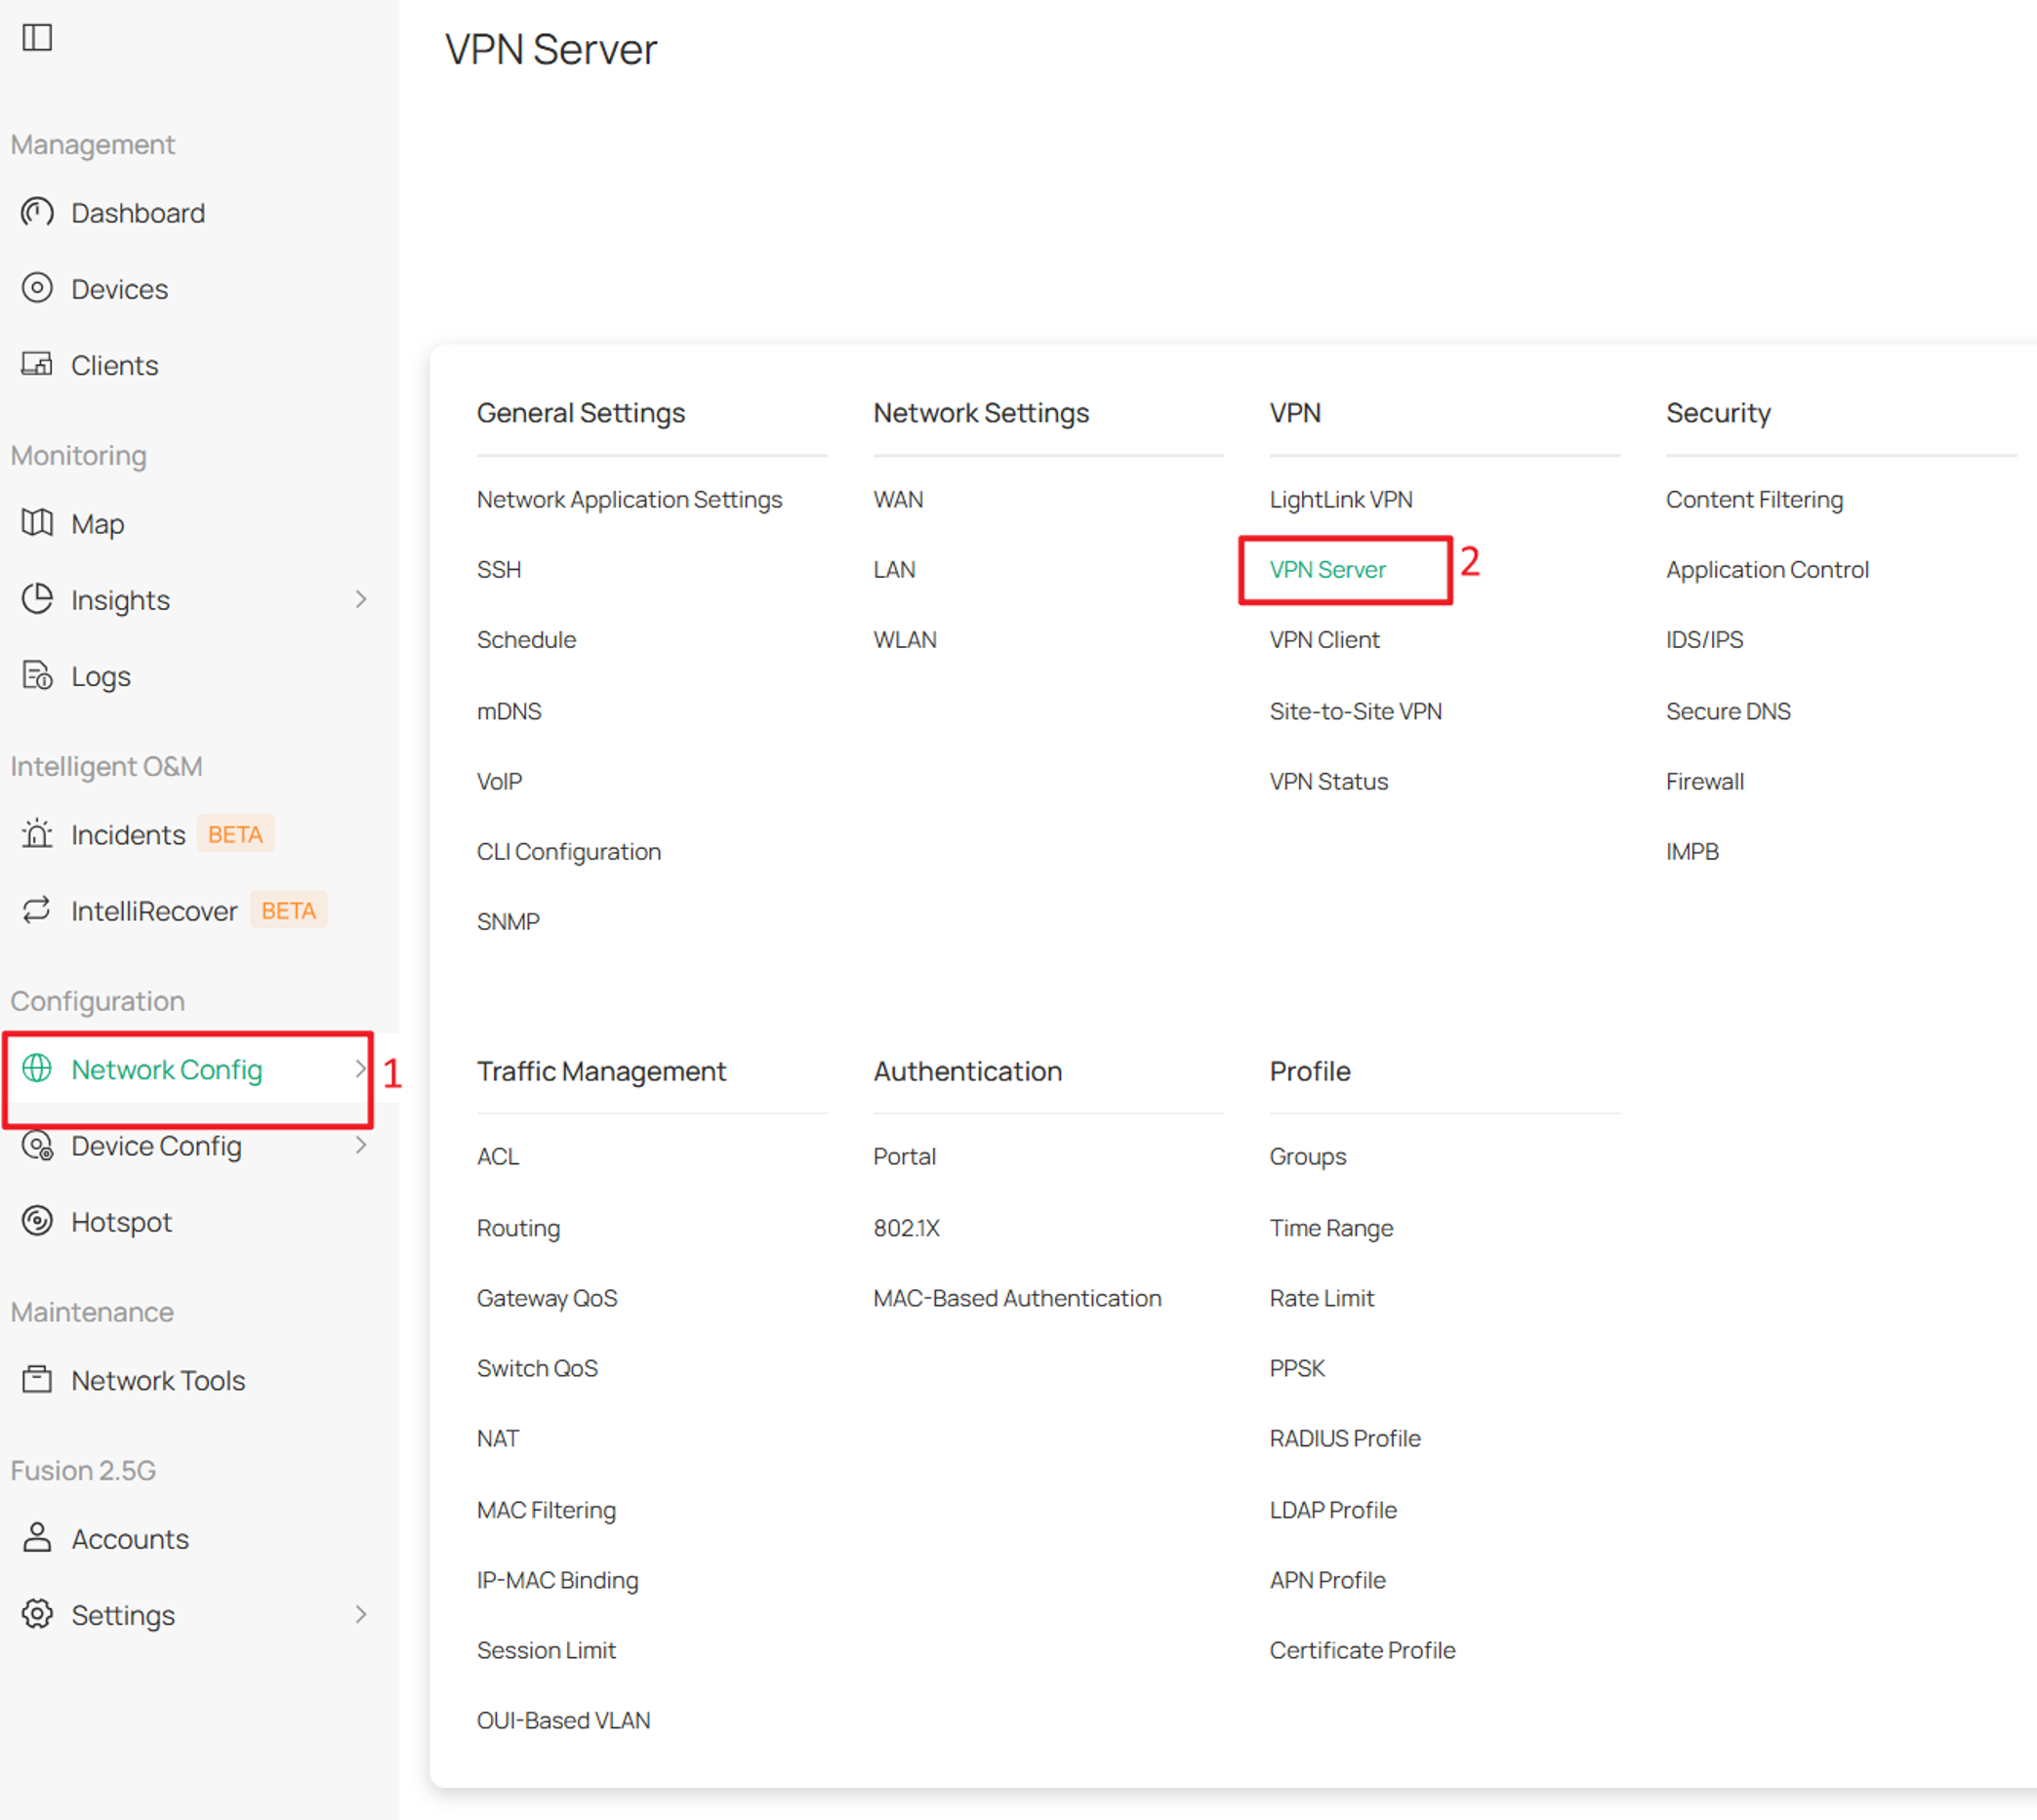
Step 1. Create an OpenVPN server.
Log in to the Controller via web browser, go to Network Config > VPN > VPN Server > and click Create New VPN Server.
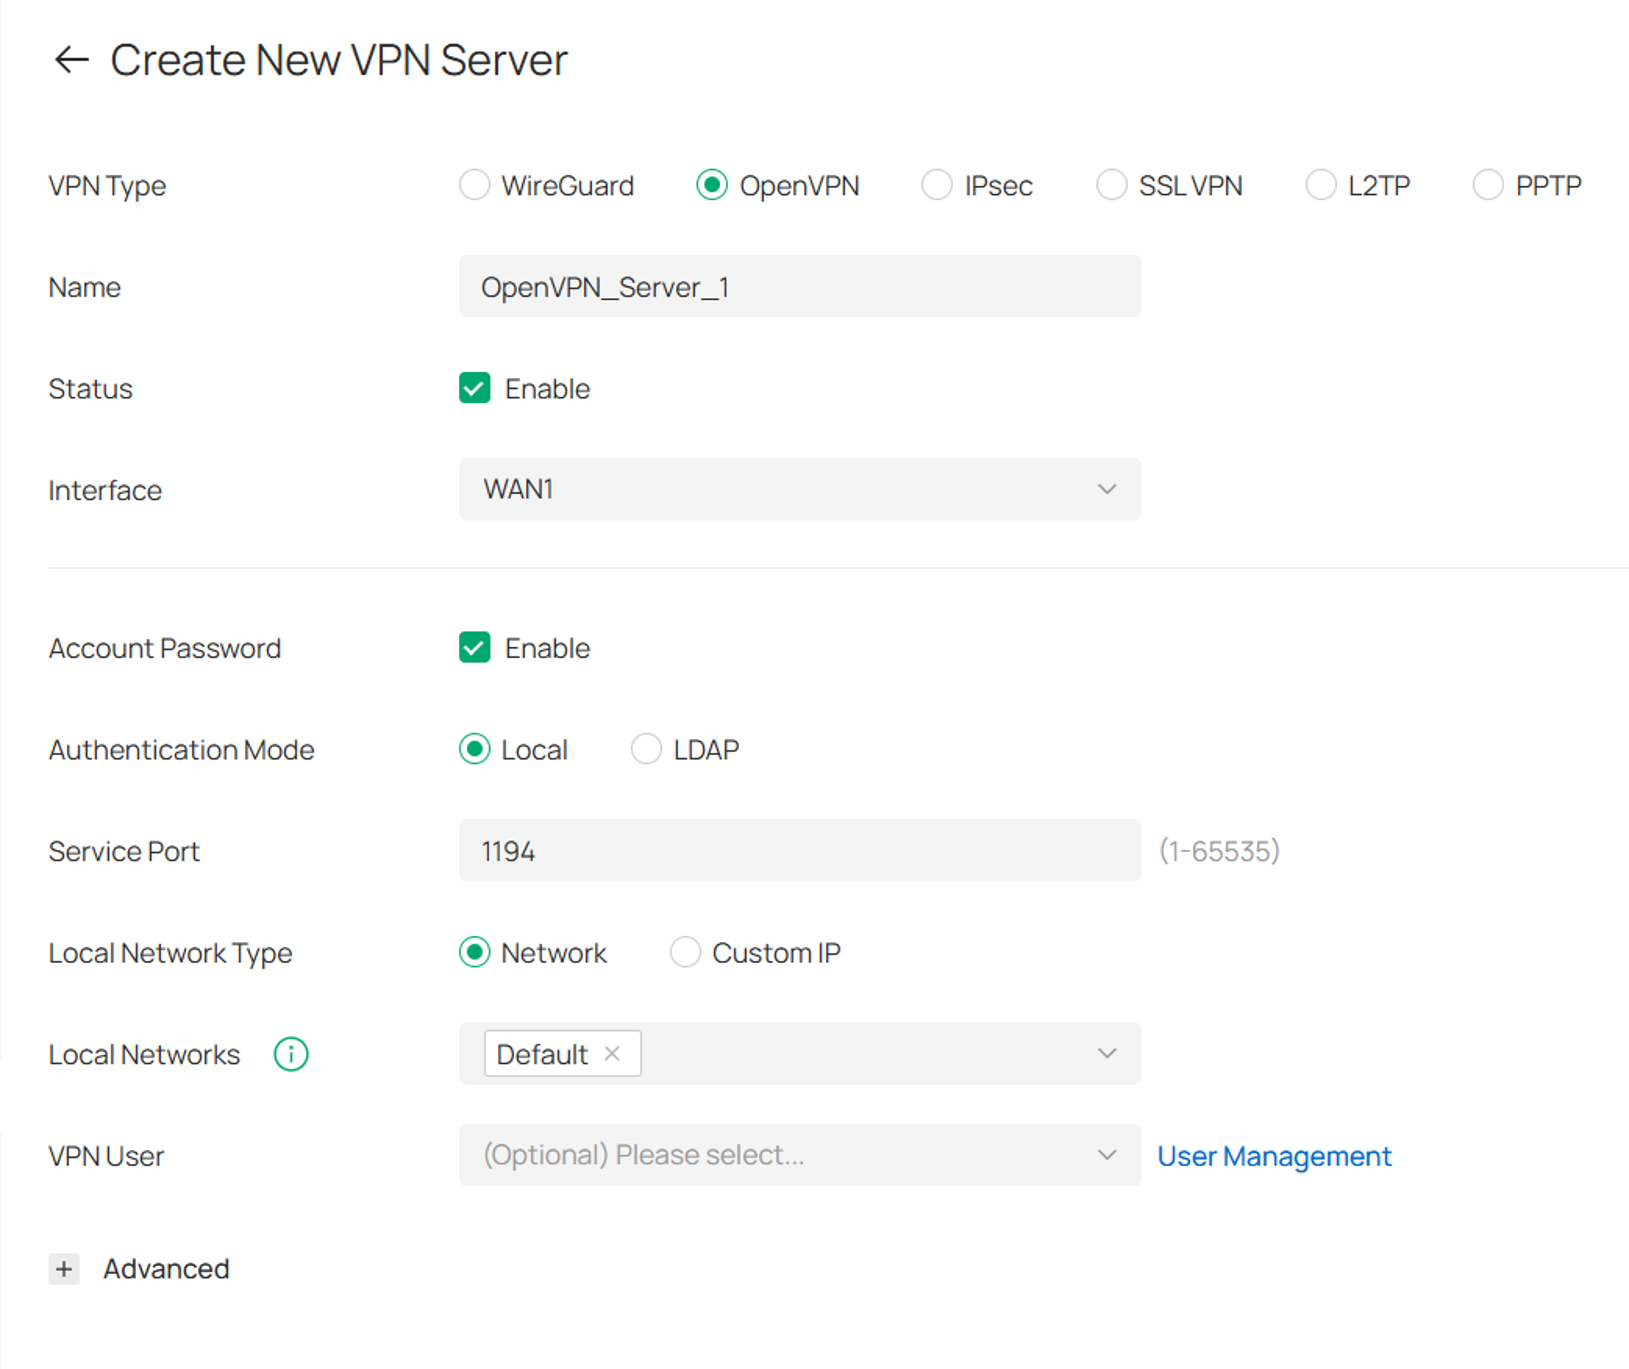
Step 2. Configure the basic settings.
Select OpenVPN and configure the required settings.
|
Parameter |
Description |
|
Interface |
Select the WAN port on which the VPN tunnel is established. Each WAN port supports only one OpenVPN tunnel when the gateway works as an OpenVPN server. |
|
Account Password |
When enabled, OpenVPN will use username/password to authenticate users. |
|
Authentication Mode |
Specify the authentication method used by the OpenVPN server. |
|
Local |
Use a built-in authentication server to authenticate when the tunnel is created. If you don’t have an additional external server, you can choose local authentication. |
|
LDAP |
Use an external LDAP server to authenticate when the tunnel is created. |
|
LDAP Profile |
Specify an LDAP entry that you have configured in Profiles > LDAP Profile. |
|
Service Port |
Enter a VPN service port to which a VPN device connects. The default port is 1194. |
|
Local Network Type |
Select the type to set the local network for VPN Policy. There are two types: Network and Custom IP. |
|
Local Networks |
Select the local networks to apply the VPN Policy. The VPN Policy will only apply to the selected or specified local network. |
|
VPN User |
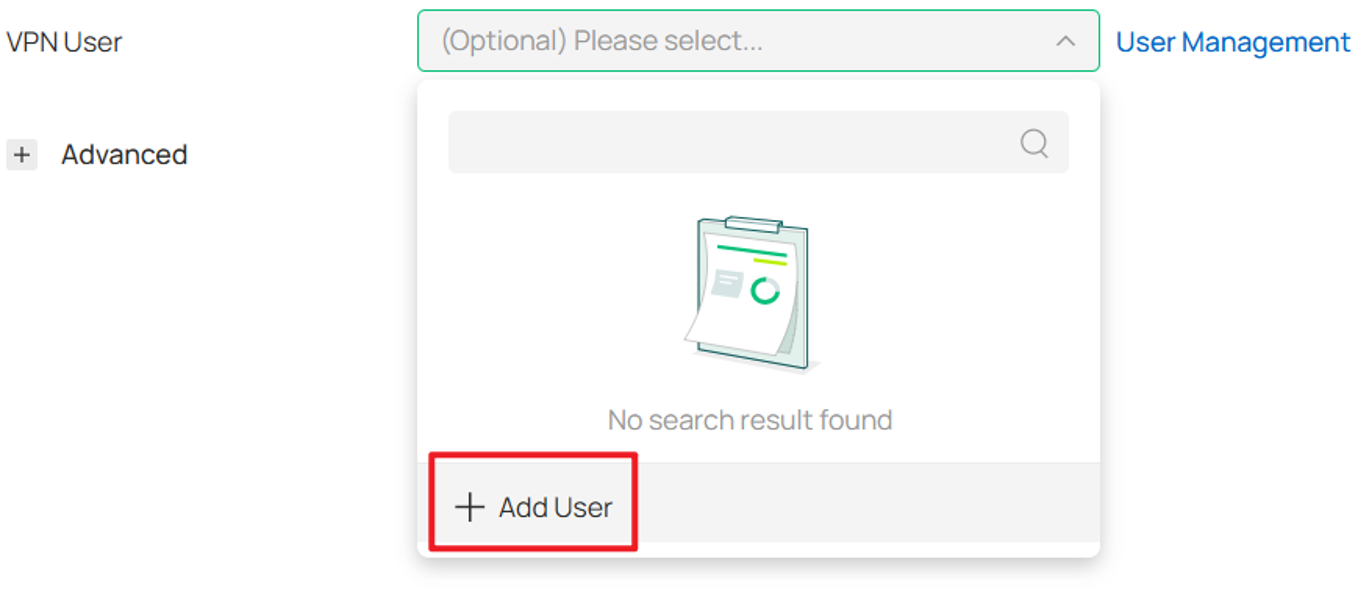
Select a user associated with the VPN server. Click Add User to add a new user. |
Step 3. Create VPN users (optional)
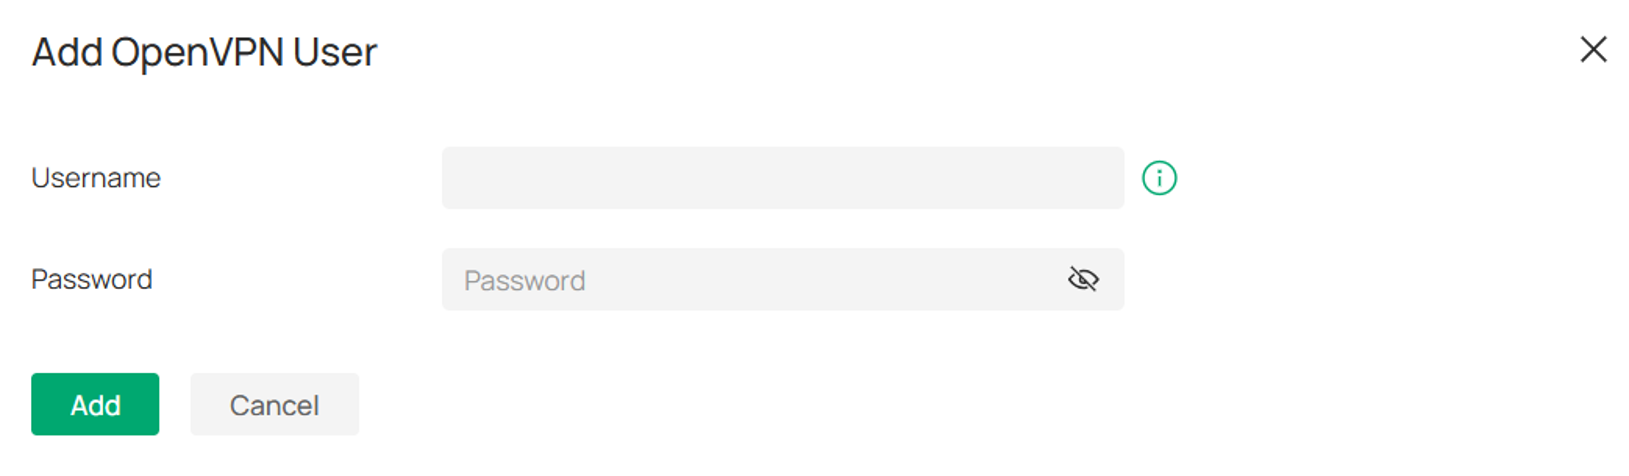
If Account Password authentication is enabled and local authentication is required, create a local user account under Authentication Mode > Local > VPN User > Add New User.
If authentication is not required, skip to Step 5.
Step 4. Configure user credentials.
Enter the Username and Password.
Step 5. Configure Advanced settings.
Expand Advanced and configure additional OpenVPN options as required.
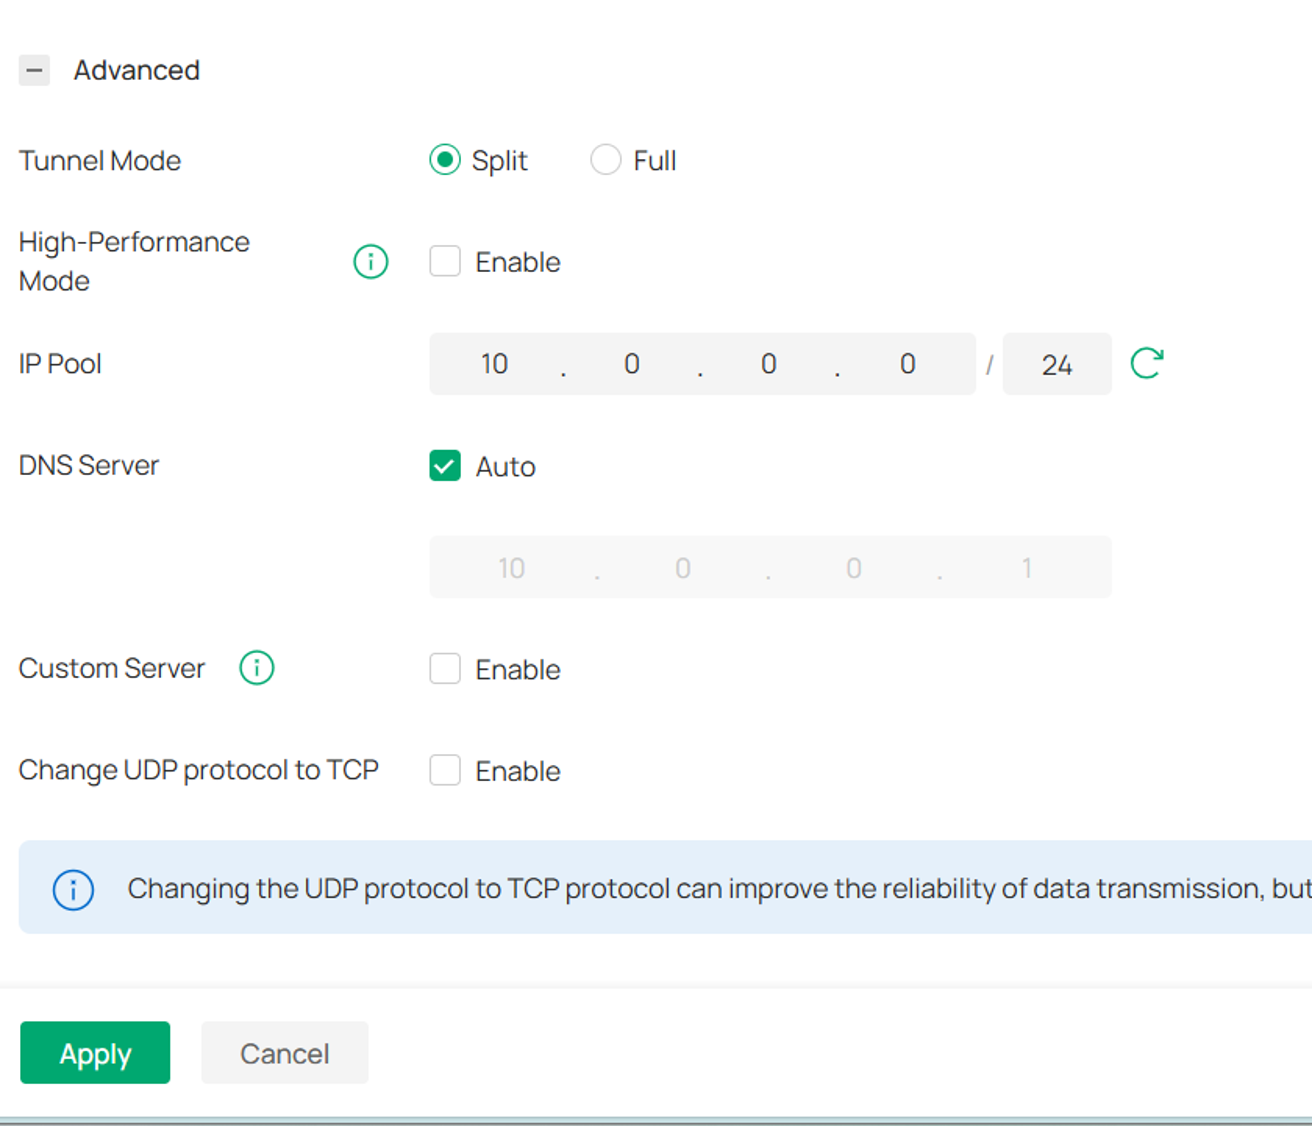
What's New in Omada Controller v6.4: High-Performance Mode (DCO)
A new High-Performance Mode option is available for supported Fusion Gateways.
When enabled:
- OpenVPN Data Channel Offload (DCO) processes encrypted VPN traffic in the kernel.
- VPN throughput can be significantly improved.
- CPU utilization can be reduced during VPN operation.
- Suitable for high-bandwidth OpenVPN deployments.
Availability
In Controller 6.4, High-Performance Mode is available only when:
- The gateway is an Omada Fusion Gateway running firmware compatible with Omada Controller 6.4.
If the gateway firmware version does not support OpenVPN Data Channel Offload (DCO), the High-Performance Mode option is hidden and cannot be configured.
|
Parameter |
Description |
|
Tunnel Mode |
Defines how traffic is routed through the tunnel. |
|
Split |
Only specified network traffic uses the tunnel |
|
Full |
Route all traffic destined for external networks through the VPN tunnel. |
|
High-Performance Mode |
Enables OpenVPN DCO acceleration. When enabled, encrypted VPN traffic is processed in the kernel, improving VPN throughput and reducing CPU usage. |
|
IP Pool |
Defines the VPN client address range. For the IP Address/Mask type, specify the IP address and subnet mask to define the VPN IP pool range. For the IP Address Range type, specify the start and end IP addresses of the VPN IP pool. |
|
DNS Server |
Sends DNS settings to VPN clients. When enabled, DNS server information is automatically assigned to VPN clients. By default, the device's LAN gateway (IPsec, L2TP, PPTP) or the virtual IP address assigned from the server IP pool (OpenVPN, SSL VPN, WireGuard) is used as the DNS server address. |
|
Primary/Secondary DNS Server |
Specifies DNS servers assigned to VPN clients. Enter a DNS server address (for example, 8.8.8.8) or the LAN IP address of the gateway. |
|
Custom Server |
Defines a custom IP address or FQDN for OpenVPN clients. When enabled, the specified server address is embedded in the client configuration, allowing clients to connect to the OpenVPN server using the defined IP address or domain name. |
|
Change UDP Protocol to TCP |
Changes the transport protocol from UDP to TCP. |
After configuration is complete, click Apply.
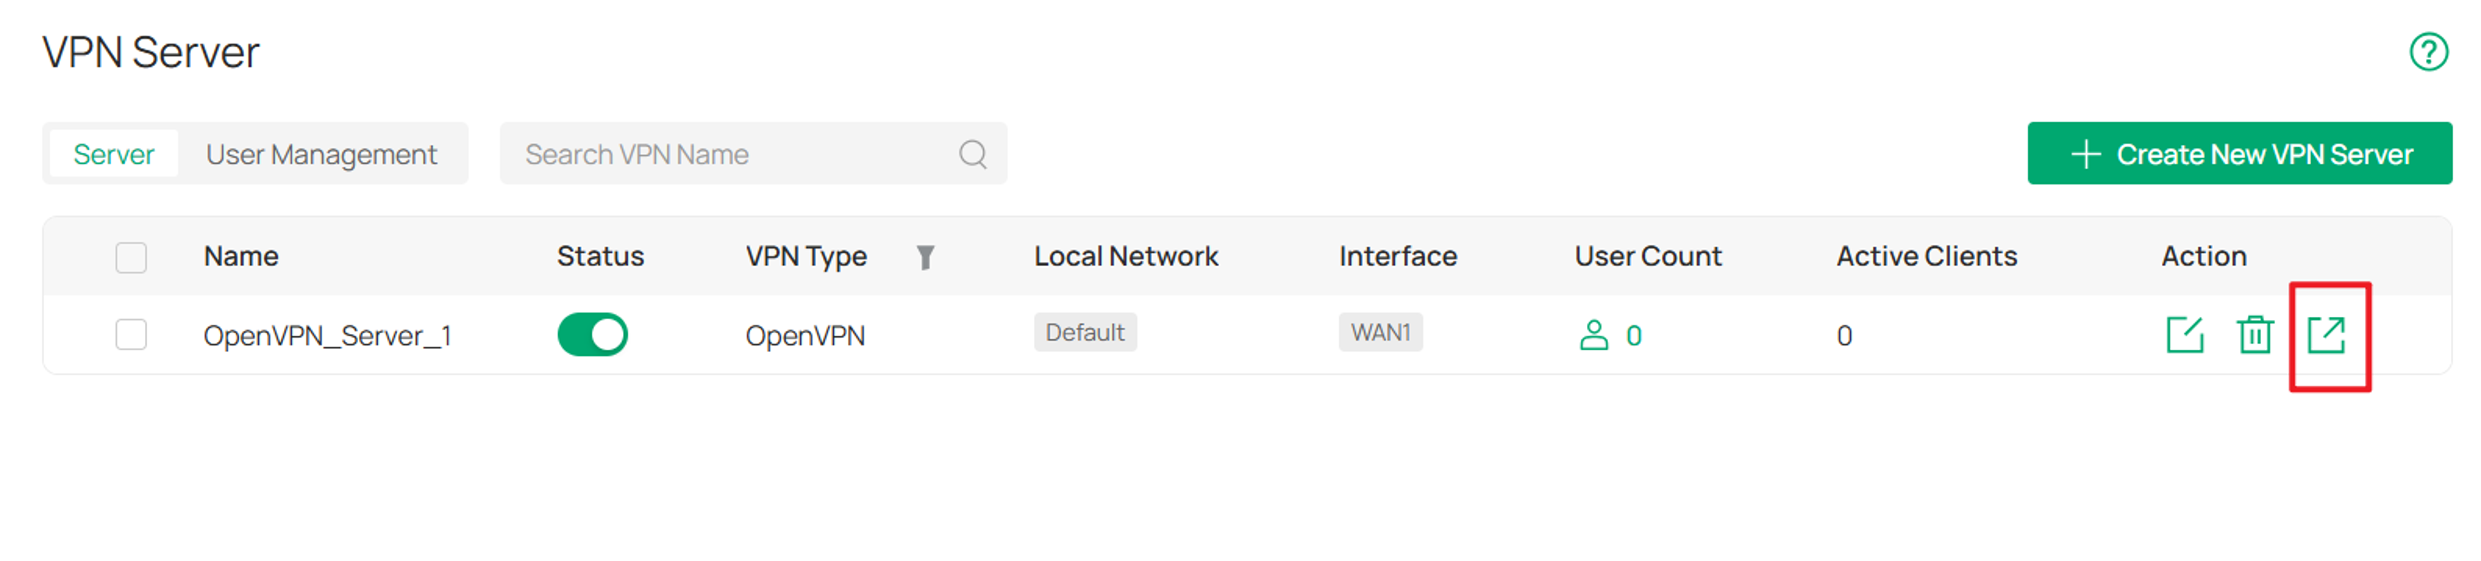
Step 6. Export the OpenVPN configuration file.
Navigate to the VPN Server page and export the generated OpenVPN configuration file.
Step 7. Configure client devices.
Import the OpenVPN file to the remote device. For different remote devices/operating systems, please refer to: How to Set Up an OpenVPN Connection with Omada Gateways on Client Devices with Different Operating Systems
Configuration for OpenVPN Client
OpenVPN Client
Omada Gateway acts as an OpenVPN client, enabling clients on a LAN to securely access remote sites or the internet.
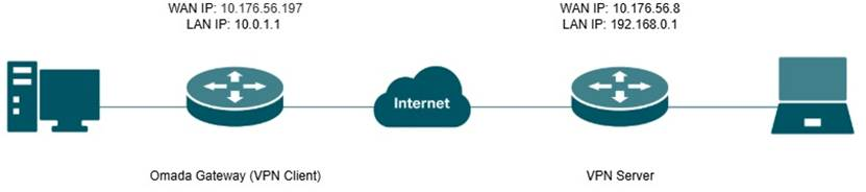
Step 1. Export the OpenVPN file from the OpenVPN Server.
Obtain the OpenVPN configuration file from the OpenVPN Server.
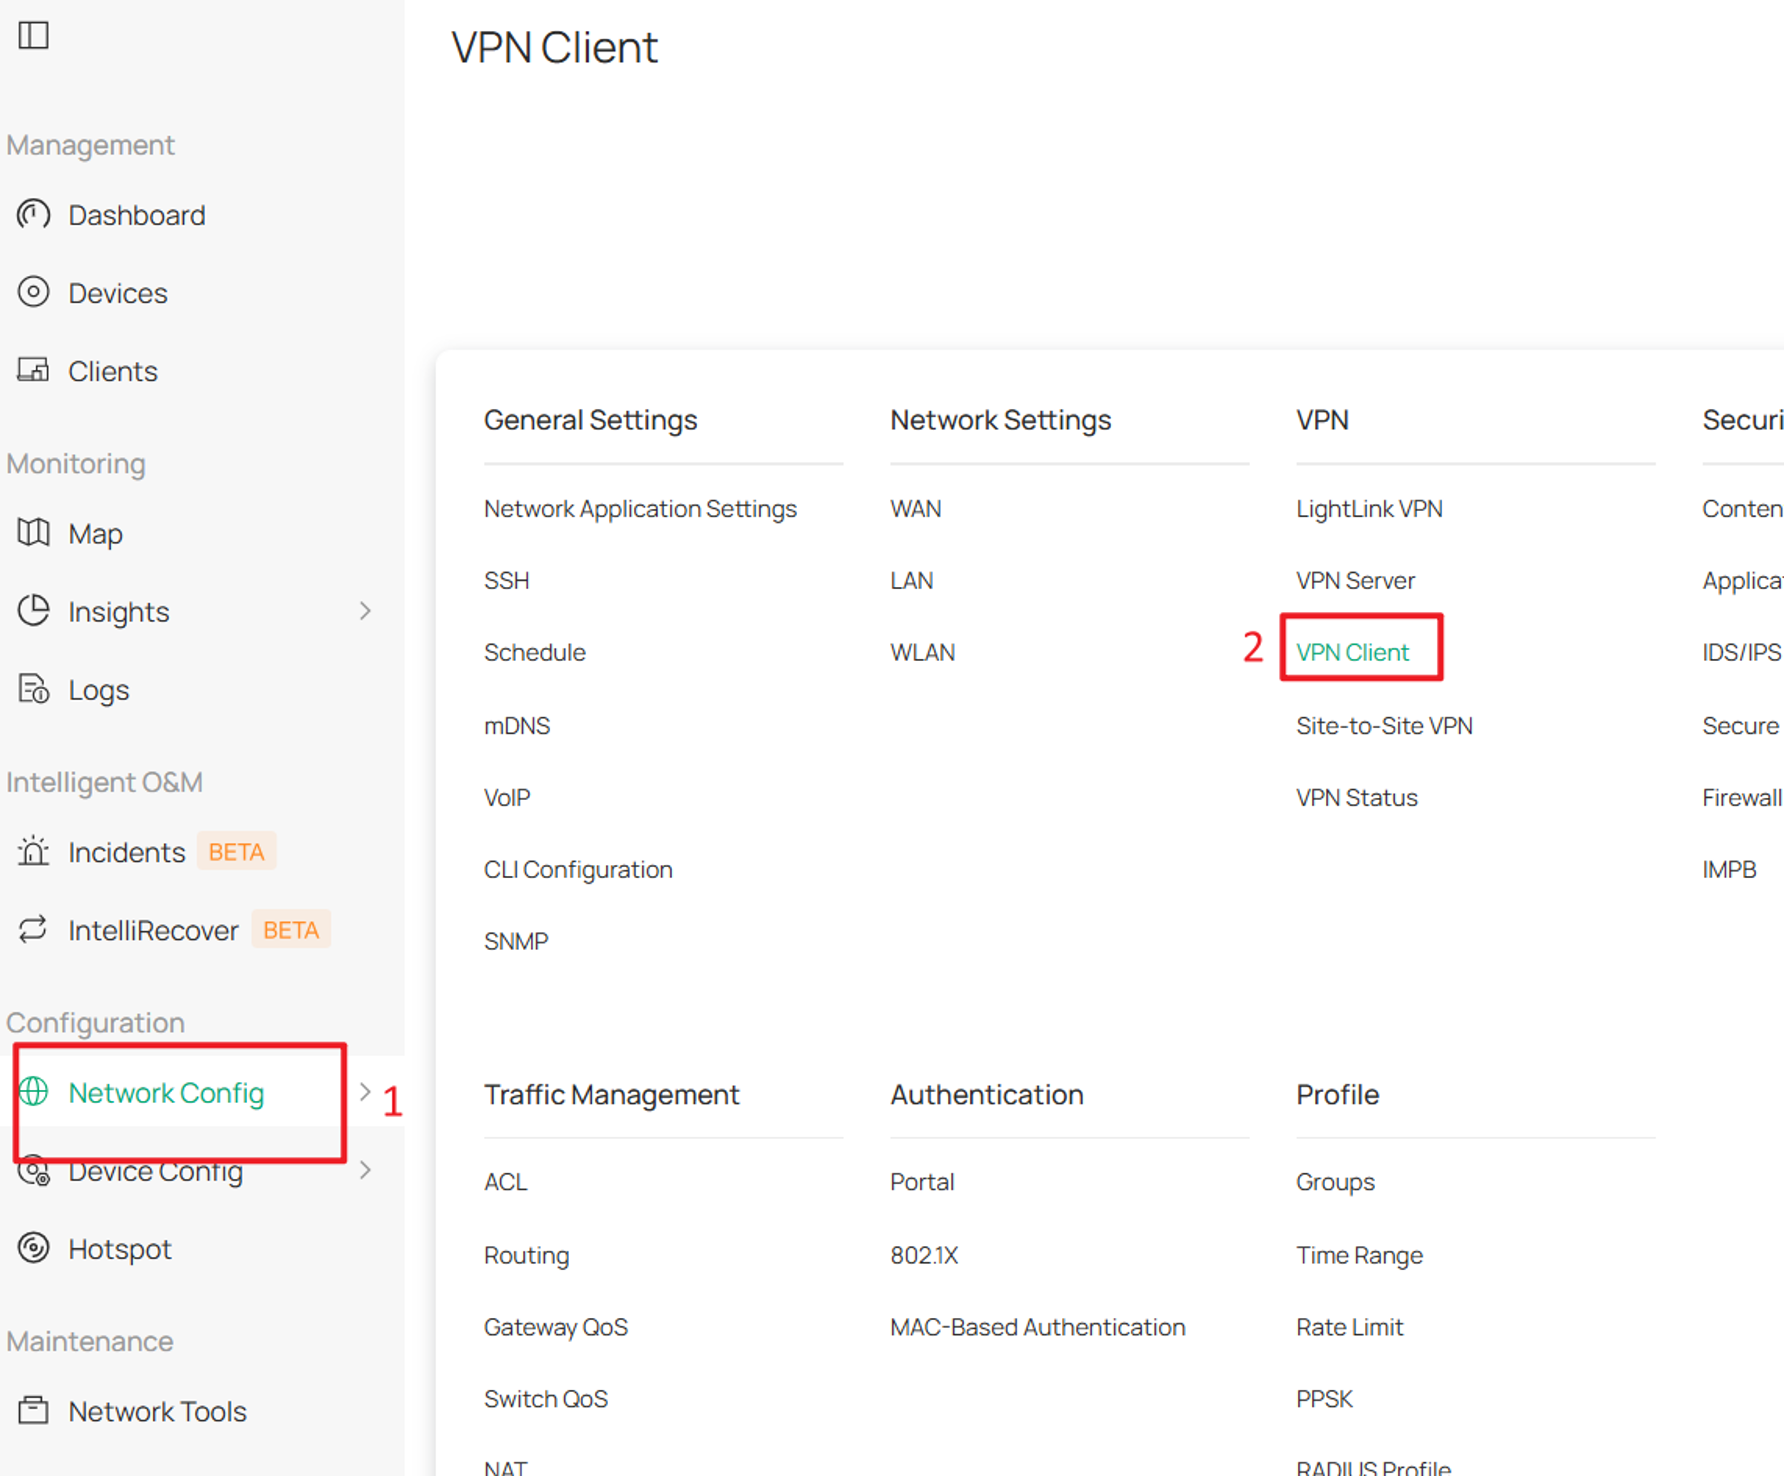
Step 2. Create an OpenVPN Client.
Navigate to Network Config > VPN > VPN Client and click Create New VPN Client.
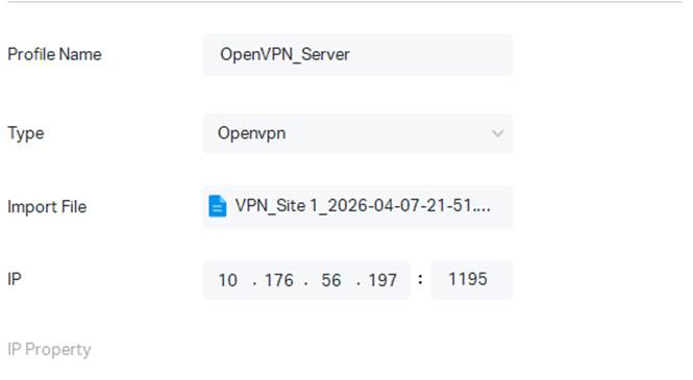
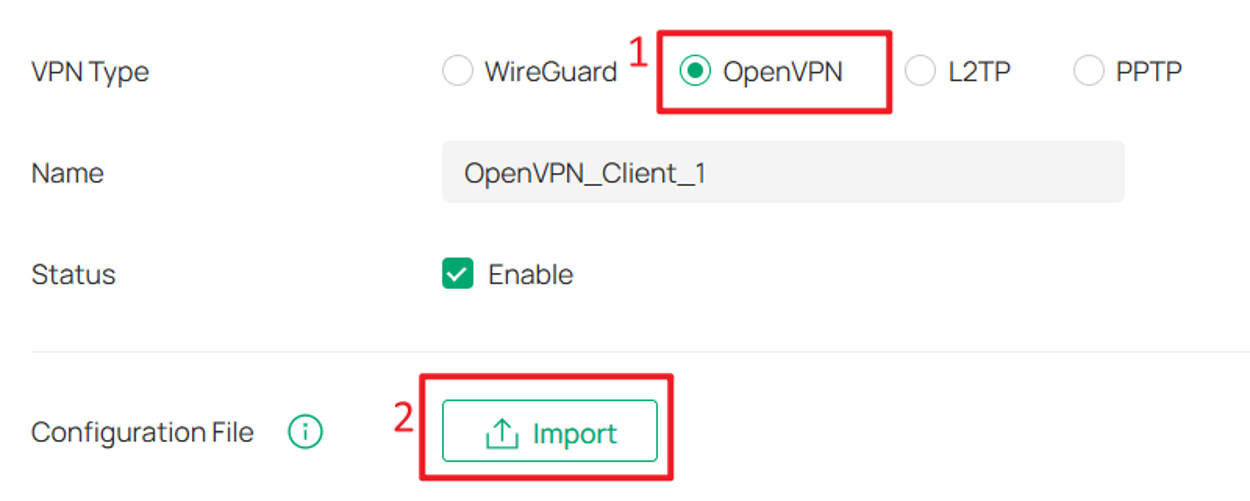
Step 3. Import the OpenVPN file.
Select OpenVPN and import the OpenVPN configuration file.
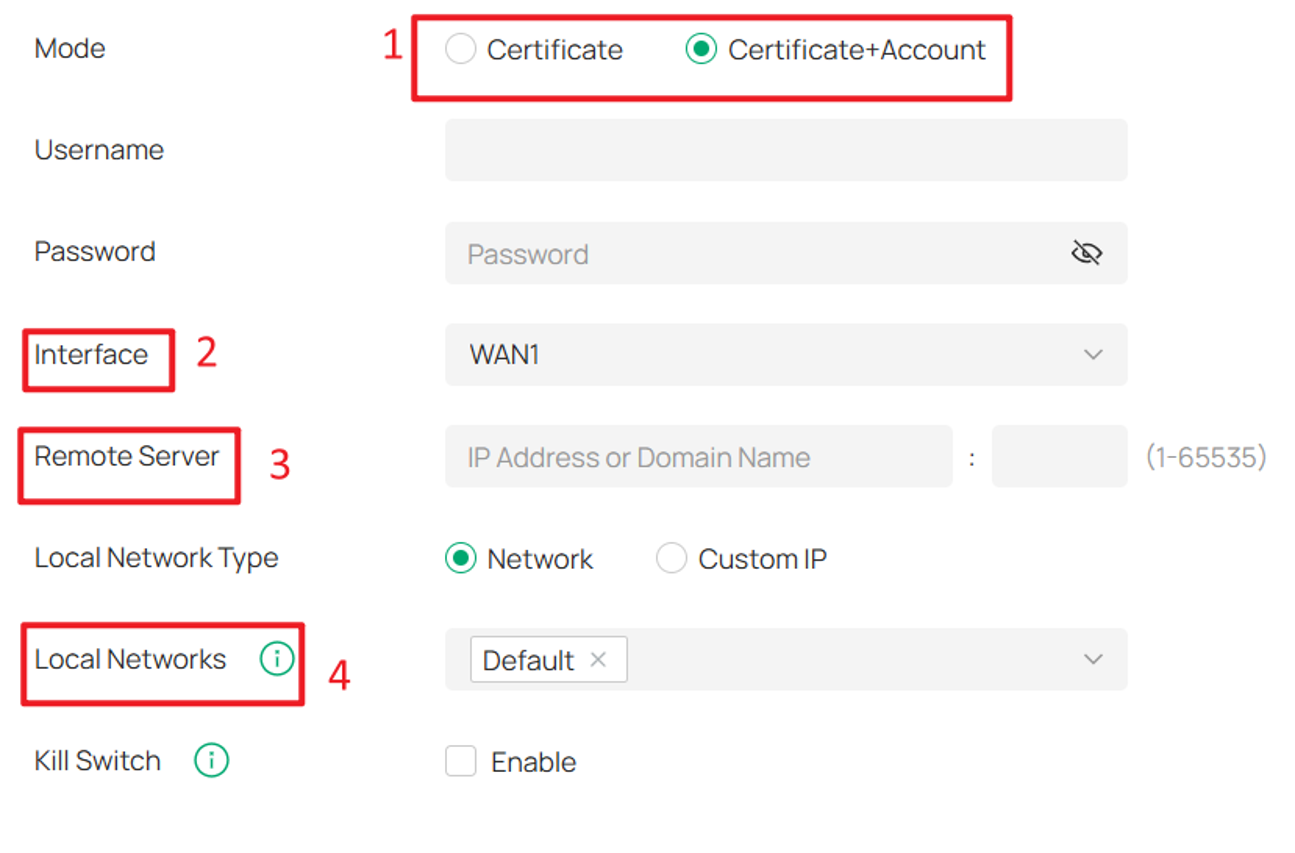
Step 4. Configure client settings.
After importing the OpenVPN configuration file, select the interface and local networks that will be accessible through the VPN tunnel.
If local authentication is required, select Certificate + Account and enter the corresponding credentials.
Verification
Step 1. Open VPN status.
Navigate to Network Config > VPN Status.
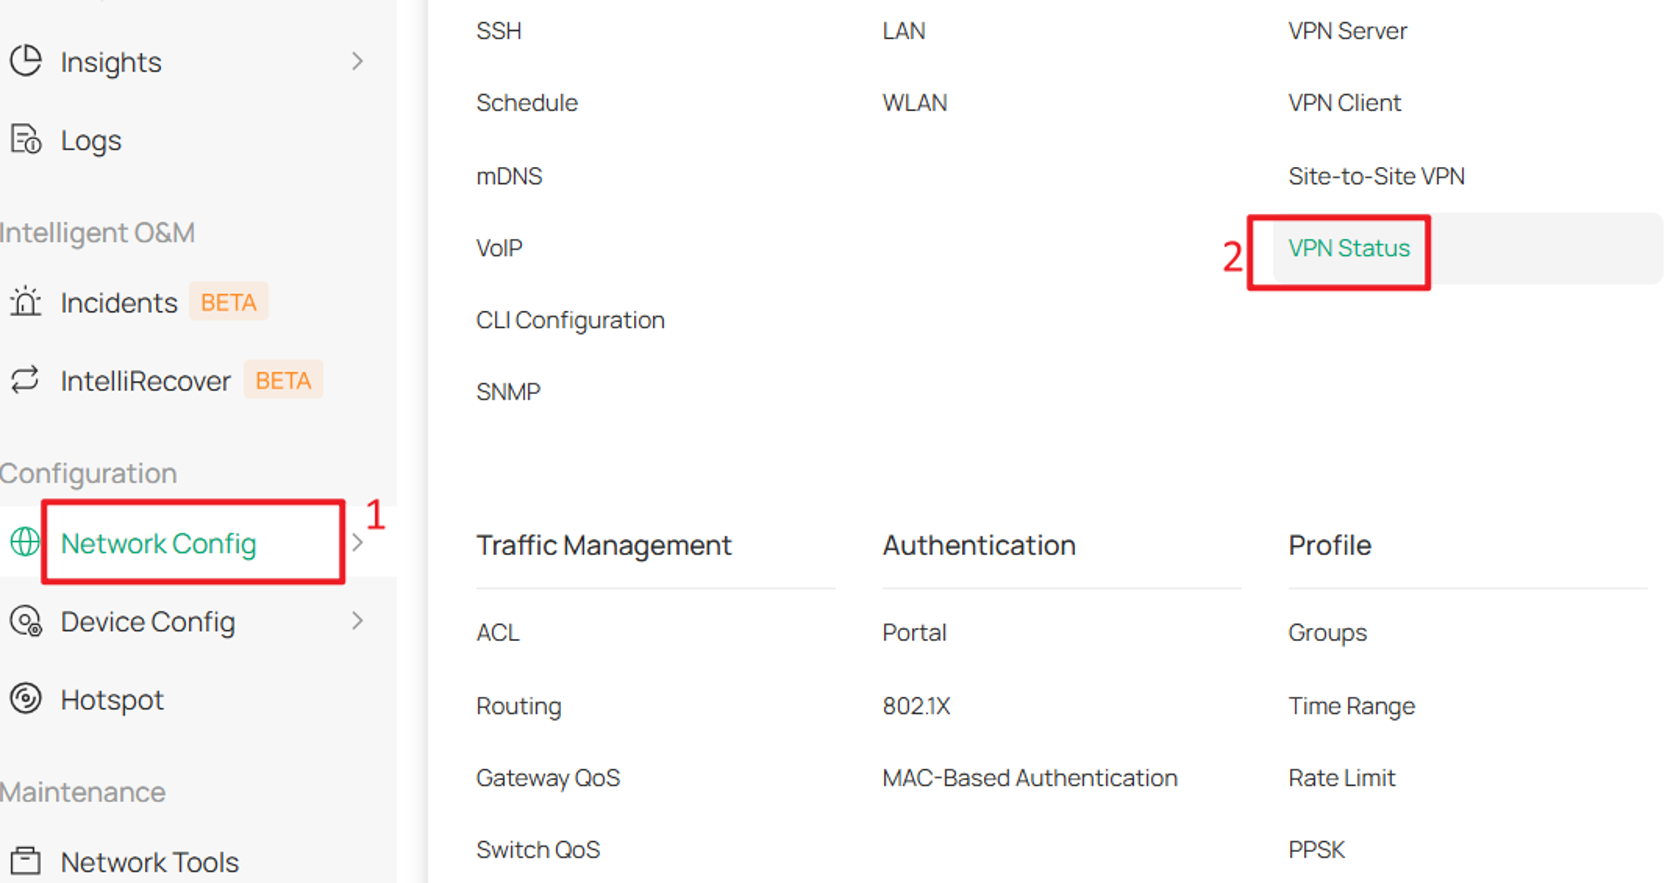
Step 2. Verify OpenVPN server status.
Navigate to VPN Server > OpenVPN and verify that the VPN tunnel status is connected.

Step 3. Verify OpenVPN client status.
Navigate to VPN Client > OpenVPN and verify that the VPN tunnel status is connected.

Conclusion
After completing the OpenVPN Server or OpenVPN Client configuration, secure VPN connectivity can be established for remote access and site-to-site communication. Administrators can monitor tunnel status through VPN Status and verify connectivity before deployment to production environments.
To learn more about each function and configuration, please visit Support Home to download or check the manual for your product.
QA
Q1: Why is my remote device not establishing a tunnel to my OpenVPN server hosted on my Omada Gateway?
A1: Check whether the gateway is using a public IP or a private IP on its WAN interface. If there is a private IP address, please set up port forwarding on your main router first. And make sure the settings on both the client and server sites are correct and matchable.
Q2: Why can't I see the High-Performance Mode option?
A2: In Omada Controller 6.4, High-Performance Mode is currently available only on Omada Fusion Gateway series (running supported firmware versions). Additional Omada gateway models are planned to support this feature in future firmware releases. Ensure that your gateway is running a firmware version compatible with Omada Controller 6.4 or later.
