


Contents
Objective
This article provides a step-by-step guide on how to connect an Alarm device or Audio device to an Omada Camera
Requirements
- Omada Camera (with an alarm/audio interface)
Introduction
This article applies to Omada cameras equipped with an alarm and audio interface. Commonly used external alarms and audio equipment include:
|
Type |
Role |
Common Devices |
|
Audio In |
Used for sound collection |
microphone, pickup |
|
Audio Out |
Used for sound output |
speakers, subwoofers, loudspeakers |
|
Alarm In |
Built-in sensors detect environmental abnormalities and provide abnormal signals |
smoke detectors, infrared detectors |
|
Alarm Out |
After receiving the alarm signal, it alerts the user |
buzzer, alarm light |
Configuration
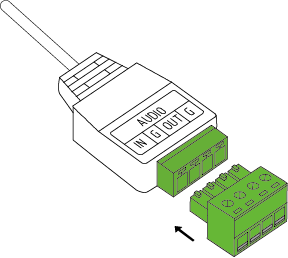
Before configuring the external alarm or audio device, connect the included terminal block to the corresponding alarm or audio interface on the camera.
Connect the Audio In device (using a microphone as an example)
For Three-wire system microphone for CCTV camera, please refer to the following diagram for the connection:
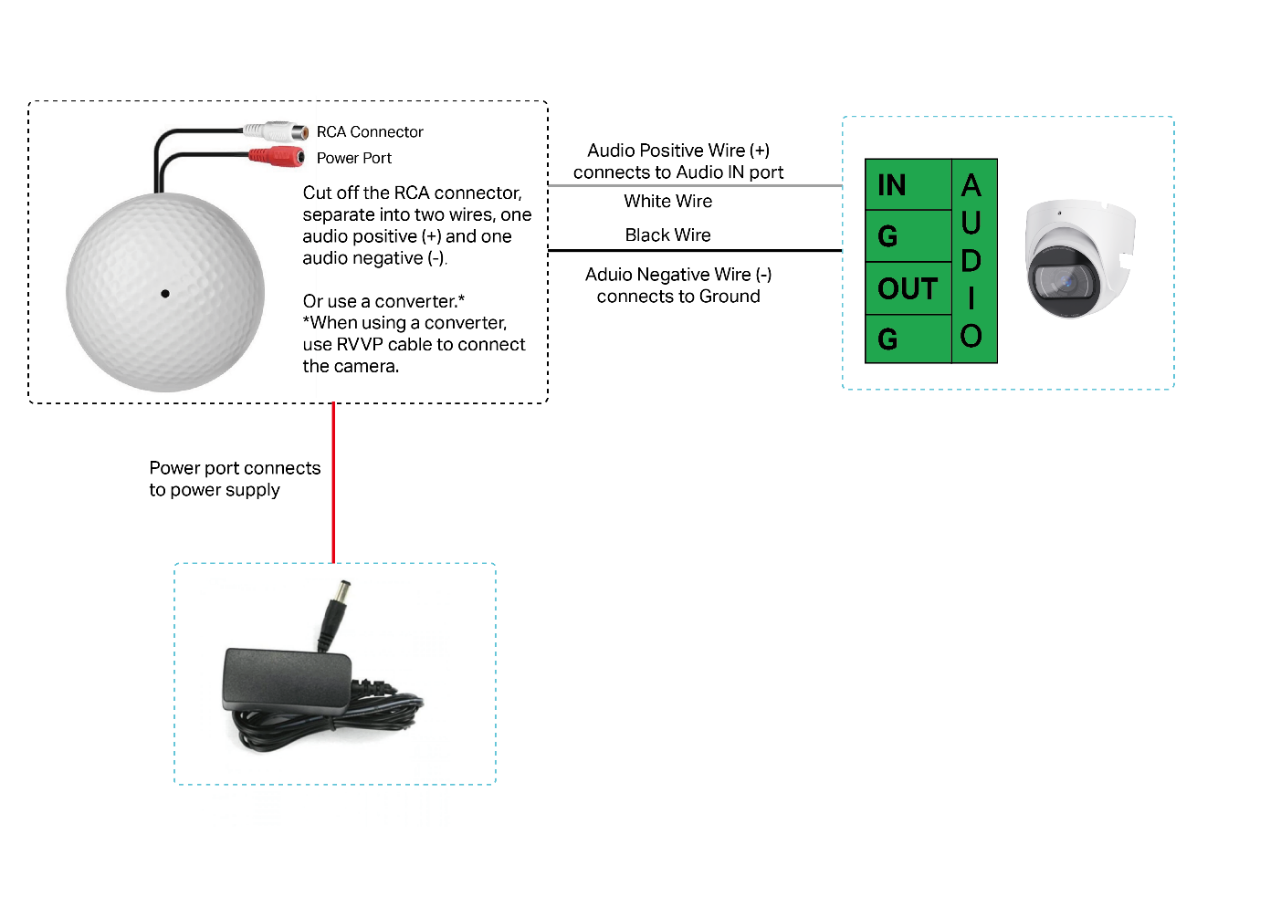
Microphone with RCA connector
Some microphones have dedicated interfaces for power and audio, which are pre-made connectors. Please refer to the following diagram for the connection:
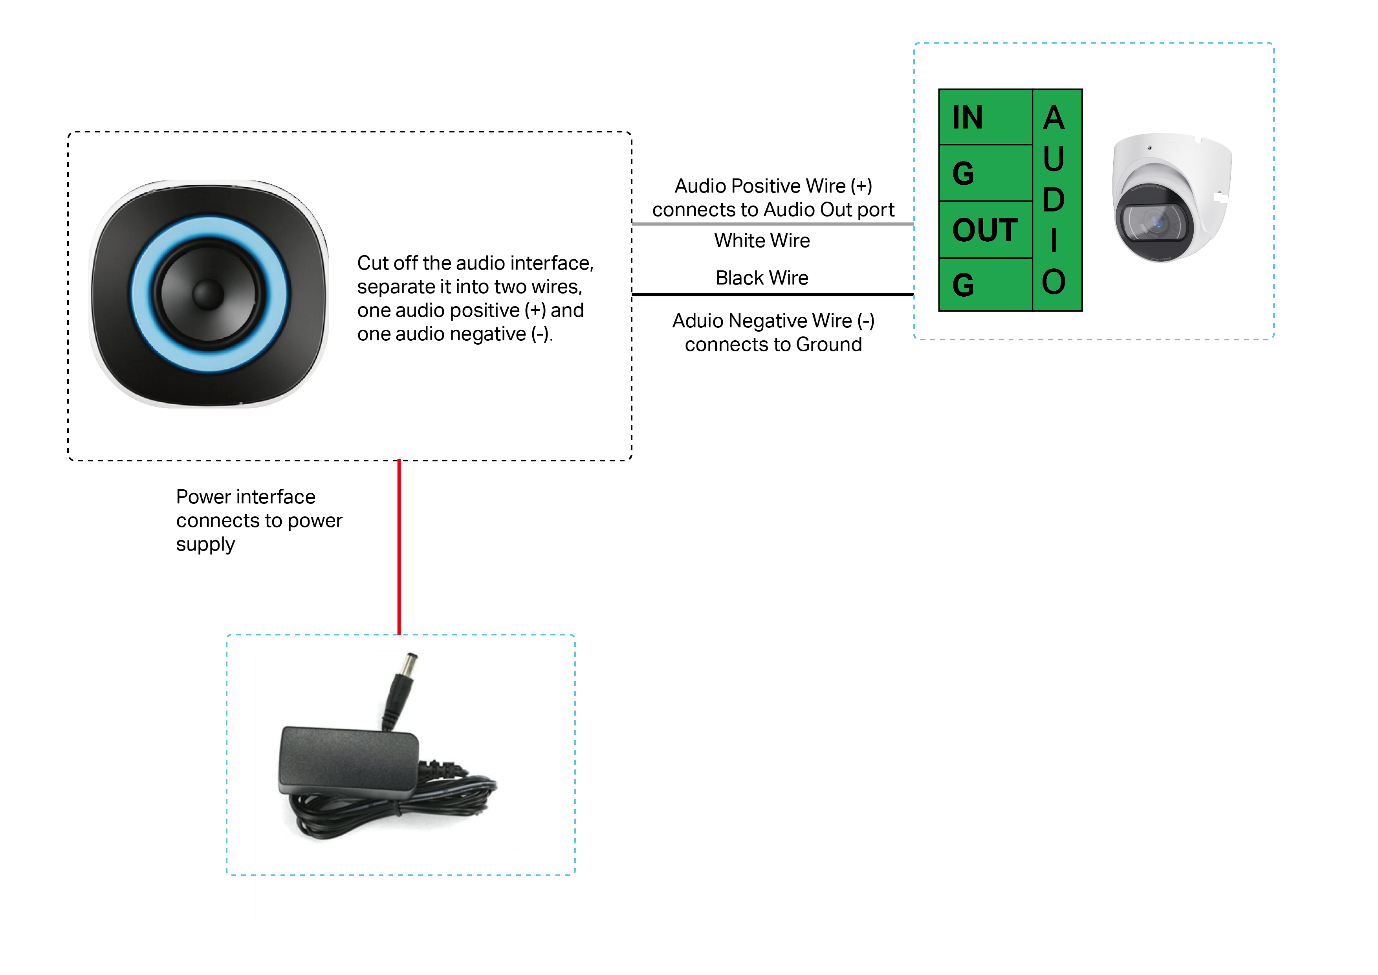
Connect the Audio Out device (using a speaker as an example)
Please refer to the following diagram for the connection:
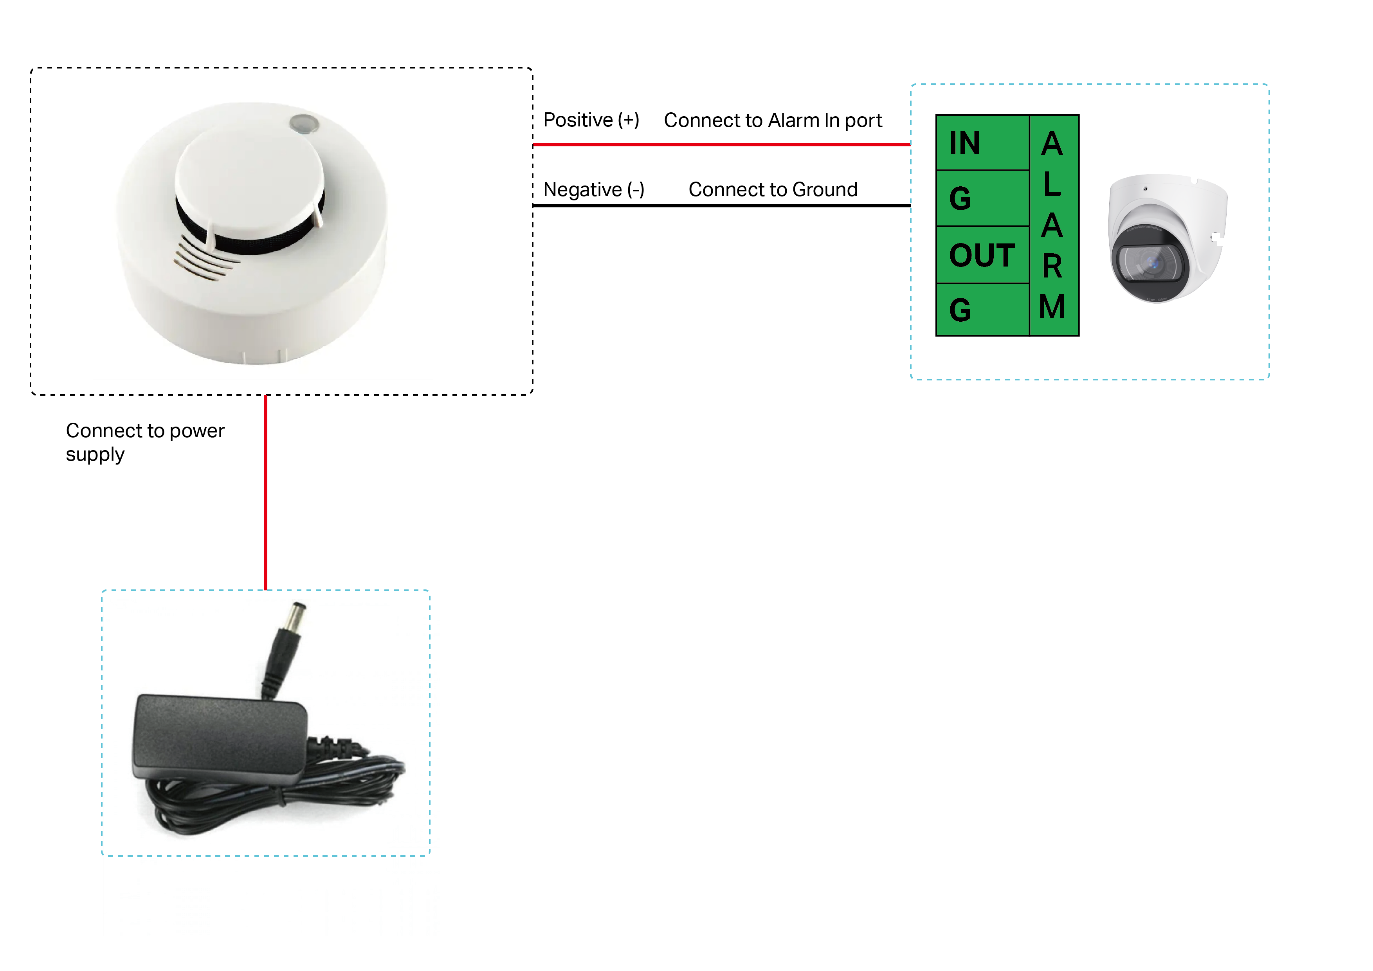
Connect the Alarm In device (using a smoke sensor as an example)
When an external alarm device detects an abnormal situation, it sends a signal to notify the camera, which then takes immediate measures to address the issue. There are various types of commonly used external detectors, such as sensors for sound, infrared, smoke, etc., which are connected to the Alarm In port of the device. Using a smoke sensor as an example, the connection diagram is as follows:
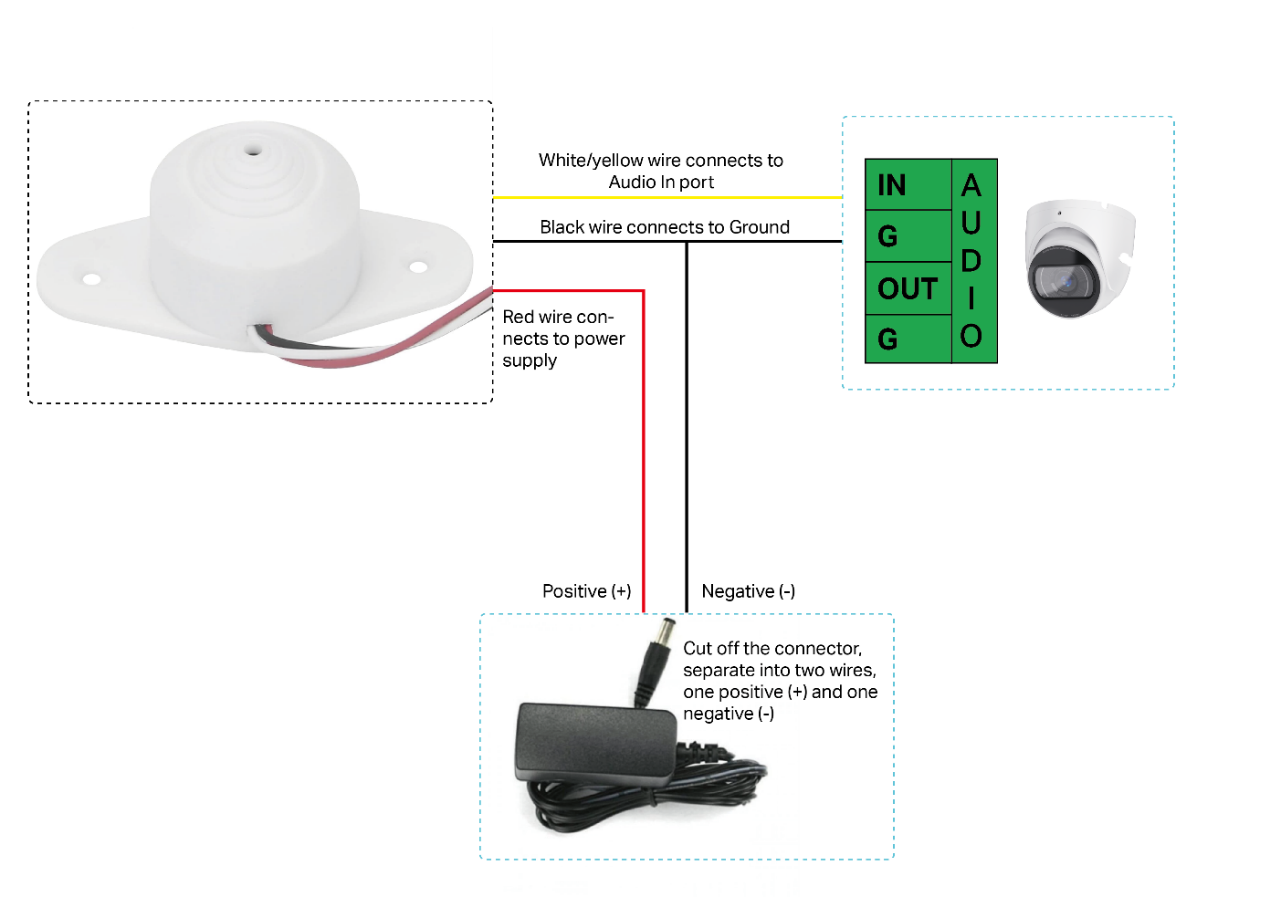
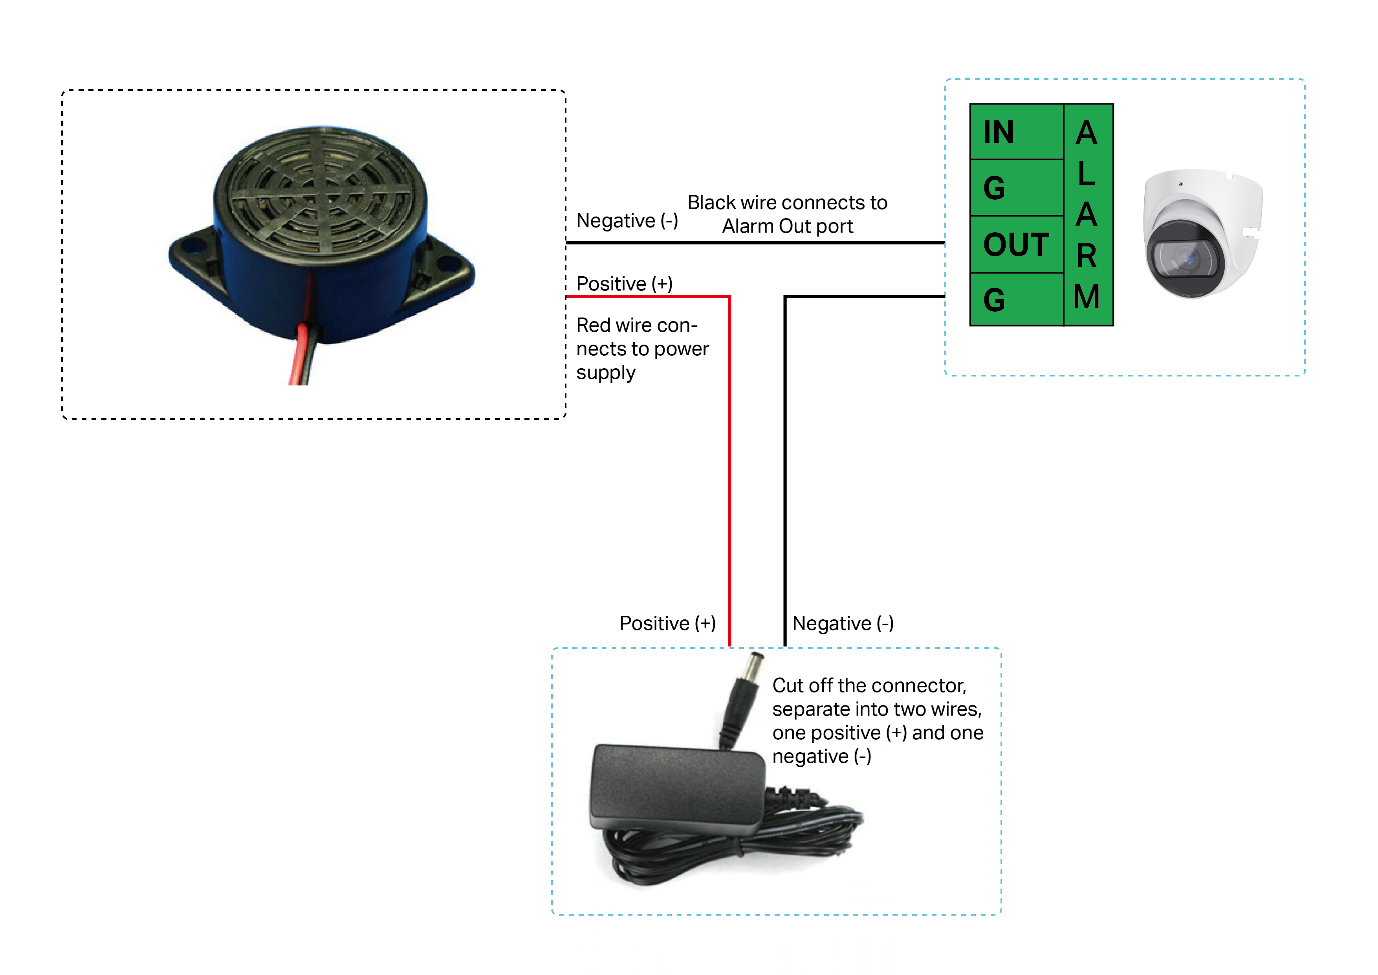
Connect the Alarm Out device (using a buzzer as an example)
Omada devices can trigger alarms through external devices, such as alarm lights, sirens, and buzzers. These alarm devices are connected to the camera’s Alarm Out port. Using a buzzer as an example, the connection diagram is as follows:
Conclusion
With the steps above, you have successfully connected an Alarm device or Audio device to an Omada Camera.
Get to know more details of each function and configuration please go to Download Center to download the manual of your product.
