


Configuration for Controller Mode Using PC
Configuration for Controller Mode Using Mobile Omada App
Introduction
Building an Omada Mesh network allows you to extend your Wi-Fi coverage to areas where running an Ethernet cable is difficult or impossible. In Controller Mode, the Omada Controller (Software, Hardware, or Cloud-Based) manages the link between the APs automatically. This guide explains how to build a mesh network via Omada EAP in controller mode, both via the Omada app or a PC.
Learn the difference between Omada Mesh VS Deco Mesh VS OneMesh
Requirements
- Omada Controller
- At least two Omada EAPs
Configuration
Configuration for Controller Mode Using PC
Network Topology
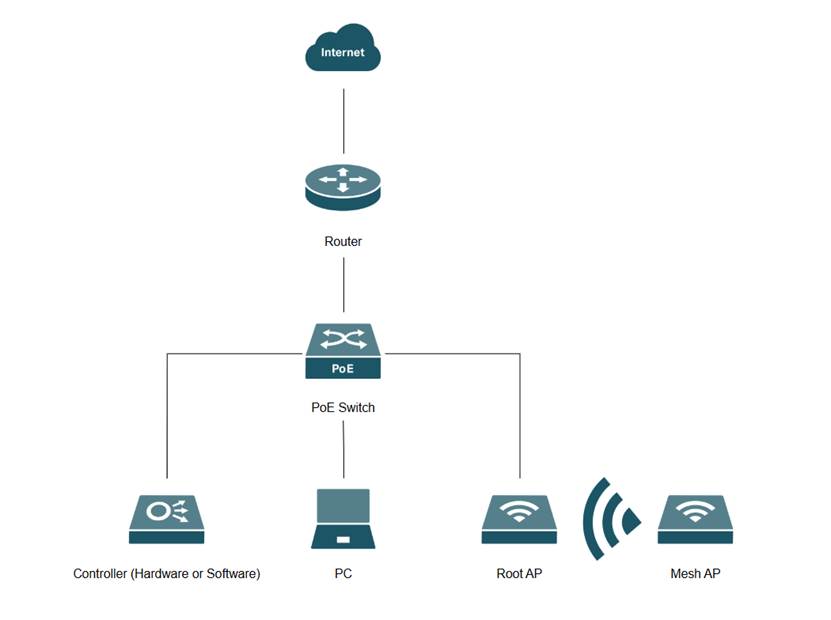
A Windows 11 Laptop is used for this section along with controller version 6.2.0.17, an OC200, ER7206 , SG2008P, and EAP772. Follow the same steps for a software and cloud controller.
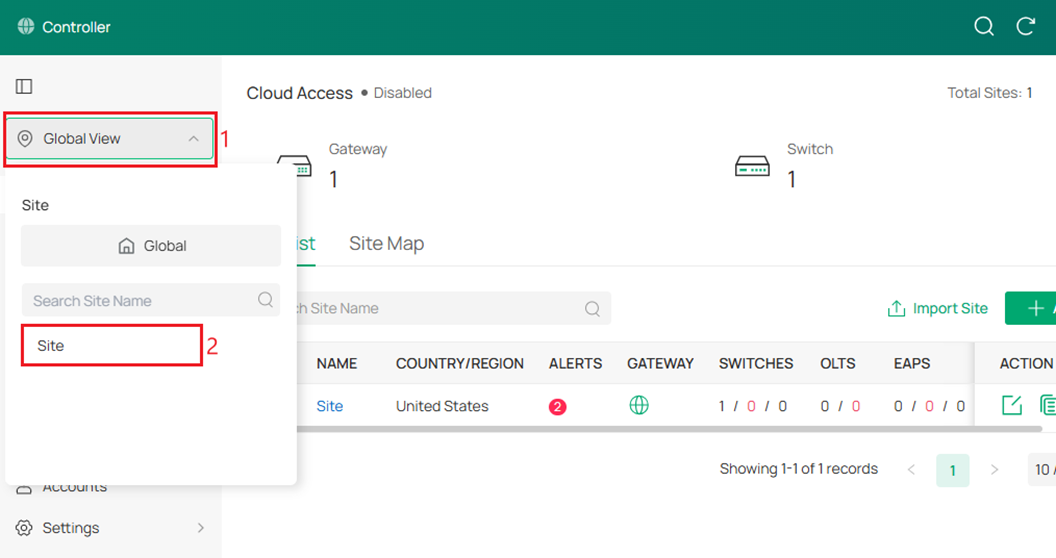
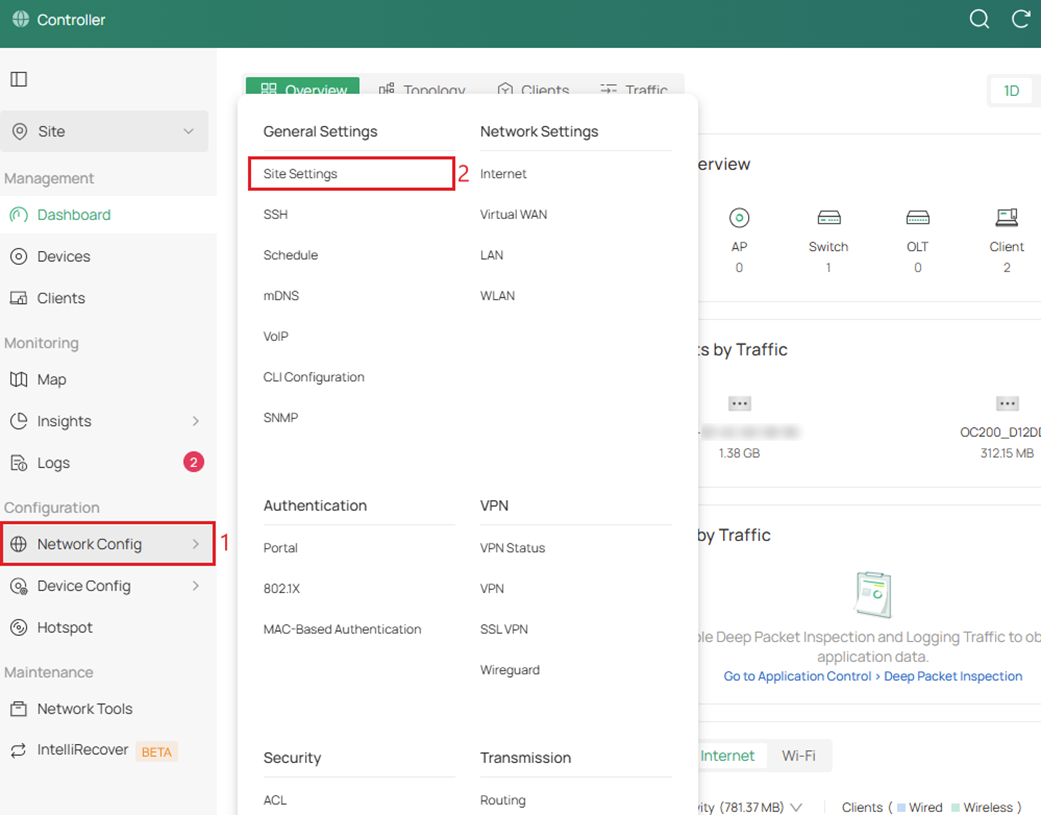
Step 1. Go to Global View and select the site. In Site View, go to Network Config > Site Settings. Scroll down to the Wireless Features section, ensure Mesh is enabled, and click Save.
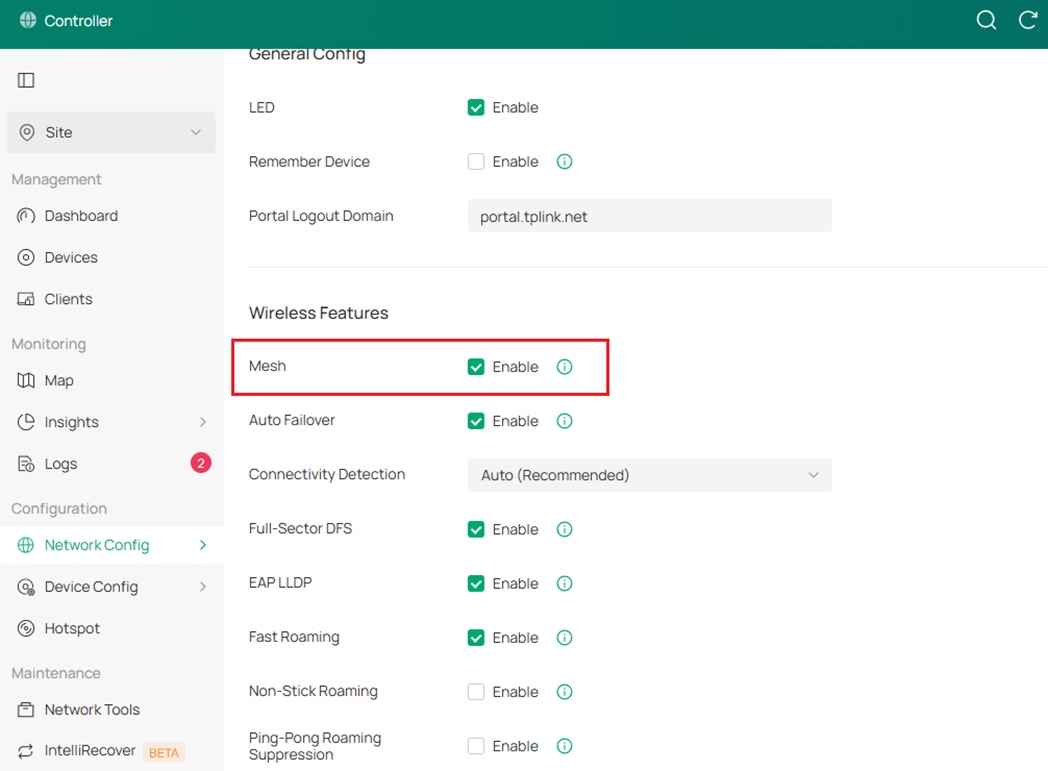
Note: Mesh mode is enabled by default.
Step 2. Connect the Mesh AP to power using a PoE injector or DC adapter, and once it is detected, it will appear with a Pending status in the Device List with a Wireless Icon next to its name. Click the Adopt button under the Action column.
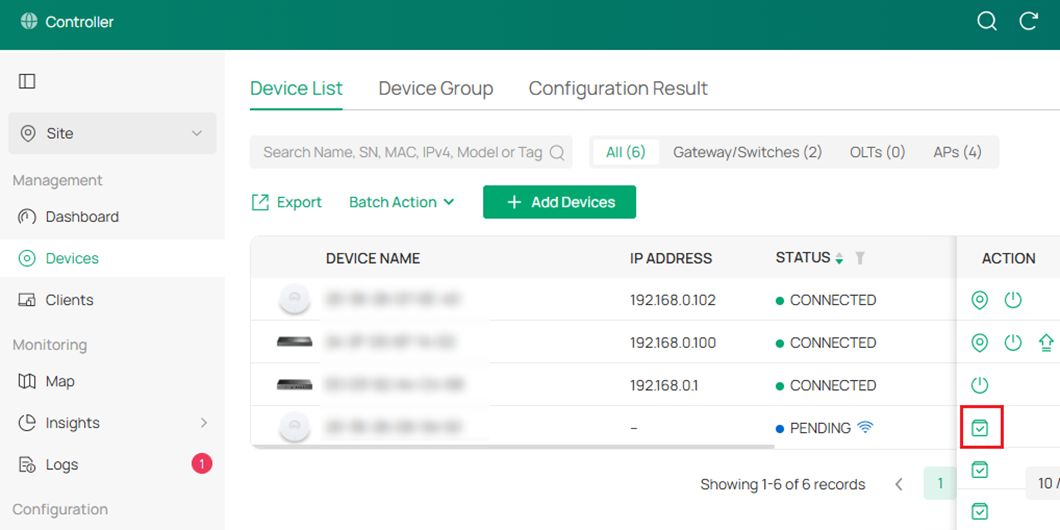
Note: Do not connect an Ethernet cable from the Mesh AP to the network switch
Step 3. Select the Uplink Device (Root AP). 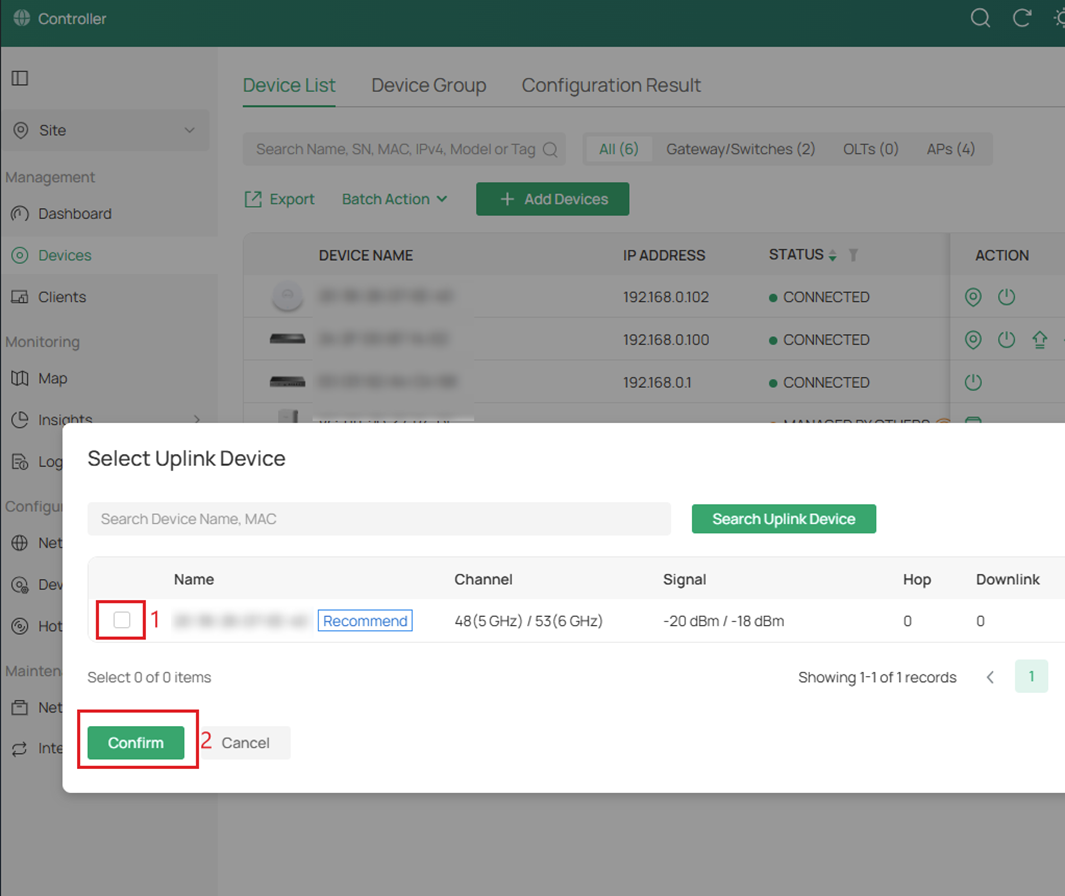
Note: The status of the Mesh AP will cycle through Adopting, Provisioning, and finally Connected (Wireless)
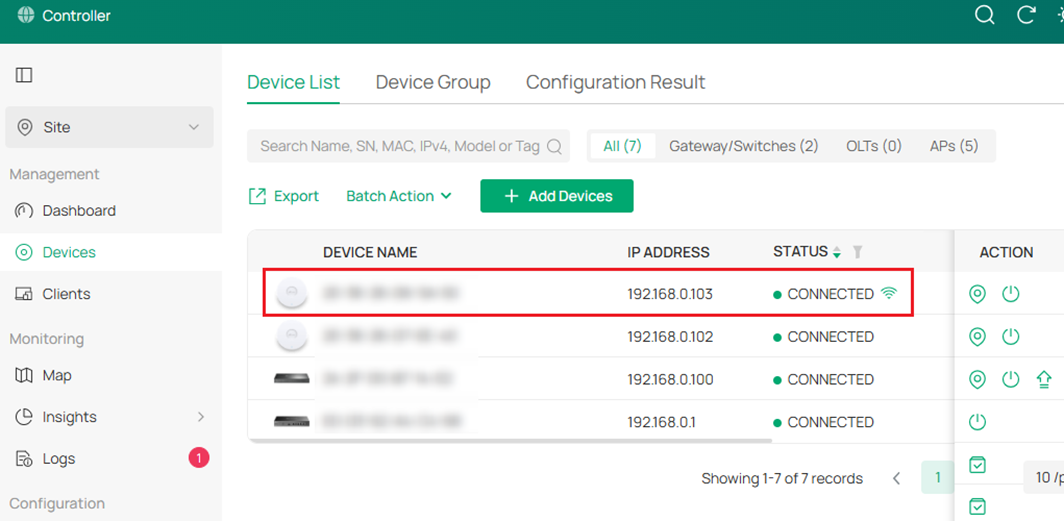
Step 4. In Device List, the Mesh AP will now show Connected to the Root AP wirelessly, and a mesh network has been created.
Note: If the AP does not appear, ensure it is reset to factory defaults and that it is not plugged into any Ethernet source that could give it a "wired" identity.
Configuration for Controller Mode Using Mobile Omada App
Network Topology
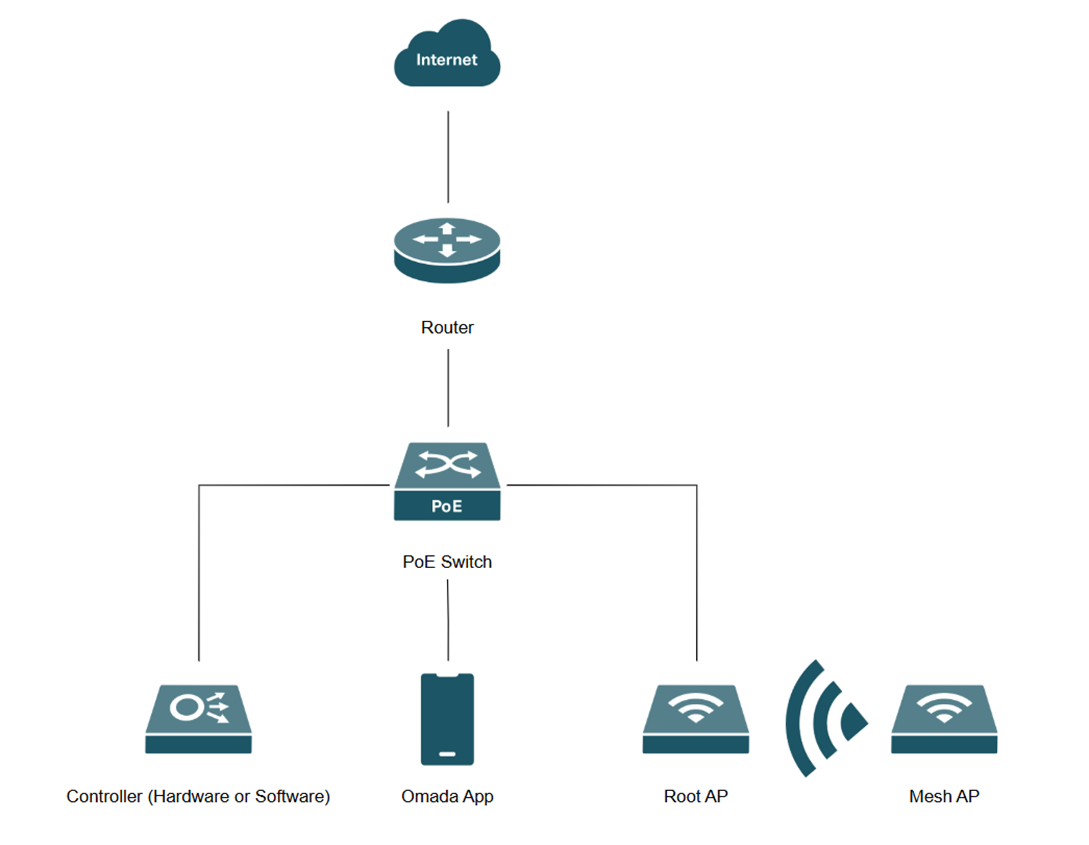
Note: A mobile phone with the Omada App is used for this section along with controller version 6.2.0.17, an OC200, ER7206 , SG2008P, and EAP772. Follow the same steps for a software and cloud controller.
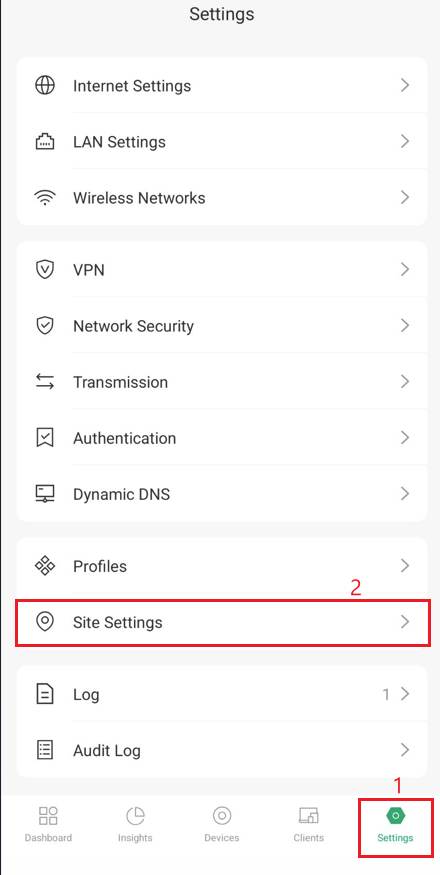
Step 1. To check mesh settings, go to Site > Settings and click on Site Settings.
Step 2. In Site Settings, scroll down to Advanced Options and ensure Mesh is enabled.
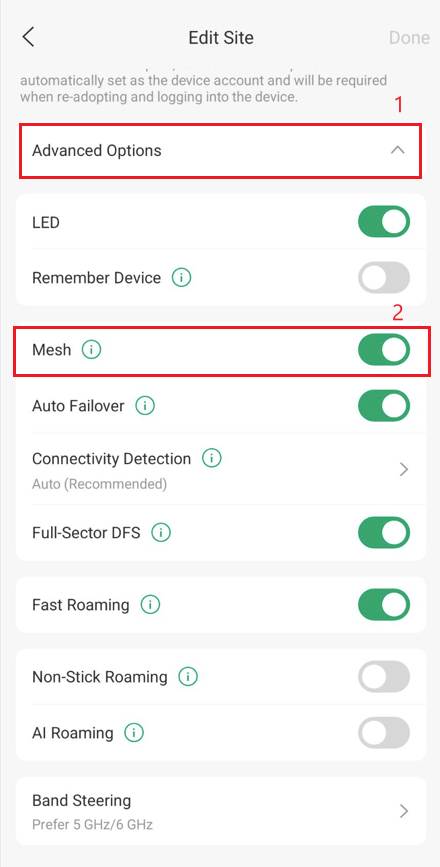
Note: Mesh is enabled by default.
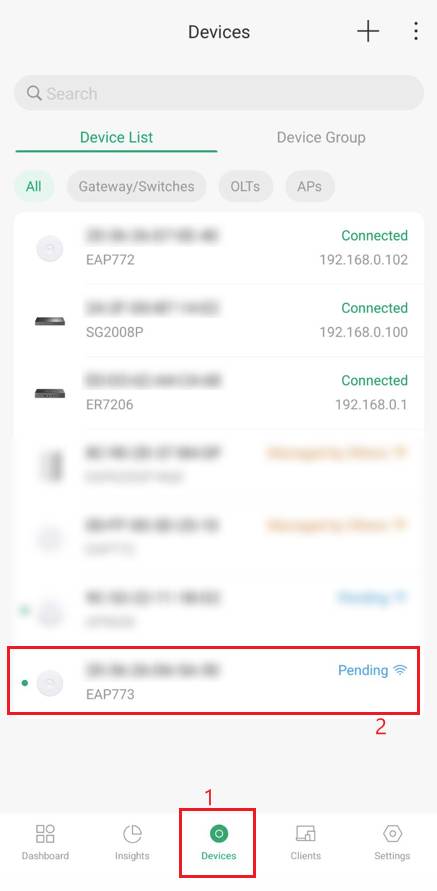
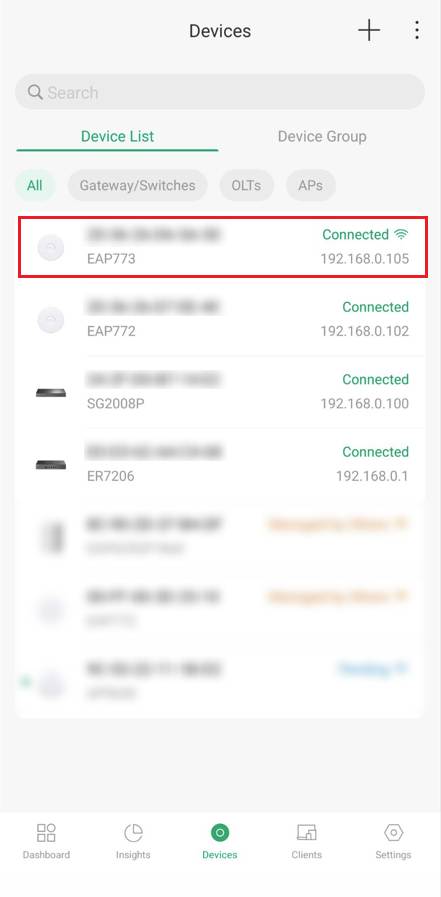
Step 3. Connect the Mesh AP to power using a PoE injector or DC adapter, and once it is detected, it will appear with a Pending status in the Device List with a Wireless Icon next its name.
Note: Do not connect an Ethernet cable from the Mesh AP to the network switch.
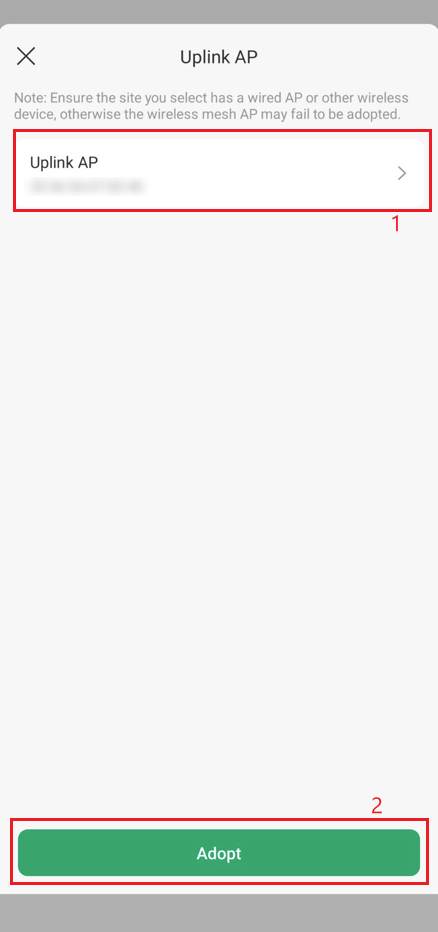
Step 4. Select the Uplink Device (Root AP) and click Adopt.
Note: The status of the Mesh AP will cycle through Adopting, Provisioning, and finally Connected (Wireless)
Step 5. In Device List, the Mesh AP will now show Connected to the Root AP, and a mesh network has been created.
Note: If the AP does not appear, ensure it is reset to factory defaults and that it is not plugged into any Ethernet source that could give it a "wired" identity.
Conclusion
We have successfully built a mesh network via Omada EAP in Controller Mode using a PC and a mobile device with the Omada App.
QA
Q1: Does the Omada Controller need to stay running for the Mesh to work?
A1: Yes. While the Mesh APs will continue to broadcast Wi-Fi if the Controller goes offline, you will lose critical features like Auto Failover (where a Mesh AP finds a new "parent" if one goes down) and Fast Roaming.
Q2: How many "Hops" can I have in a single Mesh chain?
A2: Omada supports up to 3 Hops (Root AP > Mesh 1 > Mesh 2 > Mesh 3). However, keep in mind that every "hop" reduces the available bandwidth by roughly 50%. For the best performance, try to keep your network to a single hop whenever possible.
Q3: How many Mesh APs can connect to a single Root AP?
A3: A single Uplink AP (whether it's the Root or another Mesh AP) can support up to 4 Downlink APs.
Q4: Can I use different EAP models in the same Mesh?
A4: Yes. You can mix and match any Omada EAPs that support the Mesh feature.
Q5: Can I plug a wired device into the Ethernet port of a Mesh AP?
A5: Yes. Once the EAP is connected via Mesh, its Ethernet port acts as a wireless bridge.
Get to know more details of each function and configuration please go to Download Center to download the manual of your product.
