


Content
NAT rule configuration for gateway adoption
Requirements
- Omada Gateways (FW must be fully adapted to controller version 5.15.20)
- Omada Controller (Hardware/Software/Cloud Controller: version 5.15.20.x and above)
- At least one public IP address
Introduction
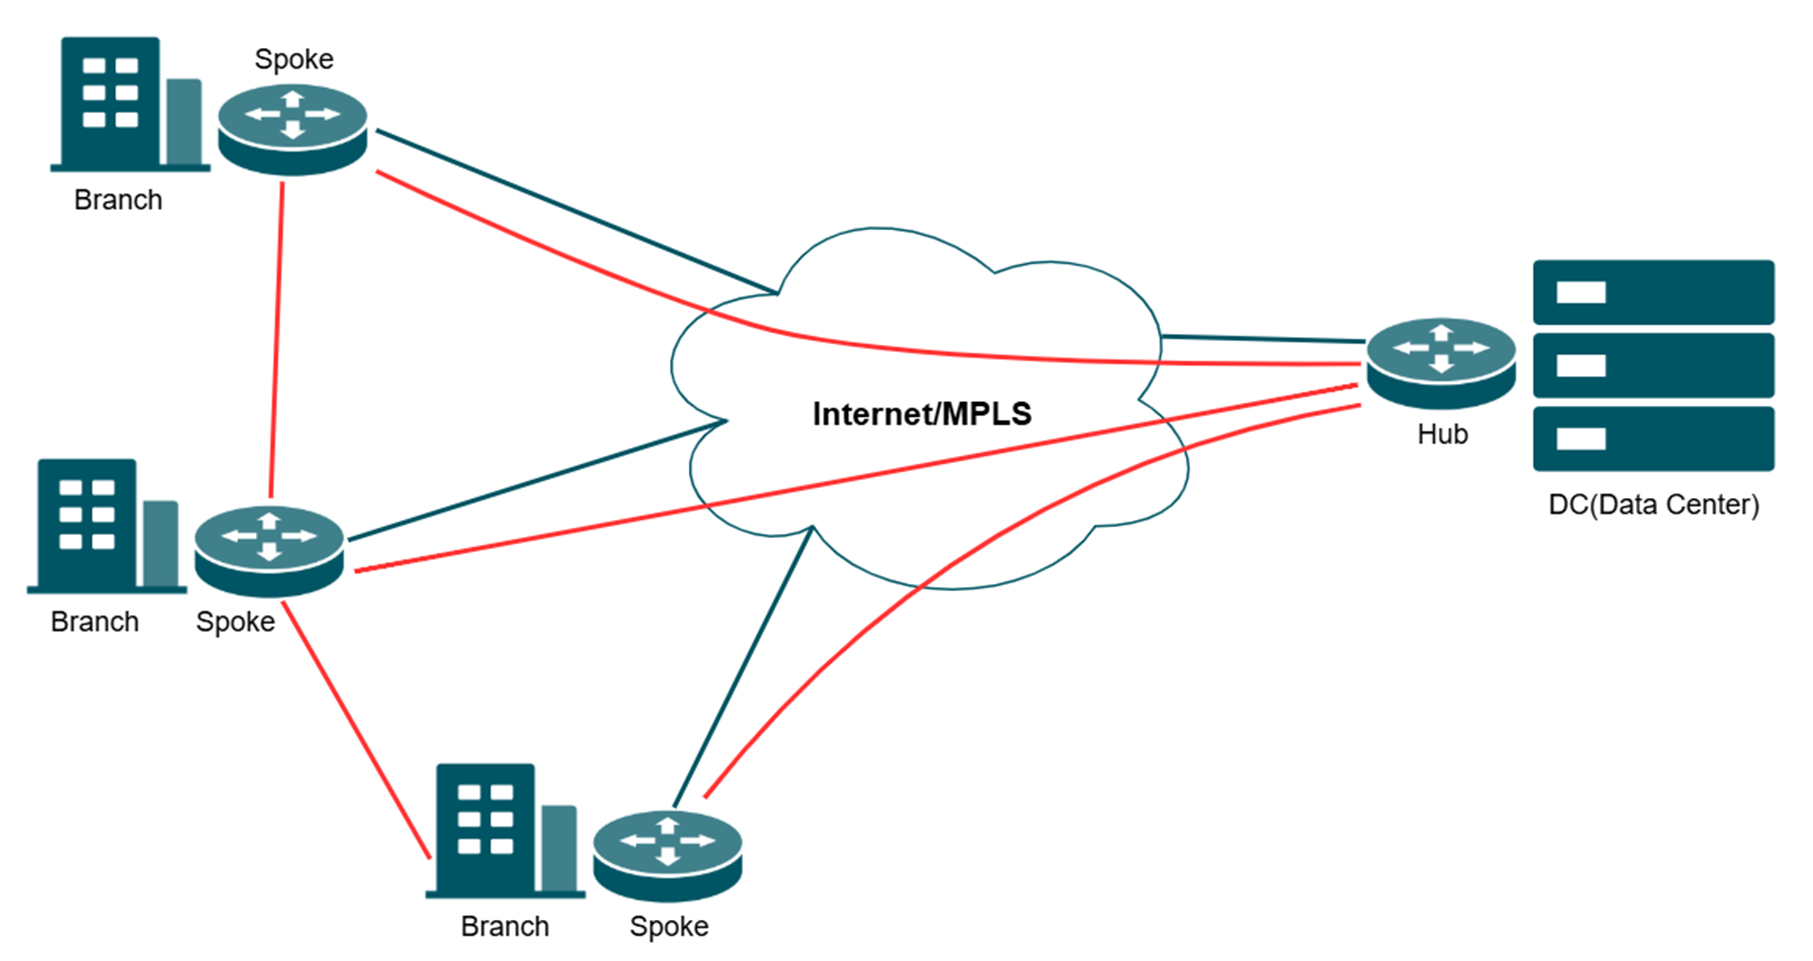
Software-Defined Wide Area Network (SD-WAN) revolutionizes traditional WAN architectures by leveraging centralized control and automation to dynamically route traffic across multiple connections (e.g., MPLS, broadband, LTE). SD-WAN enhances the hub-and-spoke model by integrating intelligent traffic steering and simplified cross-site management. Key benefit is centralized Policy Management, which defines and enforces network rules across all sites from a single Controller.
Note:
- The WAN participating in the networking cannot enable the DMZ function.
- All the spokes need to connect to hub first.
- The network segments participating in the networking should not conflict with each other, and cannot conflict with other site's LAN Network segments (there is an intersection of network segments), as shown in the following figure:
Configuration
NAT rule configuration for gateway adoption
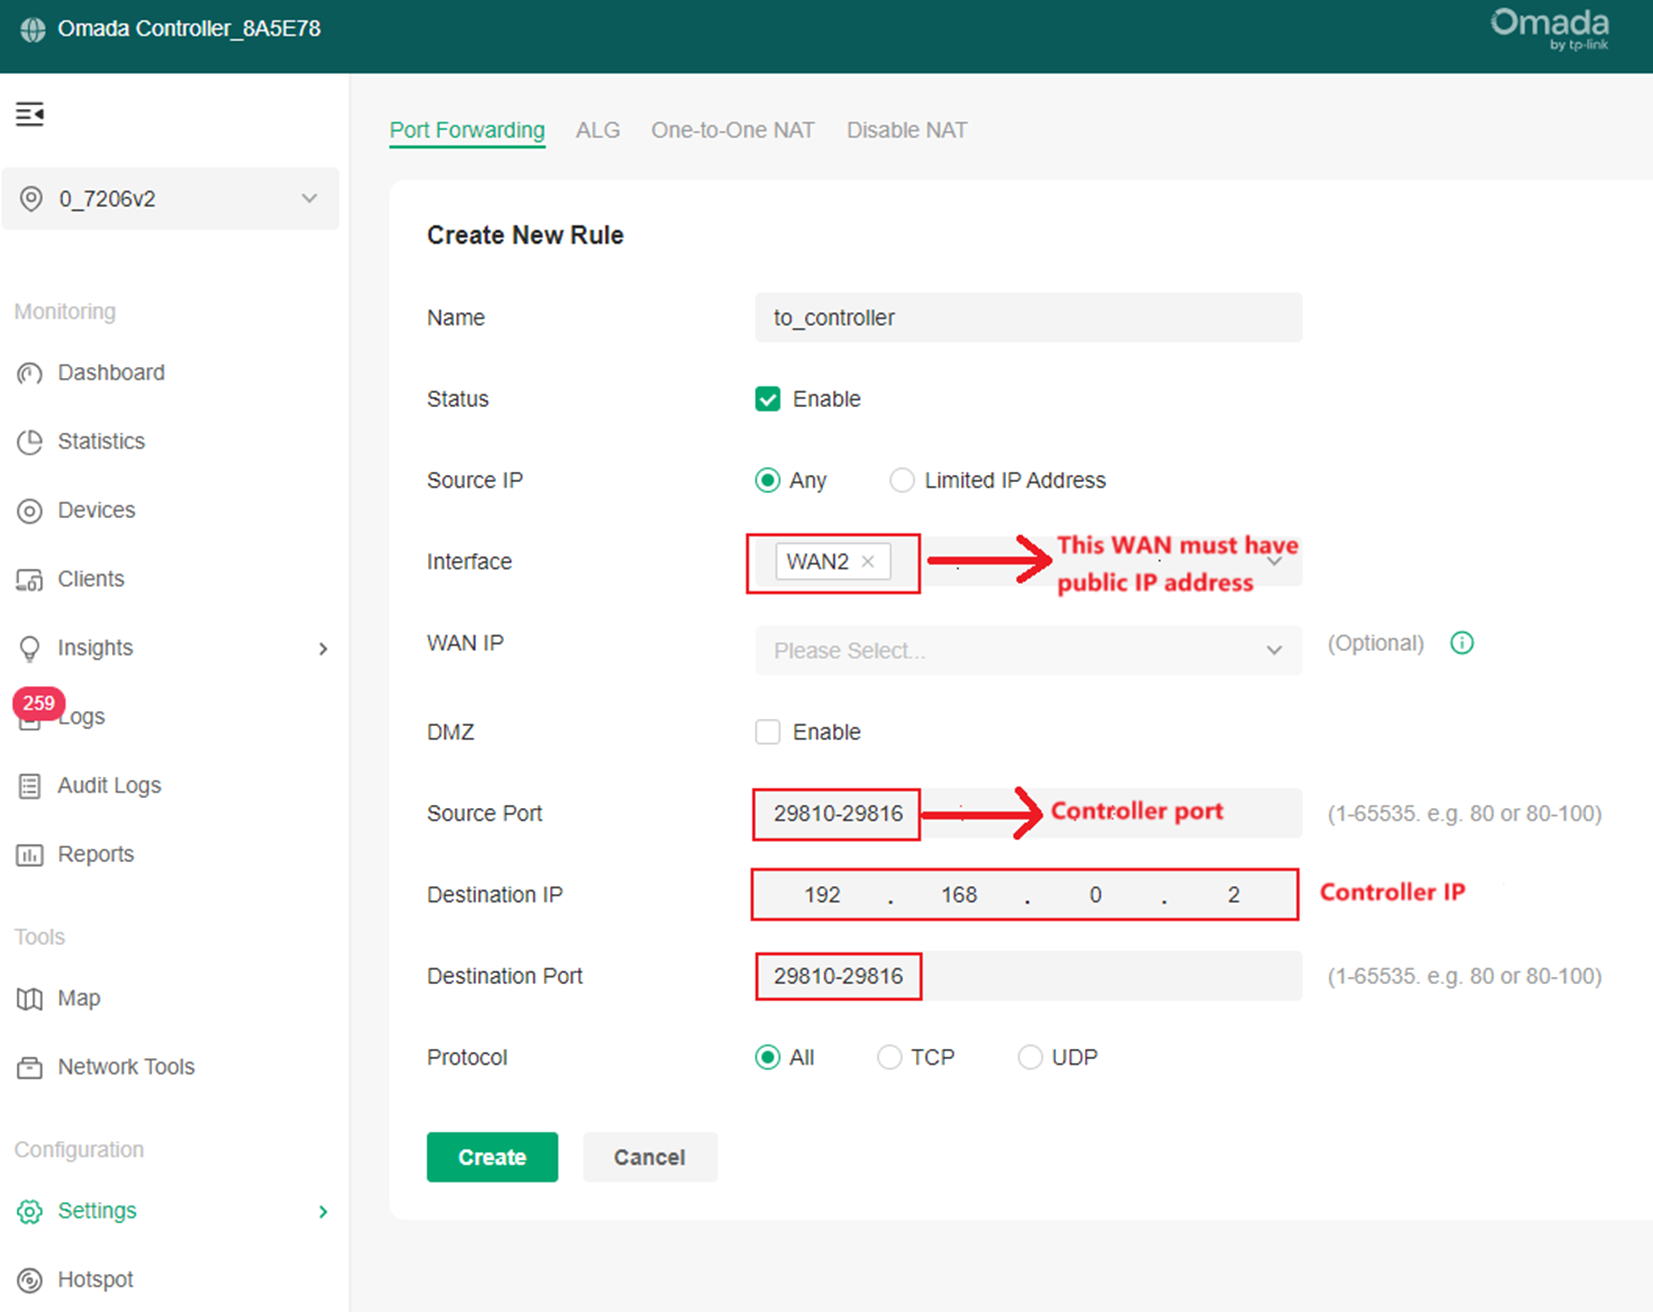
Step 1. Configure Port forwarding rule for device adoption.
If you are using Cloud-based controller, just adopt all the devices.
If you are using hardware/software controller, the controller should be on the LAN side of device which has public IP, and configures Port Forwarding rules so that you can adopt other devices in different site:
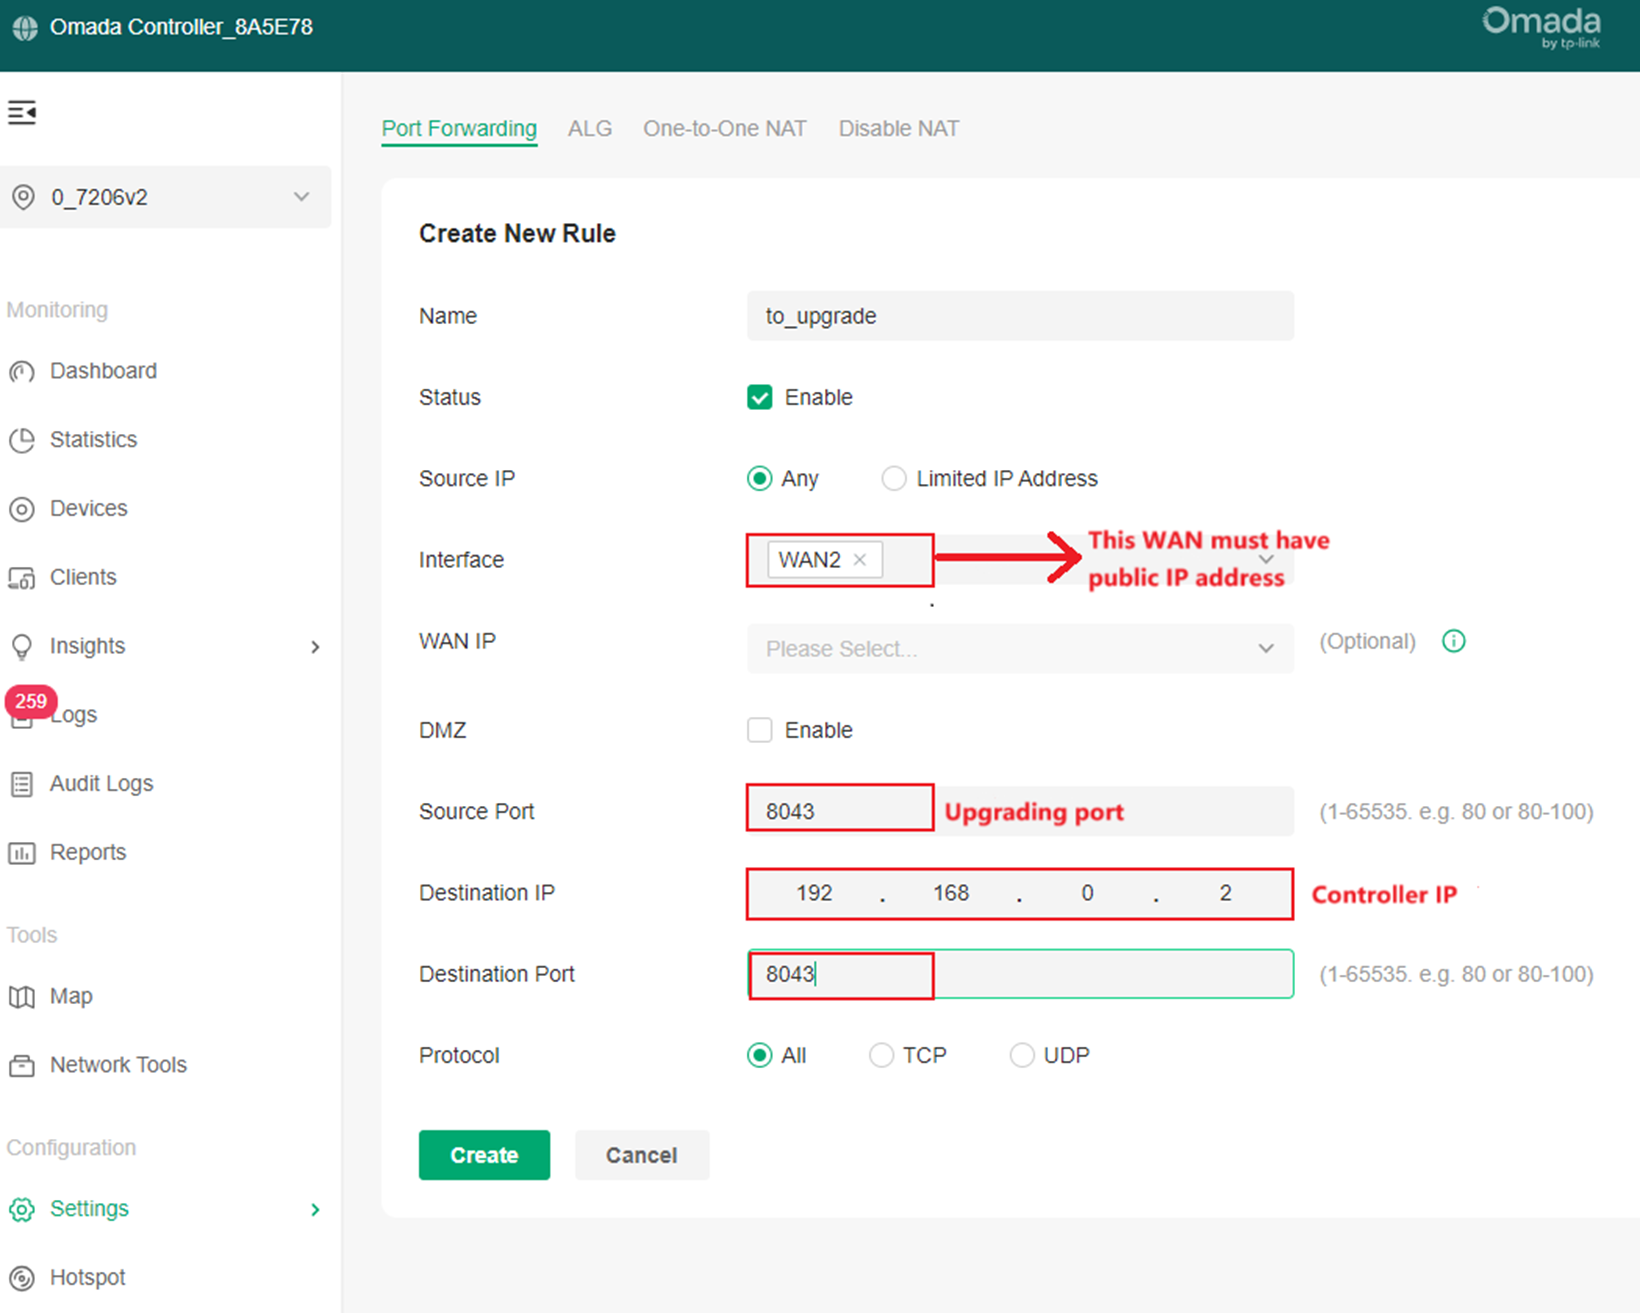
Step 2. Configure Port Forwarding rule for firmware upgrading. If you need to upgrade the device through the controller, you need to configure another NAT rule for port 8043, as configured in the following figure:
Step 3. Adopt other gateways.
The rest of the gateways need to be adopted through the WAN side, you need to configure the Controller Inform URL in the standalone page and fill in the WAN IP of the controller LAN side adoption device configured with NAT rules, as shown in the following figure:
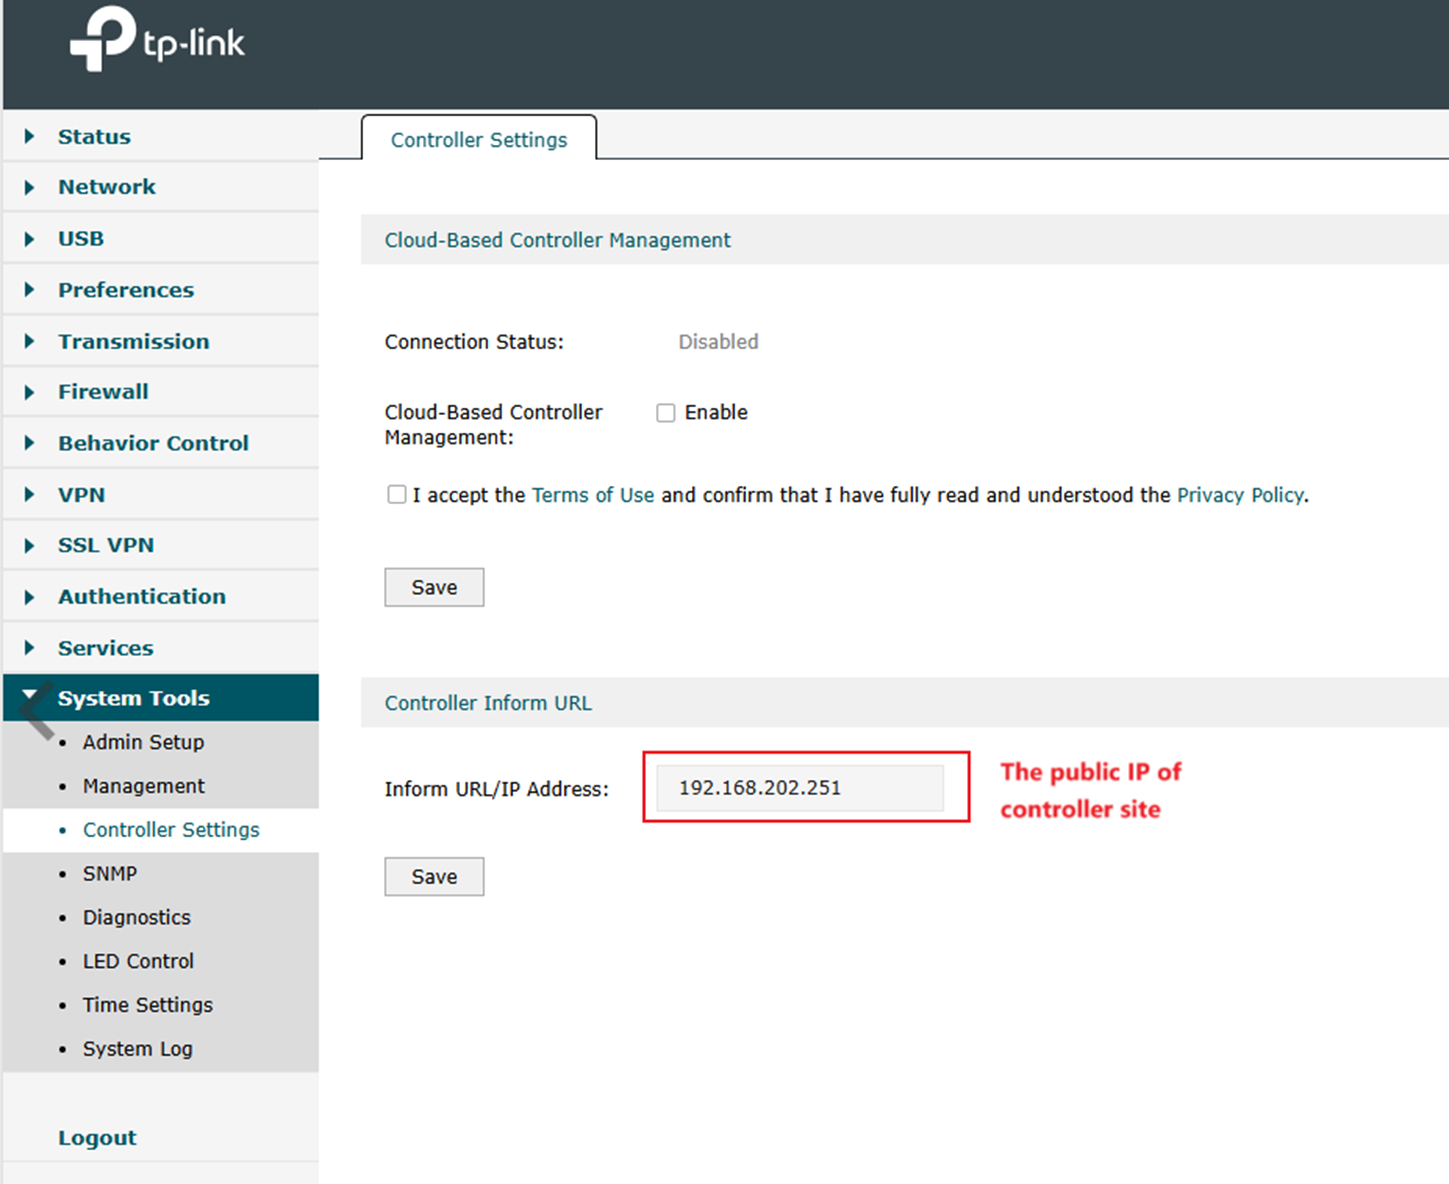
Then create a site for each gateway in the controller to complete the adoption.
SD-WAN configuration
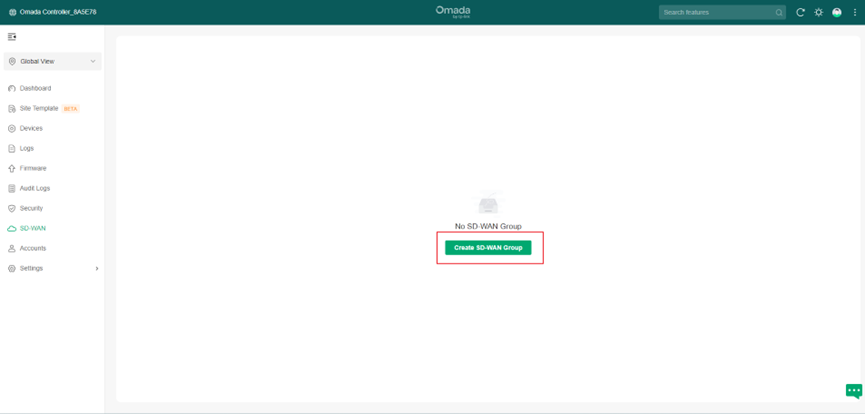
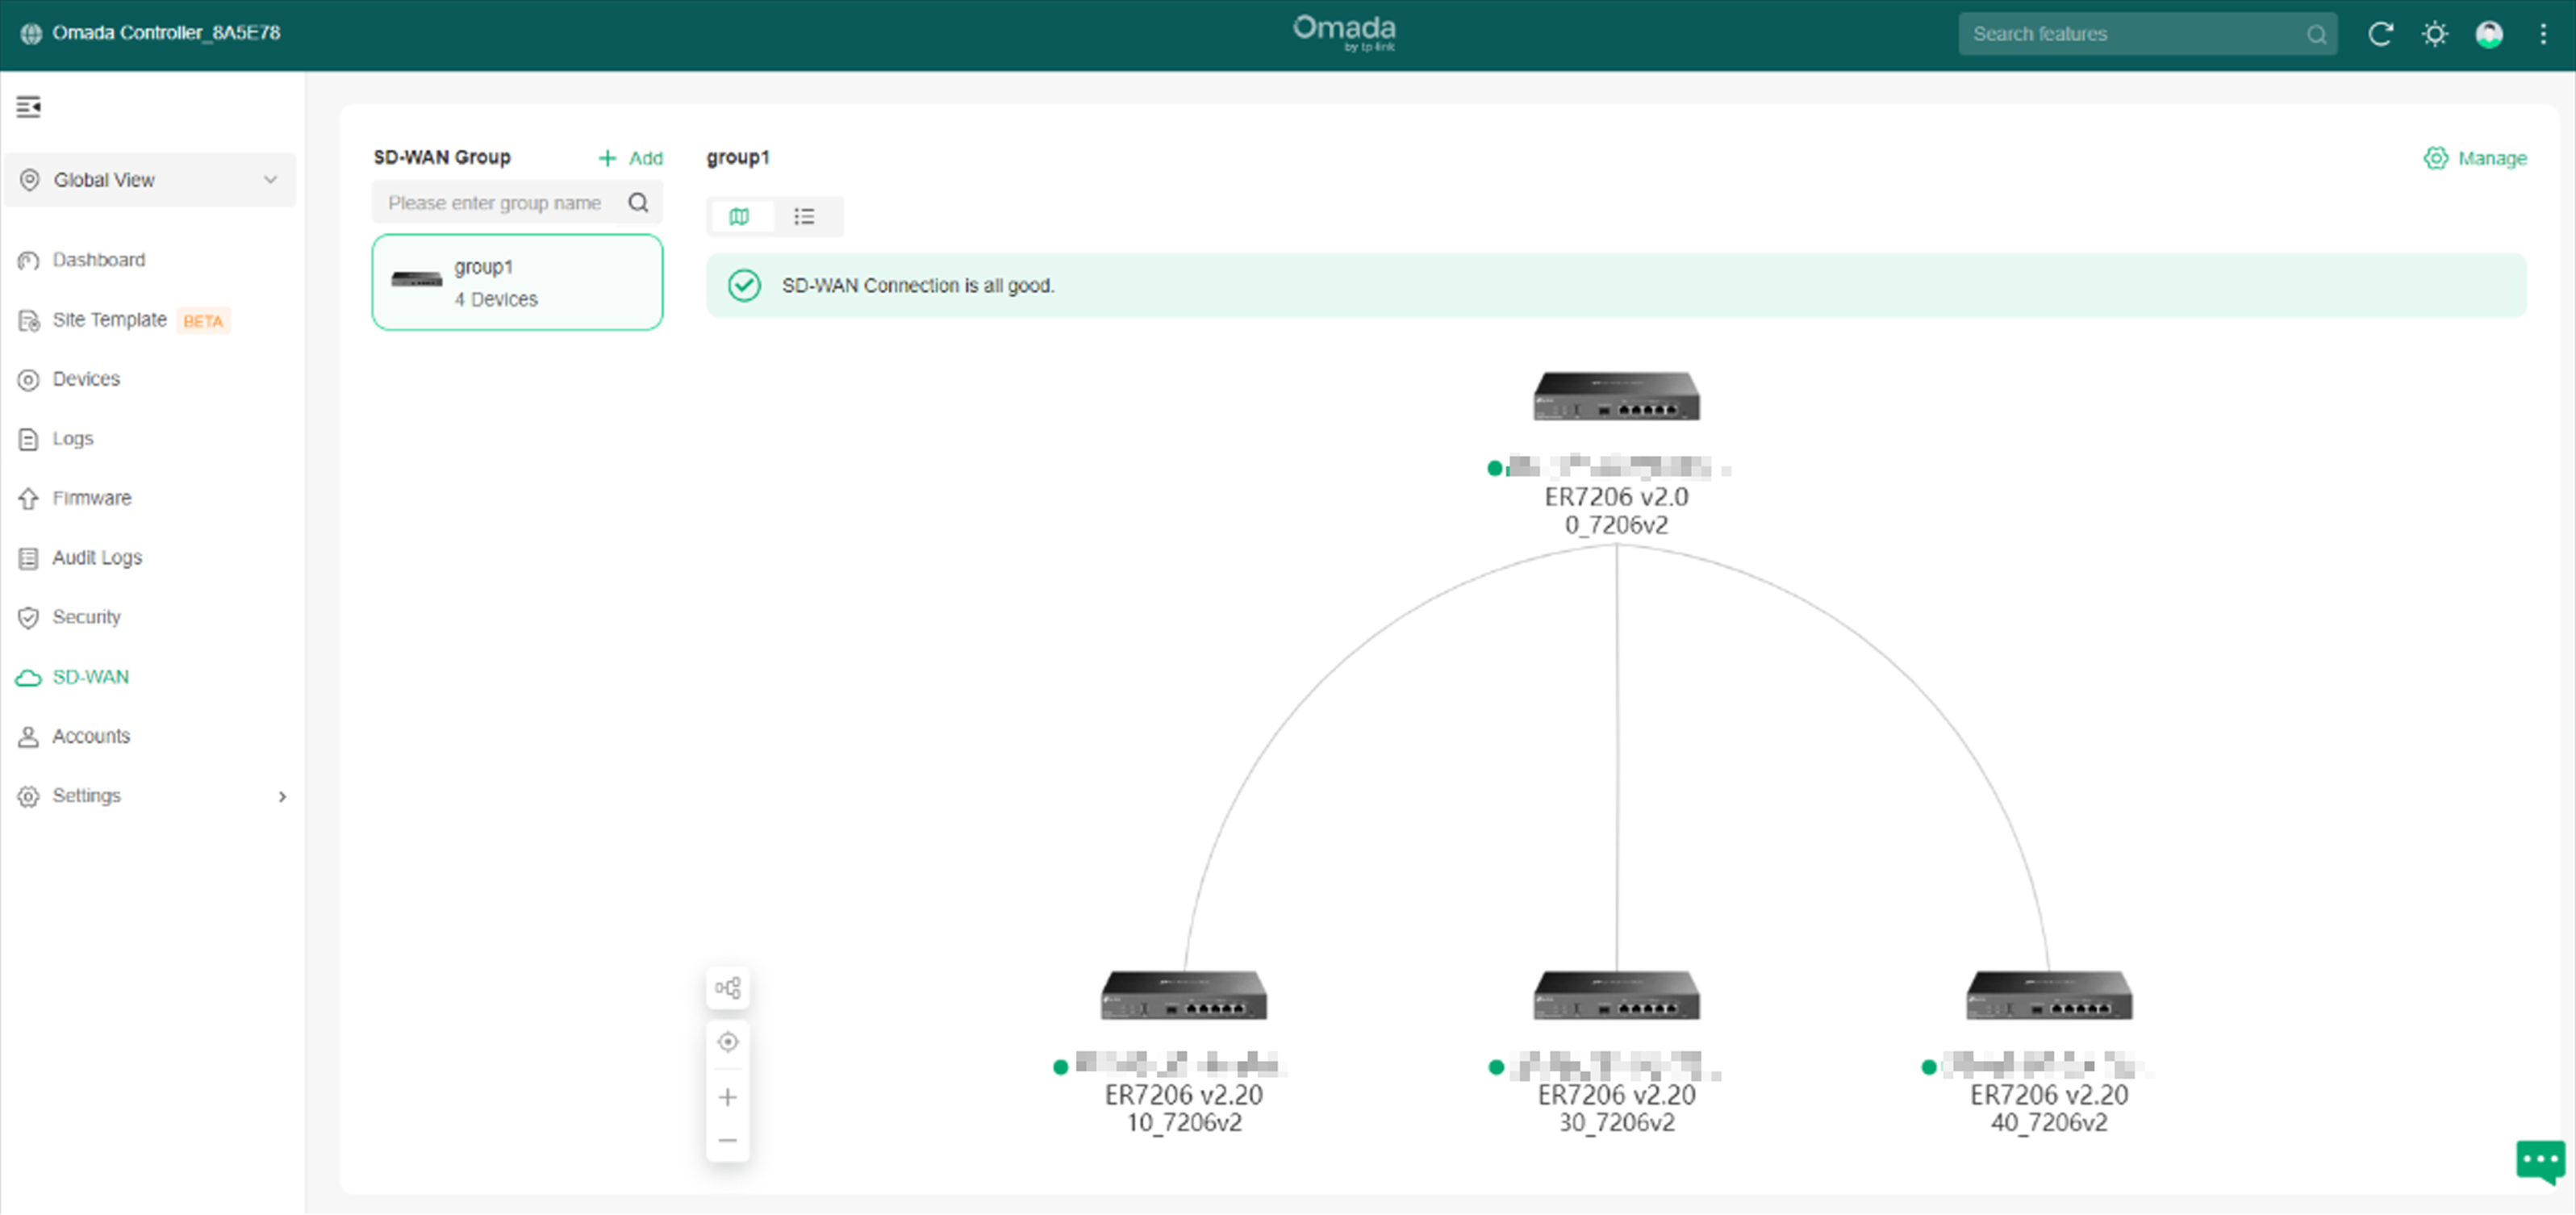
Step 1. Go to Global view > SD-WAN, click Create SDWAN Group.
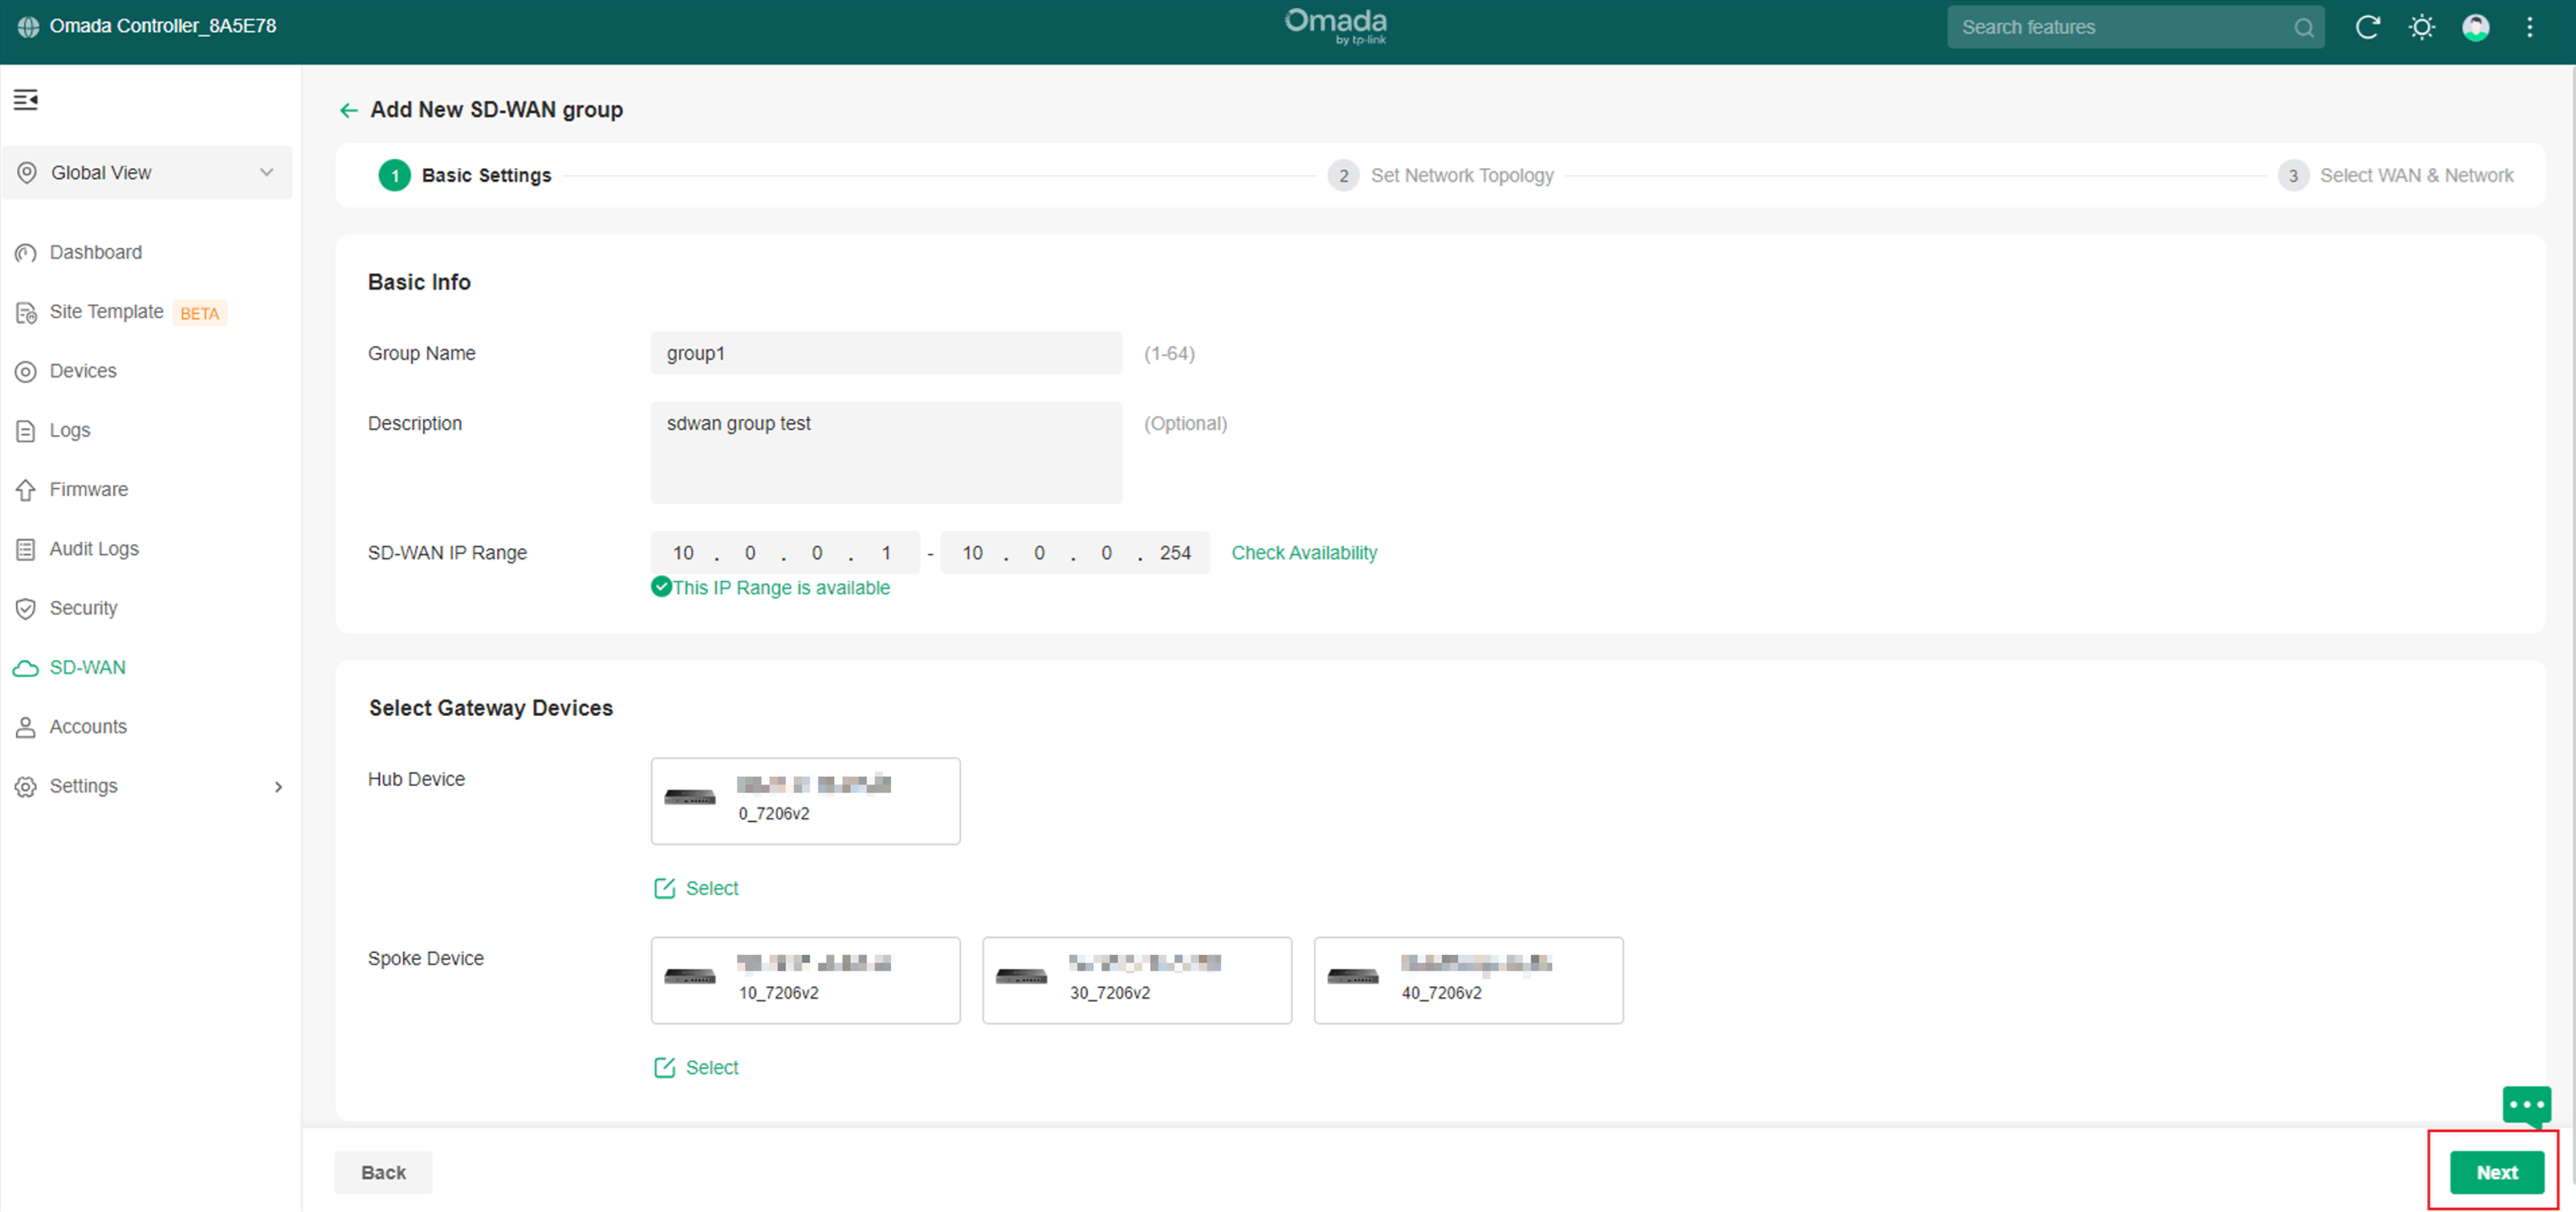
Step 2. Finish basic settings of SD-WAN group.
Please fill in the Group Name, Description, and SD-WAN IP Range. The SD-WAN IP Range is used to assign virtual IPs to VPN interfaces, so you need to ensure that the range contains at least 16 IPs. After filling in these fields, click Check Availability to detect any conflicts within the IP Range.
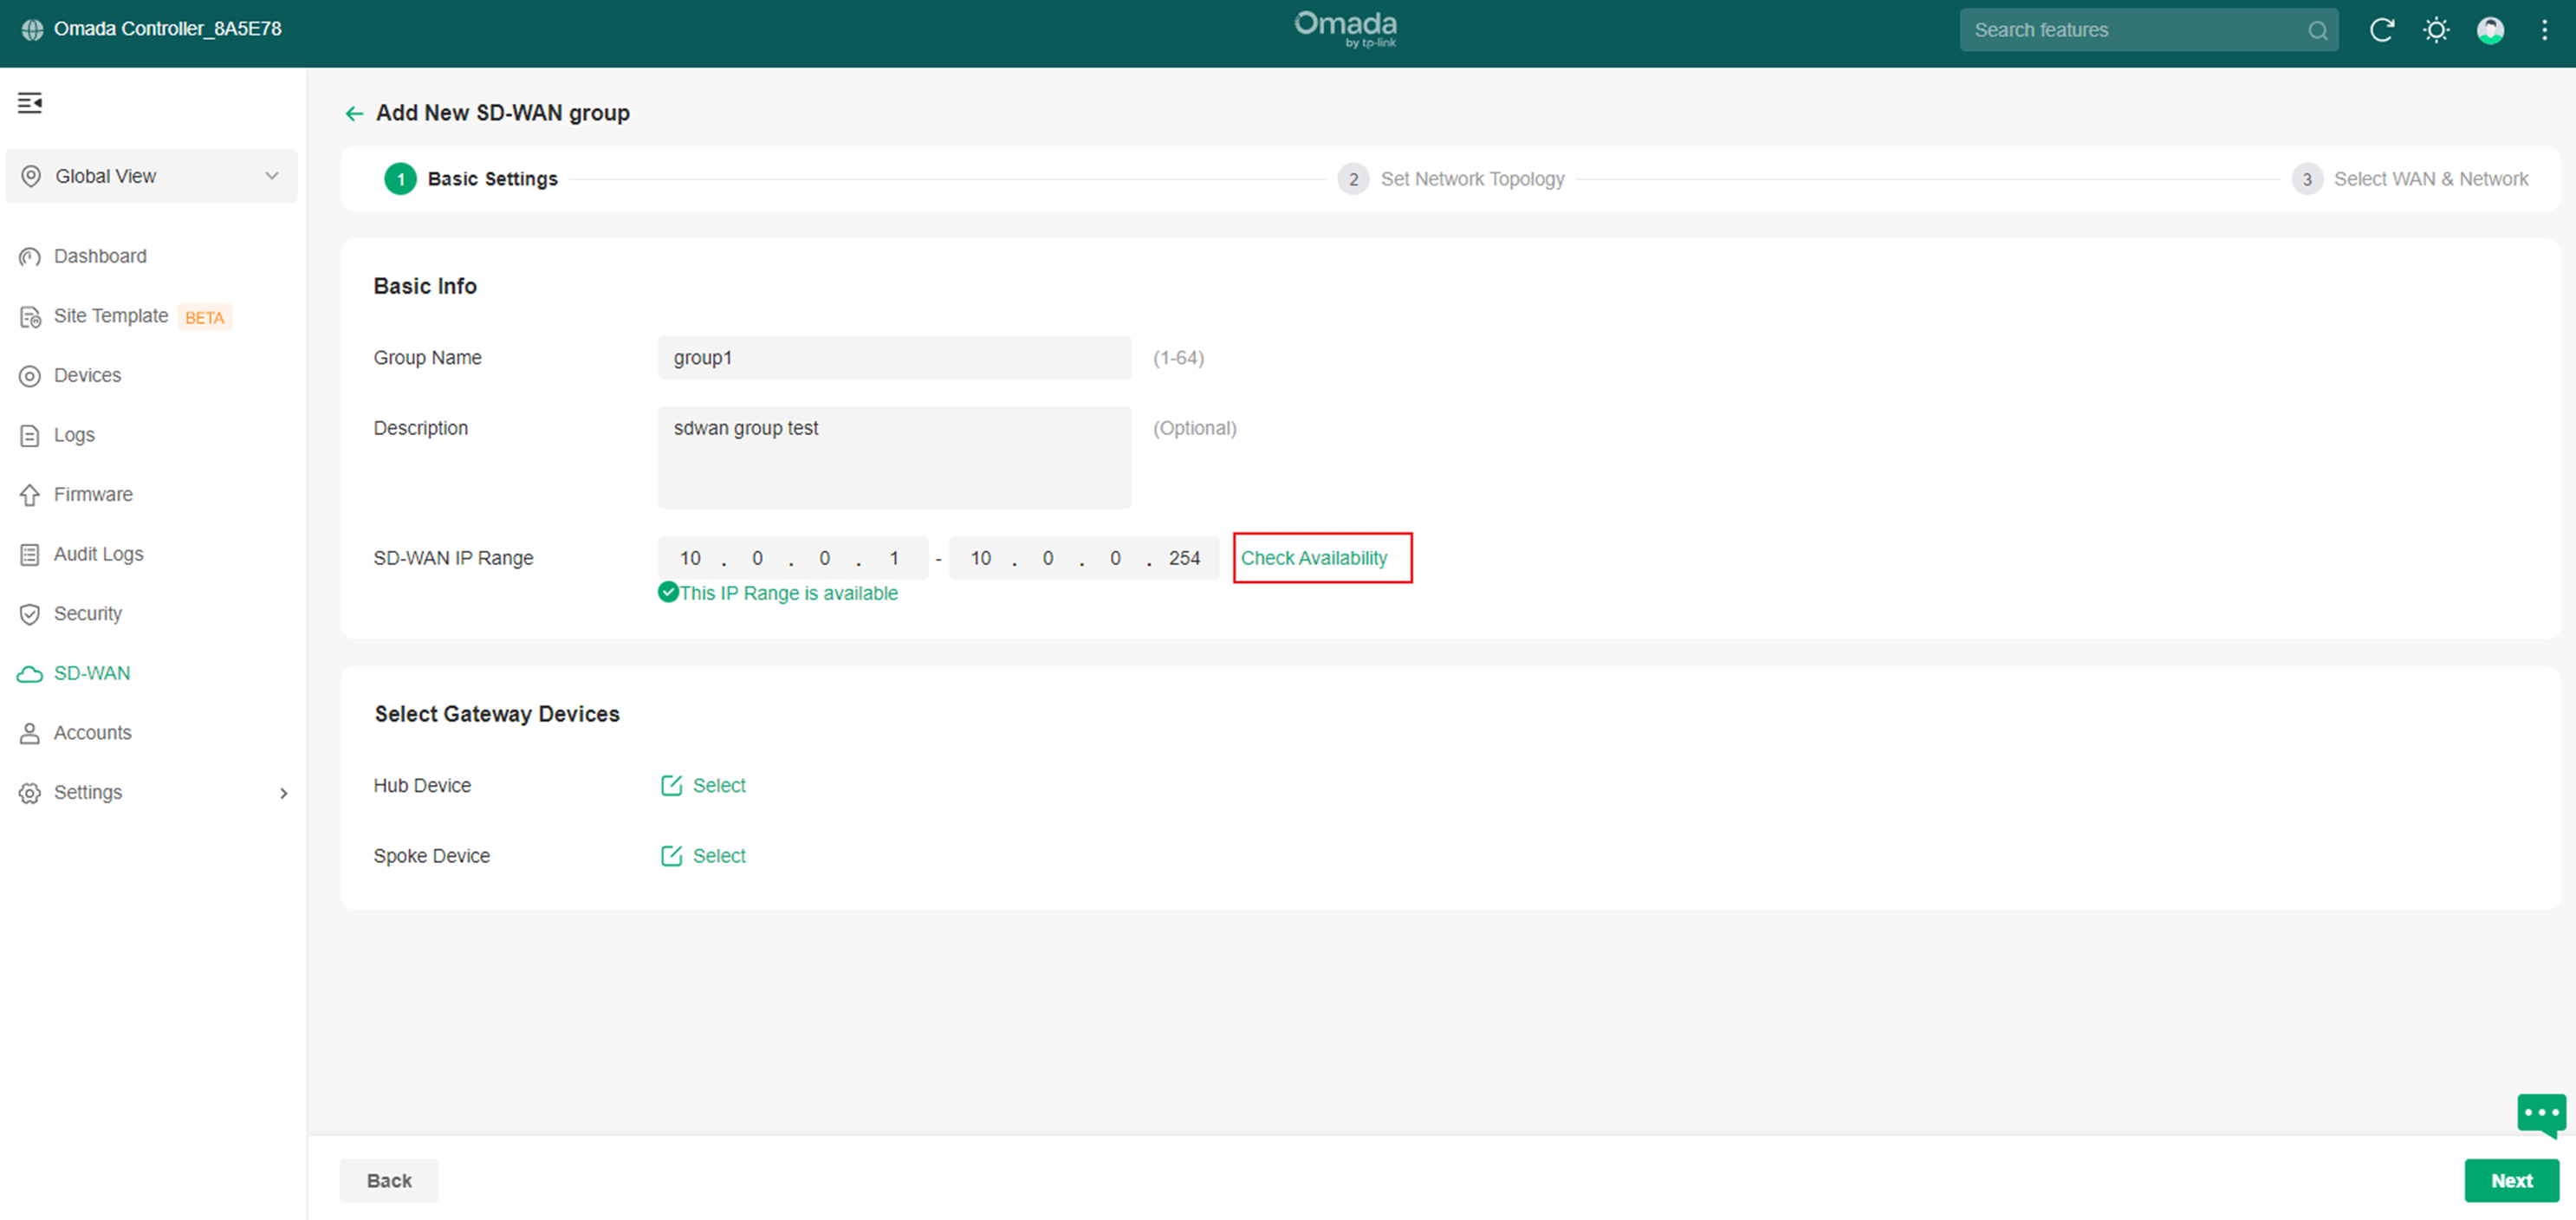
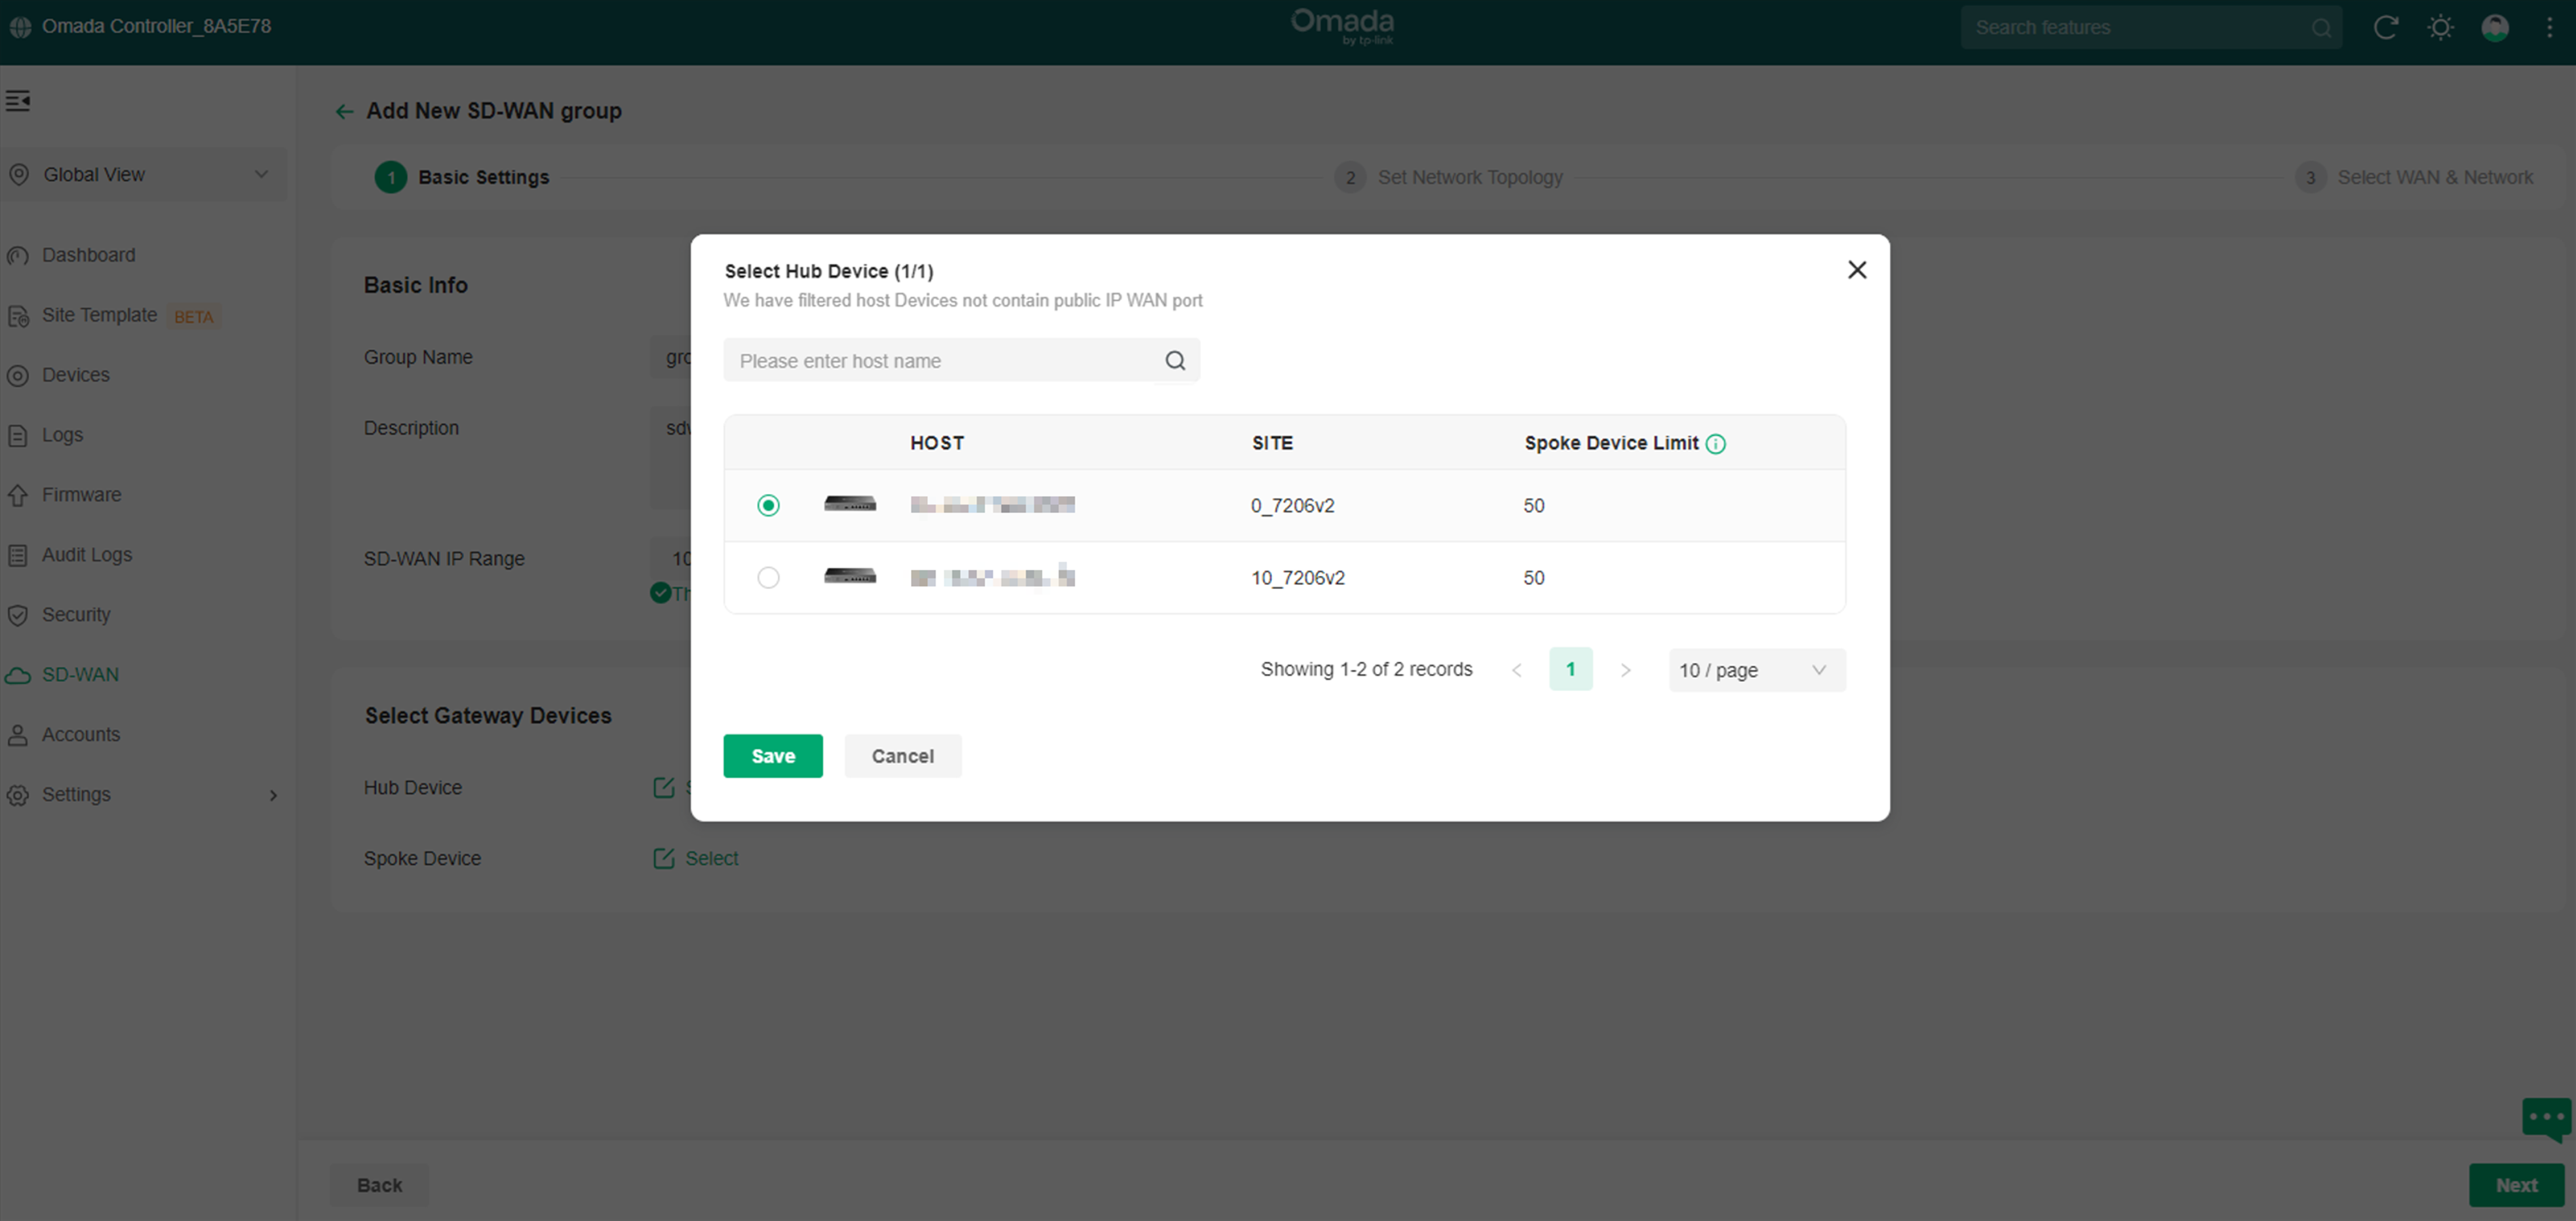
Step 3. Select hub. Click Select button of Hub Device, to select the hub.
Note: only the devices which have public IP address will be listed in hub selection.
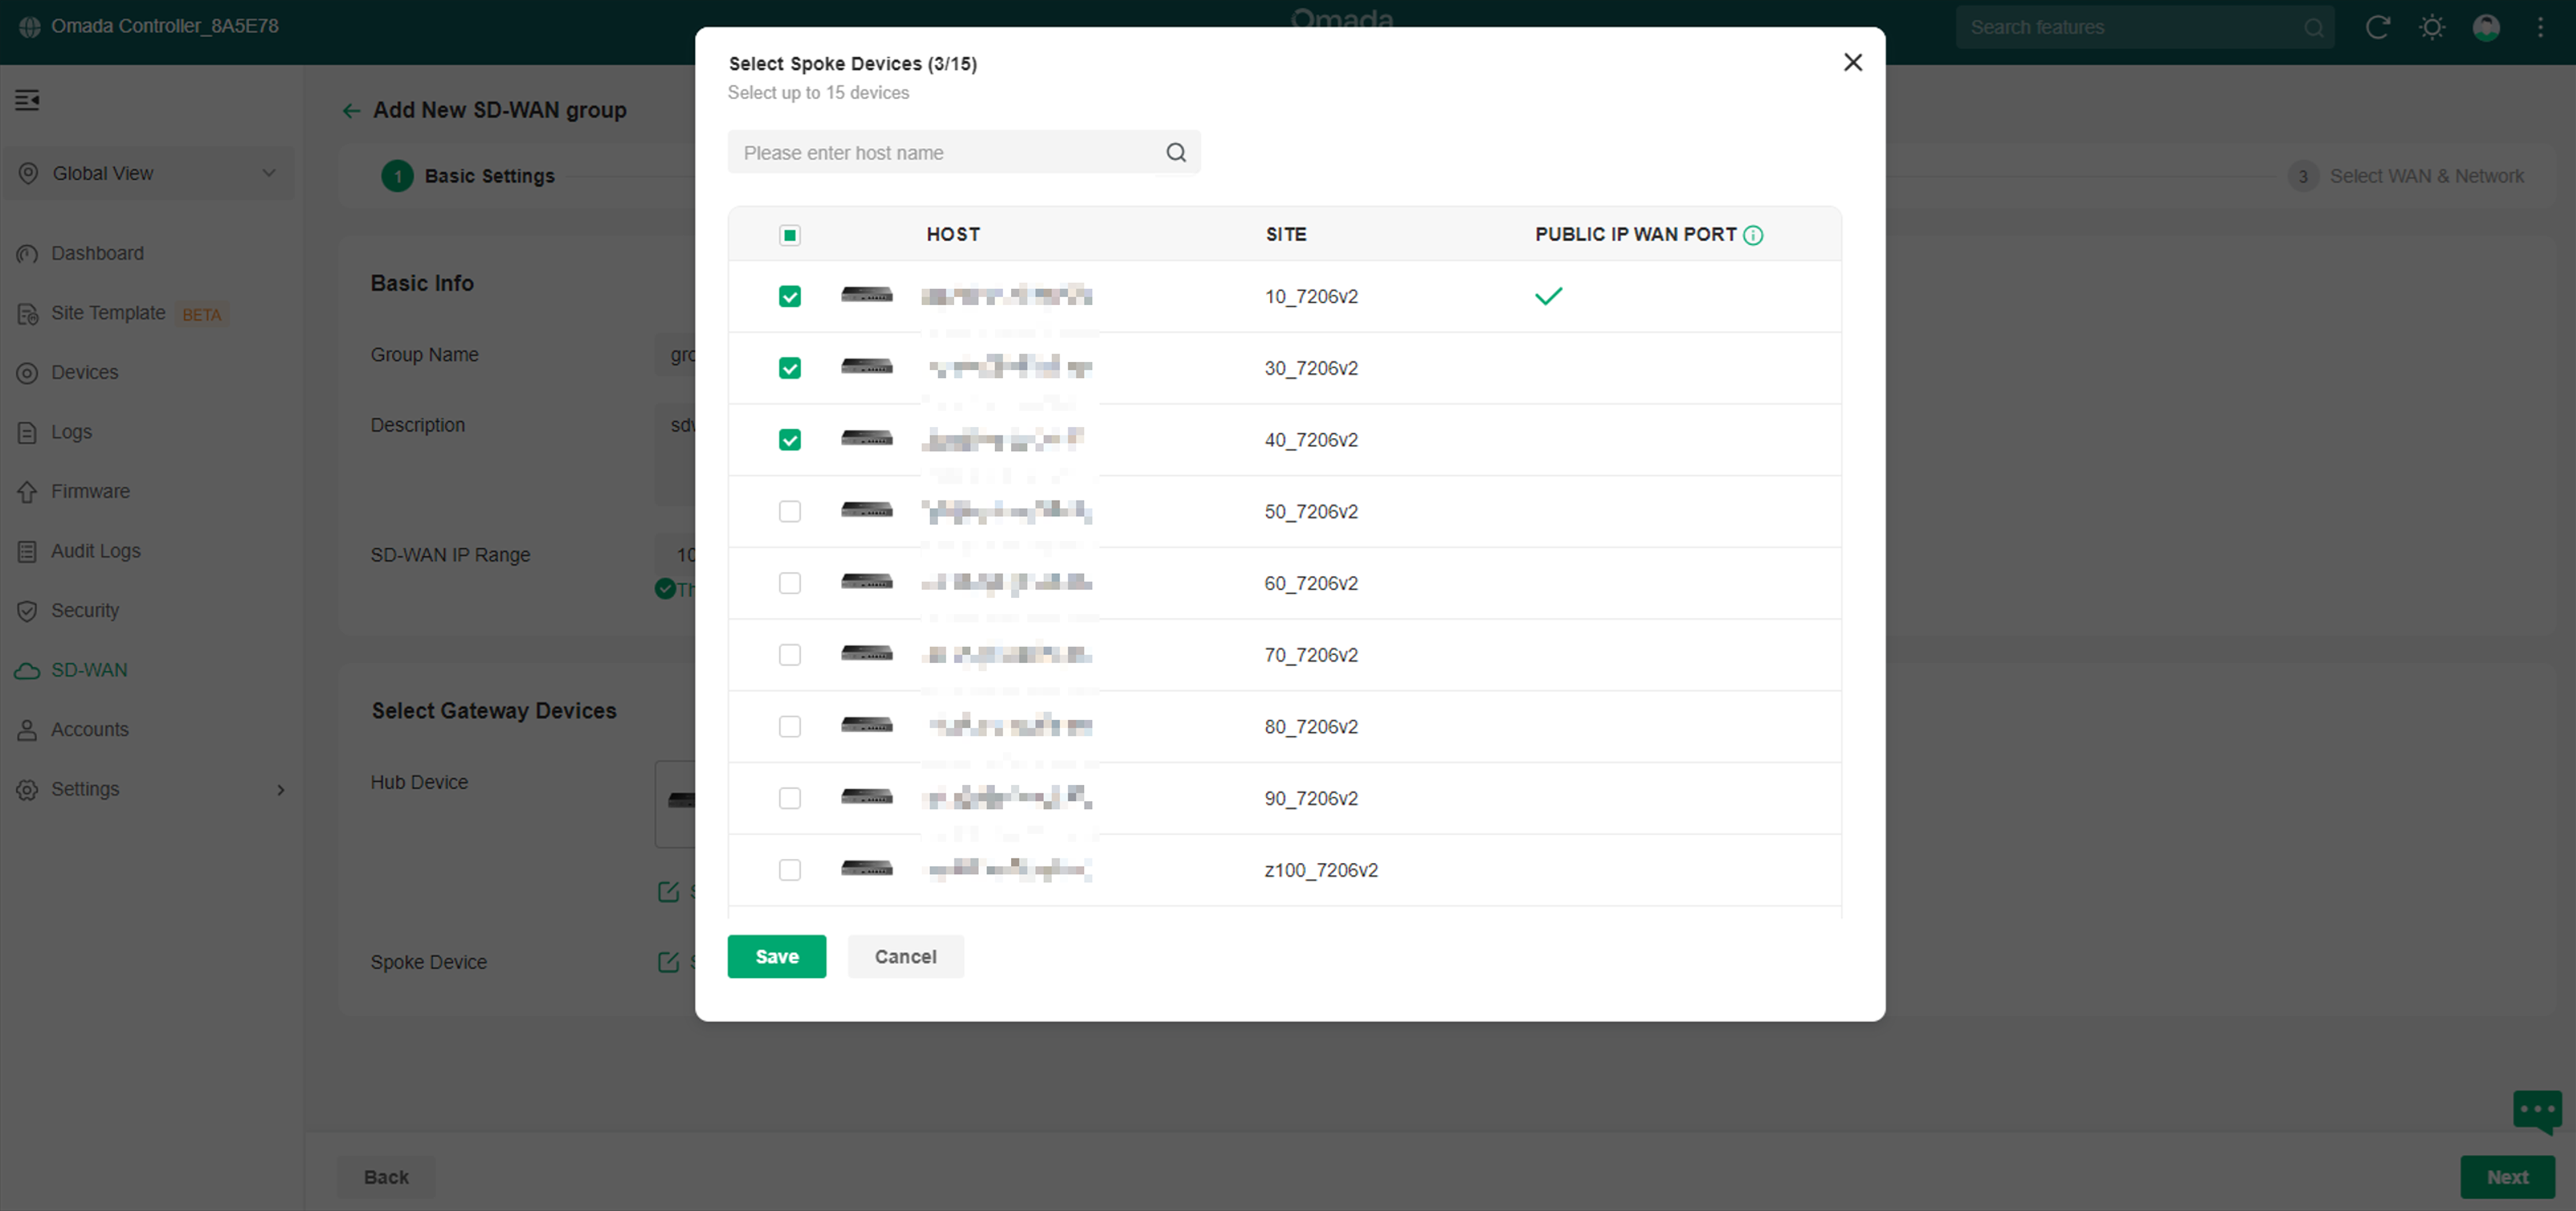
Step 4. Select spokes.
Click Select button of Spoke Device for Spoke selection.
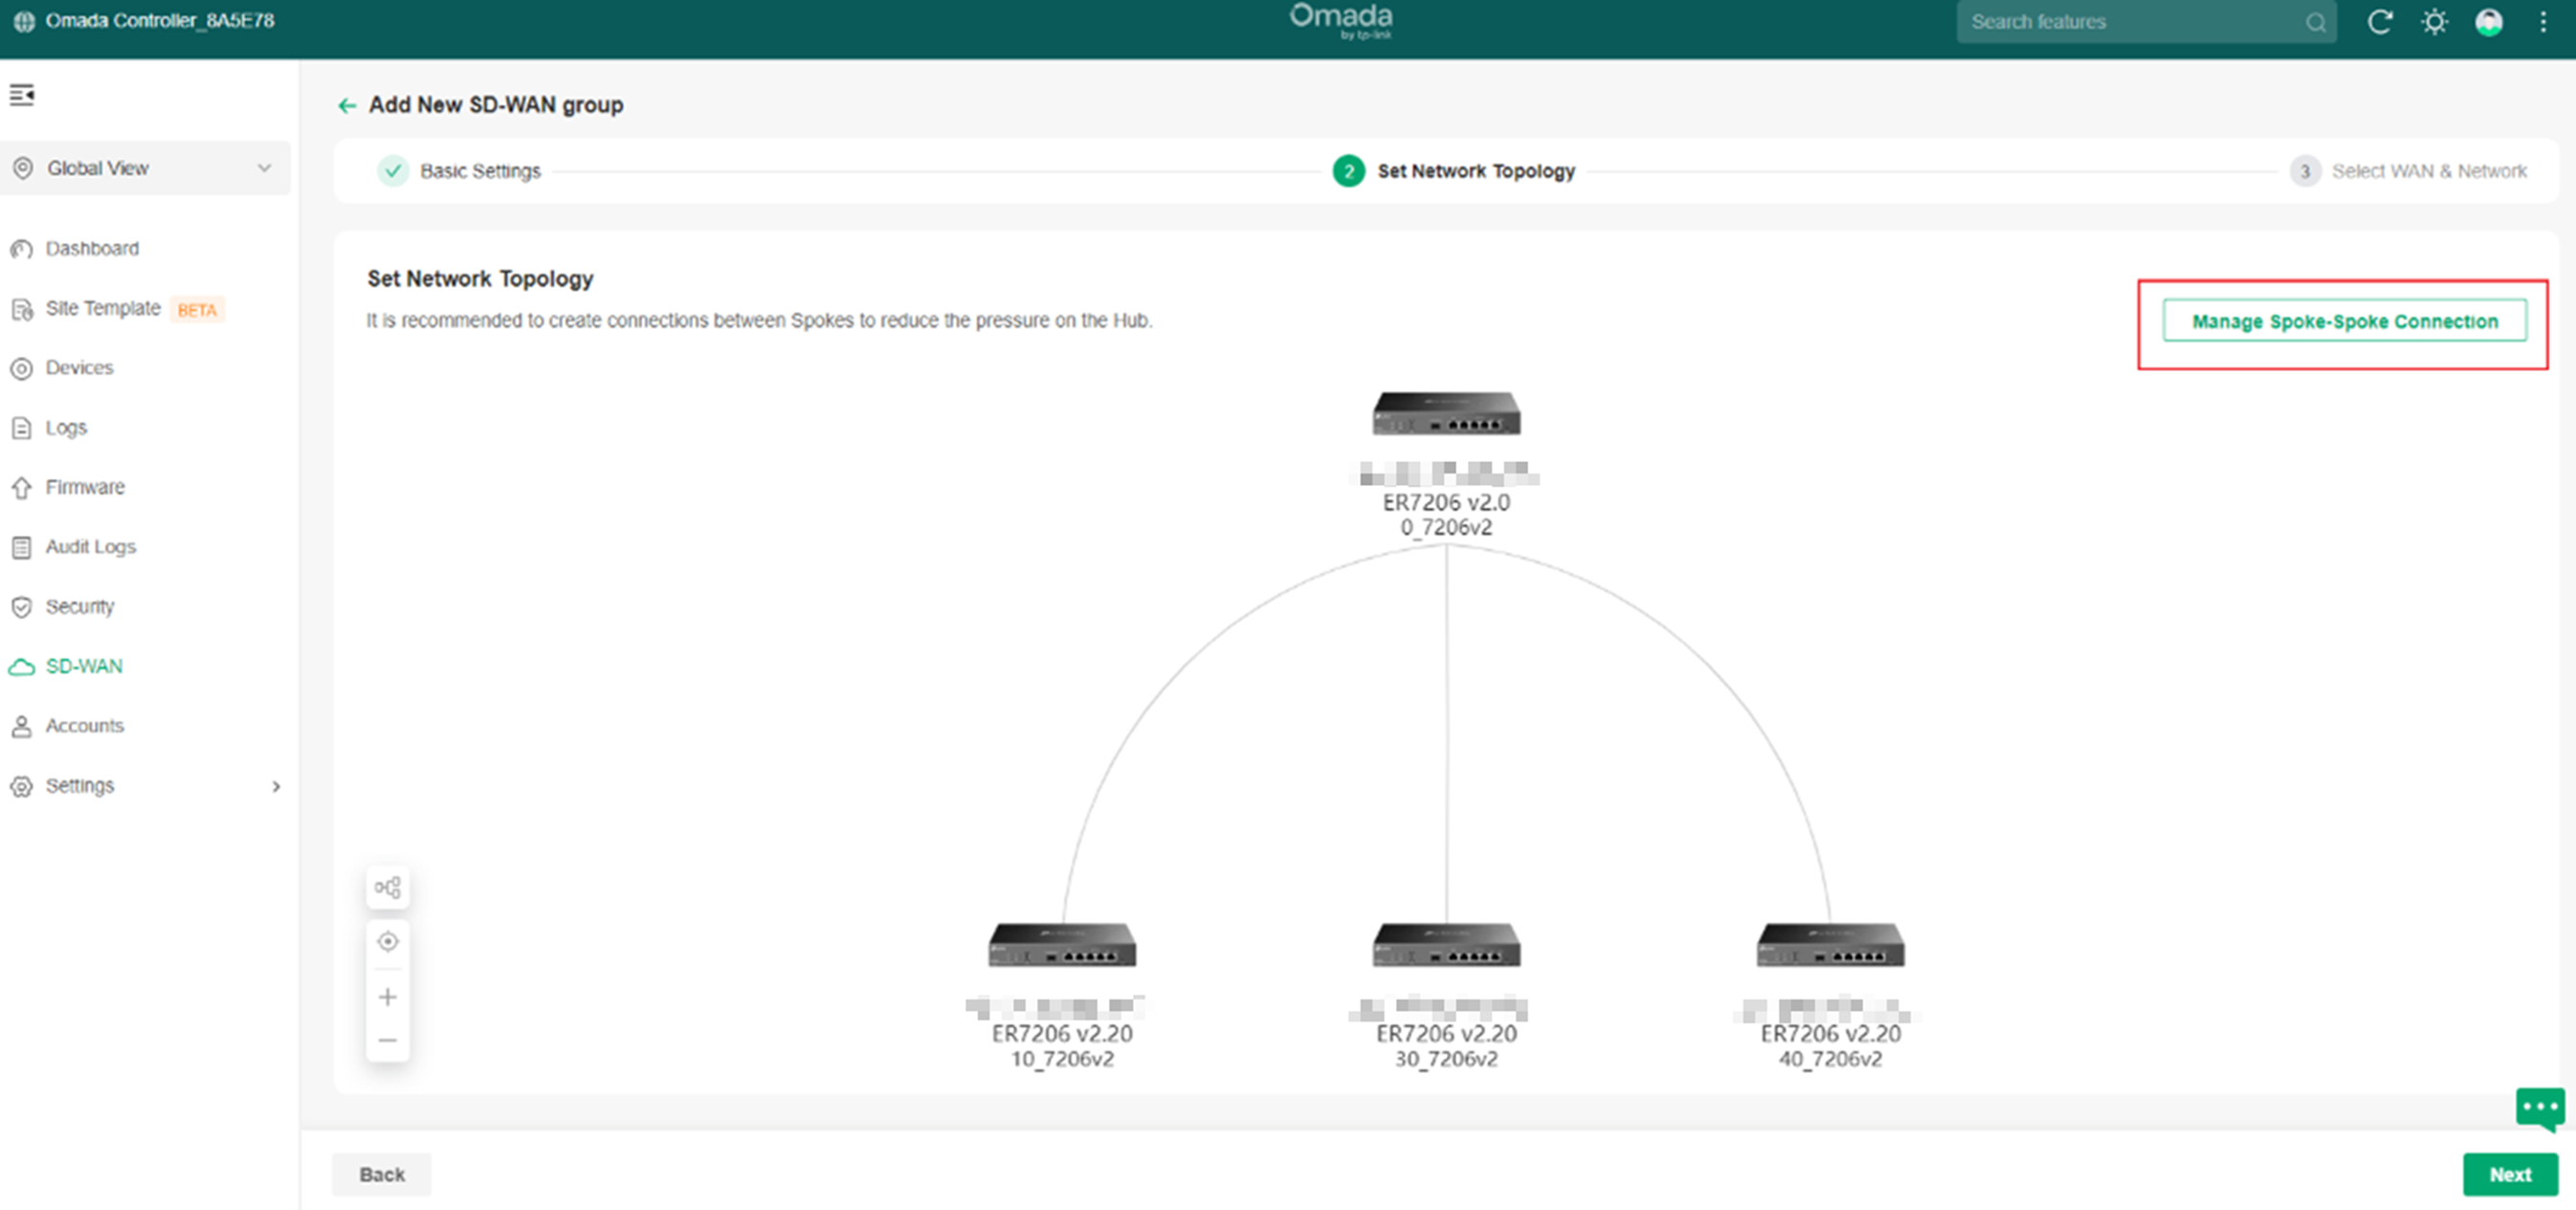
Step 5. Click Next button after finishing spoke selection to enter Set Network Topology page.
Step 6. Click Manage Spoke-Spoke Connection button to enter the setting page for Spoke-to-Spoke direct connections.
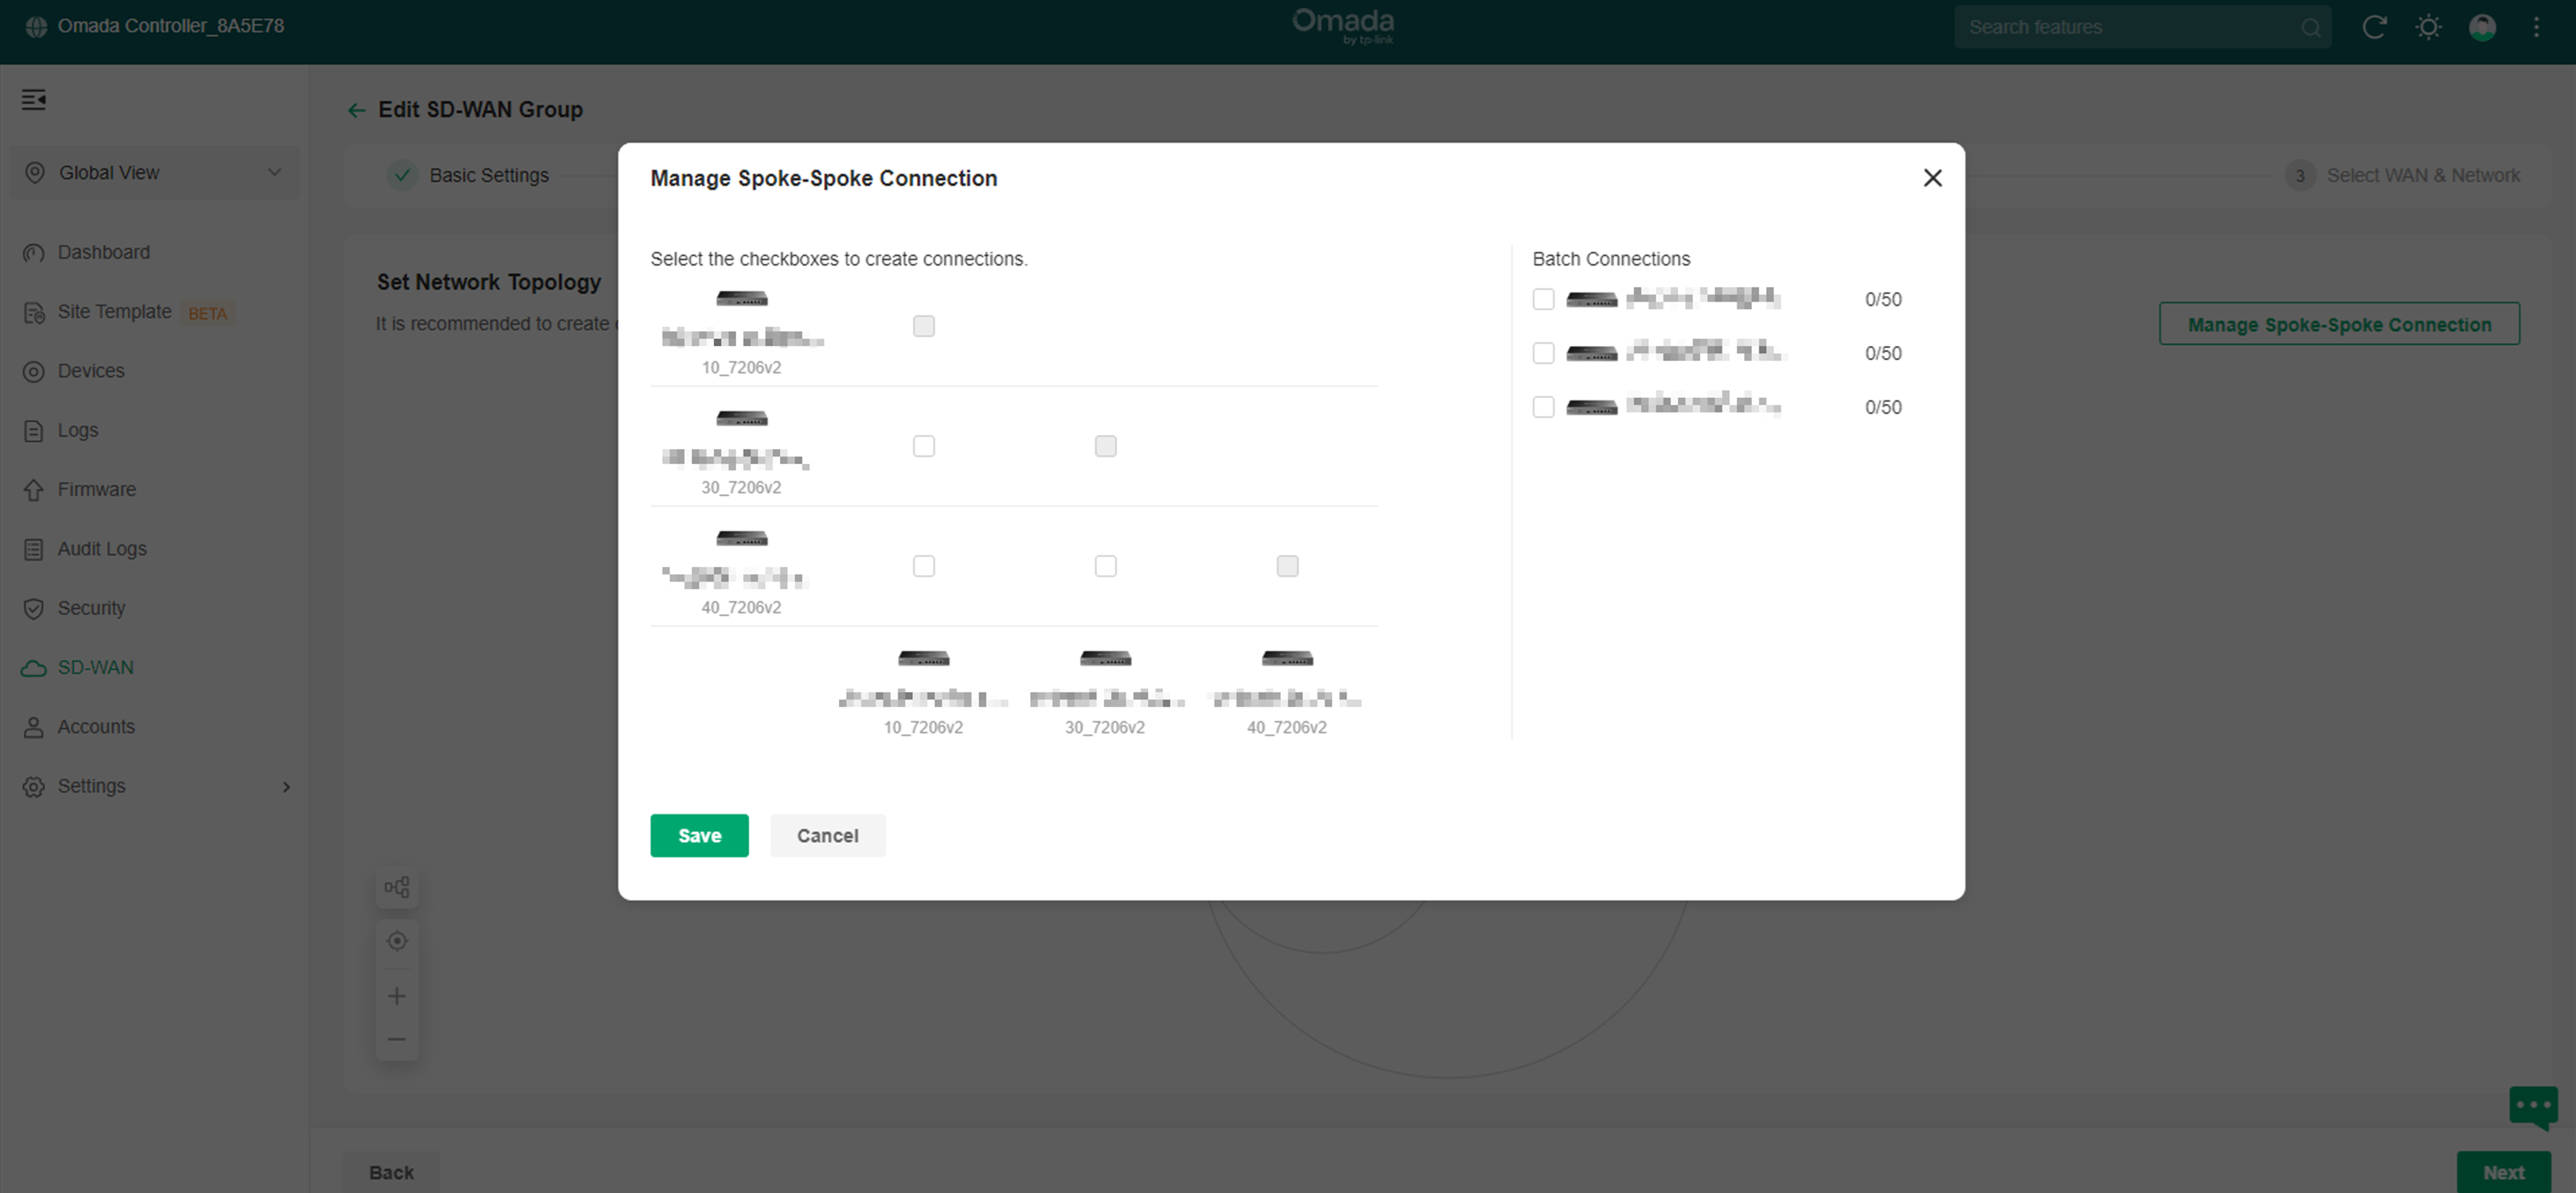
Step 7. Select the spokes which need to build direct connections.
The inter-spoke tunneling needs to ensure that at least one public IP exists at both ends. In this example 10_7206v2 site has a public IP, then it can establish direct inter-spoke tunnels with 30_7206v2 and 40_7206v2. you can configure themselves according to the actual situation of the network topology.
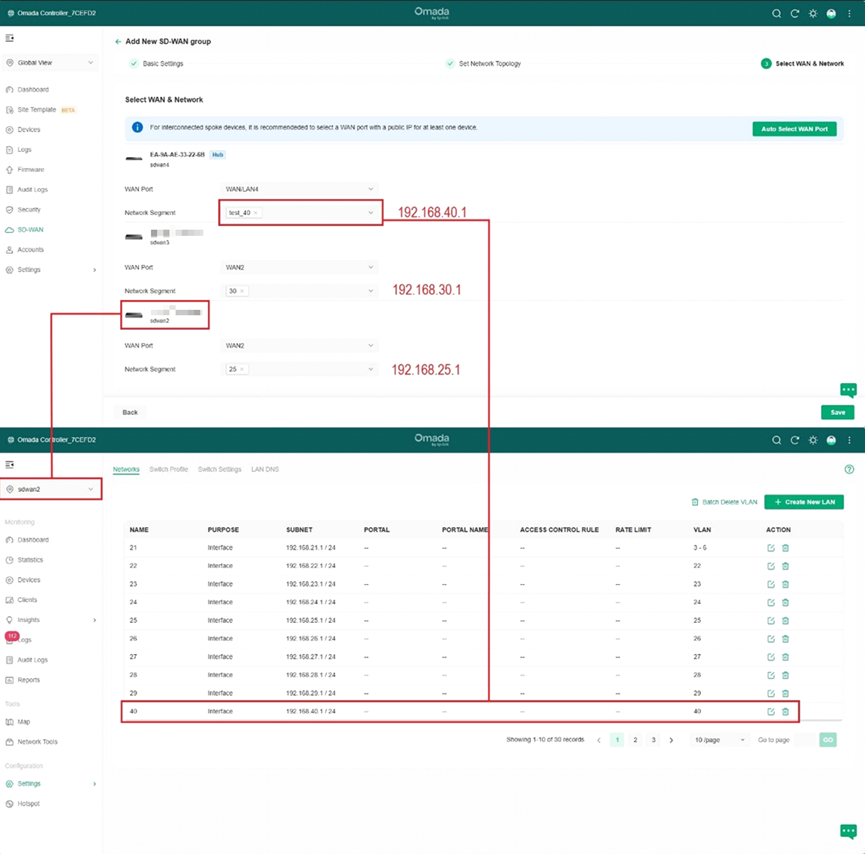
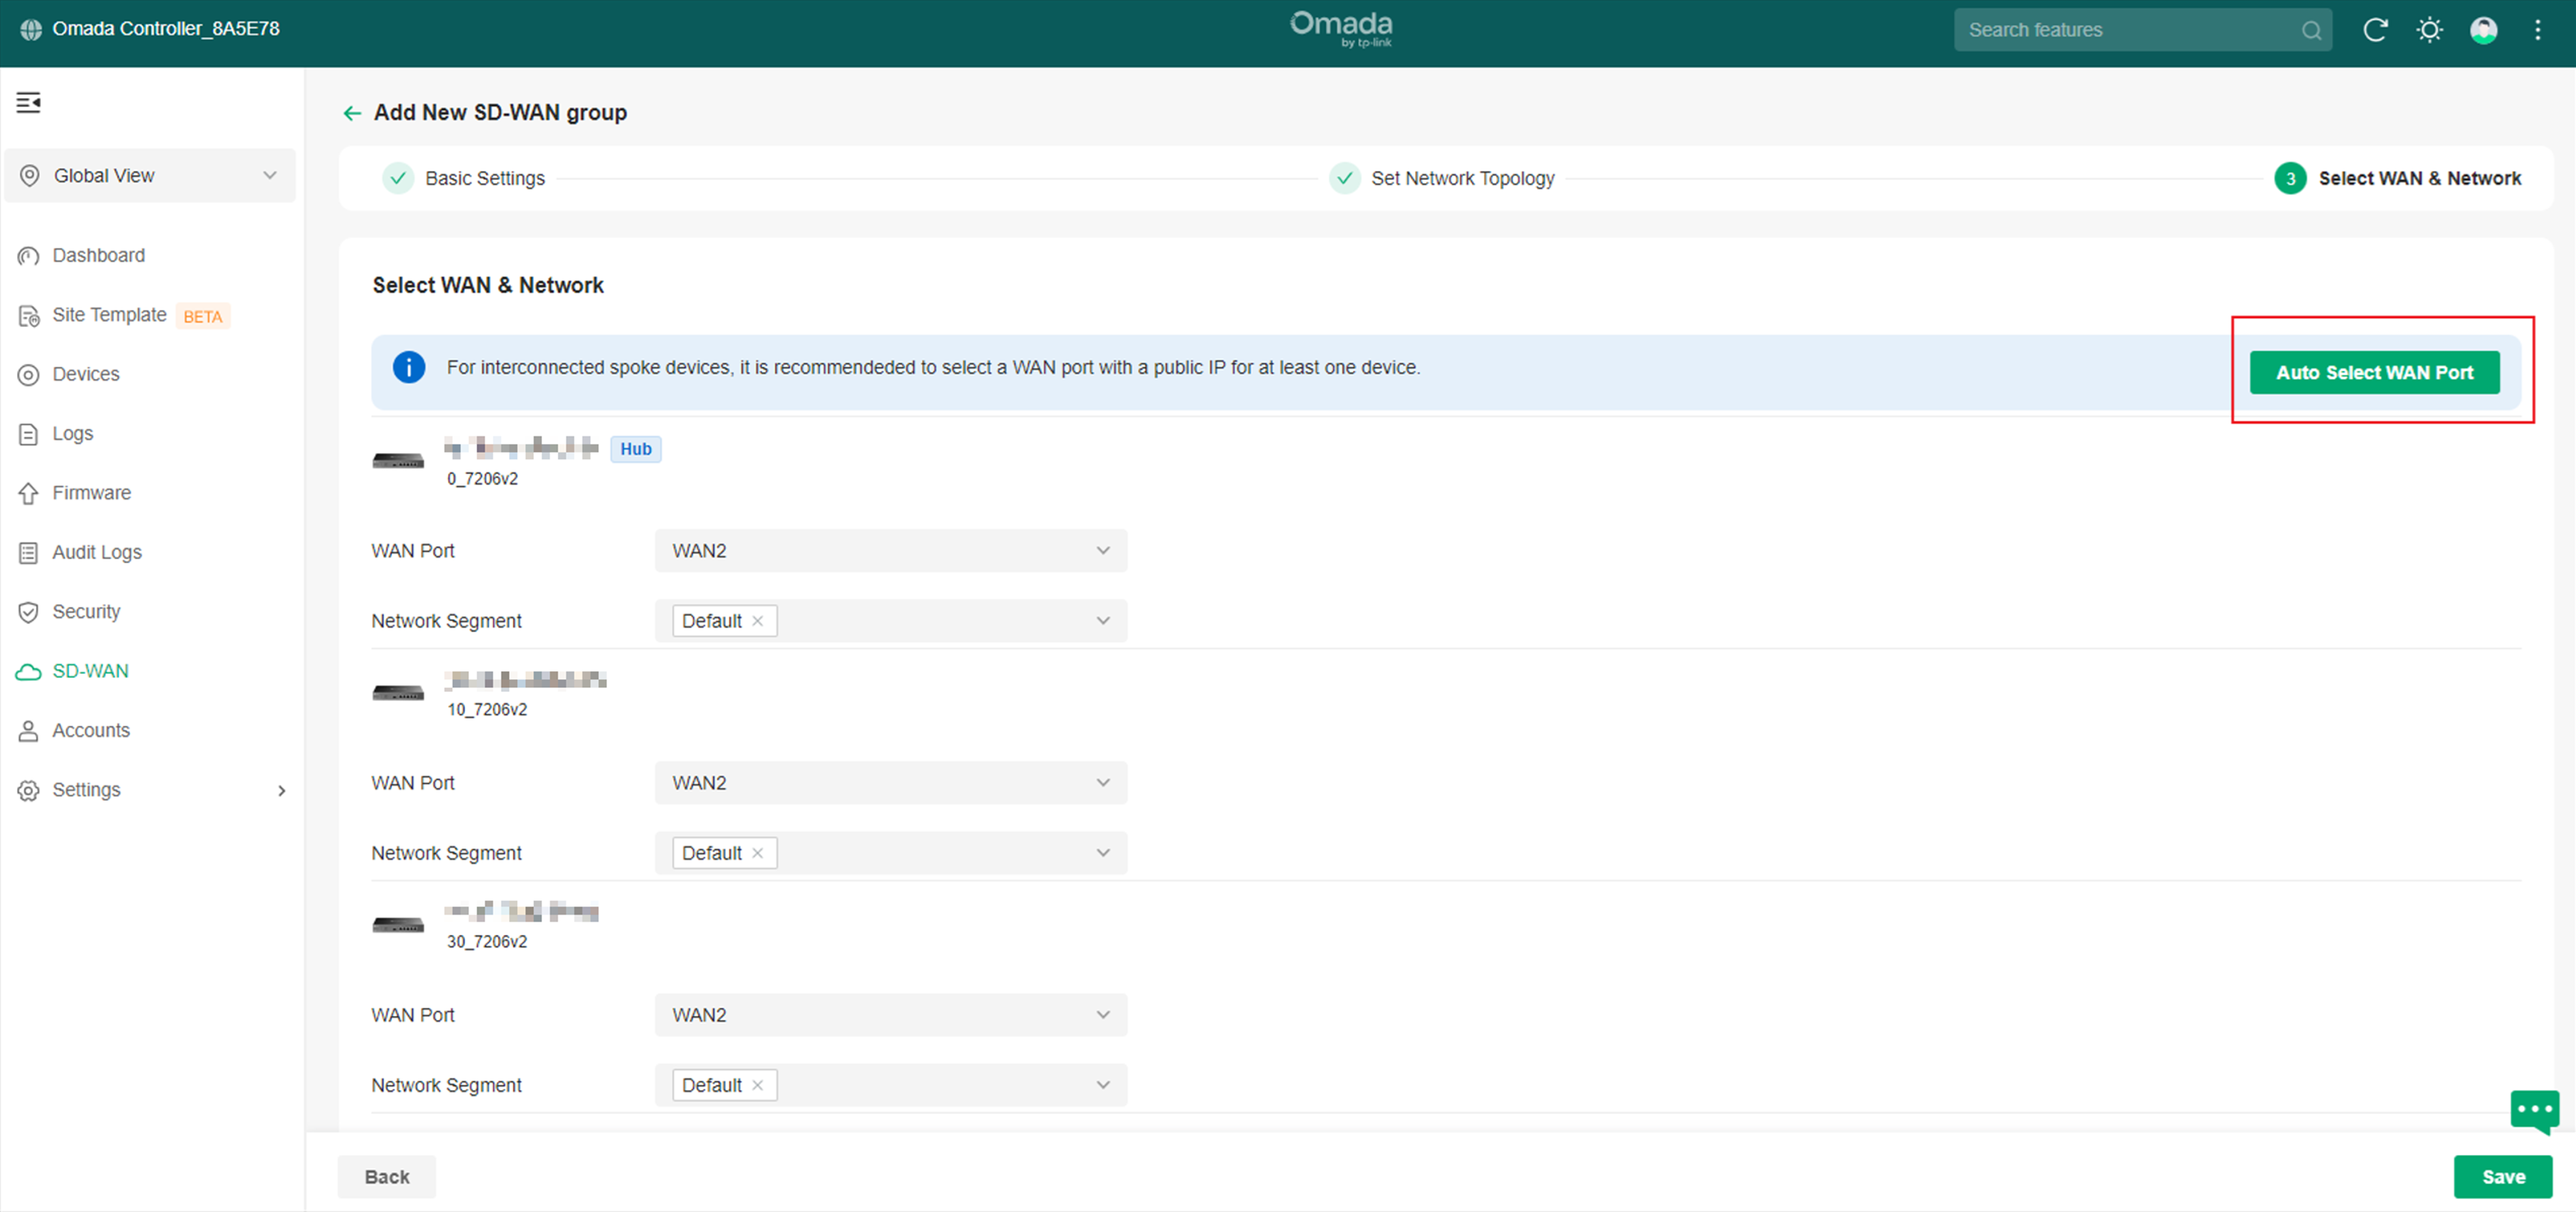
Step 8. Configure the WAN port and LAN networks of spokes.
Enter Select WAN & Network page, configure the WAN port and LAN networks for every spoke. This page will add the Default LAN of each site to the Network Segment, and users can customize the Network Segment parameters for each site. It is necessary to ensure that all Network segments in the group network cannot conflict with the LANs in other Sites. Click Auto Select WAN Port, the controller will automatically select the WAN with public IP or the WAN with the smallest number of ports and IP for the user, and the user can also customize the configuration for each site.
Step 9. Click Save to finish SD-WAN configuration.
Verification
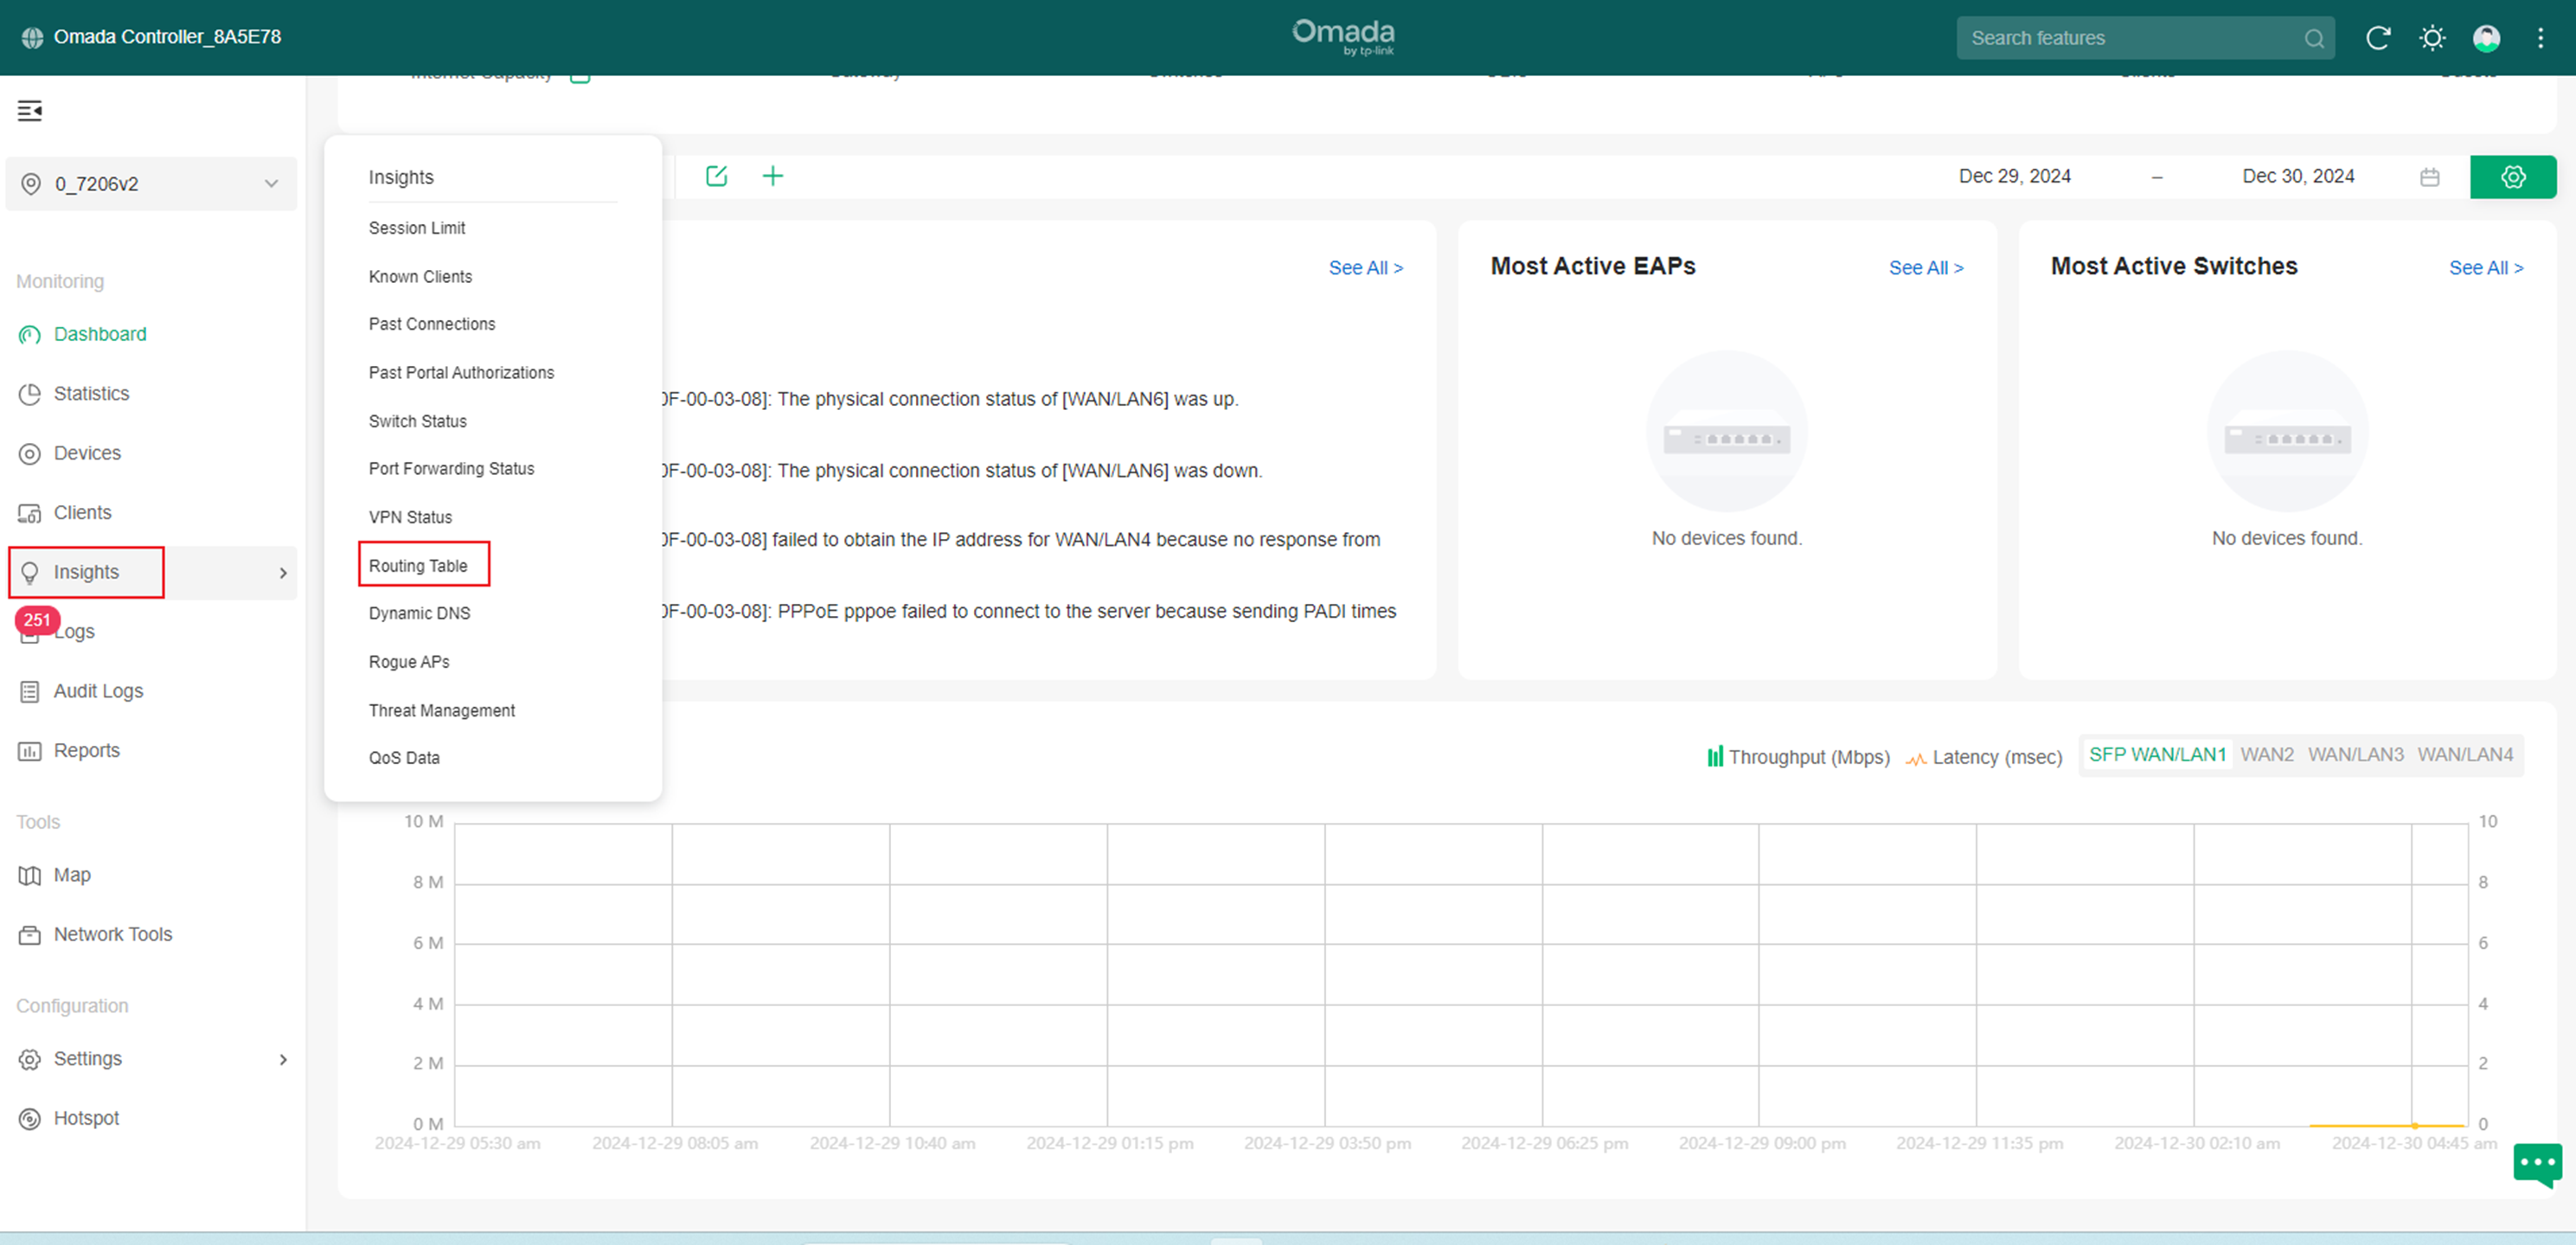
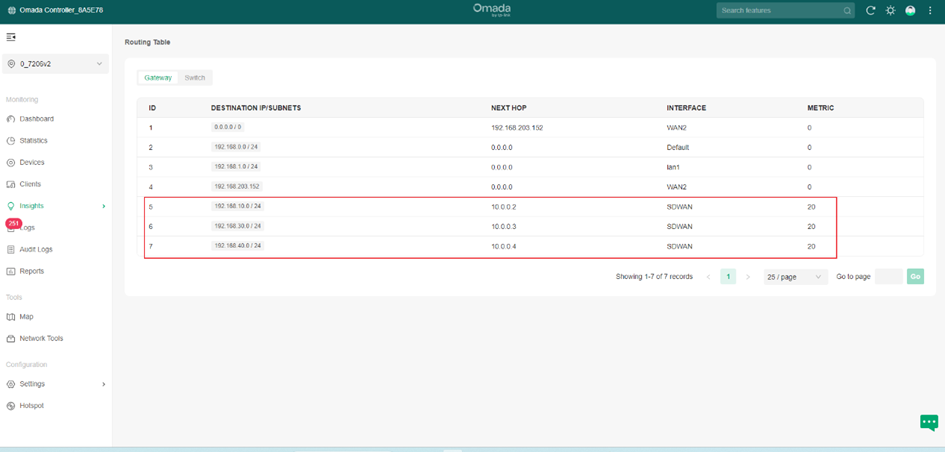
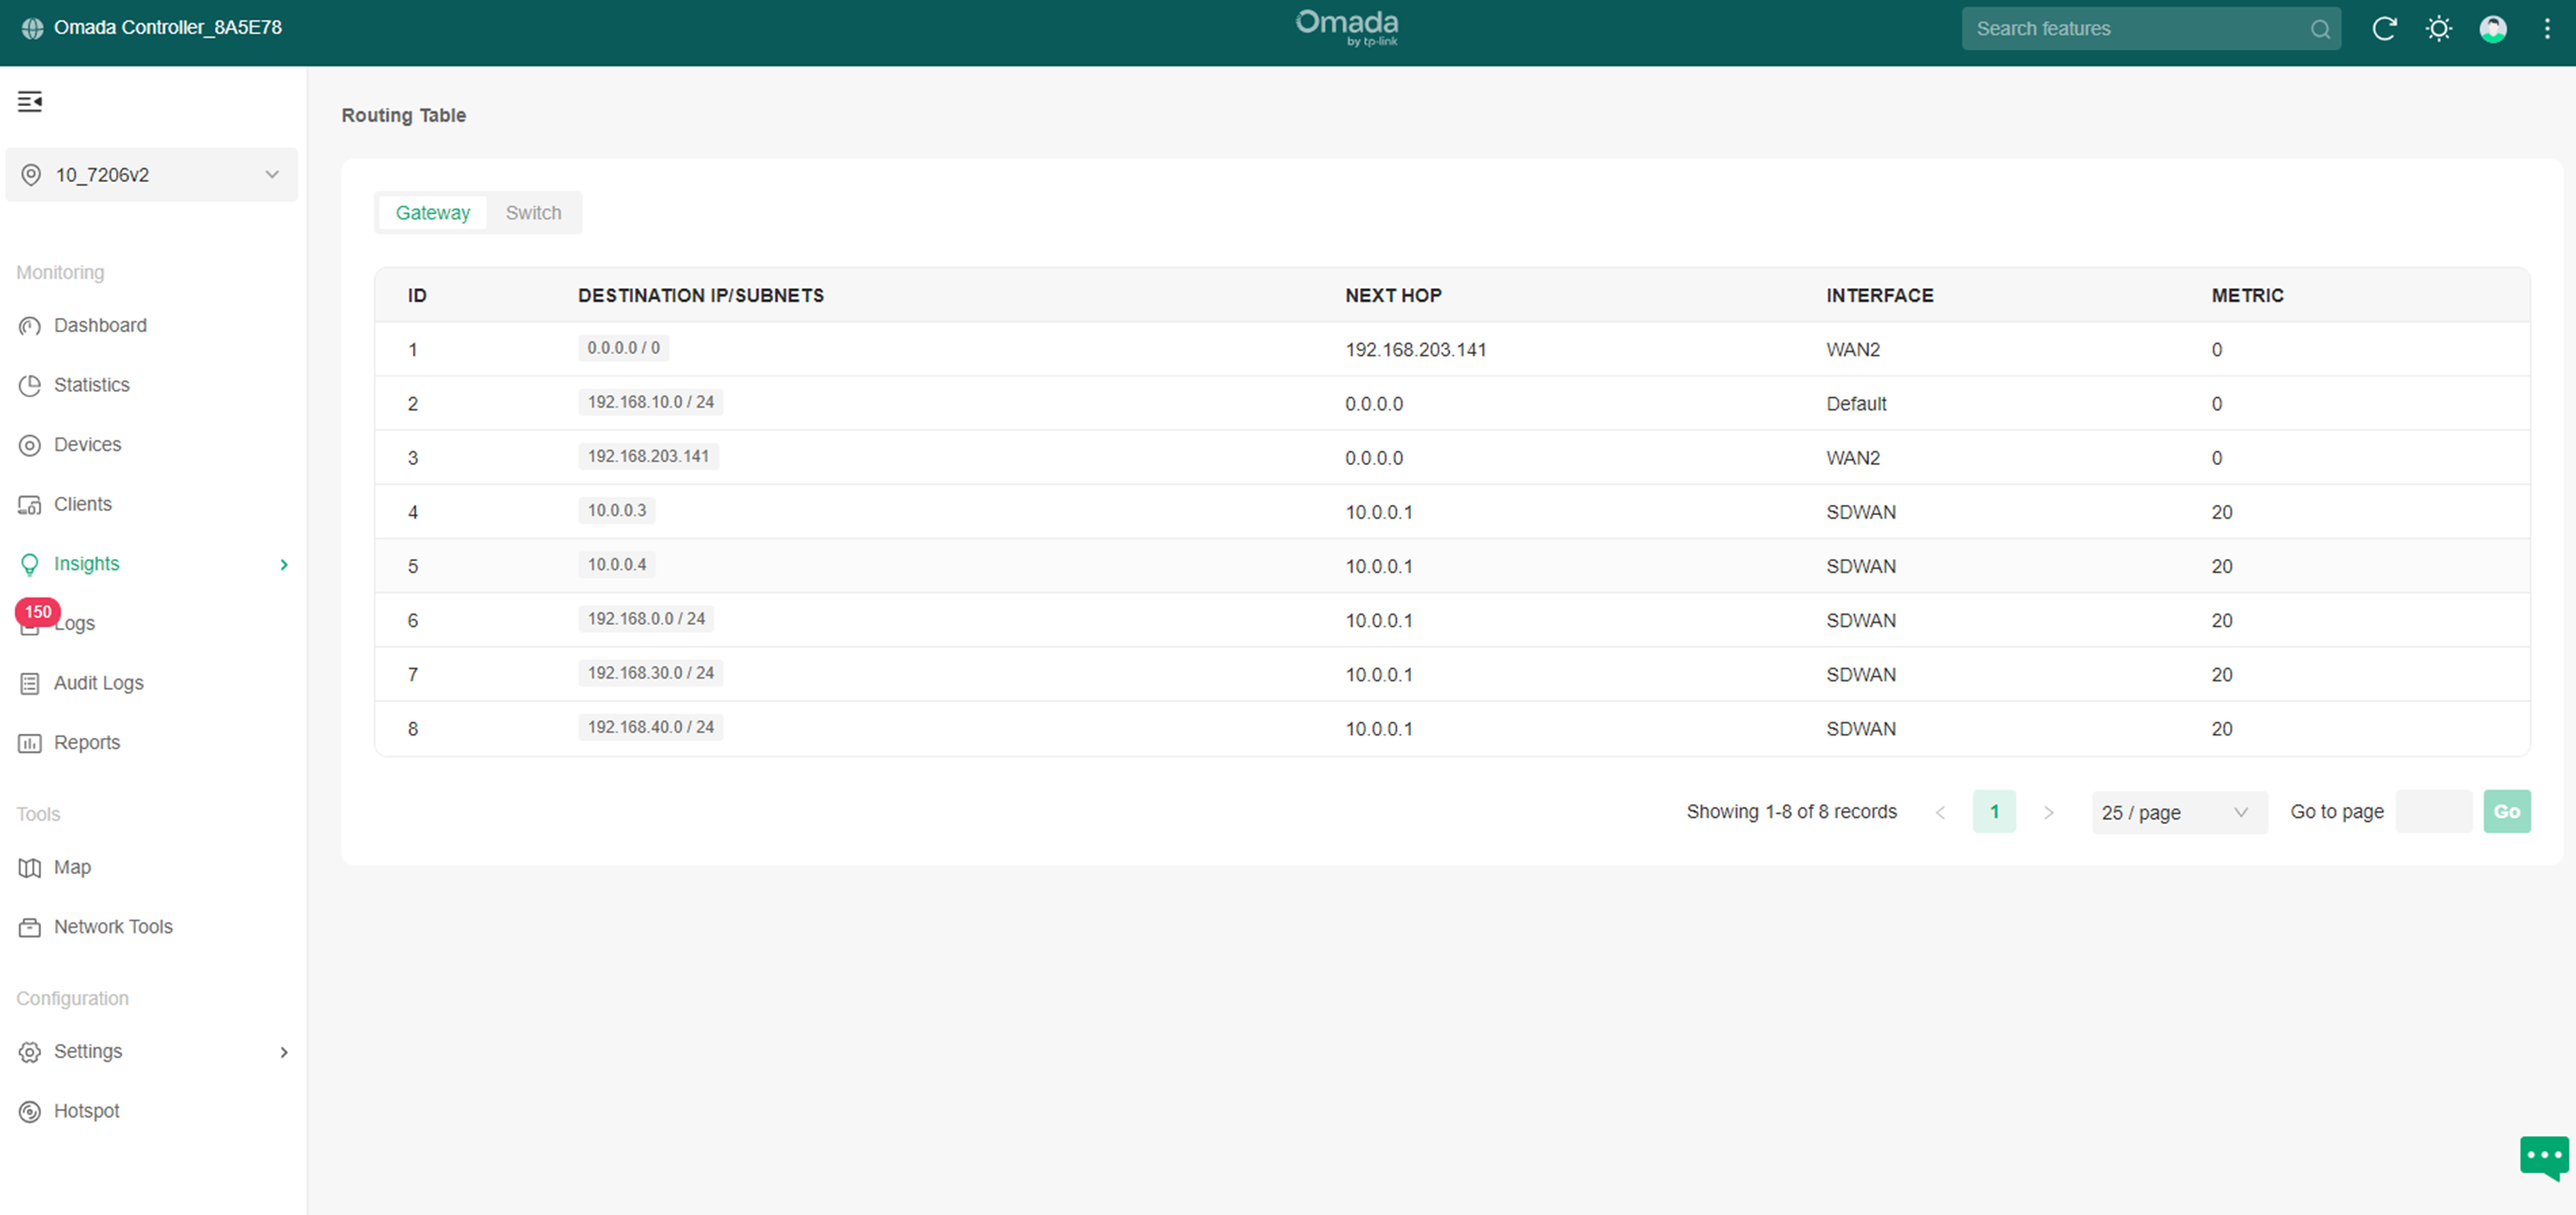
Step 1. Check routing table.
Go to Insights > Routing Table within site to view the next-hop devices for the SD-WAN group network segment.
The routing table of Hub:
The routing table of Spokes:
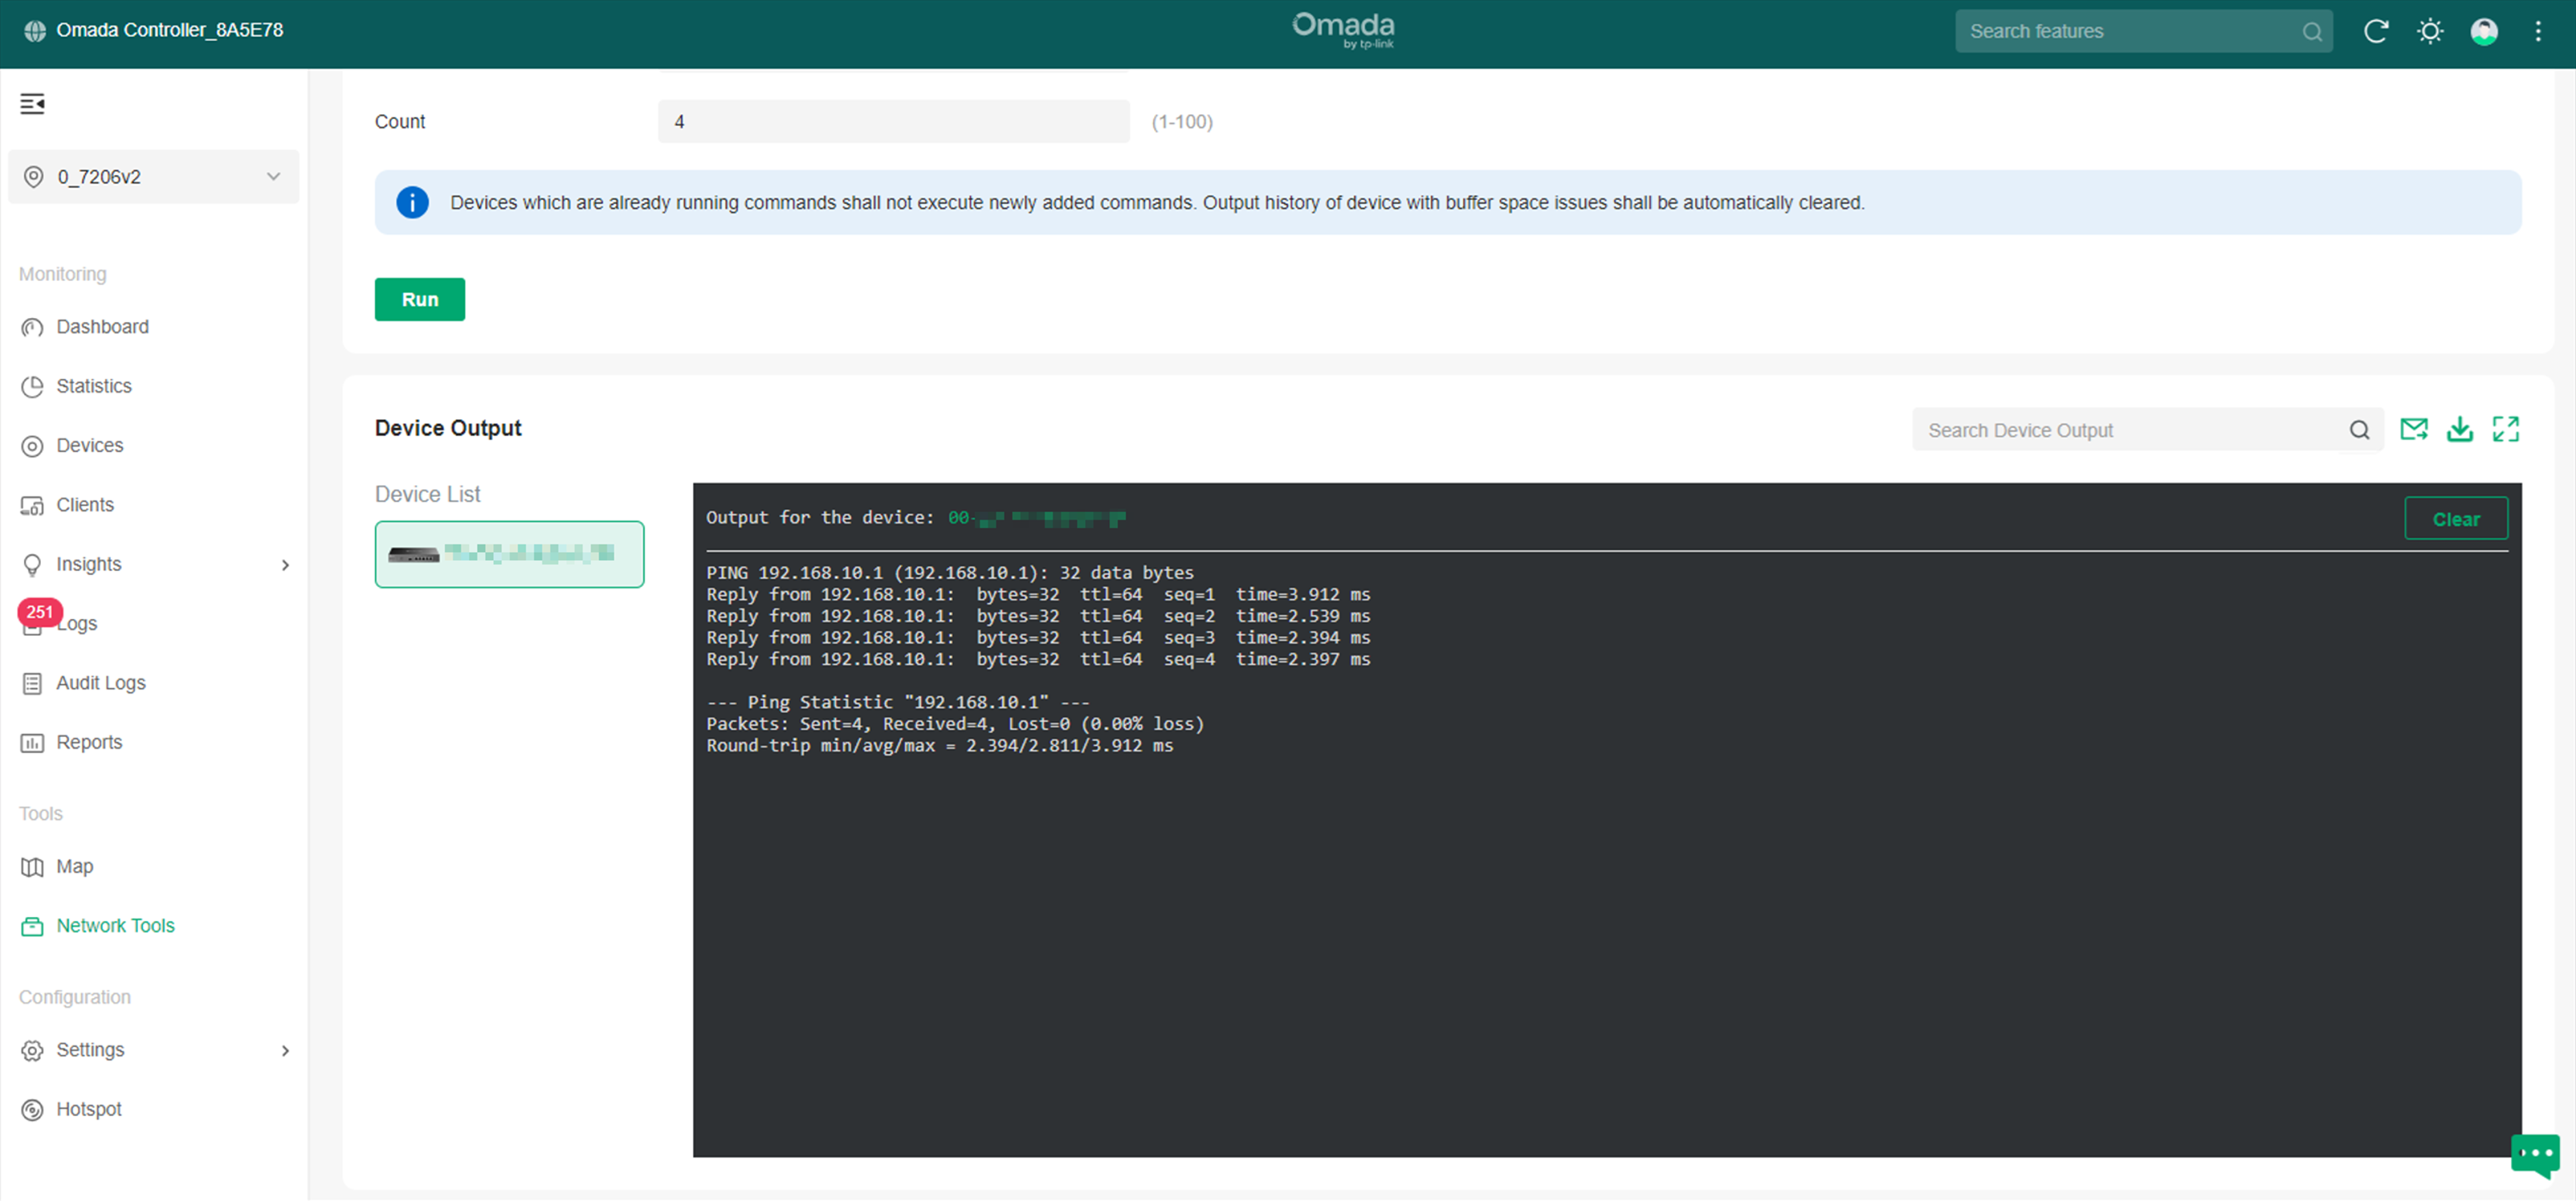
Step 2. Spoke-Hub connectivity test.
Go to the Network Tools page of the Hub site to perform a network connectivity test.
Select Network Check, as shown in the following figure, select the network segment of the Hub to participate in the network, fill in the Domain/IP Address of the Spoke network segment to be tested, and click Run.

As shown in the figure, the Hub to the 10_7206v2 site on the 192.168.10.1/24 segment has normal connectivity.
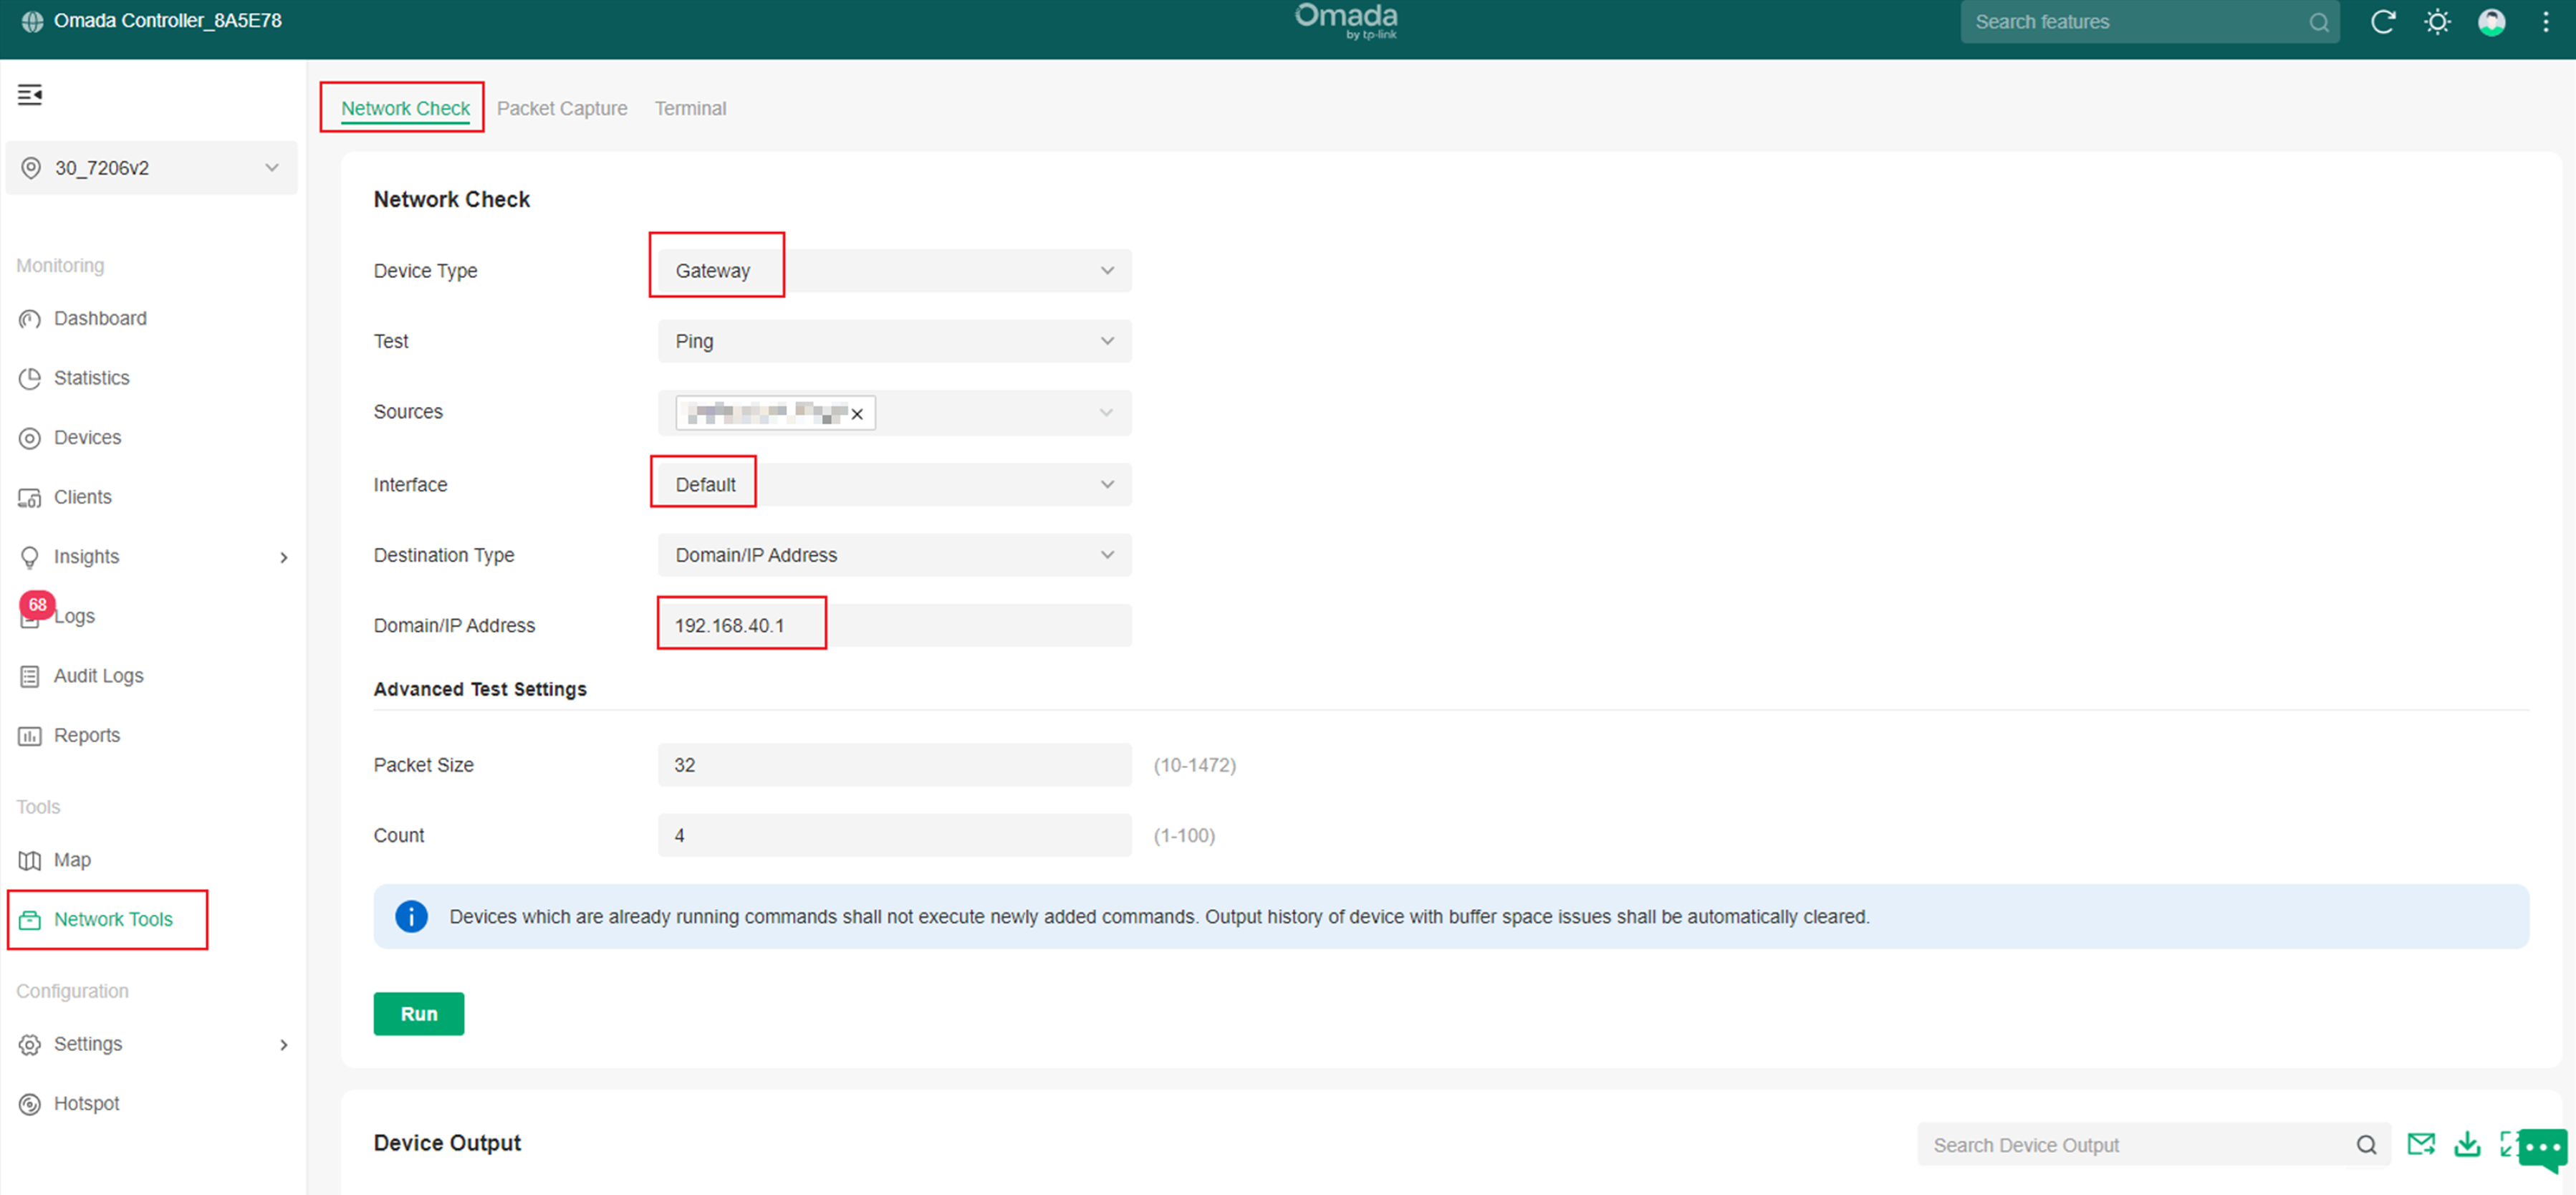
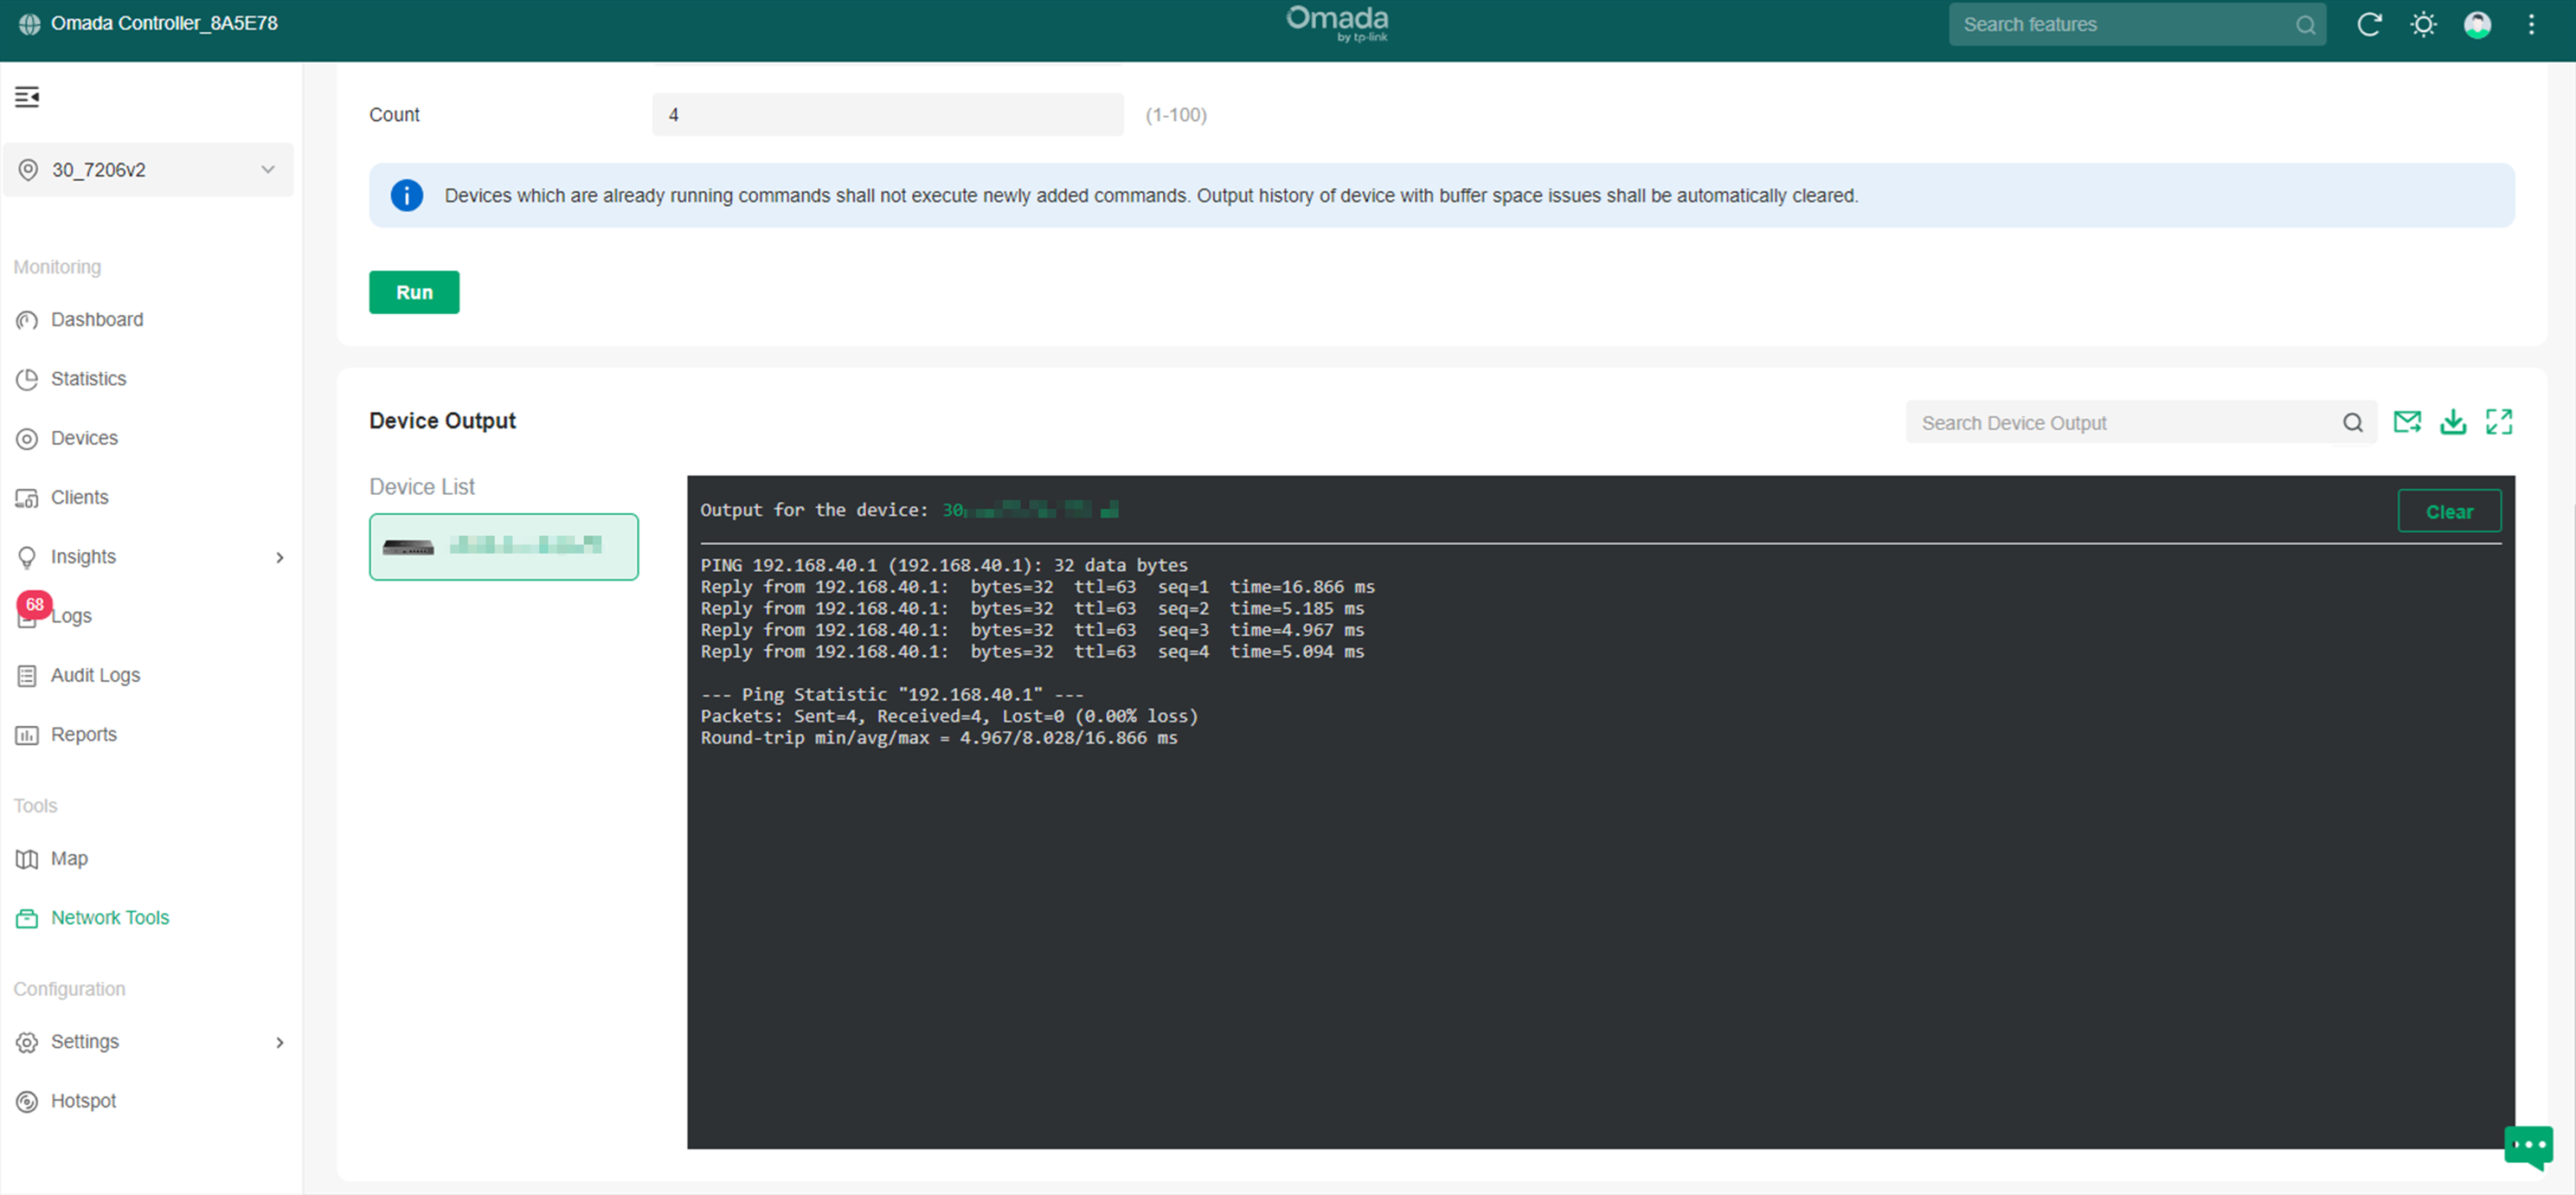
Step 3. Spoke-Hub-Spoke connectivity test.
Enter the Network Tools page of the spoke site to perform a network connectivity test.
Select Network Check, as shown in the figure below, select the network segment of the spoke participating in the network, fill in the Domain/IP Address of a spoke network segment to be tested, and click Run.
As shown in the figure, spoke to the 40_7206v2 site on the 192.168.40.1/24 segment has normal connectivity.
Conclusion
You have now successfully configured SD-WAN on the Omada Controller.
Get to know more details of each function and configuration please go to Download Center to download the manual of your product.
QA
Q1: Does Omada gateway support AWS cloud server for SD-WAN?
A1: No, currently Omada gateway doesn’t support to establish direct connections with major public clouds like AWS, Azure, and Google Cloud.
