How to Create Site in Omada Controller via Open API

Contents
Create an App on the Controller
Complete Open API Authorization
Objective
This guide provides instructions for creating sites in Omada Controller via Open API.
Requirements
- Omada Controller
- Postman
Introduction
The Omada API provides programmatic access to TP-Link’s Omada SDN Controller, enabling integration with external systems and automation of network management tasks. Users can authenticate, query network status, manage devices, control client access, and configure settings without using the Omada web interface. This makes it easier to build automate workflows and integrate Omada with third-party platforms or monitoring tools.
This guide shows how to use the Controller’s Open API feature for creating sites in Omada Controller.
Configuration
Create an App on the Controller
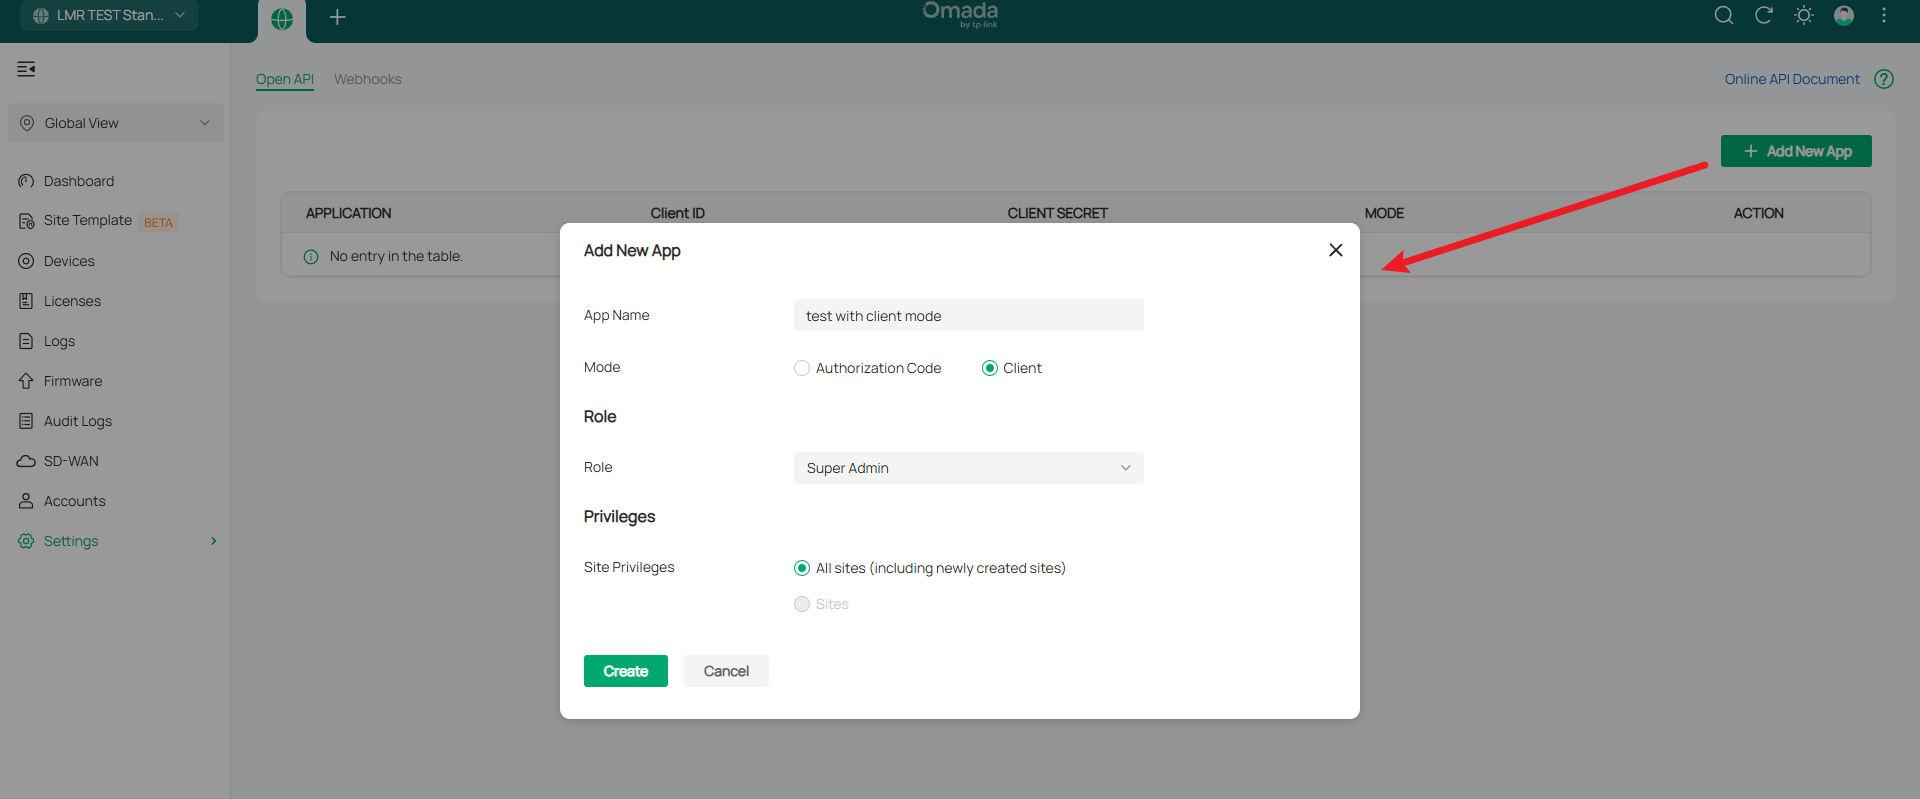
Note: Omada Open API supports two modes: Authorization Code mode and Client Credentials mode. Users can create the application type according to their needs. Authorization Code mode: Suitable when a third-party platform or user needs to log in through the Controller with user identity verification (such as TP-link ID). Client mode: Suitable for system-to-system integration where no user interaction is required. In this guide we use Client Credentials mode as example.
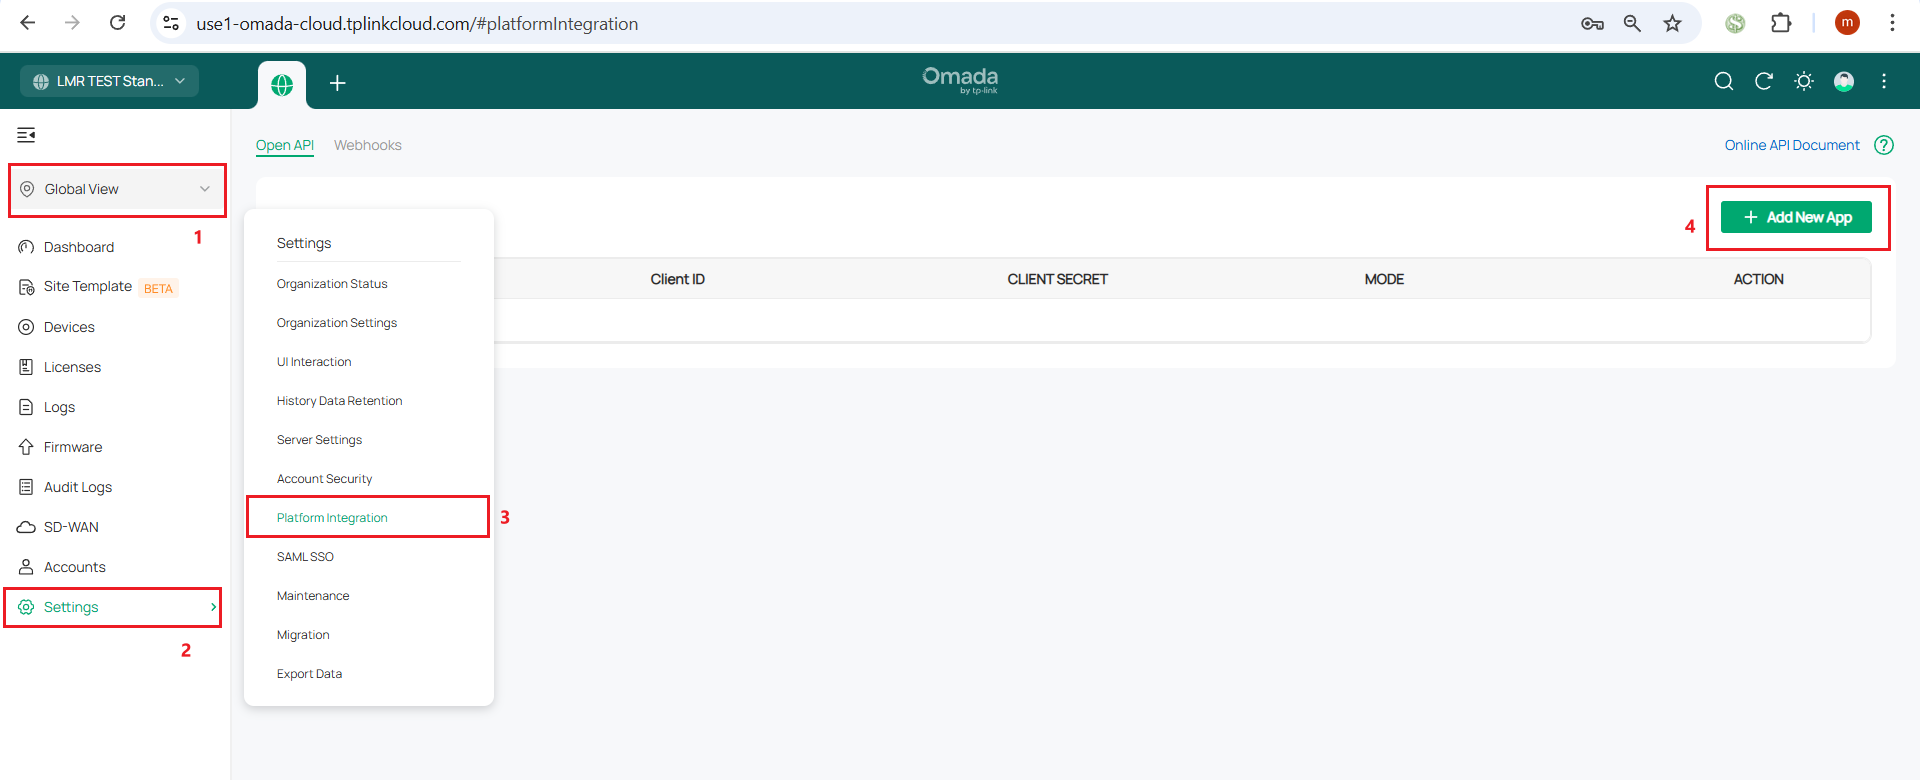
Step 1. Log in to the Controller Web Page, and switch to the Global view, Navigate to Settings > Platform Integration > Open API > Add New App.
Step 2. Name the App you want to create, select Role and Site Privilege.
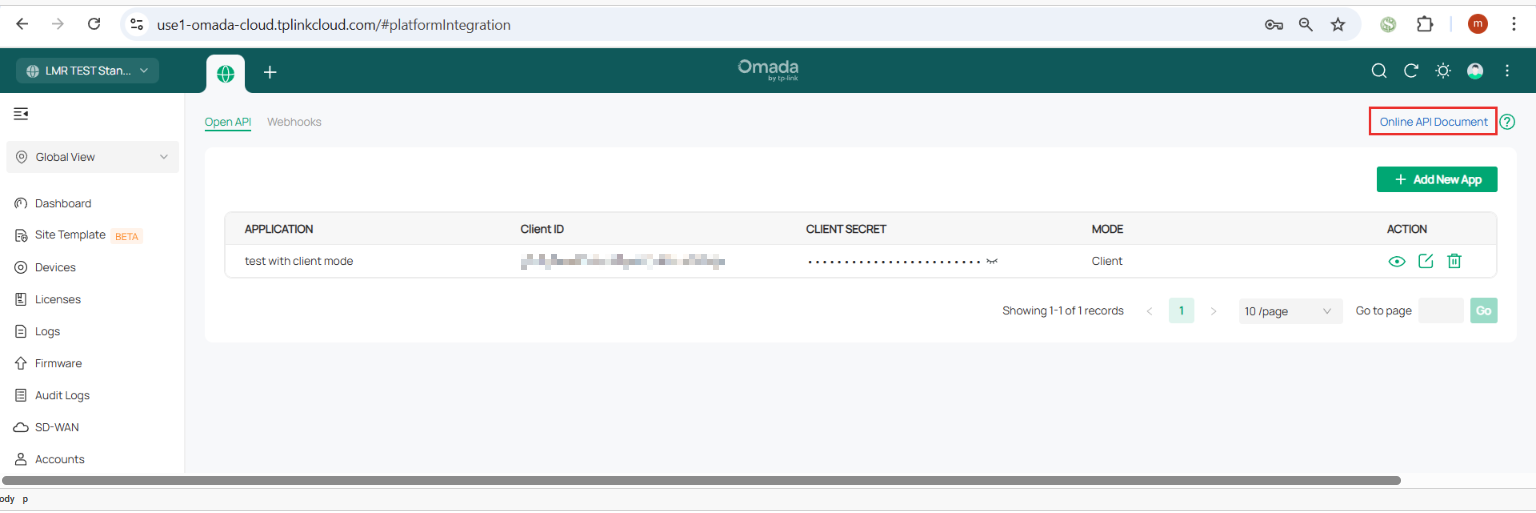
Step 3. Click Online API Document in the top-right corner. You will be redirected to the online documentation page, where you can review the authorization process and detailed API specifications.
Complete Open API Authorization
Note: The access token is required for all API calls. It serves as a credential proving that the request is authorized. Without a valid token, the Controller will reject the request.
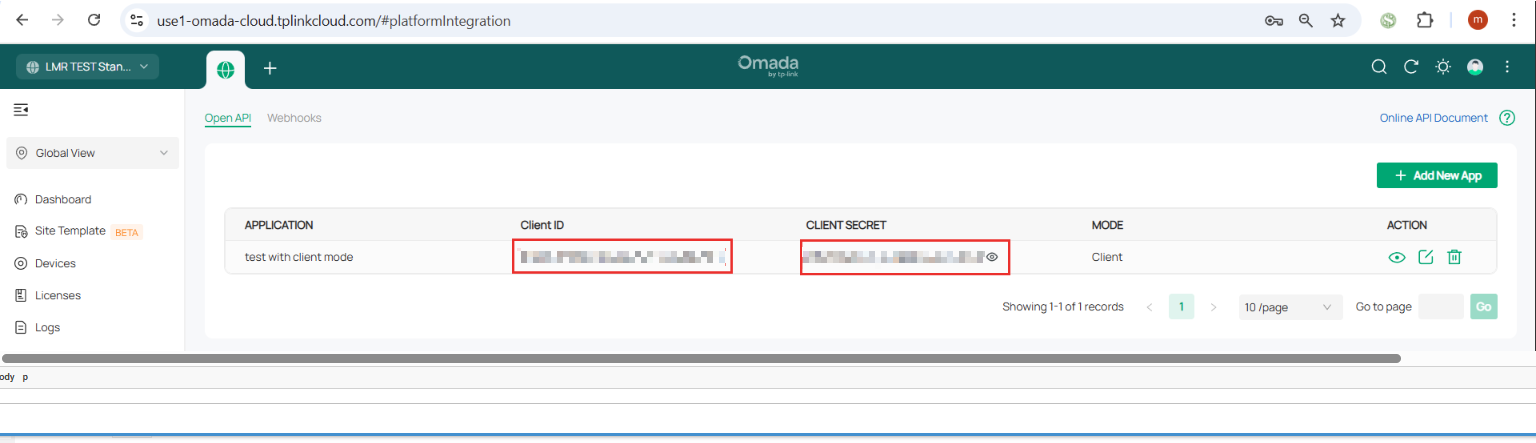
Step 1. Click the eye icon to reveal the Client Secret. Record the Client ID and Client Secret after creating the application. These values are required when requesting an access token.
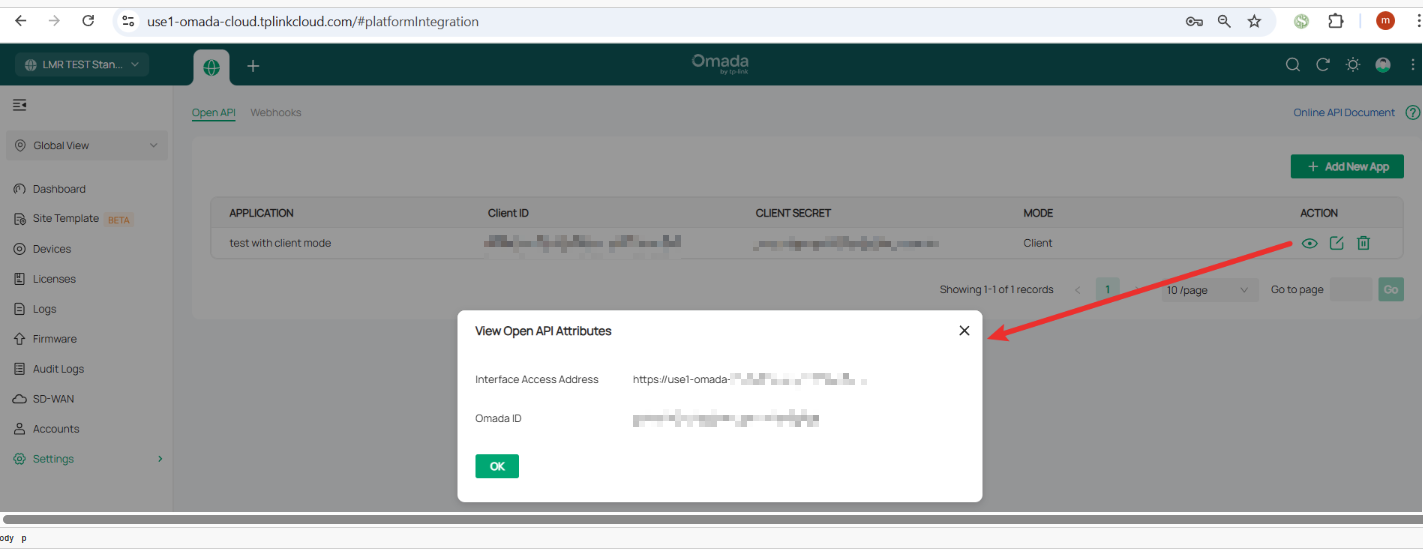
Step 2. Click the view icon to reveal the Omada ID and the Interface Access Address. Record these values, as they are required when calling the APIs.
Step 3.Refer to Section 2.3 on the Home page of the online documentation to complete authorization in Client mode. If you choose Authorization Code mode instead, refer to Section 2.2.
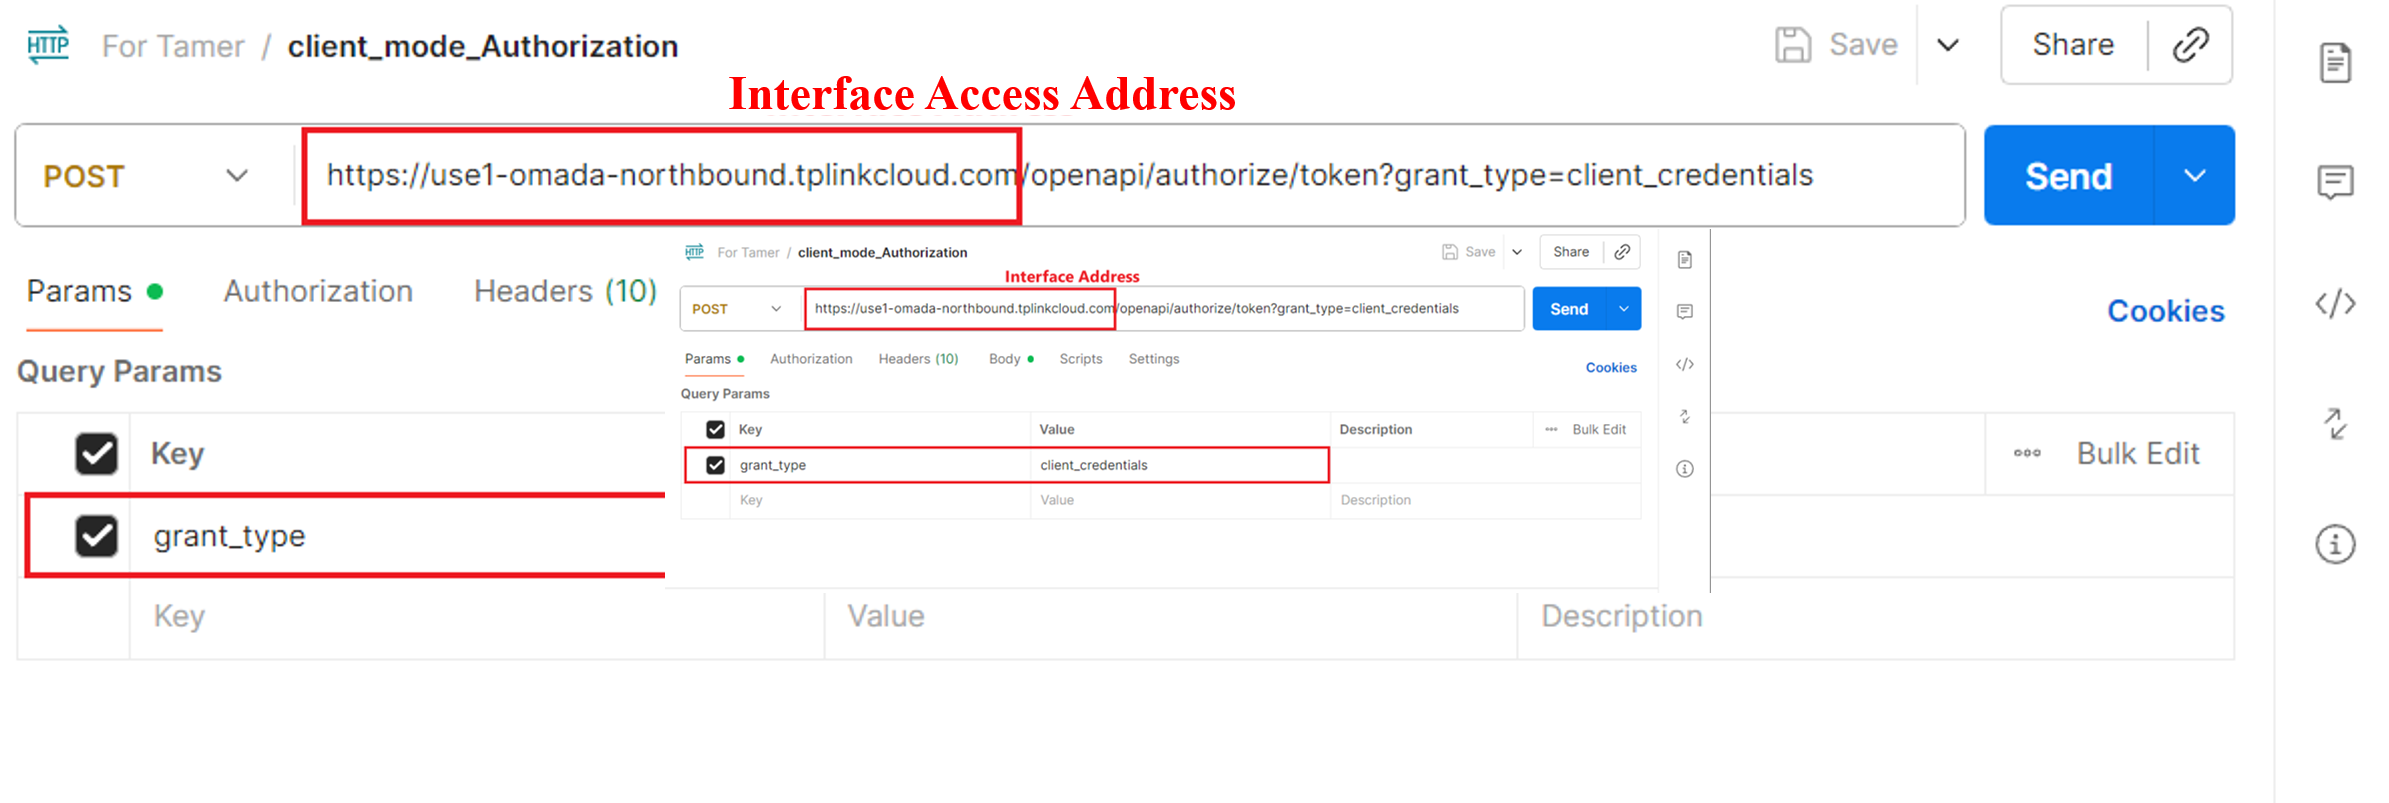
Use the docs to verify the method, path, query parameters, and headers. Set the body to raw JSON and fill its fields exactly as specified in the docs.
Fill in the request URL and Params.
Add the headers required by the API
.
Complete the body part according to the parameters in the API documentation. Click Send to send the request, and the AccessToken will be returned successfully.
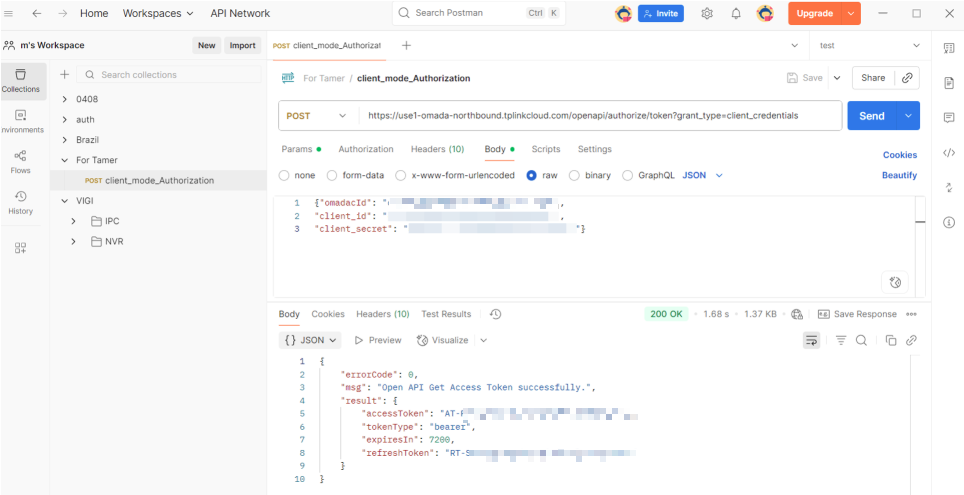
Note: After obtaining the access token, you will use it to access API interfaces.
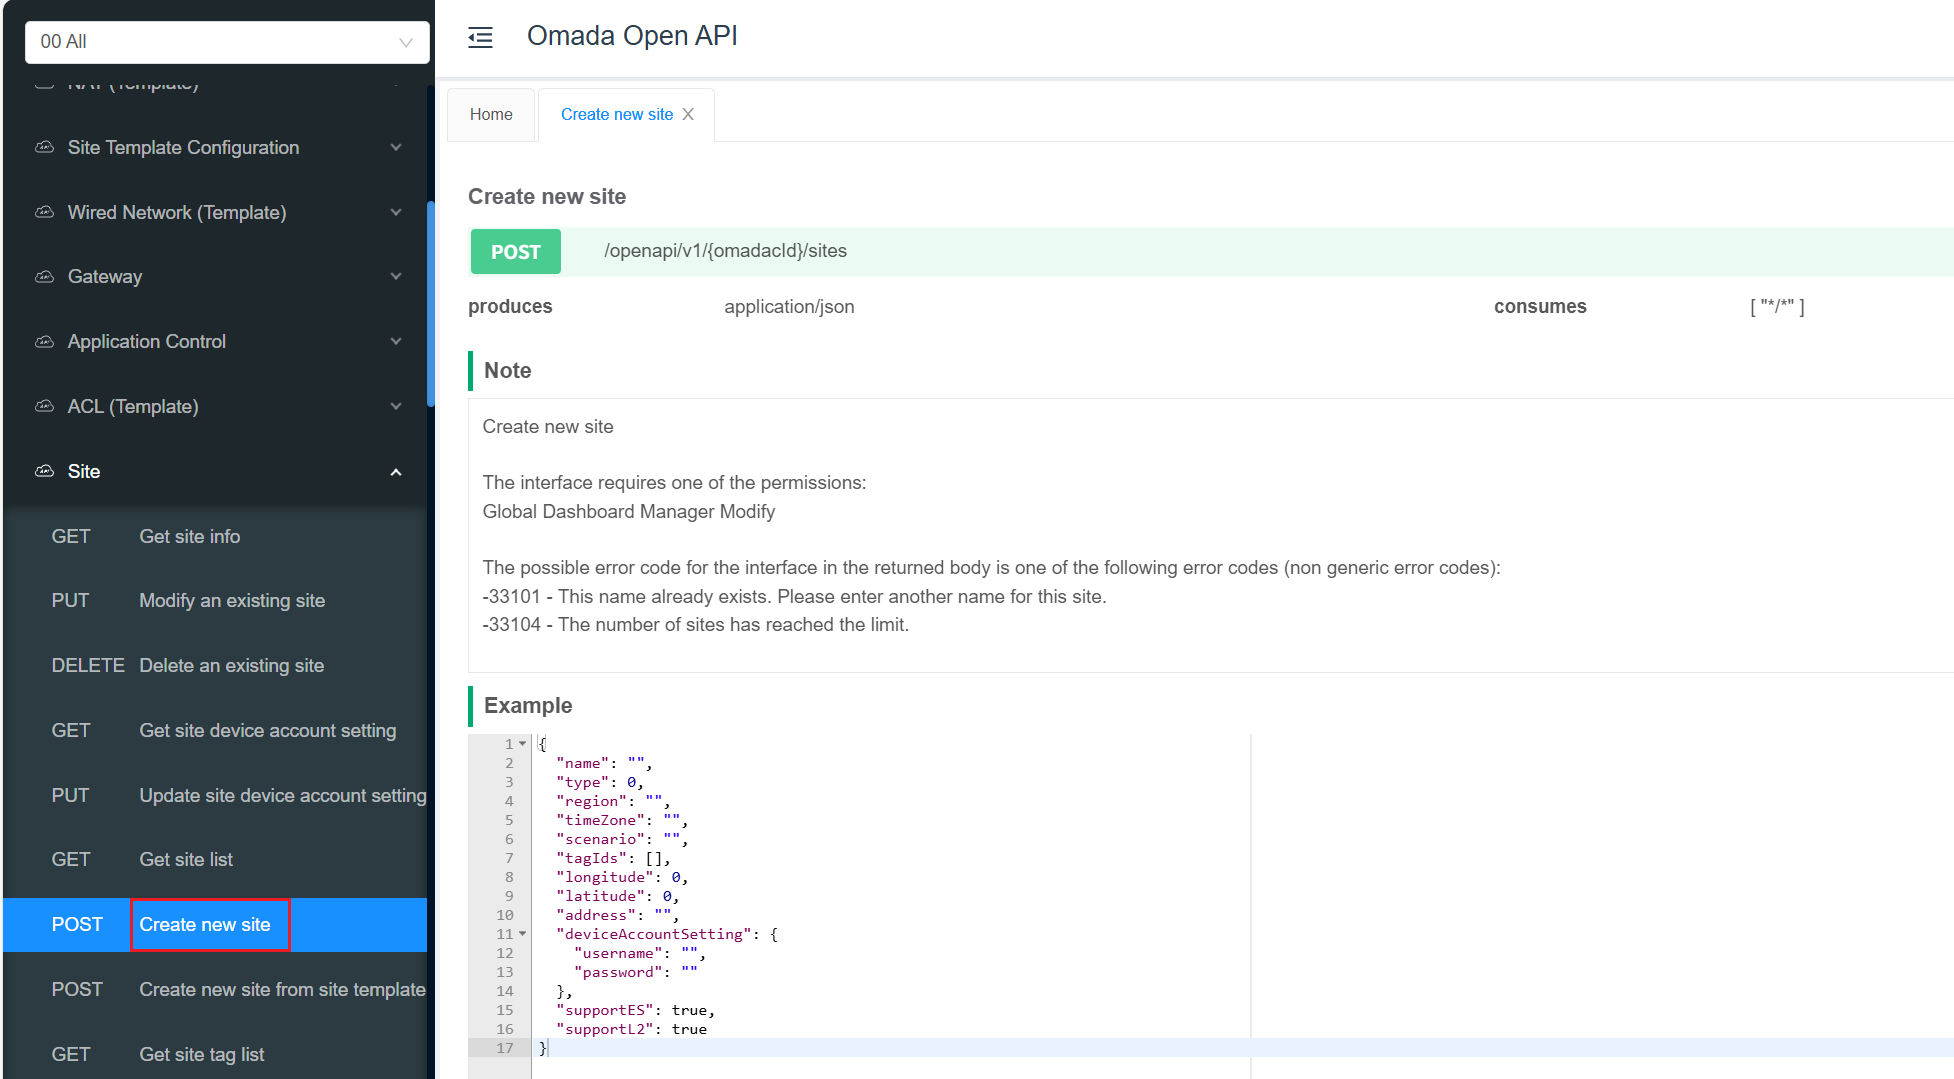
Create new site
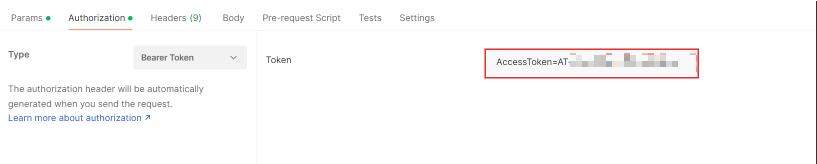
Step 1. Fill in the Access Token obtained in the previous step in the Authorization field.
Note:The prefix in the Authorization header must be AccessToken=
Step 2. Find the API you want to call in the API documentation
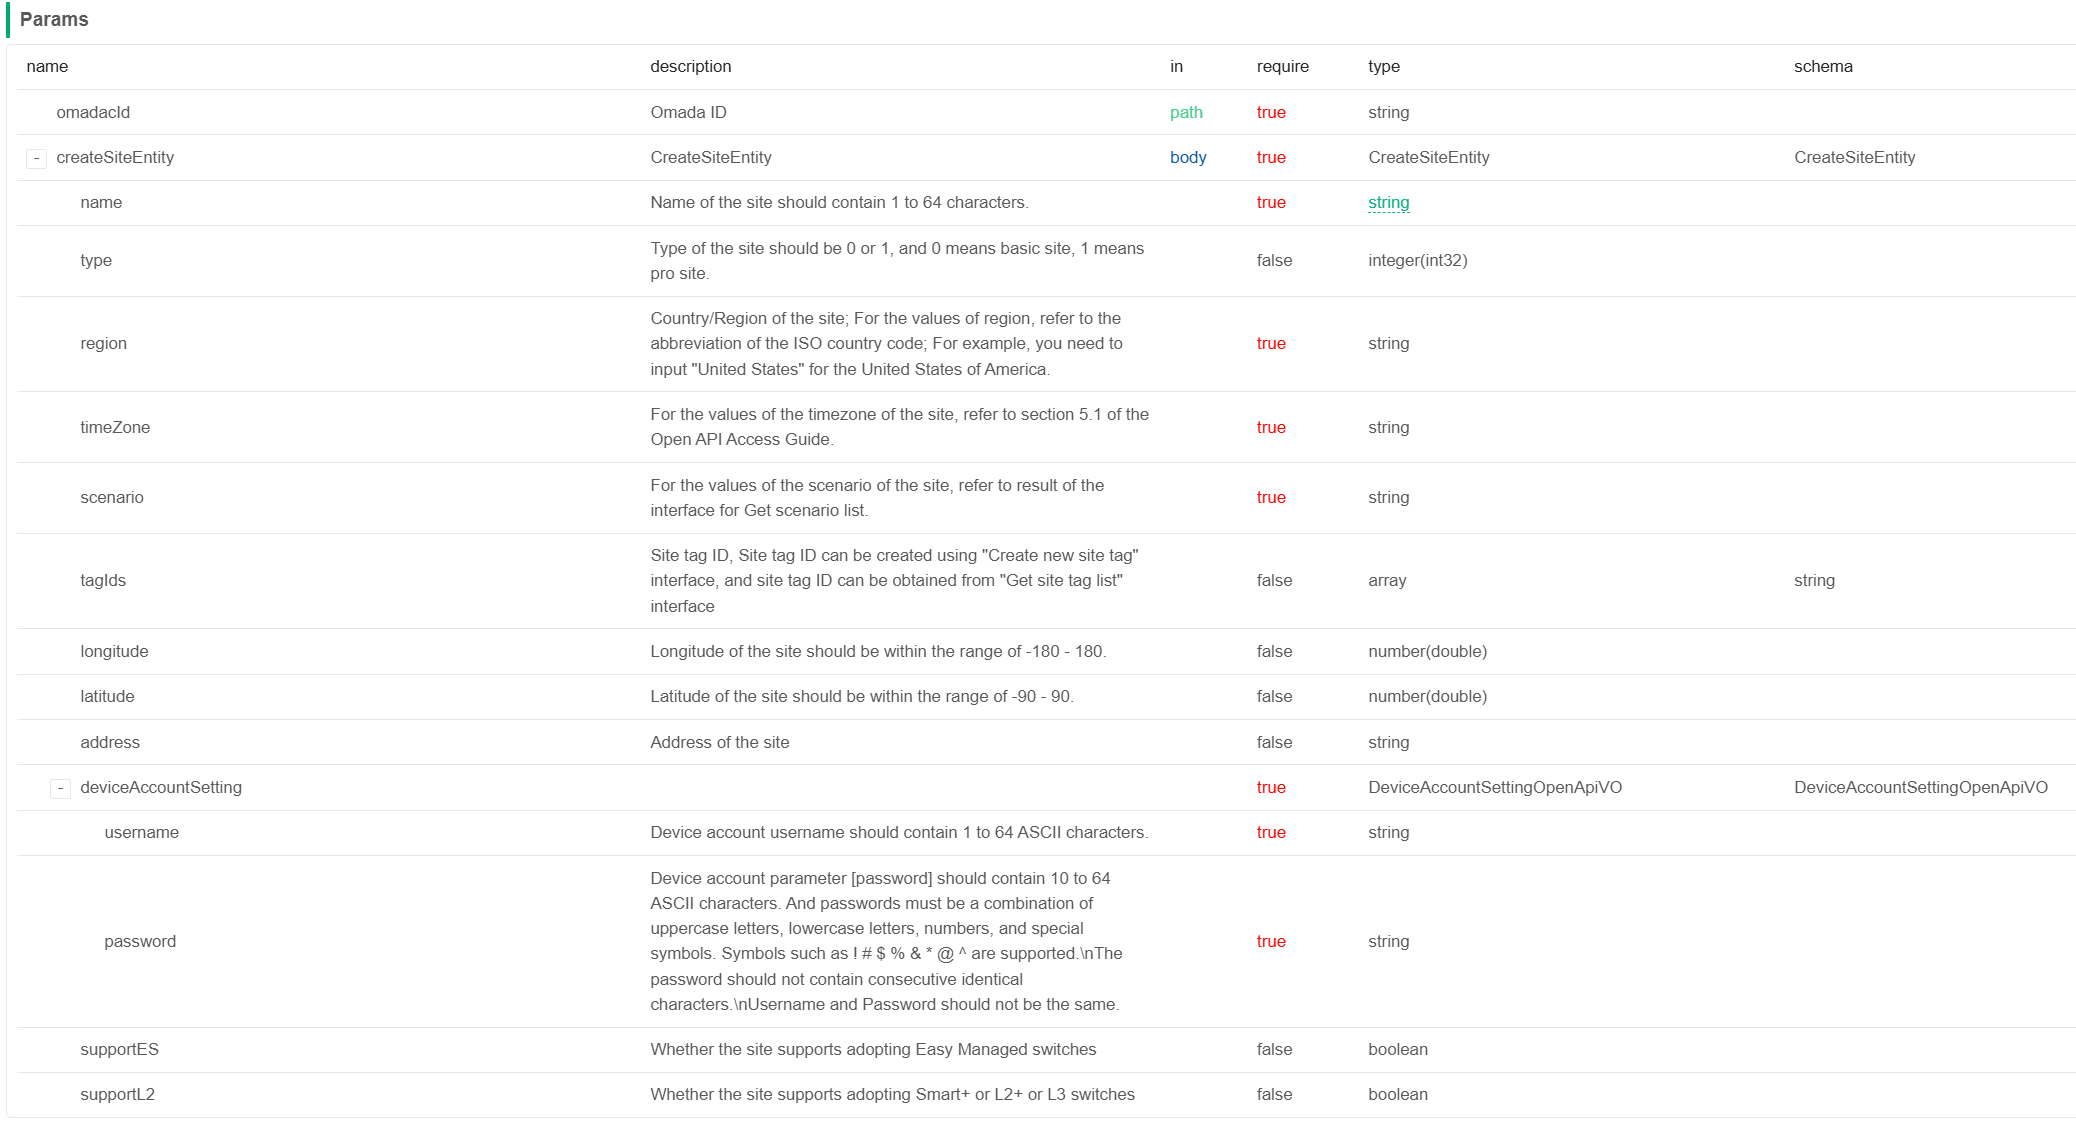
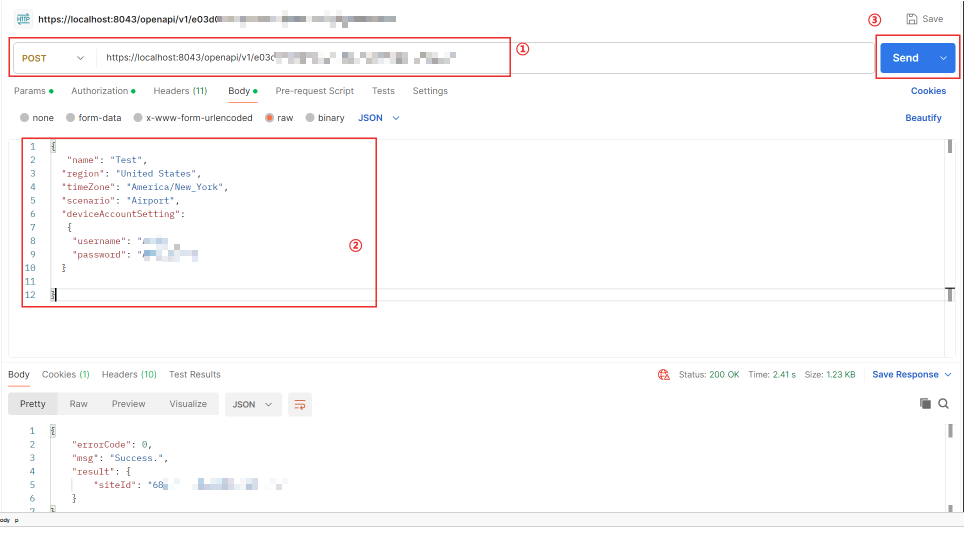
Step 3. Fill in the corresponding URL and parameters according to the content in the document. Parameters marked as true are required, and parameters marked as false are optional. After the configuration is complete, click Send to send the request. If the creation is successful, errorCode 0 and siteID will be returned.
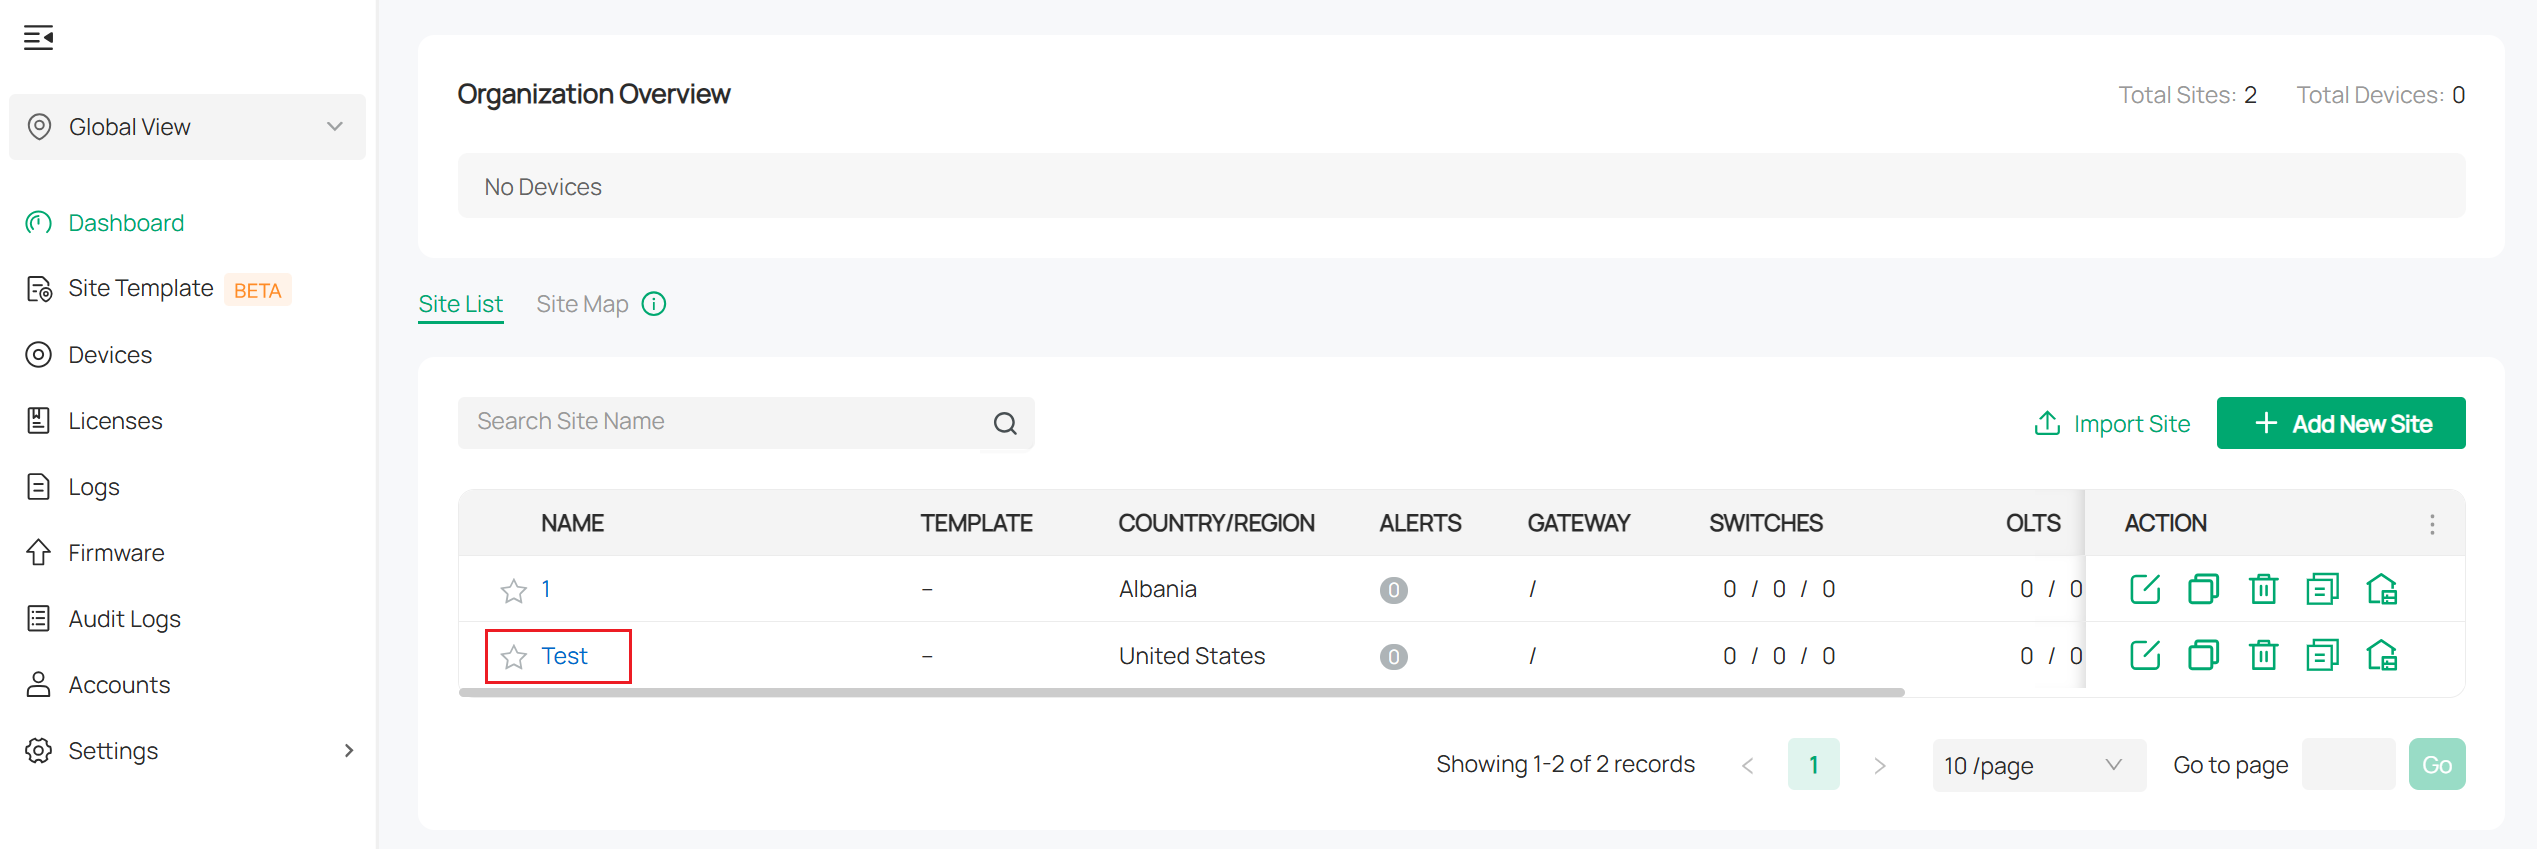
Verification
Go to Global > Dashboard. If the newly created site appears in the site list, it verifies that the site creation was successful.