


How to Use Case Center to Preserve and Manage Video Evidence on Omada Fusion Pro Gateway


Contents
Introduction
Case Center on the Omada Fusion Pro Gateway is designed to preserve important video evidence for incidents that require further review or investigation. Relevant video clips can be collected from Playback, Events, and Smart Search and added to the same Case, where they are organized by time to present the sequence of the incident.
Once a recording is added to a Case, it is protected from being overwritten by Loop Recording. The preserved evidence can then be reviewed in Case Center, downloaded for offline use, or shared remotely through a Share Link. This guide explains how to create and manage Cases, add video clips, and download or share Case evidence.
Requirements
-
Omada Fusion Pro Gateway
Configuration
Create a case
Go to Omada Guard > Case Center and click Add. Enter the Case Name and, if needed, the Case Description, then click Add to create the Case.
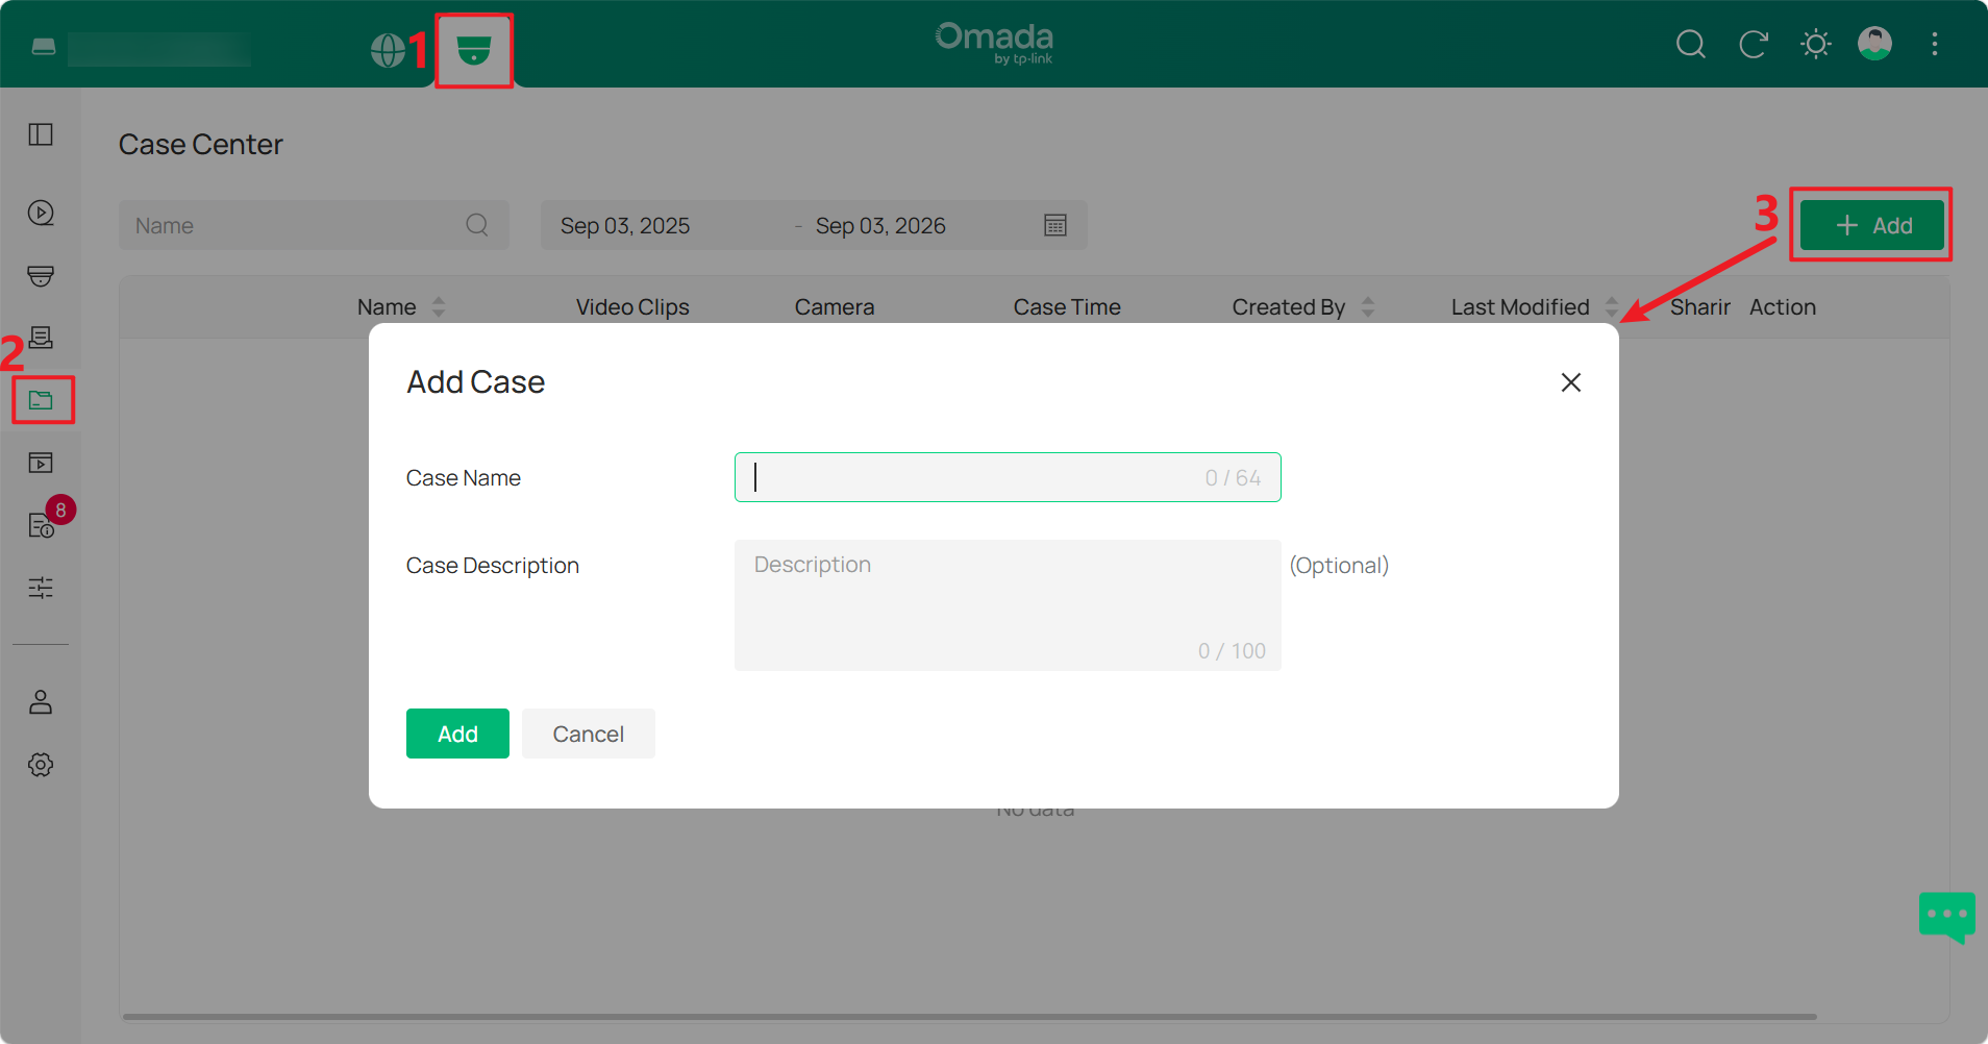
After the Case is created, the Case Details page opens automatically. This page displays the Case information and provides guidance for adding video clips from Playback, Events, or Smart Search.
Add video clips to a case
Video clips can be added to a Case from Playback, Events, or Smart Search.
Option 1: Add a video clip from Playback
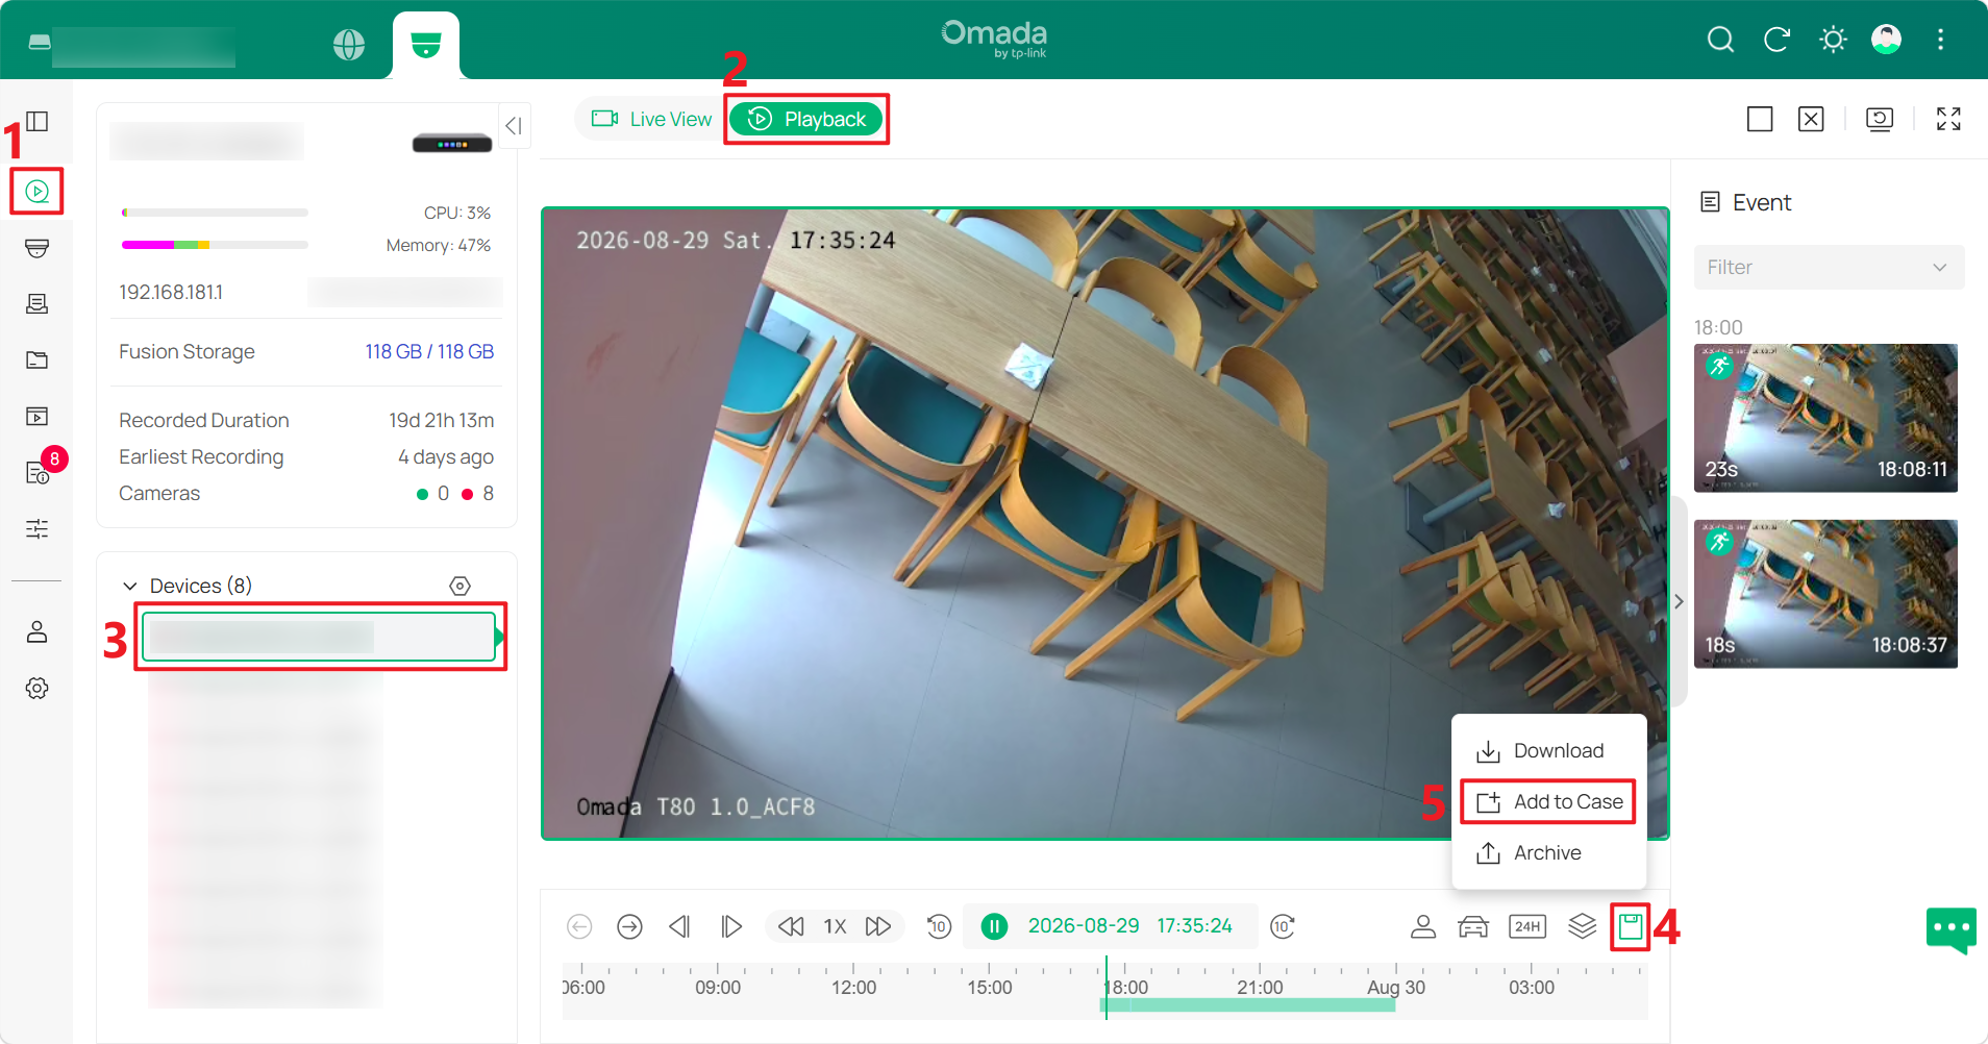
Step 1. Go to Videos > Playback, select the required camera and locate the recording to be preserved. Click the Save icon and select Add to Case.
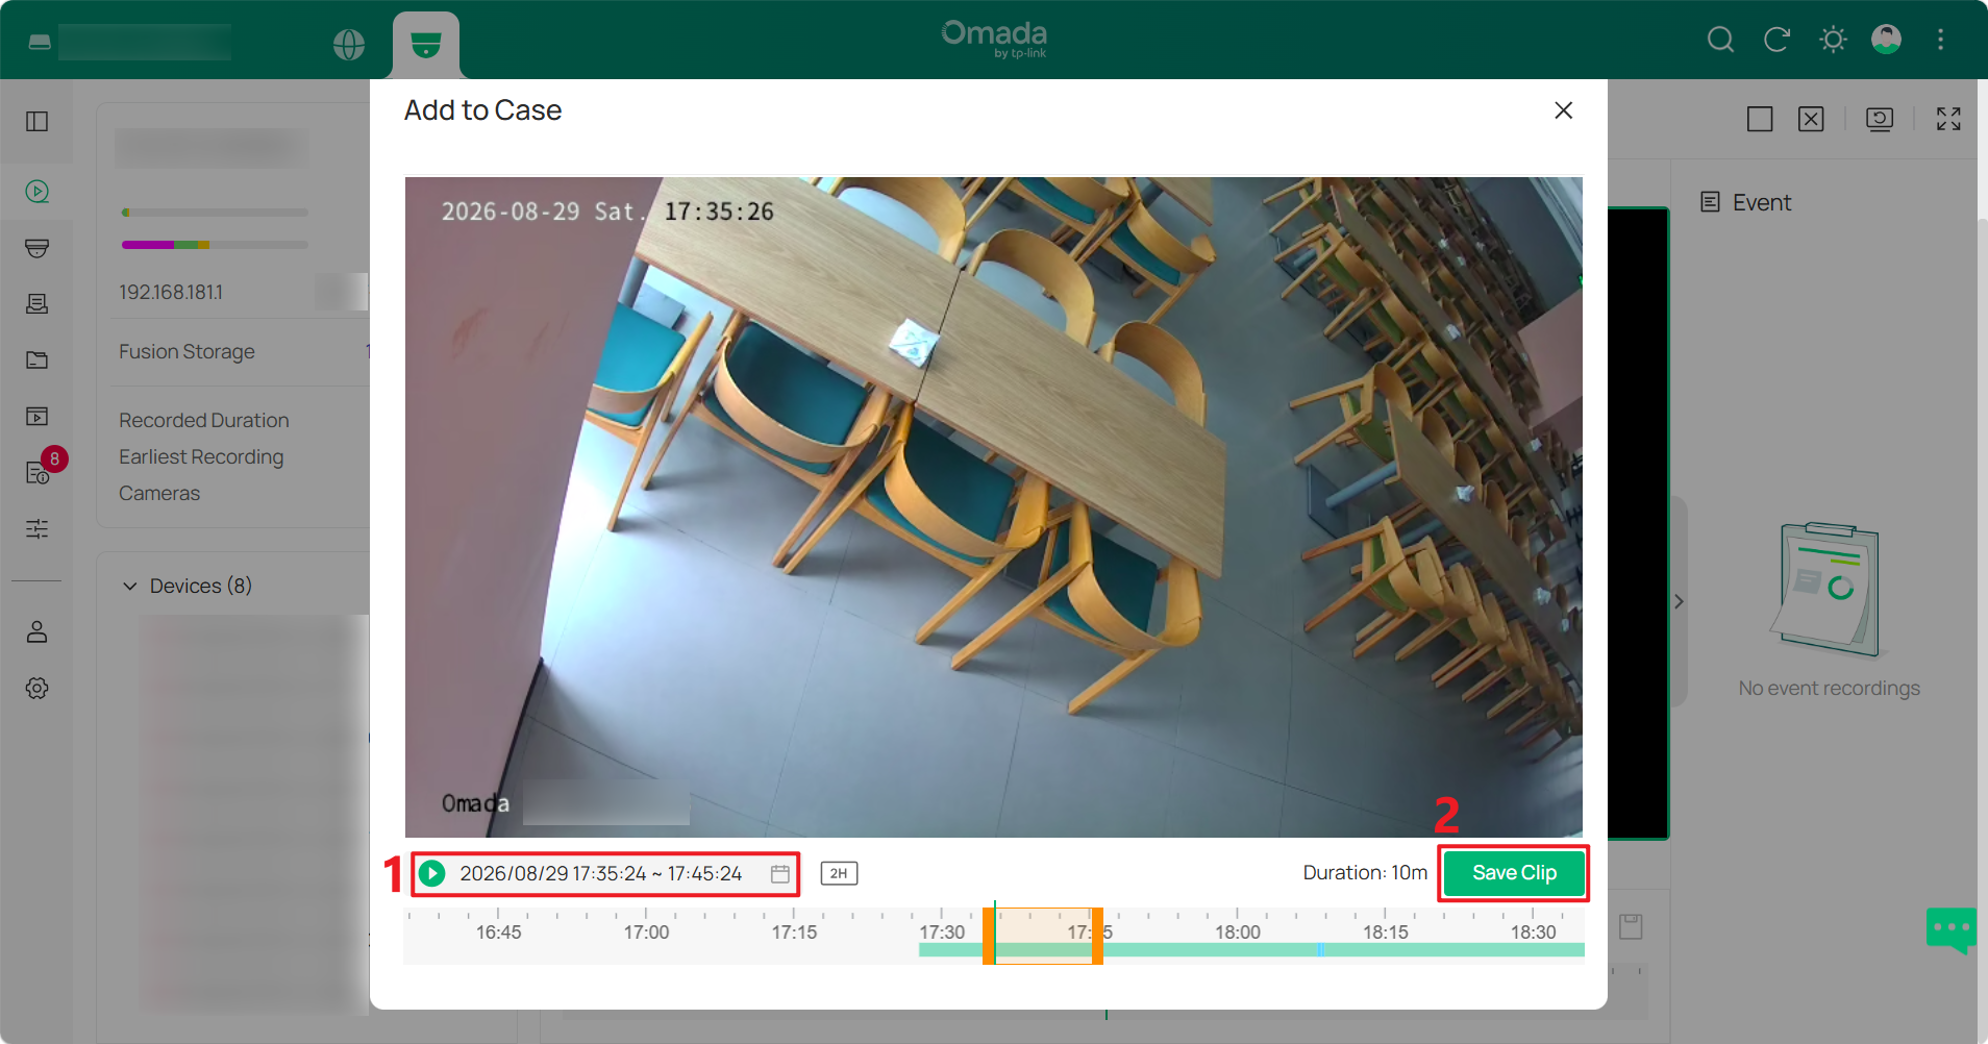
Step 2. Adjust the start and end times, or drag the trim handles on the recording timeline to select the required video segment. Then click Save Clip.
Option 2: Add a video clip from Events
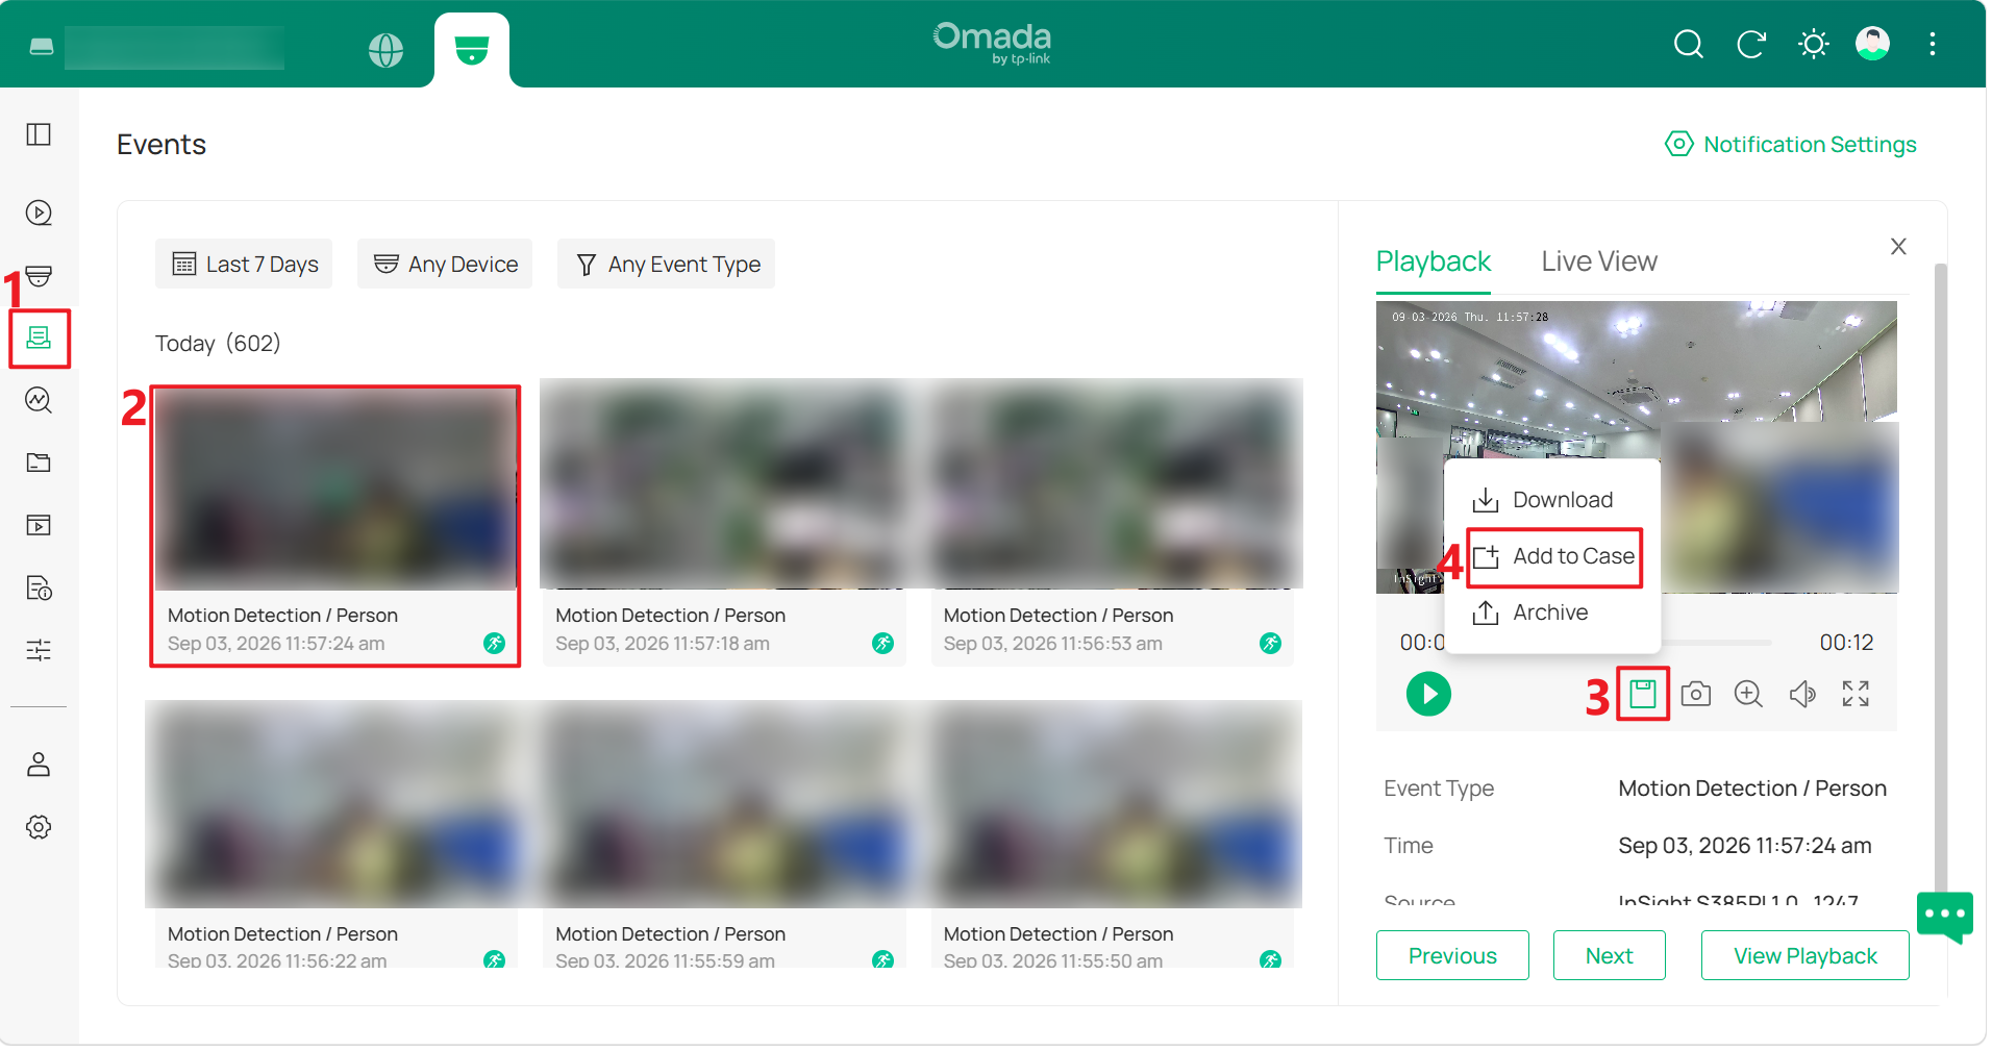
Go to Events and locate the required event. Click the Save icon and select Add to Case.
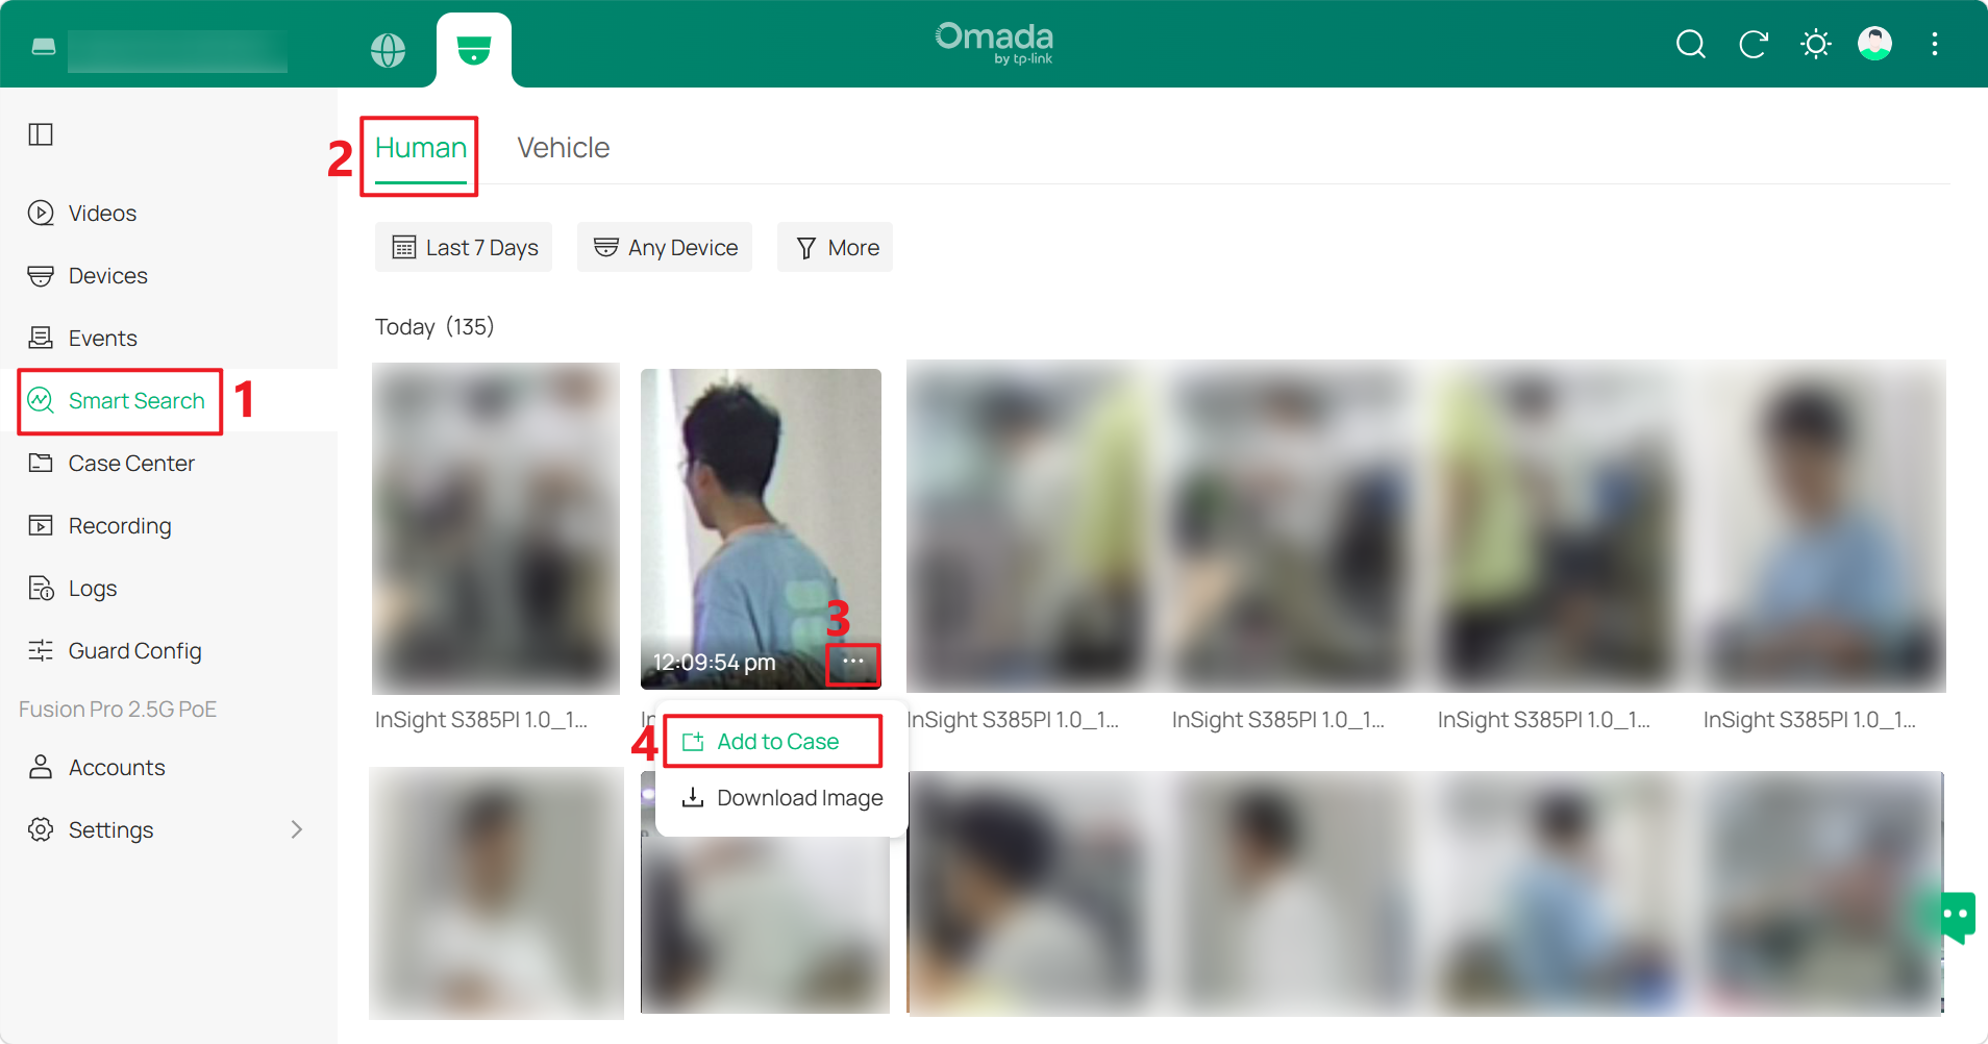
Option 3: Add a video clip from Smart Search
Note: Before using Smart Search, confirm that the camera supports People & Vehicle Analytics.
Go to Smart Search, select Human or Vehicle as needed, locate the required search result, click the More icon, and select Add to Case.
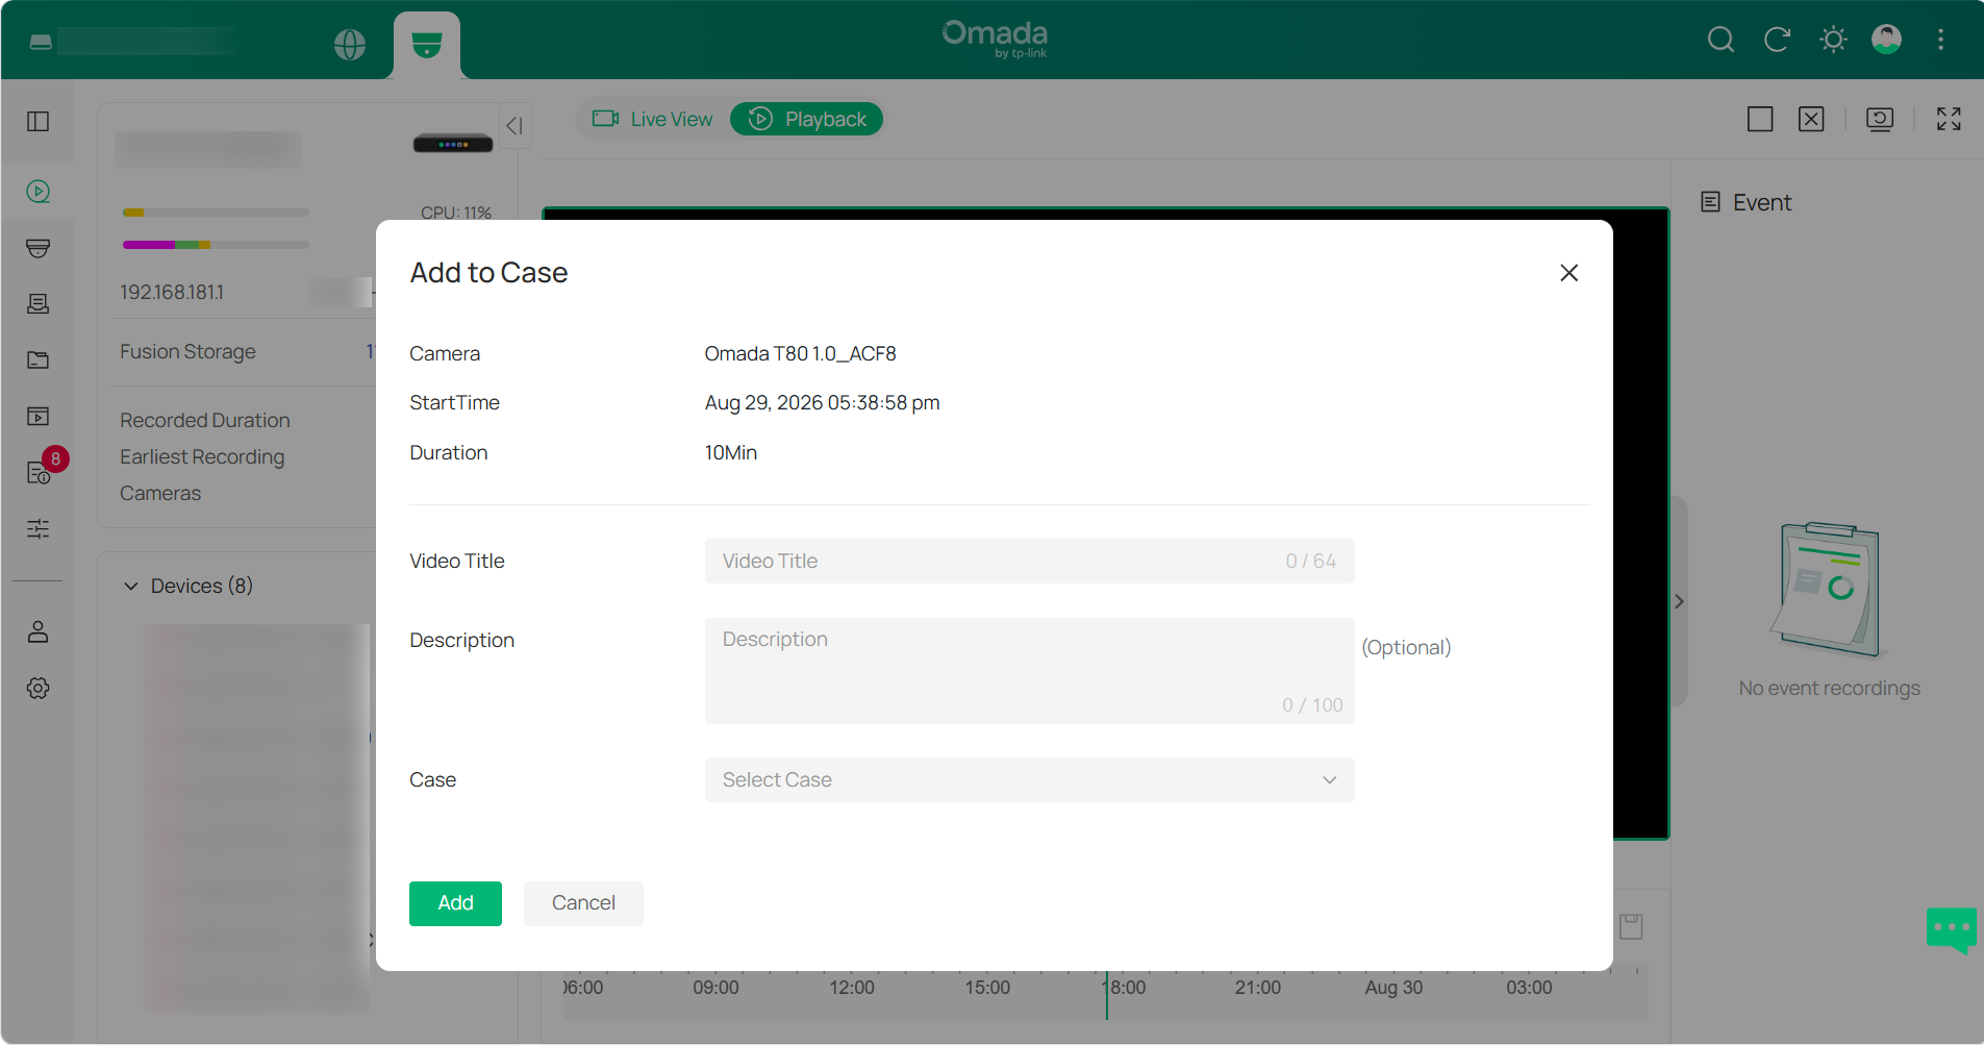
After selecting Add to Case using any of the options above, enter the Video Title and an optional Description in the dialog, select the target Case, and click Add.
Note:
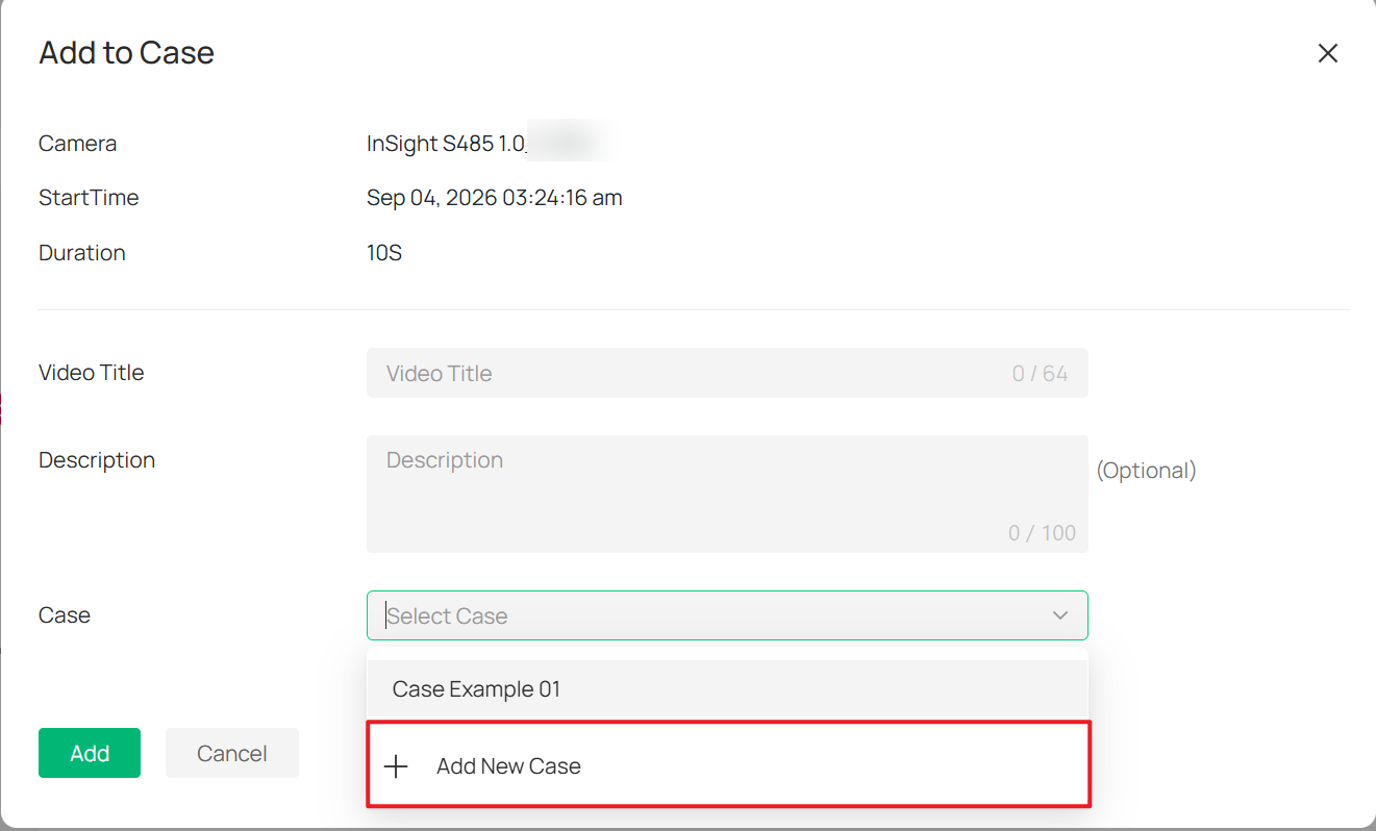
- If no suitable Case exists, select Add New Case from the Case drop-down list to create a new Case directly.
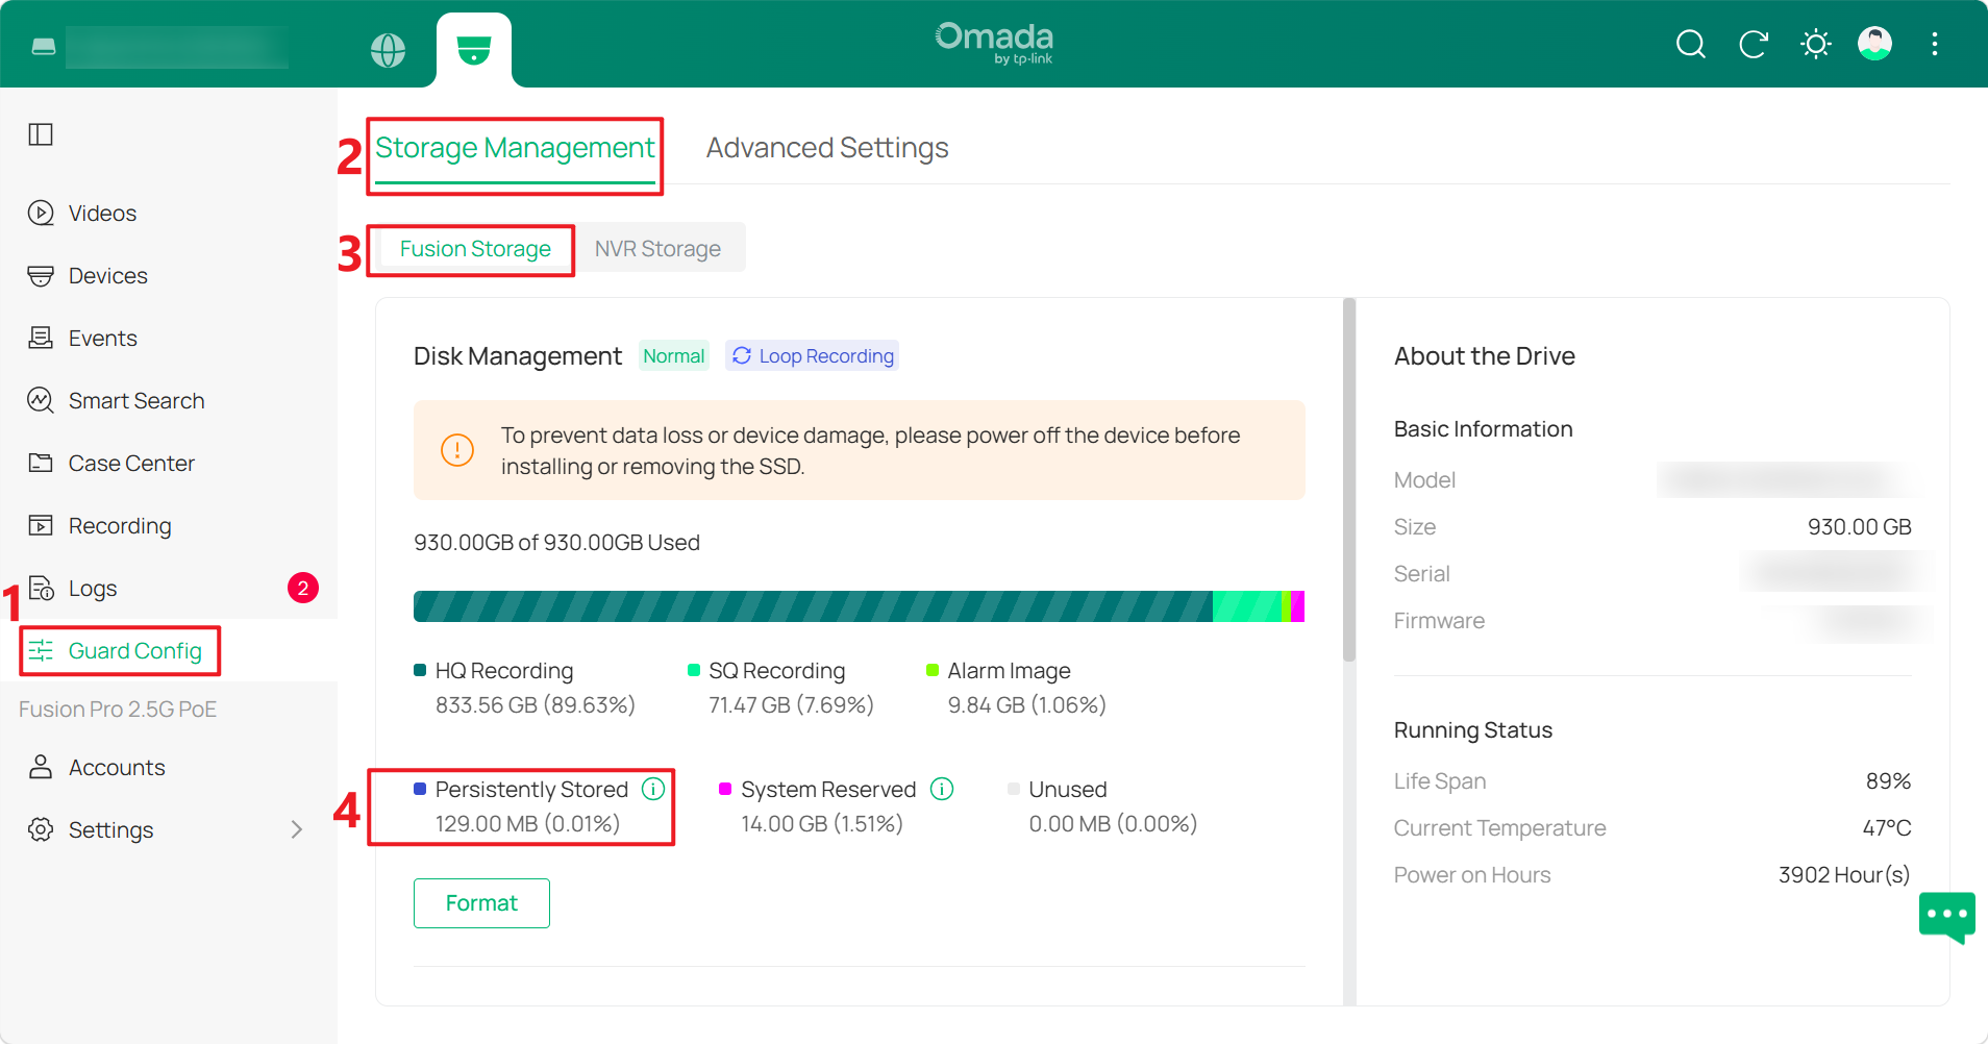
- For recordings stored on Fusion Storage, video clips added to a Case remain locked and are counted under Persistently Stored. Go to Guard Config > Storage Management > Fusion Storage to check the storage usage. Recordings added from an NVR managed by the Omada Fusion Pro Gateway are not included in this value.
Manage cases
View case details
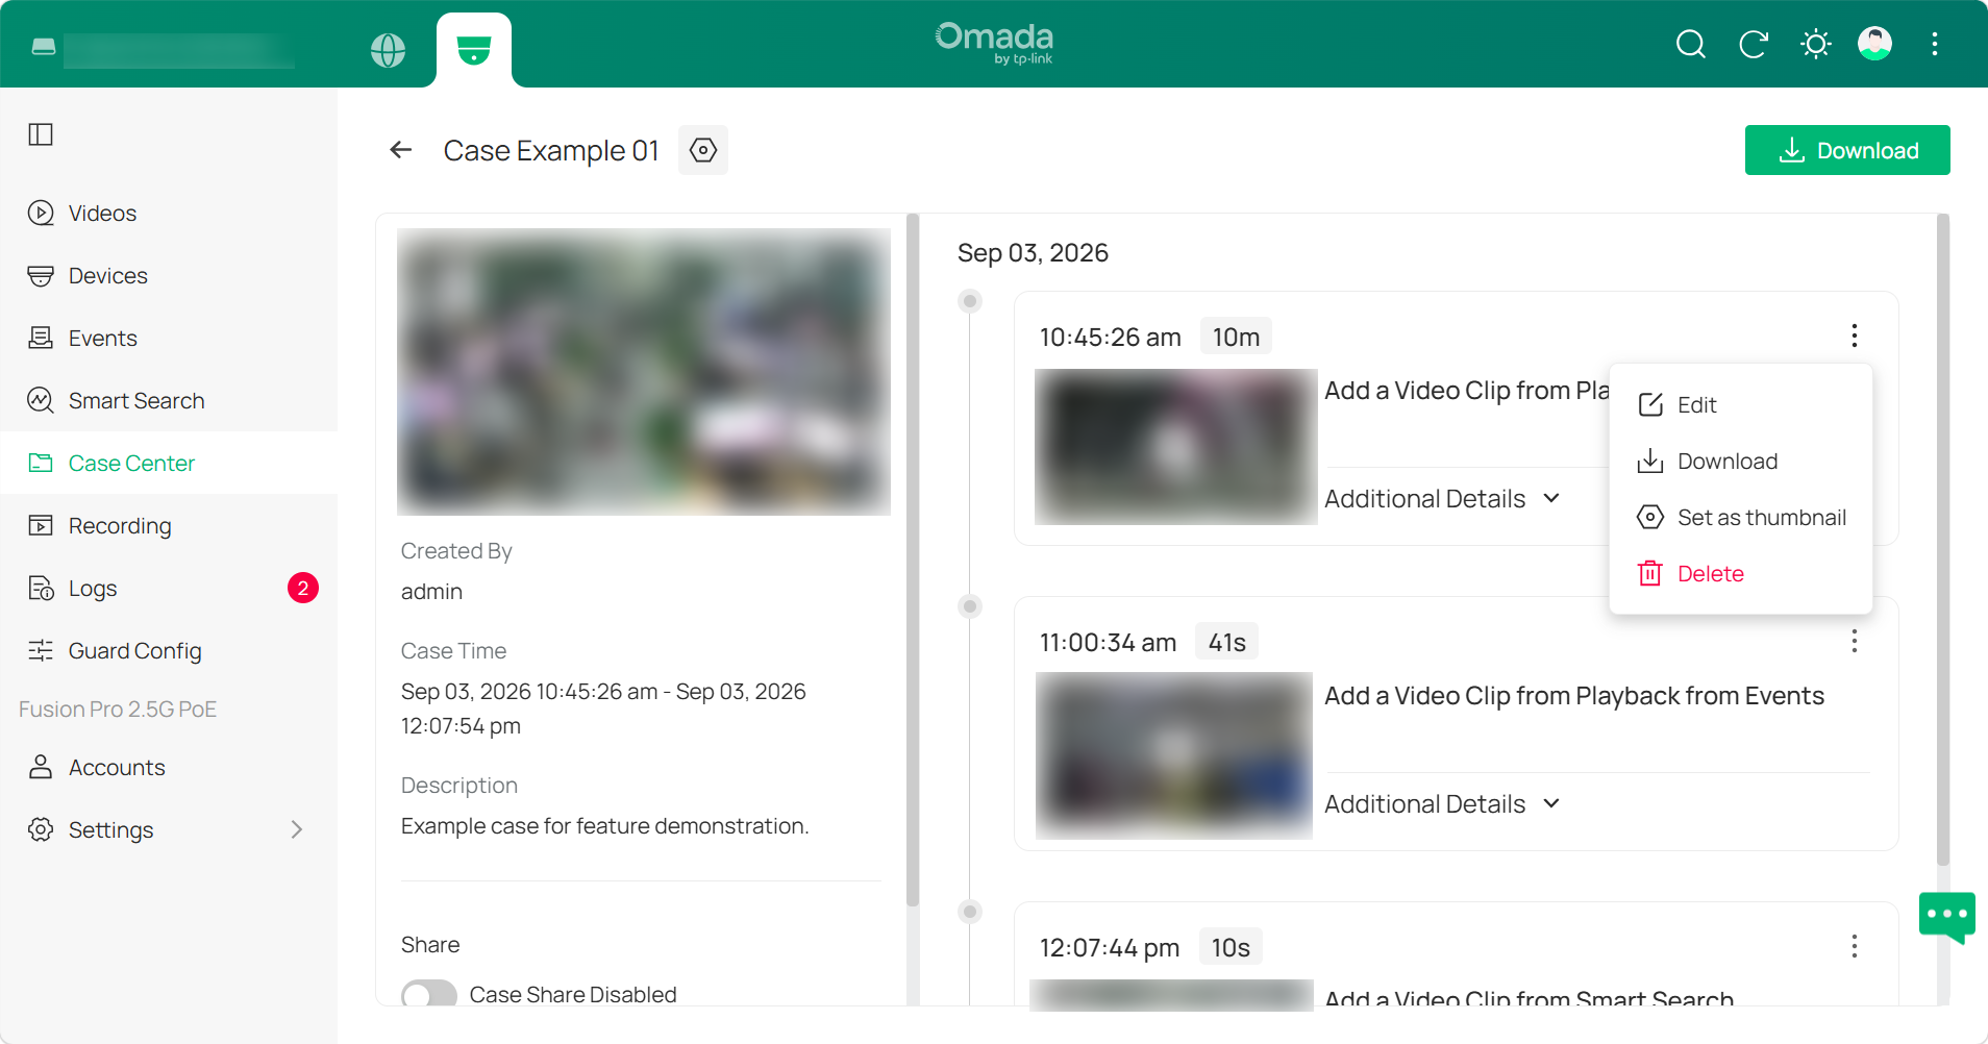
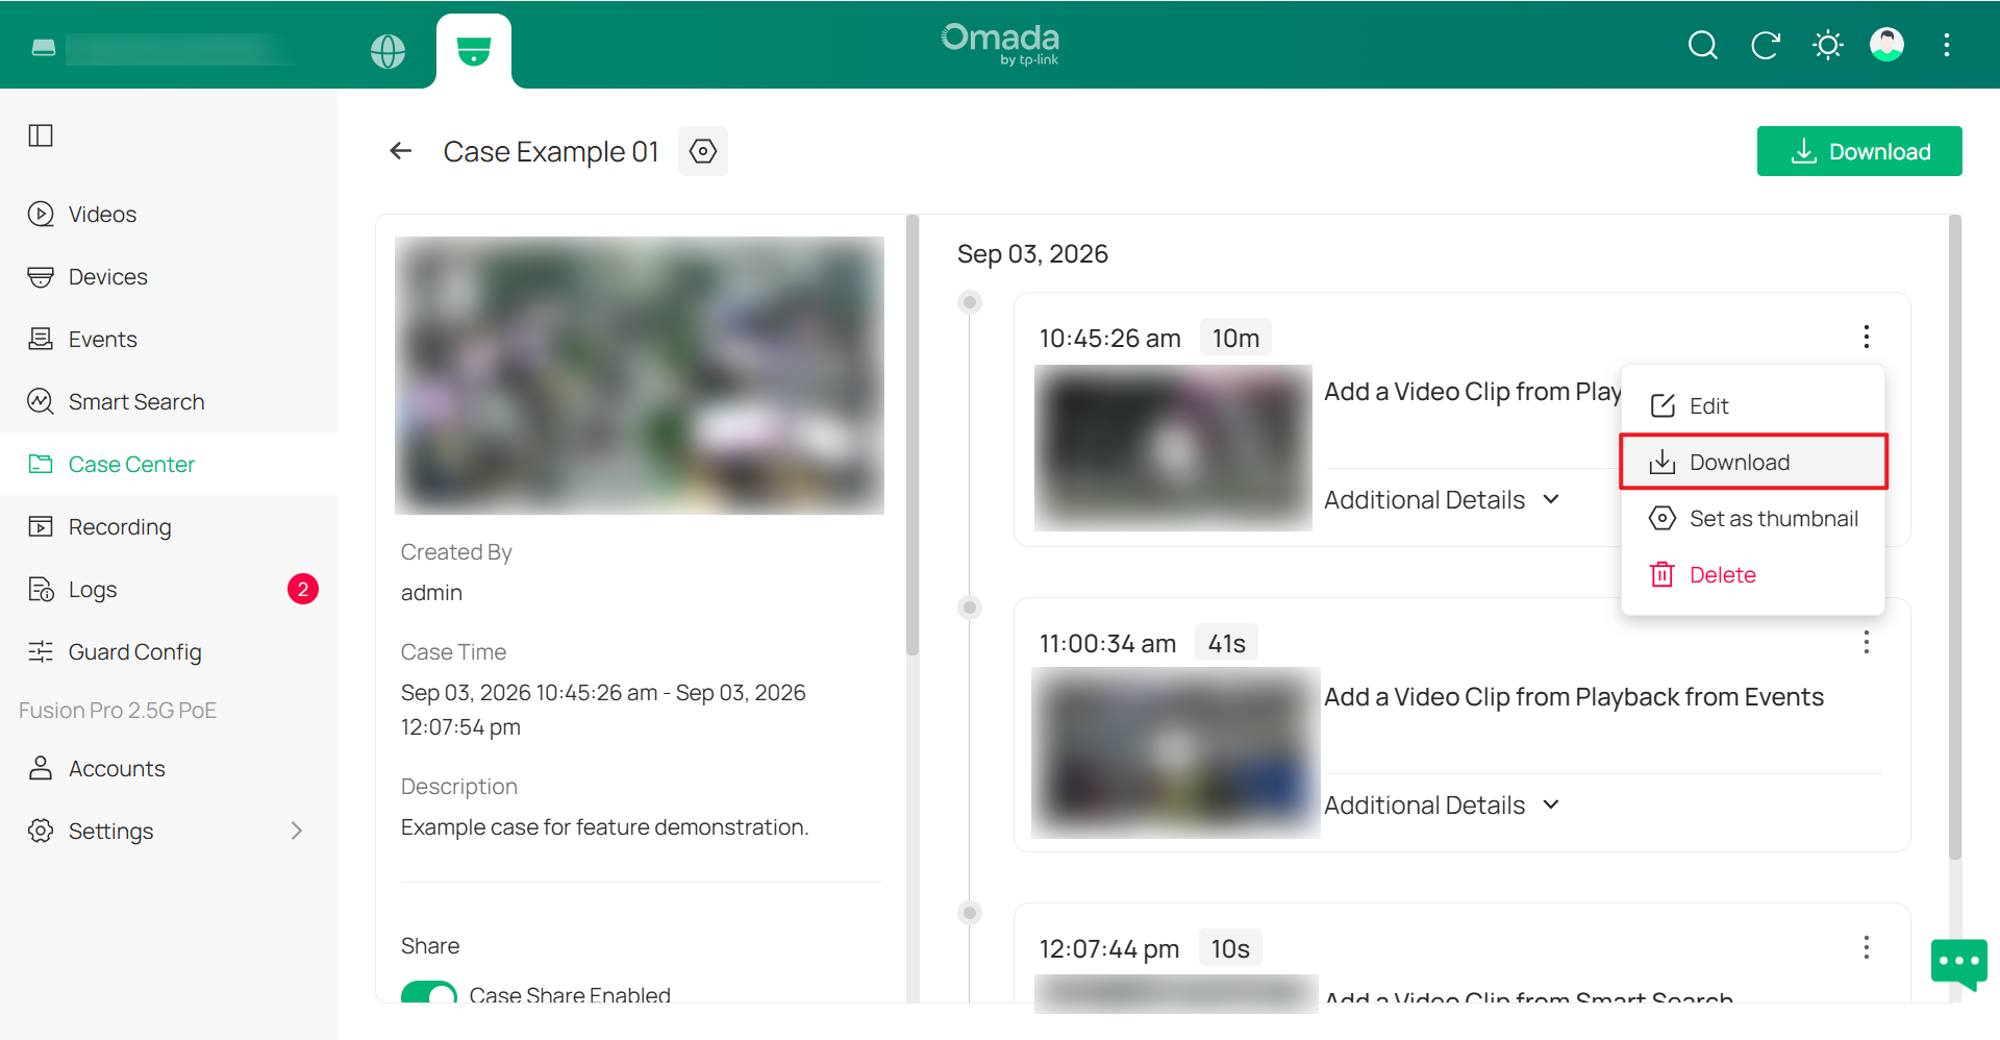
Click the target Case in Case Center to open Case Details. Case information, sharing status, and associated video clips are displayed in time order. Each video clip can be played back directly, and Additional Details can be expanded to view more information about the clip.
Open the action menu for a video clip to Edit, Download, Set as thumbnail, or Delete the clip.
Edit a case
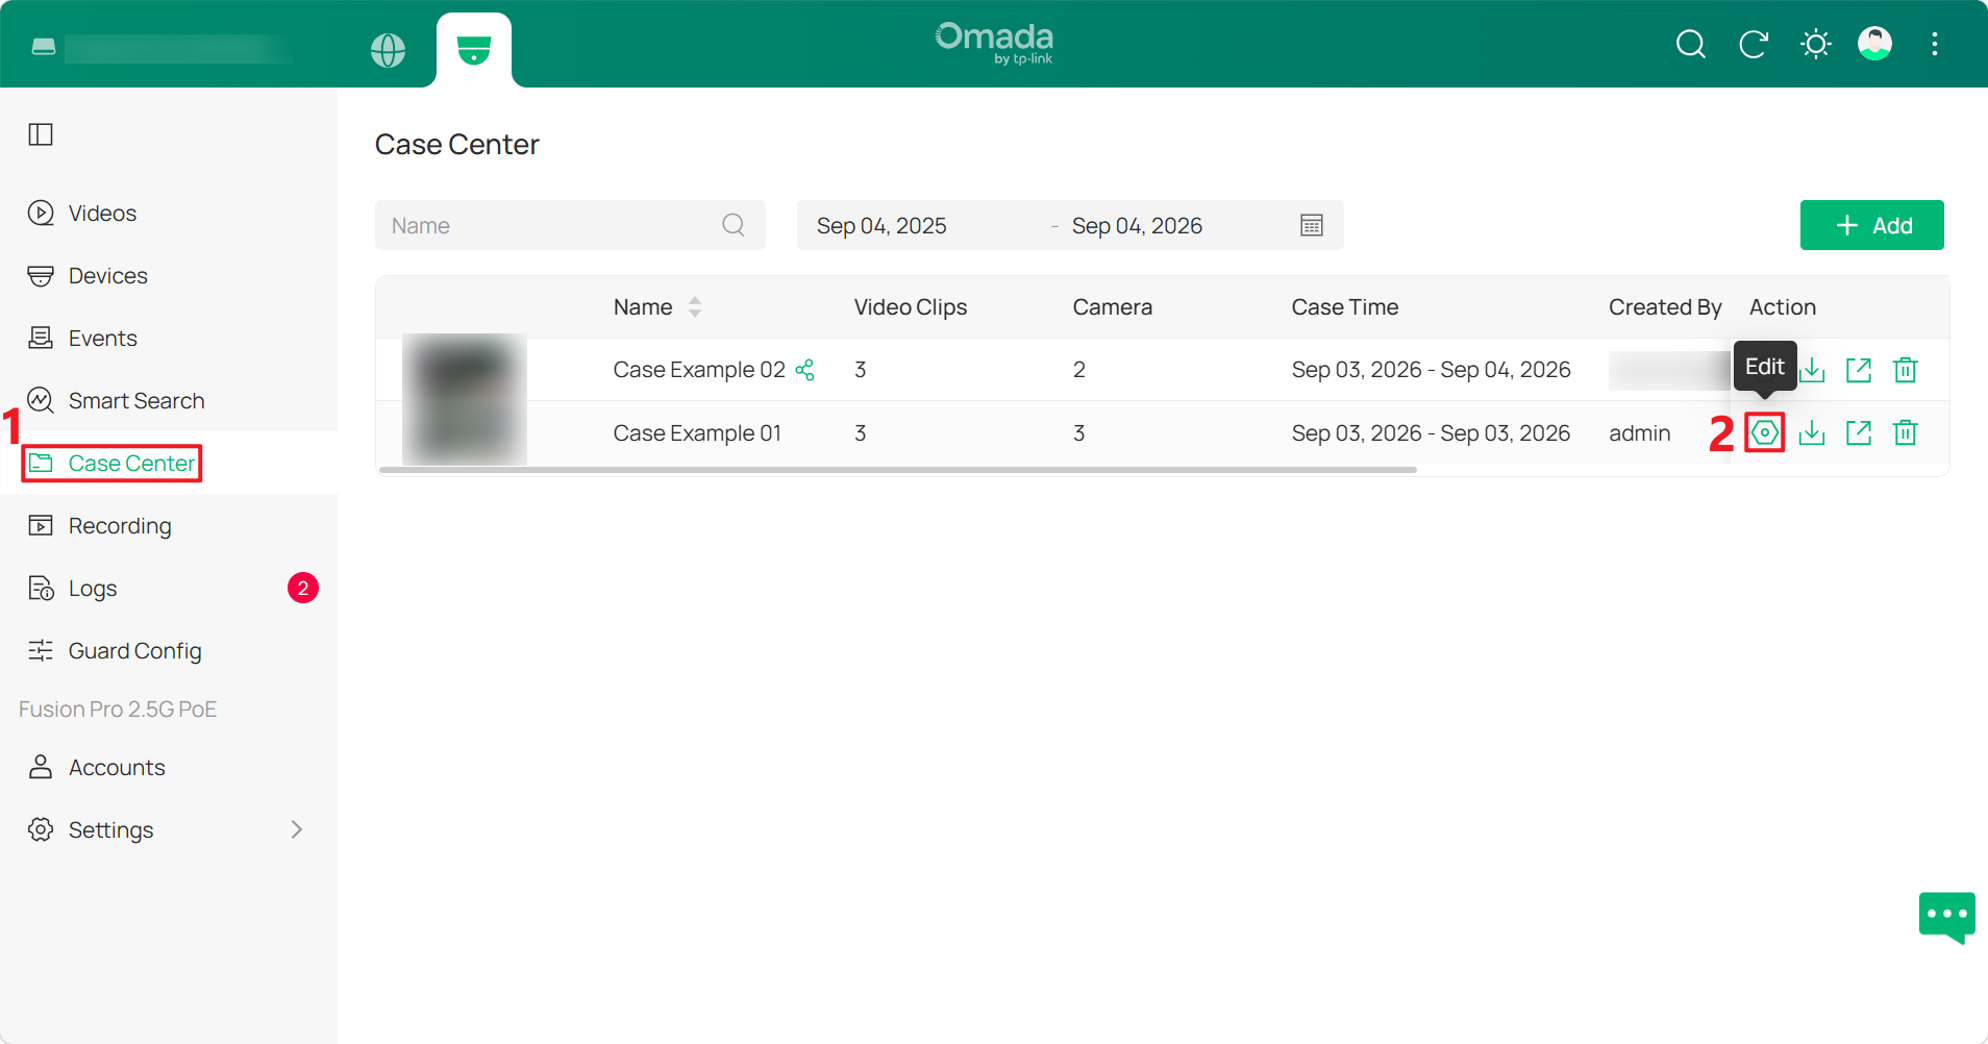
Step 1. In Case Center, locate the target Case and click the Edit icon under Action.
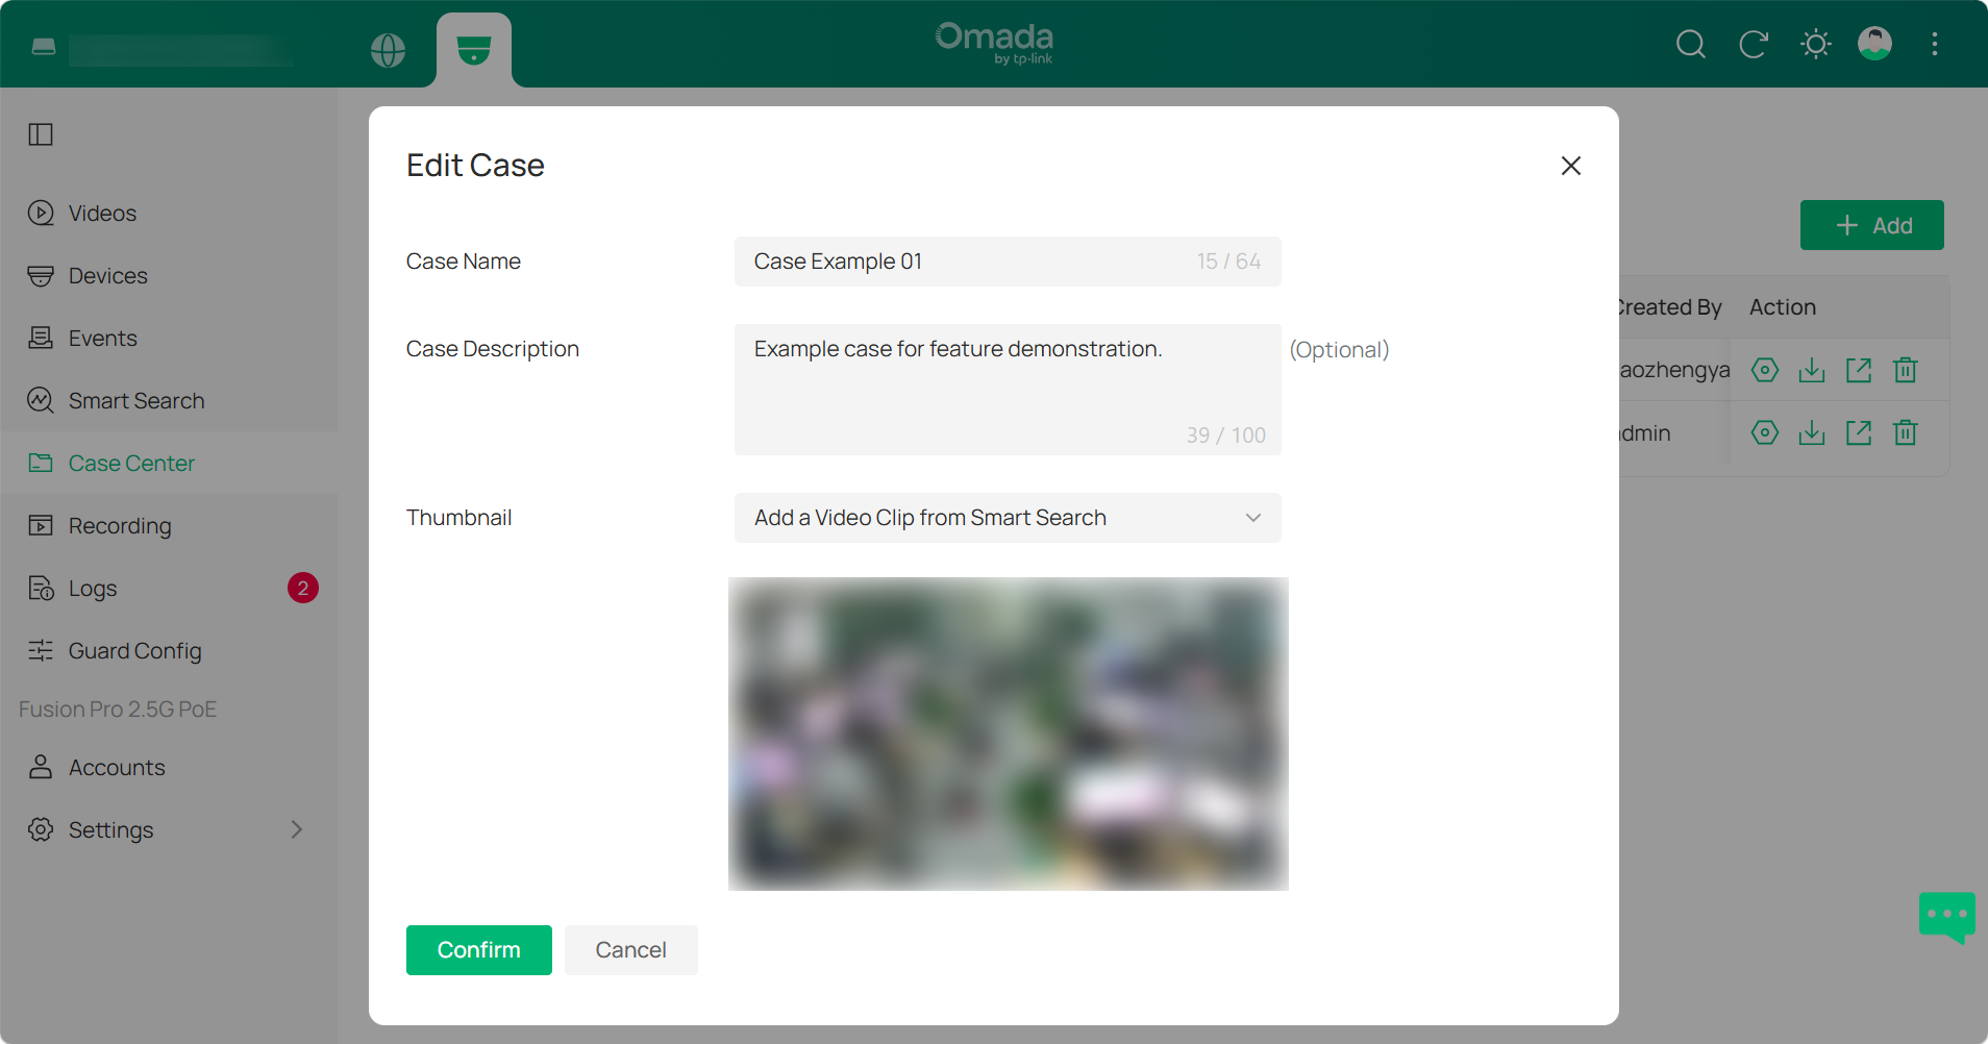
Step 2. Modify the Case Name, Case Description, or Thumbnail as needed, and then click Confirm to save the changes.
Share a case
Step 1. Open the target Case in Case Center. In the Share section, enable Case Share Enabled to generate a share link.
Note: Cloud Access must be enabled before a Case can be shared remotely.
Step 2. Configure Password Protection and Expire Date as needed, and then click Confirm to apply the sharing settings.
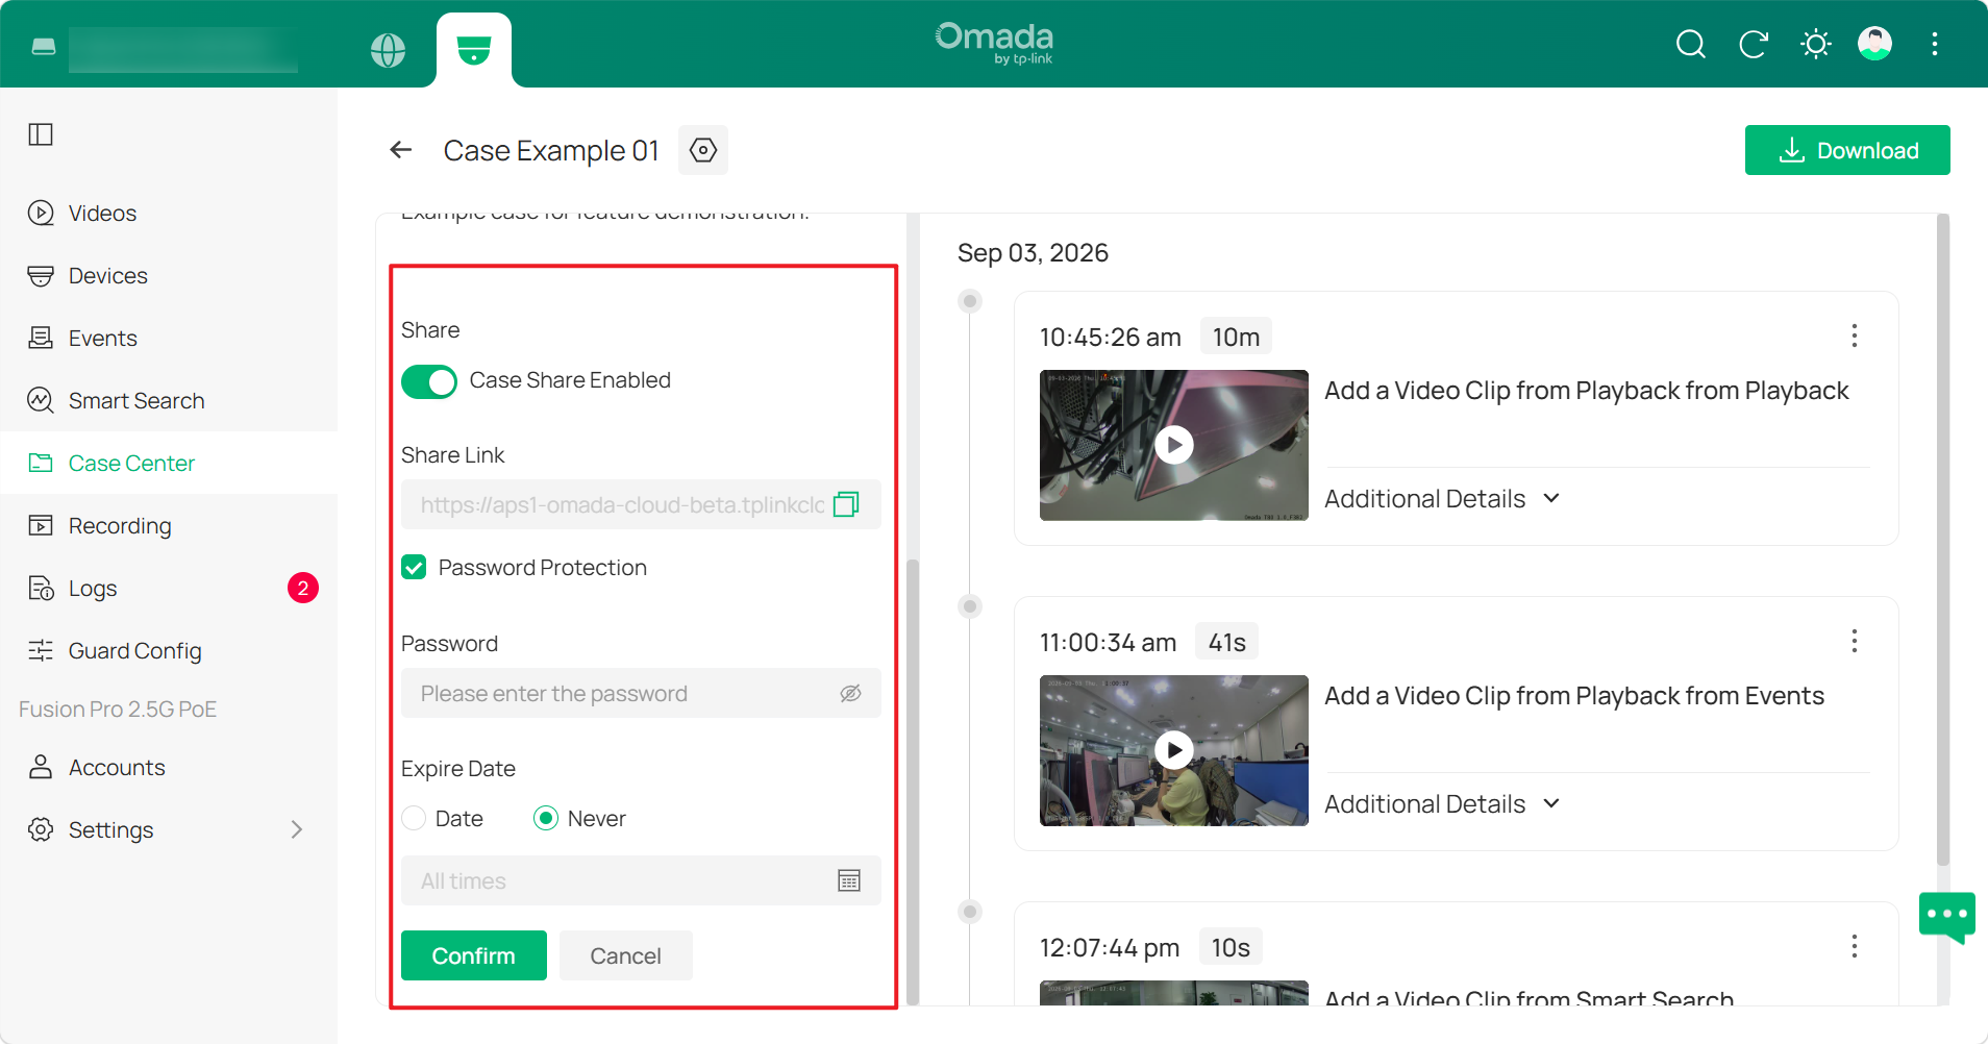
Step 3. Copy the Share Link and provide it to the intended recipient. The shared Case can be accessed directly through a web browser. If password protection is enabled, the configured password is required to view the Case.
Note: Up to five users can access a Share Link at the same time.
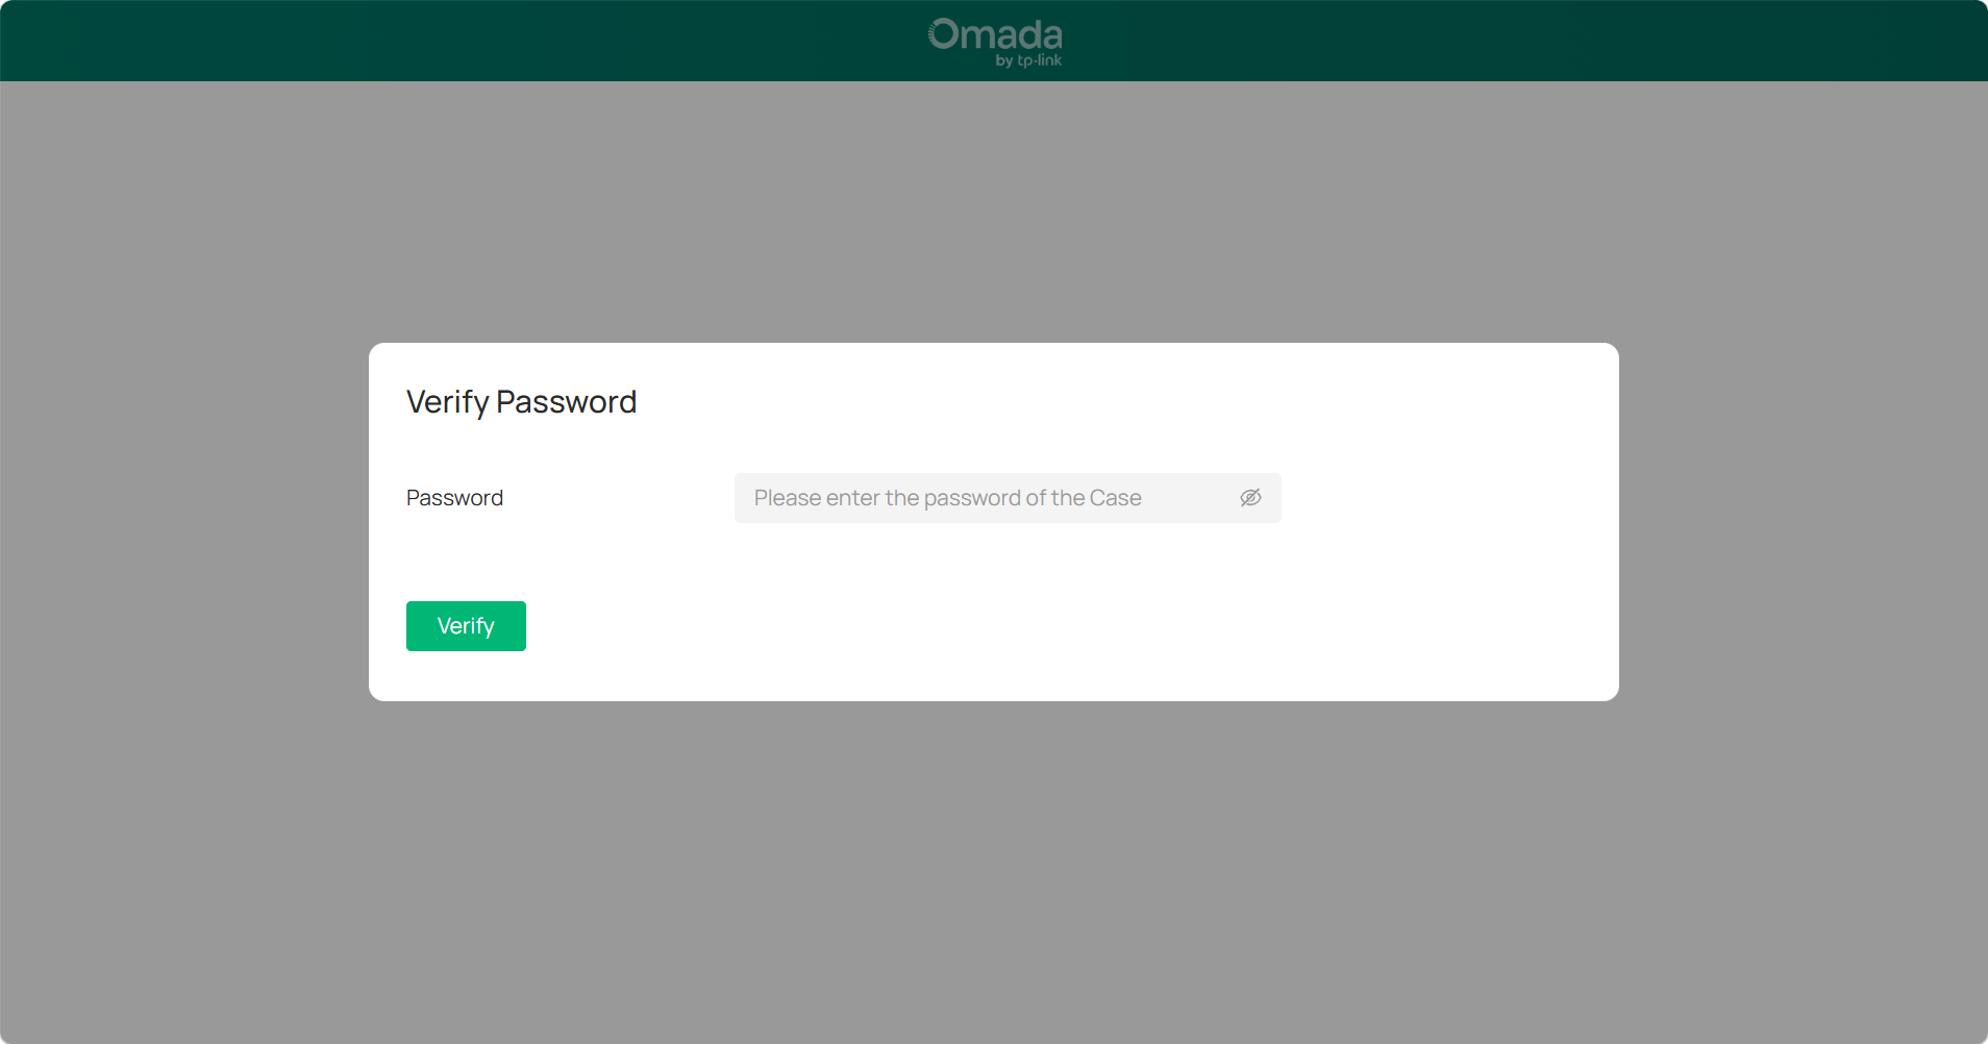
Note: If Cloud Access or Case Share is disabled, the current Share Link becomes invalid. When Case Share is enabled again, a new Share Link is generated and must be shared with the intended recipients.
Delete a case
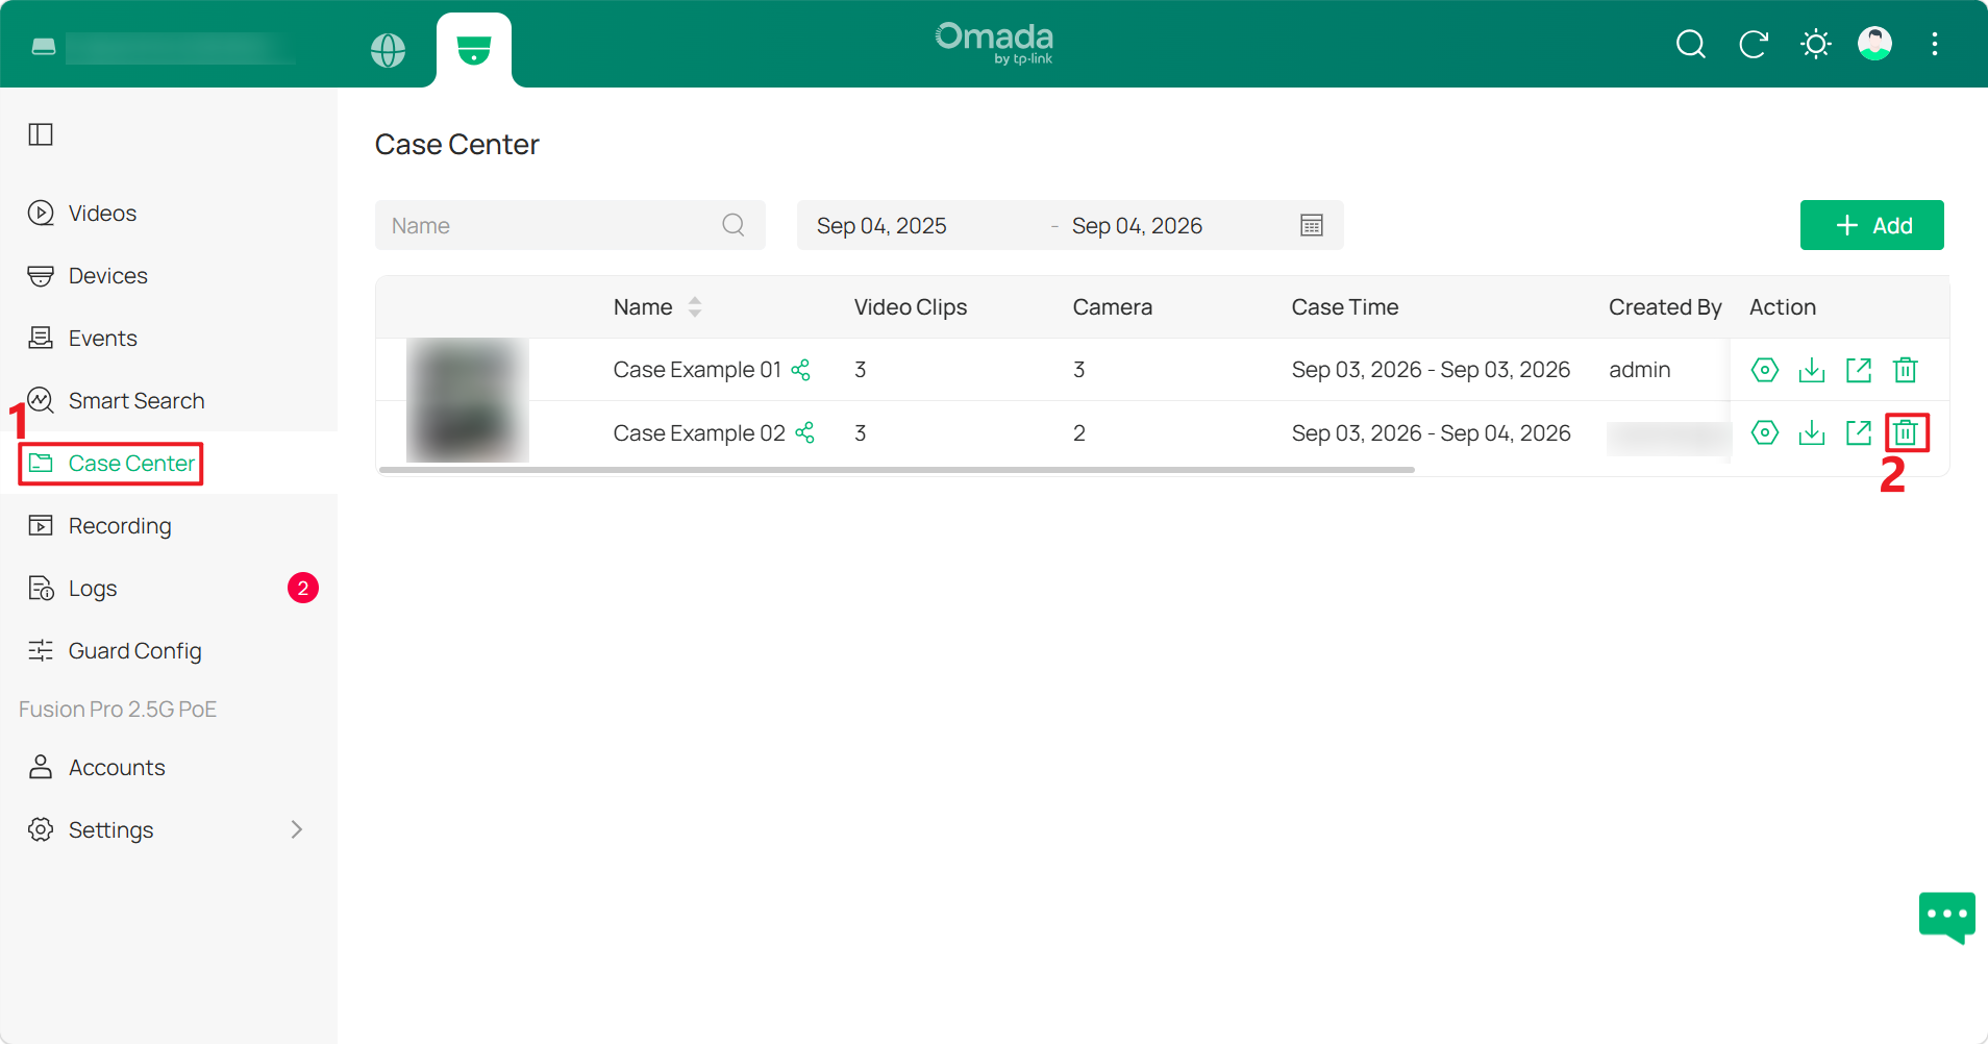
Step 1. In Case Center, locate the target Case and click the Delete icon under Action.
Step 2. Review the confirmation message and click Confirm to delete the Case.
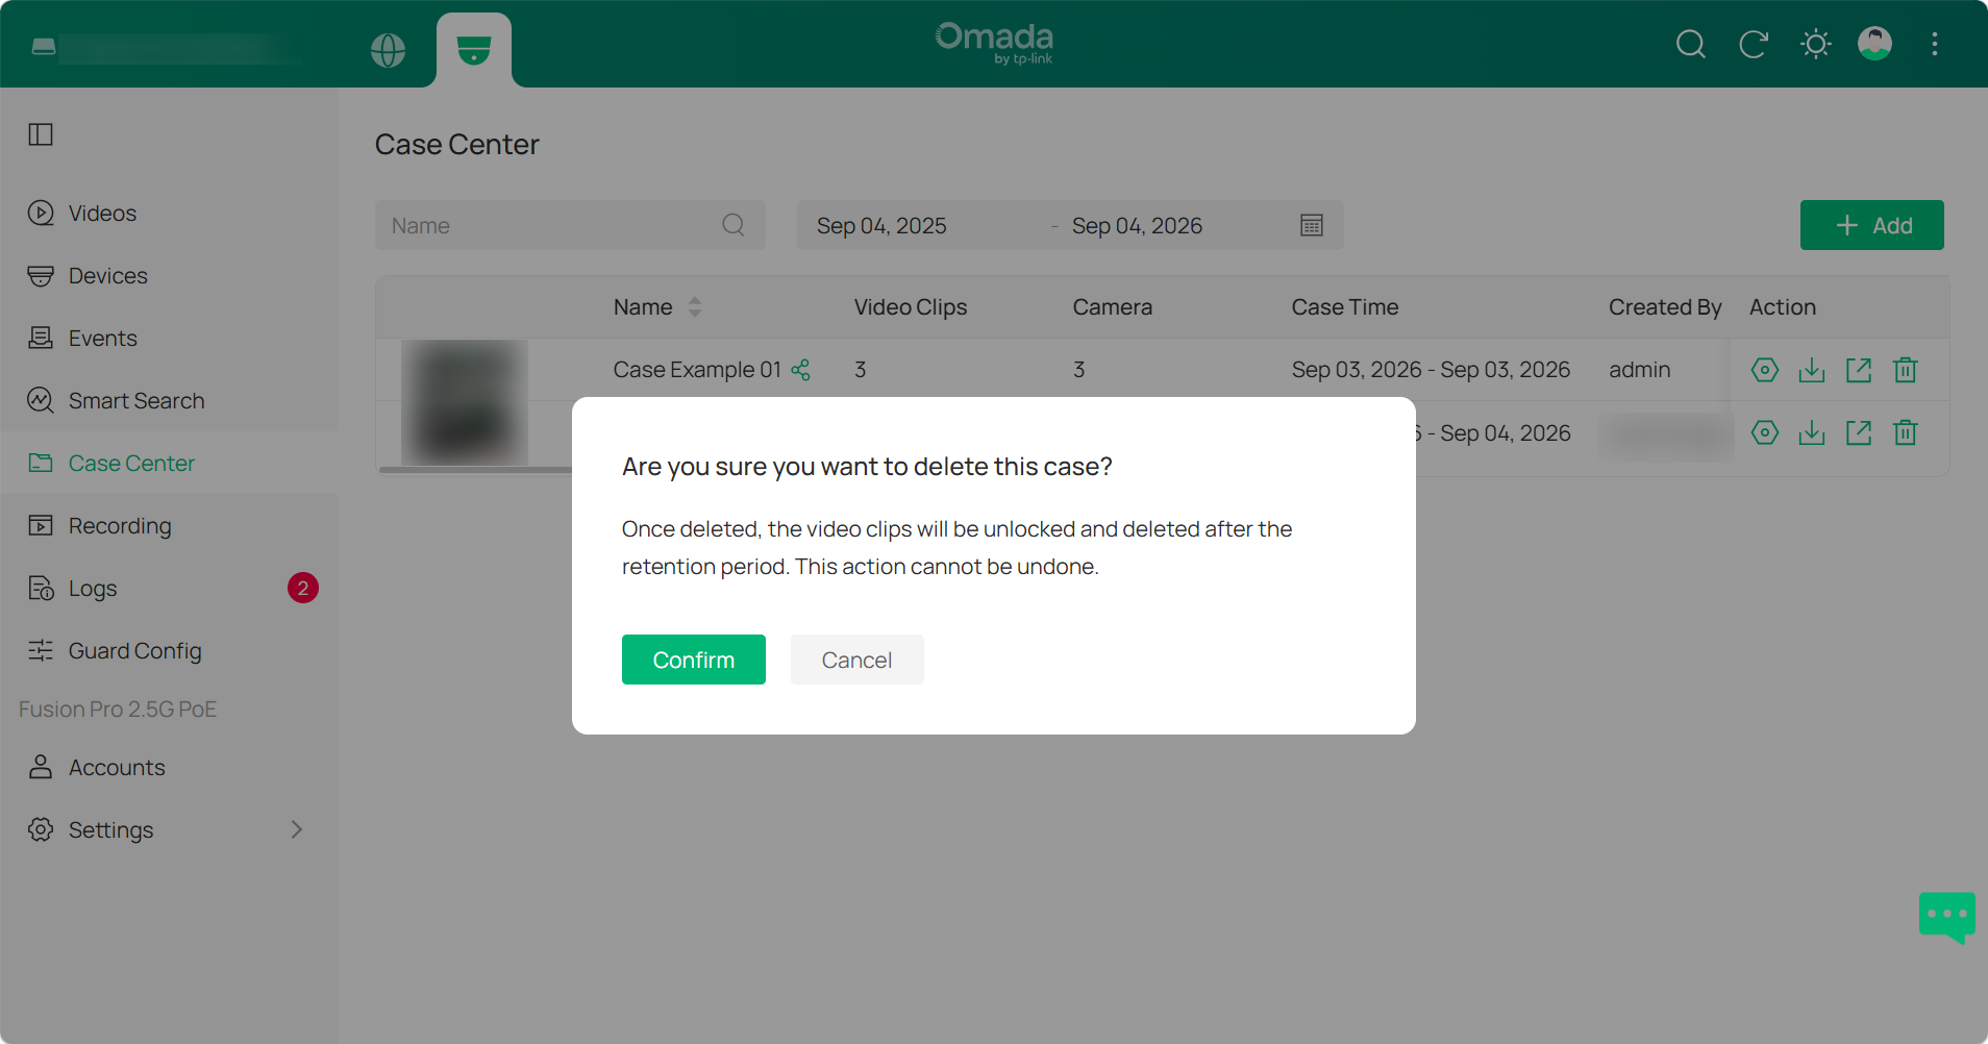
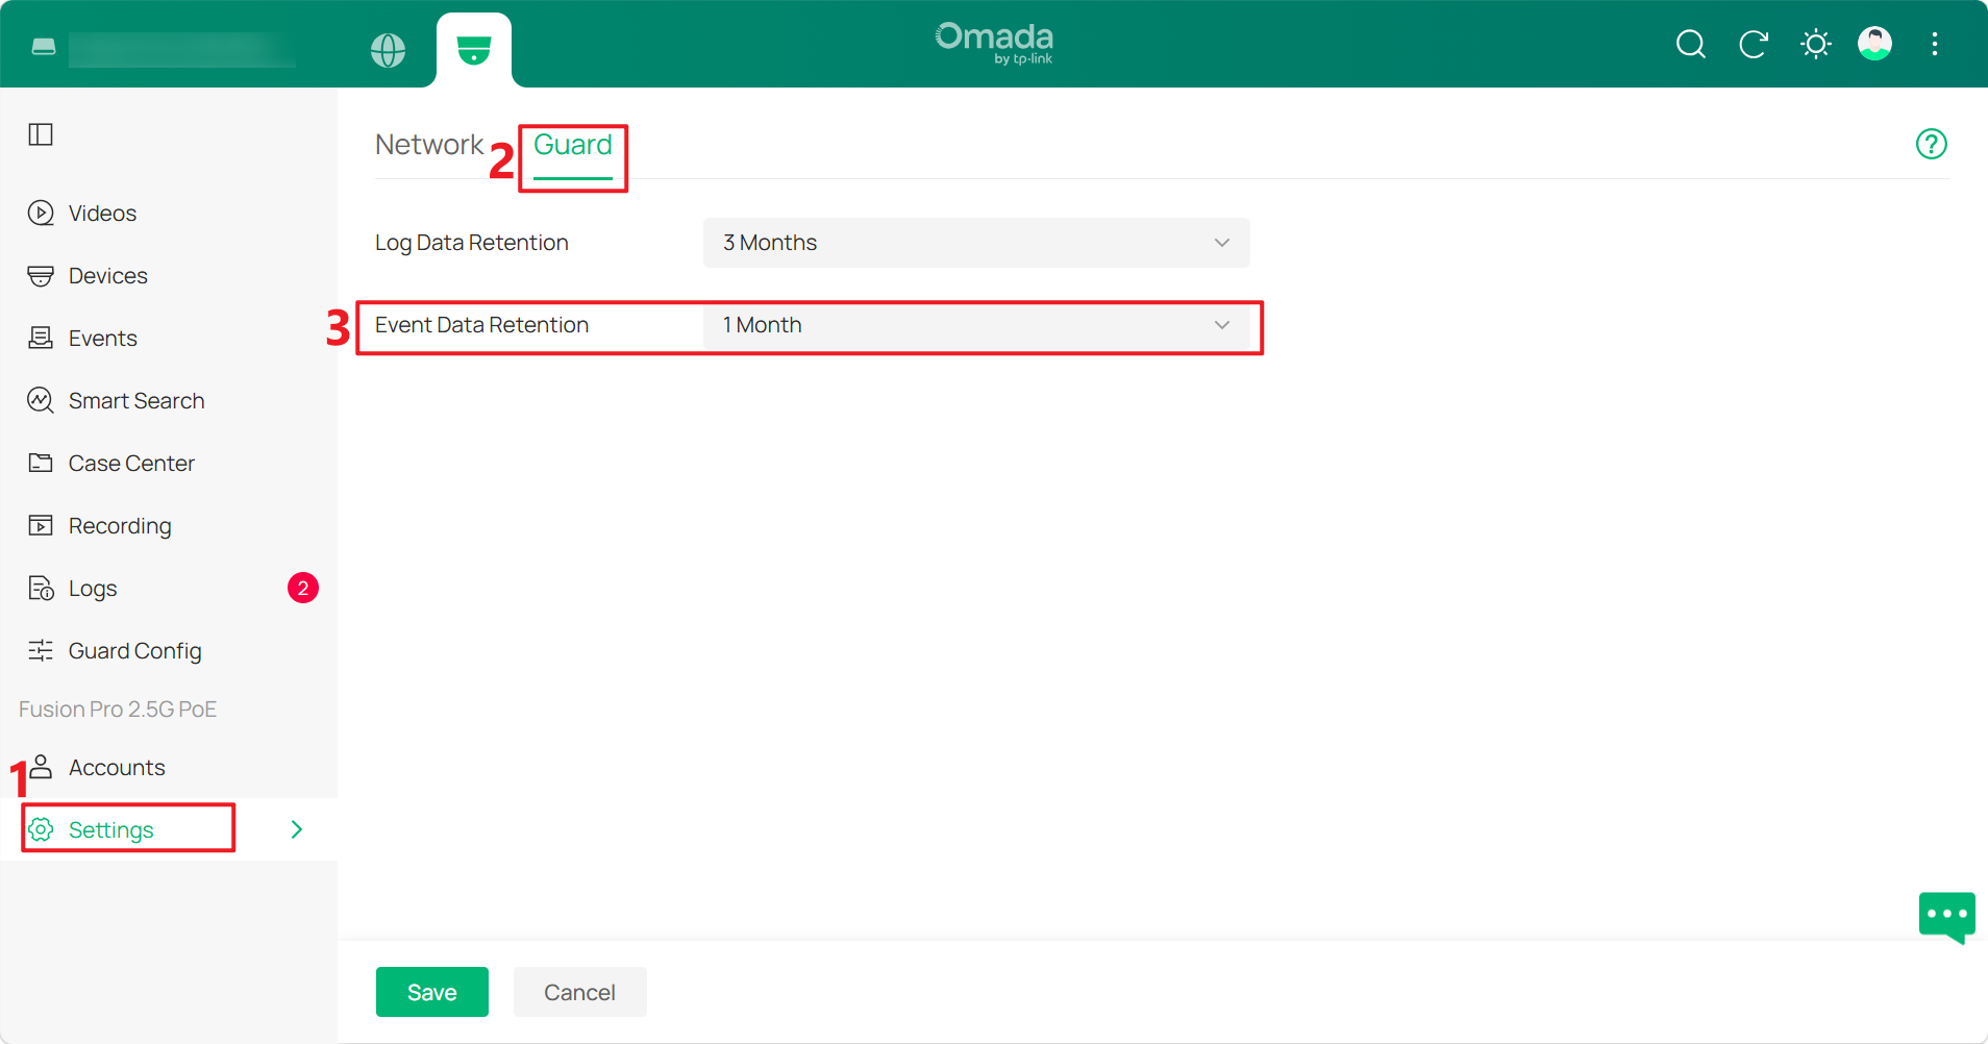
Note: Deleting a Case unlocks its associated video clips. The recordings will then follow the configured retention setting and may be deleted after the retention period or overwritten by Loop Recording. To review or change the retention period, go to Settings > History Data Retention > Guard > Event Data Retention.
Download case evidence
Download an individual video clip
On the Case Details page, locate the required video clip, open the action menu, and click Download to save the clip locally.
Download a case report
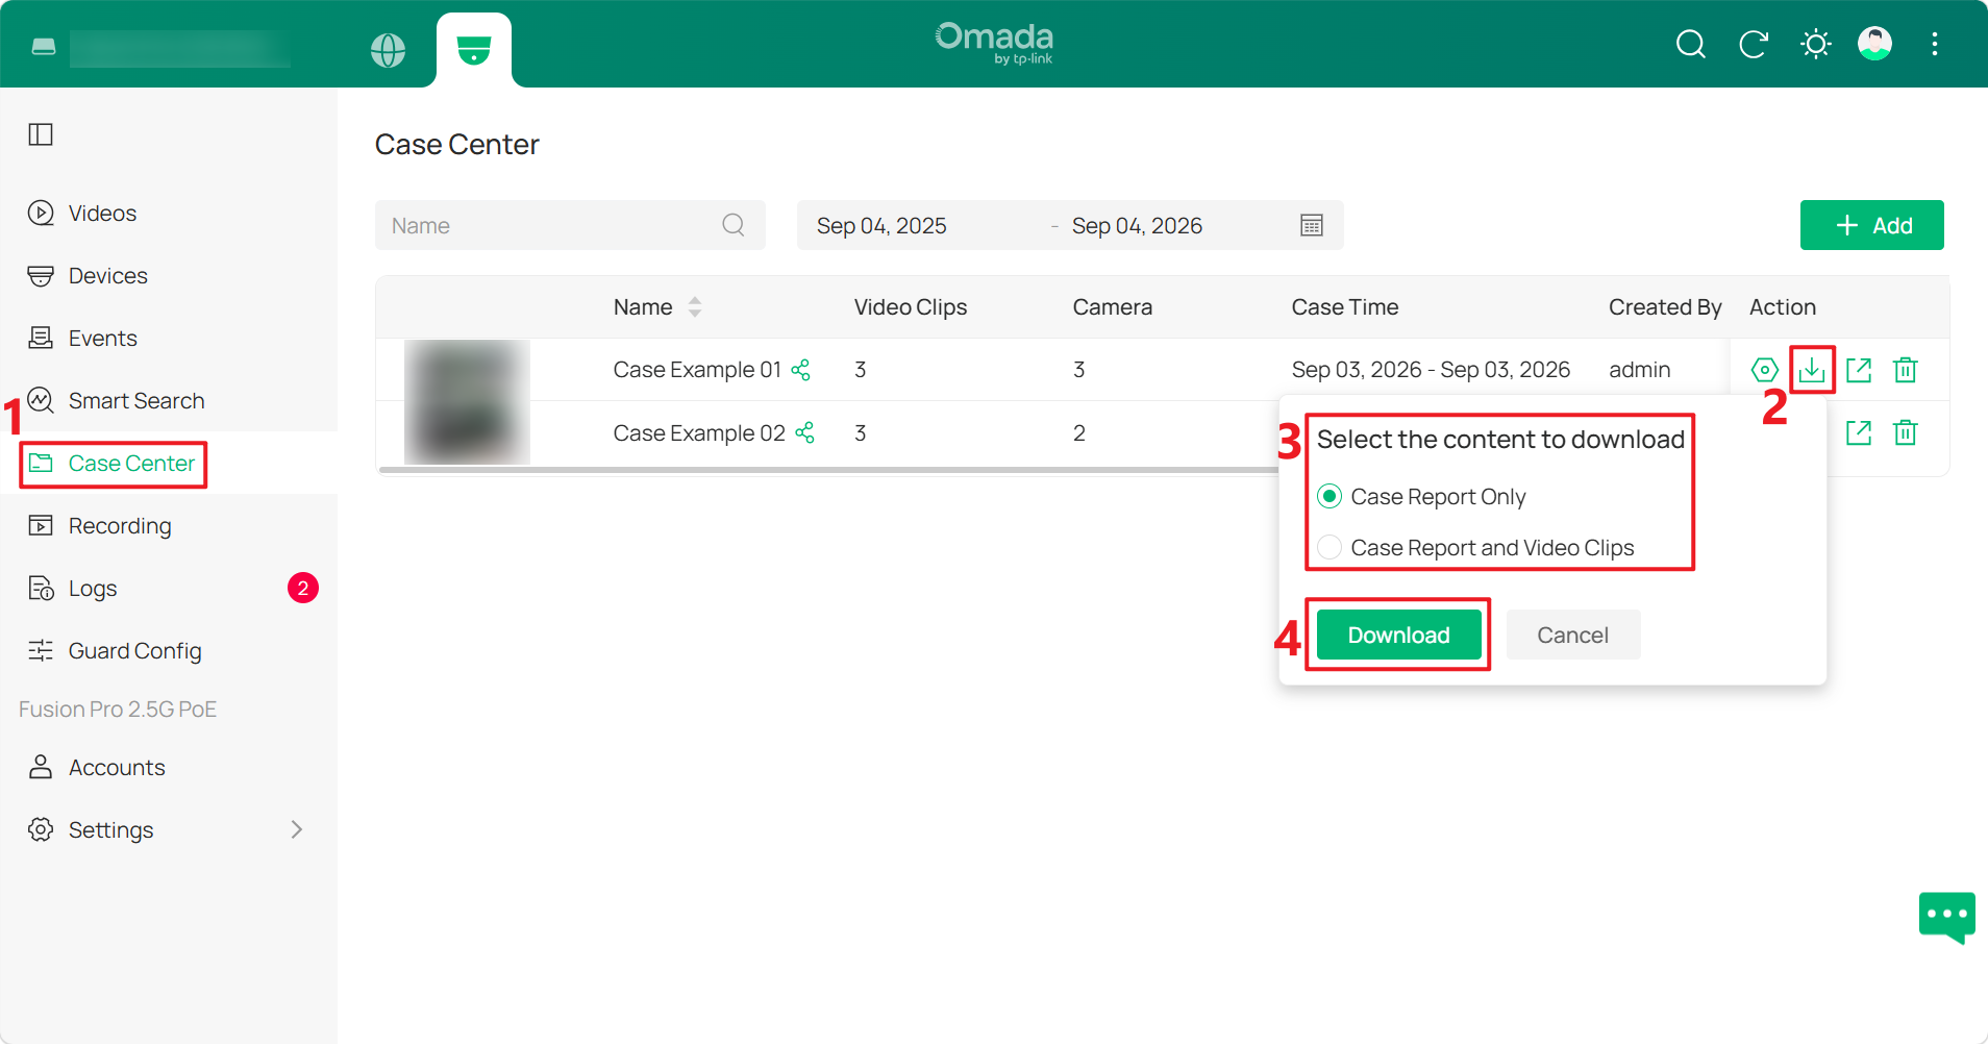
Step 1. In Case Center, locate the target Case and click the Download icon under Action.
Step 2. Select Case Report Only to export the PDF report or Case Report and Video Clips to export the report together with all video clips as individual MP4 files. Then click Download.
Conclusion
Case Center can now be used to preserve important video evidence, organize related video clips into Cases, and manage, share, or export Case content for incident review.
To learn more about each function and configuration, please visit Support Home to download or check the manual for your product.
QA
Q1: Why are the Share or Download options unavailable for a Case?
A1: A Case must contain at least one video clip before it can be shared or downloaded. In addition, Cloud Access must be enabled for remote Case sharing.
Q2: Why is a previously shared Case no longer accessible?
A2: Check whether the Share Link has expired or whether Cloud Access or Case Share has been disabled. Disabling Cloud Access or Case Share invalidates the current Share Link. When Case Share is enabled again, a new Share Link is generated and must be provided to the intended recipients.
Q3: What happens to the recordings after a Case is deleted?
A3: Deleting a Case unlocks its associated video clips. The recordings then follow the configured retention setting and may be deleted after the retention period or overwritten by Loop Recording. The retention period can be checked under Settings > History Data Retention > Guard > Event Data Retention. This action cannot be undone.
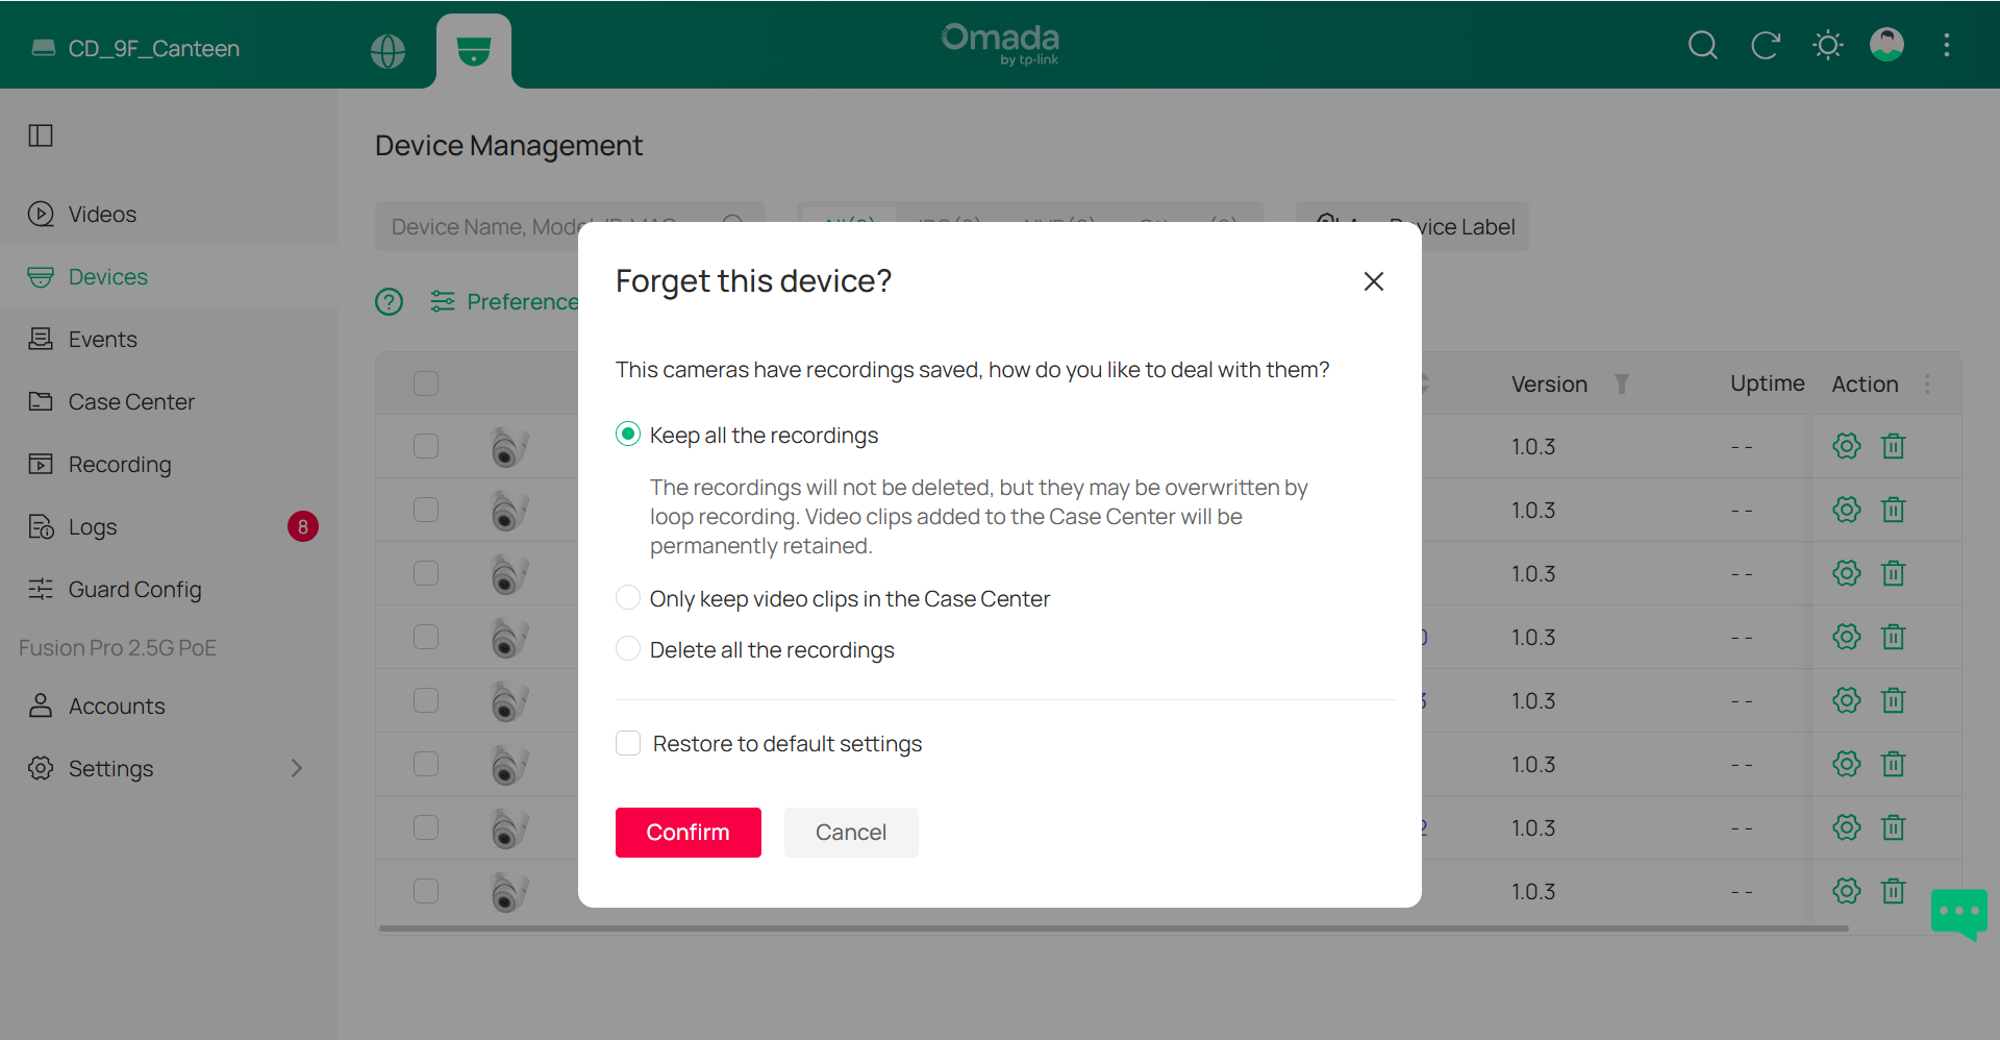
Q4: What happens to Case Center video clips if a camera is removed?
A4: When a camera is removed, recordings can be kept, or only the clips saved in Case Center can be retained. If Delete all the recordings is selected, the Case Center clips are deleted as well.
Q5: Why can a video clip in a Case no longer be played?
A5: Case Center relies on the recording stored on the local storage device. If the storage containing a Case video clip is formatted or removed, the Case information may remain available, but the corresponding recording may become unavailable for playback.
Q6: Why is Smart Search unavailable?
A6: Confirm that the camera supports People & Vehicle Analytics and that the account has access to Smart Search Page. Cameras without the required analytics capability cannot provide Human or Vehicle results for Smart Search.
Q7: Can recordings from third-party cameras or cameras managed through an NVR be added to Case Center?
A7: Yes. Recordings that are available in Omada Guard can be added to Case Center, whether the camera is added directly to the Omada Fusion Pro Gateway through ONVIF or RTSP, or managed through a VIGI NVR or Omada NVR supported by the gateway.
