


Contents
Configuration for Scenario 1: Via Web Browser
Configuration for Scenario 2: Via Omada App
Introduction
Wireless settings determine how users discover, connect to, and access your Wi-Fi network. With Omada Controller, you can centrally configure SSIDs, wireless security, client access options, and other key Wi-Fi parameters for your Omada wireless devices. This guide walks you through the basic wireless settings configuration process to help you build a secure and reliable wireless network.
If you don't have the Omada Controller, please refer to How to Configure Basic Wireless Settings on Omada EAP in Standalone Mode
Requirements
- Method 1 (Via Web Browser) requires a computer that can access the Omada Controller Web UI through a web browser.
- Method 2 (Via Omada App) requires a mobile device with the Omada App installed and connected to the existing Omada wireless network.
Configuration
Configuration for Scenario 1: Via Web Browser
Step 1. Log in to the Omada Controller that manages the Omada devices.
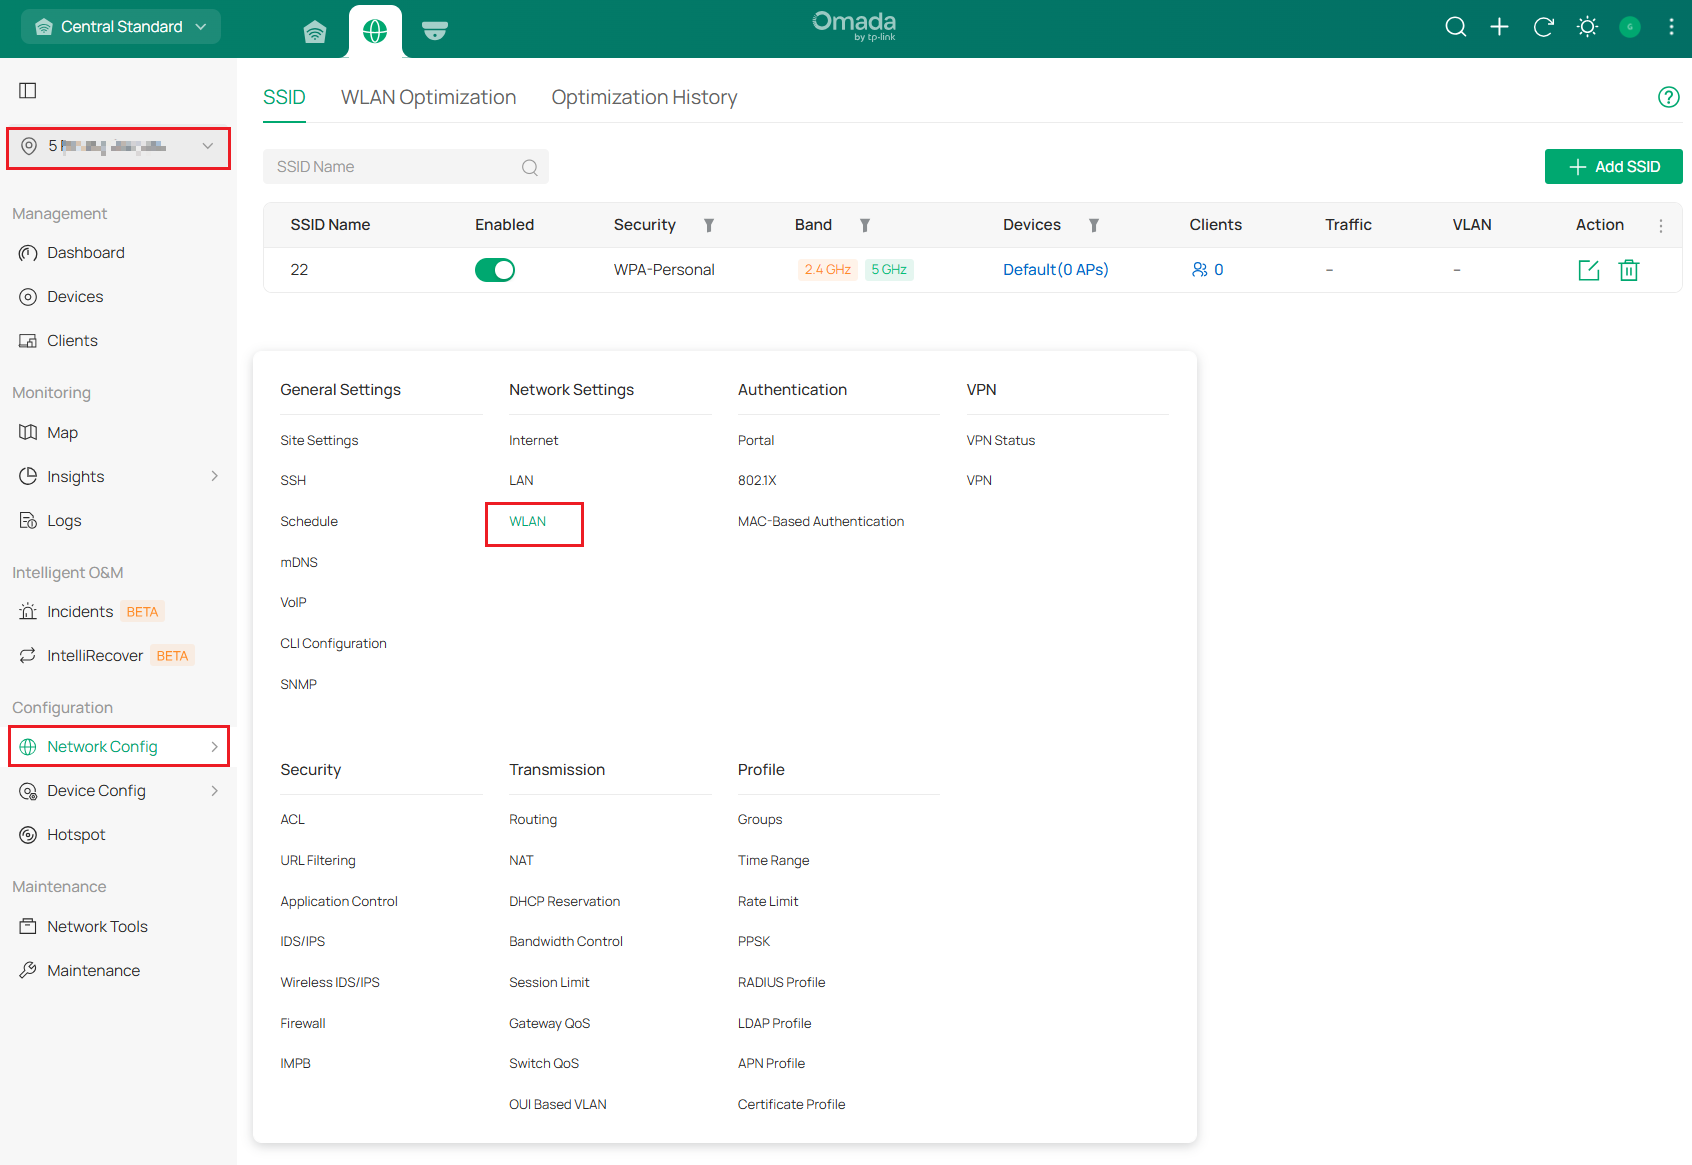
Step 2. Go to Site Settings > Network Config >WLAN to find SSID page.
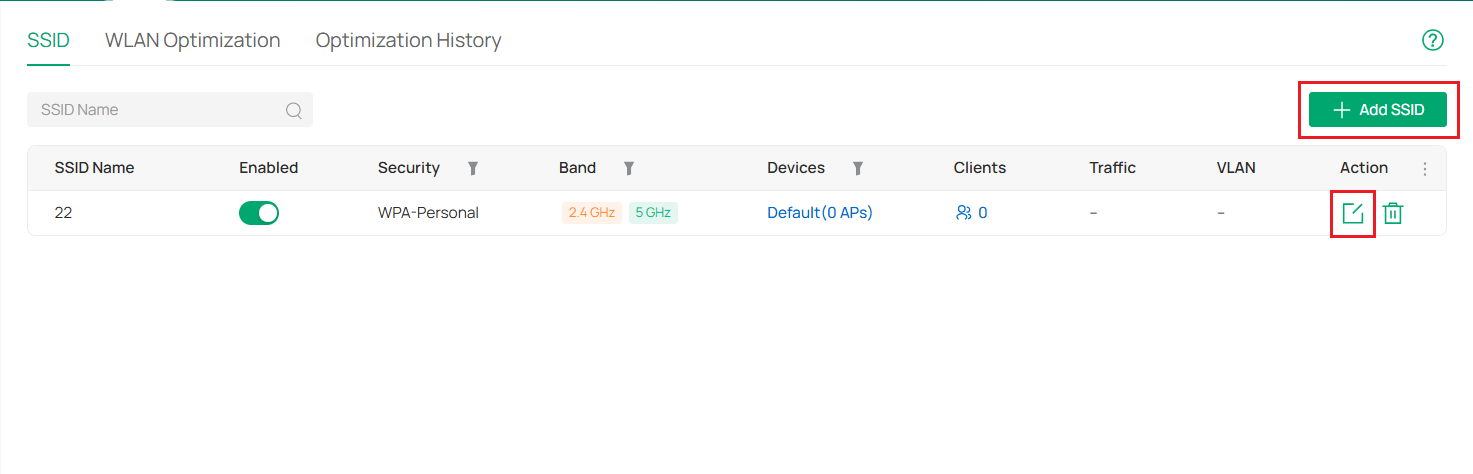
Step 3. Add SSID or Edit an existing SSID.
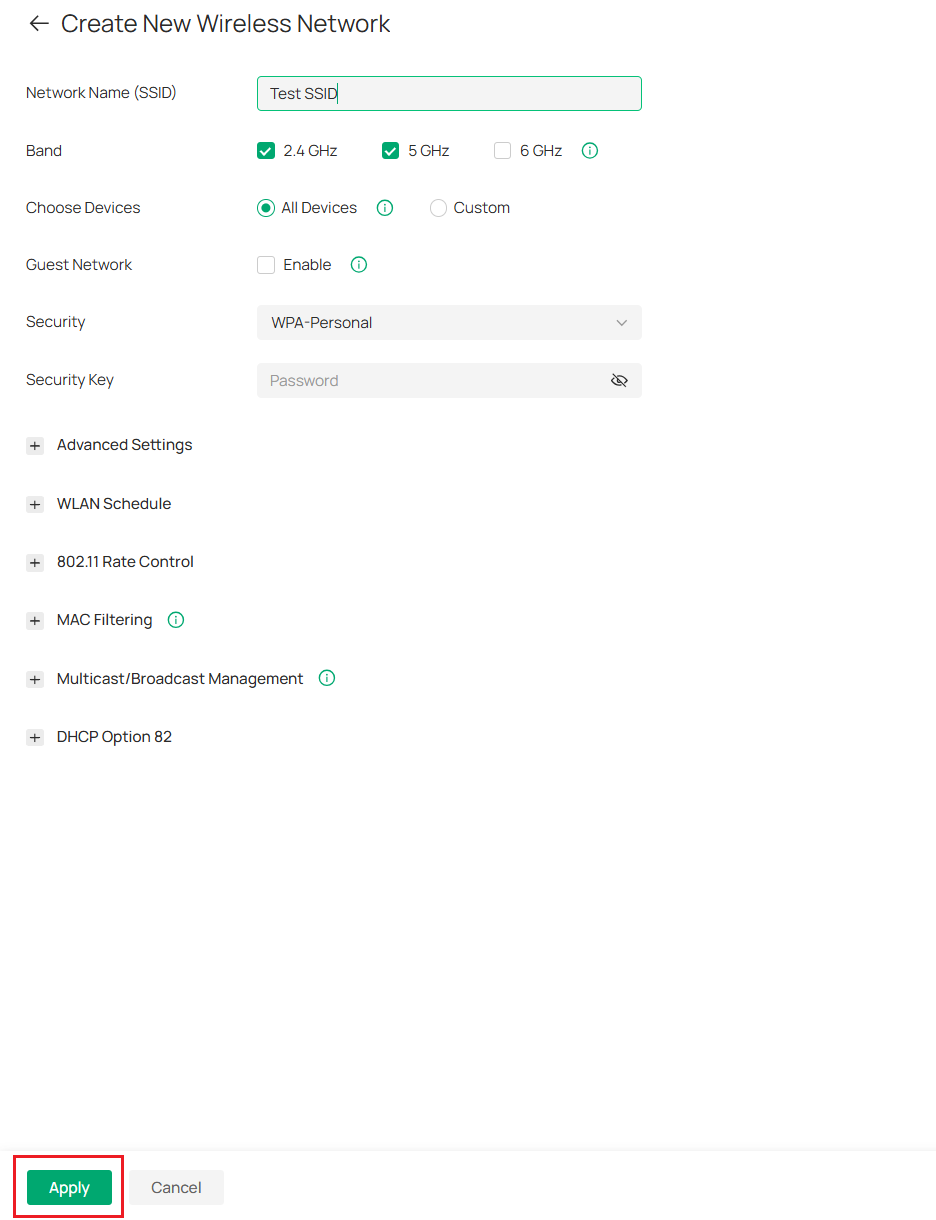
Step 4. Configure SSID based on your needs. Apply the settings.
Network Name (SSID): Specify the network name (SSID) to identify the wireless network. The wireless clients choose the SSID on their WLAN settings page to connect to the wireless network.
Band: Enable the 2.4 GHz, 5 GHz, and/or 6 GHz radio band(s) for the wireless network.
Choose Devices: Select the devices that the wireless network can apply to.
Guest Network: When enabled, all the clients connecting to the SSID are blocked from reaching any private IP subnet.
Security: Select the encryption method for the wireless network based on needs.
Configuration for Scenario 2: Via Omada App
Step 1. Open the Omada app and select the controller in controller mode.
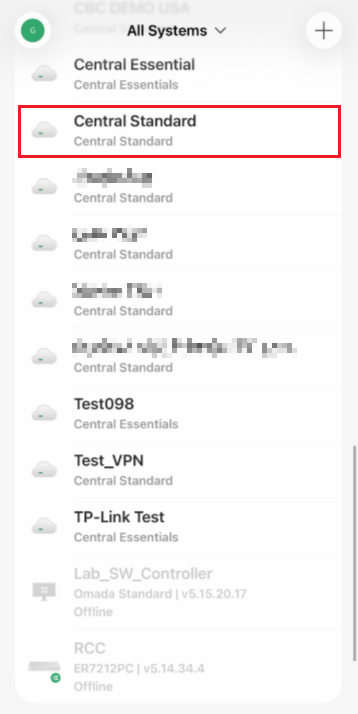
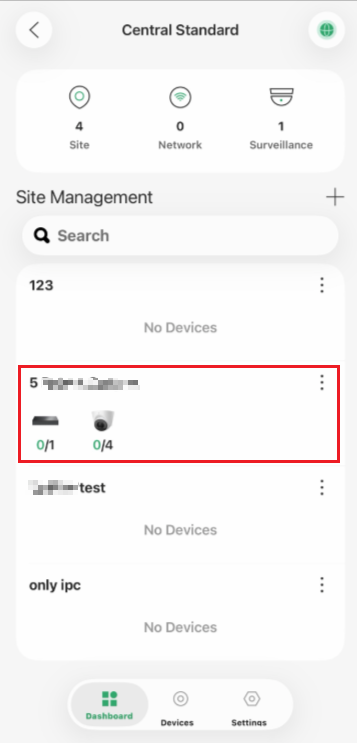
Step 2. Go to the specific Site.
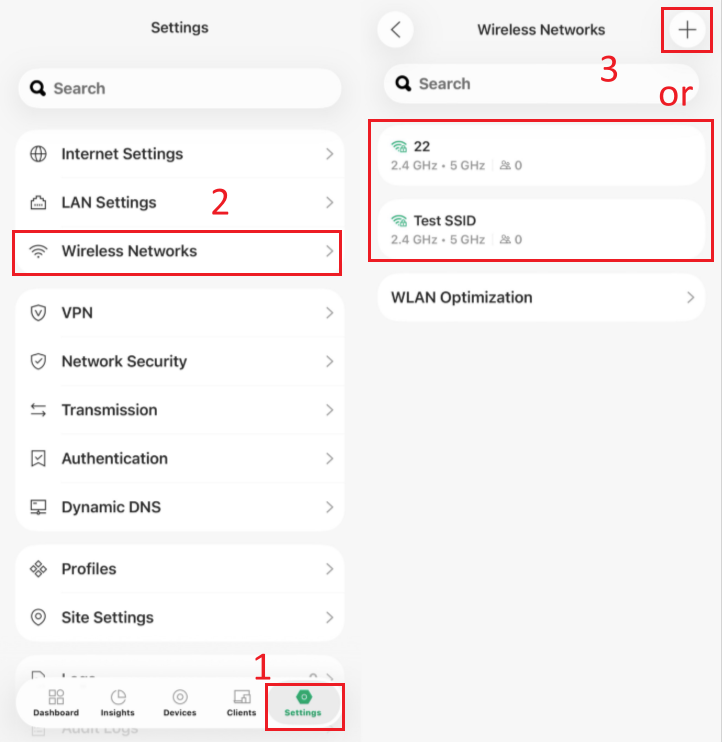
Step 3. Go to Settings > Wireless Networks > Add or Edit an existing SSID.
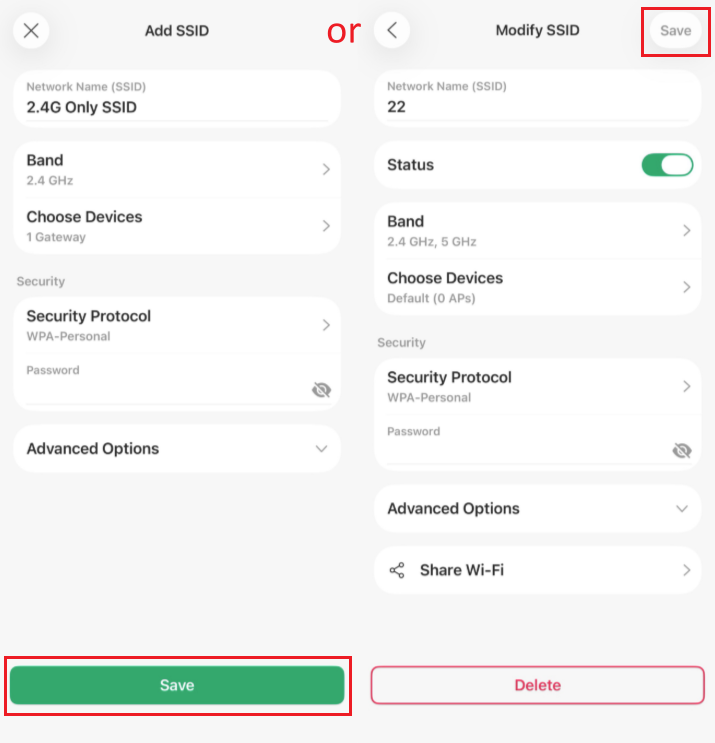
Step 4. Configure the SSID based on your needs. Save the settings.
Conclusion
By following the steps in this guide, you can easily configure basic wireless settings for your Omada wireless devices using either the Omada App or the Omada Controller web interface. Whether you need to set up an SSID, adjust Wi‑Fi security settings, or manage your wireless network configuration, both methods provide a convenient way to customize and optimize your Omada Wi‑Fi network for better performance and user experience.
To learn more about each function and configuration, please visit Support Home to download or check the manual for your product.
