


Contents
Configuration for Hardware or Software Controller
Configuration for Controller Local UI
Configuration for the Omada App
Configuration for Cloud-Based Controller
Configuration for the Web Interface
Configuration for the Omada App
Introduction
Adopting an Omada switch into an Omada Controller enables centralized configuration, monitoring, and management of the switch. The adoption method may vary depending on the switch type and controller platform. This guide explains how to adopt supported Omada switches into a Hardware, Software, or Cloud-Based Controller.
Requirements
- Omada Switch (Except Unmanaged)
- Omada Hardware Controller, Software Controller, or Cloud-Based Controller
- Omada App
Choosing a Method
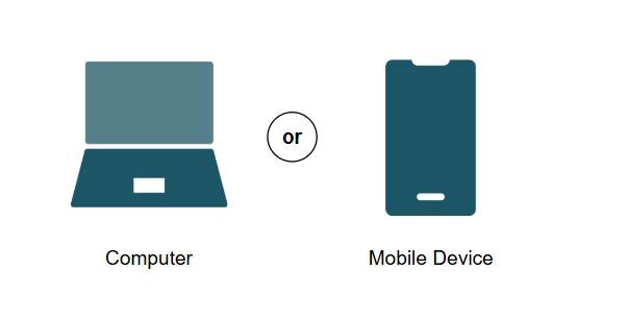
Choose a management platform to manage the Omada Switches and a management device to log in to the platform. To learn how to choose one based on your needs, refer to: The differences and commonalities of three Omada Controllers.
Management Platform
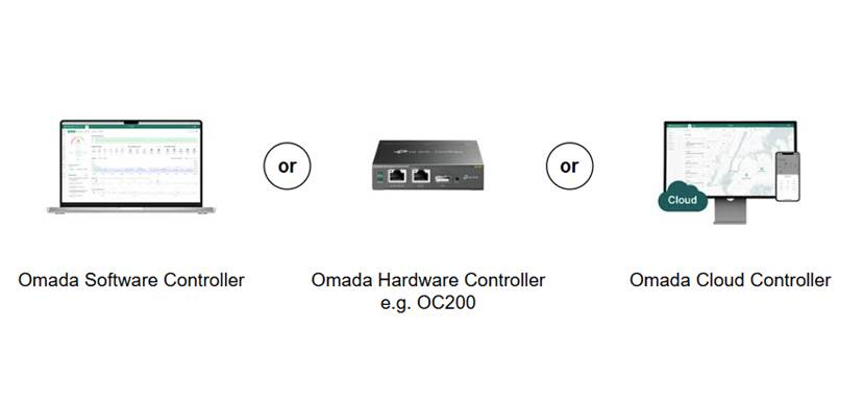
The Omada Software Controller, Omada Hardware Controller, and Omada Cloud-Based Controller can be used to manage Omada Switches.
Management Device
Configuration for Hardware or Software Controller
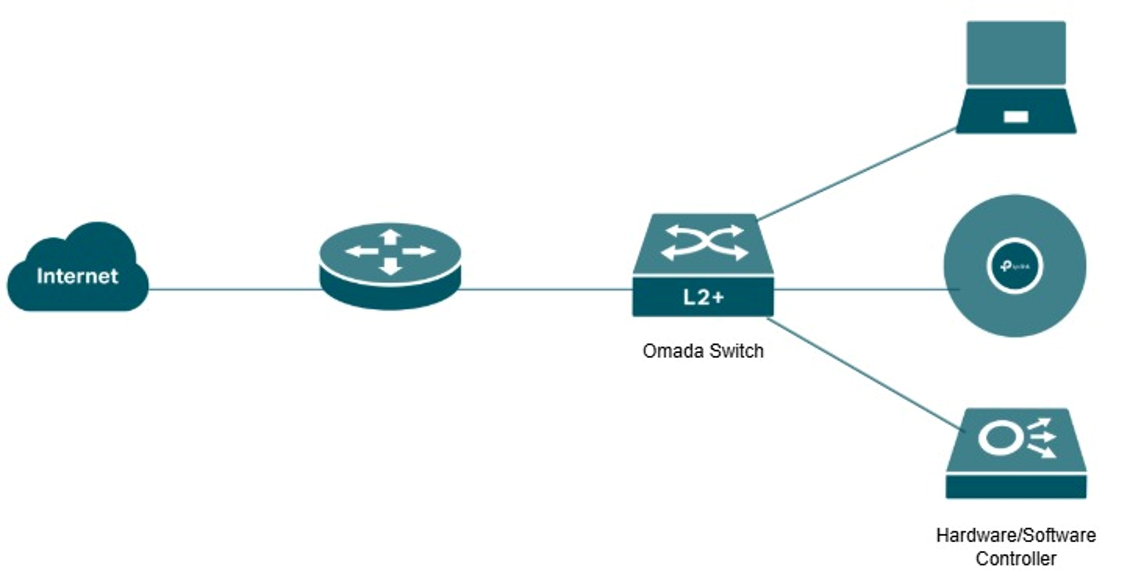
In this example, the Omada Switch and Hardware/Software Controller are connected to the same local network. The administrator can access the controller through its web interface on a PC or through the Omada App on a cellphone connected to the network and then adopt the switch for centralized management.
Note: If you have an Omada Agile Switch, go to Global View, edit the target site, and enable Agile (ES2XX / IES2XX Series) under Switch Series before adopting the switch.
Configuration for Controller Local UI
Step 1. Log in to your controller with its IP address and navigate to your Site > Devices.
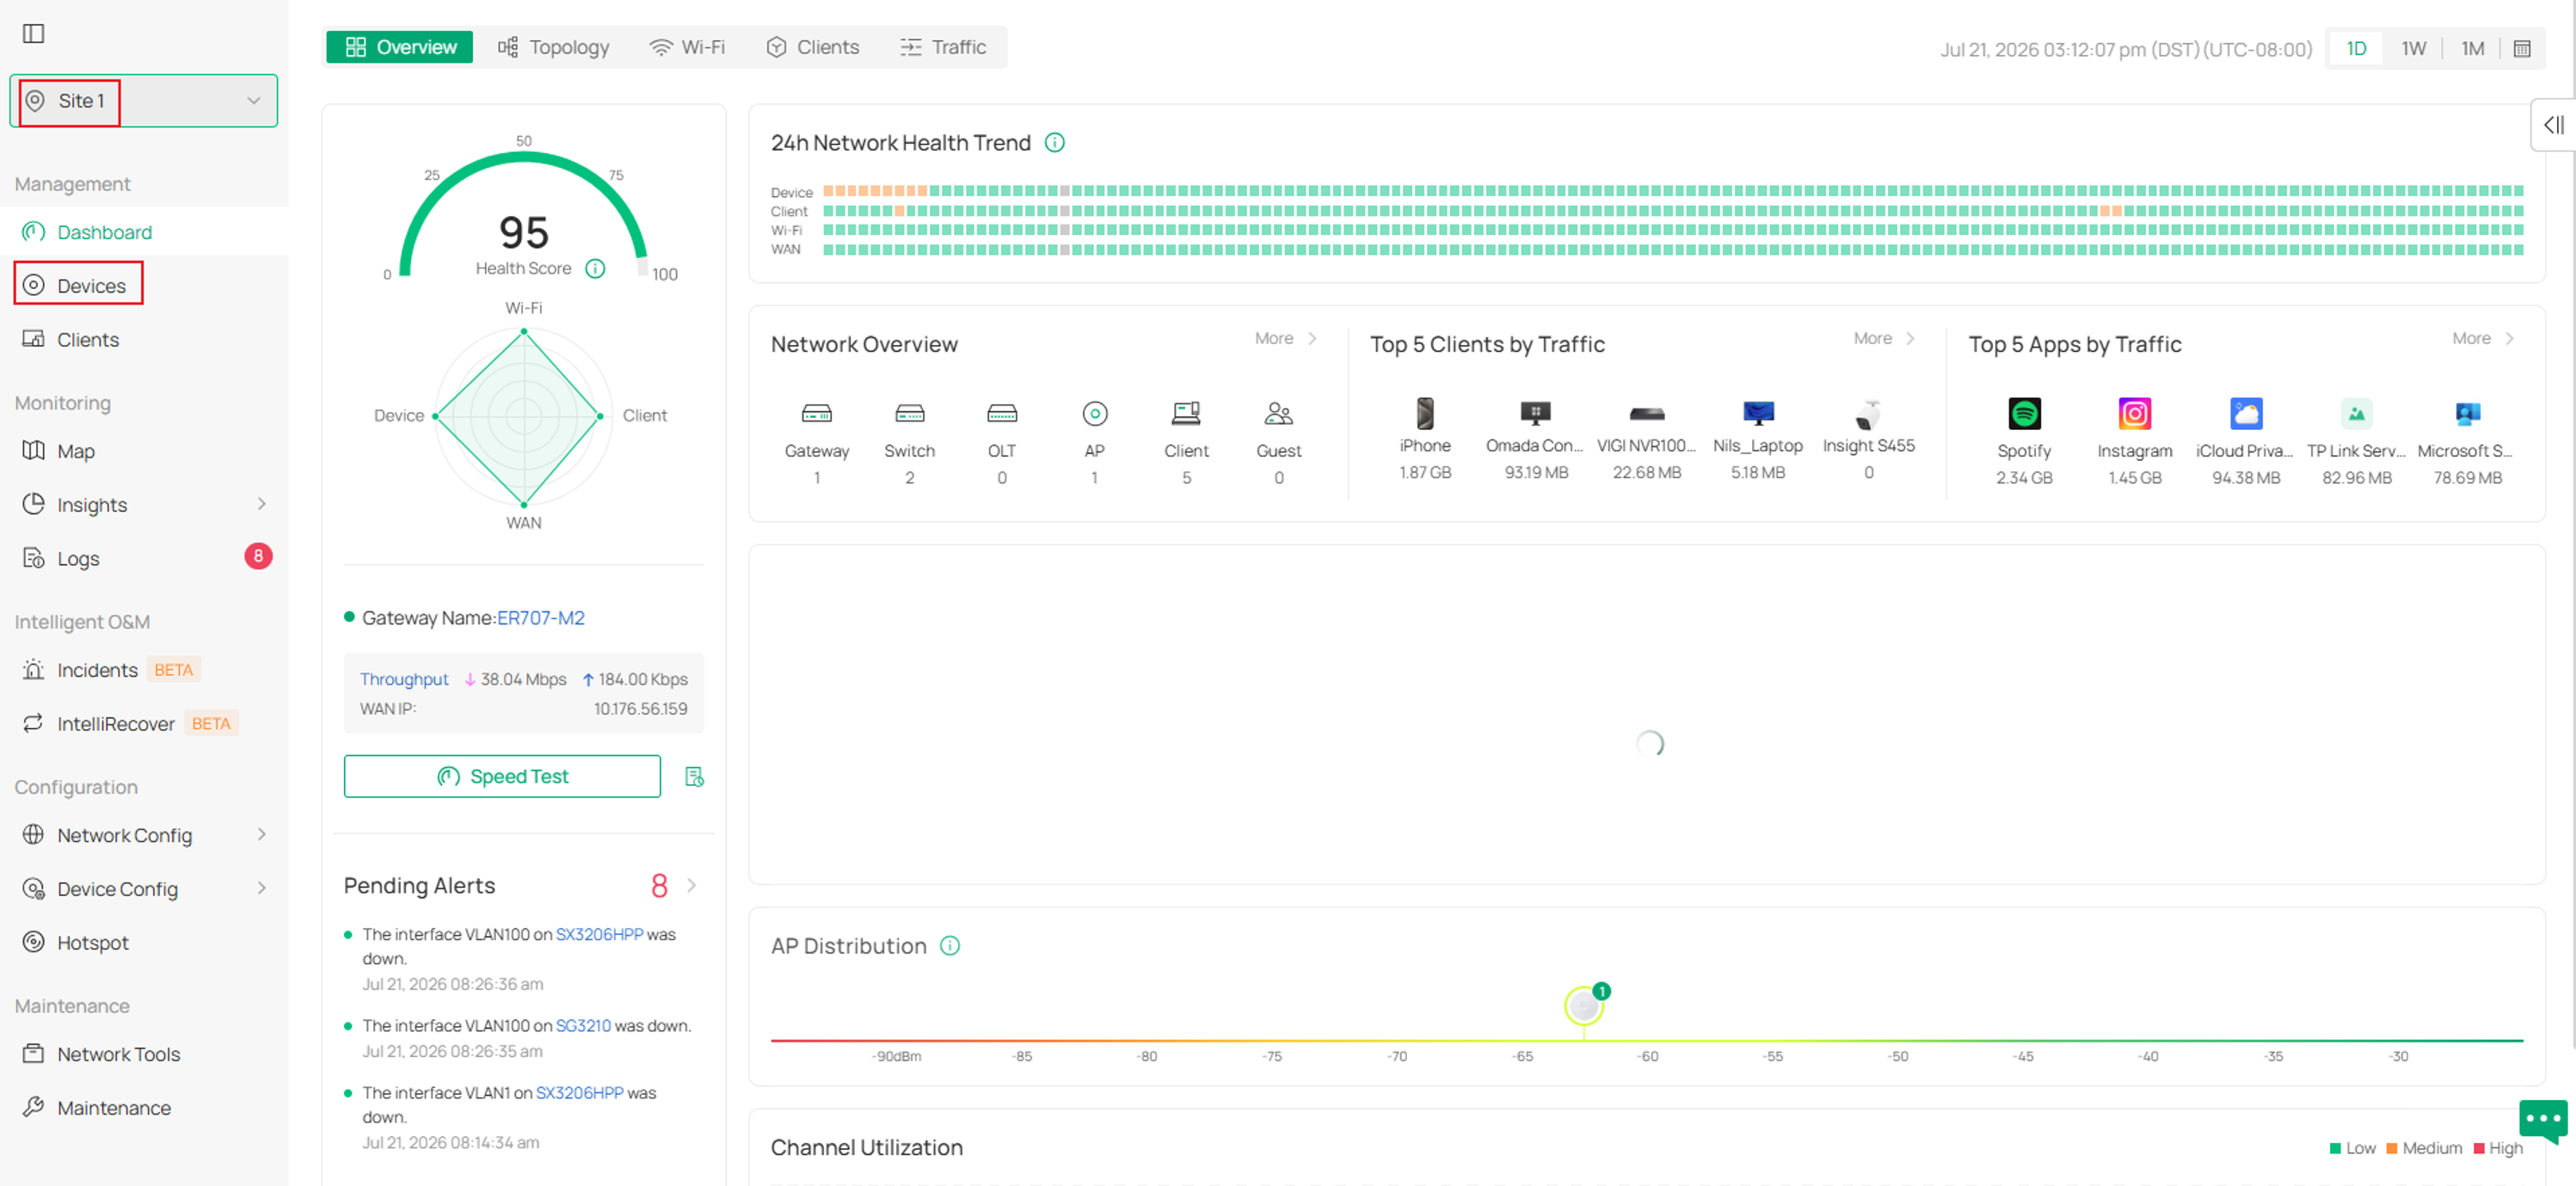
Step 2. The switch will populate in the Device List as Pending.
Click on the switch and Adopt the device.
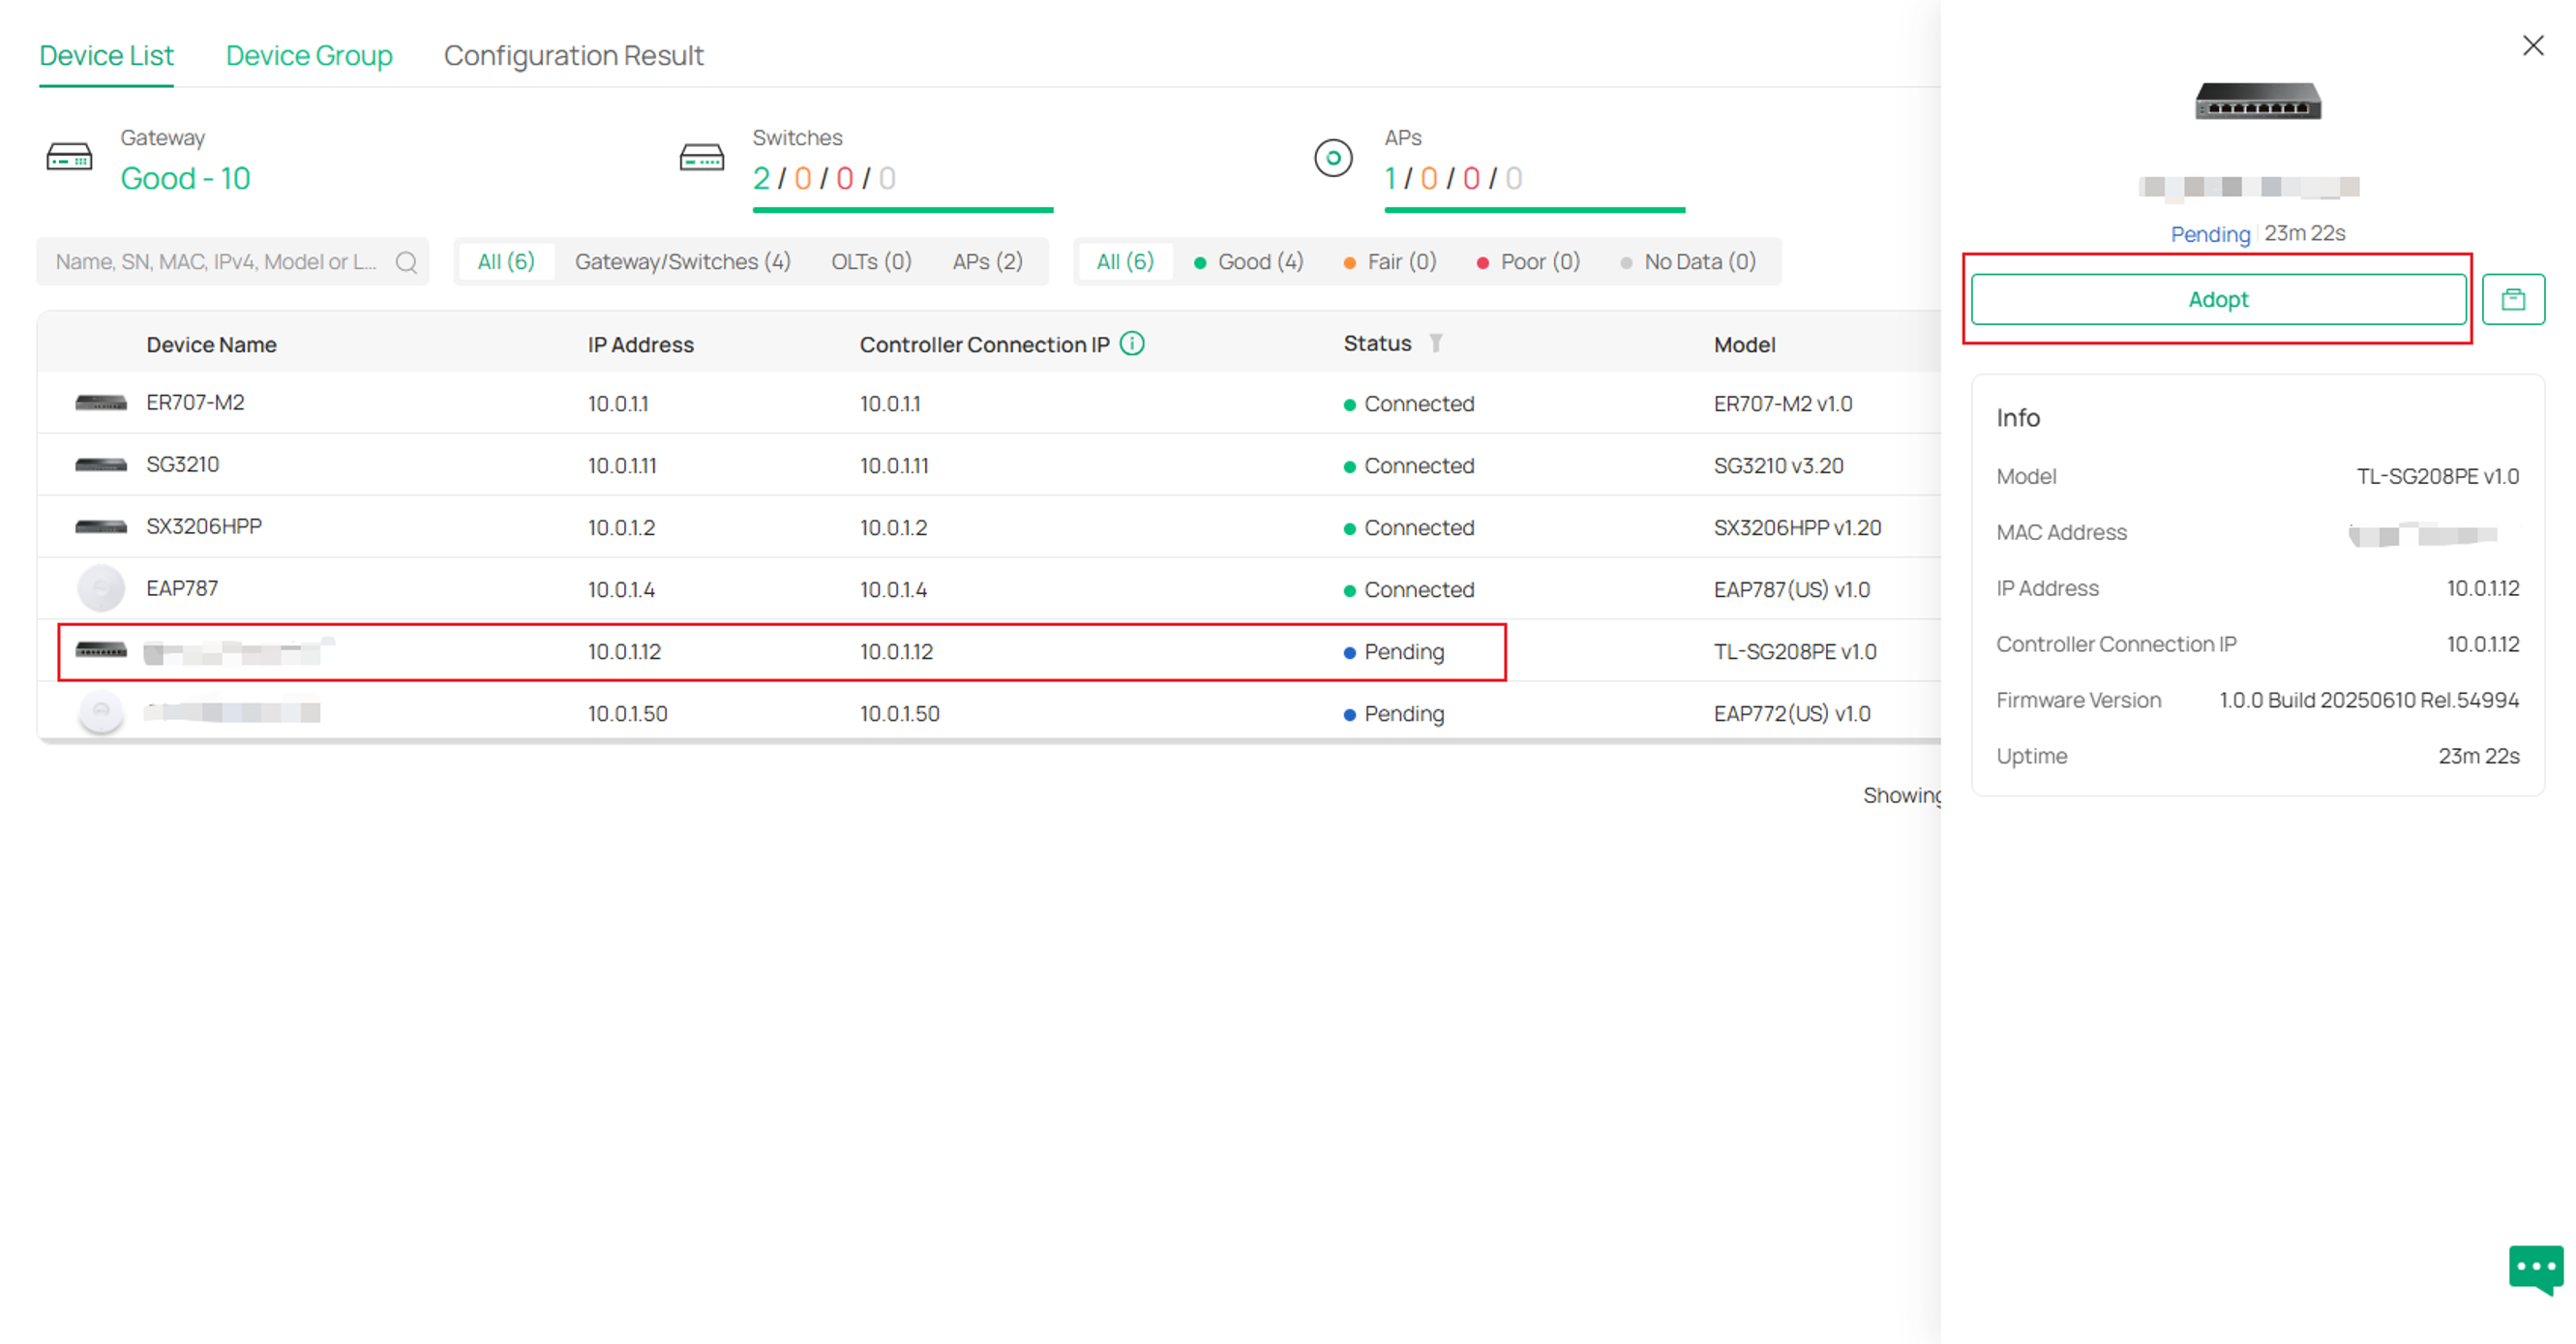
Note: If the switch does not appear in the Device List, confirm that it is powered on, has obtained a valid IP address, and can communicate with the Controller. For automatic Layer 2 discovery, the switch and Controller must be on the same subnet.
Configuration for the Omada App
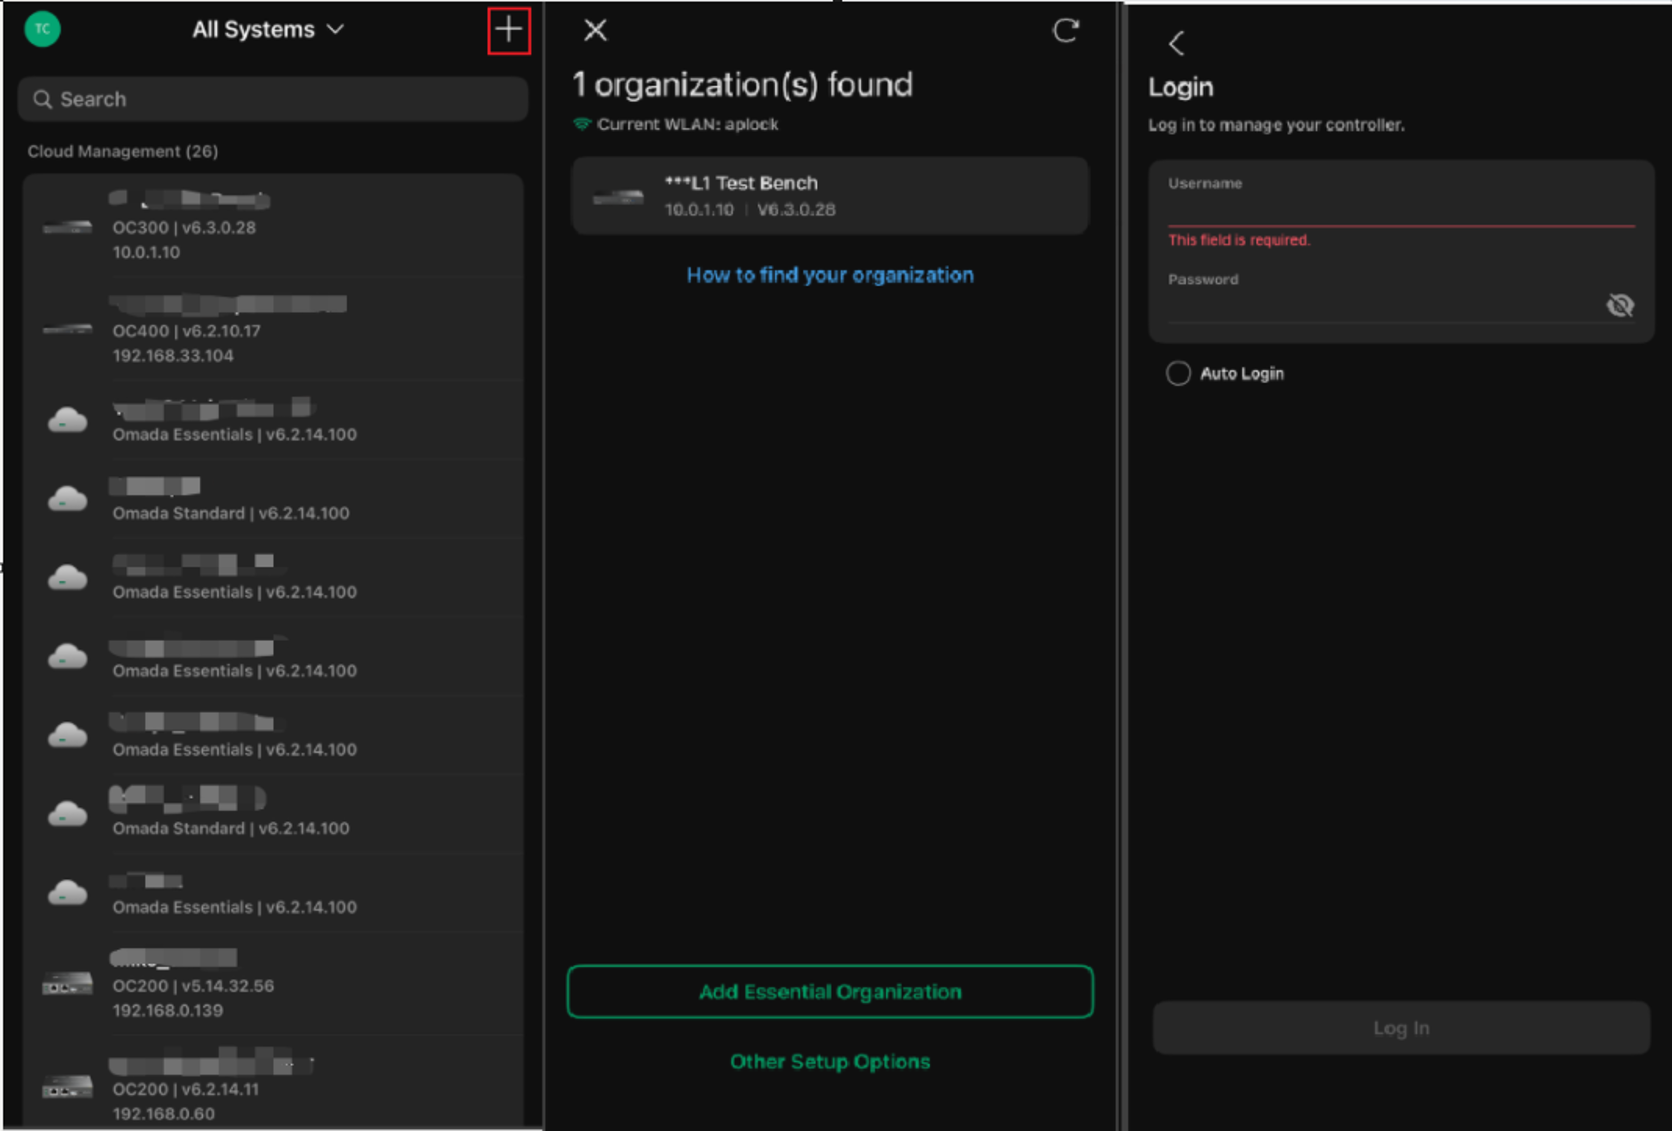
Step 1. Log into your Omada App and click the + logo at the top right of your screen in Controller Mode.
Click on your Controller and log in when it populates.
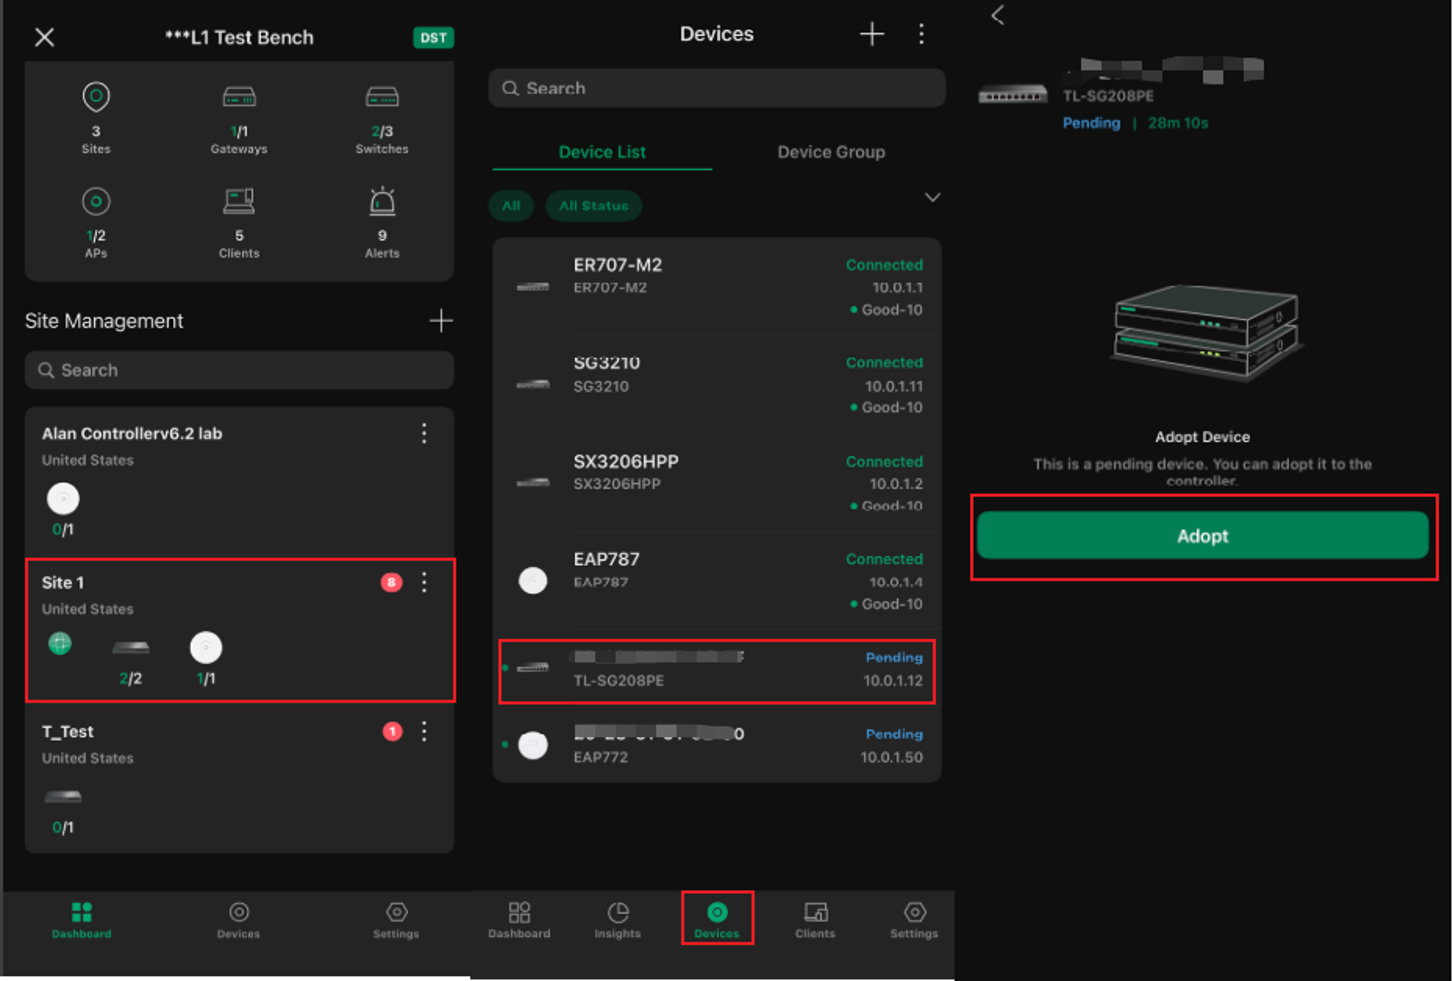
Step 2. Navigate to your Site > Devices > select the Pending switch > and tap Adopt.
Configuration for Cloud-Based Controller
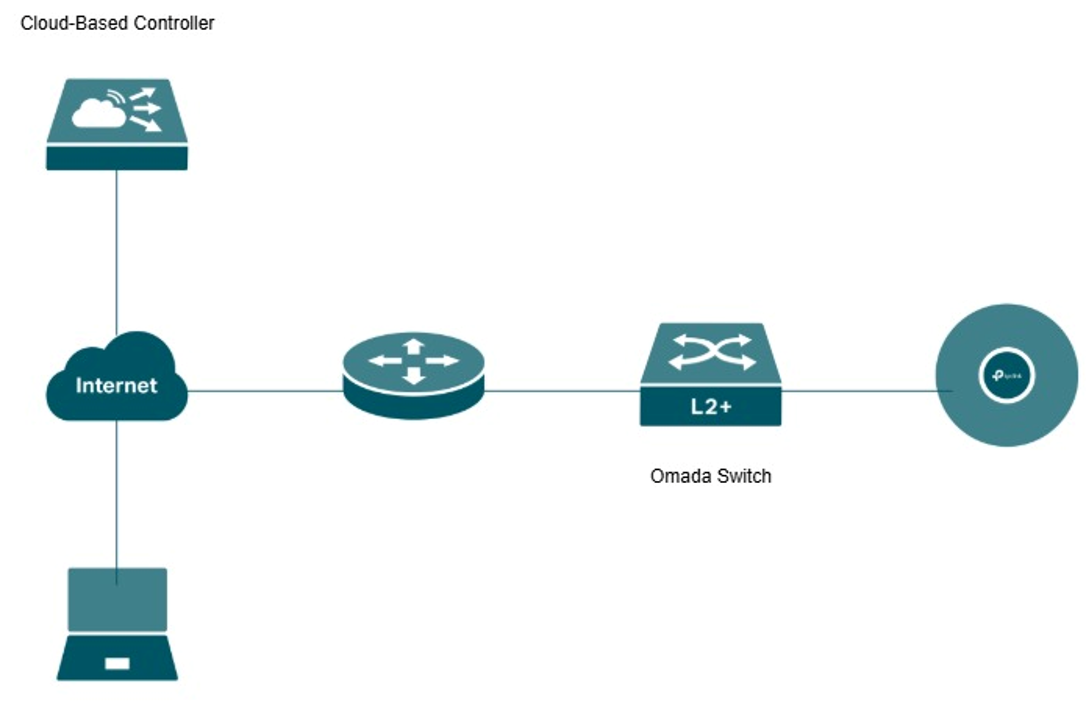
In this example, the Omada Switch is connected to a router with Internet access, allowing it to communicate with the Cloud-Based Controller. The administrator can access the controller through a web browser on a PC or the Omada App on a cellphone to adopt and centrally manage the switch.
Note: If you have an Omada Agile Switch, go to Global View, edit the target site, and enable Agile (ES2XX / IES2XX Series) under Switch Series before adopting the switch.
Configuration for the Web Interface
Step 1. In a web browser go to omada.tplinkcloud.com and log in using your TP-Link ID.
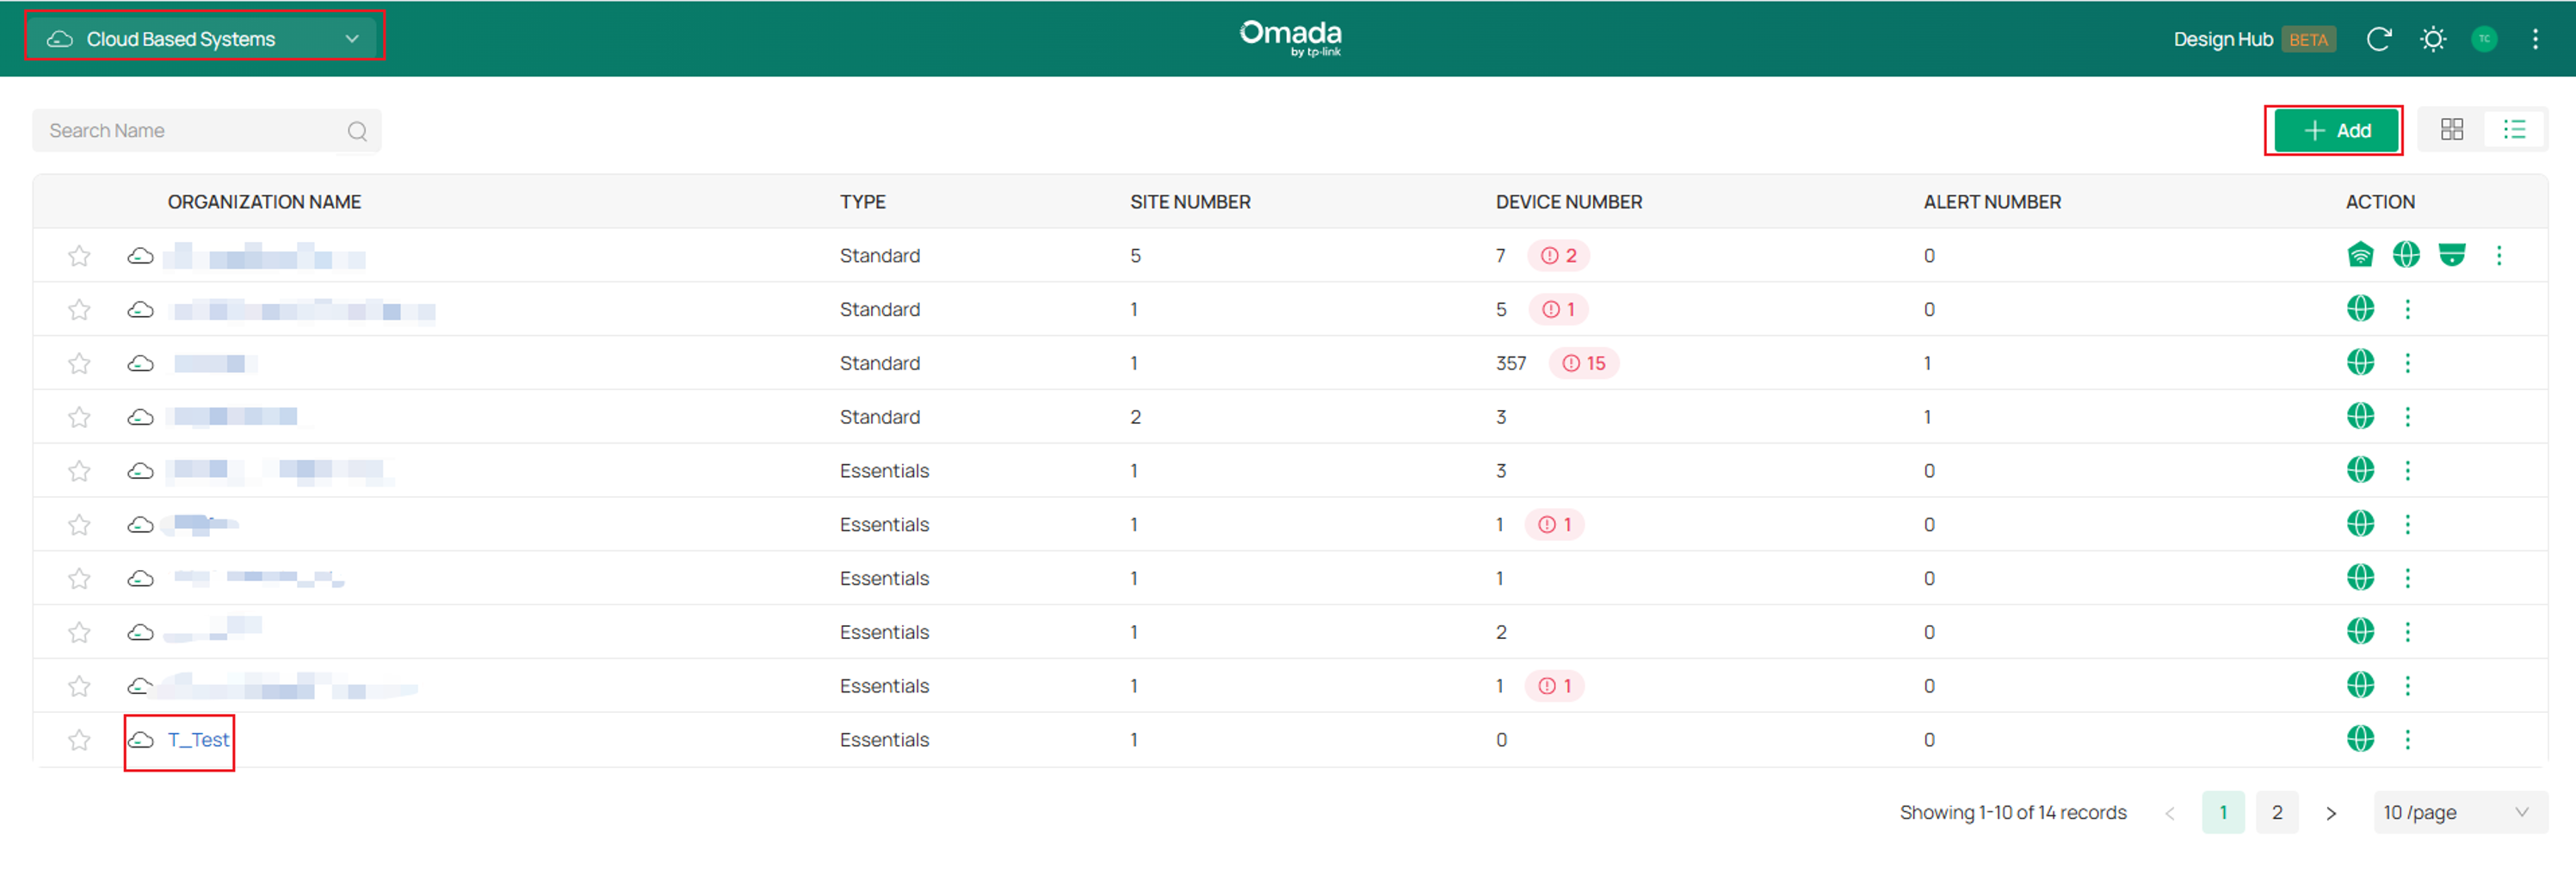
Step 2. Make sure that the page is on Cloud-Based Systems and select your Controller.
If you need to create a Controller, click Add at the top right.
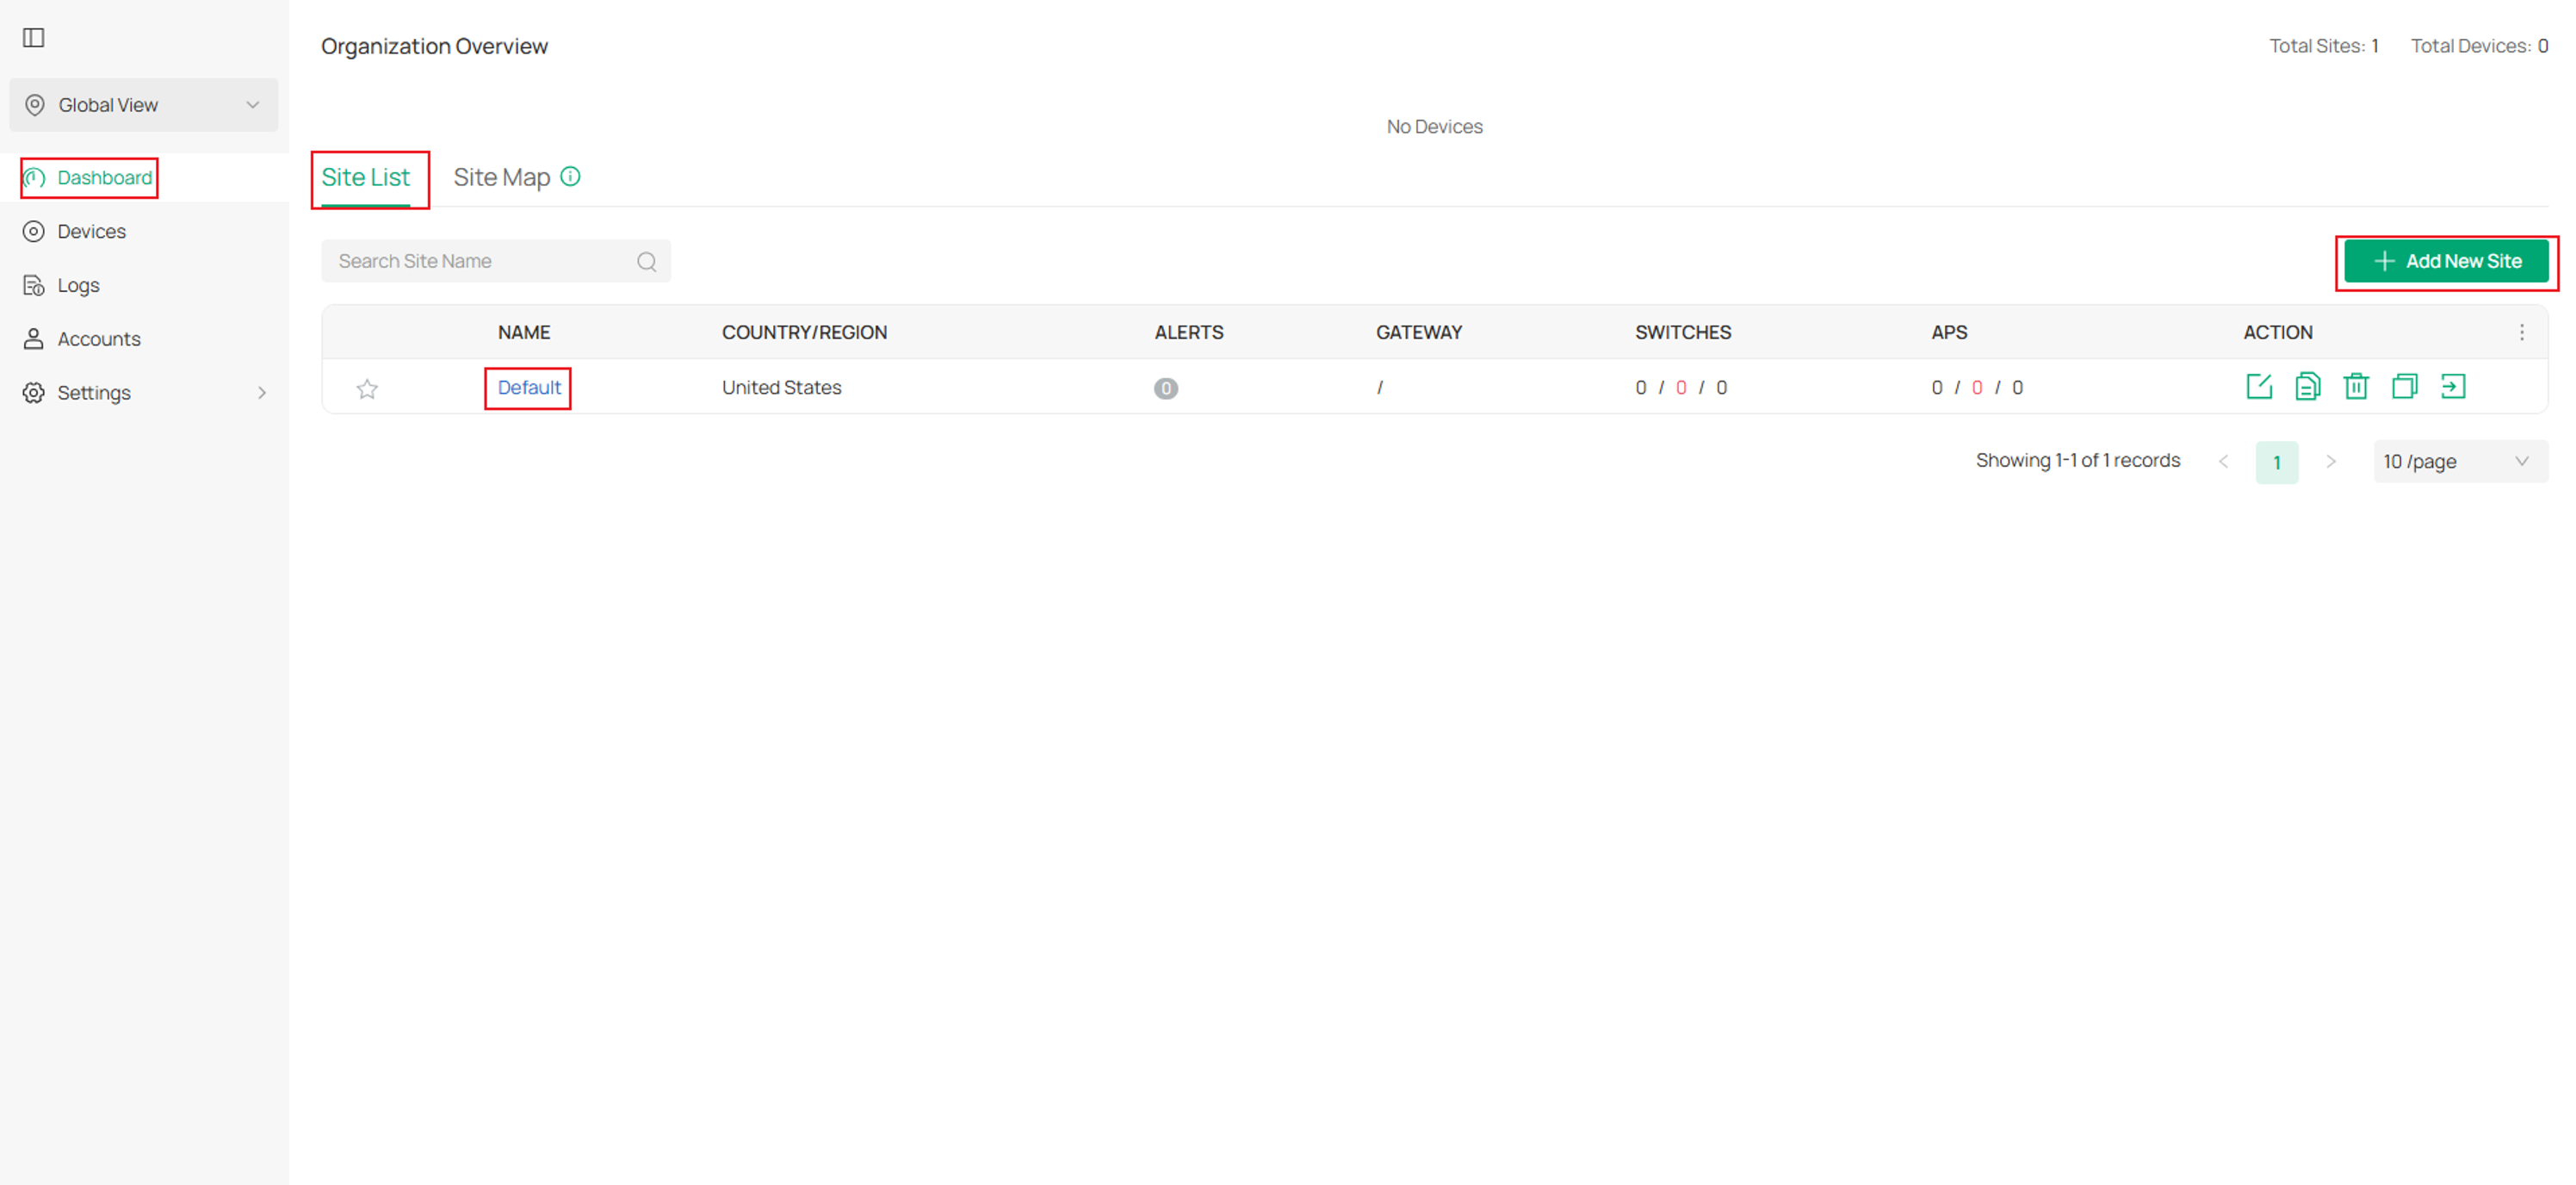
Step 3. Next, go to Dashboard and click on the Site under the Site List.
If a site has not been created, click Add New Site at the top right corner.
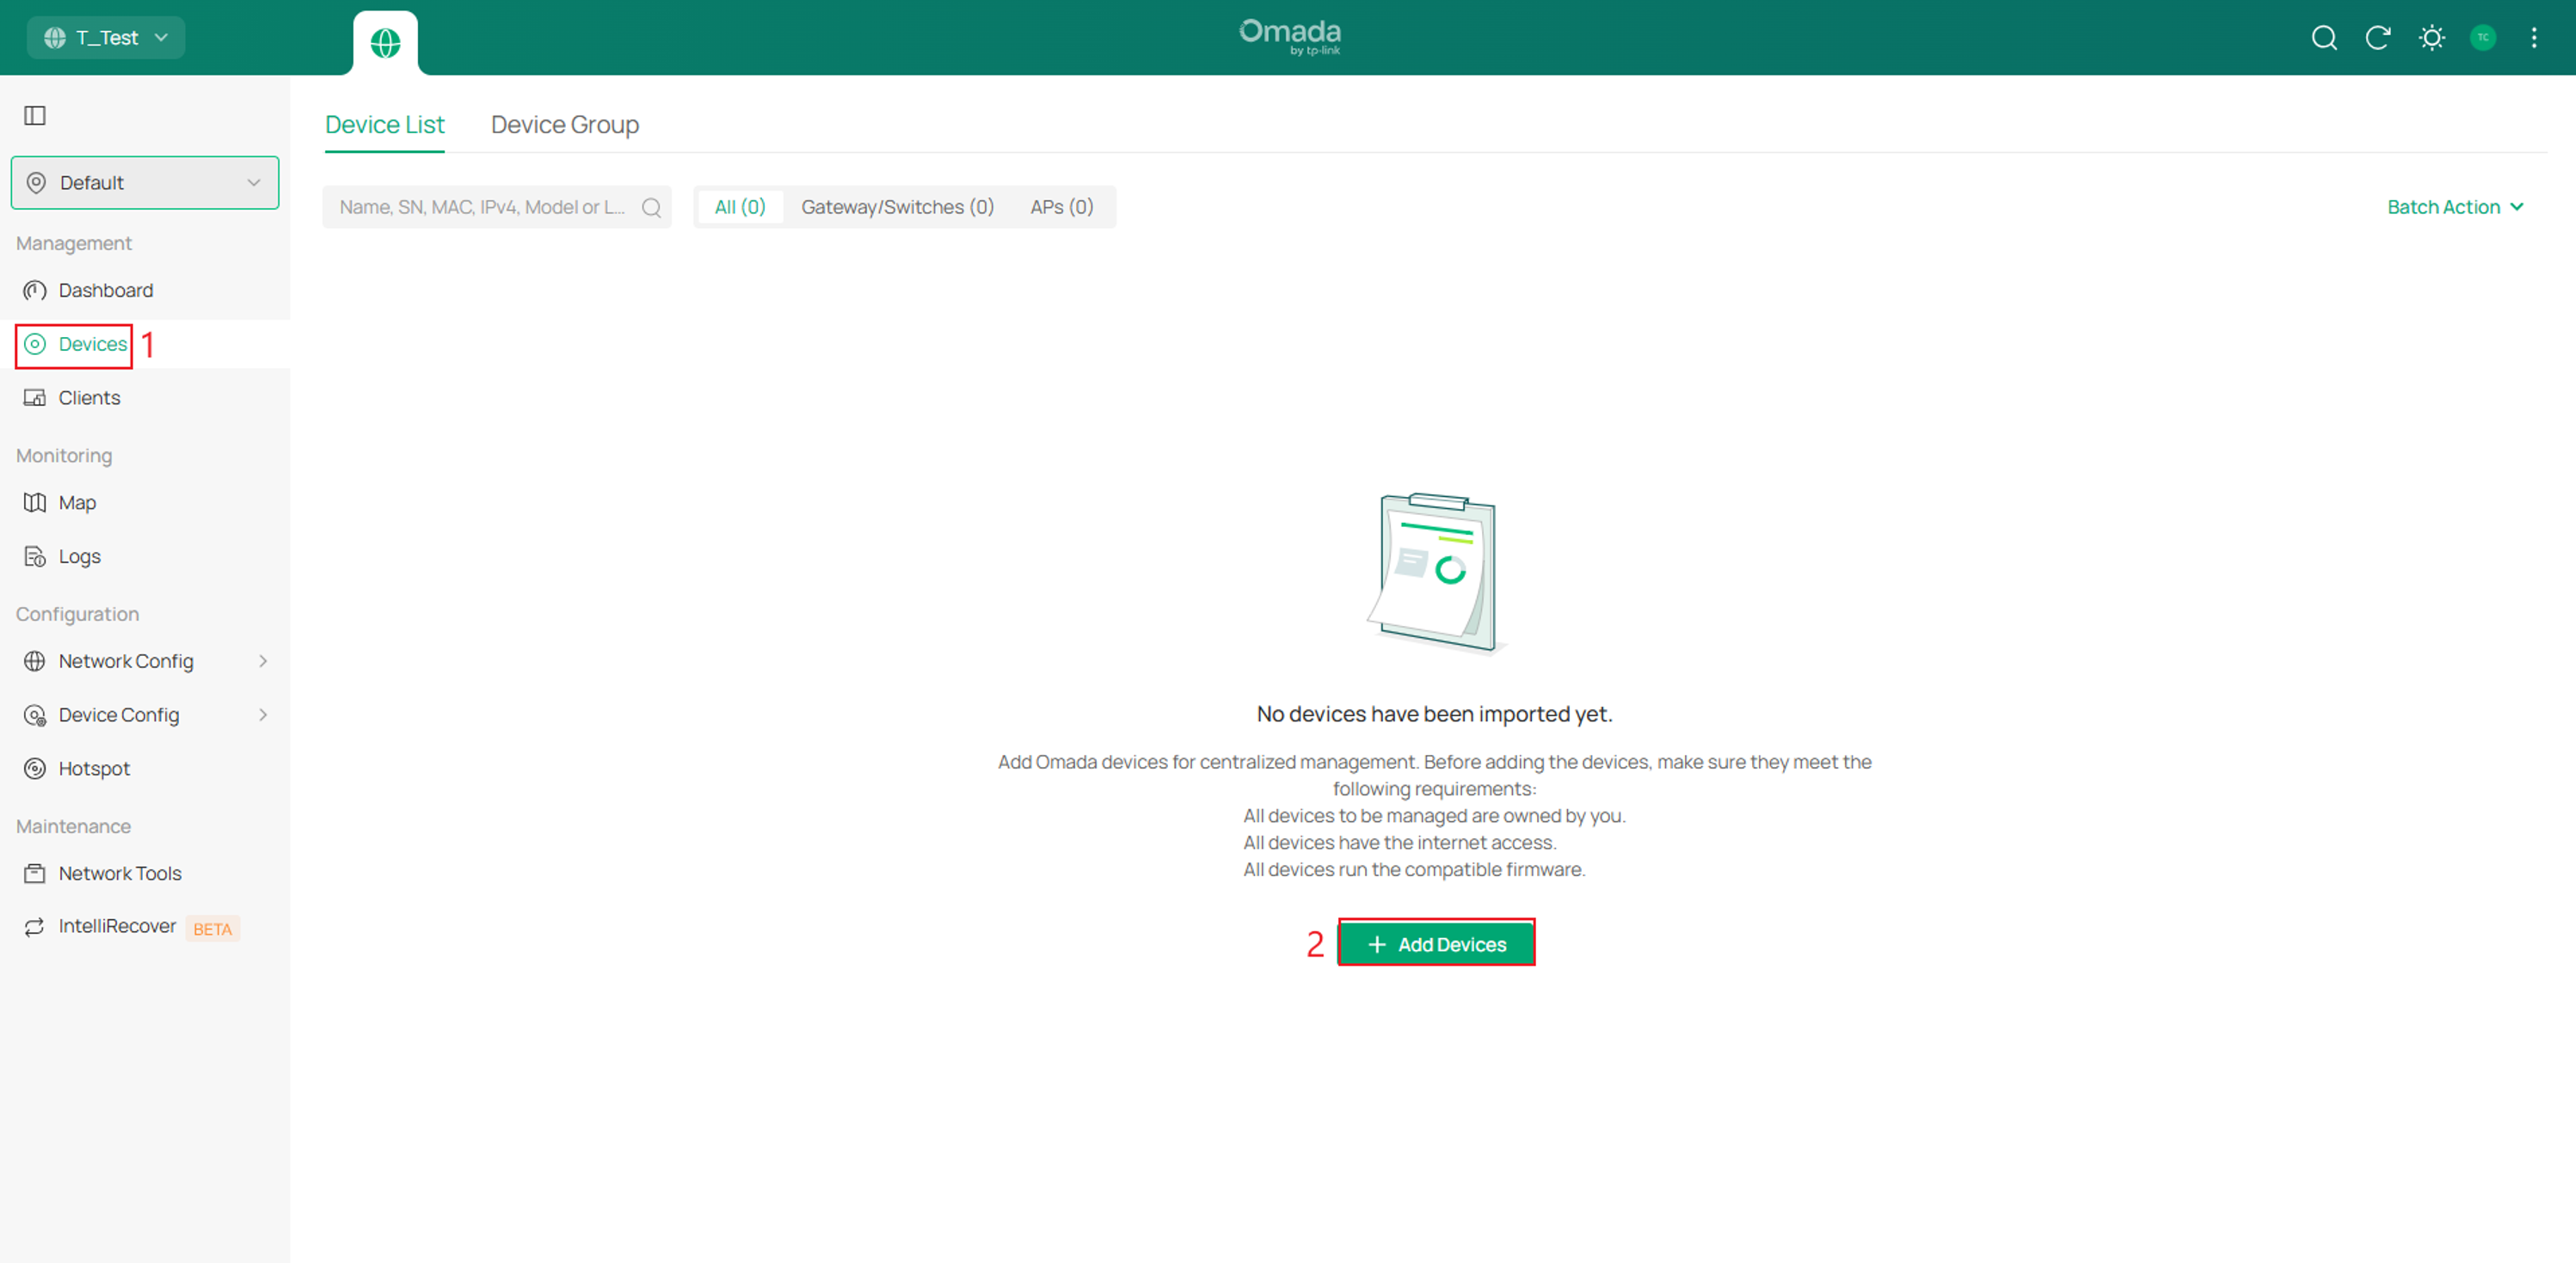
Step 4. Navigate to Devices and click Add Devices. Select the site where the switch will be added. The following methods are available:
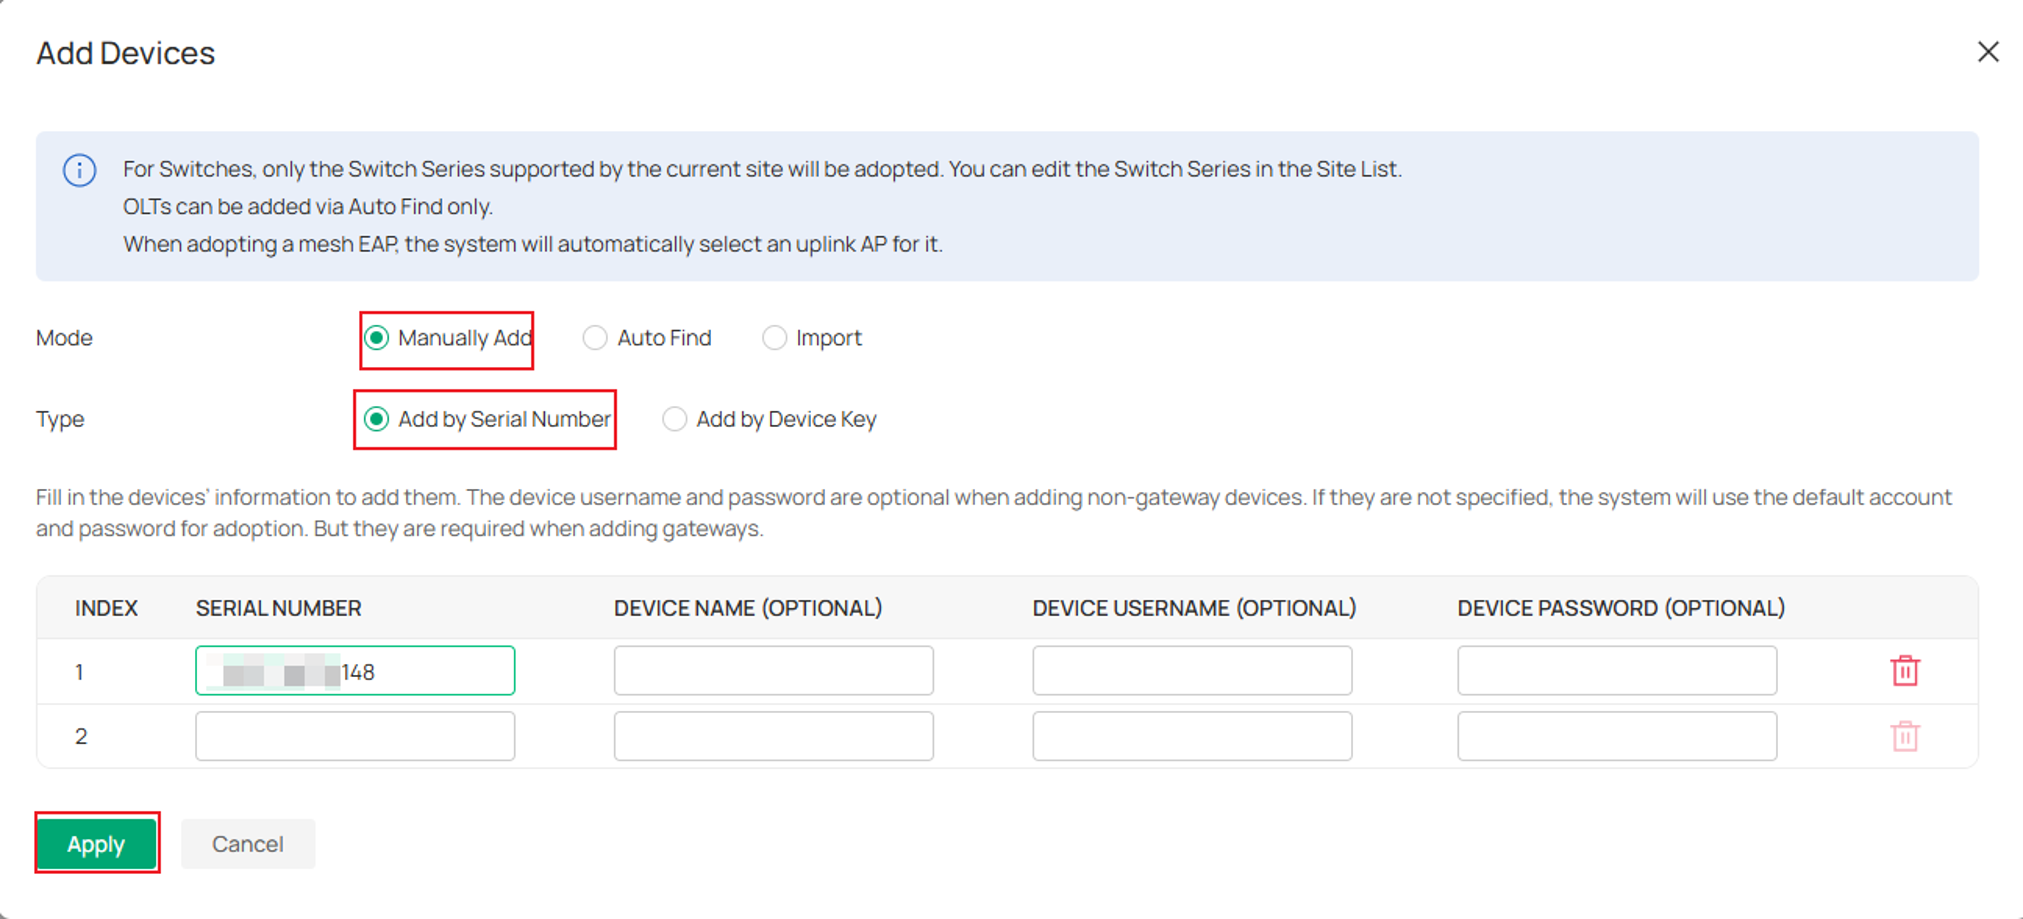
- Manually Add: Add an individual switch using its Serial Number or Device Key.
- Auto Find: Automatically find devices configured with the site’s Inform URL. For detailed instructions, refer to How to Discover and Adopt Omada Devices on Omada Central using the Site URL.
- Import: Add multiple devices by selecting Add by Serial Number or Add by Device Key. Click Template to download the template, fill in the device information, and save the file. Click Upload to import the completed file. XLSX, XLS, and CSV files are supported, with up to 1,500 devices per import.
In this example, we will use the Manually Add method. Select Add by Serial Number or Add by Device Key, enter the corresponding information for the Omada Switch, and click Apply.
Note: You can find the Serial Number and Device Key of the device on the device tag either on the box it came with or on the physical device itself.
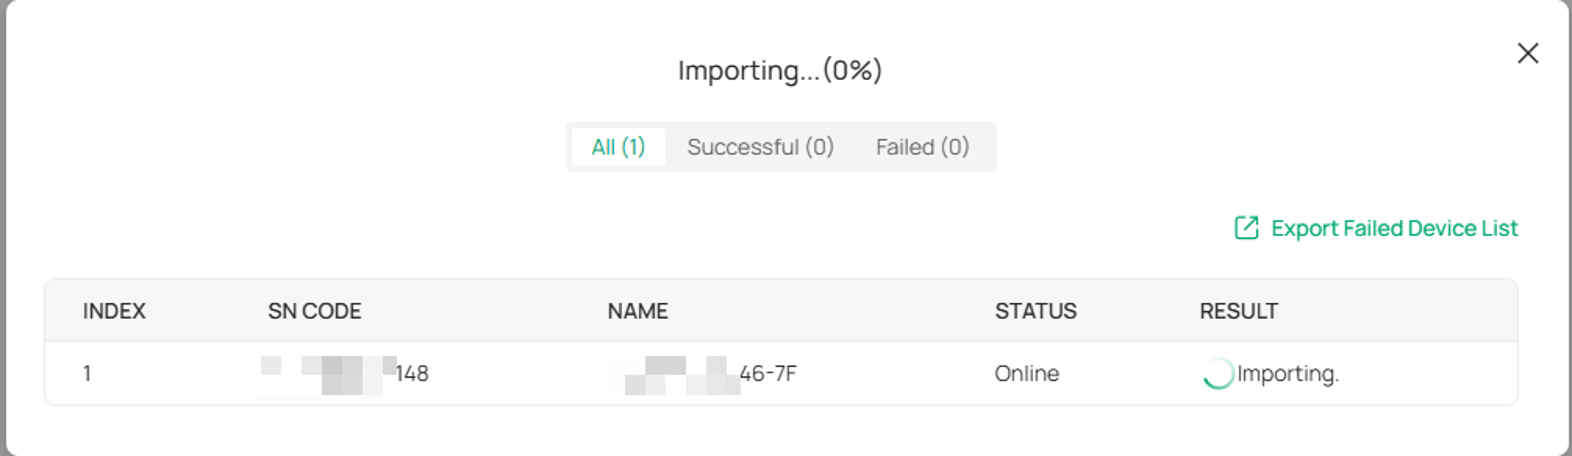
Note: After being added, the switch may appear as Preconfigured until it communicates with the Cloud-Based Controller. Confirm that the switch has Internet access and that Cloud-Based Controller Management is enabled through its local interface.
Configuration for the Omada App
To add devices to the Cloud-Based Controller please follow this guide: How to Add Omada Devices to Cloud-Based Controller via Omada APP
Conclusion
By following this guide, you can adopt a supported Omada Switch into a Hardware, Software, or Cloud-Based Controller using the Controller web interface or Omada App. Once adopted, the switch can be centrally configured, monitored, and managed through the Omada Controller.
QA
Q1: What should I do if the Omada Switch does not appear in the Controller?
A1: Verify that the switch is powered on, has obtained a valid IP address, and can communicate with the Controller. If you have an Omada Agile Switch, also confirm that Agile (ES2XX / IES2XX Series) is enabled for the target site.
To learn more about each function and configuration, please visit Support Home to download or check the manual for your product.
