


Contents
Configuration for Controller Mode
Configuration for Standalone Mode
Introduction
The DMZ Host feature on an Omada Gateway uses IPv4 NAT to forward new inbound connections received on a selected WAN interface to a designated device on the local network. It is useful for applications that use multiple or dynamically assigned ports, as well as for temporary testing and troubleshooting. Because the designated host is exposed to greater security risks, DMZ should only be enabled when necessary and the host should be properly secured. This guide demonstrates how to configure DMZ on an Omada Gateway in both Standalone Mode and Controller Mode.
Requirements
- Standalone: Omada Gateway
- Controller: Omada Gateway + Omada Controller
Configuration
The DMZ Host feature can be configured through the gateway’s standalone web interface or the Omada Controller. Before proceeding, assign the designated DMZ host a static IP address or DHCP reservation to prevent its IP address from changing. When using a DHCP reservation, make sure the DMZ destination IP, reserved IP, and device’s current IP address are identical. If the device is still using a different address after the reservation is configured, renew its DHCP lease so that it obtains the reserved address.
Follow the applicable configuration method below based on how your Omada Gateway is managed.
Configuration for Controller Mode
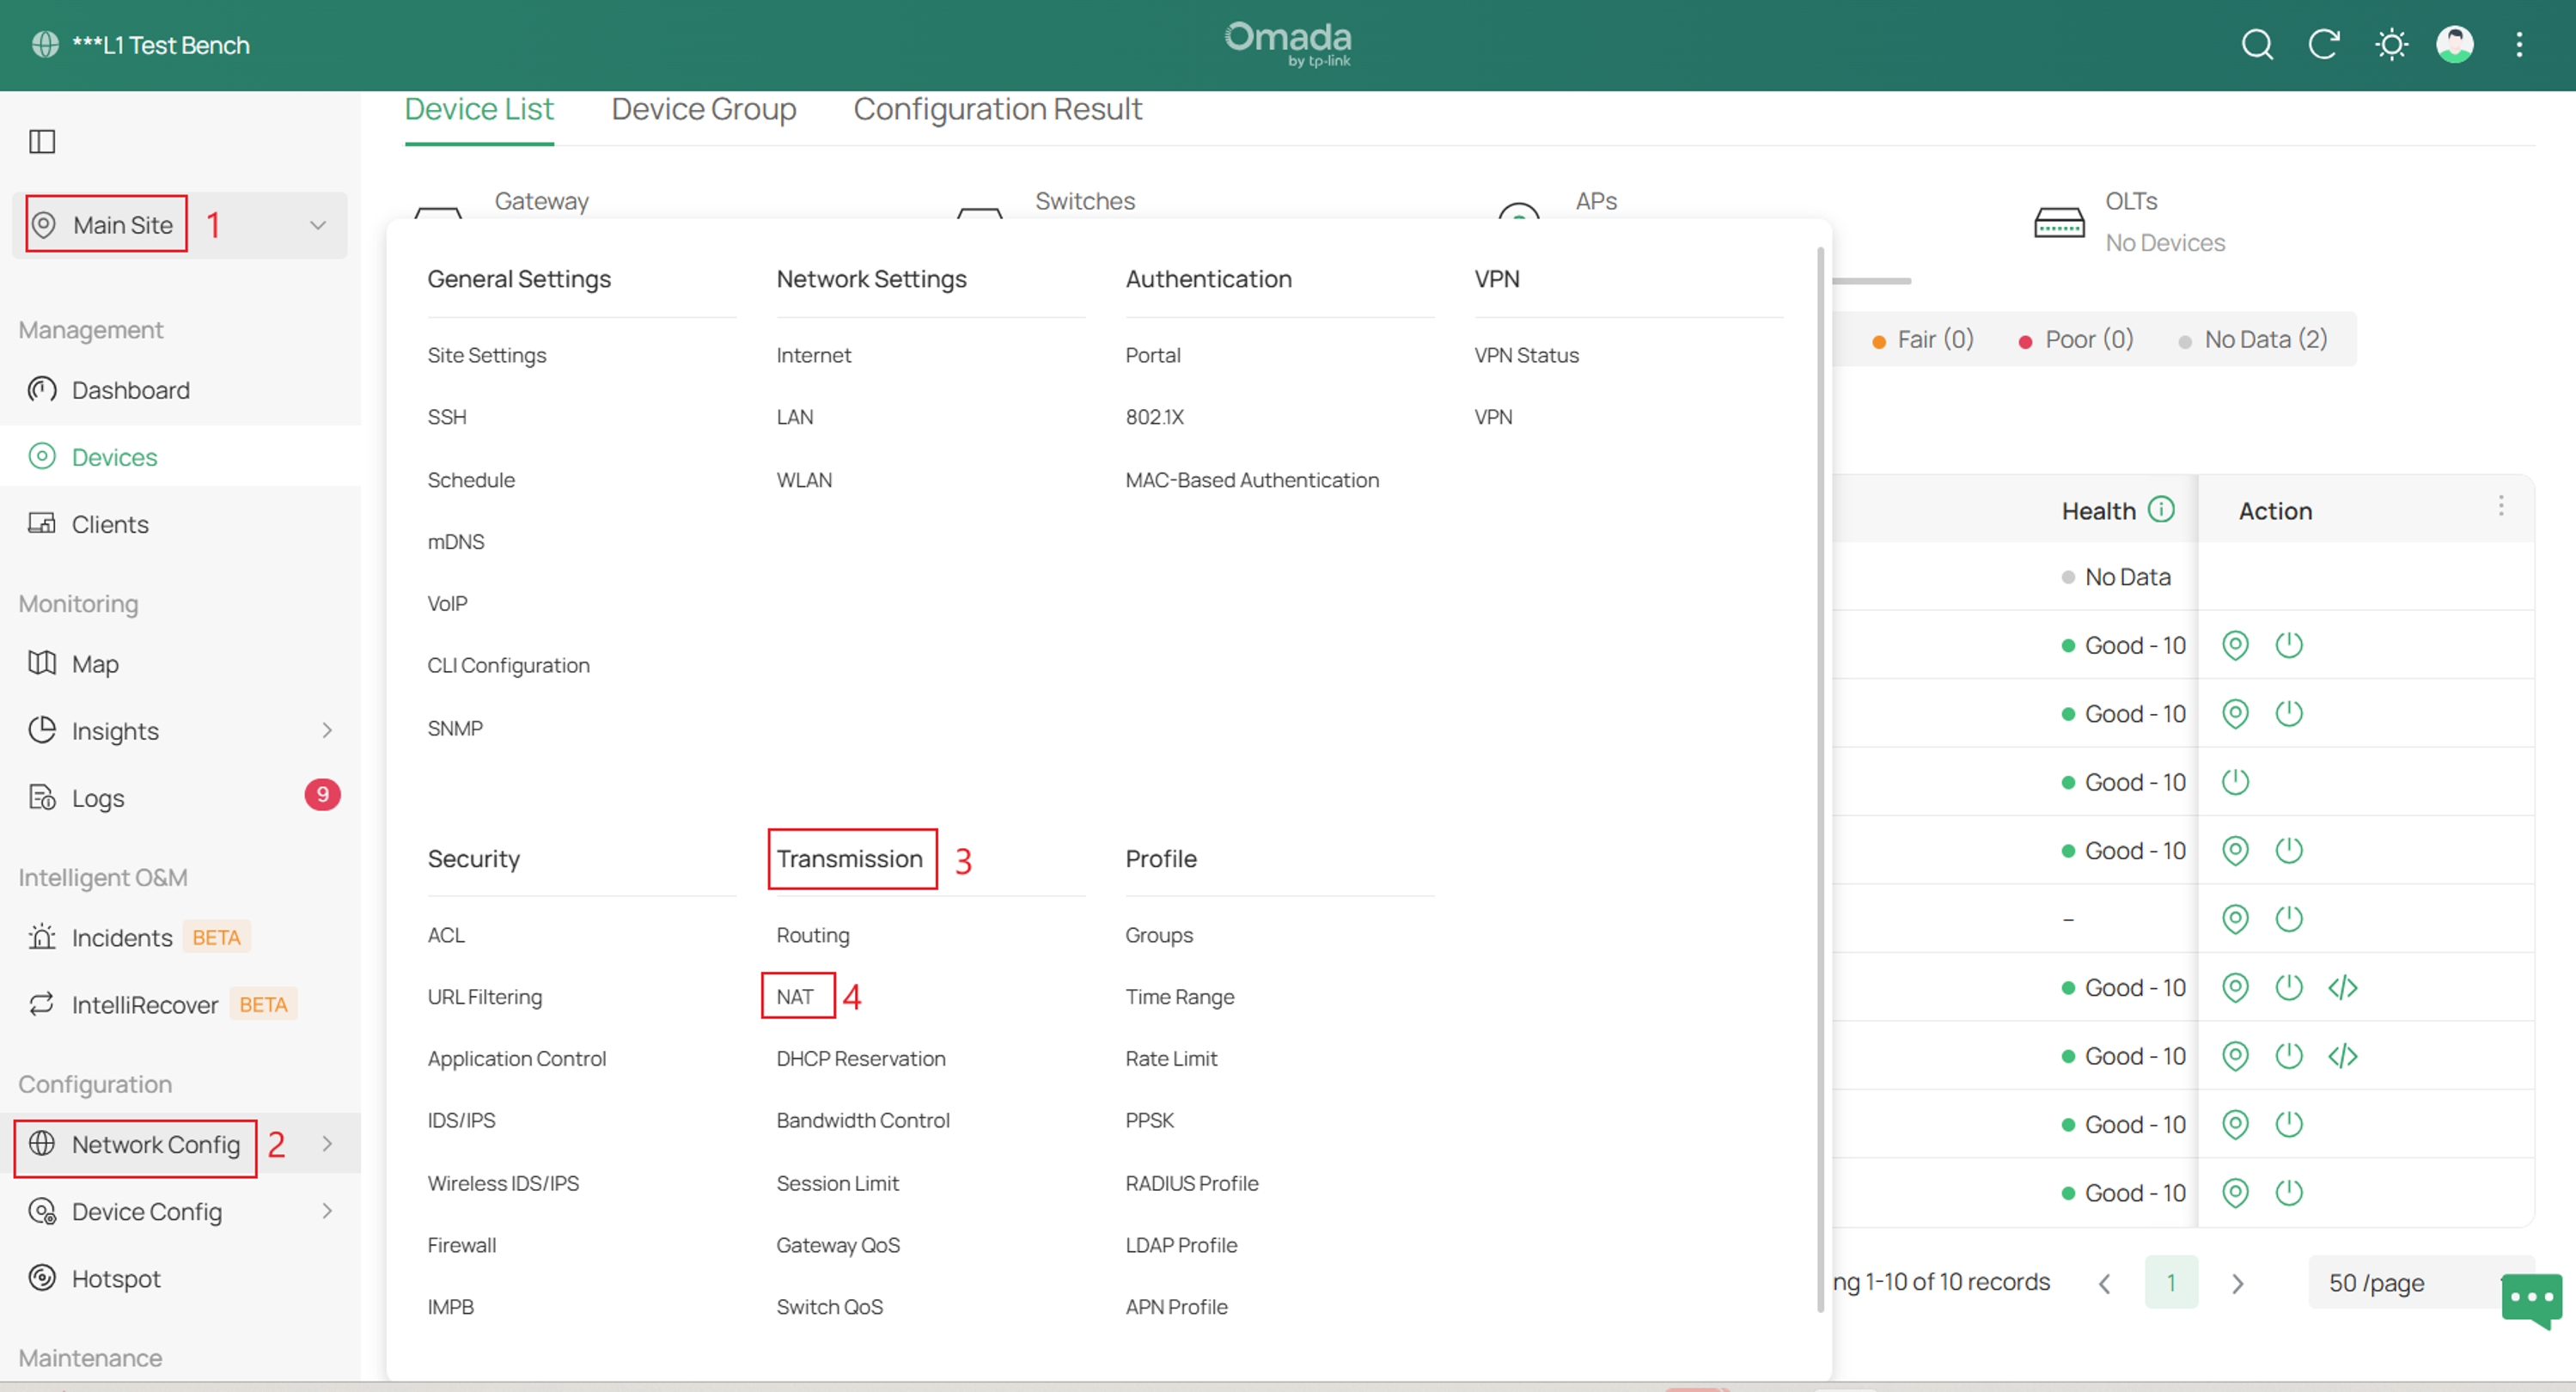
Step 1. Log in to the controller and navigate to the Site > Network Config > Transmission > NAT.
Step 2. Next, go to Port Forwarding > select Create New Rule.
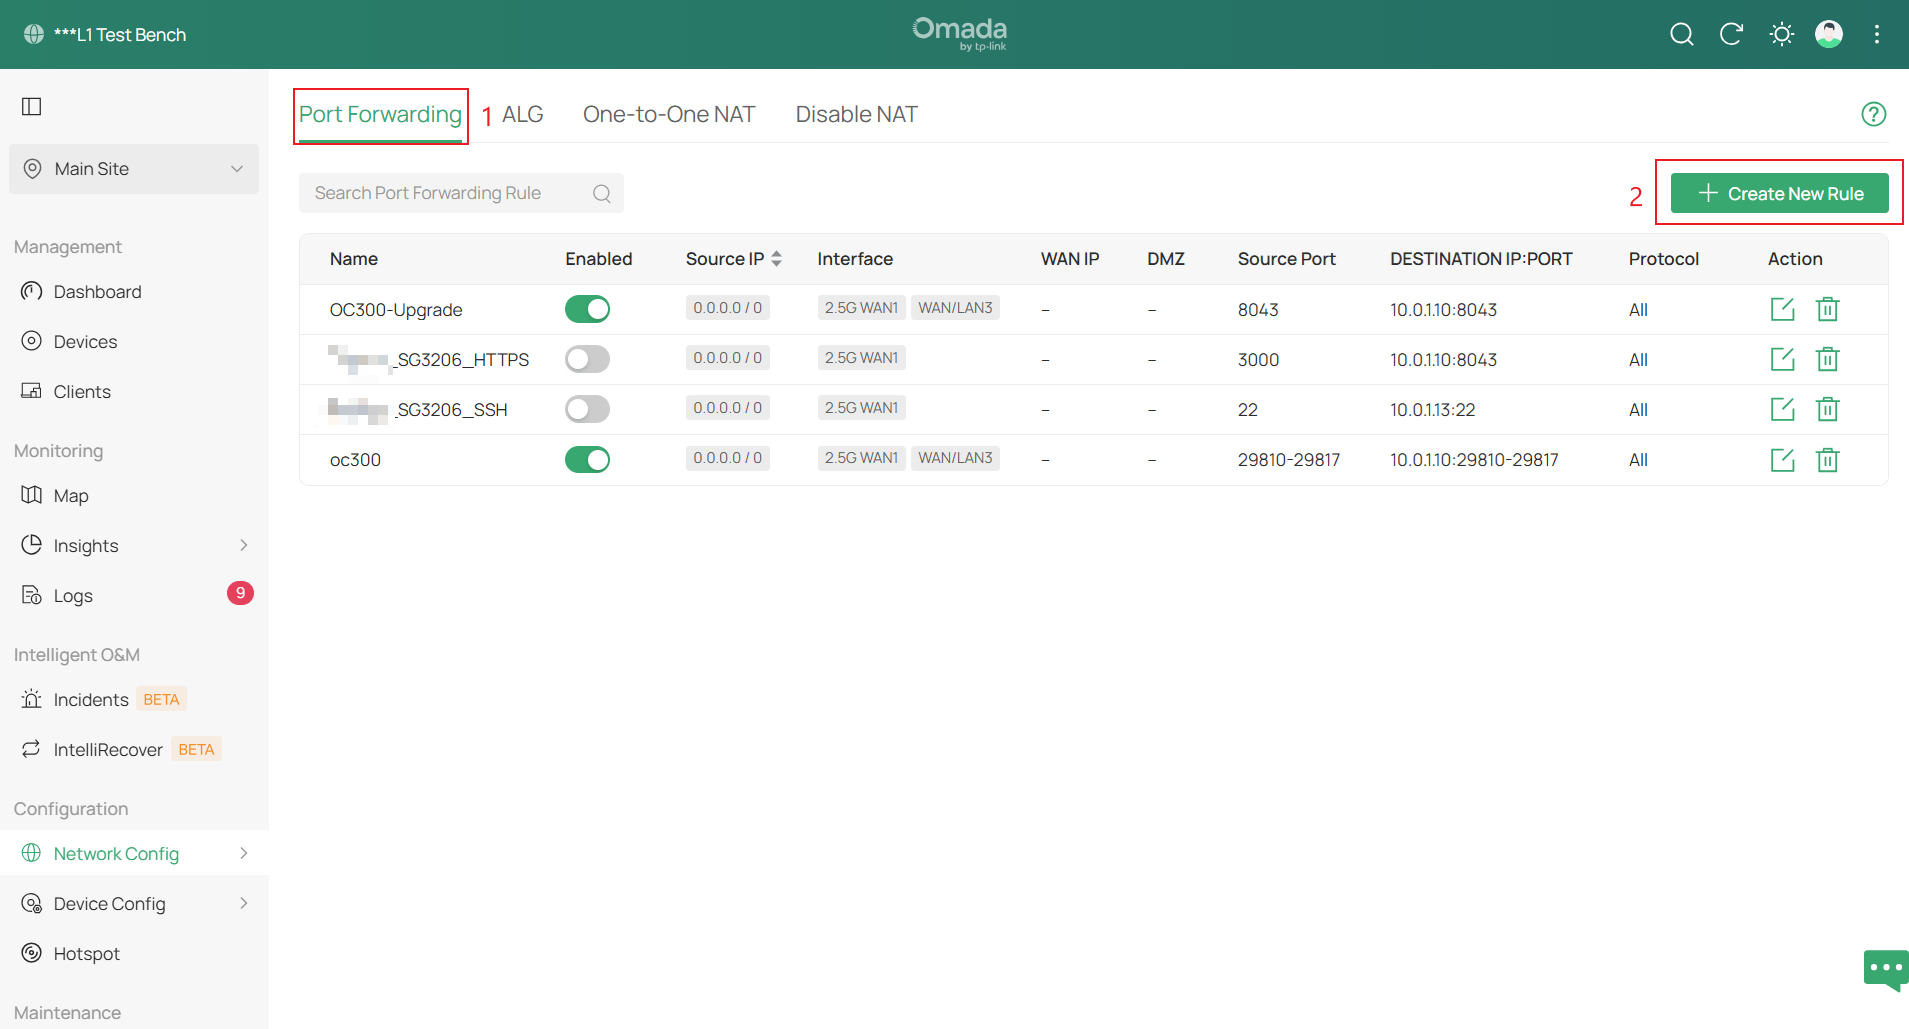
In Controller Mode, DMZ is implemented as a special port-forwarding rule that forwards all destination ports for matching new inbound IPv4 connections to a designated host.
Fill in the parameters and click Create once complete.
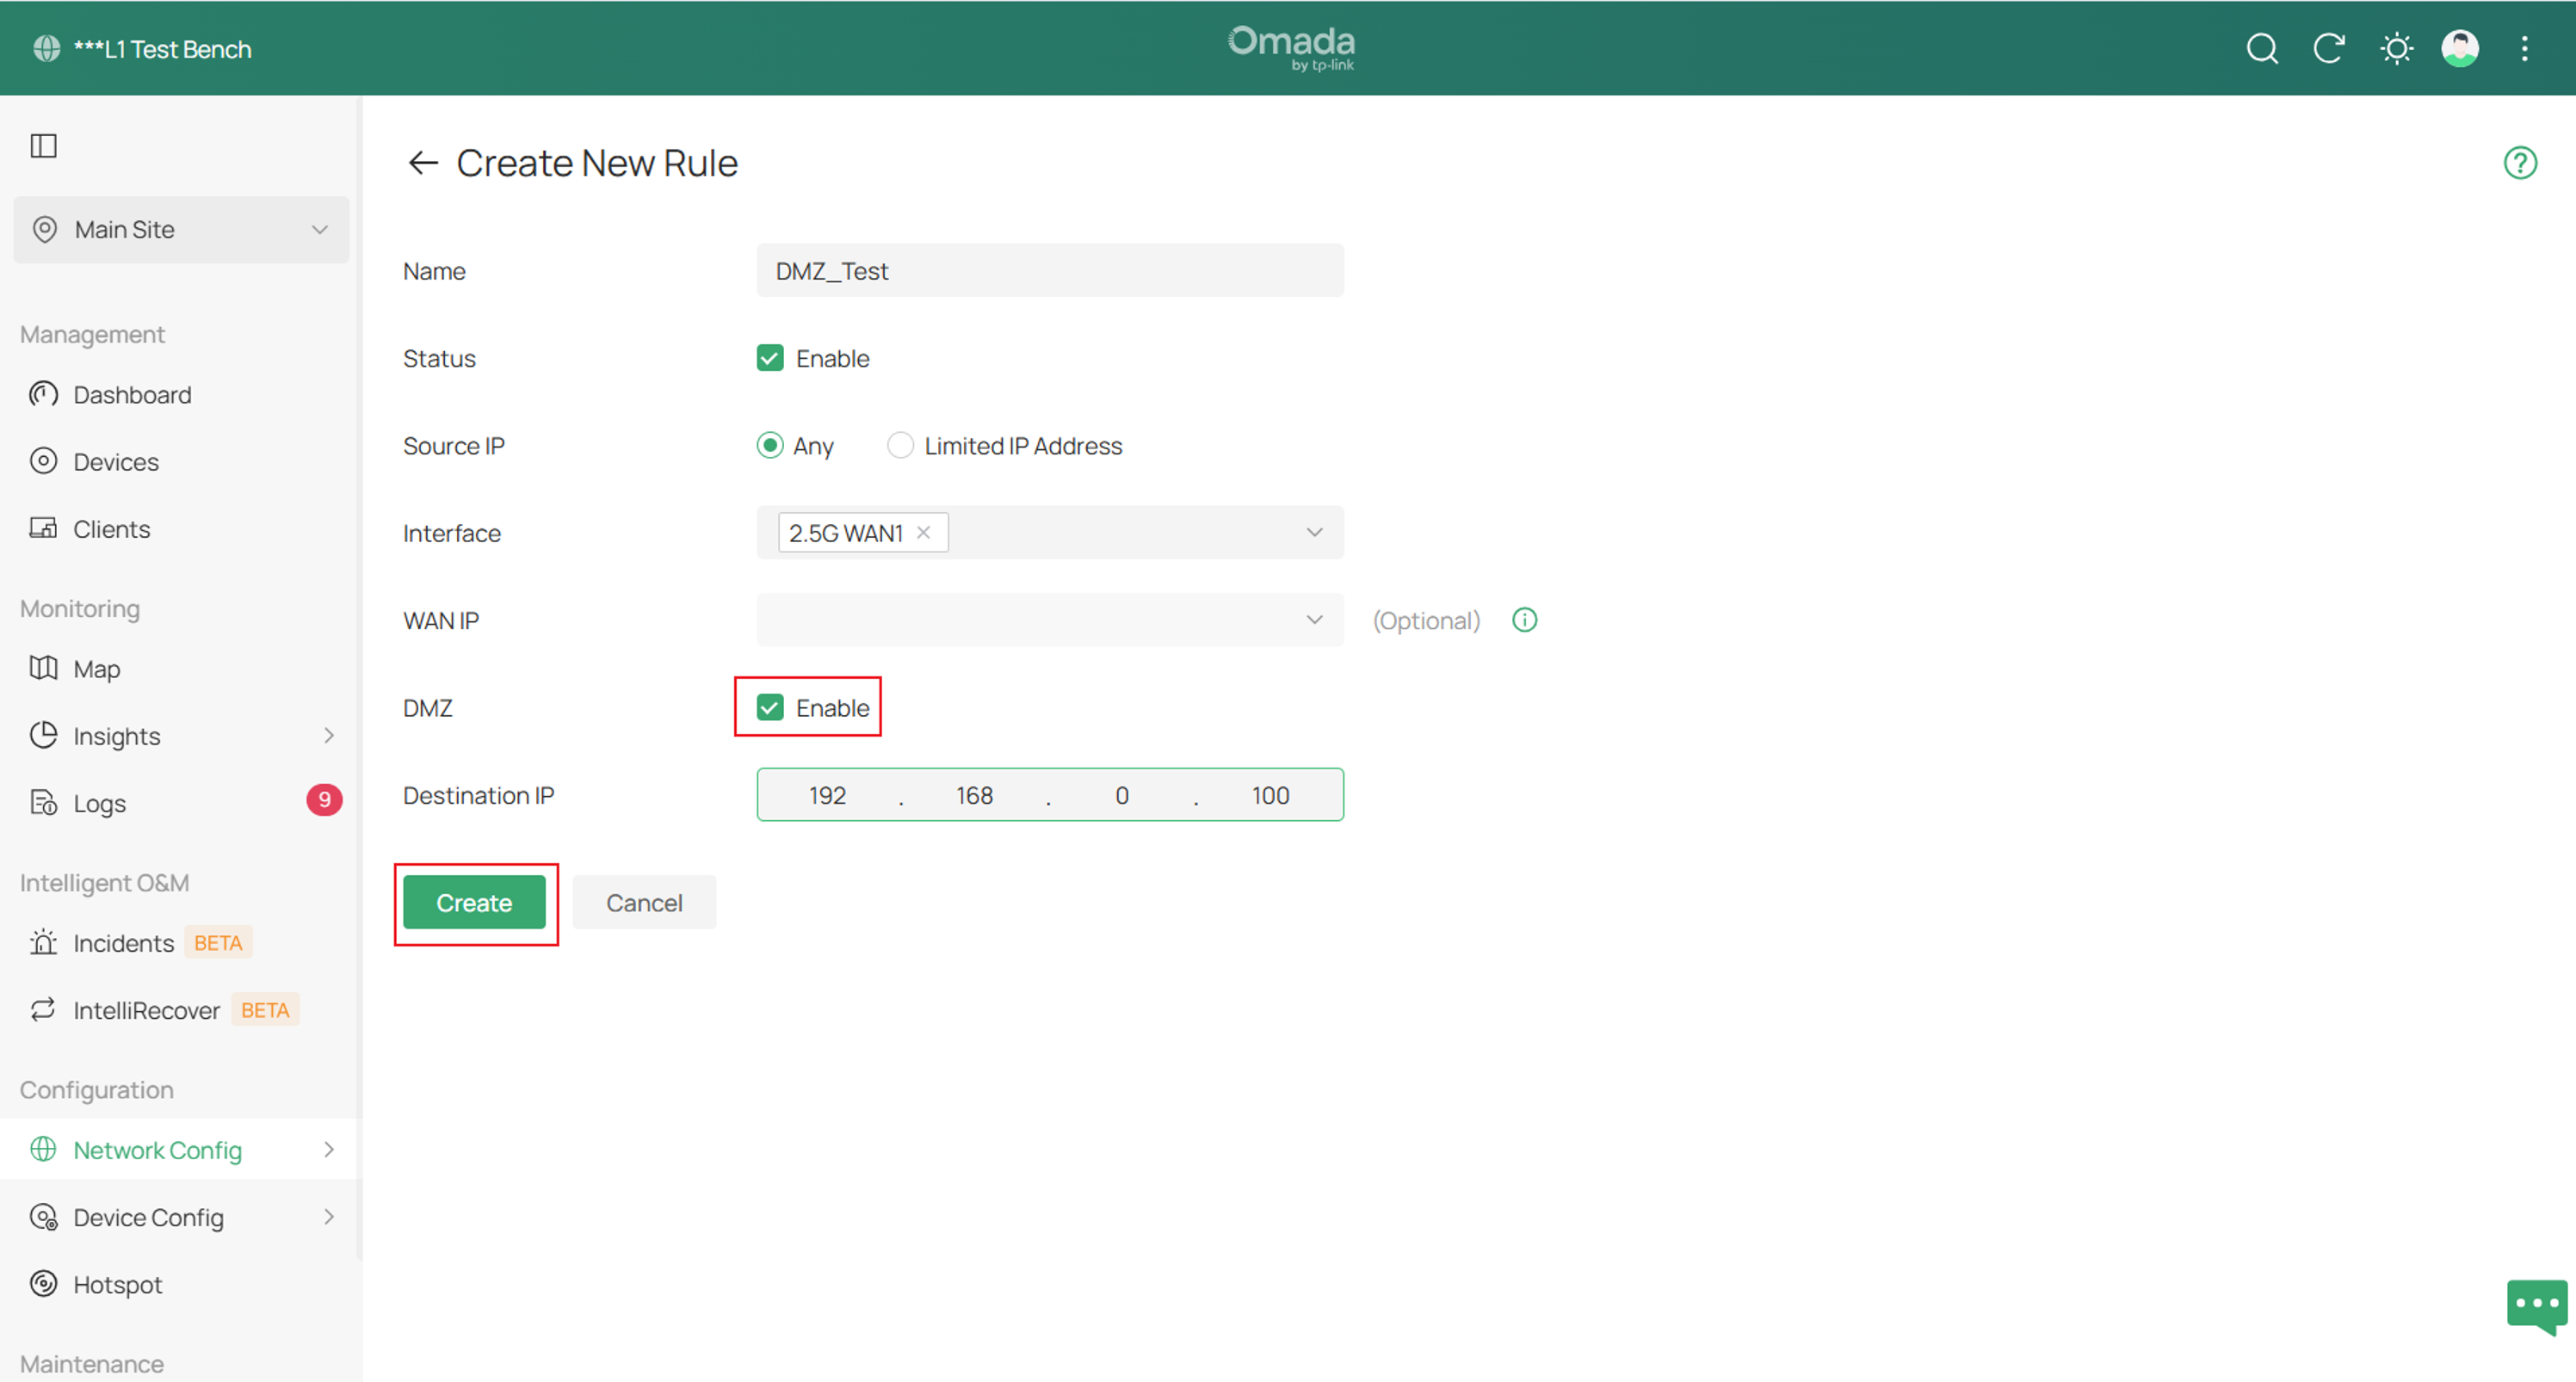
Note: When DMZ is enabled, the Destination Port setting is ignored. All destination ports are forwarded to the Destination IP.
Source IP: Select the source IP of the created rule.
Any: The rule applies to traffic from any source IP address.
Limited IP Address: The rule only applies to traffic from specific IP addresses. With this option selected, specify the IP addresses and subnets based on needs.
Interface: Select the interface to which the rule applies. When the traffic is received through the selected WAN port, it will be forwarded according to the rule.
WAN IP: This field is optional. If it is left blank, the rule applies to all WAN IP addresses assigned to the selected interface.
To bind the rule to a specific WAN alias IP, navigate to Internet > Edit the corresponding WAN > Advanced Settings > WAN IP Alias and configure the alias. Return to the DMZ rule, select the corresponding WAN interface, and then select the alias from the WAN IP list.
When a specific WAN alias is selected, the rule is triggered only by traffic addressed to that alias on the selected interface. Other WAN IP addresses are not affected.
DMZ: Enable this option to forward all destination ports for matching new inbound IPv4 connections to the specified Destination IP.
In Controller Mode, creating a DMZ rule does not automatically create a corresponding firewall allow rule. DMZ performs NAT forwarding only and does not open gateway firewall ports. Ensure the applicable gateway ACL permits the required inbound traffic; otherwise, the connection will be blocked.
Destination IP: Specify the destination IP of the host in the LAN to which the traffic is forwarded.
Configuration for Standalone Mode
Step 1. Login to your Omada Router and navigate to Transmission > NAT > NAT-DMZ > and click Add.
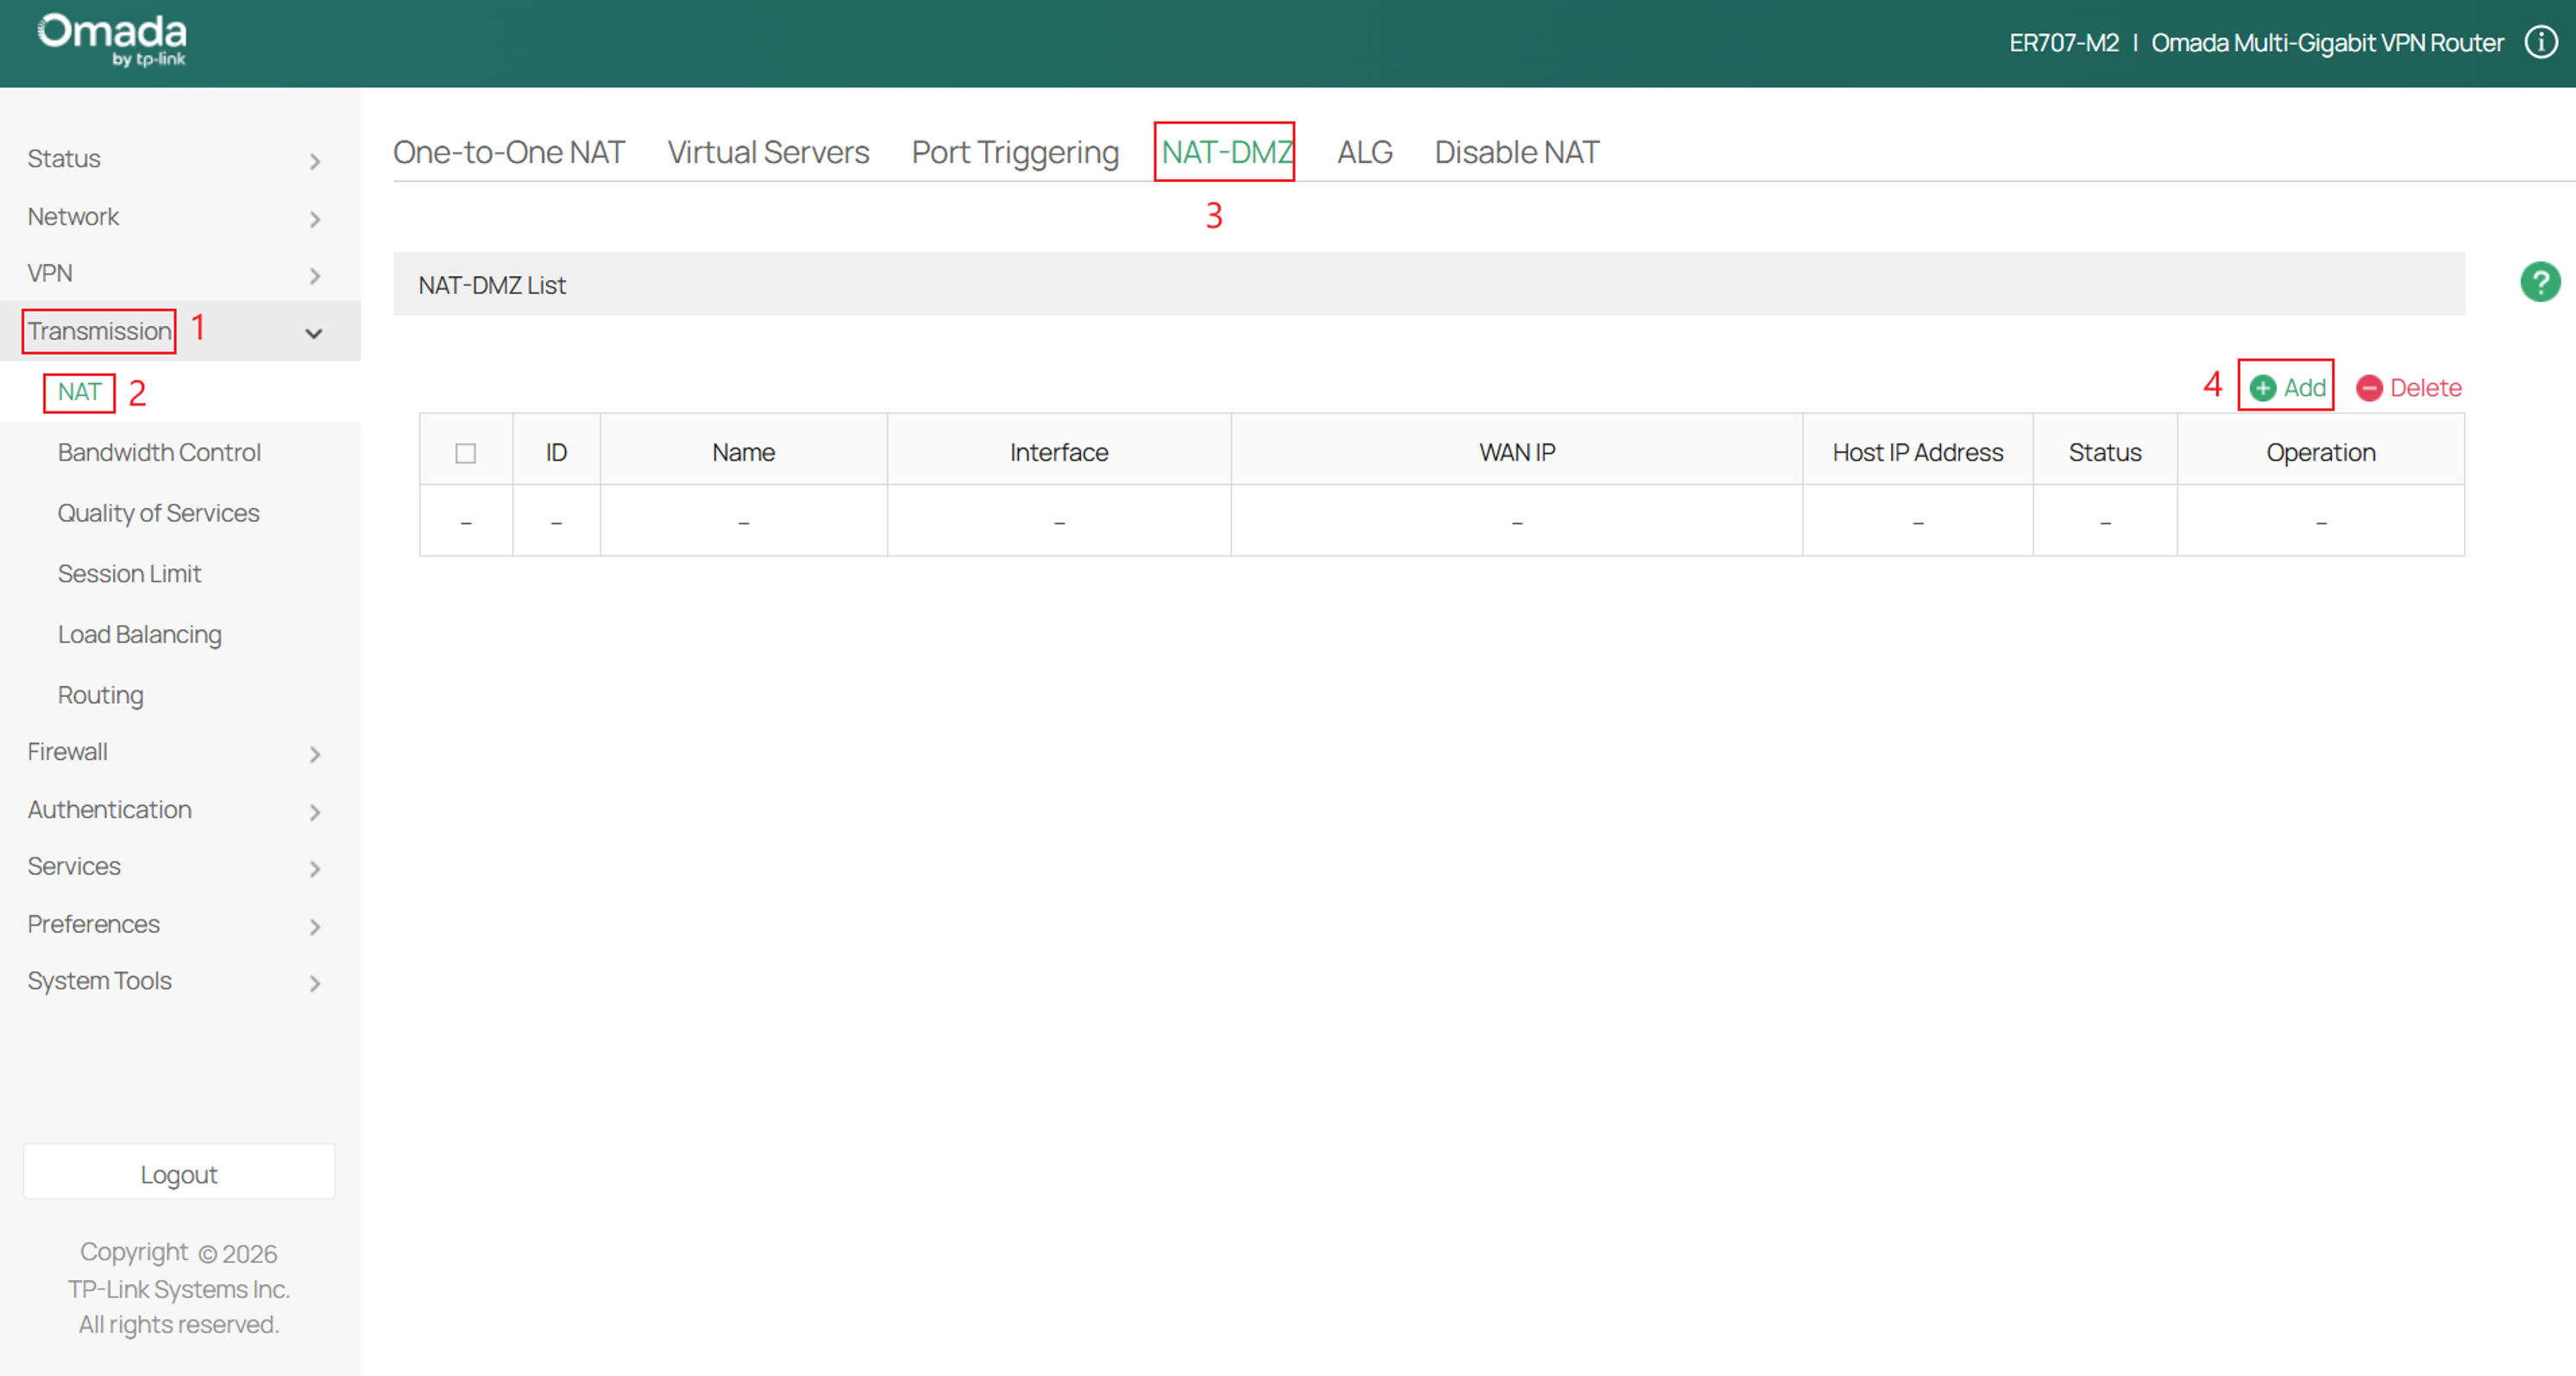
Step 2. Fill in the parameters and click OK once complete.
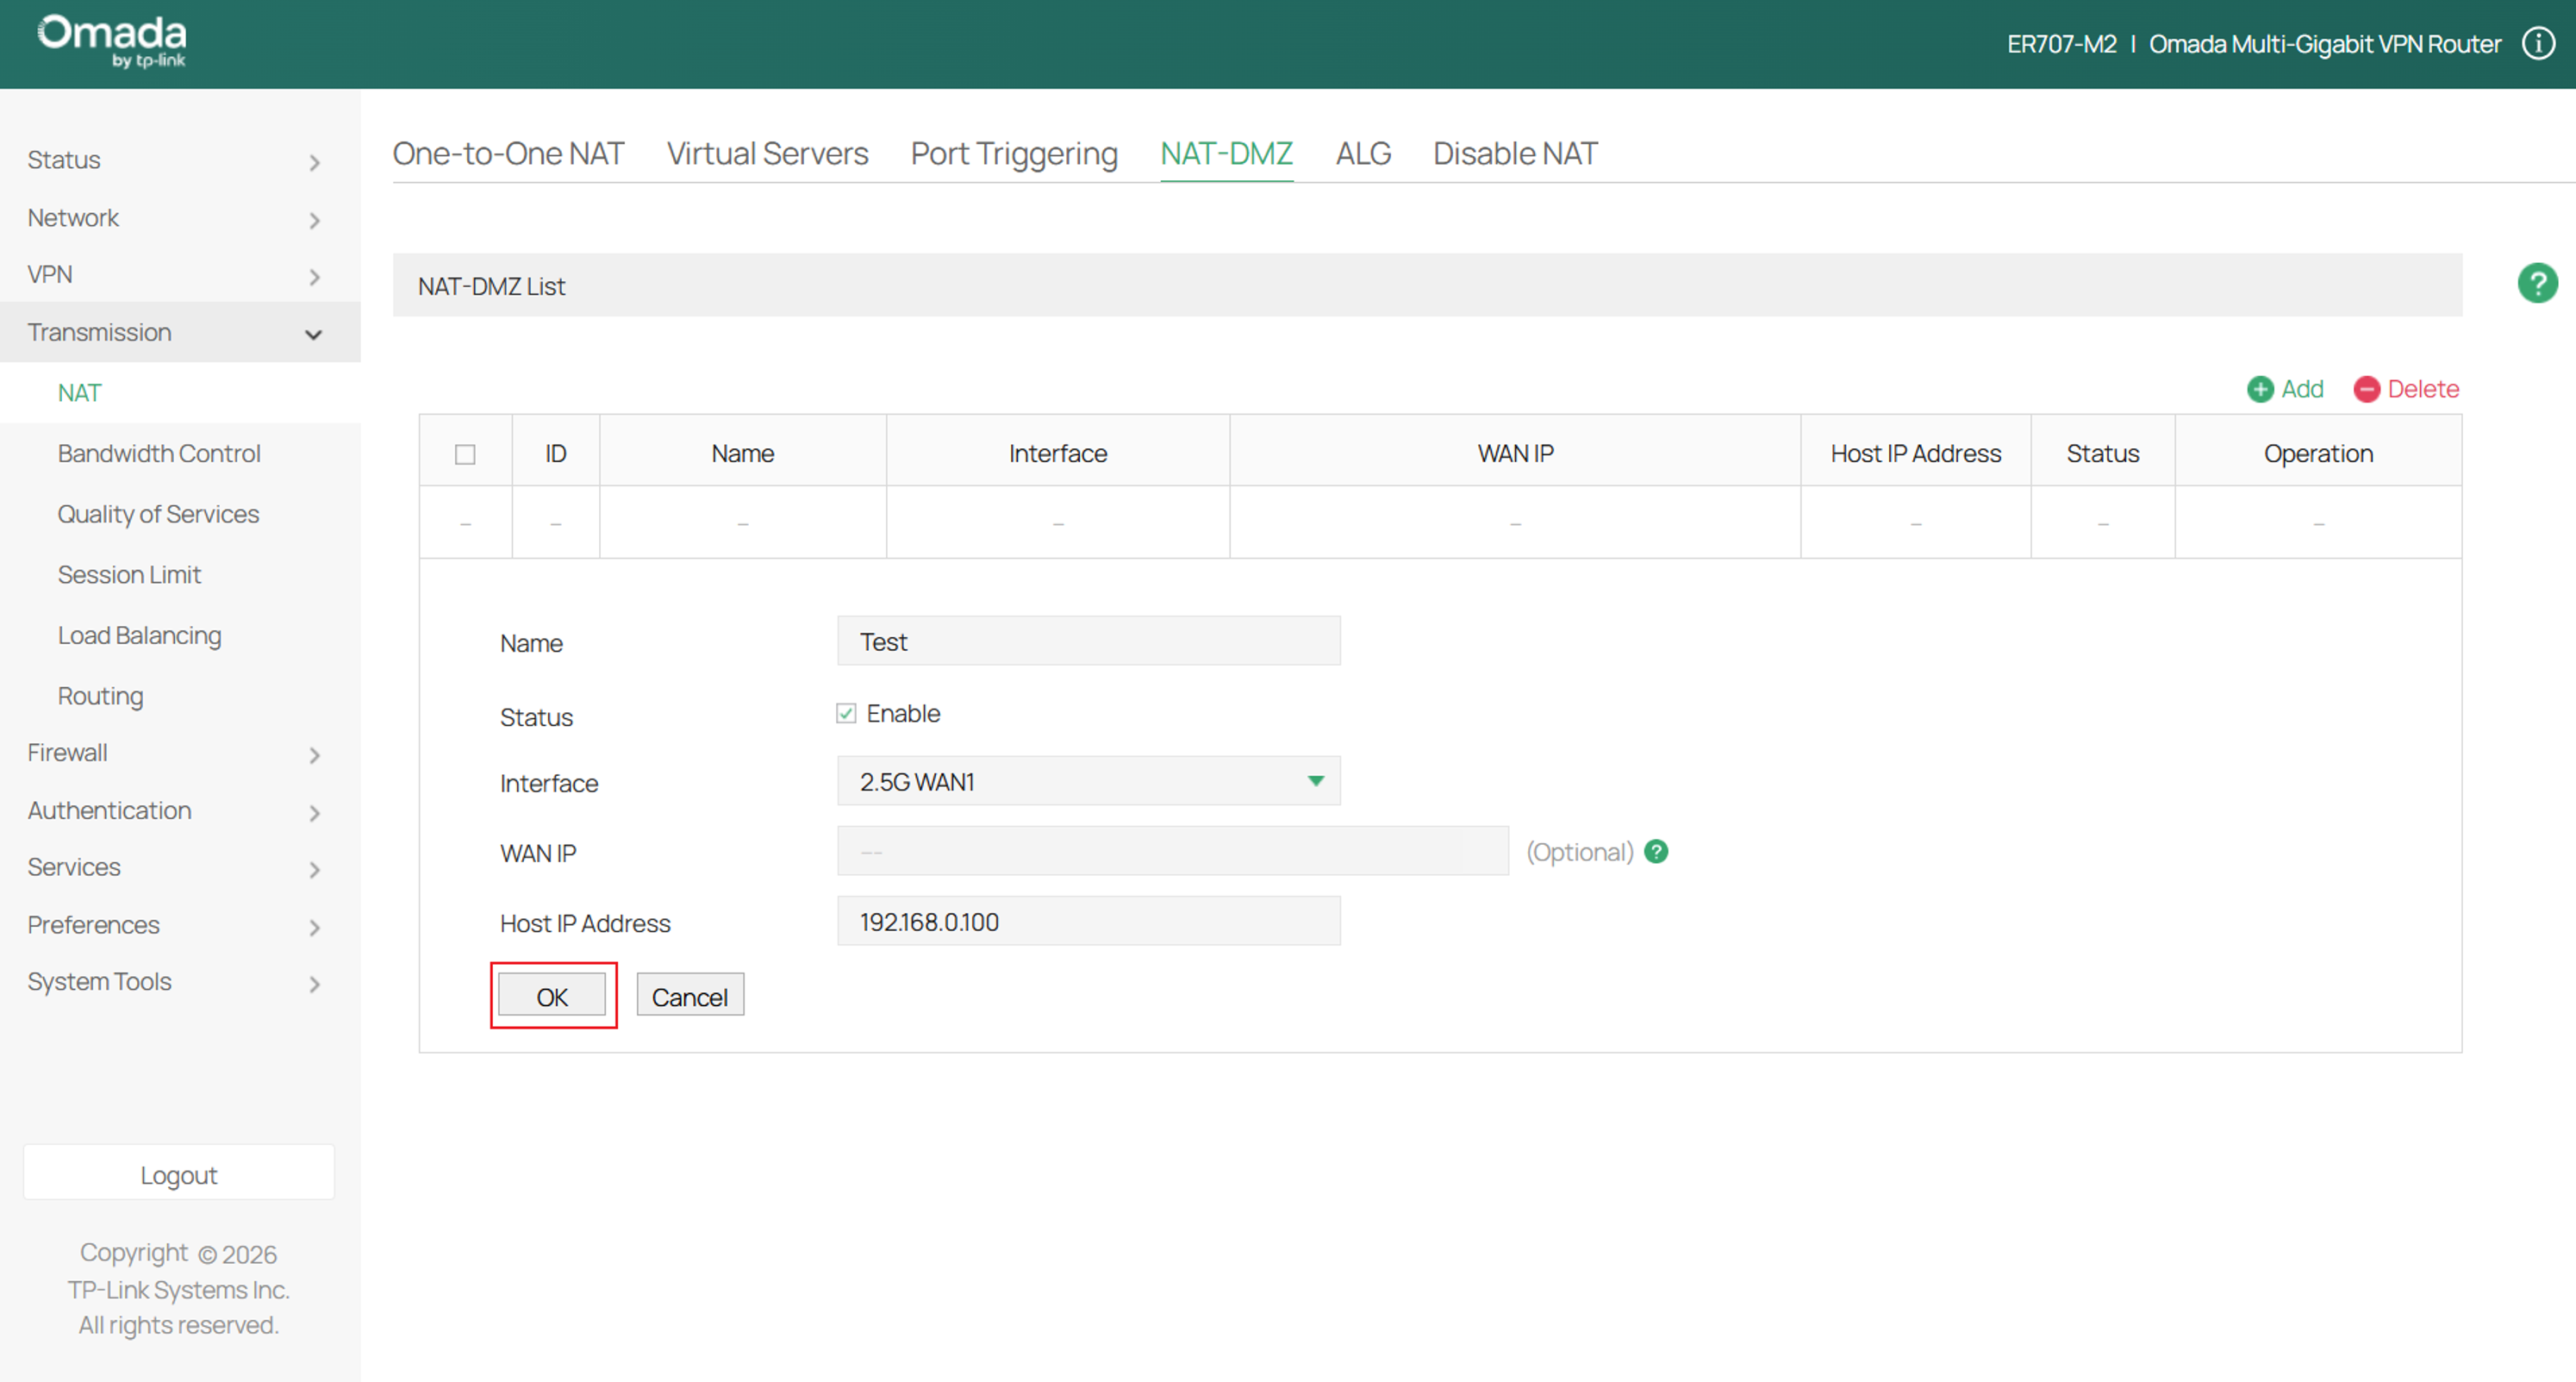
Name: Enter the name of the rule.
Interface: Specify the effective interface for the rule.
WAN IP: Specify the WAN Alias IP for the rule. If you choose multiple IPs, the entry will be applied to all selected IPs simultaneously.
Host IP Address: Specify the host IP address for NAT-DMZ.
Conclusion
The DMZ Host feature allows an Omada Gateway to use IPv4 NAT to forward new inbound connections received on a selected WAN interface to a designated device on the local network. By following this guide, you can configure DMZ in either Standalone Mode or Controller Mode. Because the DMZ host is directly exposed to external traffic, enable this feature only when necessary and properly secure the designated device.
To learn more about each function and configuration, please visit Support Home to download or check the manual for your product.
QA
Q1: What should I do if the DMZ host cannot be accessed from the WAN?
A1: Verify that the DMZ rule is enabled and configured with the correct WAN interface and destination host IP address. Confirm that the host’s service is running, its local firewall permits the traffic, and the service is accessible from the LAN. Test from an external network and ensure the gateway has a reachable public WAN IP. If the gateway is behind another router or CGNAT, additional configuration may be required on the upstream network.
