


Contents
Objective
This article provides guidance on how to provide a professional, flexible project quotation on Omada Design Hub.
Requirements
- Omada Design Hub
Introduction
Omada Design Hub is a professional commercial network design tool within TP-Link Omada ecosystem, delivering integrated network and security planning solutions for SMBs and system integrators.
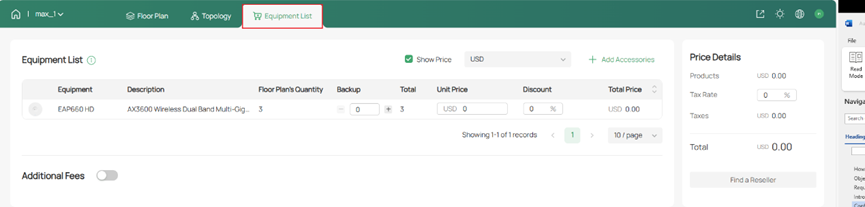
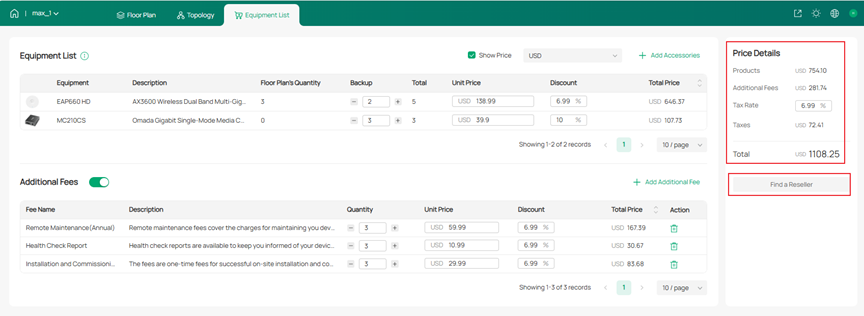
The Equipment List page in the Omada Design Hub provides professional, flexible project quotation management.
1. Smart Requirement Management:
Effortlessly generate a project equipment list with one click, enabling real-time adjustments to quantities and custom discounts for precise alignment with planning needs.
2. Comprehensive Fee Customization:
Flexibly add installation and management surcharges, supporting personalized fee items definition to ensure all project costs are accounted for in the quote.
3. Accurate Total Cost Overview:
Incorporating tax settings, the system automatically calculates the all-inclusive taxable total, instantly providing structured pricing details, streamlining the quotation process, and enhancing accuracy.
Configuration
Step 1. Log in to https://design.tplinkcloud.com/ using your TP-Link ID, and enter your project. Ensure that devices have been placed on the floor plan page before the devices appear in the Equipment List; otherwise, the Equipment List will remain empty.
Step 2. Click Equipment List to complete the project quotation.
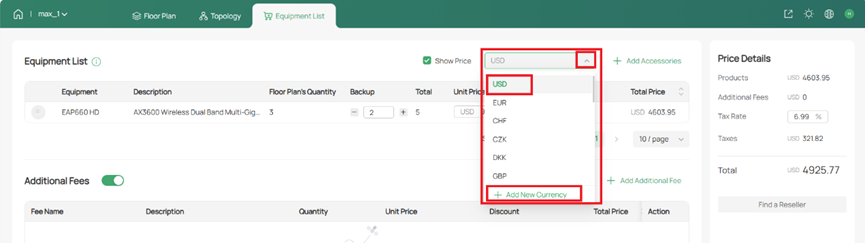
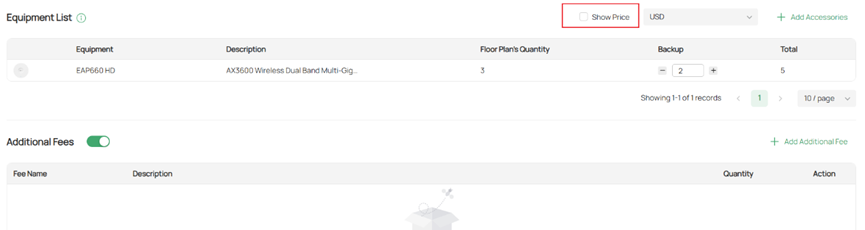
Step 3. Select the correct currency.
Note:
- Click ‘+ Add New Currency’ to add a new custom currency.
- System-provided currency cannot be deleted.
- To delete a currently selected custom currency, switch to another currency first, as other projects cannot use the custom currency unit; otherwise, it cannot be deleted.
Step 4. Click Add Accessories to select the required accessories.
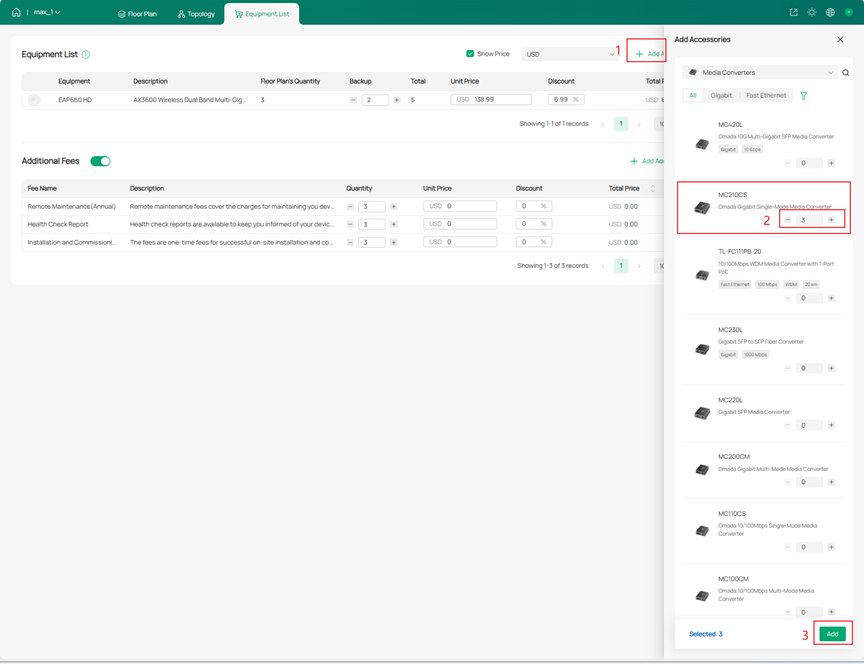
Step 5. Click Add, and the Accessories will display on the Equipment List.

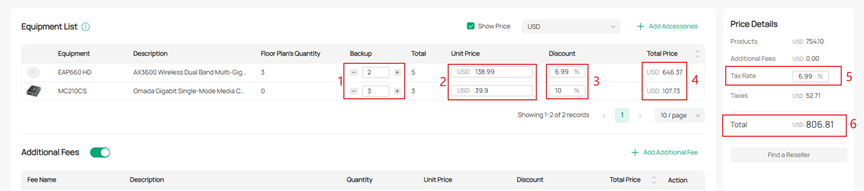
Step 6. Enter the quantity of Backup, Unit Price, Discount, and the Total Price is automatically calculated.
Notes:
- The Backup quantity supports whole numbers, with buttons to decrease/increase the product backup count.
- Price, Discount, and Tax Rate support two decimal places.
Disable the “Show Price” button can hide the price. After hiding the price, the Price Details on the right will also be hidden, and the exported report will not include the price.
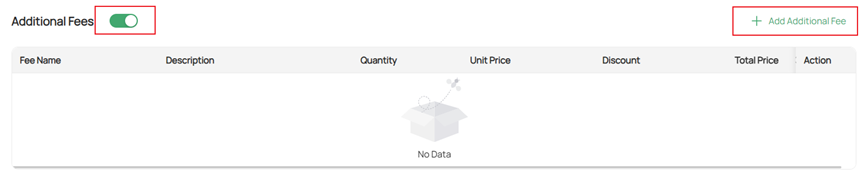
Step 5. Enable Additional Fee, click ‘+ Add Additional Fee’.
- The system includes five predefined additional fee templates.
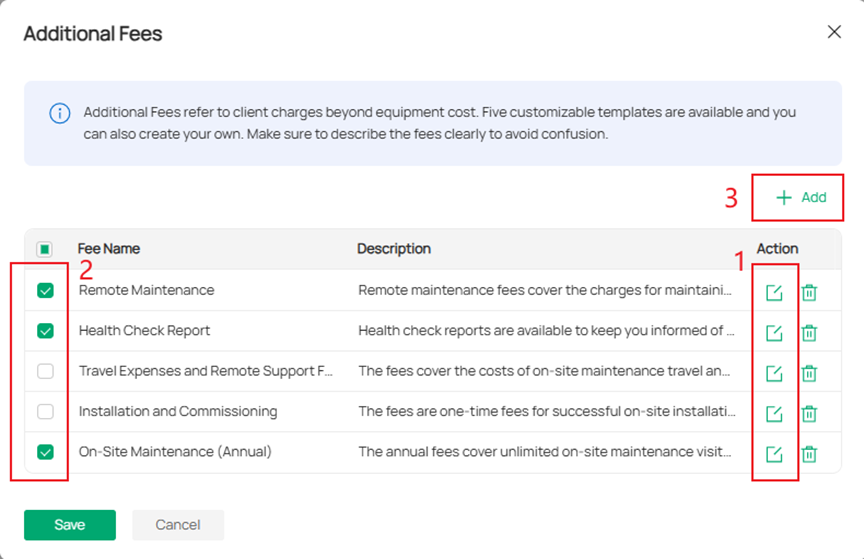
- You can click the Edit button to modify these templates. Then, please select the required additional fees.

You can click the ‘+ Add’ icon to create custom items based on actual requirements. Then, please select the required additional fees.
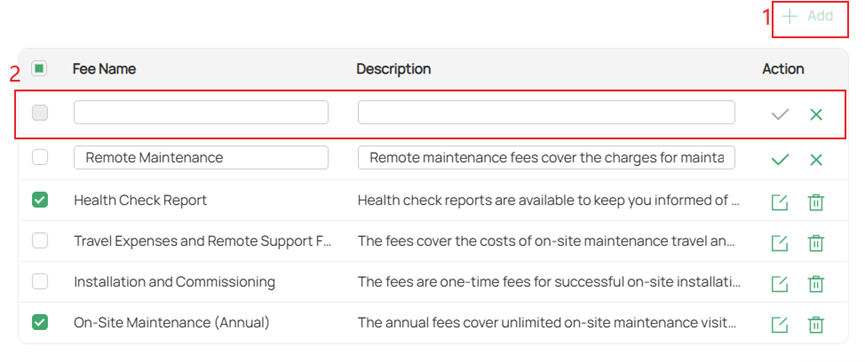
Step 6. Select additional fees, click Save to add them to the current project, and adjust for quantity and price. Quantity and pricing logic must be clearly defined.
After adding the corresponding additional fees, you will need to enter the price and quantity for each fee. Therefore, when editing the fee description, clearly outline the charging rules and how the quantity is defined. For example: “Remote maintenance fees cover the charges for maintaining your devices remotely. The fees are based on the number of devices and are charged annually.” This additional fee is charged based on the number of devices and is billed annually. Therefore, multiply the Unit Price by the number of devices in your network environment.
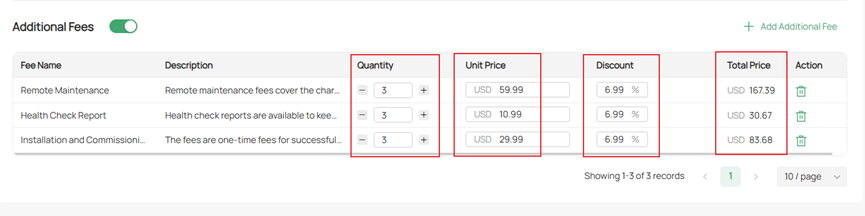
Note: Additional Fees refer to client charges beyond equipment cost. Five customizable templates are available, and you can also create your own. Make sure to describe the fees clearly to avoid confusion.
Step 7. Enable the “Show Price” button to open the Price Detail page.
Click the “Find a Reseller” hyperlink to search for product distributors.
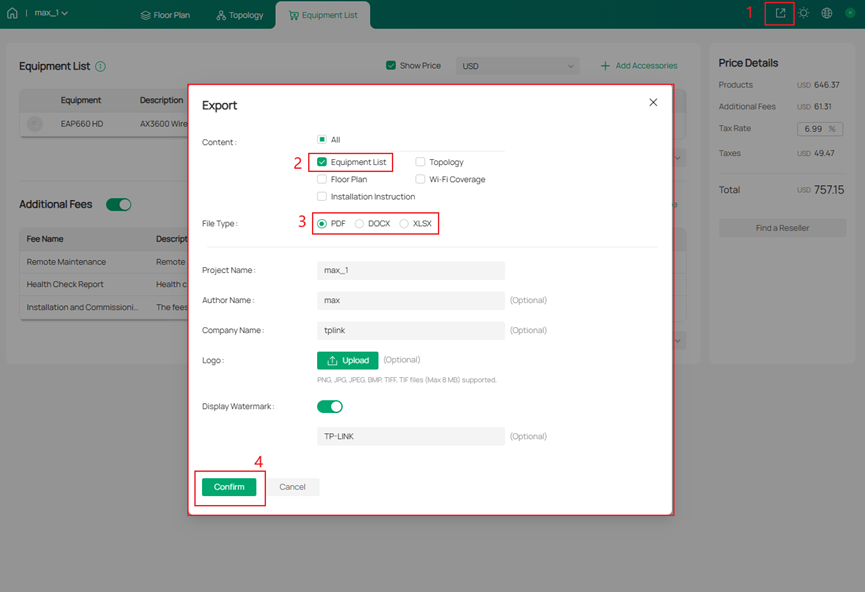
Step 8. Export project quotation.
Conclusion
With the steps above, you can provide a professional and flexible project quotation on Omada Design Hub successfully.
Get to know more details of each function and configuration please go to Download Center to download the manual of your product.
