


How to view detailed client information of an EAP


Contents
View Client Information of an EAP in Standalone Mode
View Client Information of EAPs in Controller Mode
Introduction
This article introduces the difference between two types of clients and the way to view detailed client information of EAPs in Standalone Mode and Controller Mode. The detailed information includes a client’s IP address, MAC address, and active time, as well as the SSID and radio band information of the network that it is connected to.
As for the management interface, you can use a web browser on a computer or use the Omada app on a mobile phone.
Note: You are recommended to use the latest version of Google Chrome, Firefox, Microsoft Edge or Safari.
Clients: User or Guest?
The clients are divided into two types: User and Guest. Users are the wireless clients without the Portal Authentication. Guests are the wireless clients that pass the Portal Authentication. For more details about portal authentication, refer to Chapter 3 of the document: Configuring the EAPs Globally via Omada Controller.
Requirements
- Omada EAP
View Client Information of an EAP in Standalone Mode
Follow the steps below to view detailed client information of an EAP managed in Standalone Mode via a computer or mobile phone.
Via a computer
Step 1. Log into the EAP
Choose one method below according to the way that the computer is connected to the EAP.
Method 1. Log in via a wired connection
Launch a web browser and enter the IP address of the EAP in the address bar to load the login page. Enter the username and password to log in.
Method 2. Log in via a wireless connection
Launch a web browser, enter http://tplinkeap.net in the address bar to load the login page. Enter the username and password to log in.
Note: EAP330 and EAP320 are not available for login via a wireless connection.
Step 2. View detailed information
Go to Status > Client to load the client list. Click User or Guest to view the detailed information of users or guests.

Via a mobile phone
Step 1. Log into the EAP
Connect your mobile phone to the EAP’s wireless network. Open the Omada app, switch to Standalone Mode and wait for the EAP to be discovered. Then tap on the EAP item and enter the username and password to log in.

Step 2. View detailed information
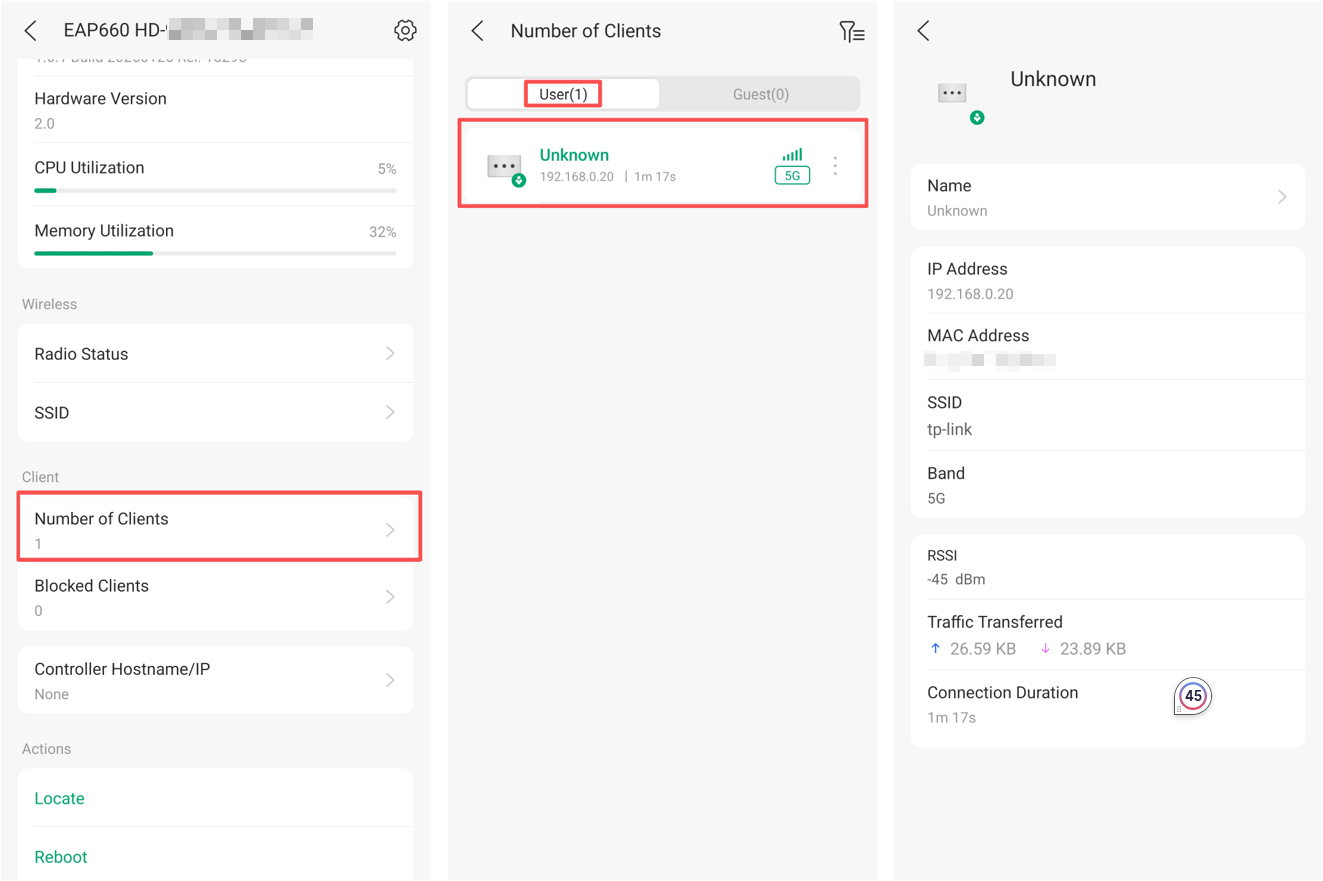
Slide the screen to Client and tap Number of Clients. In the Connected Clients page, tap User or Guest to view the list of users or guests. Tap a client item in the list to view its detailed information.
View Client Information of EAPs in Controller Mode
In Controller Mode, you can manage the EAP locally or remotely by the Omada Hardware Controller, Software Controller or Omada Cloud Controller.
Follow the steps below to view detailed client information of EAPs managed in Controller Mode via a computer or mobile phone.
Via a computer
Step 1. Launch the controller
Choose one method below according to the controller and the access way you use.
Method 1. Local Access
(For Omada Software Controller) Double-click the software icon and wait for a while to open the web browser. Then enter the username and password and click Log in to launch the controller.
Note: Make sure the computer has the route to access the Hardware Controller.
(For Omada Hardware Controller) Launch a web browser, enter the Controller’s IP address in the address bar, and press Enter (Windows) or Return (Mac).
Method 2. Cloud Access
Connect your computer to the internet. Launch a web browser and enter https://omada.tplinkcloud.com in the address bar to load the login page. Use the TP-Link ID that is bound to the controller to log in. Click the Launch icon of the controller to open the management page.
Note:
1.Make sure Could Access is enabled on Omada Software Controller or the Omada Hardware Controller.
2.Make sure the computer running Omada Software Controller or the Omada Hardware Controller can access the Internet.
Step 2. View detailed information
You can view the following detailed information on the computer:
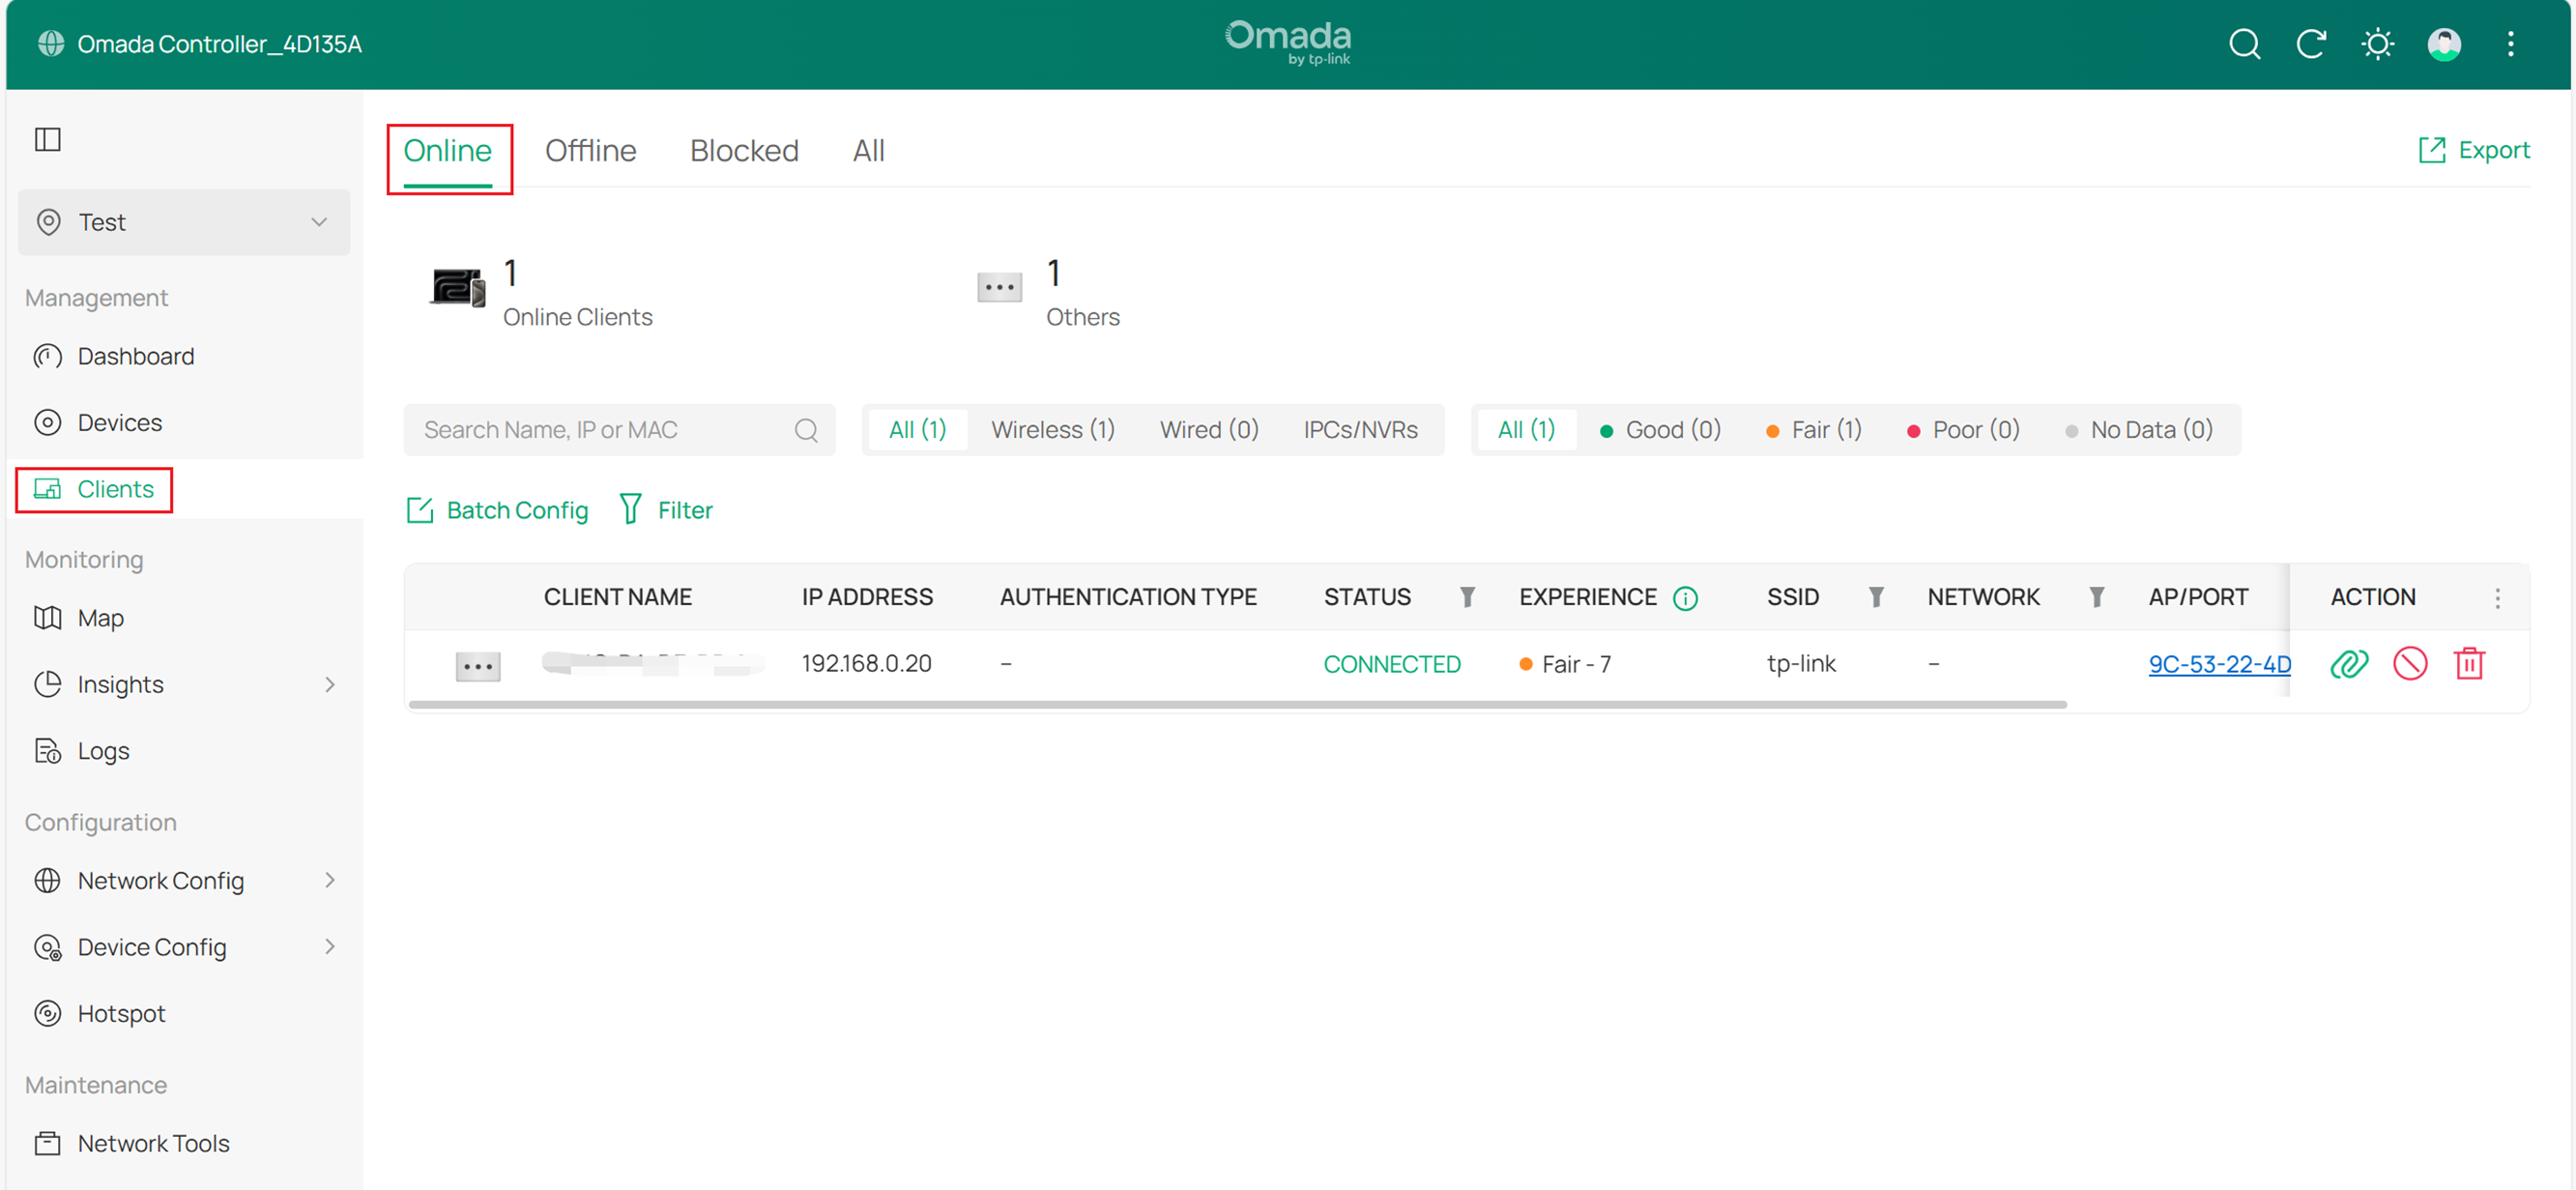
- To view client information of all EAPs managed by the controller, go to Clients, then view all connected clients in Online page.
- To view the client list of a specified EAP which is managed in Controller Mode, go to Devices and click the AP name in the table. Then click Client in the Connection window to view the corresponding list of clients connected to the EAP.
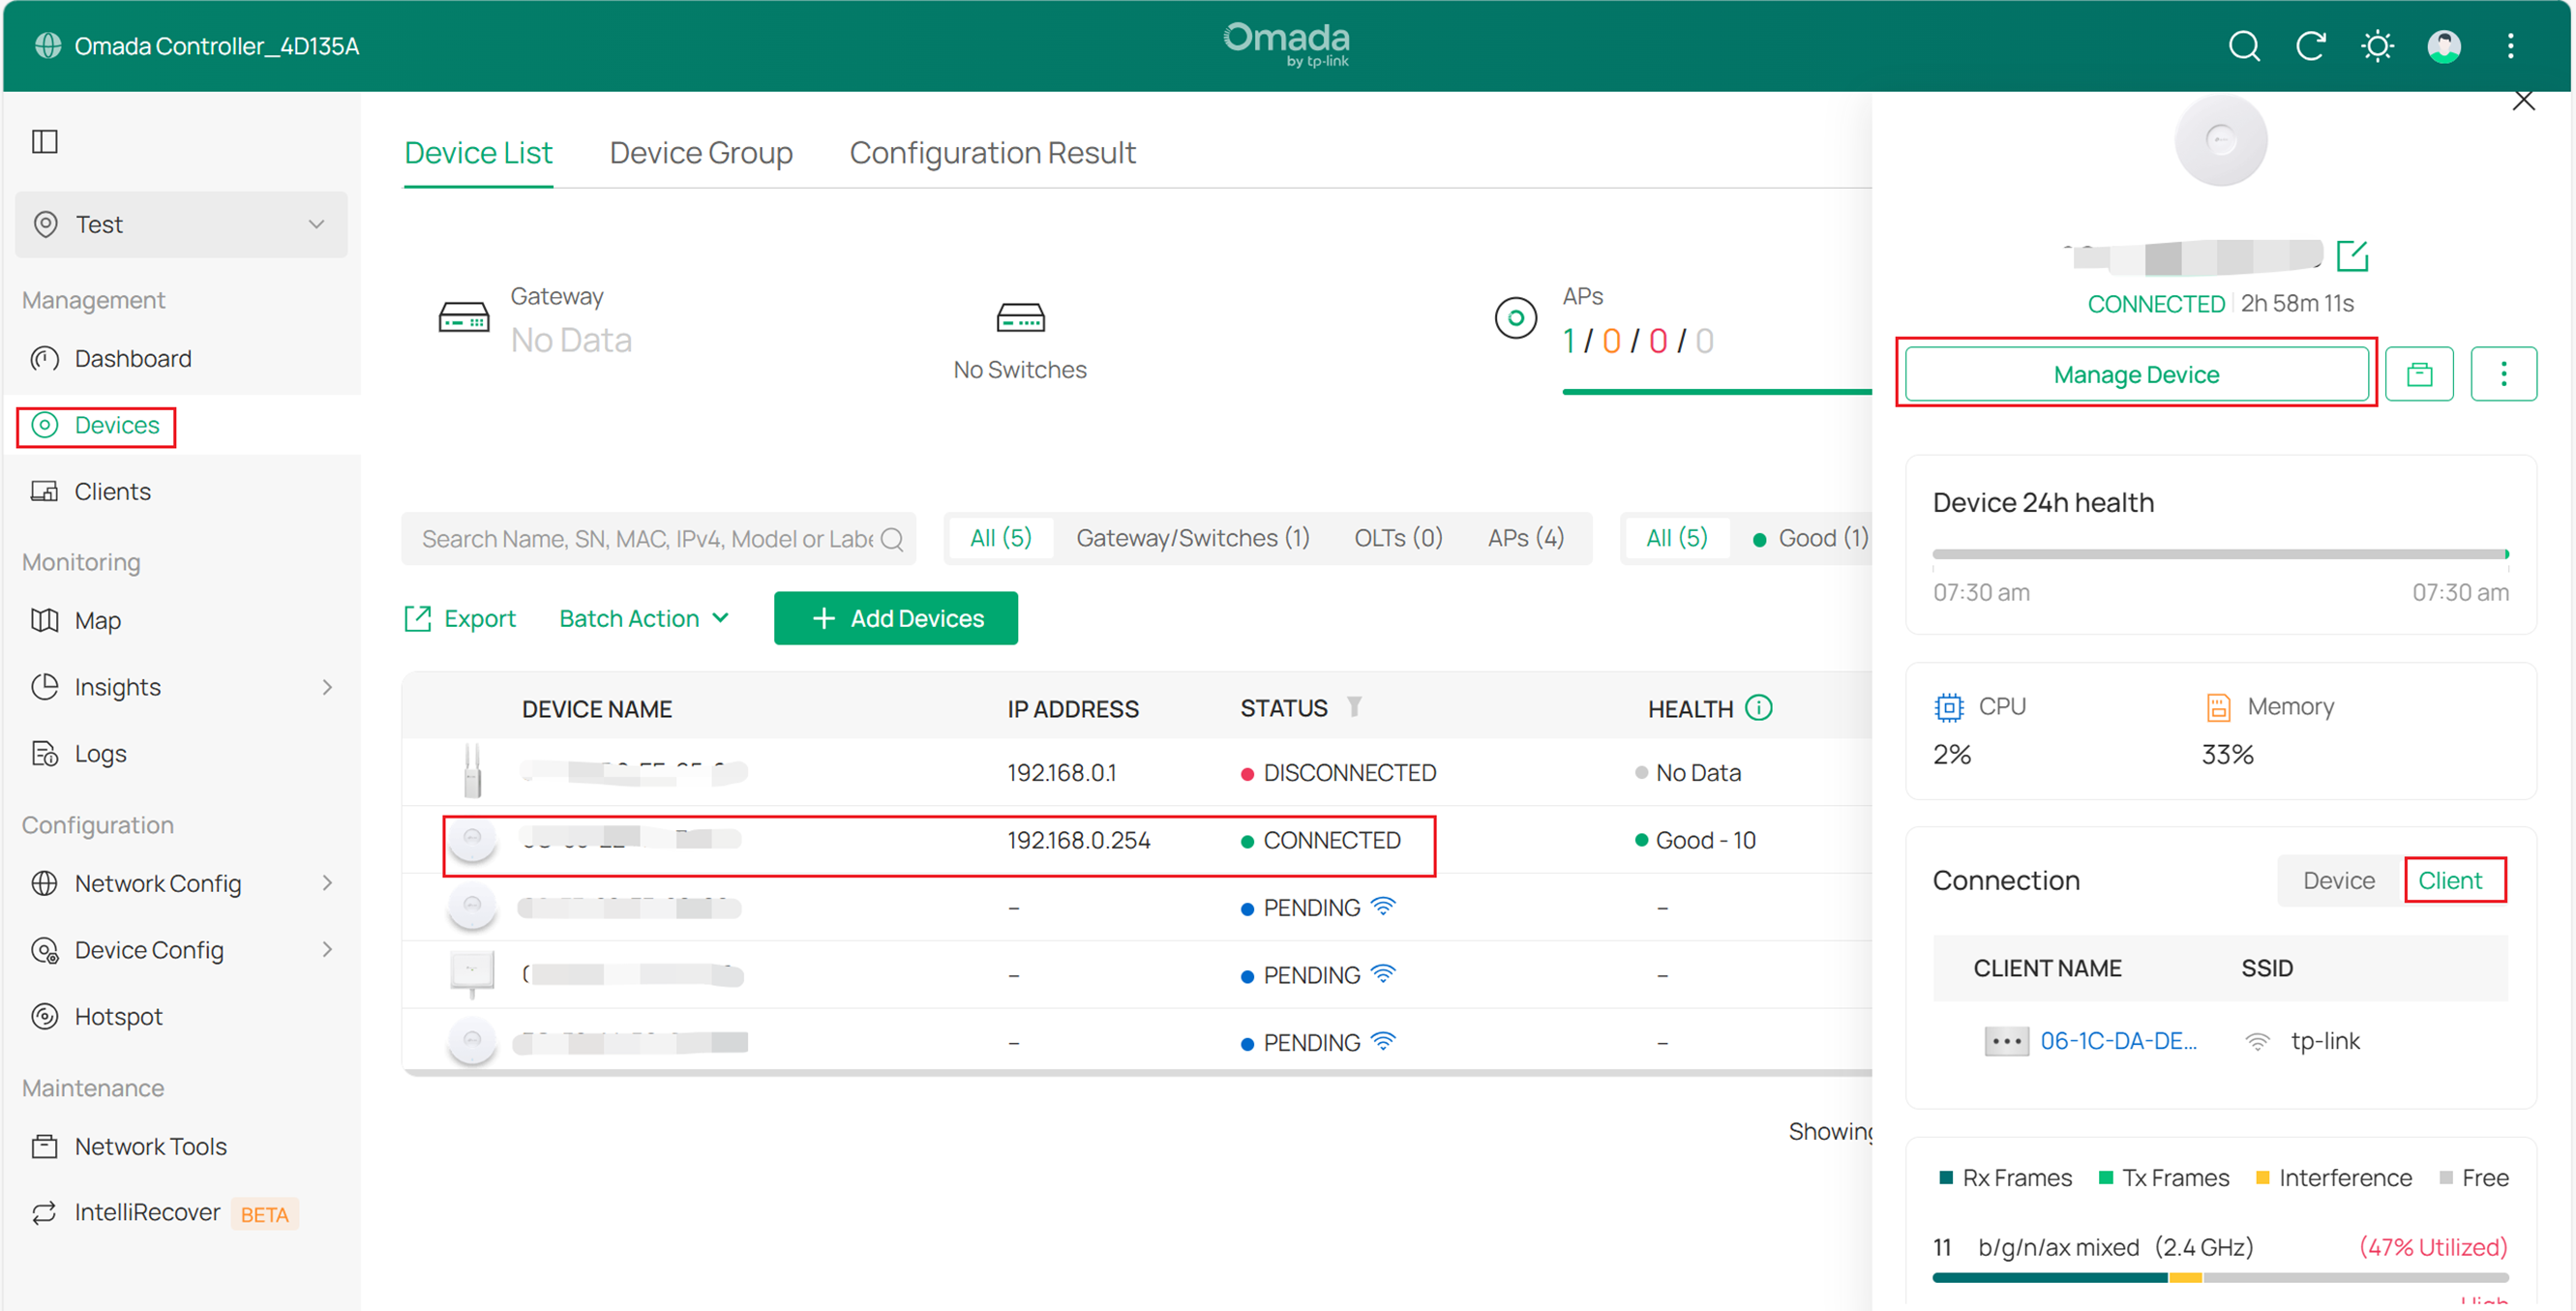
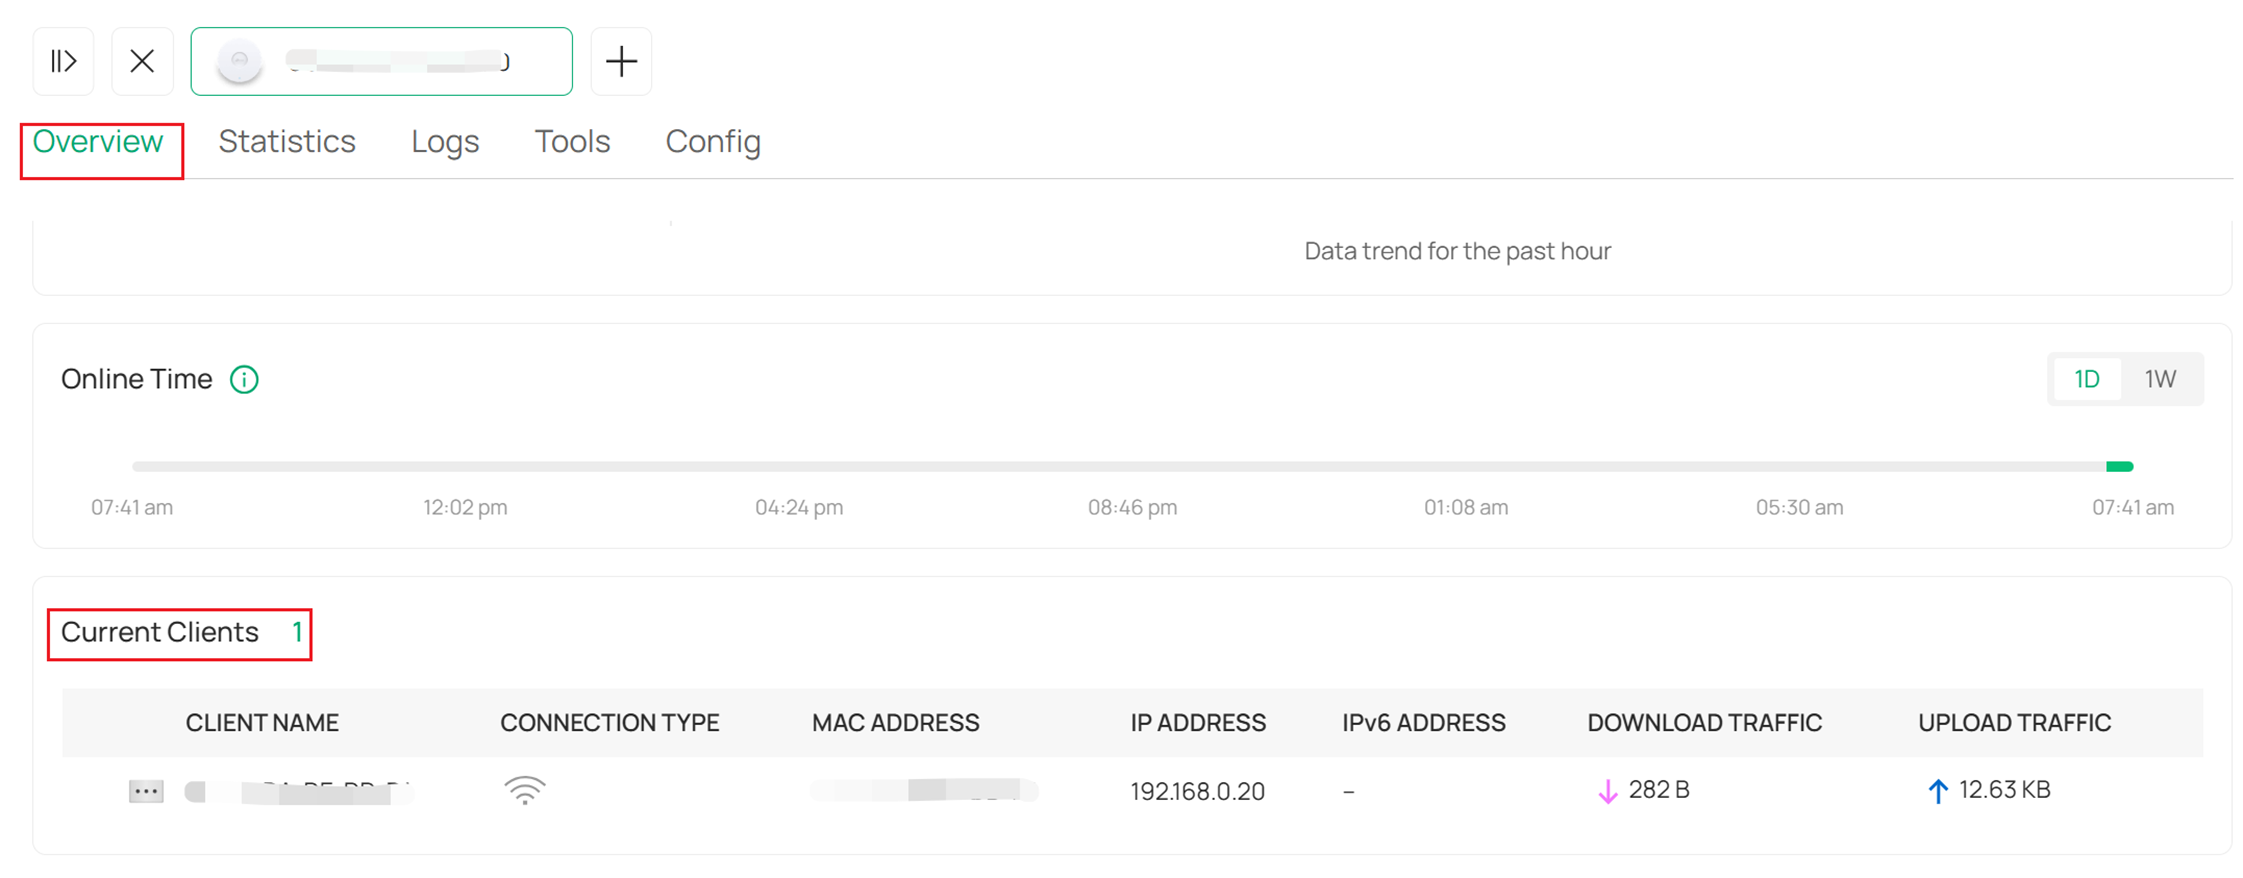
Or you can click the Manage Device button, On the Overview page, scroll down and view the detailed client information in the Current Clients window.
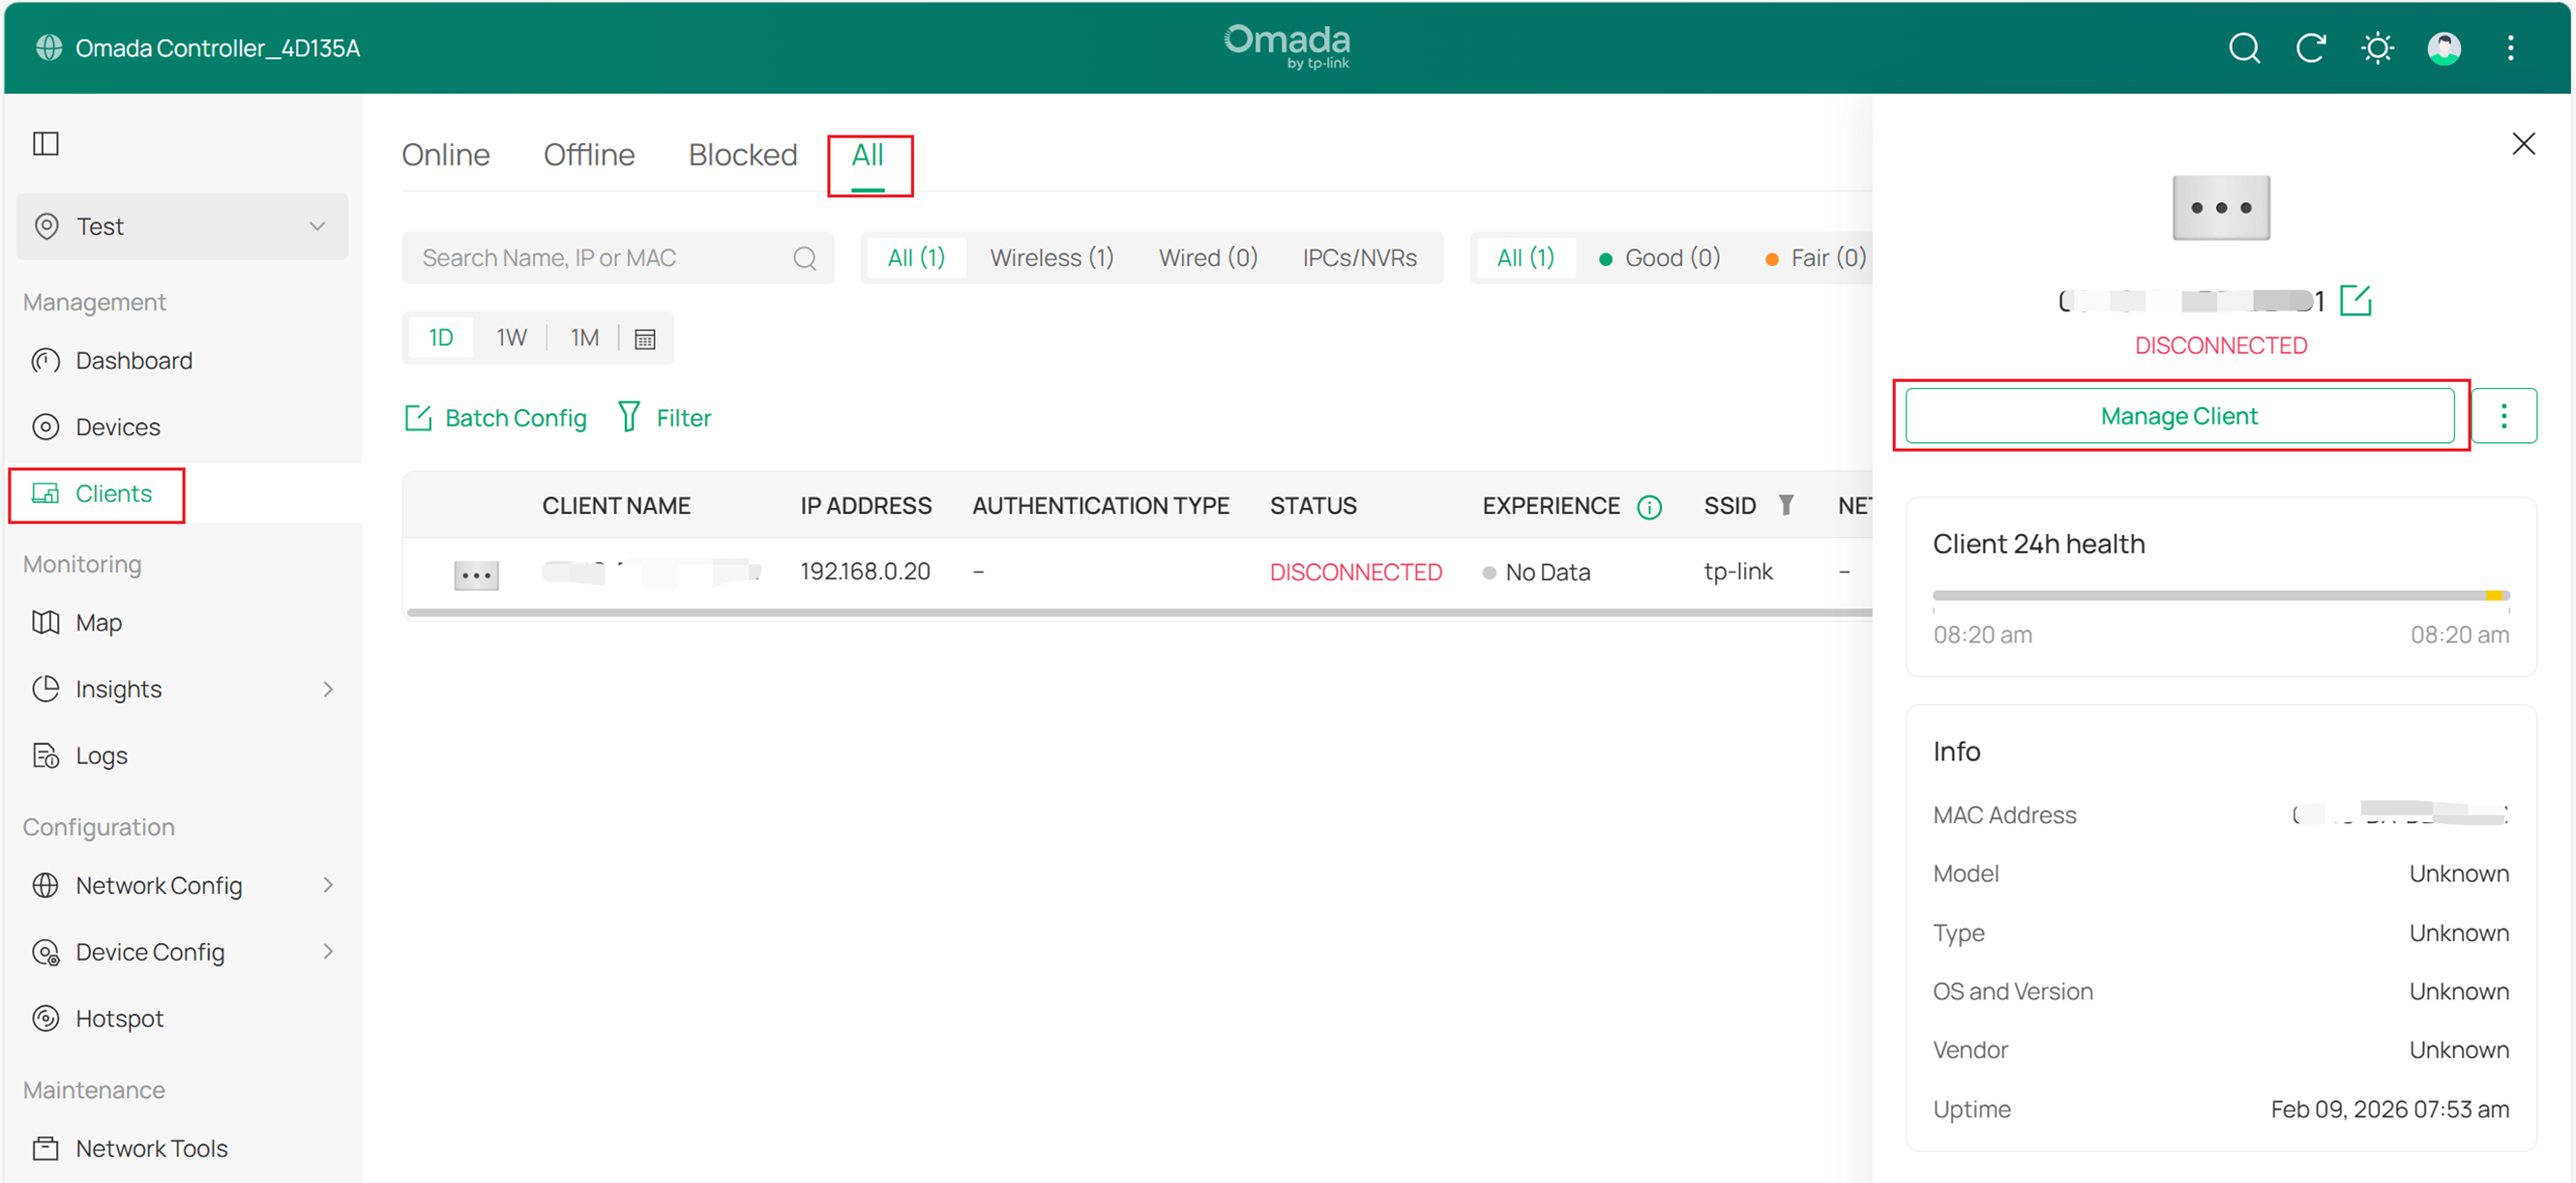
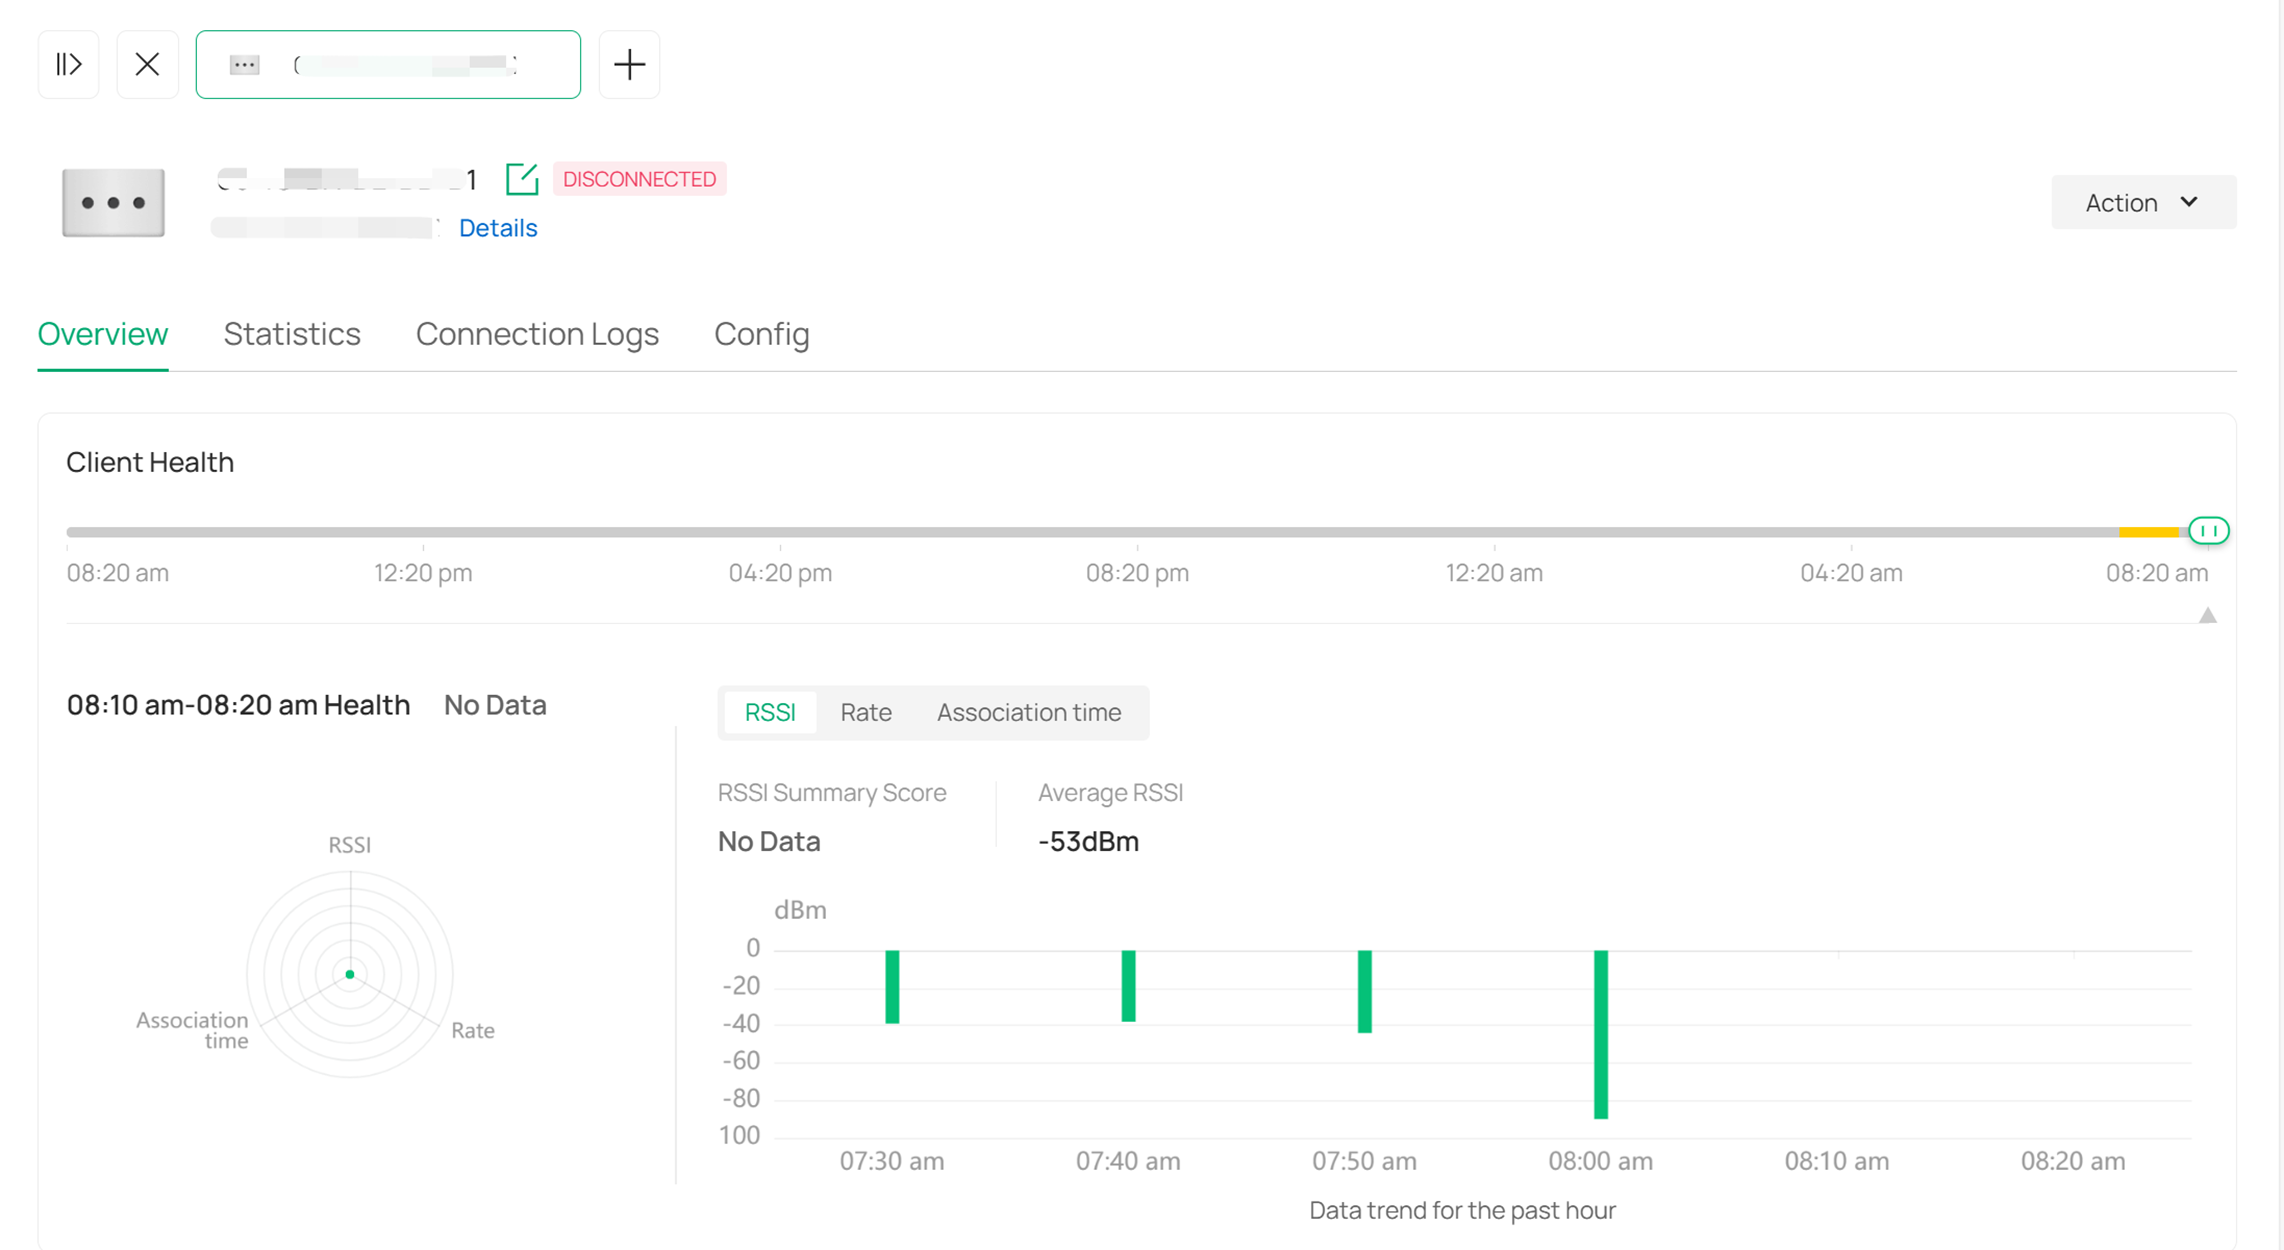
- To view detailed client information of EAPs during a specified period, go to Clients > All. Click a specified client name and click the Manage Client button. In the pop-up window, you can view the Statistical Information of the client and configure it.
Via a mobile phone
Step 1. Launch the controller
Choose one method below according to the access way you use.
Method 1. Local Access
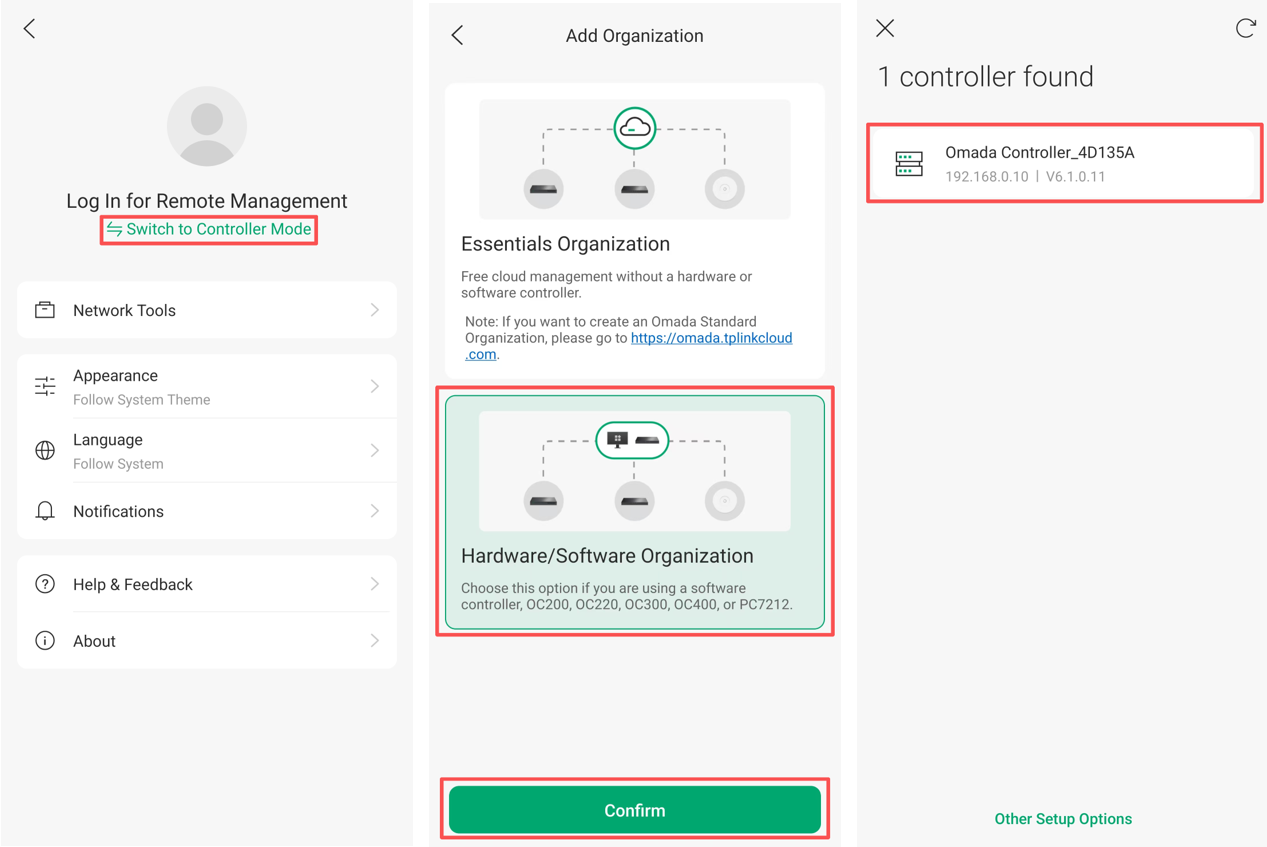
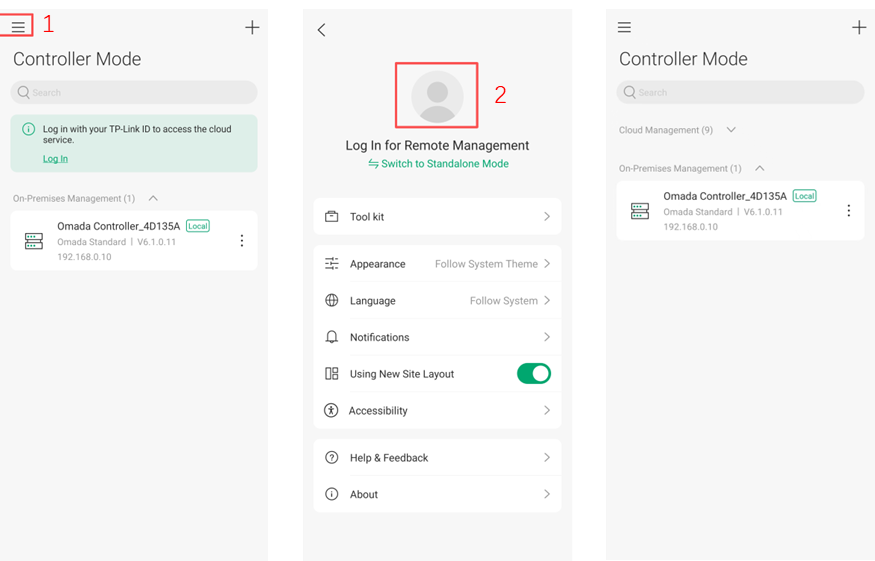
Connect your mobile phone to the EAP’s wireless network. Open the Omada app, Switch to Controller Mode, click the ‘+’ button in the upper right corner, choose Hardware/Software Organization and confirm, then click your Controller and type the Username and Password to login.
Method 2. Cloud Access
Connect your mobile phone to the internet. Open the Omada app, switch to set-up page and log in with your TP-Link ID then tap the Controller name to open it.
Note:
1.Make sure Could Access is enabled on Omada Software Controller or the Omada Hardware Controller.
2.Make sure the computer running Omada Software Controller or the Omada Hardware Controller can access the Internet.
Step 2. View Clients and detailed information
You can view client information of all EAPs or a specified EAP on the mobile phone.
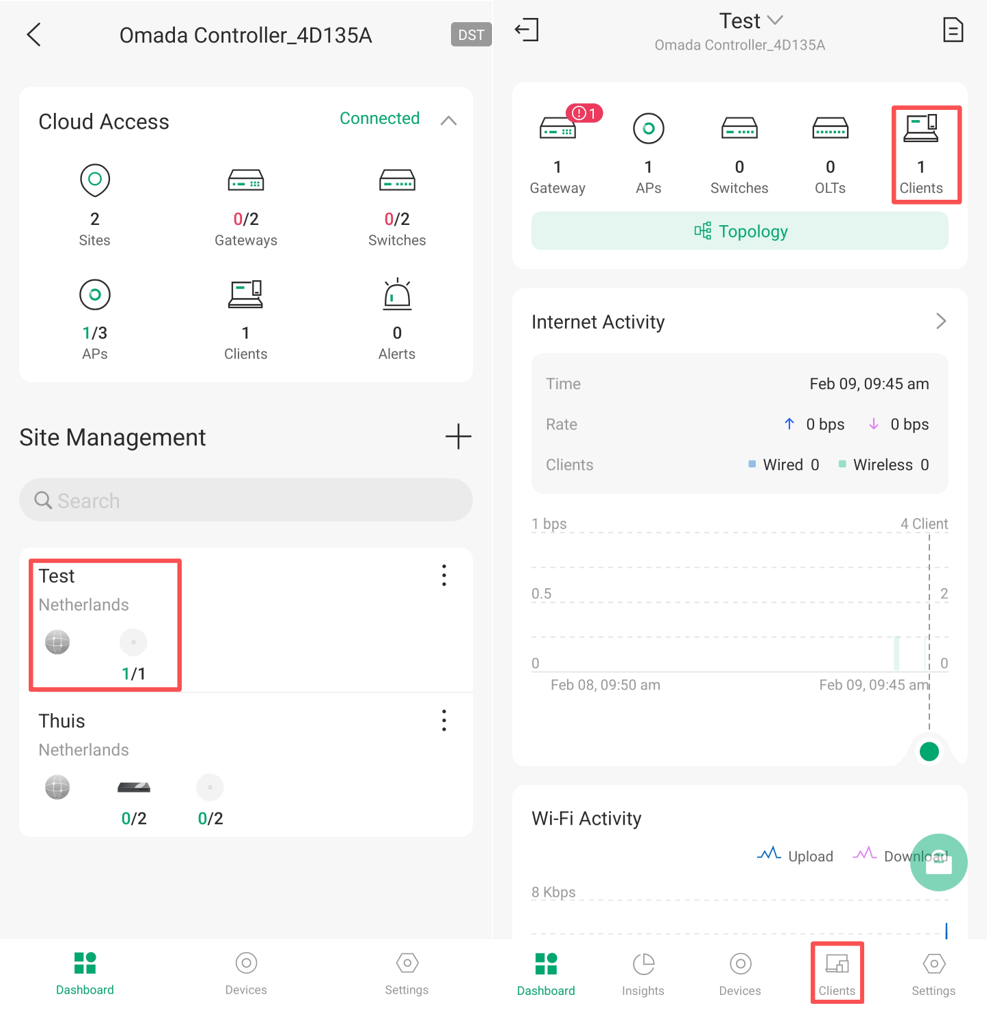
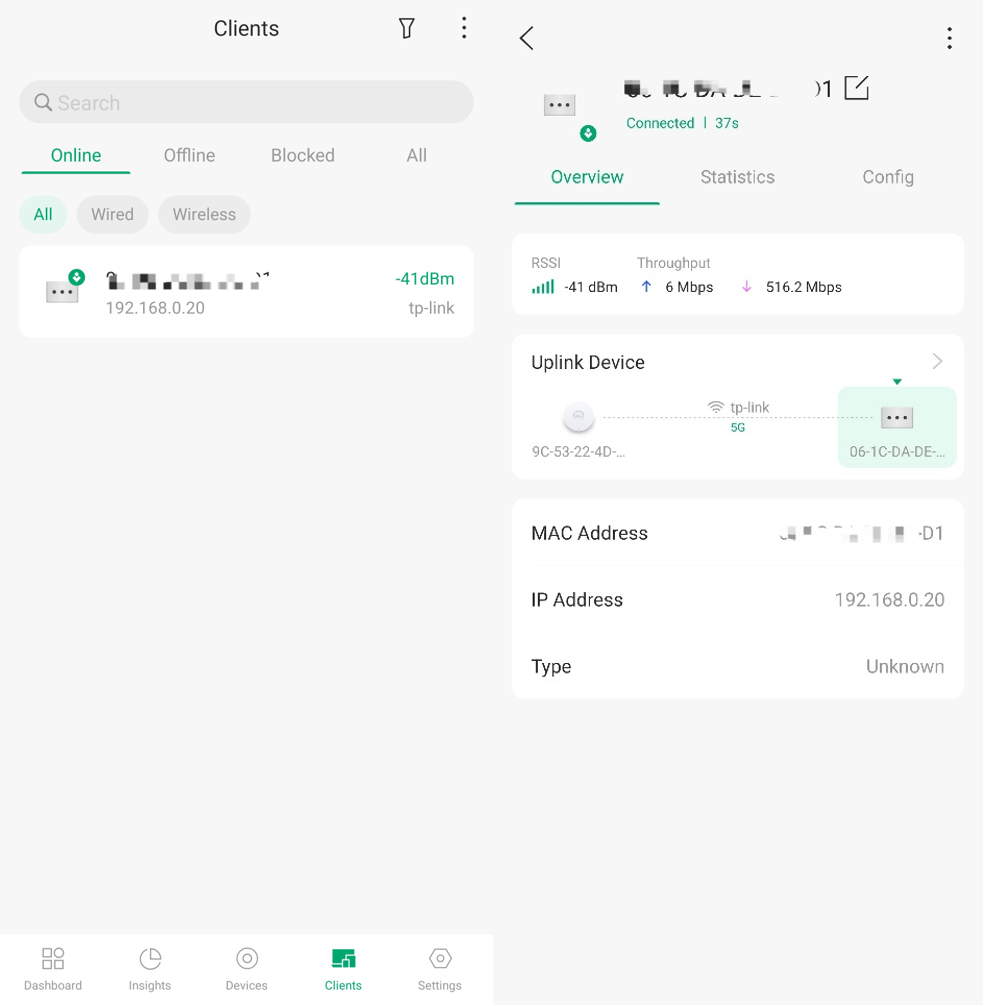
- To view client information of all EAPs, tap to open the site page on the dashboard, go to Clients to open the list of all online clients. Then tap a client item in the list to view its detailed information.
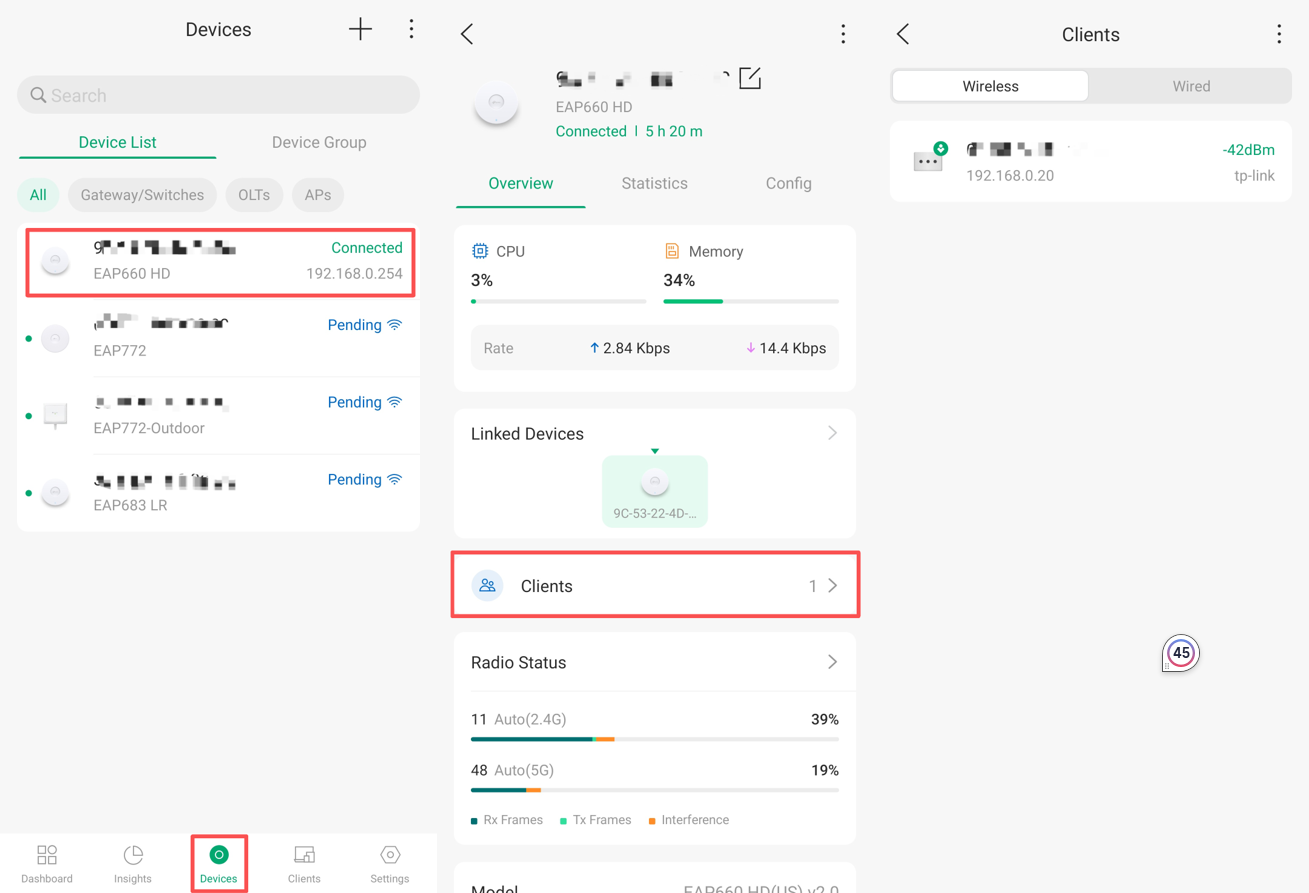
- To view client information of a specified EAP, go to Devices. Tap the EAP of which you want to view the client information. Then tap Clients to open the list of clients connected to the EAP. Tap the client item to view its detailed information.
Conclustion
Now you can choose the appropriate method to query client information based on your situation.
Get to know more details of each function and configuration please go to Download Center to download the manual of your product.
