


Contents
Configuration for Standalone Mode Omada AP
Configuration for Controller Mode Omada AP
Introduction
CLI stands for Command Line Interface, which is an efficient and important way of managing a device. All Omada APs support CLI, which can be accessed through SSH or Terminal within the Omada Controller.
For the Omada APs with firmware adapted to Omada Controller V6.1 and later, the CLI commands have been modified and made more systematic. The CLI reference guide for Omada APs could be downloaded at Omada AP CLI Guide.
Requirements
- Omada AP with firmware adapted to Omada Controller V6.1 and above
- Omada Controller V6.1 and above
Configuration
In the following part, we will introduce how to access and use the CLI on Omada AP in standalone mode and controller mode.
Configuration for Standalone Mode Omada AP
Step 1. Use the IP address of the Omada AP to access the management UI.
Step 2. Go to Management -> SSH, tick to enable SSH Login. Click Save to finish the configuration.
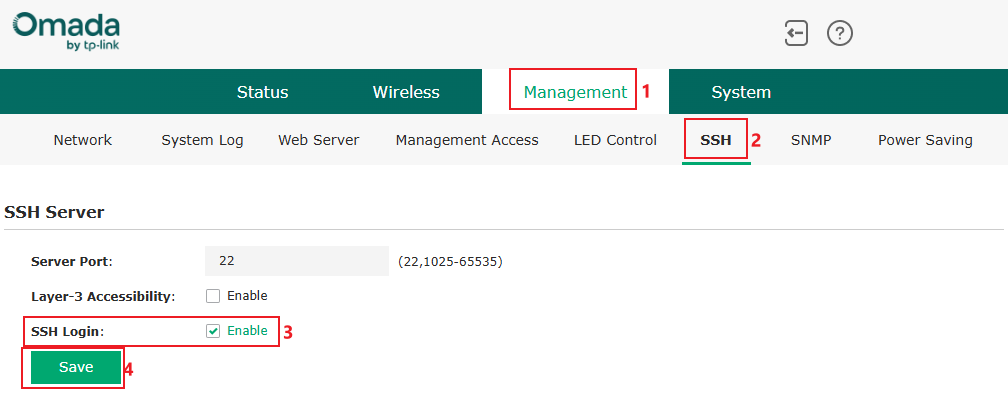
Server Port indicates the port used for SSH connection; by default, it’s port 22, you could also change it to another custom port.
If you need to connect through a different network, please tick to enable Layer-3 Accessibility; only the connection from the same network will be accepted.
Step 3. Use terminal software such as MobaXTerm, TeraTerm, PuTTY, or the OS built-in terminal to log in.
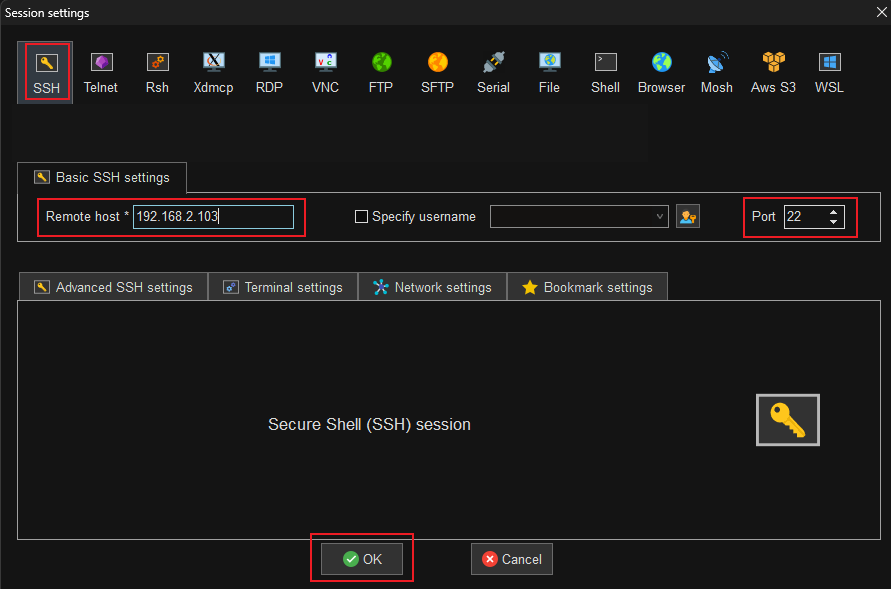
Terminal software usually supports multiple kinds of connections. When using this software to access, create a connecting session and choose the type as SSH, then specify the IP address and port of this connection, which are the IP address of the AP and the Server Port configured in the SSH page. For example:

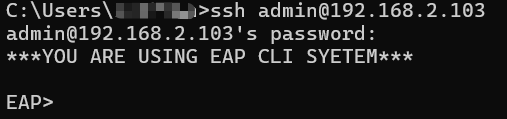
After that, enter the AP's username and password to log in.
For the OS built-in terminal, use the SSH command to connect; for example, in Windows CMD, use the command ssh <username>@<IP address> -p <Server Port> (if the Server Port is the default 22, the -p <Server Port> can be omitted). After that, enter the password to log in.

Here we have finished introducing how to connect to the CLI of Omada AP under standalone mode. After connecting, please use the CLI commands according to the Omada AP CLI Reference Guide.
Configuration for Controller Mode Omada AP
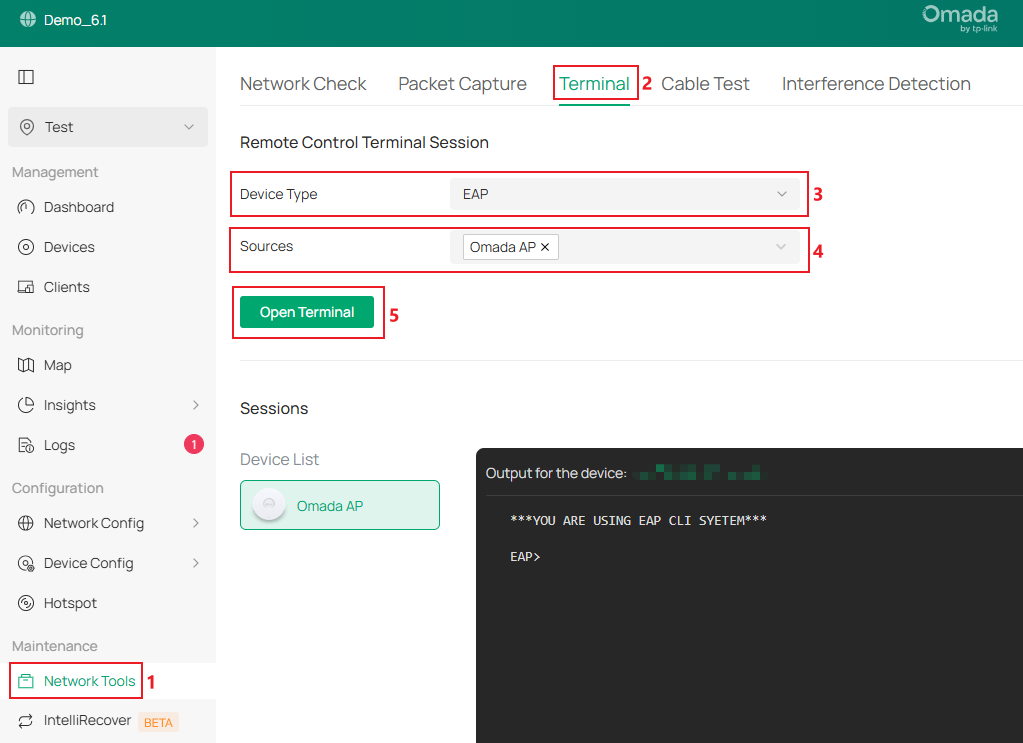
Step 1. When adopted by the controller, it’s recommended to use the Terminal integrated on the Omada Controller. Go to Network Tools -> Terminal. Select Device Type as EAP, Sources as the device you wish to connect, and click Open Terminal to start the session.
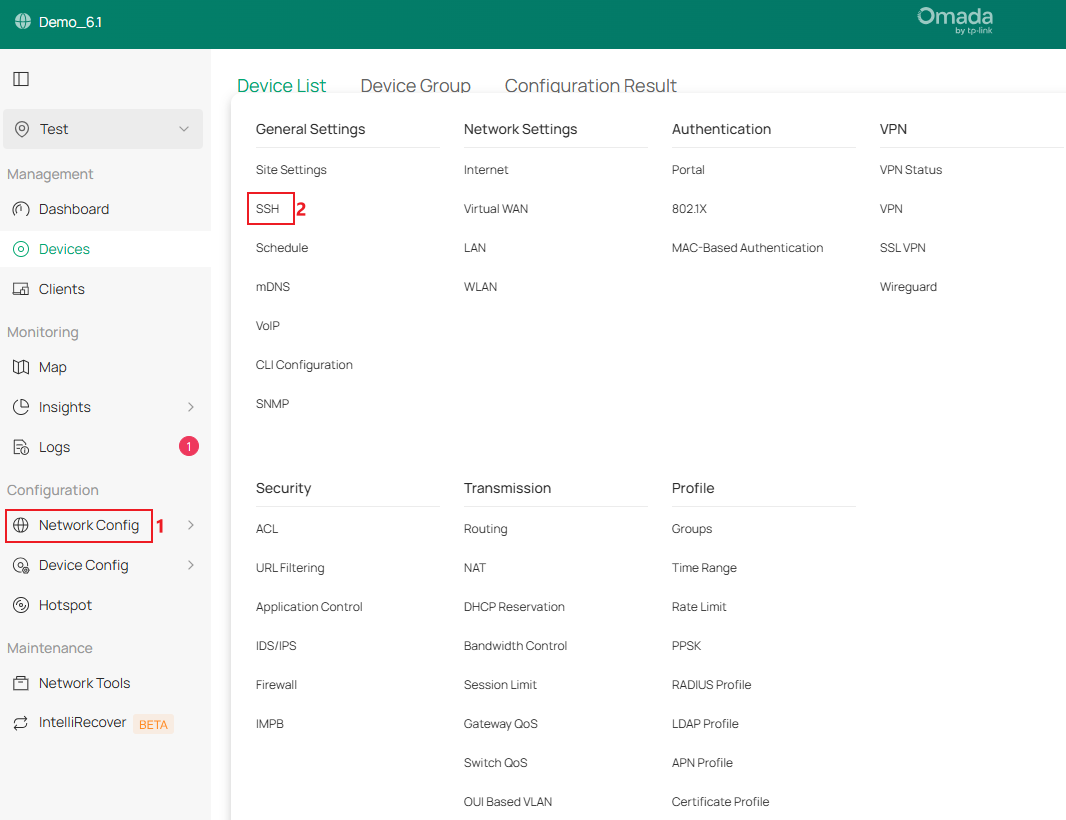
Step 2. If you wish to use other Terminal software to access the CLI of Omada AP, go to Network Config -> SSH.
Tick to enable SSH Login, click Apply to finish the configuration.
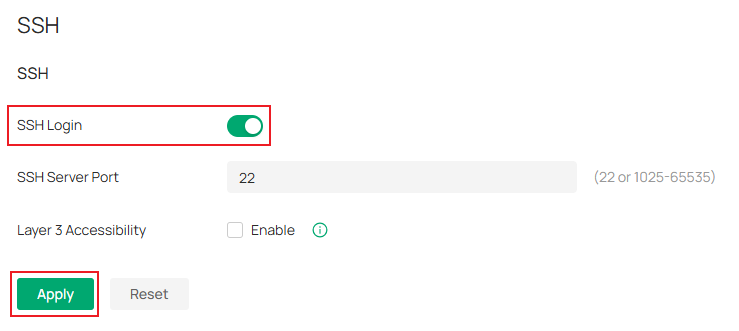
SSH Server Port indicates the port used for SSH connection, by default it’s port 22, you could also change it to another custom port.
If you need to connect through a different network, please tick to enable Layer-3 Accessibility; only the connection from the same network will be accepted.
Step 3. Terminal software usually supports multiple kinds of connections. When using this software to access, create a connecting session and choose the type as SSH, then specify the IP address and port of this connection, which are the IP address of AP and the Server Port configured in SSH page. For example:
After that, enter the AP's username and password to log in.
For the OS built-in terminal, use the SSH command to connect; for example, in Windows CMD, use the command ssh <username>@<IP address> -p <Server Port> (if the Server Port is the default 22, the -p <Server Port> can be omitted). After that, enter the password to log in.
Here we have finished introducing how to connect to the CLI of Omada AP under controller mode. After connecting, please use the CLI commands according to the Omada AP CLI Reference Guide.
Verification
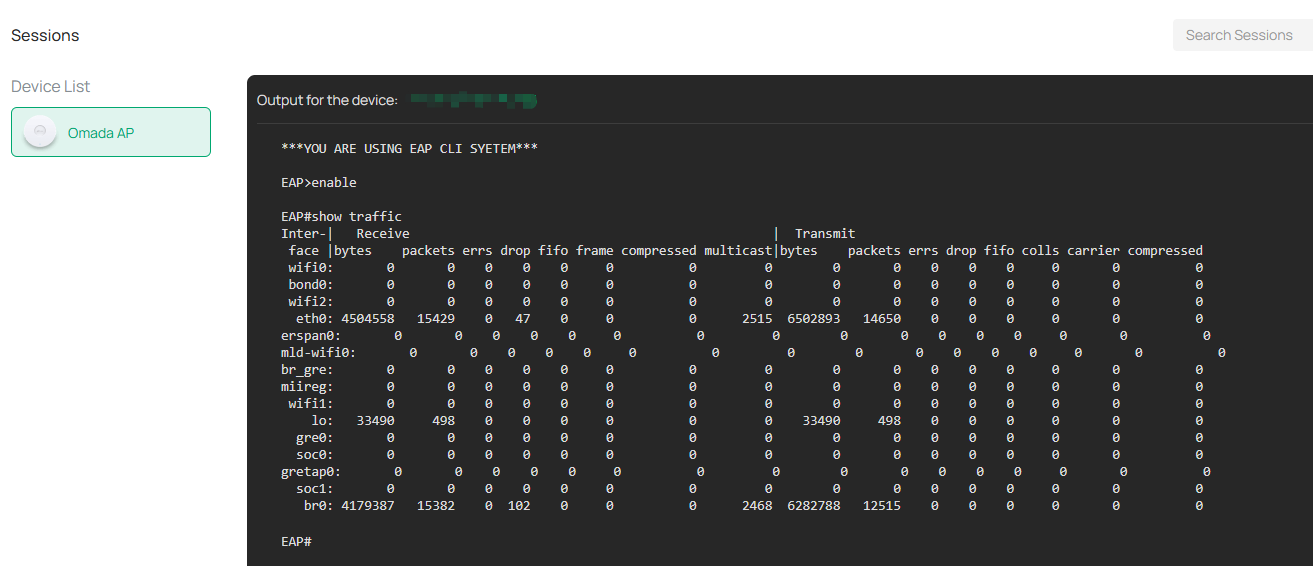
After connecting to the CLI, use the commands to proceed. For example, use the command show traffic after entering Public Mode to display the network traffic statistics on different interfaces.
Conclusion
This article introduced the CLI on Omada AP, including how to configure and use the commands.
Get to know more details of each function and configuration please go to Download Center to download the manual of your product.
QA
Q1: Am I able to configure the Omada AP through CLI?
A1: Currently, all the CLI commands supported on Omada APs can only display certain information; users are not able to make any configuration on Omada APs through the CLI commands.
