


Contents
Downloading the thumbnail image
Introduction
Smart Search is an AI-powered video search feature that uses Smart Analytics and Object Attribute Analysis to identify and categorize people and vehicles captured by connected VIGI InSight Cameras. This helps administrators locate specific recordings more efficiently.
Smart Search can be used with supported Fusion Pro Series Gateways.
Storage requirements depend on the device, such as an SSD installed in a Fusion Pro Series Gateway or a hard drive installed in a supported VIGI NVR.
This guide explains how to configure Smart Search, enable people and vehicle attribute analysis, use search filters, review recordings, create investigation cases, and download thumbnail images.
Requirements
- Fusion Pro Series Gateway
- SSD installed in the Fusion Pro Series Gateway, or a VIGI NVR with an installed HDD connected to the target IP camera
- VIGI InSight Camera
Initial configuration steps
Devices must first be adopted to the Fusion Pro Series Gateway. In the following configuration steps, the Fusion Pro 2.5G PoE is used as an example with a VIGI InSight S385 v1 camera. First, adopt the IP camera to the gateway.
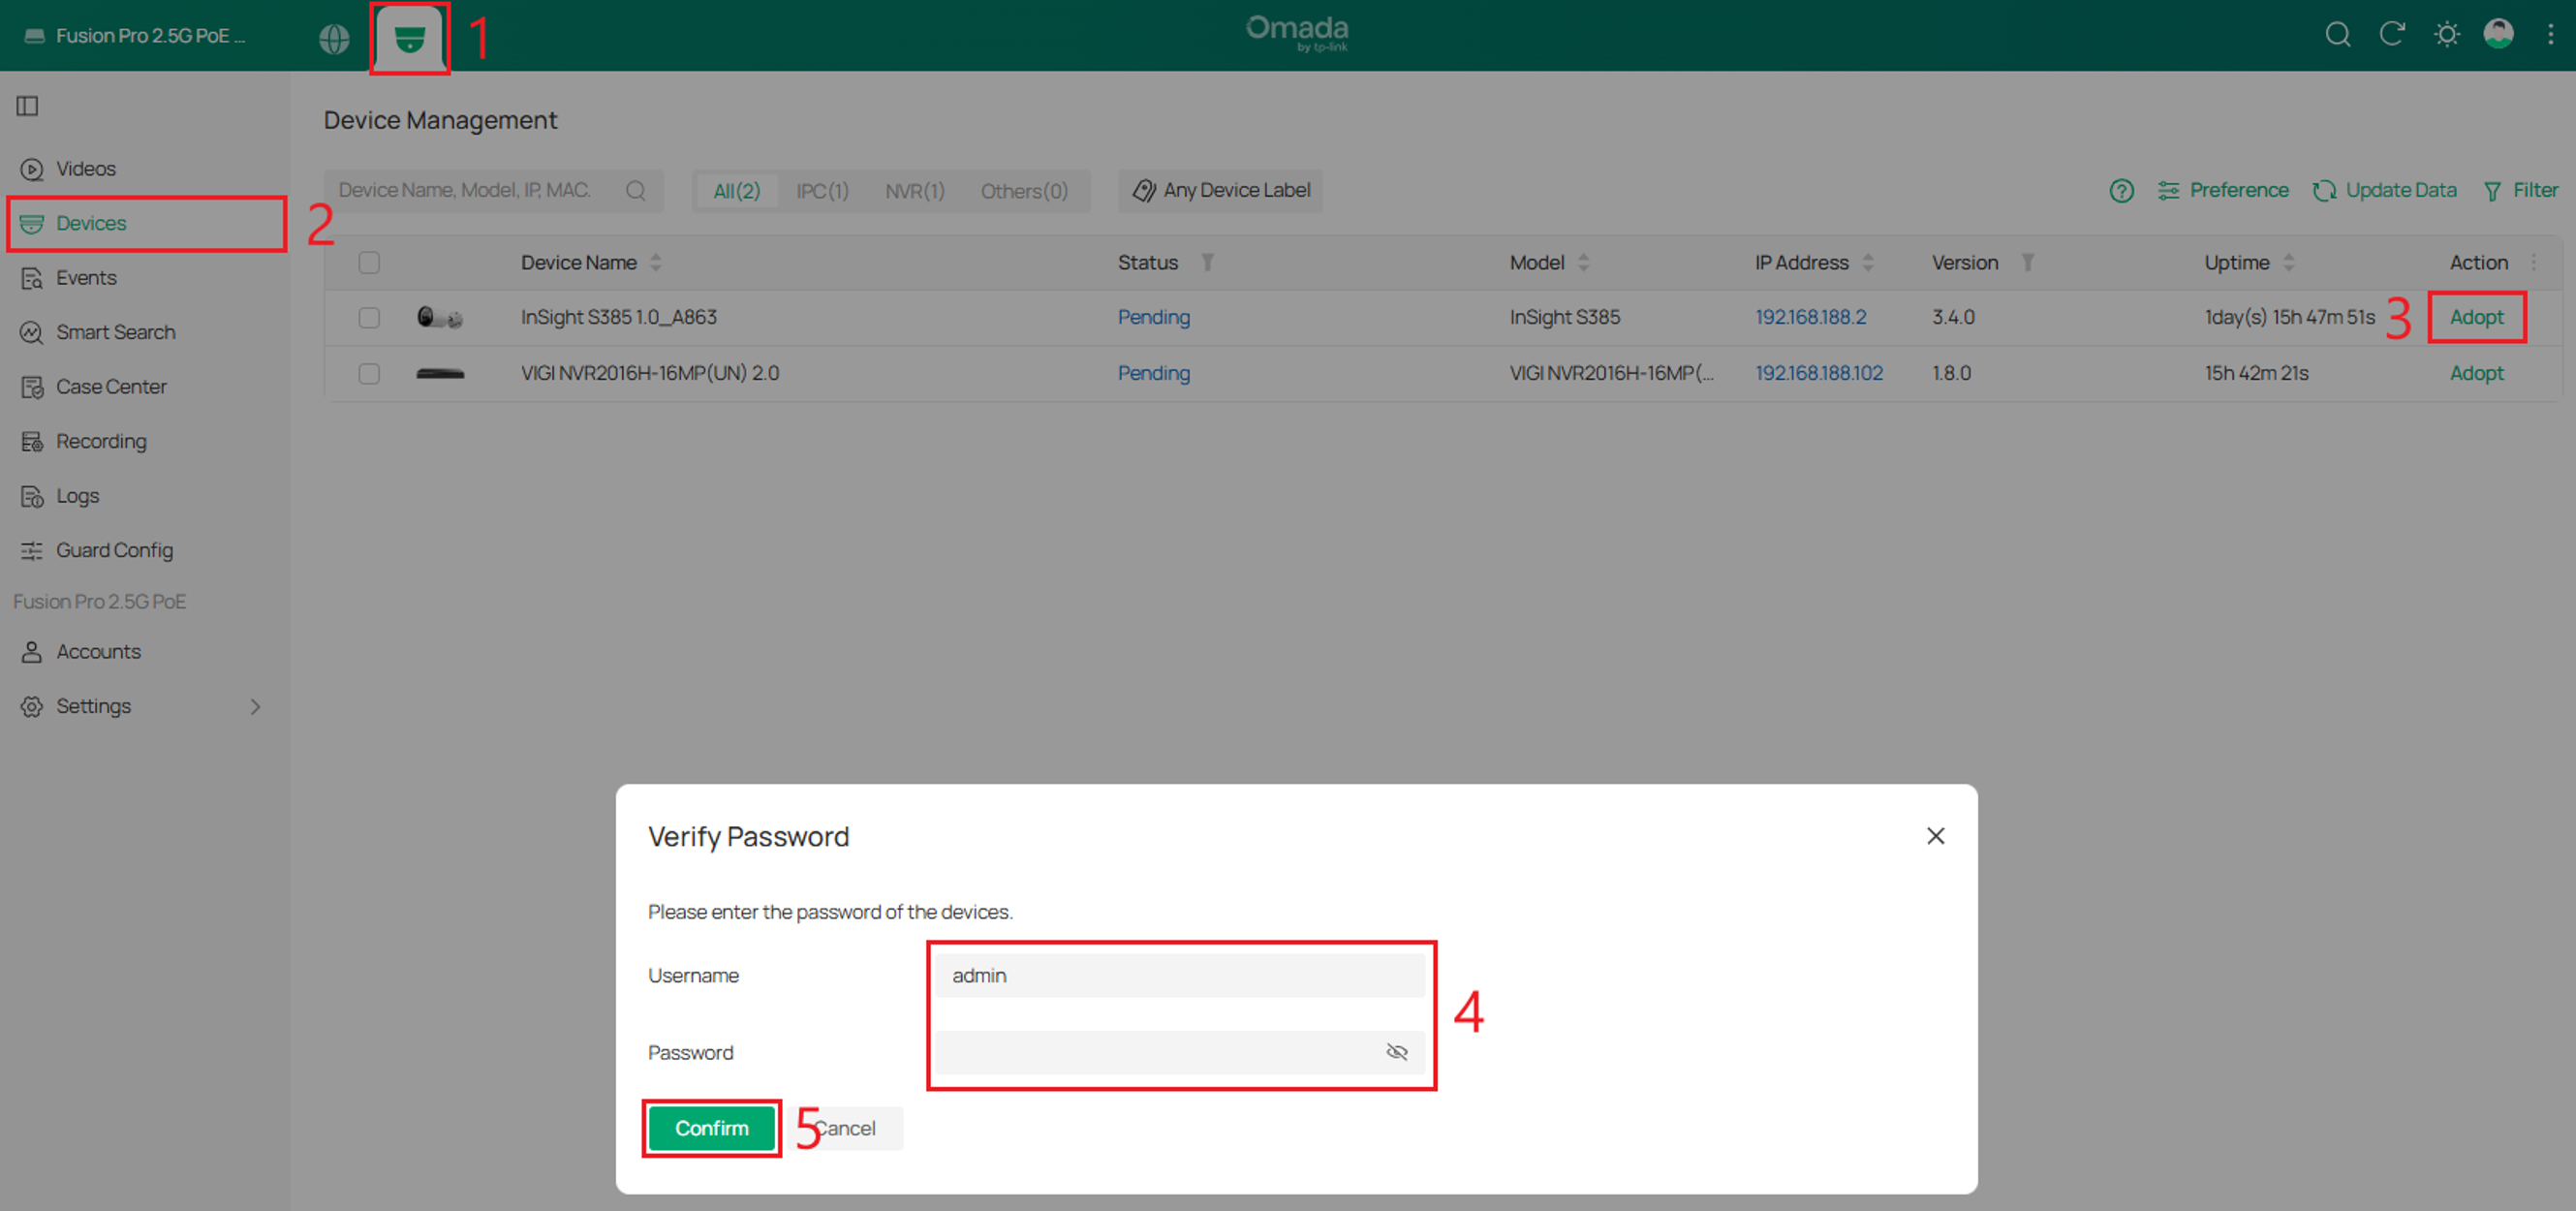
Step 1. Connect the IP camera to the network. Then navigate to the Fusion site. Go to Omada Guard tab > Devices to find the Device Management List. Find the IP camera and select Adopt. A Verify Password menu will appear. Enter the Username and Password of the IP camera, then select Confirm.
Note: If the device status shows Unsupported Firmware, download and install the latest firmware from the official Omada website: Omada Download Center. After the update, the device status will change to Pending. If the device still shows Unsupported, check whether the device is supported.
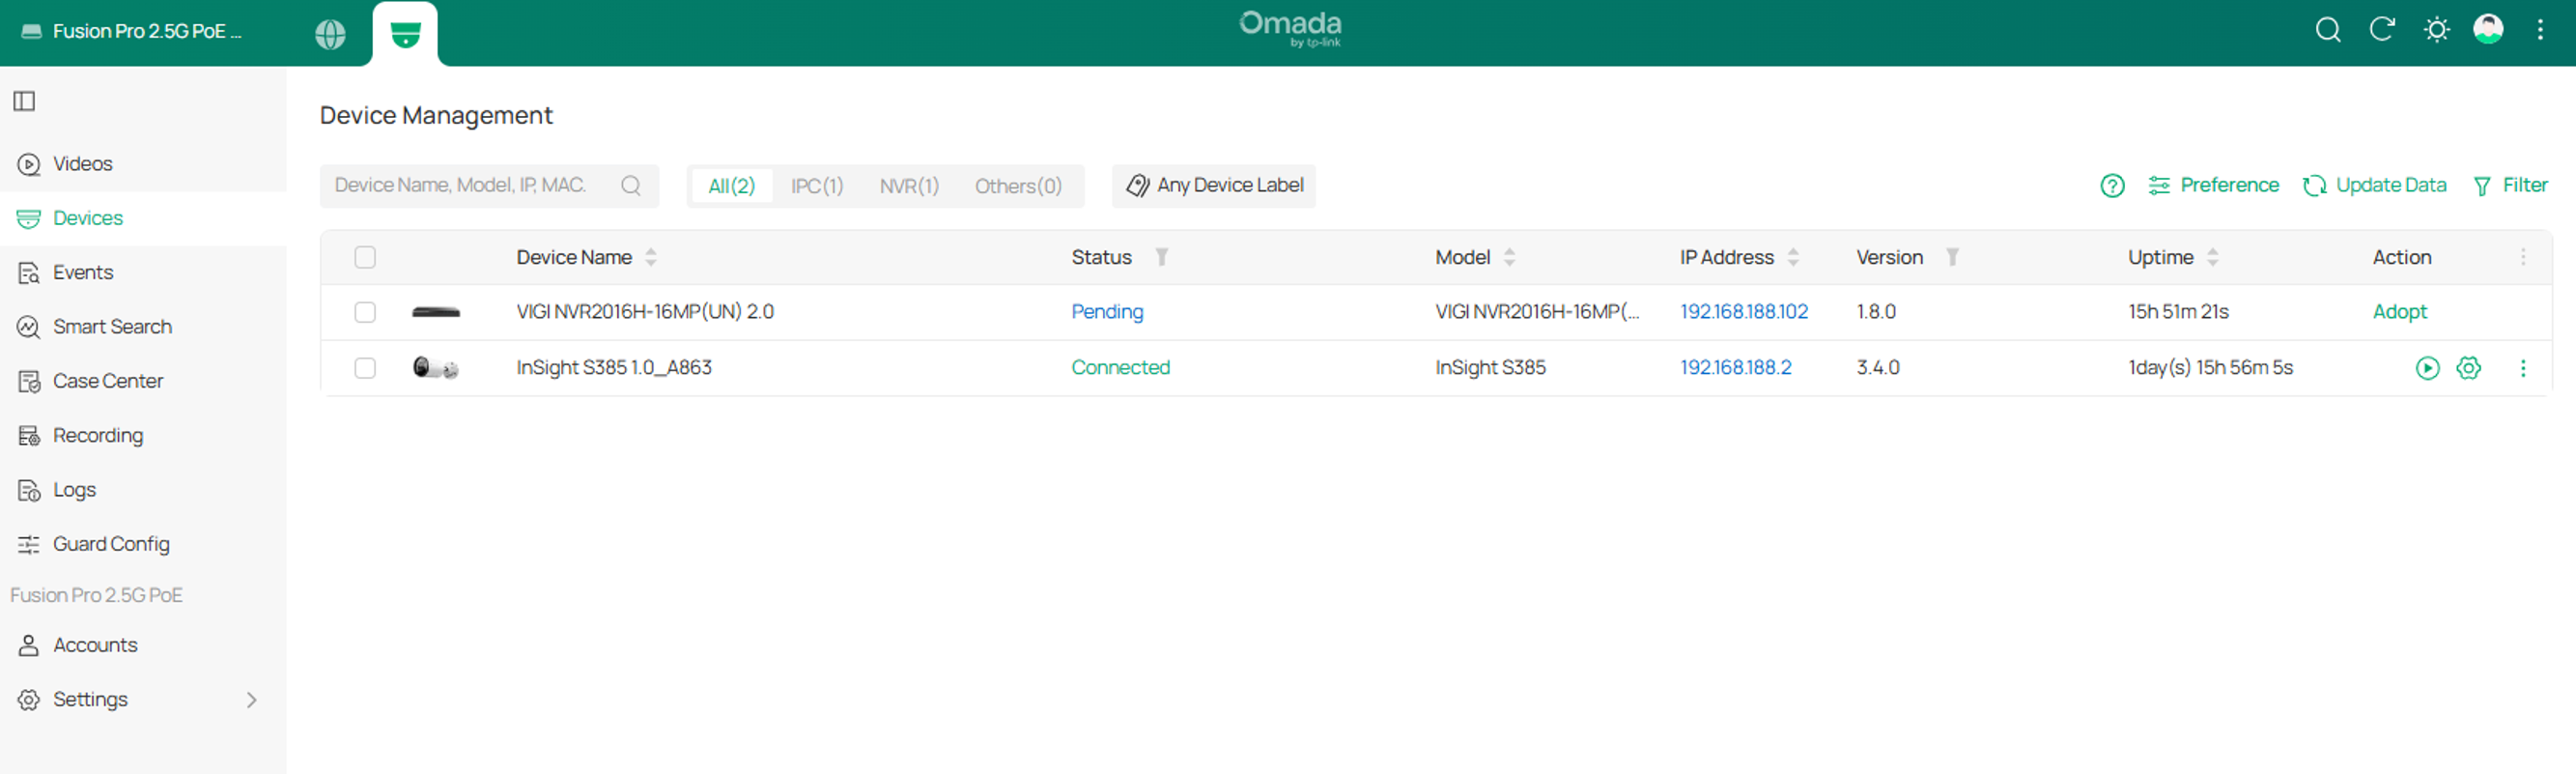
The IP camera’s status will change to Adopting, and then to Connected once the adoption process is complete. You are now ready to configure Smart Search.
Configuration
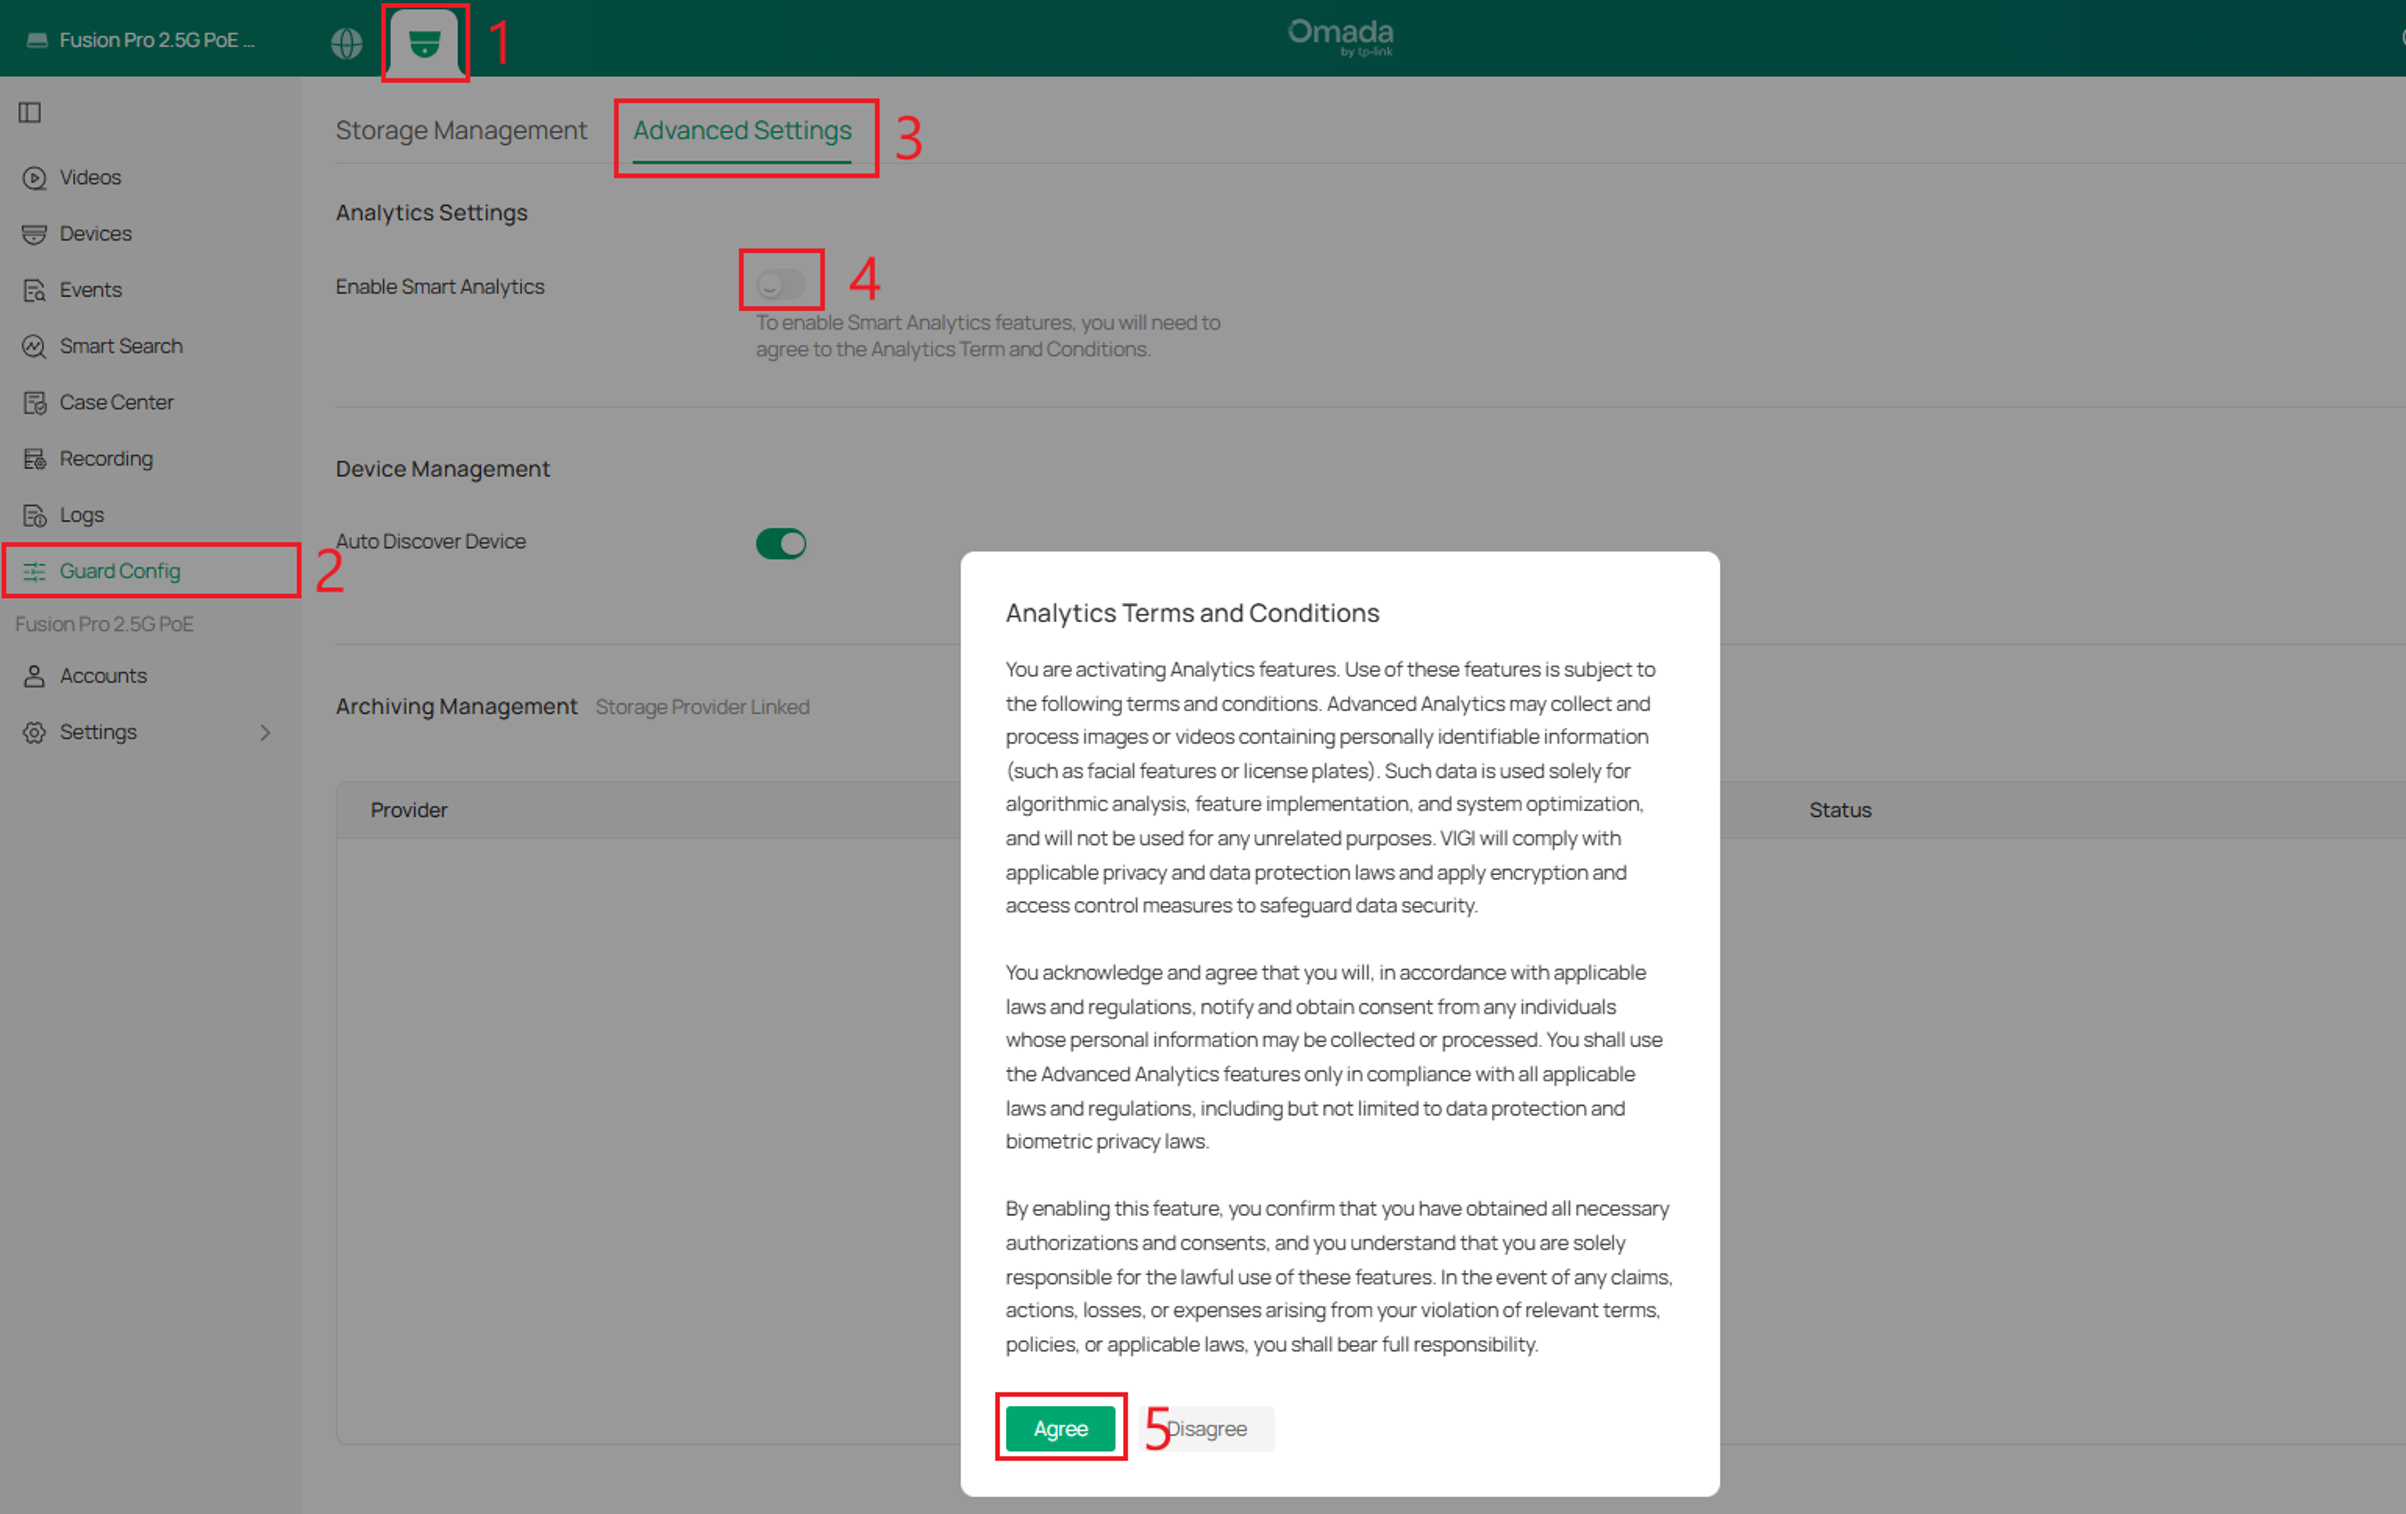
Step 1. Check whether Smart Analytics is enabled. Within the Omada Guard tab, go to Guard Config > Advanced Settings, and select Enable Smart Analytics. An Analytics Terms and Conditions dialog box will appear. Select Agree.
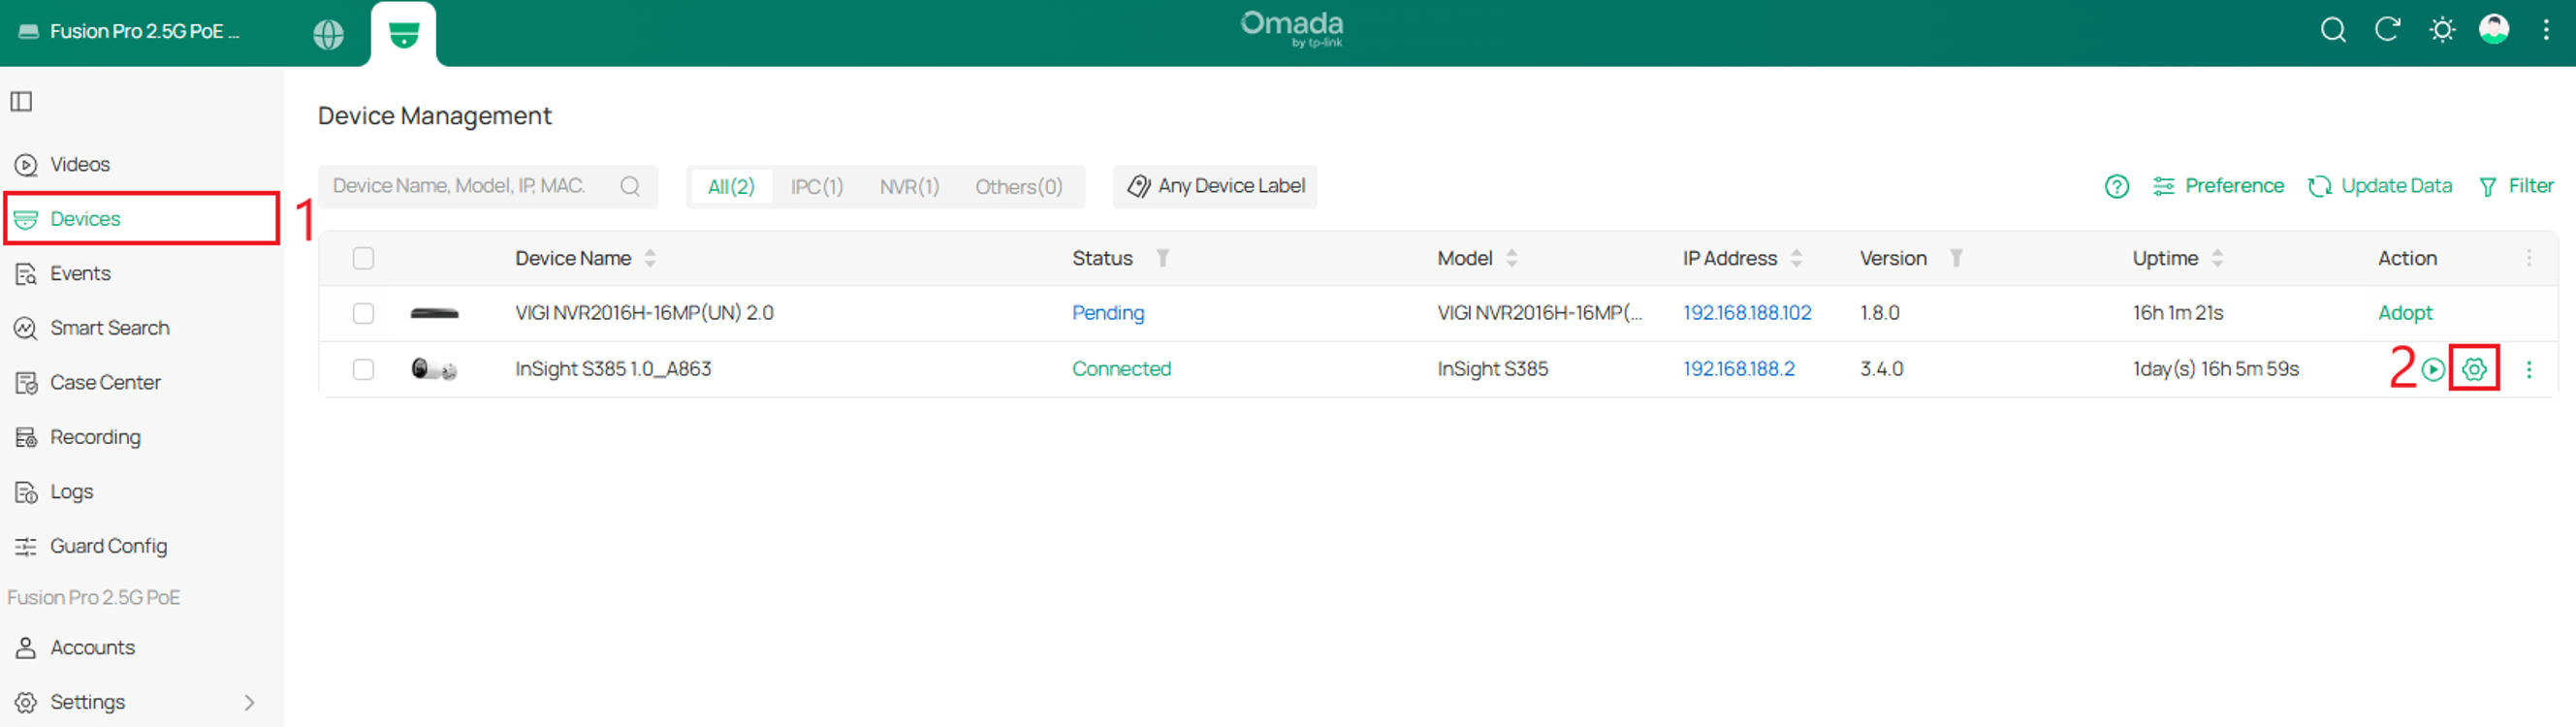
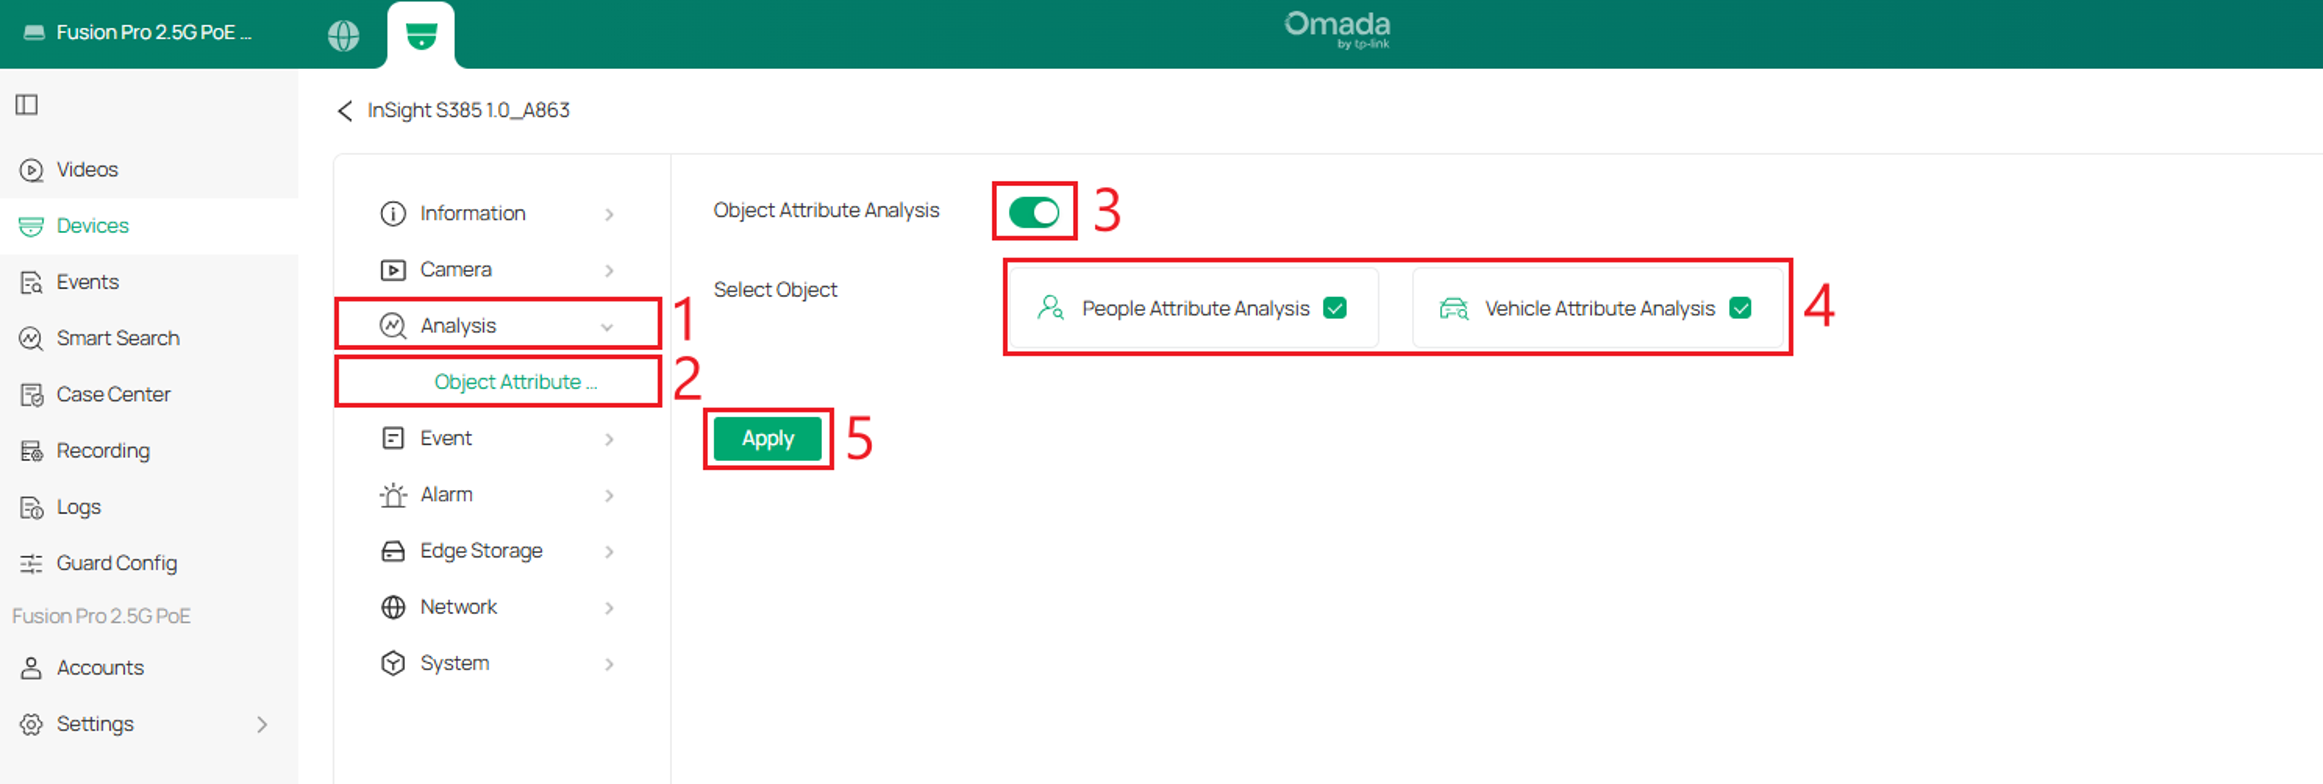
Step 2. Object Attribute Analysis must be enabled. Go to Devices, then select the Edit action for the IP camera.
Step 3. Go to Analysis > Object Attribute Analysis, enable Object Attribute Analysis, and select People Attribute Analysis and/or Vehicle Attribute Analysis. Select Apply.
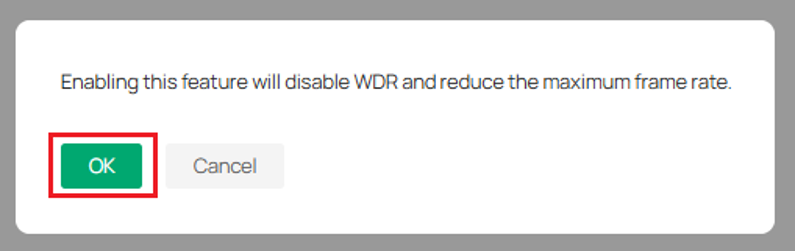
Step 4. A dialog box will appear. Select OK. Please allow a few minutes for the IP camera to reboot.
Smart Search settings
After configuration, Smart Search will begin displaying detected people and vehicles that enter the IP camera's field of view. This section primarily uses human detection as an example.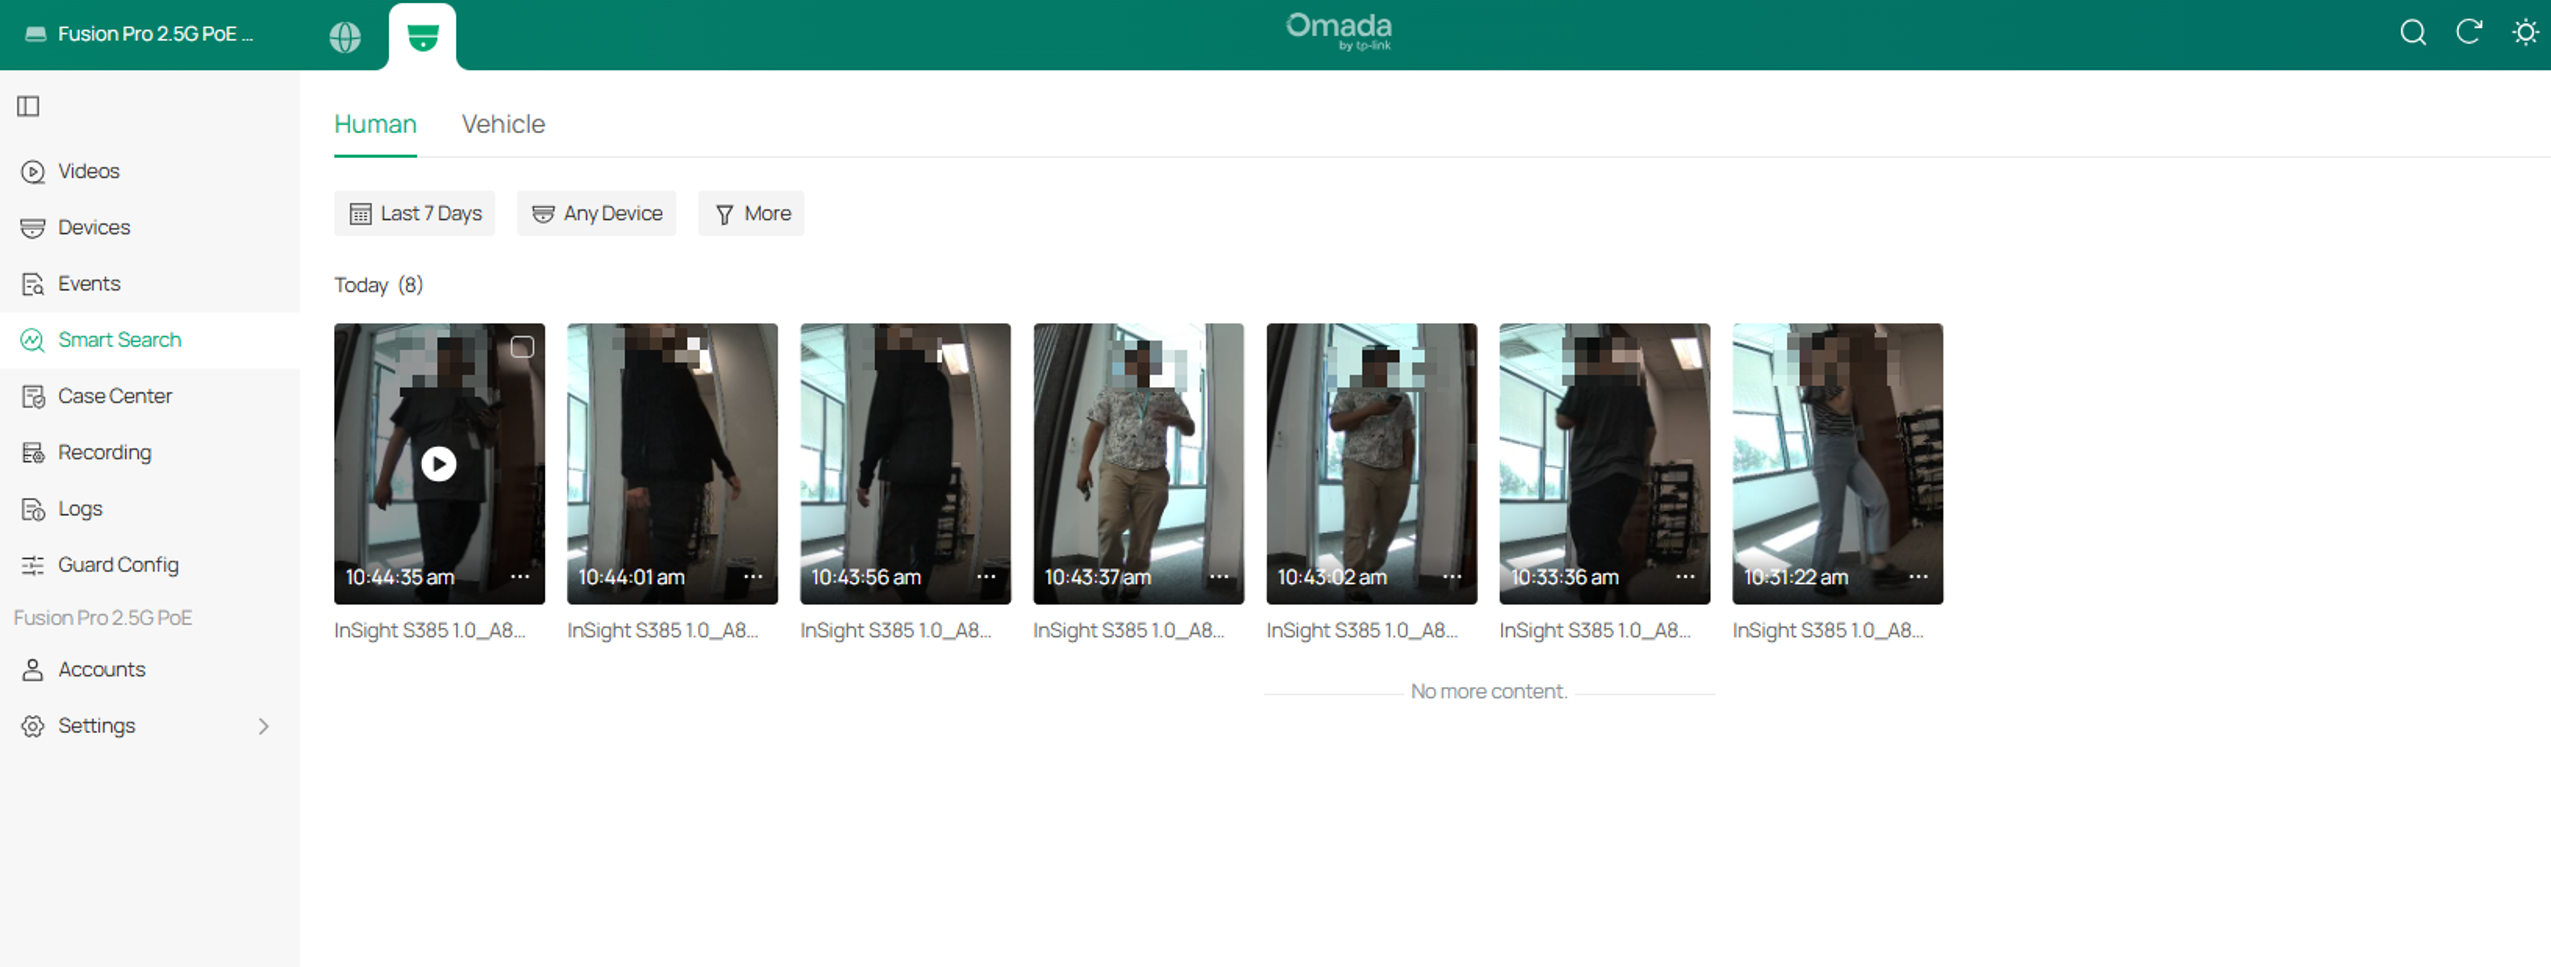
Calendar search
The Calendar filter allows you to search for recorded events within a specified time period. Select one of the predefined time periods or configure a Custom time period.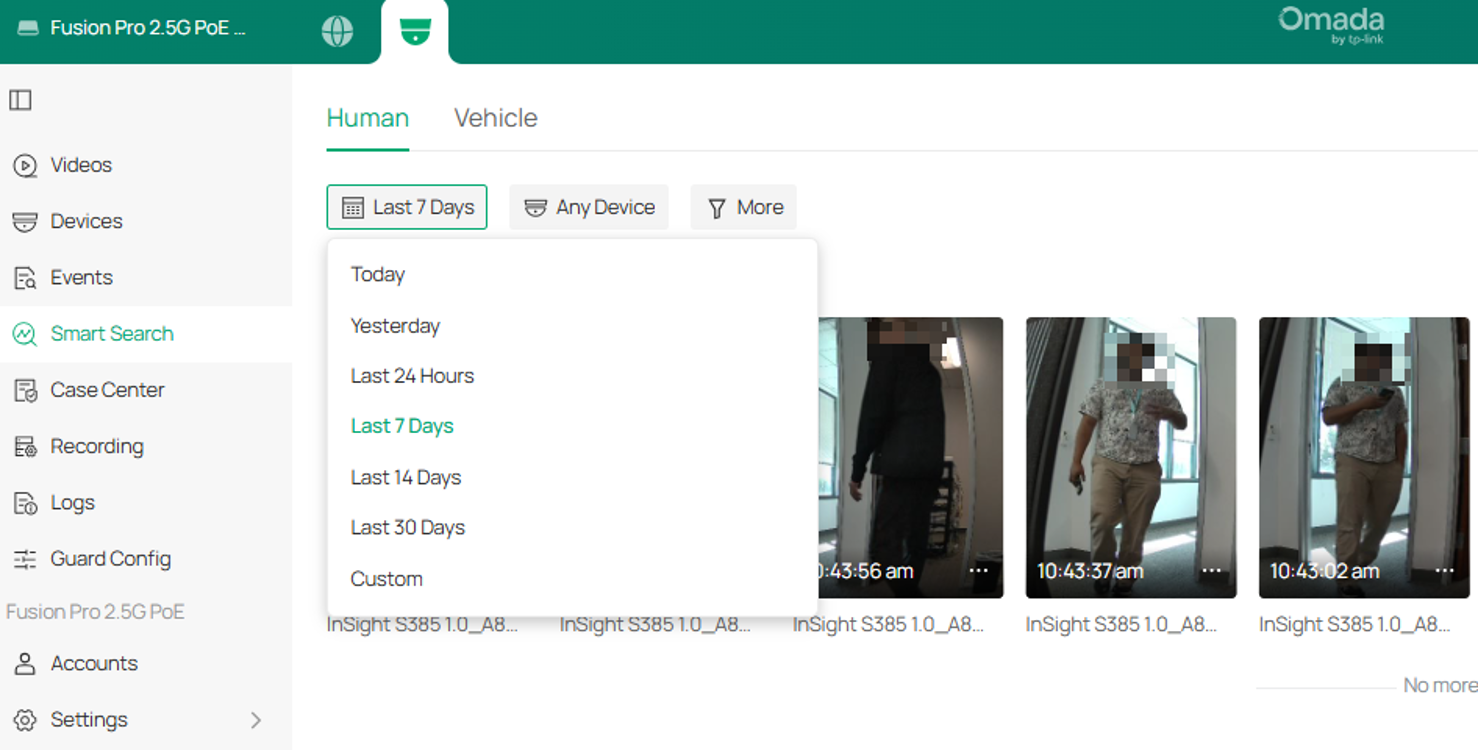
Device
To search recorded events from a specific IP camera, select the camera from the device filter. The default option is Any Device.
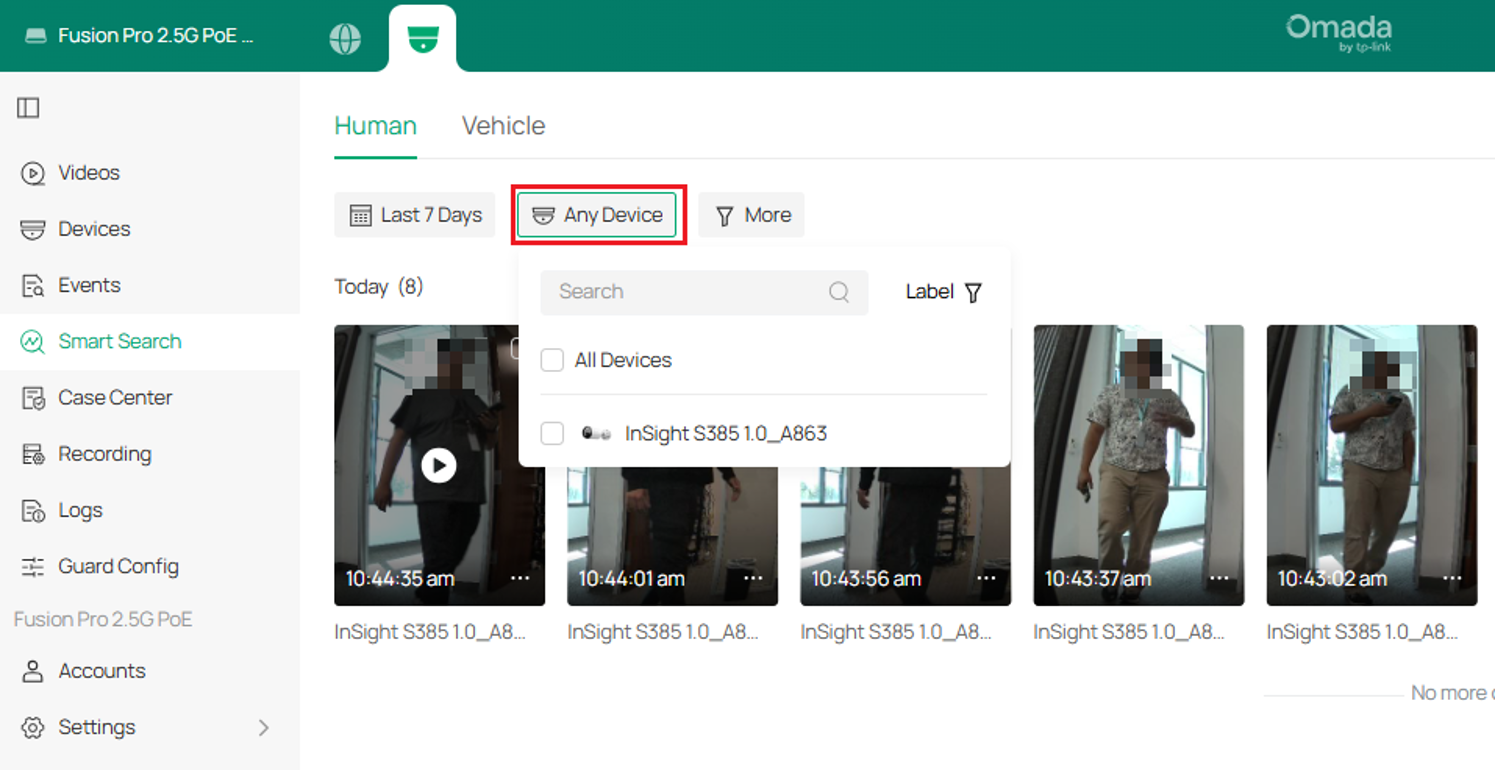
Filter options
The More filter provides additional options for filtering human results by Gender, Hair, Topwear Type, Topwear Color, Bottomwear Type, and Bottomwear Color.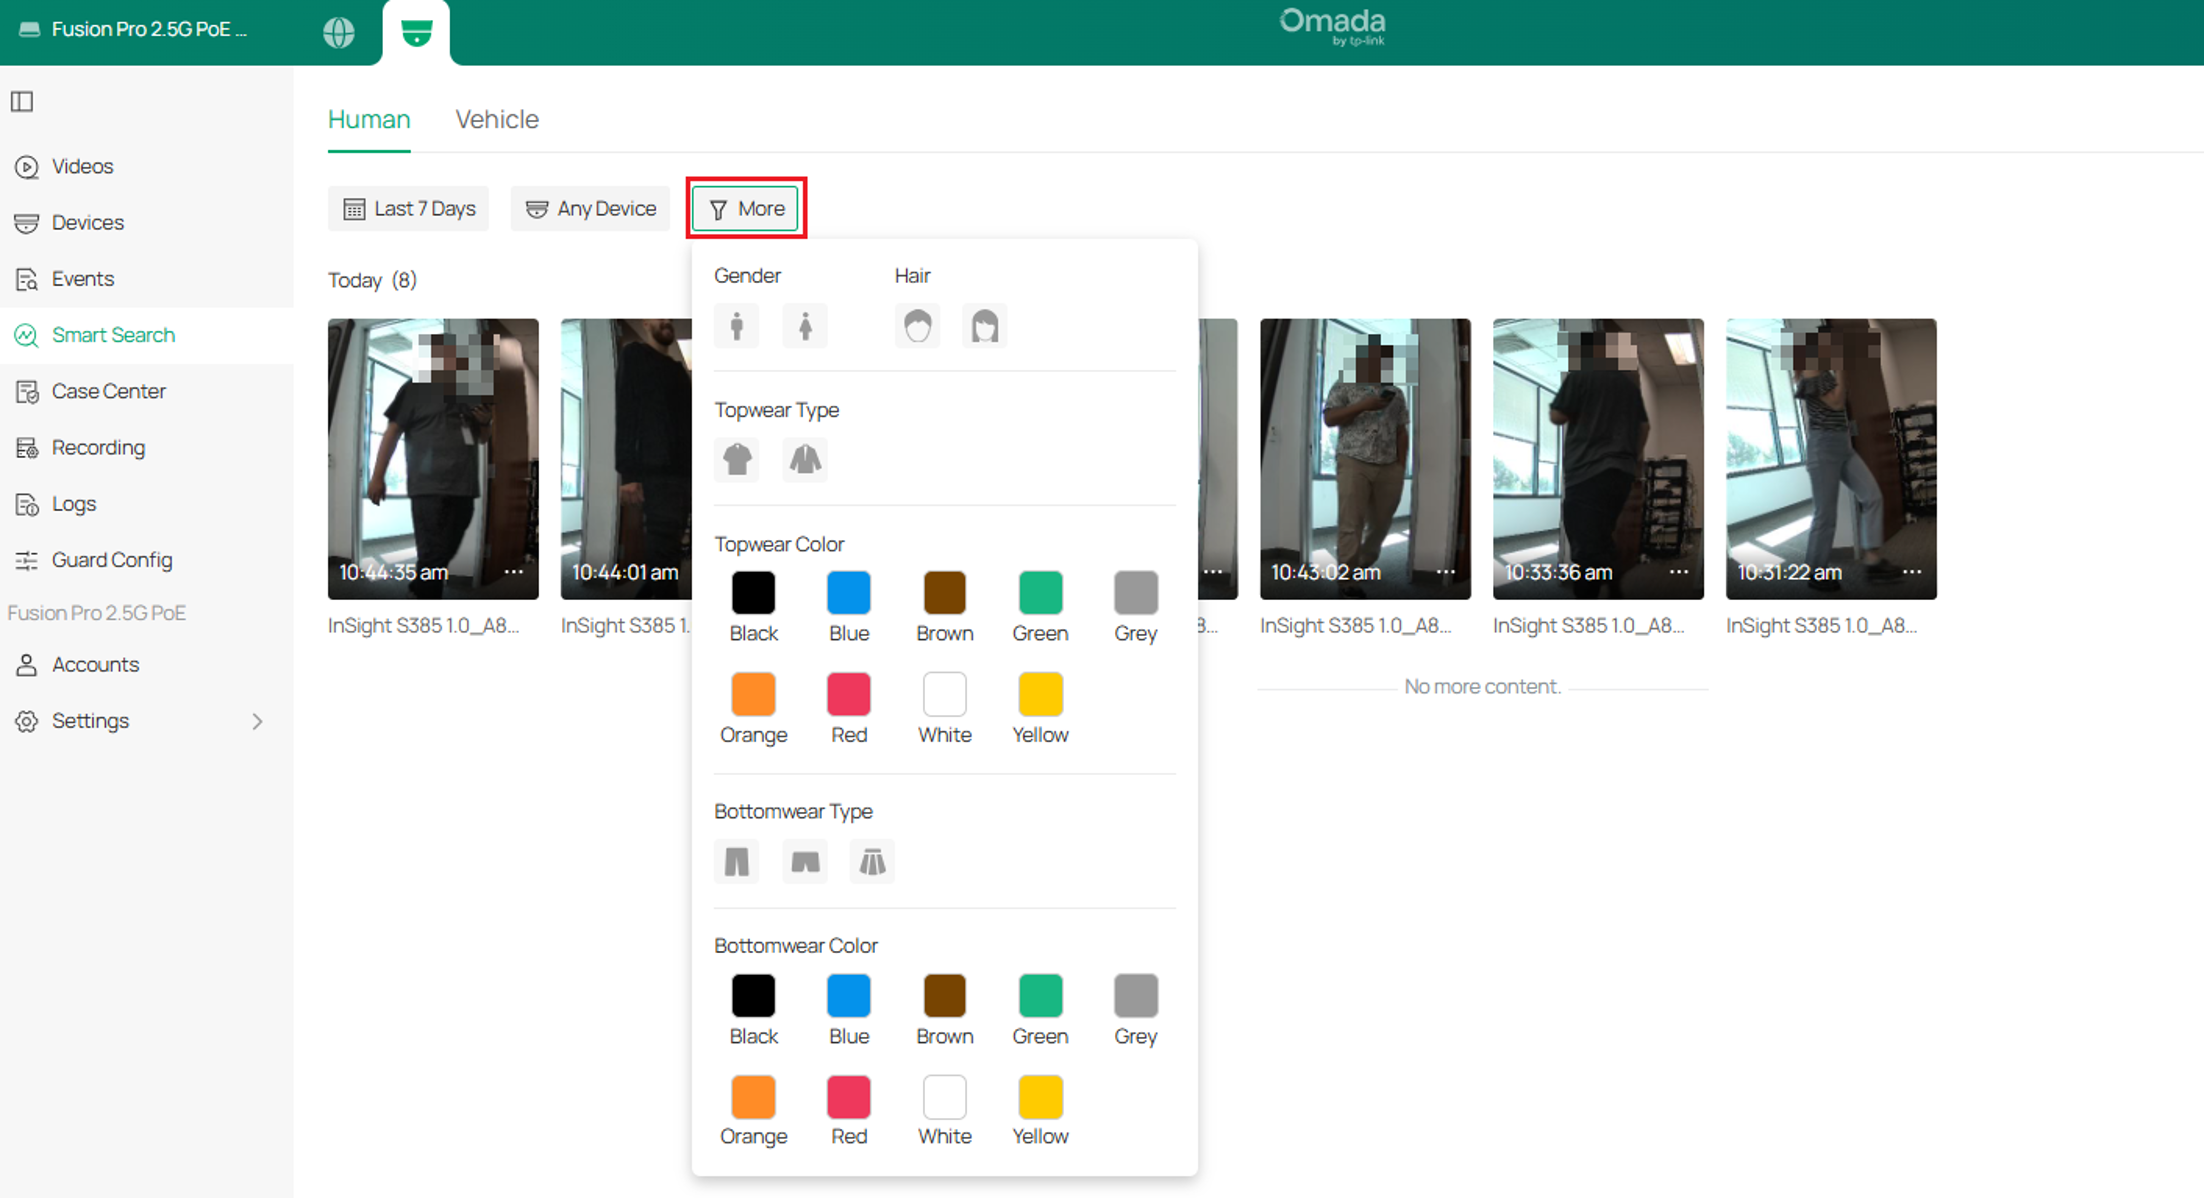
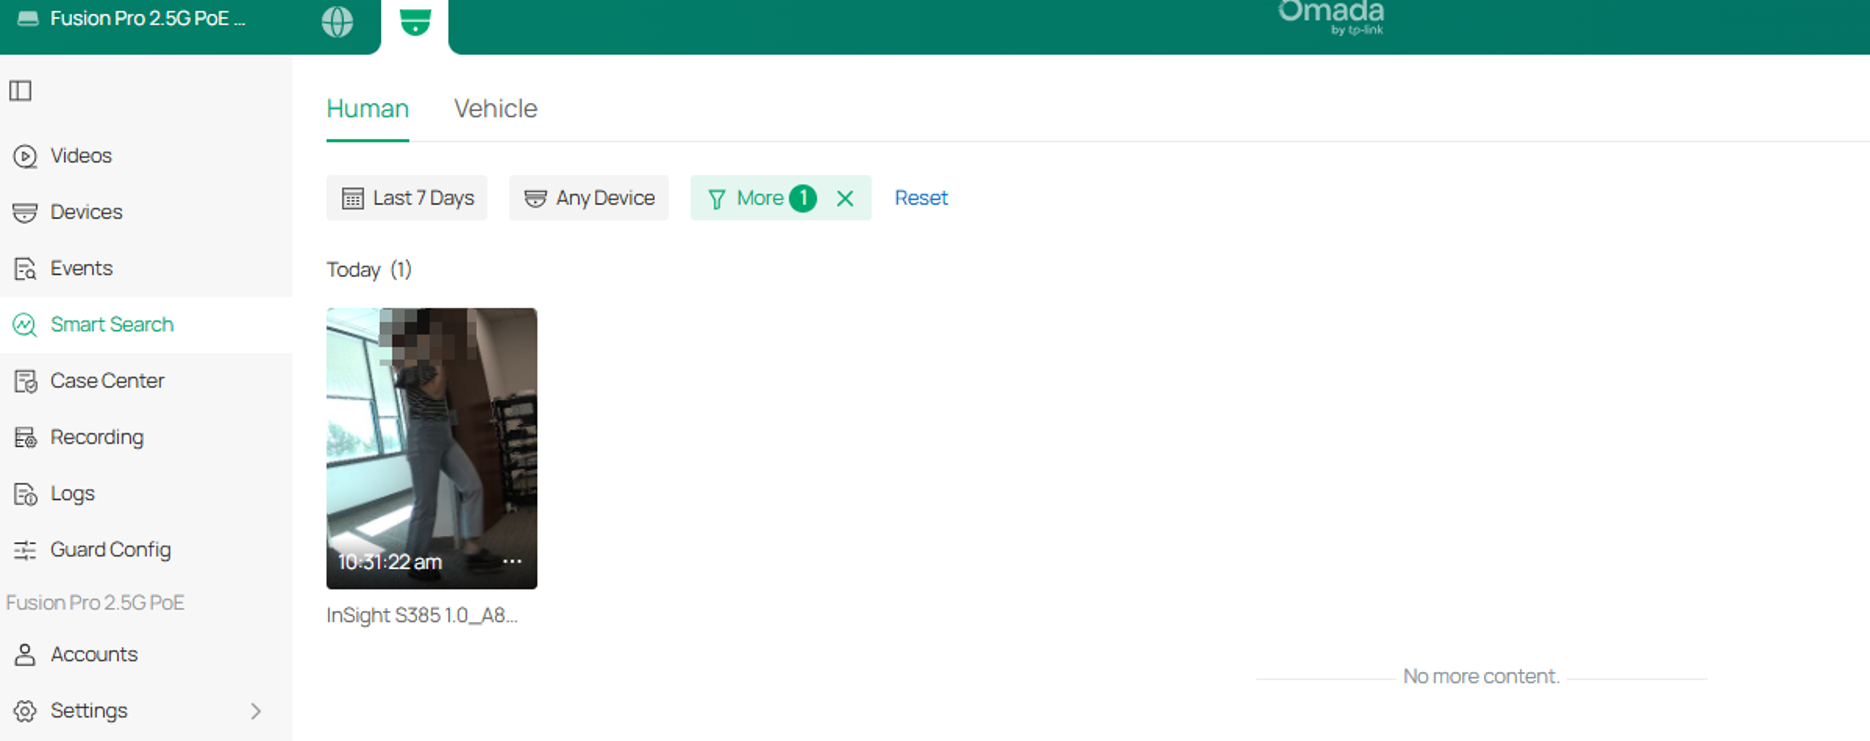
Example: Filtering by Female
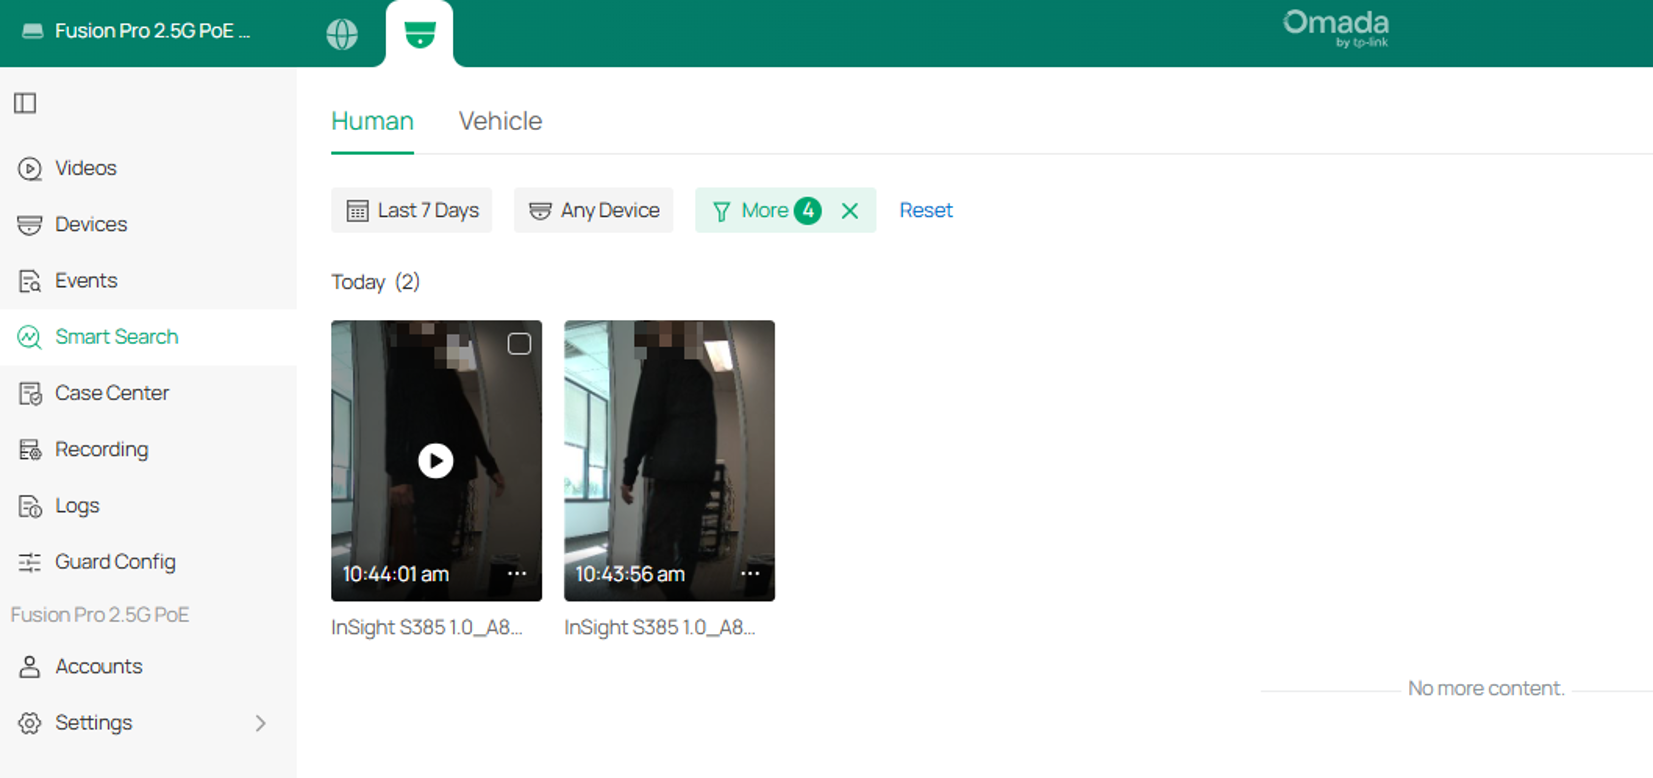
Example: Filtering by Male, short hair, long sleeves, and black topwear color
For vehicle filter options, select the Vehicle tab, then select More. Vehicles can be filtered by Vehicle Type, including Car, SUV, Bus, Micro Bus, and Truck. Results can also be filtered by Vehicle Color.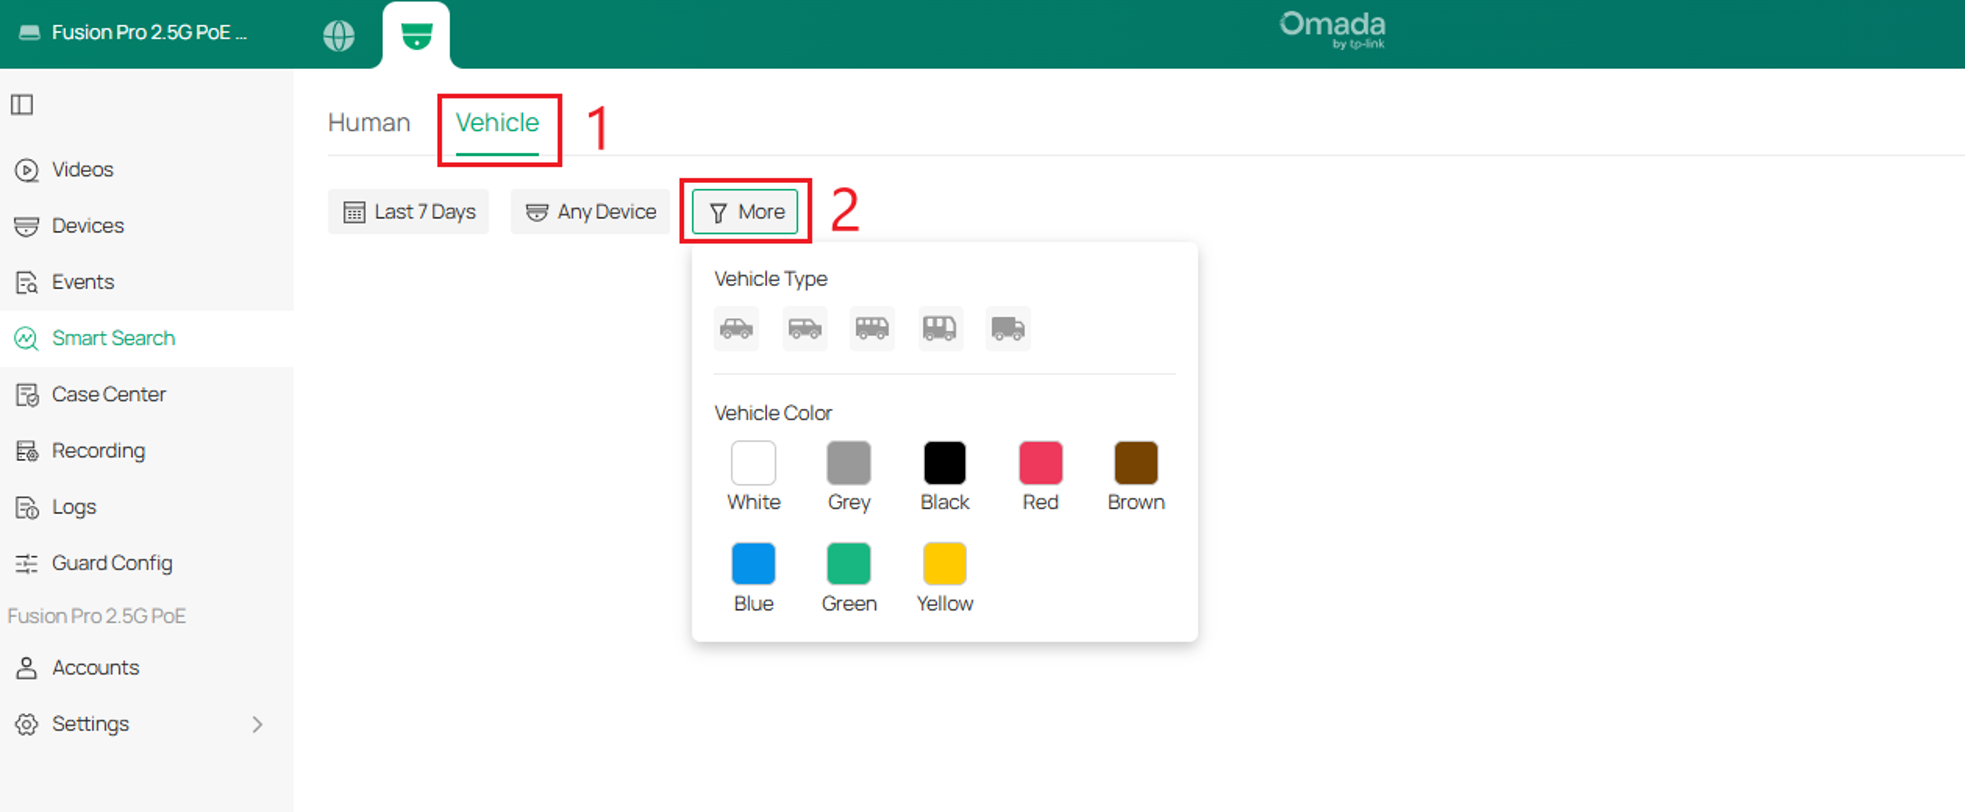
Viewing recordings
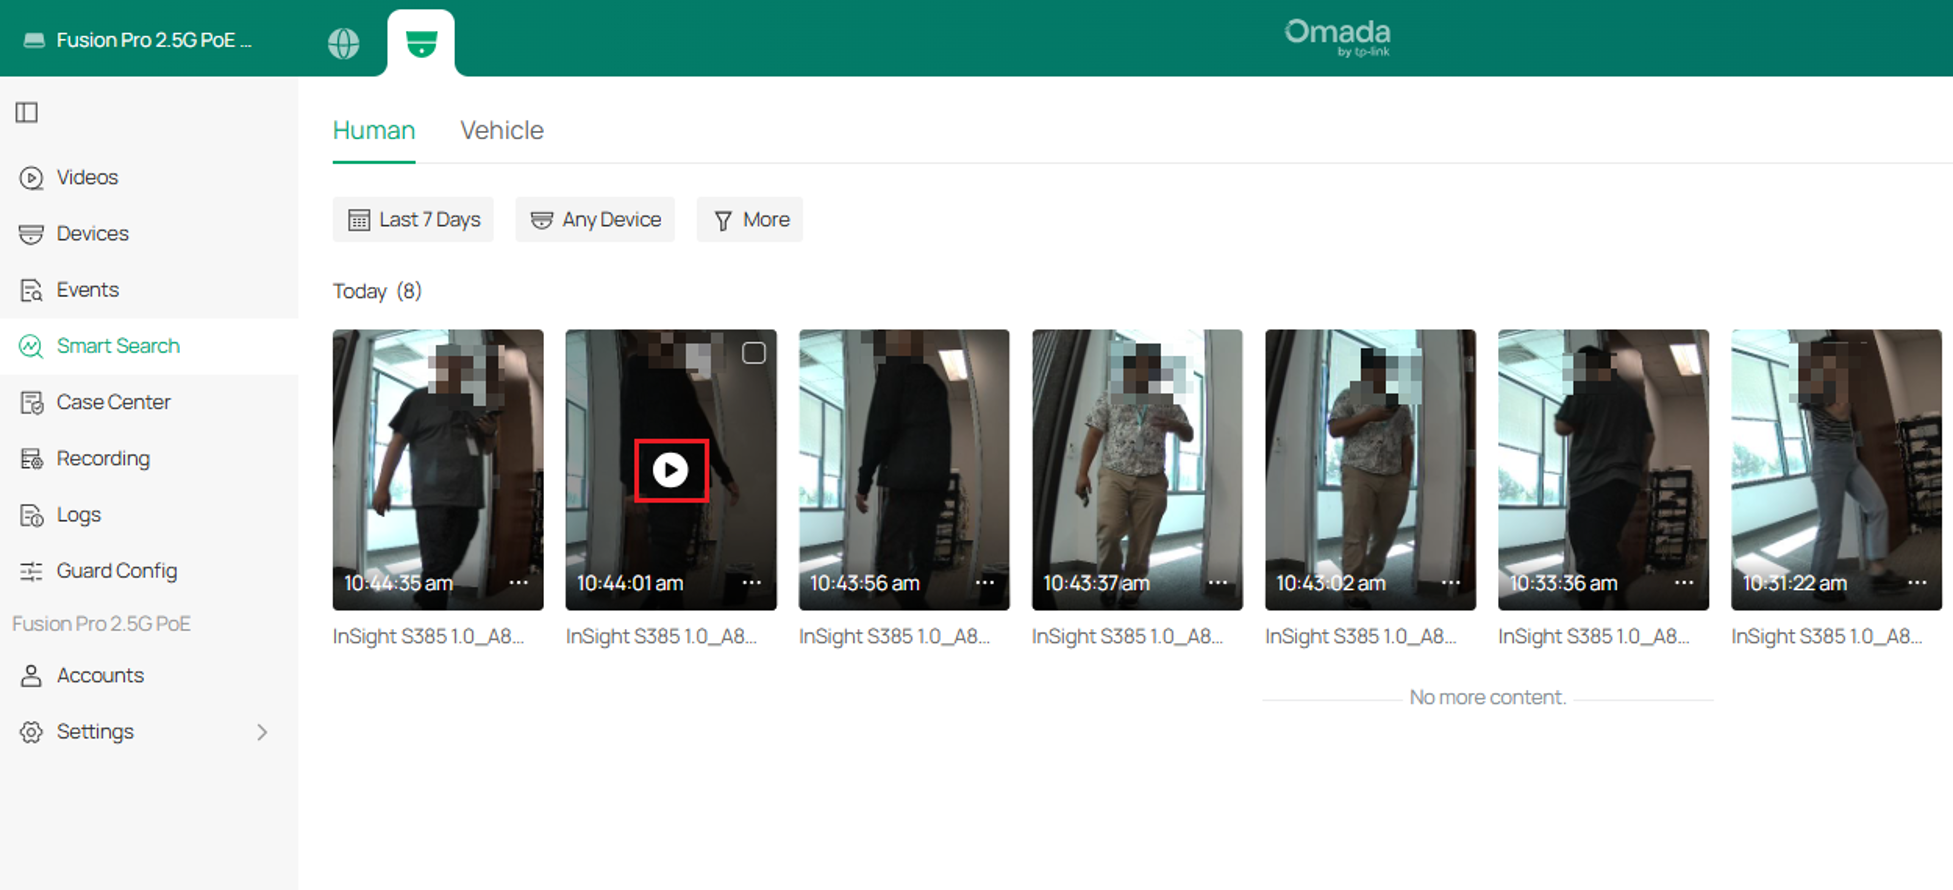
Recordings can be quickly viewed by hovering over a result and selecting the Play button.
After selecting the Play button, a video player appears and begins playback one second before the detected event. The player includes timestamps, forward and backward controls, and a Save button.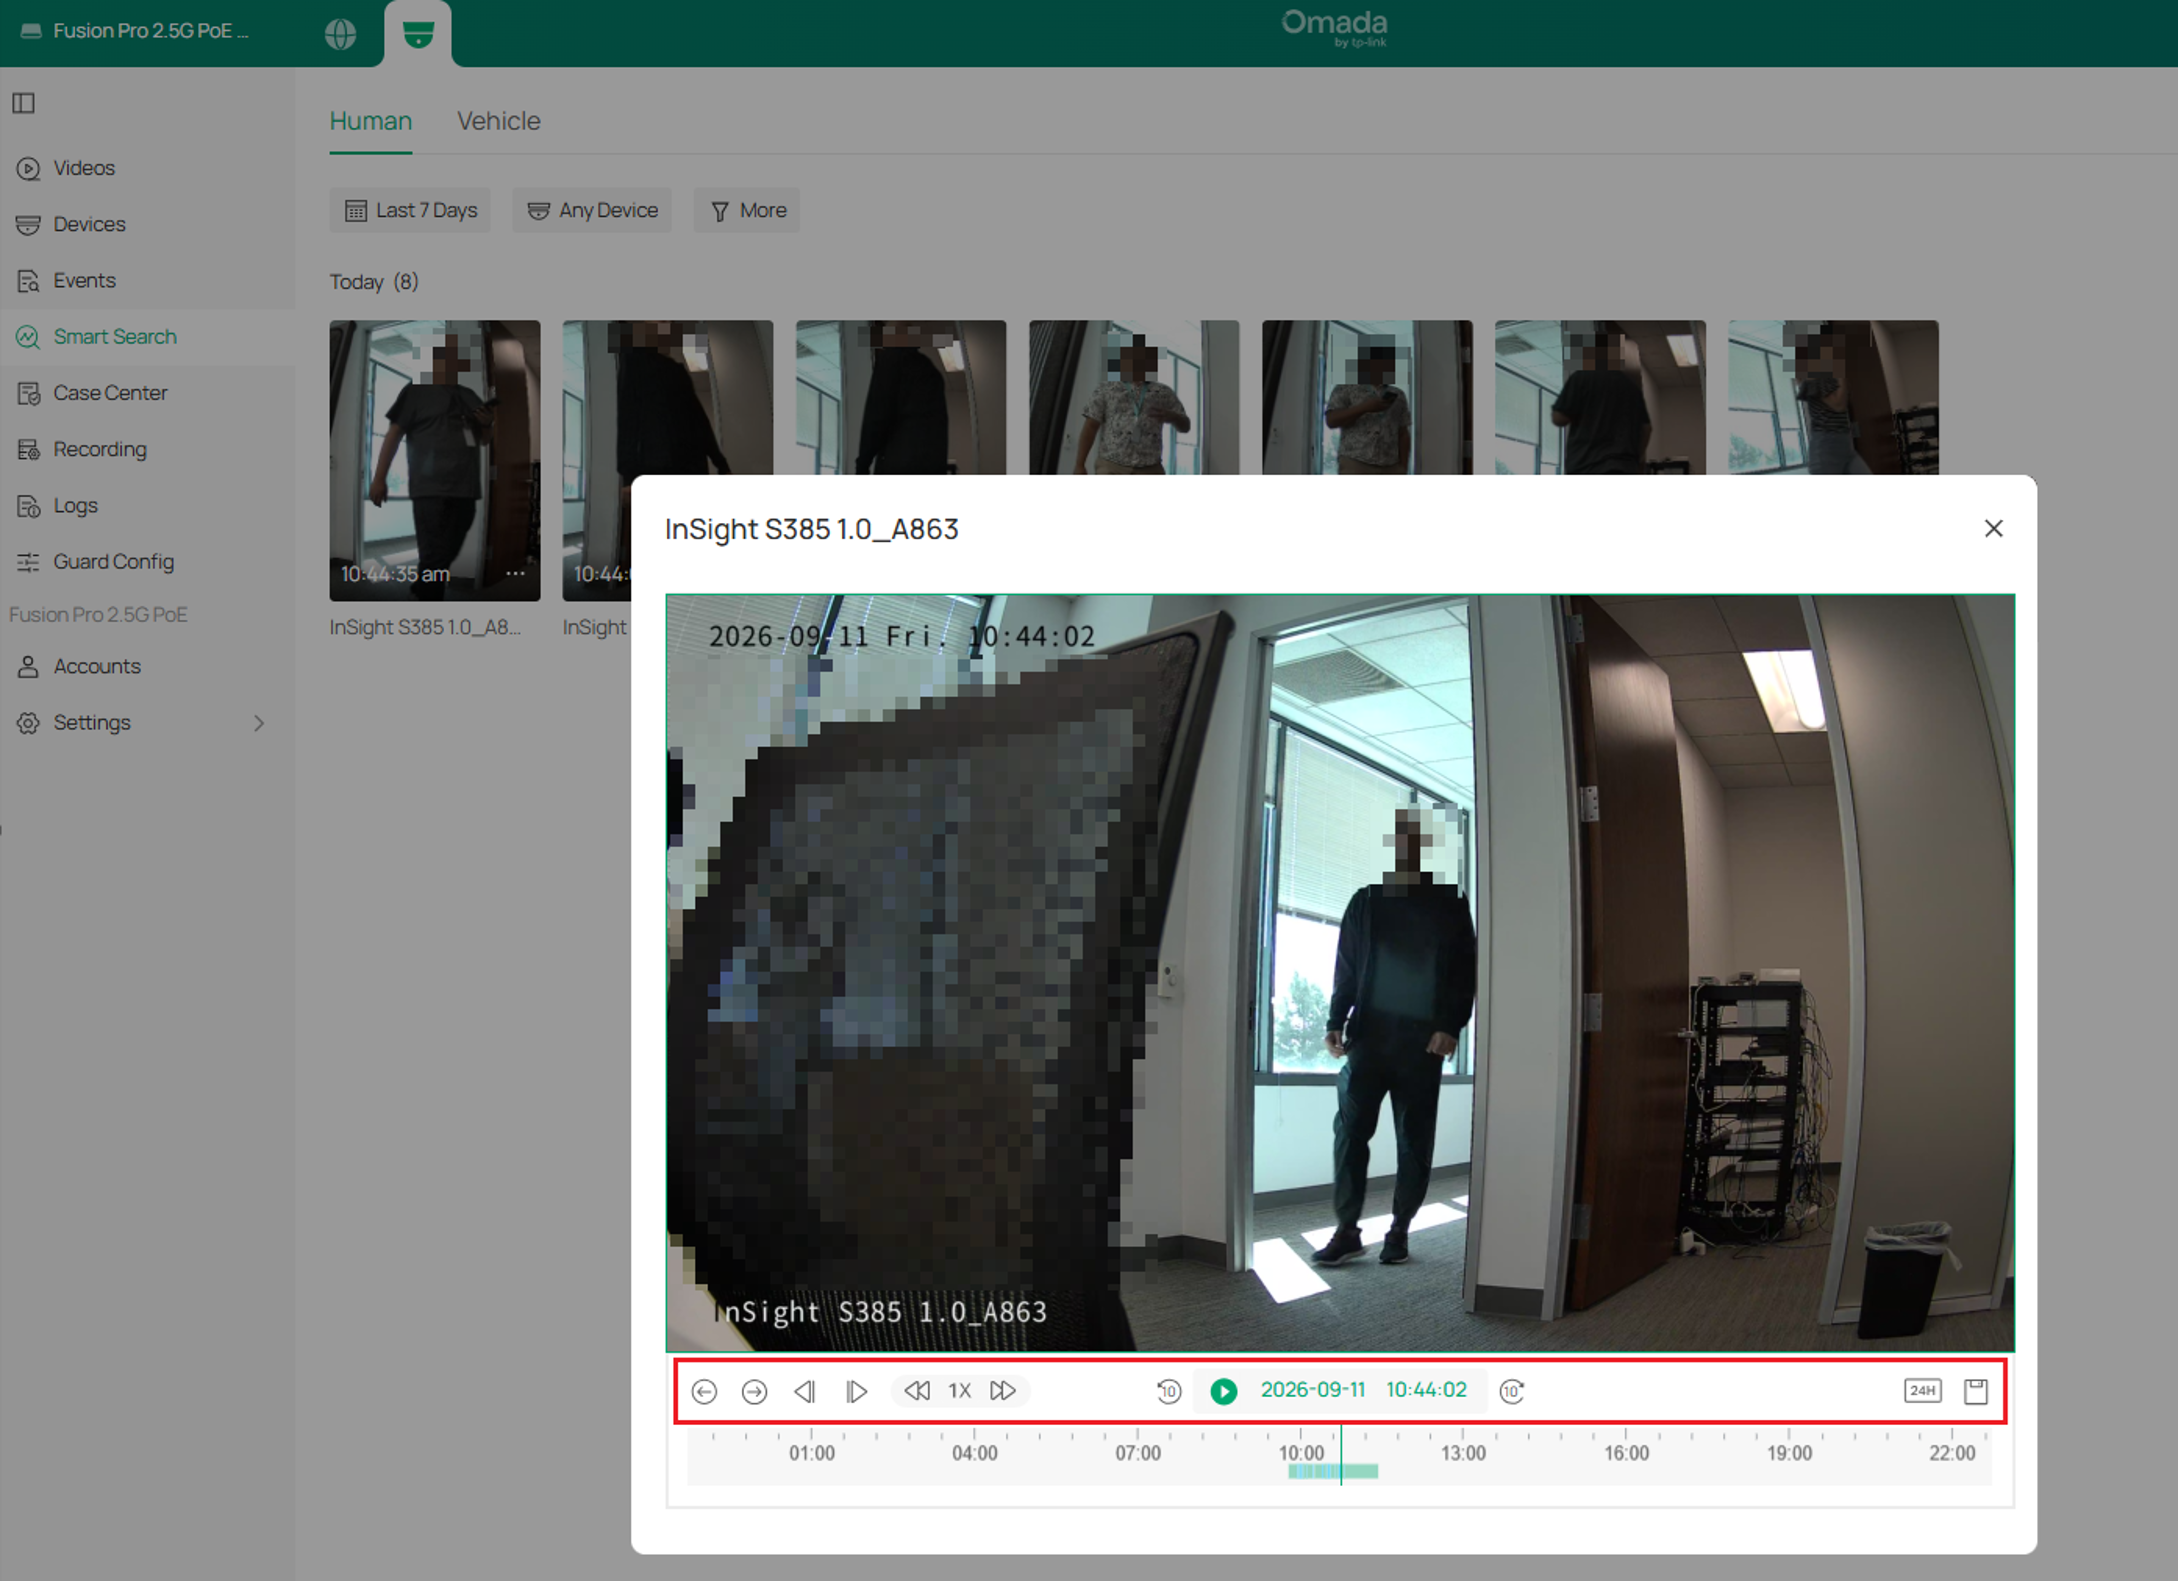
Creating cases
If a detected person or vehicle requires further investigation, the recording can be added to a case.
Step 1. To create a case, hover over the three-dot menu for a Smart Search result and select Add to Case.
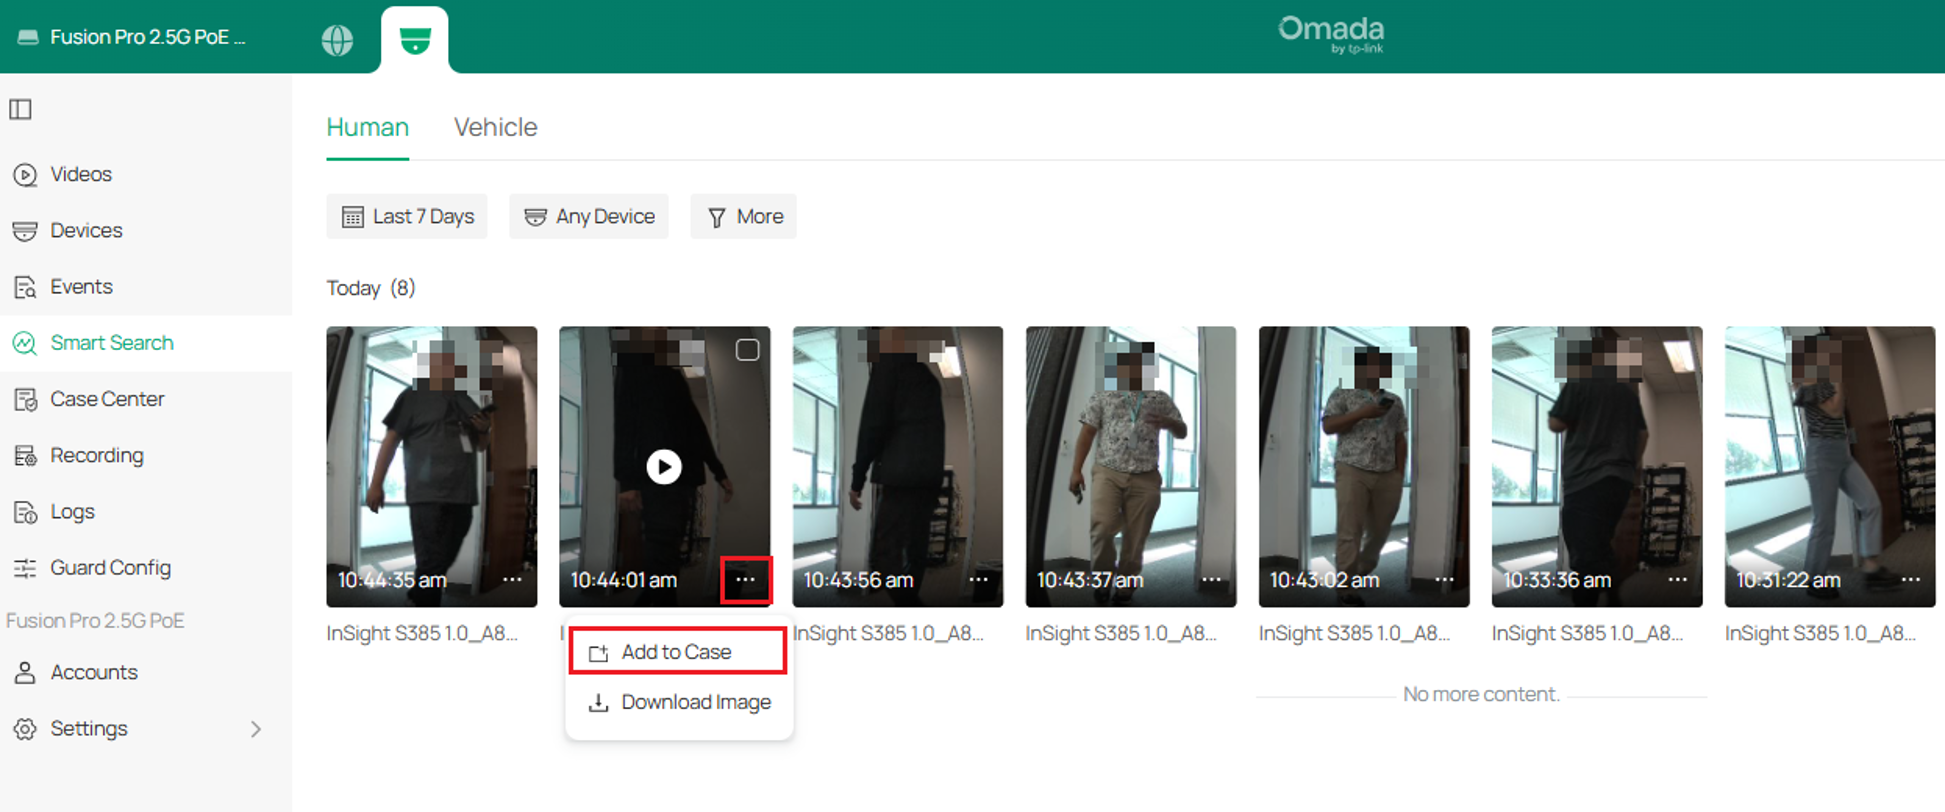
Step 2. The Add to Case dialog box appears. Enter the Video Title and optional Description, then select a case. To create a new case, select Add New Case. Select Add to save the recording to the case.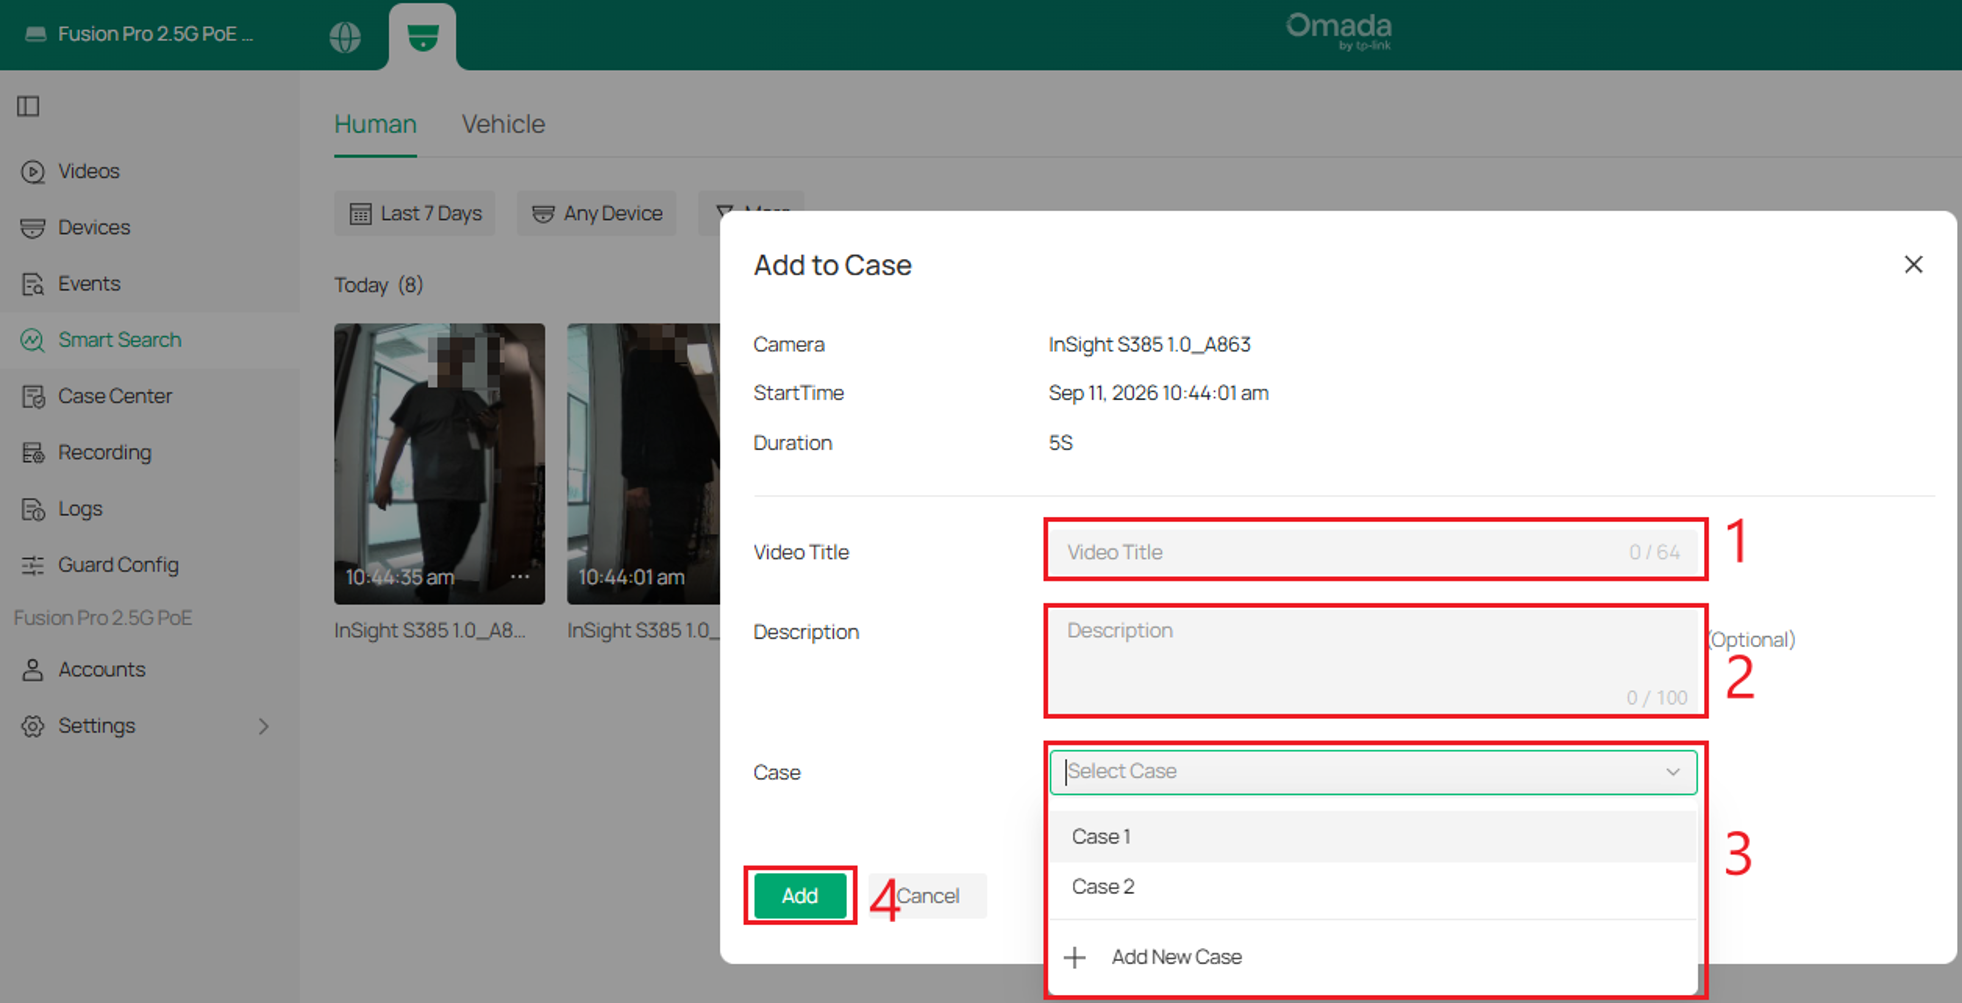
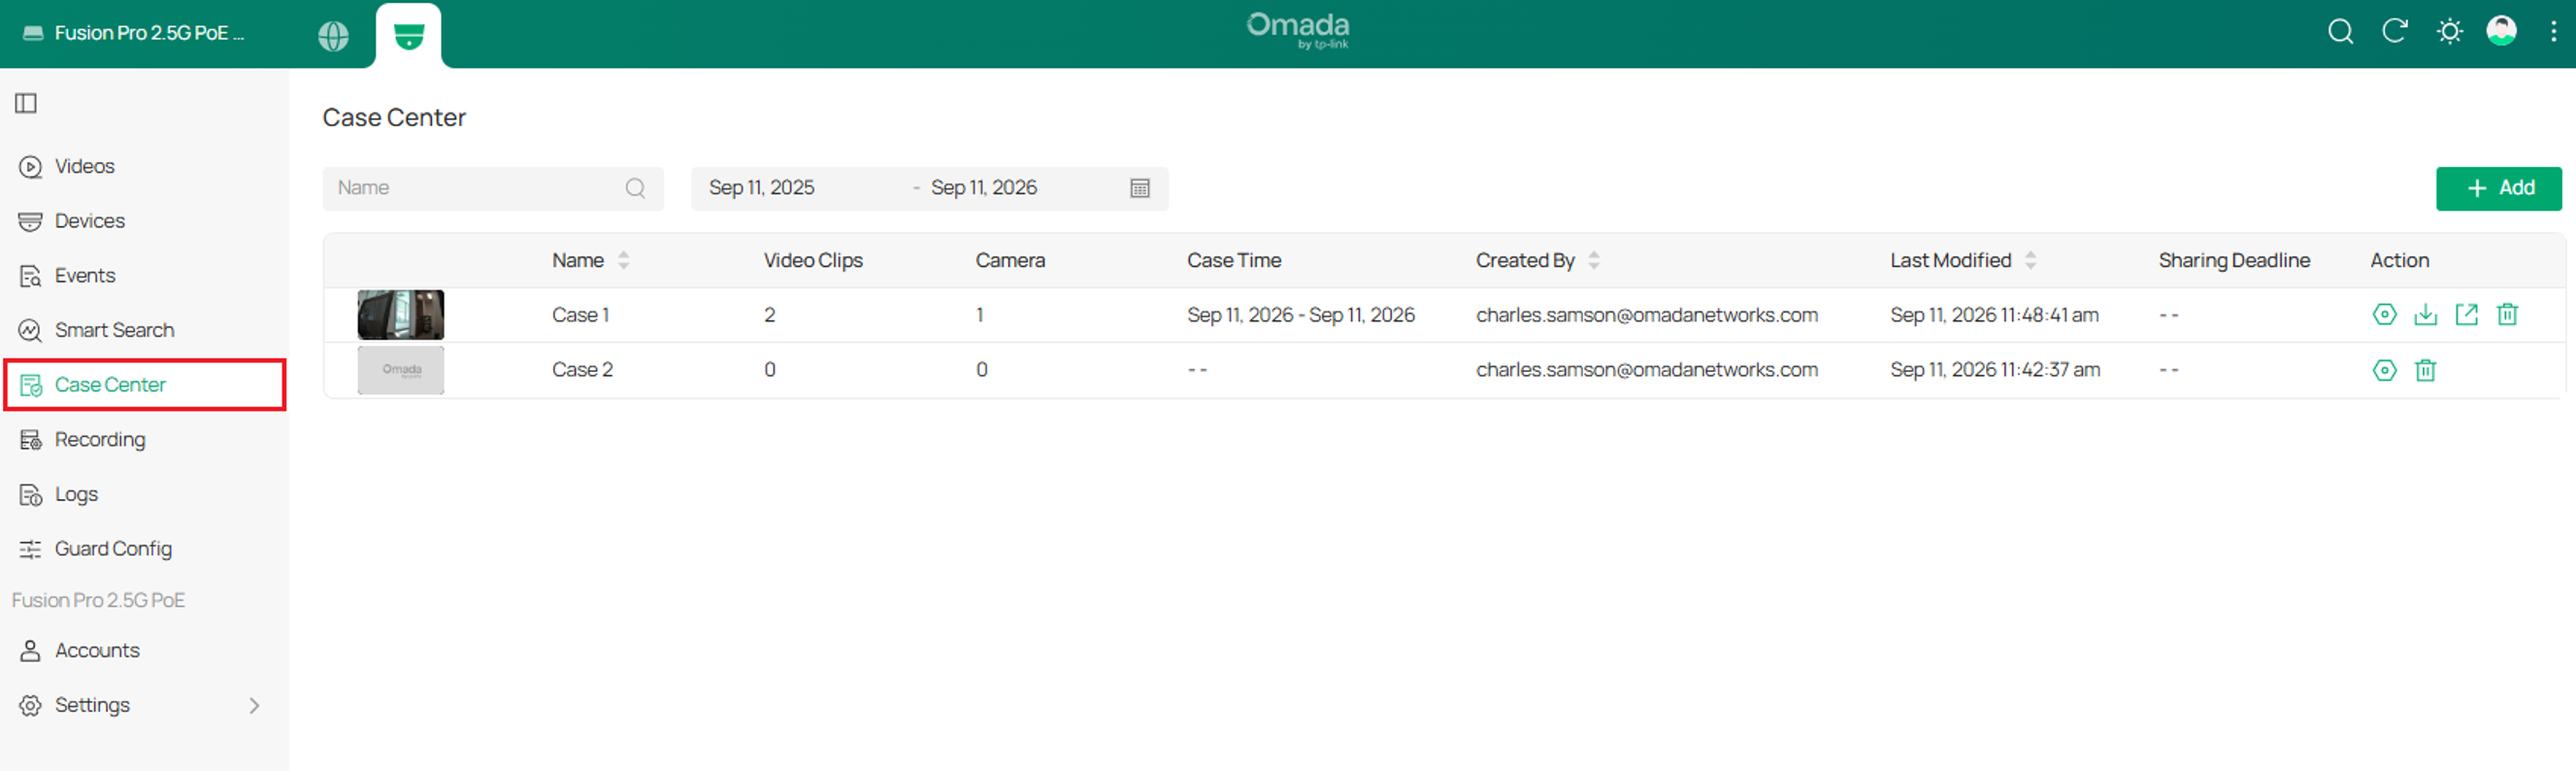
Step 3. To open the Case Center, select Case Center from the menu on the left.
Downloading the thumbnail image
You can download the thumbnail image from a Smart Search result.
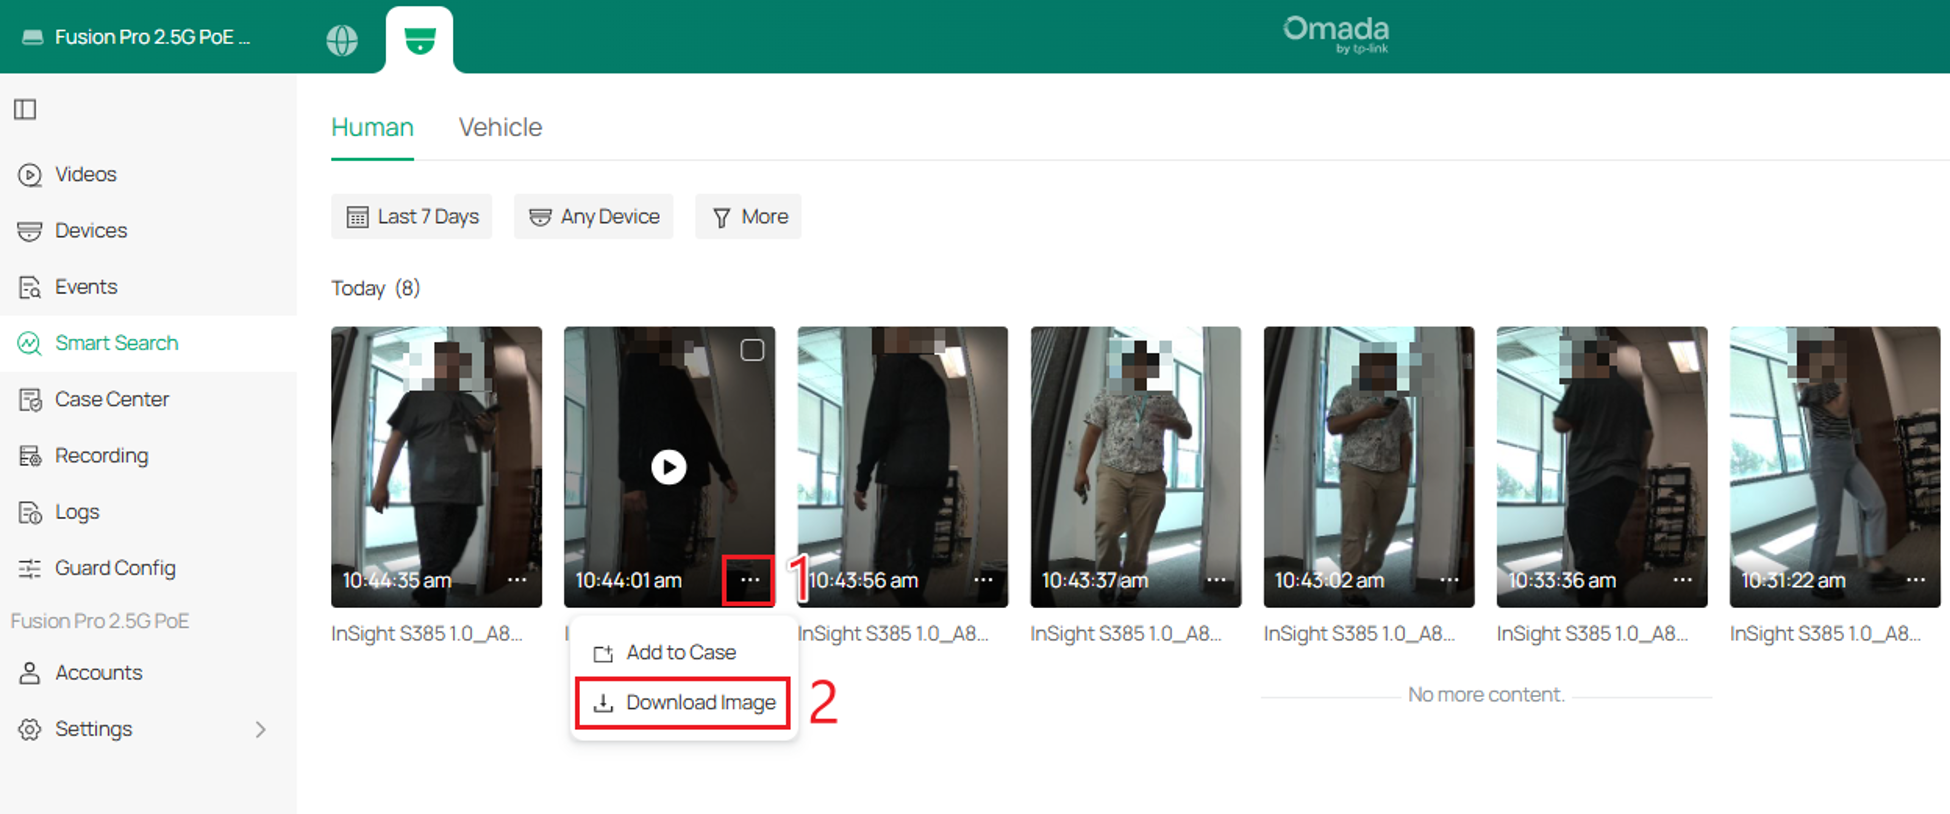
Hover over the three-dot menu for a Smart Search result and select Download Image. The thumbnail is downloaded as a JPG file.
Conclusion
You have now configured Smart Search on the Fusion Pro Series Gateway. You can use Smart Search to locate recorded people and vehicles, apply attribute filters, review recordings, create case files, and download thumbnail images for further investigation.
To learn more about each function and configuration, please visit Support Home to download or check the manual for your product.
QA
Q1: Why is Smart Search not displaying any results?
A1: Ensure Smart Analytics is enabled under Guard Config > Advanced Settings and Object Attribute Analysis is enabled for the IP camera.
Q2: Why do some filtering results not match the specified criteria?
A2: AI-based visual analysis may occasionally misidentify objects or attributes due to factors such as image quality, lighting, viewing angle, or object visibility. It is recommended to review the search results and confirm that they match the intended criteria.
Q3: What should I do if the camera shows Unsupported Firmware?
A3: Update the camera to the latest supported firmware. After the update, the device status should change to Pending so it can be adopted.
Q4: What should I do if the camera status shows Unsupported?
A4: Check whether the camera model supports the required Smart Search and Object Attribute Analysis features.
Q5: Why did the IP camera reboot after I enabled Object Attribute Analysis?
A5: This is expected. The camera reboots after Object Attribute Analysis is enabled and the configuration is applied.
Q6: Can I search Smart Search results from a specific time period?
A6: Yes. Use the Calendar filter to select one of the predefined periods or configure a Custom time period.
Q7: Can I search recordings from only one camera?
A7: Yes. Use the Device filter to select a specific IP camera. The default setting is Any Device.
Q8: Which attributes can I use to filter people?
A8: Human results can be filtered by Gender, Hair, Topwear Type, Topwear Color, Bottomwear Type, and Bottomwear Color.
Q9: Which attributes can I use to filter vehicles?
A9: Vehicle results can be filtered by vehicle type and color. Available vehicle types include Car, SUV, Bus, Micro Bus, and Truck.
Q10: How can I save a Smart Search result to a case?
A10: Open the 3-dot menu for the result and select Add to Case. You can add the recording to an existing case or create a new case.
Q11: How can I download an image from a Smart Search result?
A11: Open the 3-dot menu for the result and select Download Image. The thumbnail will be downloaded as a JPG file.
