


Contents
Requirements
-
Omada Central Standard Controller
-
On-Premises Controller
Introduction
The migration feature enables users to transfer configurations and data from an existing Controller to a new one. It also supports direct migration from an On-Premises Controller to an Omada Central Standard Controller.
Note:
-
Site migration is currently not supported by the Omada Central Standard Controller.
-
The source Controller must be running version V5 or higher to export configurations for migration.
Configuration
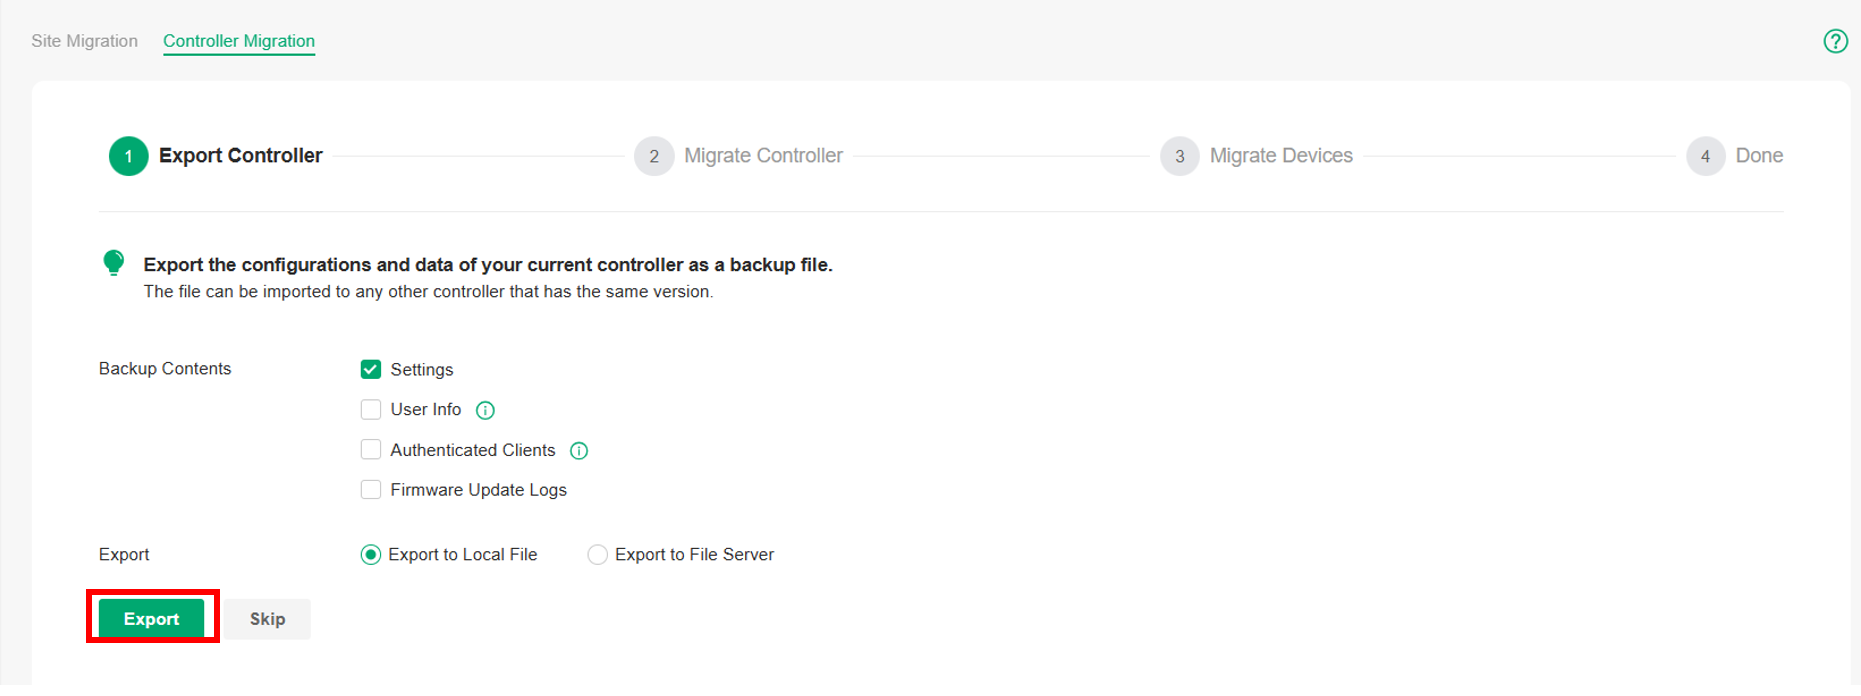
Step 1. Export configurations and Controller data as a backup file.
-
Navigate to Global View > Settings > Migration > Controller Migration, and click Start.
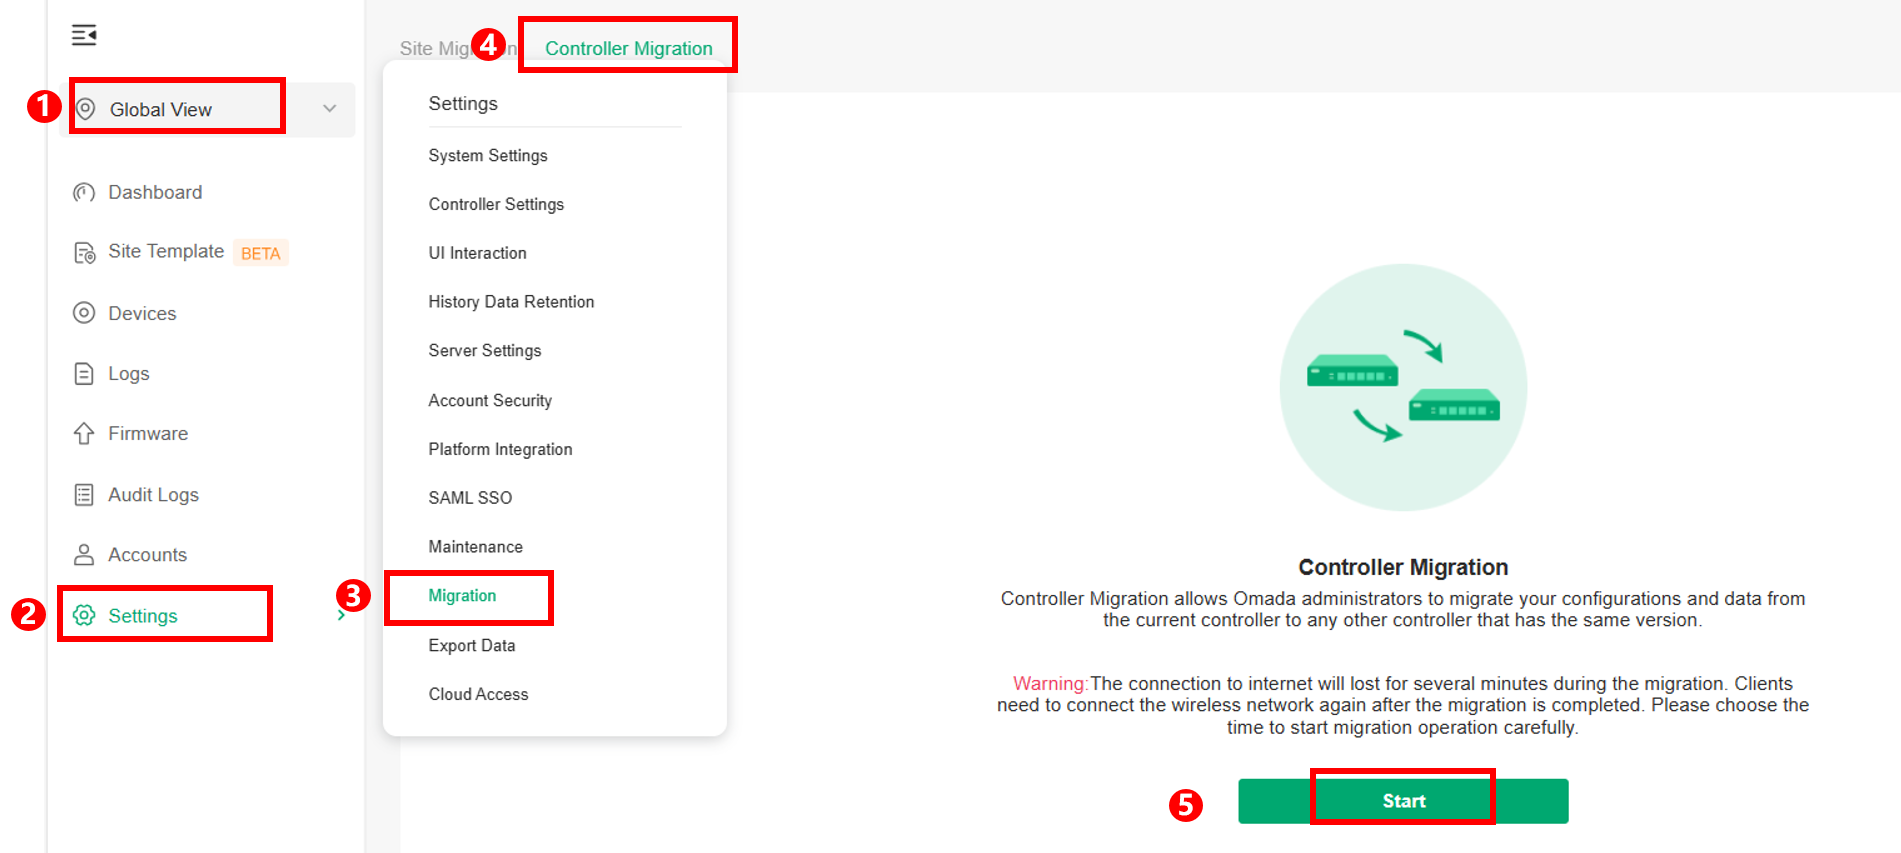
-
Export the current Controller’s backup file. You can select the specific contents to include and choose your preferred export method.
Step 2. Log in to Omada Central, restore the Controller backup, and copy the target organization's URL.
-
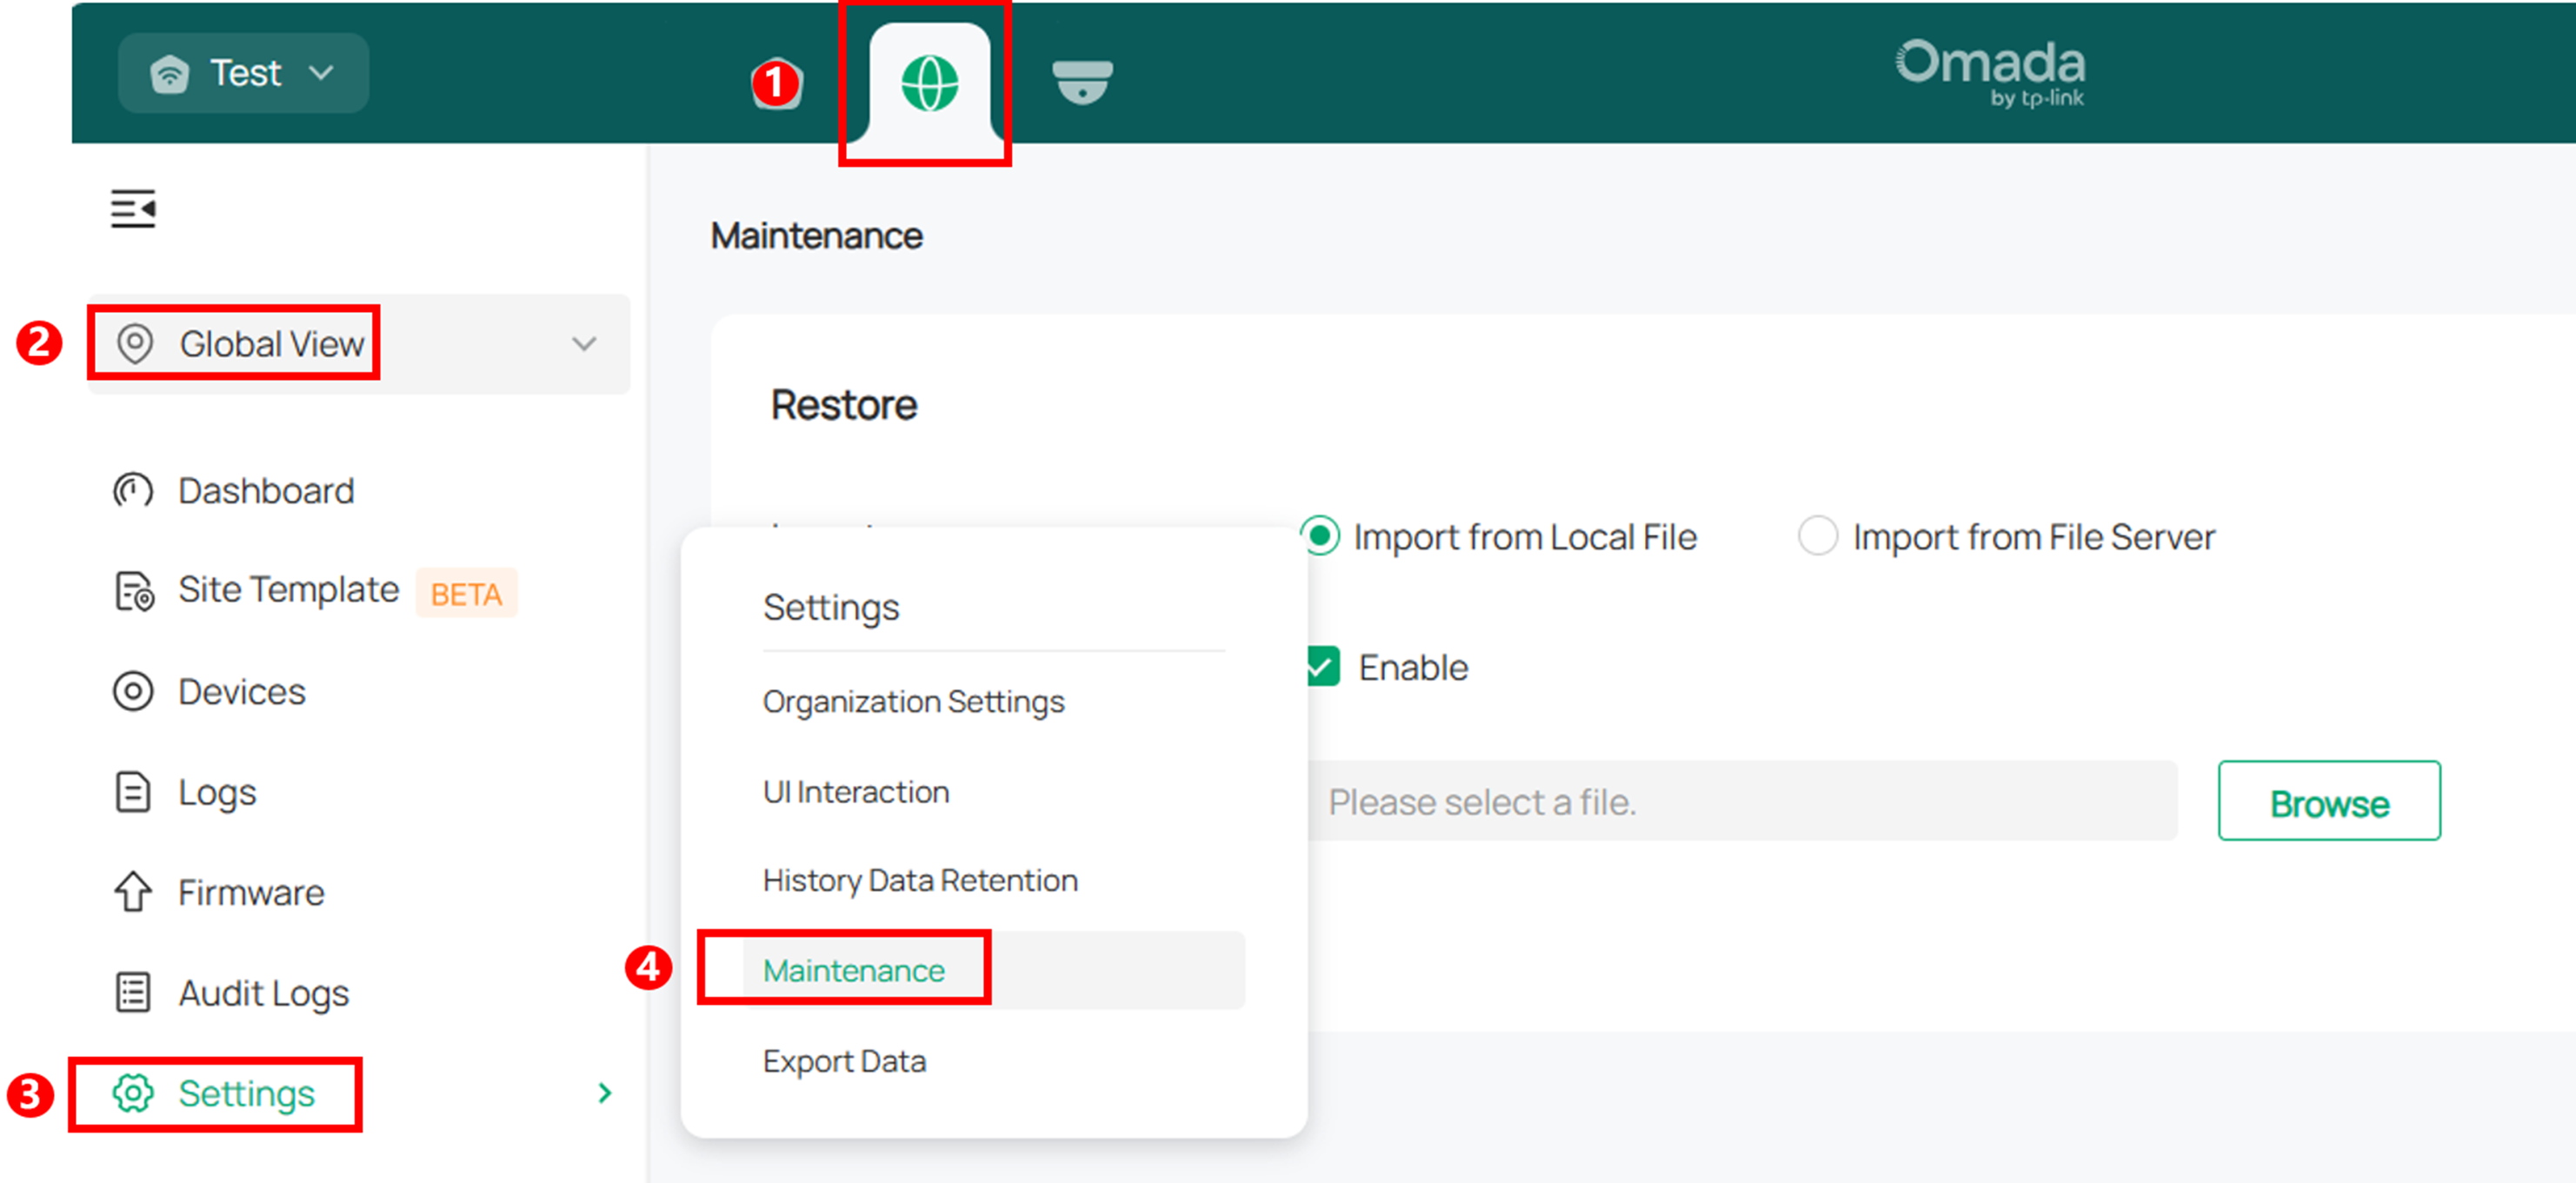
Log in to Omada Central Standard, and create the organization to which you want to migrate your Controller.

-
Enter the organization, then navigate to Omada Network > Global View > Settings > Maintenance, and restore the previously exported backup file.
-
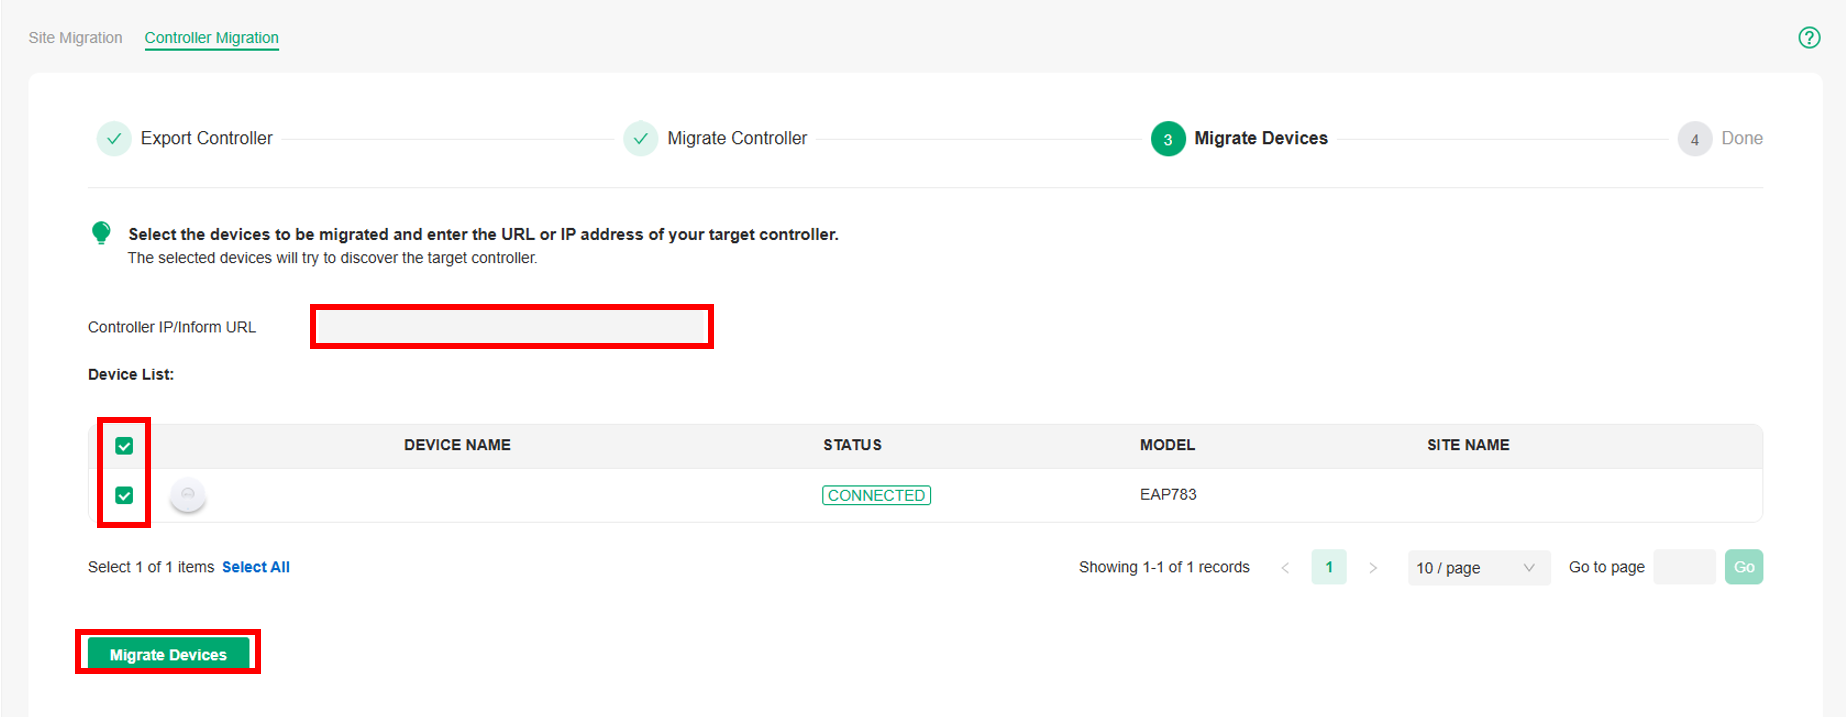
Return to the Manage Organization page, and copy the URL of the target organization as shown below.

Step 3. Migrate devices from the local Controller to Omada Central.
-
After restoring the Controller backup, you can proceed with device migration. Paste the URL copied in Step 2 to specify the target Controller, then select the devices you wish to migrate to Omada Central. Ensure all intended devices are selected before starting the migration.
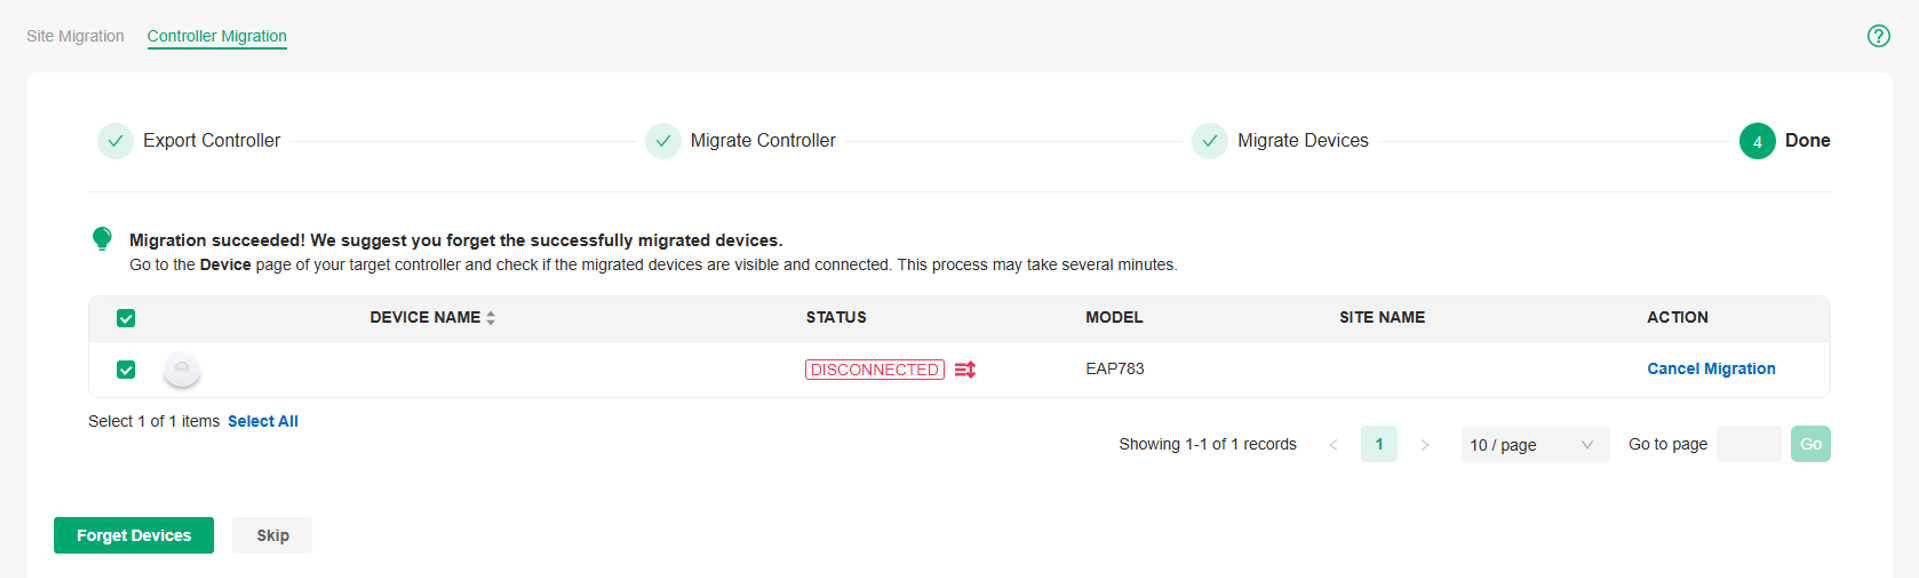
- Once initiated, the migration process may take several minutes, depending on the number of devices. After completion, verify that all migrated devices are successfully adopted and connected to the target Omada Central Controller.
-
If everything is functioning properly, you may forget the devices from the original Controller to finalize the migration, and delete the old Controller if needed.
Conclusion
You have successfully migrated your local Omada Controller to Omada Central Controller now.
Get to know more details of each function and configuration please go to Download Center to download the manual of your product.
