


How to Setup Omada EAP in Standalone Mode


Contents
Configuration via Web GUI by connecting to the SSID
Configuration via Web GUI using a wired computer
Introduction
This FAQ provides guidance on setting up an Omada EAP in Standalone Mode using either the Web GUI or the Omada App. Omada EAPs deliver flexible wireless coverage for small and medium-sized businesses as well as residential environments and can operate independently or under centralized management via an Omada Controller.
For advanced configuration options, please refer to the EAP User Guide available in the Document center on the TP-Link official website: Documents | Omada Network Support. If you intend to deploy and manage multiple Omada devices centrally, consult the documentation for Getting started with an Omada Controller.
Note: Standalone Mode is unavailable while the EAP is managed by a controller. To restore Standalone Mode, remove the EAP from the controller or reset the device.
Requirements
- Omada EAP
- A mobile device with Omada App installed or a PC
Configuration
This FAQ is divided into three sections. Please navigate to the section which applies in your case:
Configuration via Omada App
Configuration via Web GUI by connecting to the SSID
Configuration via Web GUI using a wired computer
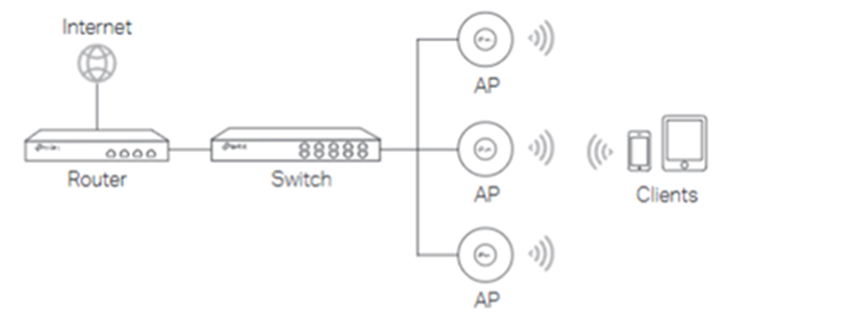
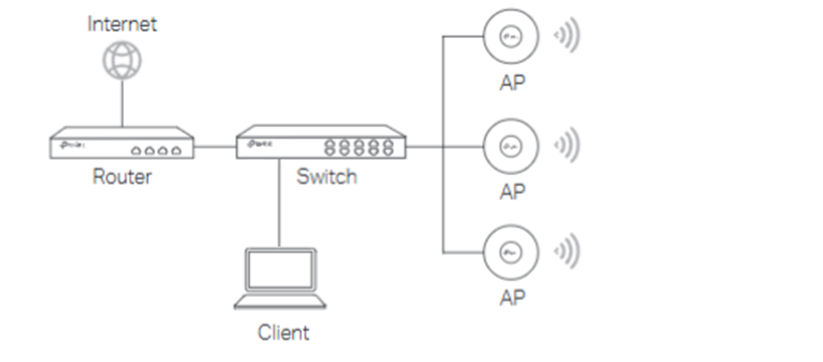
The Omada EAP should be connected to a Router, Switch or PoE Switch. Connecting the EAP to a Router or non-PoE Switch will require another power source, such as a 12v DC Adapter or a PoE injector. Please consult the product specification sheet for a compatible power source. When connected to a compatible PoE Switch, the EAP will send and receive both data and power using a single RJ45 cable connected to the PoE Switch.
Configuration via Omada App
The Omada App is designed for quick configuration of common settings. For advanced configuration options, please use the EAP’s web interface or manage the device in Controller Mode.
Note: This article uses the Omada App for Android v5.0 for demonstration purposes.
Step 1. Download and install the TP-Link Omada App from the App Store or Google Play.

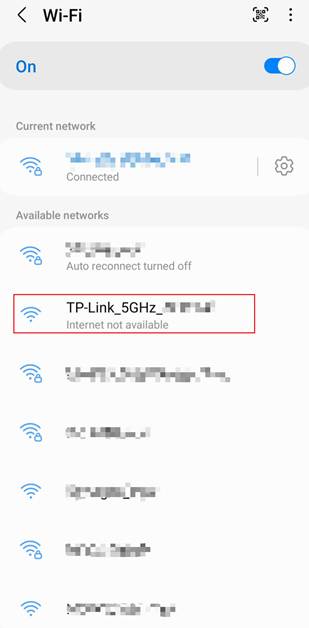
Step 2. Connect your mobile device to one of the default SSIDs listed on the label on the underside of the EAP. The SSID will appear as TP-Link_ 2.4G/5G_xxxx or Omada_2.4G/5G_xxxx.
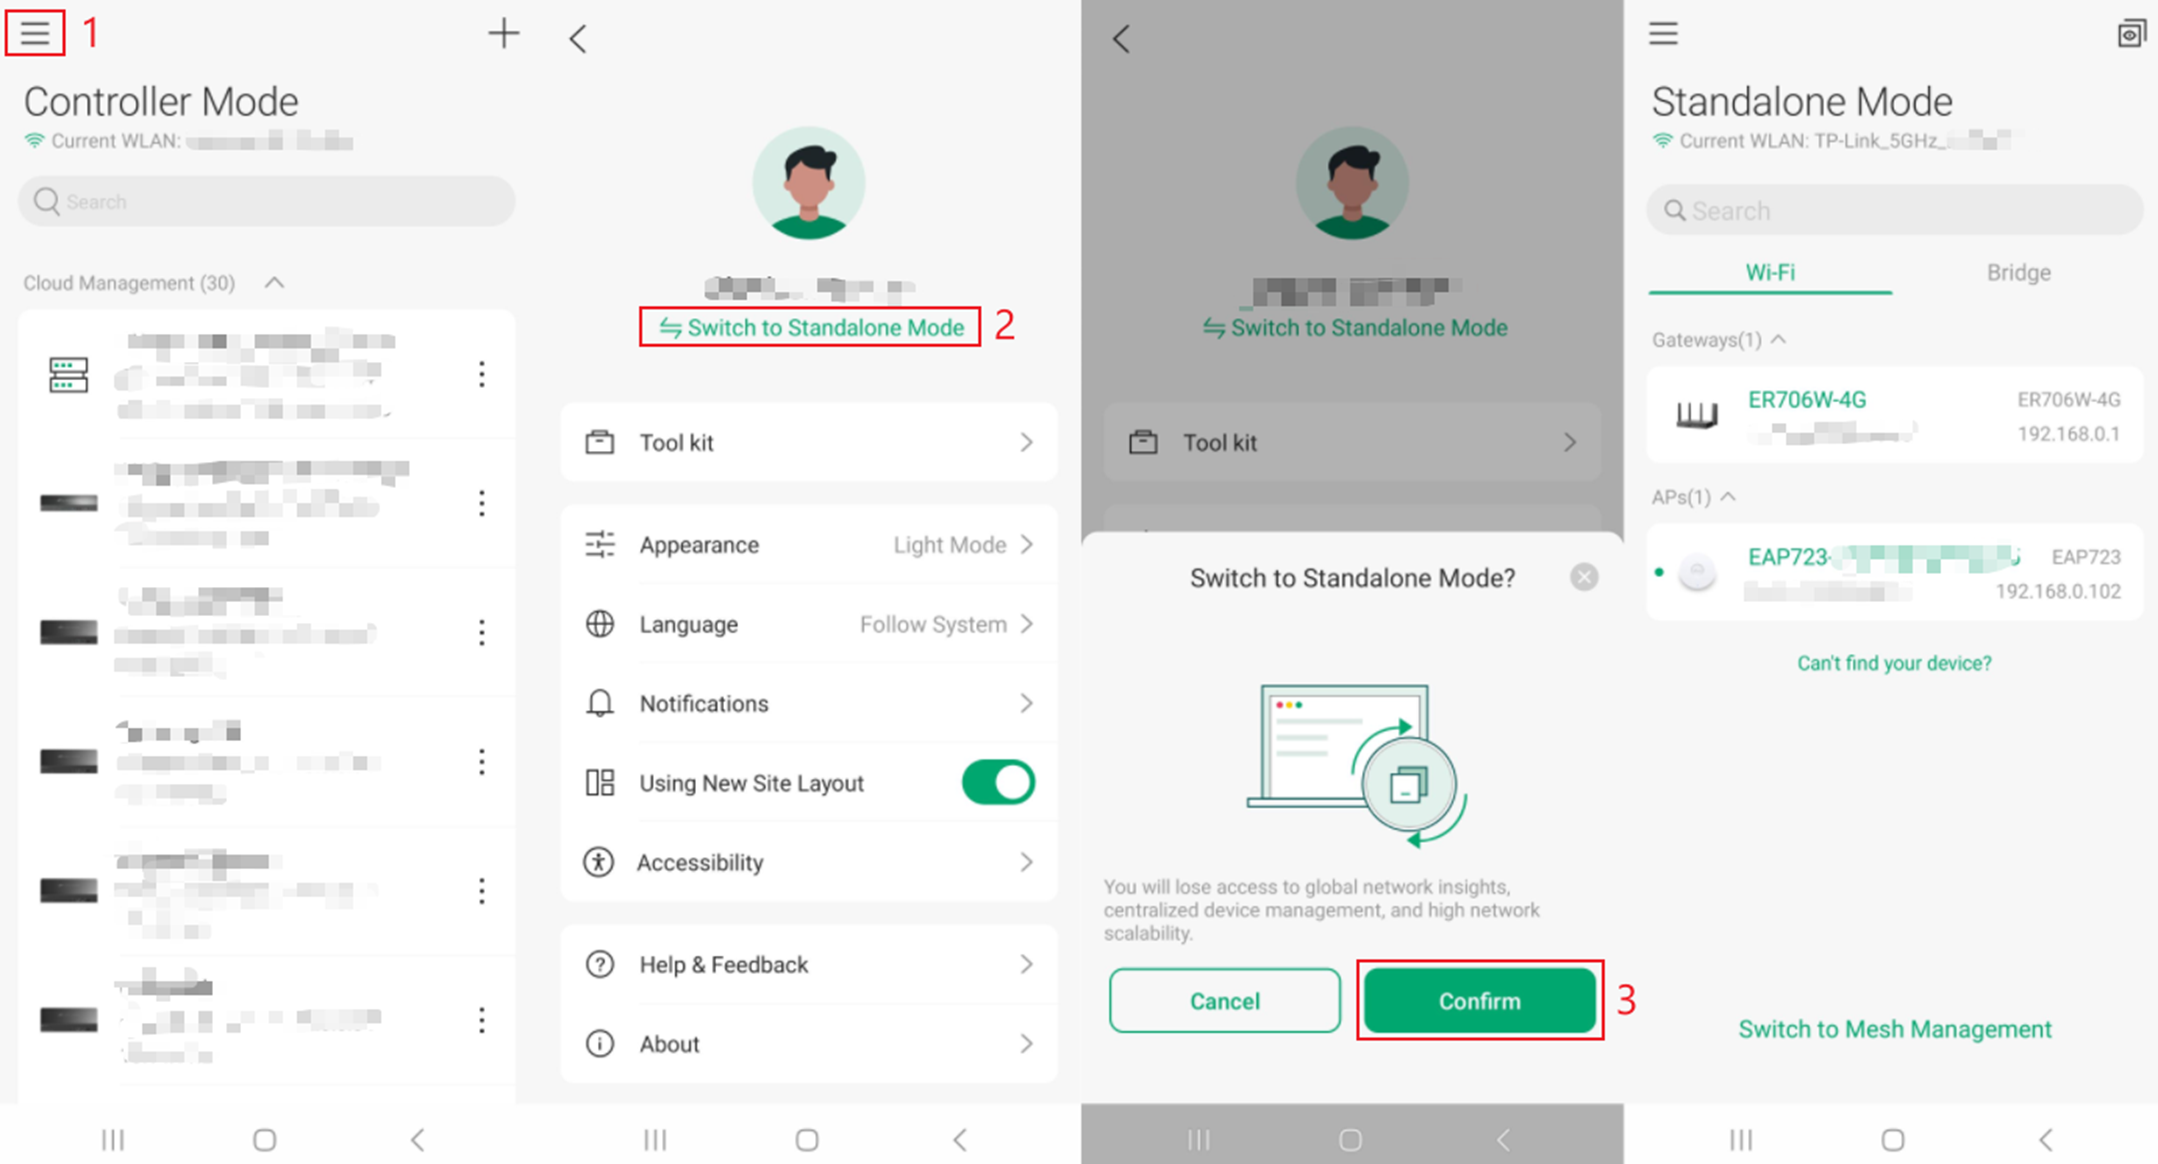
Step 3. Open the Omada App, go to the Standalone Mode page, and wait for the EAP to appear.
To navigate to Standalone Mode from Controller Mode, tap on the 3-line bar menu, select Switch to Standalone Mode. Tap Confirm. You are now in Standalone Mode. The EAP should be displayed under Standalone Mode.
Step 4. Tap on the EAP and follow the app instructions to complete the initial setup.
Set up a new Device Username and Password, tap Next. In Wireless Basic Settings, configure the Wi-Fi name (SSID) and a Password. Enable or disable Wi-Fi Bands here. Tap Next. The Summary screen is a summary of Setup and Wireless Basic Settings. Tap Confirm if you are satisfied with the configuration.

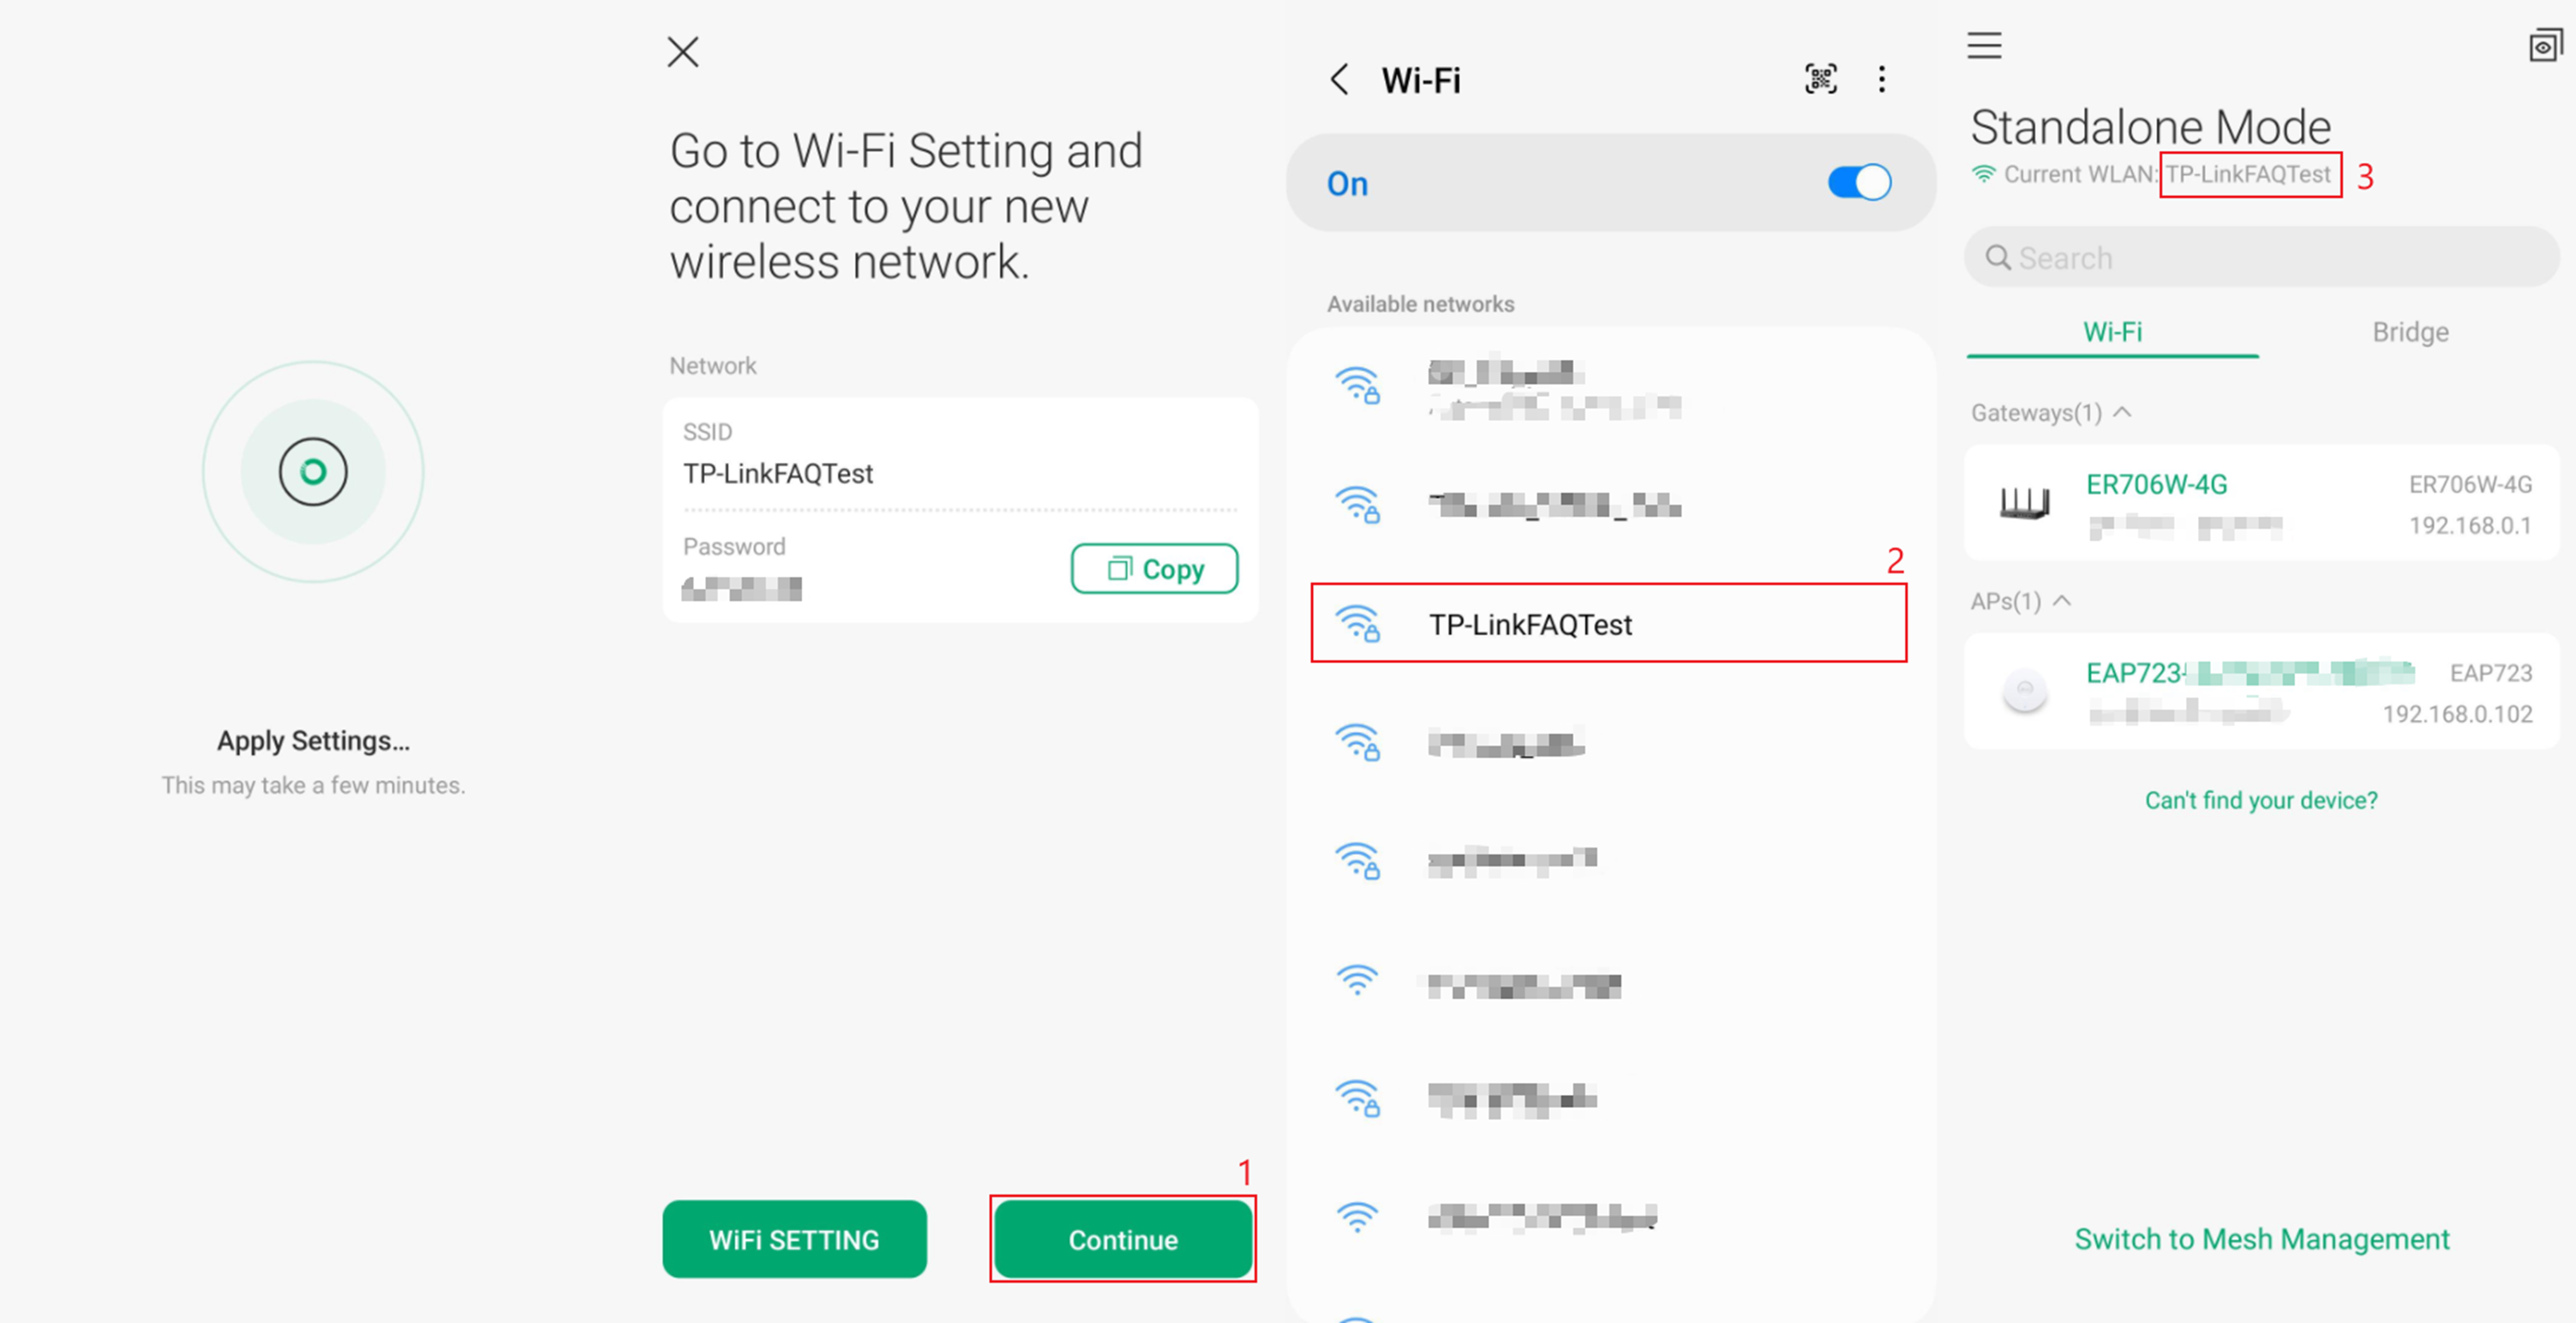
Step 5. Apply settings, and connect to the new SSID to manage the EAP on Omada App.
An Apply Settings screen will appear, please allow a few minutes for this process to be completed. A page will appear notifying of the new configuration, with the user set SSID and Password. Go to your phone’s Wi-Fi settings and connect to this new SSID using the Password. Wi-Fi is now configured. Checking within the TP-Link Omada App, the Current WLAN will display the new Wi-Fi SSID. For further configuration settings, tap on the EAP.
Configuration via Web GUI by connecting to the SSID
This section describes how to configure an EAP wirelessly in Standalone Mode. By connecting directly to the EAP’s SSID and accessing its web management interface, you can complete both initial setup and advanced configuration without using a controller.

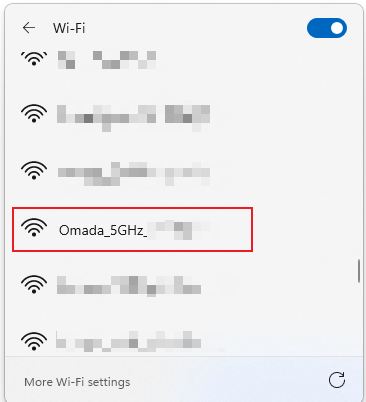
Step 1. Connect to the SSID of the EAP.
Connect your device to one of the default SSIDs listed on the label on the underside of the EAP. The SSID will appear as TP-Link_ 2.4G/5G_xxxx or Omada_ 2.4G/5G_xxxx.
Note: Clients using IPv6 addresses cannot log in to the EAP via the domain name, as Omada EAPs do not currently support translating domain names to IPv6 addresses. If your device is using IPv6, please adjust its network settings to obtain an IPv4 address and try again.
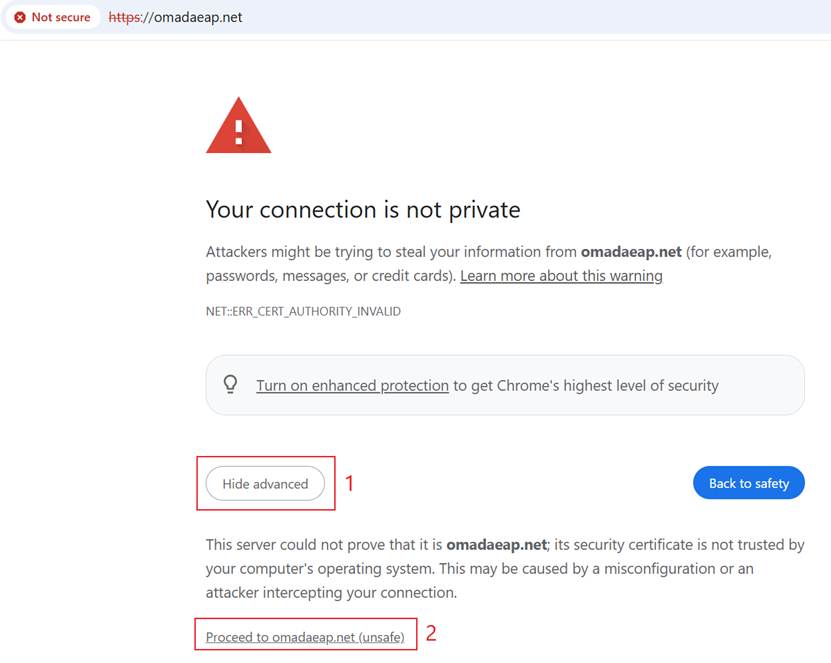
Step 2. Launch a web browser and enter the URL shown on the device label (https://tplinkeap.net or https://omadaeap.net).
A security warning page may appear. Click Advanced, then select Proceed to continue.
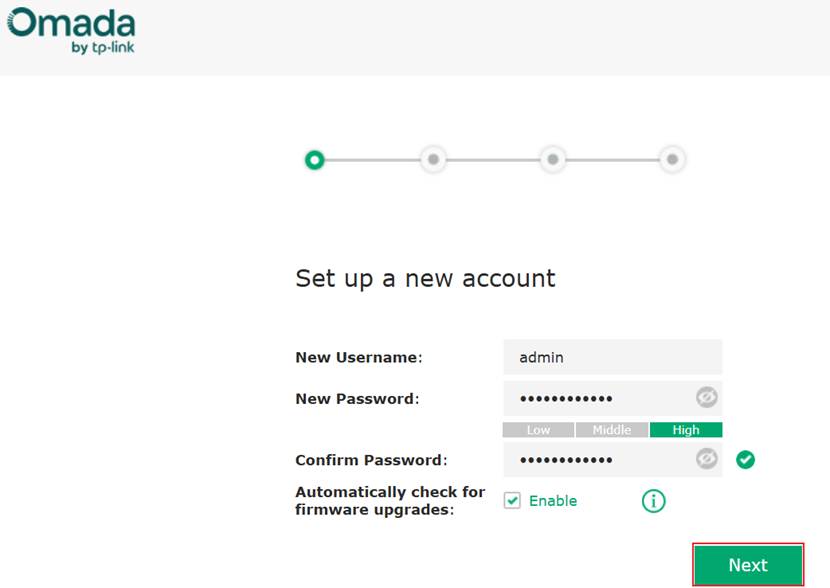
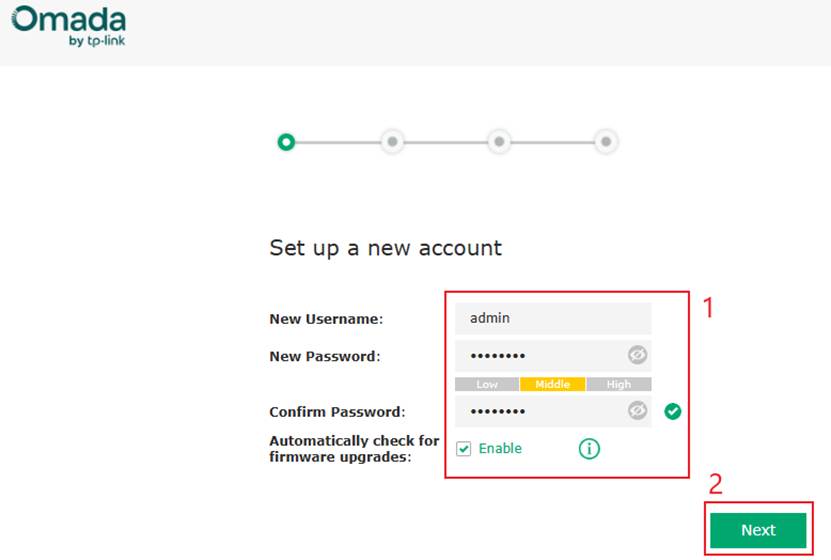
Step 3. Configure a new Username and Password. Click Next.
Note: If you are using an older version device, a login screen may appear instead. Use admin for both the username and password to log in. You will then be prompted to change the username and password.
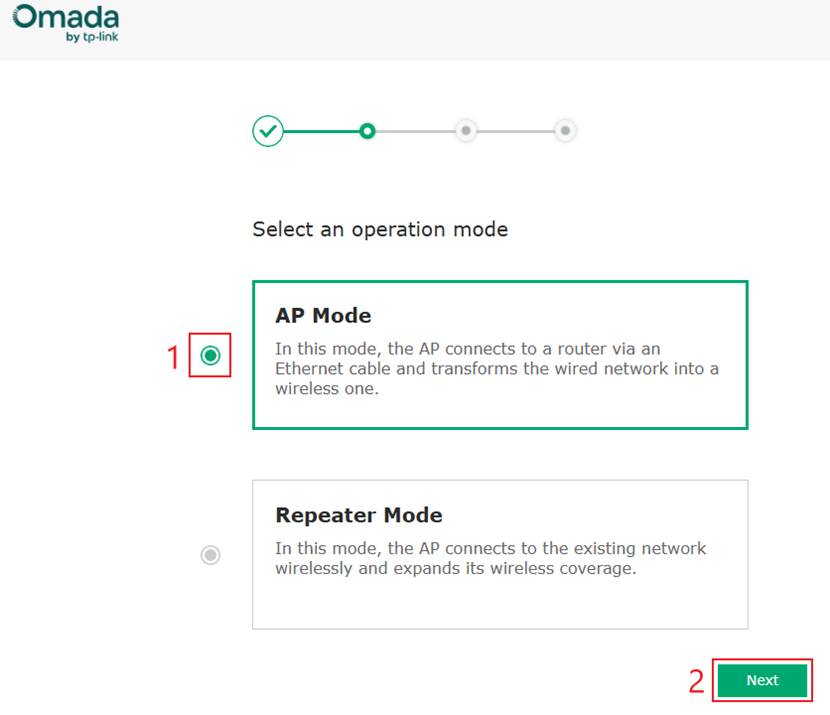
Step 4. Mode selection
Some EAP devices have multiple operating modes. If this option appears, select AP Mode, then click Next.
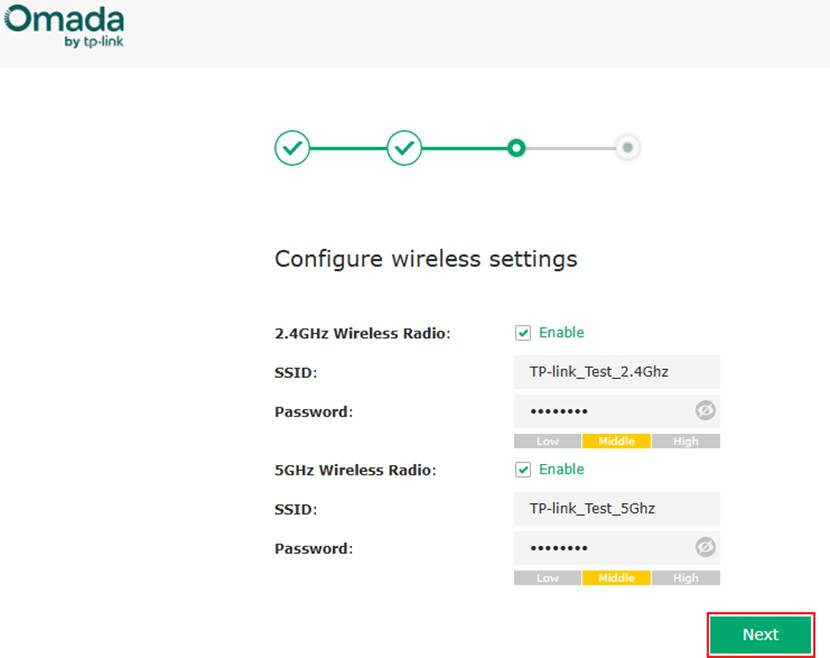
Step 5. Configure Wireless Settings
Configure the new SSID names and their respective passwords, then click Next. The EAP will apply the settings, and the new SSIDs will become available for connection. Please allow up to one minute for the configuration to take effect.

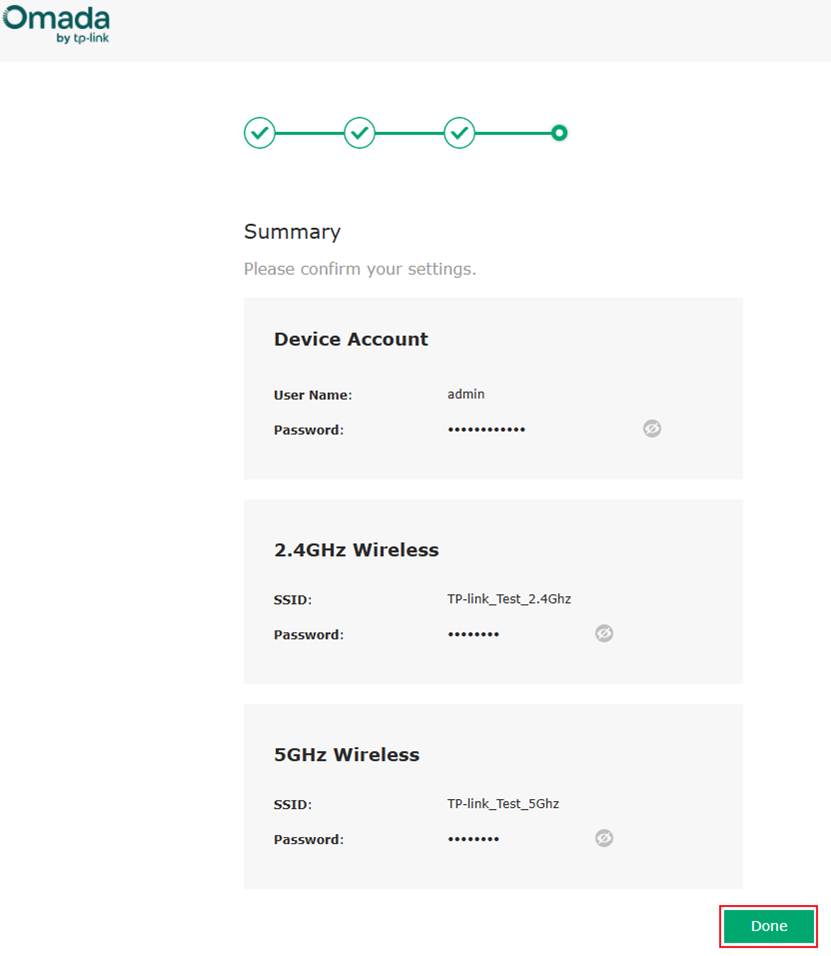
Step 6. A Summary message will appear. Click on Done.

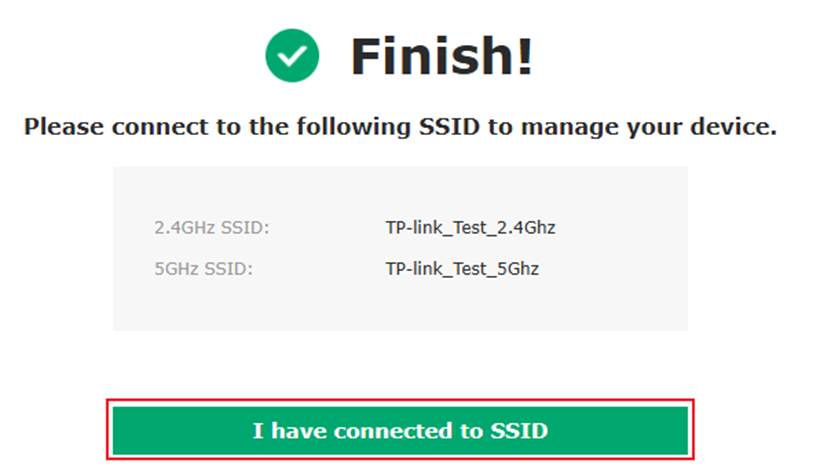
Step 7. Connect to one of the SSIDs then click, I have connected to SSID.
Step 8. Further configuration.
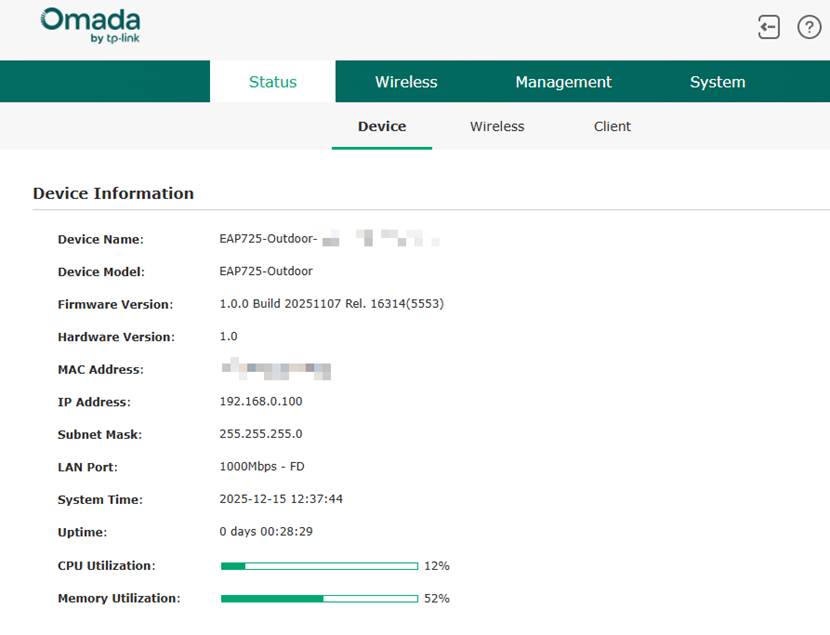
You will now be within the Web GUI of the AP. You are now able to make further configuration changes according to your needs.

Configuration via Web GUI using a wired computer
This section describes how to configure an EAP in Standalone Mode using the web management interface. By connecting a computer to the same router/switch and subnet as the EAP, you can access the EAP’s web GUI to complete both initial setup and advanced configuration without using a controller.
Step 1. Obtain the IP address of the Omada EAP device.
Using the router’s DHCP client list is a common and recommended method. For step by step instructions, along with alternative approaches, please refer to the following guide: How to find IP address of my Omada Devices
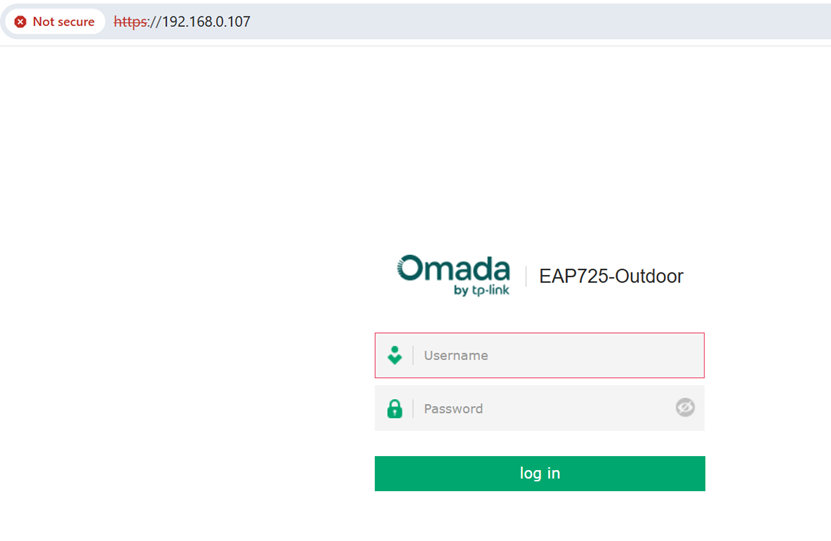
Step 2. Navigate to the Web GUI of the EAP.
Using the IP address noted in the step above, type this into a web browser window. In this example it was 192.168.0.107. If you receive a warning, click on Advanced and Proceed. Type in a Username and Password, by default it will be admin / admin.
Note: If your network doesn’t have a DHCP server, ensure your PC is using IP address 192.168.0.X, then enter https://192.168.0.254 instead to access the AP’s web page.
Step 3. Configure a new Username and Password. Click Next.
Step 4. Mode selection
Some EAP devices have multiple operating modes. If this option appears, select AP Mode, then click Next.

Step 5. Configure new SSID names and their respective passwords. Click Next. The EAP will apply these configurations and the new SSID names will be available to connect to. Please wait for a minute while the EAP applies these configurations.
Step 6. A Summary message will appear. Click on Done.
Step 7. Click on I have connected to SSID.

Step 8. You will now be directed to the Web GUI of the configured EAP. You are now able to make further configuration changes according to your needs.
Conclusion
The Omada EAP can be set up easily in Standalone Mode using either the Omada App or the Web GUI. Once powered and connected to the network, the EAP can be accessed for initial configuration and is ready for wireless use after applying your chosen settings. Further adjustments can be made at any time through the Web GUI or the App.
Get to know more details of each function and configuration please go to Download Center to download the manual of your product.
QA
Q1: Why am I seeing a warning page when accessing the EAP or Router interface?
A1: This is expected when accessing a local device that uses a self-signed certificate. You can proceed because these connections take place within your local network and are safe.
Q2: Why am I disconnected from Wi-Fi during App based setup?
A2: The EAP reboots when applying the new SSID. This is expected. Reconnect using the new Wi-Fi name and password.
Q3: Do I need a TP-Link account to set up an EAP using Omada App in Standalone Mode?
A3: No. A TP-Link account is only needed for Cloud based controllers or remote access.
Q4: What if my Omada App is already in Standalone Mode and I do not have a TP-Link ID?
A4: A TP-Link ID is only required for Cloud access. Standalone Mode does not require an account.
Q5: What if my Router does not use DHCP and my network uses static IP addressing?
A5: If your network does not have a DHCP server, configure your PC with a static IP address in the 192.168.0.X range. Then, from the same subnet as the EAP, enter https://192.168.0.254 in a web browser to access the AP’s web management page and complete the initial setup.
Q6: Tplinkeap.net or Omadaeap.net is not working. How can I access the EAP?
A6: Please follow the steps below to troubleshoot access to the EAP:
- Ensure your PC, phone, or tablet is connected to the EAP’s Wi-Fi network. Wired clients cannot access the EAP’s management page using the domain name.
- Verify that your client has obtained an IPv4 address from the DHCP server.
Clients using IPv6 addresses cannot log in to the EAP via the domain name, as Omada EAPs do not currently support translating domain names to IPv6 addresses. If your device is using IPv6, adjust its network settings to obtain an IPv4 address and try again. - Confirm that you are entering the correct domain name:
https://tplinkeap.net
Note: Some newer models use https://omadaeap.net. Please refer to the device label on the back of the EAP for the correct domain. - Try accessing the page using an incognito or private browser window, or use a different web browser.
For more details, please refer to the following guide: What can I do if I fail to log in to the EAP via the domain name?
If you are still unable to access the EAP using the domain name, try logging in directly using the EAP’s IP address.
Q7: Can I Switch an EAP from Standalone Mode to Controller Mode later?
A7: Yes. The device can be adopted by an Omada Controller at any time. This will override existing Standalone settings.
Q8: Why does the Omada App not display the EAP when I am connected to the SSID?
A8: Confirm that your device is connected to the SSID. Check your Omada App permissions. It is possible the app was not granted permission to recognize the EAP.
Q9: iPhone cannot connect to the SSID. The iPhone attempts to connect to the SSID for an extended period and then fails. What is wrong?
A9: Change the IP Address of the iPhone to static and choose an IP Address within the same subnet as the network and ensure DNS is accessible. This should allow the iPhone to connect to the SSID.
Q10: Why does the newly purchased prototype connect to the external network normally after being powered on, but wireless clients are unable to access the Internet after connecting?
A10: With the new security features introduced in the Omada 6.1 platform software, the default factory SSID is unencrypted and has low security. This SSID is intended only for EAP configuration and does not provide Internet access. Please connect to the encrypted SSID created during Quick Setup to access the Internet.
Q11: Why does the wireless SSID disappear after 2 hours of power-on?
A11: This is a new security feature introduced in the Omada controller v6.1. In the factory-default state, the default SSID is unencrypted and provides low security. It is intended only for initial EAP configuration. To mitigate security risks, the SSID stops broadcasting its beacon after 2 hours. Please use a wired client to complete Quick Setup for the EAP. Once configured, the wireless network can be used normally.
