


How to configure Jumbo Frame on Omada Switch


Contents
Objective
This article describes how to configure the jumbo frame of Omada switch through the Omada Controller v6 and standalone page.
Requirements
- Omada Campus/Aggregation/Access Max/Access Pro/Access Plus/Access/Agile switches
- Omada Controller (Software Controller / Hardware Controller / Cloud-Based Controller, V5.9 and above)
Introduction
In the traditional Ethernet standard, a frame's maximum length is limited to 1518 bytes. However, as network speed increases, this limitation may lead to insufficient utilization of network bandwidth and reduced processing efficiency, especially in a Gigabit Ethernet environment. In order to solve this problem, Jumbo Frame technology came into being.
Configuration
In Controller Mode
Here uses Controller v6 as the demonstration.
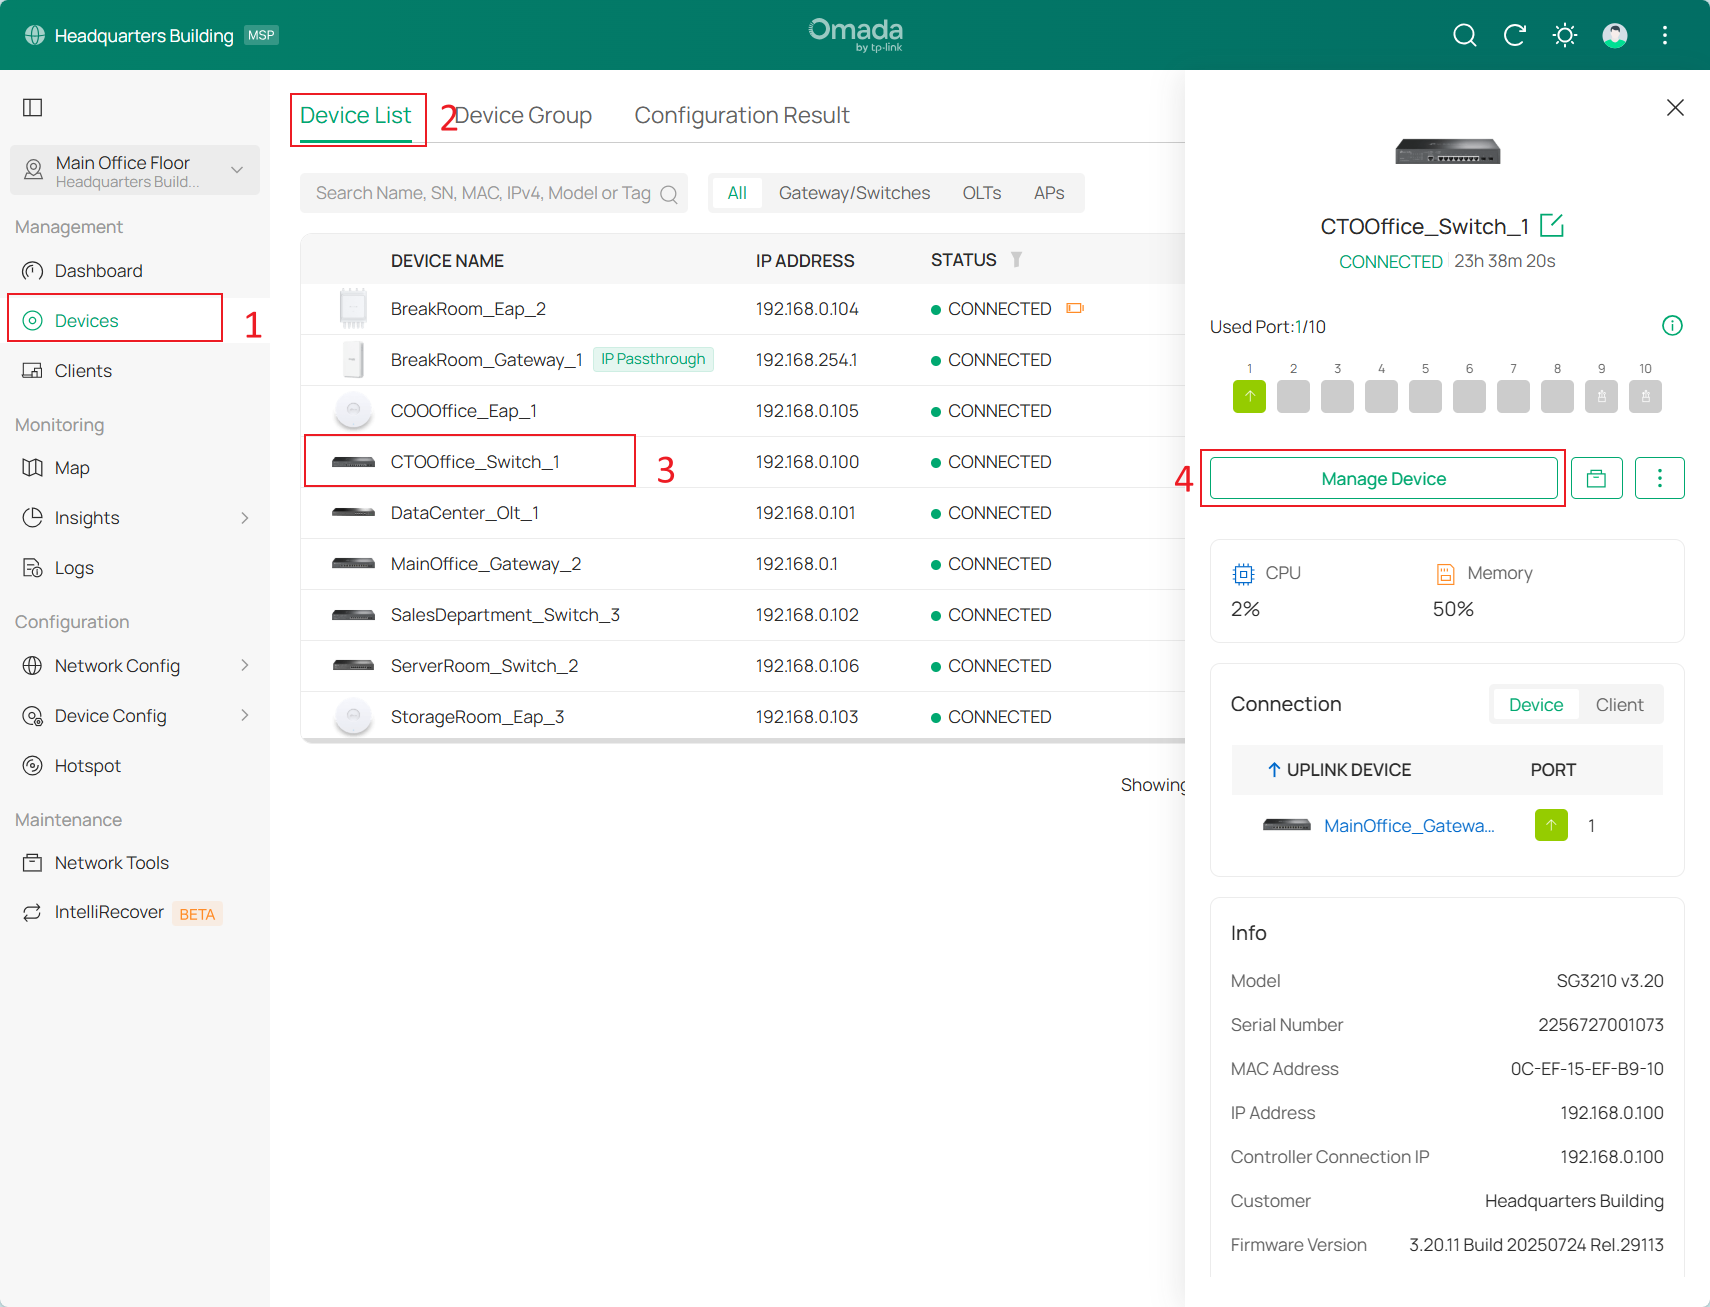
Step 1. Go to Devices > Device List and click the name of a desired switch and Manage Device.
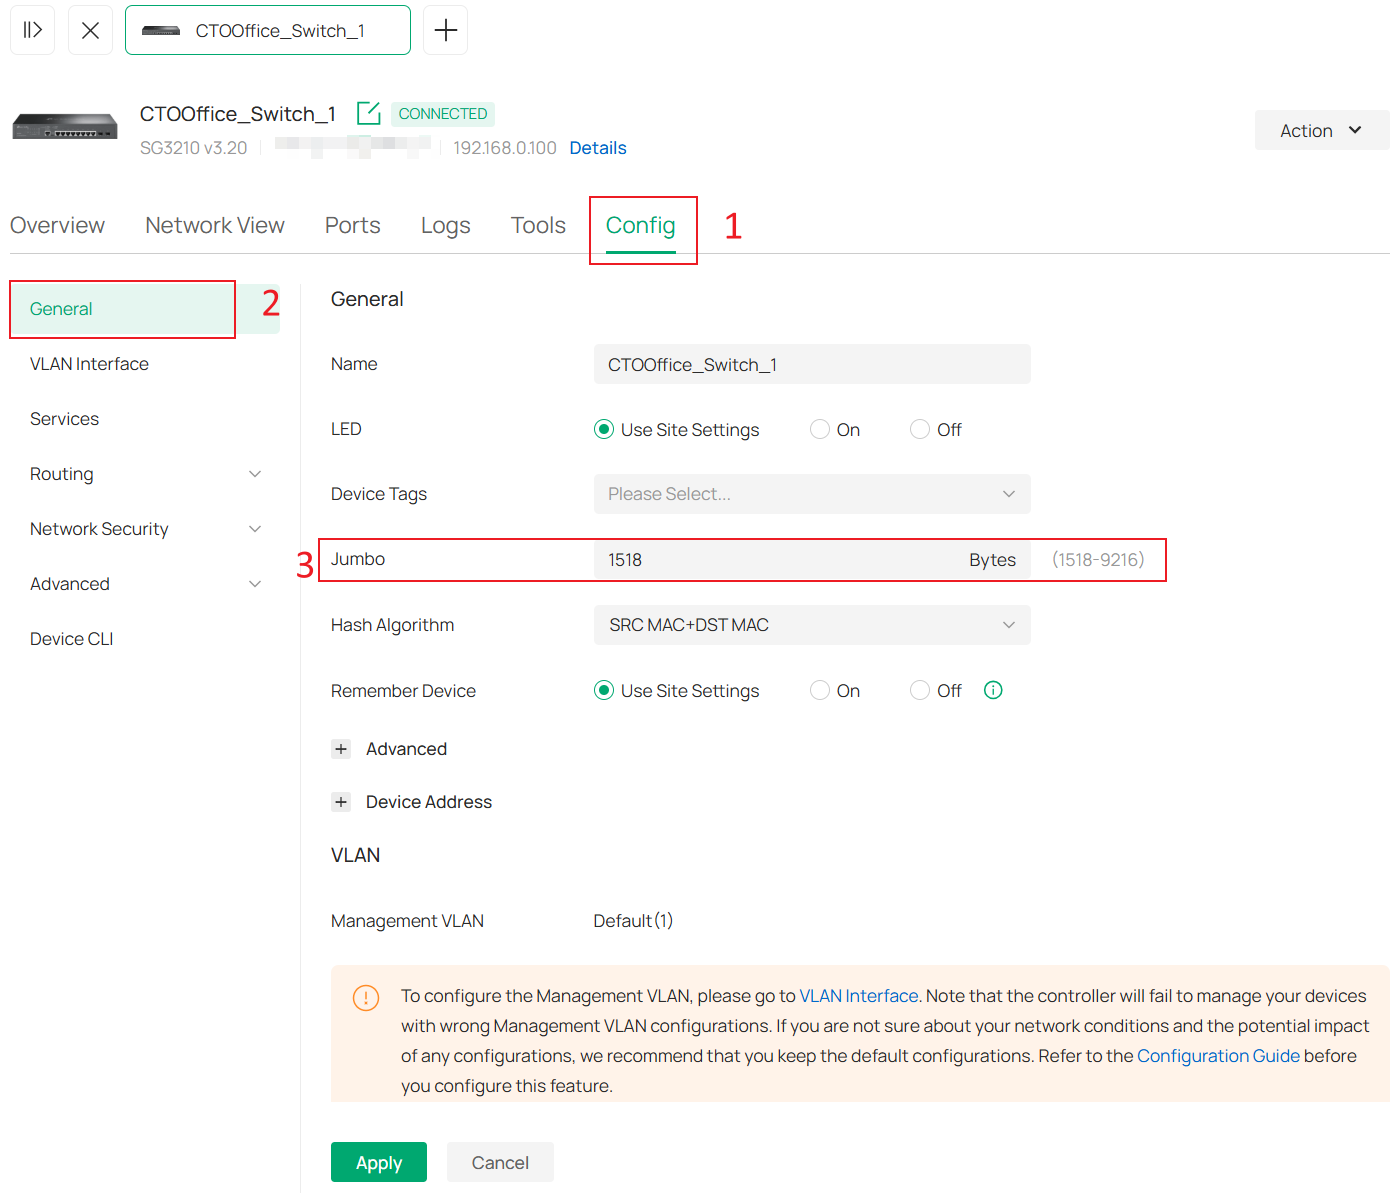
Step 2. Set an appropriate Jumbo Frame value in the Config > General section, as shown below.
Note: To fully utilize the advantages of Jumbo Frame, make sure all devices in the network support this feature.
In Standalone Mode
Here uses an Omada Access switch as the demonstration.
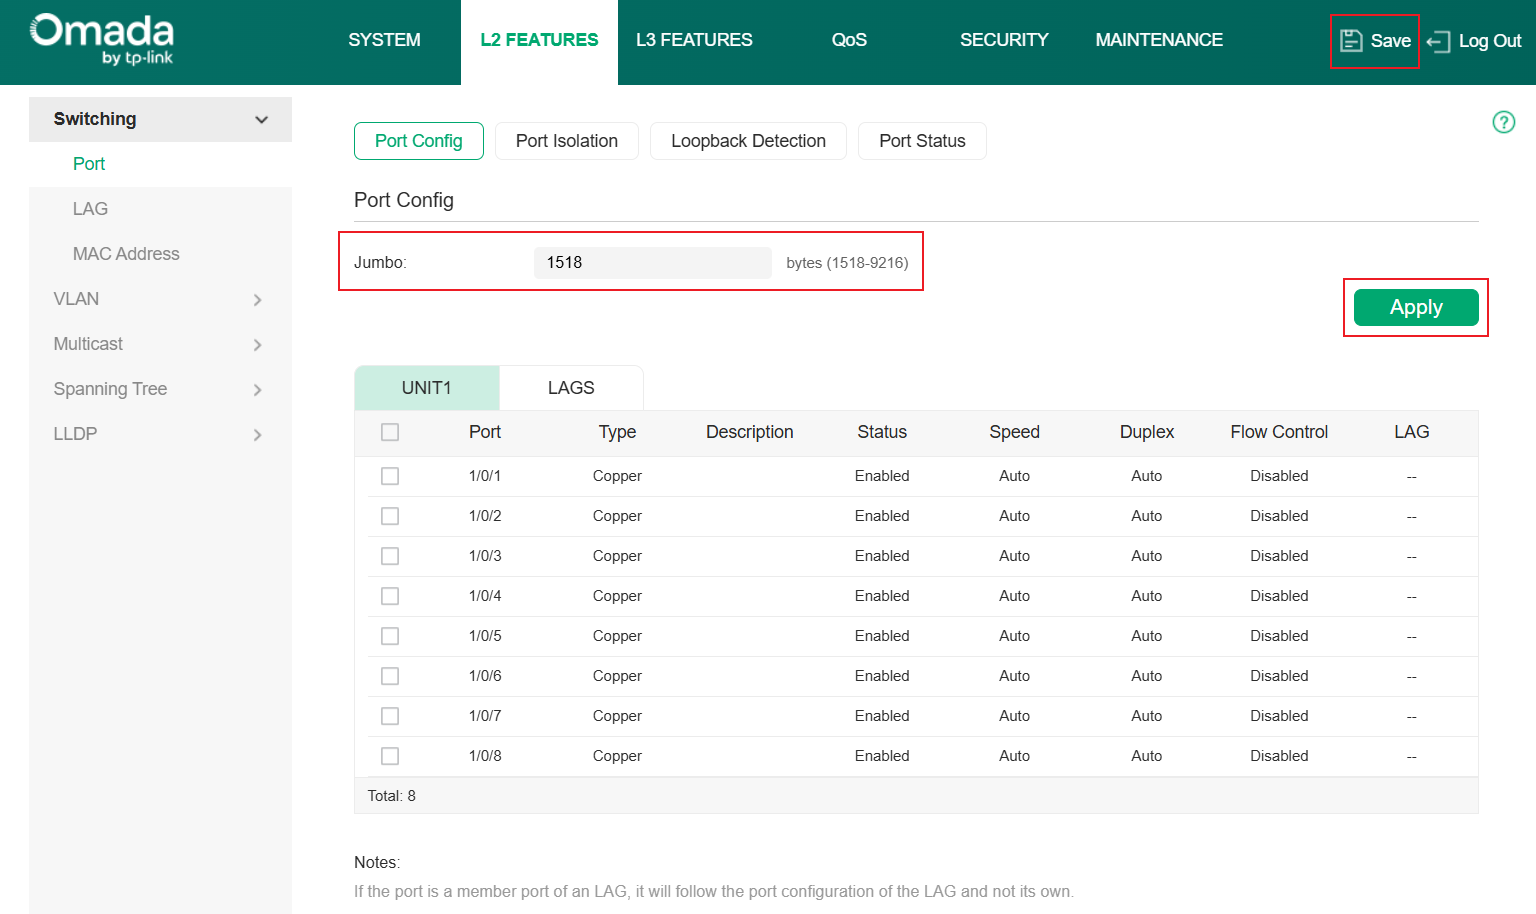
Step 1. Log in switch page and check Jumbo Frame Settings in System Summary page. It will jump to L2 FEATURES > Switching > Port > Port Config page.

Step 2. Set an appropriate Jumbo Frame value. Then Apply and Save the settings.
Conclusion
You have successfully configured the Jumbo Frame on the Controller.
Get to know more details of each function and configuration please go to Download Center to download the manual of your product.
