


Getting started with an Omada Fusion Gateway


Contents
Get started using a mobile phone (Recommended)
Introduction
This article will guide you through getting started with your Omada Fusion Gateway.
Requirements
- Omada Fusion Gateway
- Omada APP v5.2 and above
- Ethernet cables
Configuration
Get started using a mobile phone (Recommended)
Step 1. Power on your Omada Fusion Gateway, connect the WAN port to the ISP modem using an Ethernet cable. Wait for the device to finish booting up.

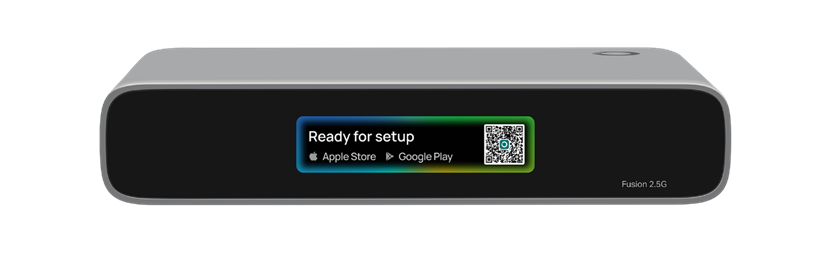
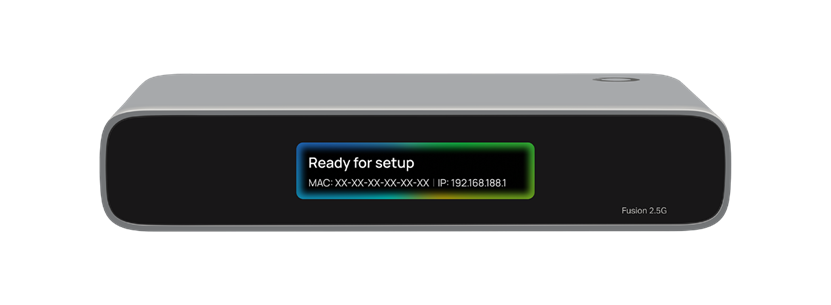
Step 2. Once the device has finished booting up, the screen will display “Ready for setup”. Scan the QR code on the right side of the screen to download and install the latest Omada app.
Step 3. Enable Bluetooth on your mobile phone.

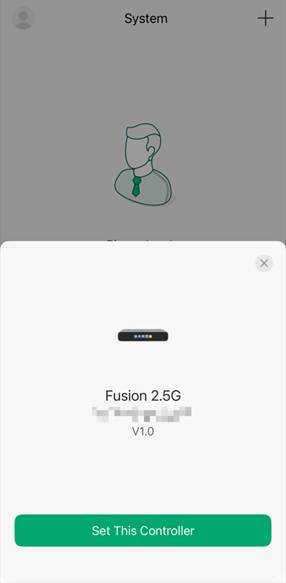
Step 4. After the Gateway boots up, enter the Omada app, and it will automatically detect the Omada Fusion Gateway nearby that is waiting to be initialized. Click Set This Controller.
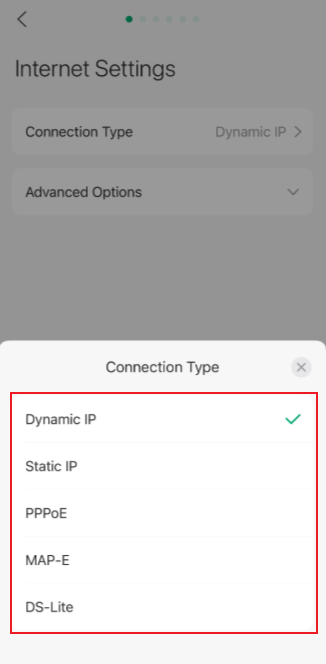
Step 5. We can check the WAN port status here. By default, the Omada Fusion Gateway dials up via DHCP.
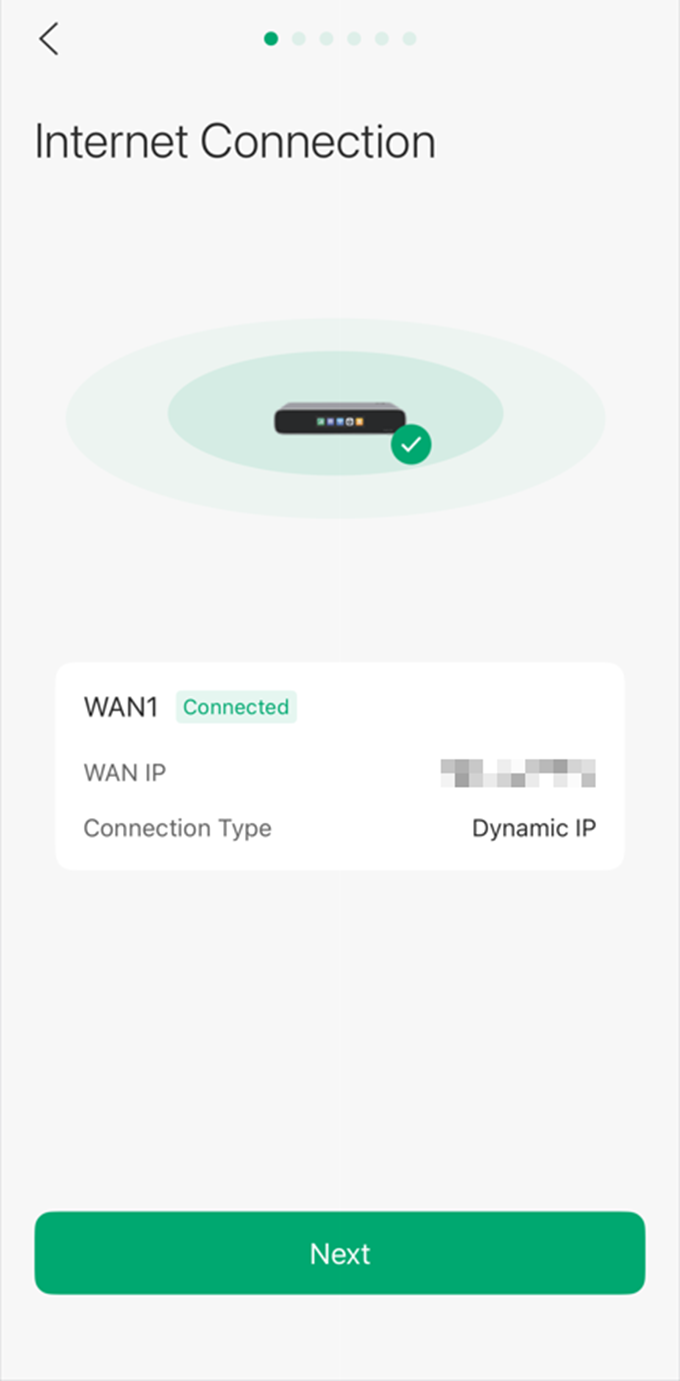
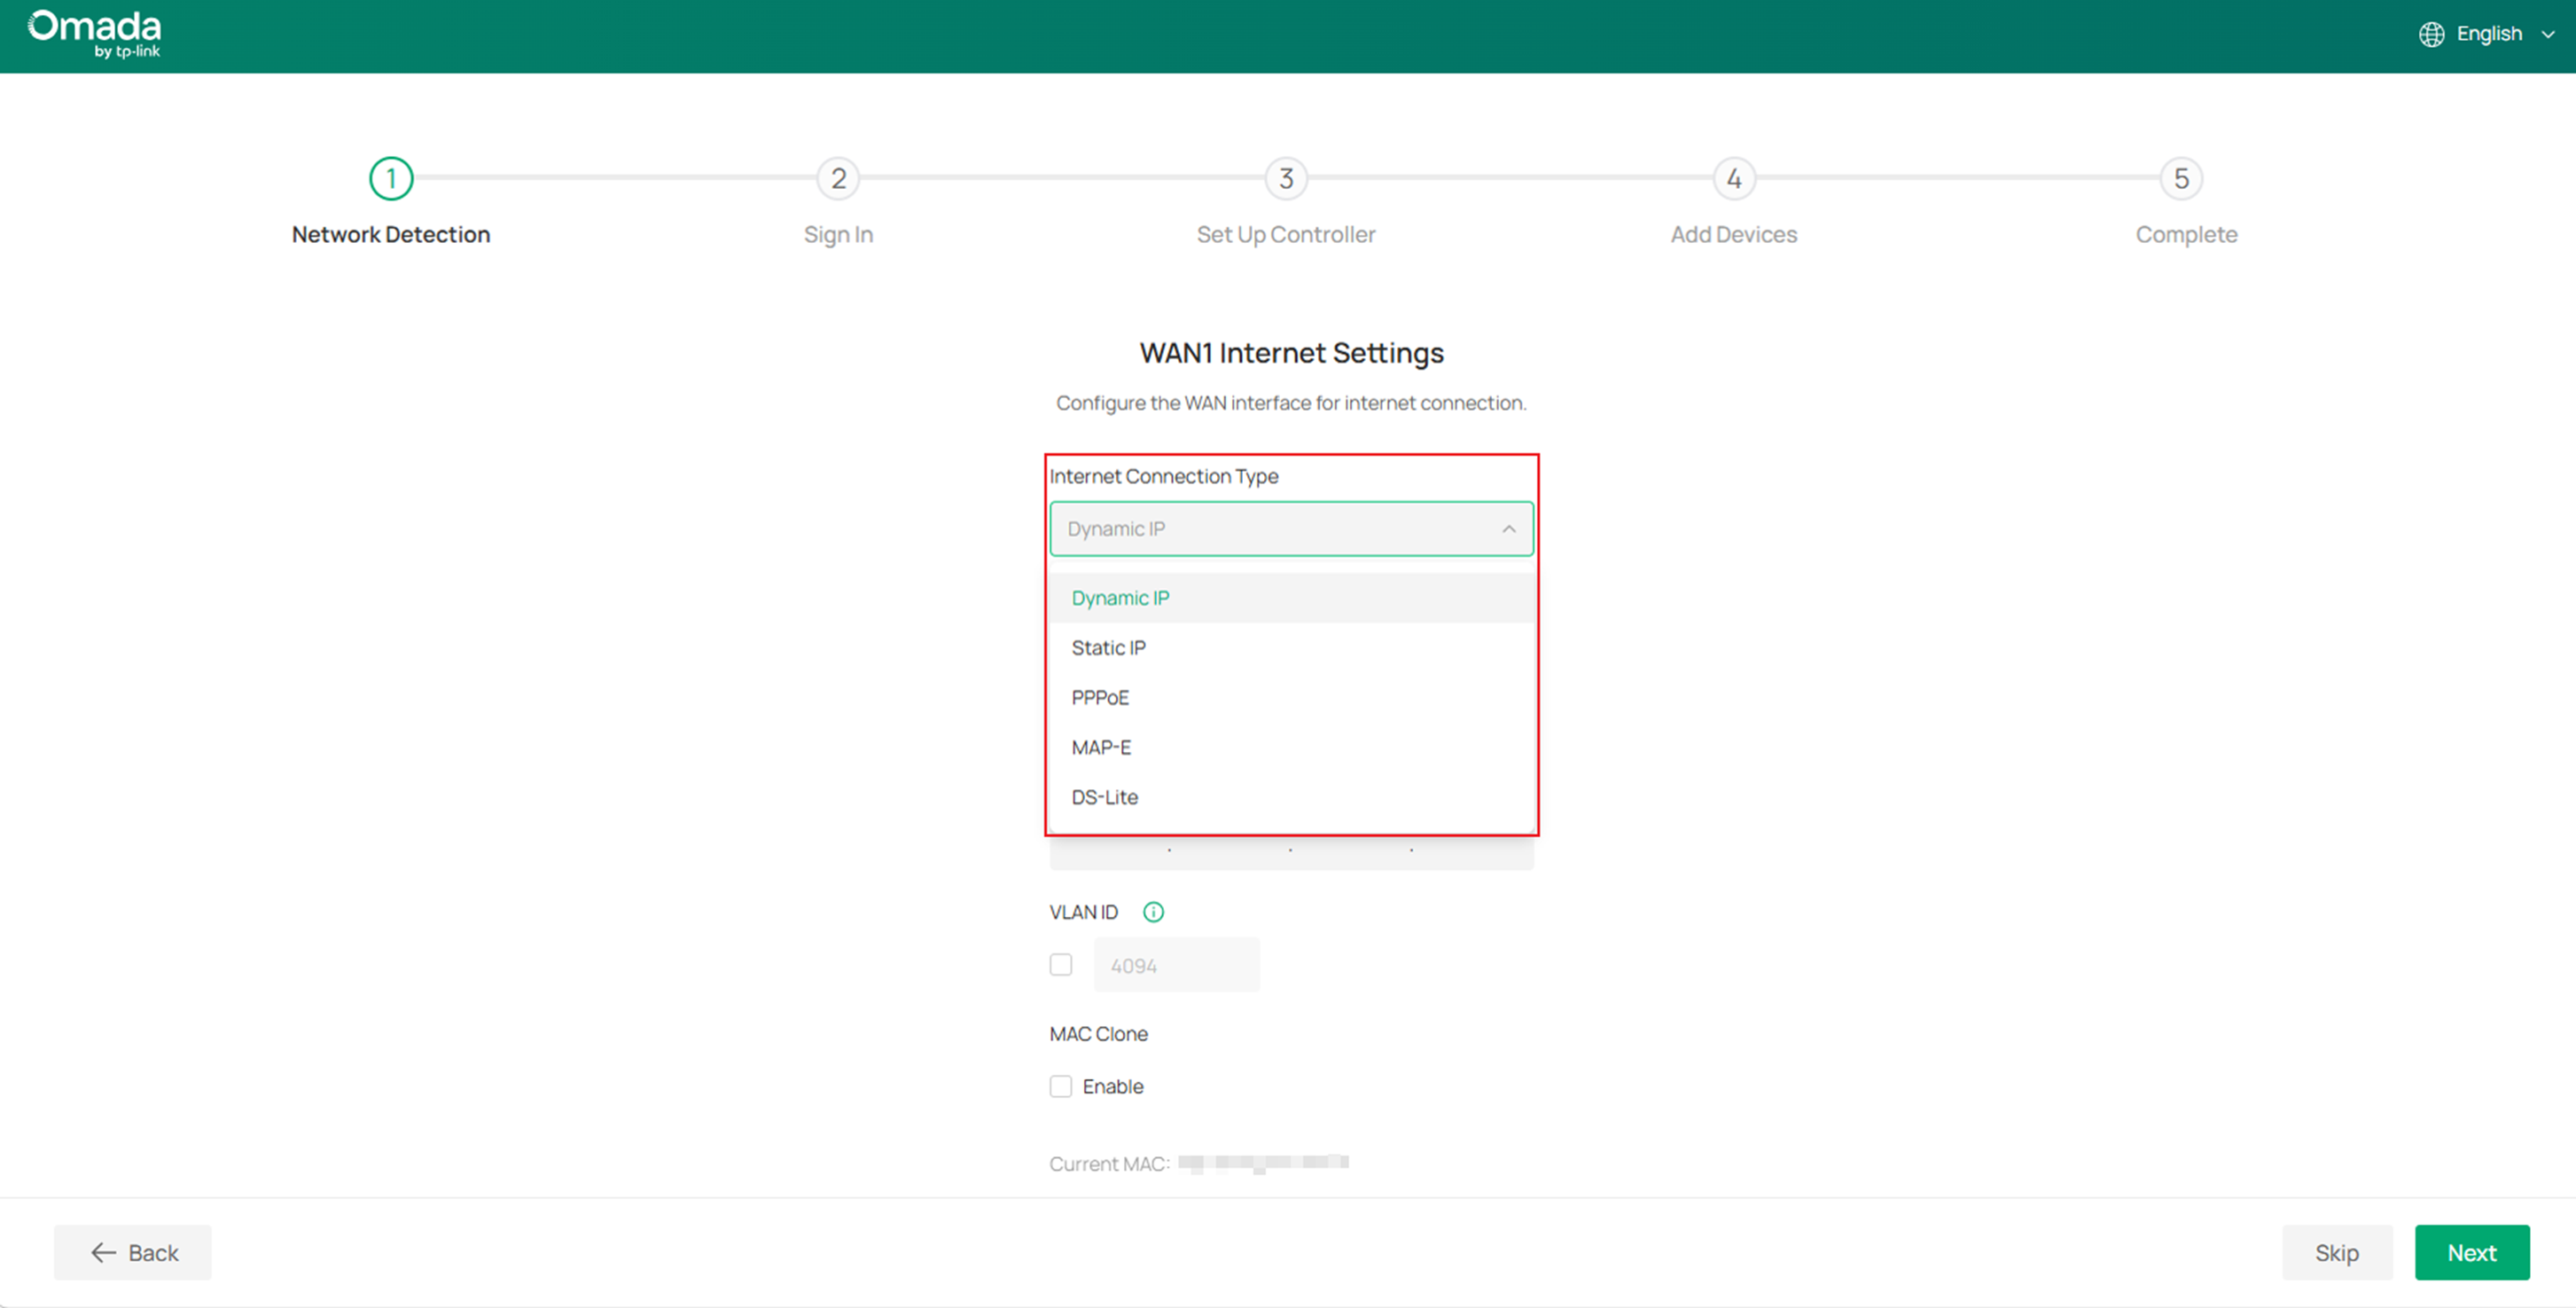
If you need to use a different dial-up method or configure VLAN ID/DNS Server/ MAC Clone, click Internet Settings.
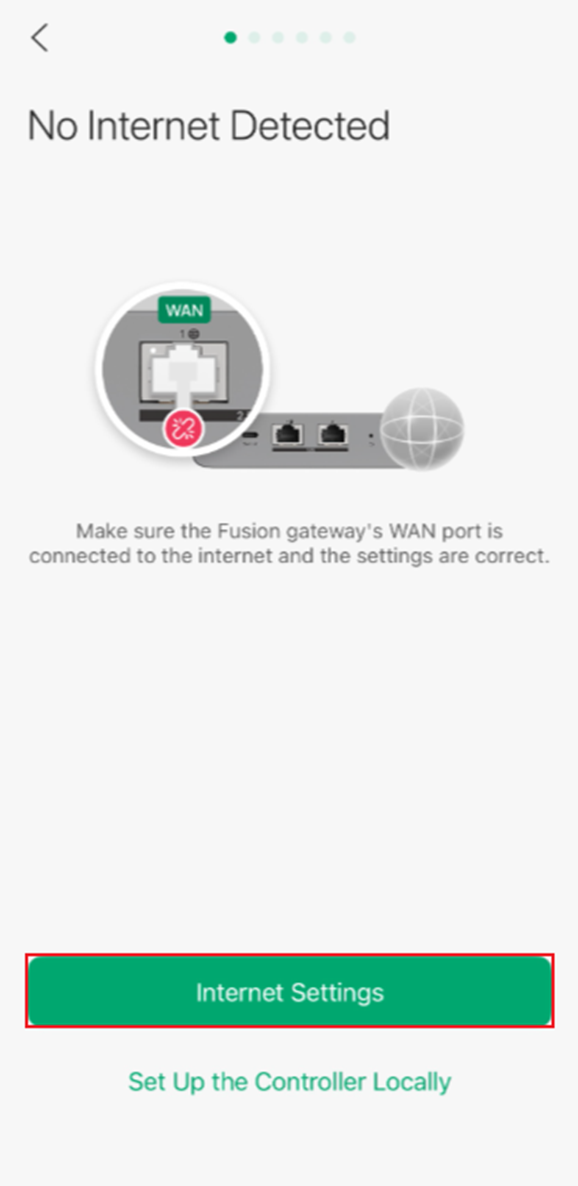
Besides Dynamic IP (DHCP), the Omada Fusion Gateway also supports Static IP, PPPoE, MAP-E, and DS-Lite as dial-up methods.
Step 6. Once the Omada Fusion Gateway successfully connects to the network, it will automatically measure your internet speed.
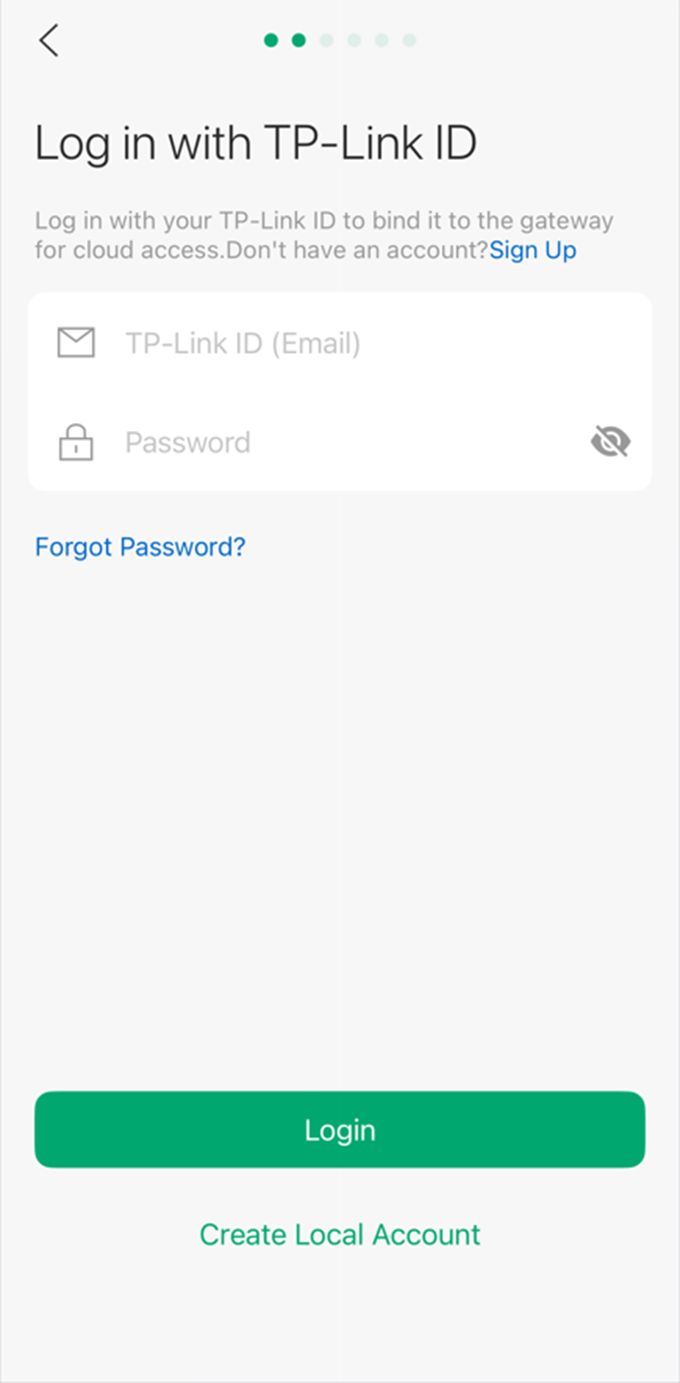
Step 7. To enable Omada Cloud Management and unlock more features, it is recommended to bind the Omada Fusion Gateway to your TP-Link ID.
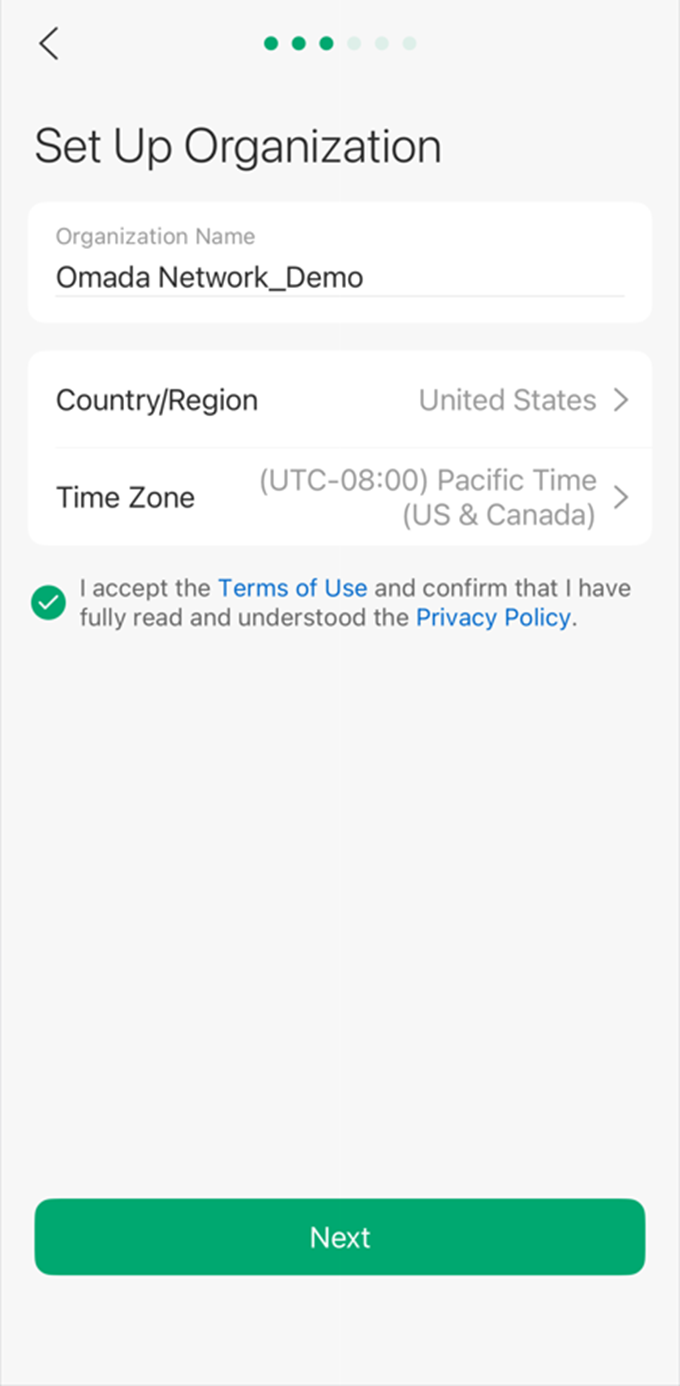
Step 8. Next, name your Omada Fusion Gateway and select the country/region and time zone.
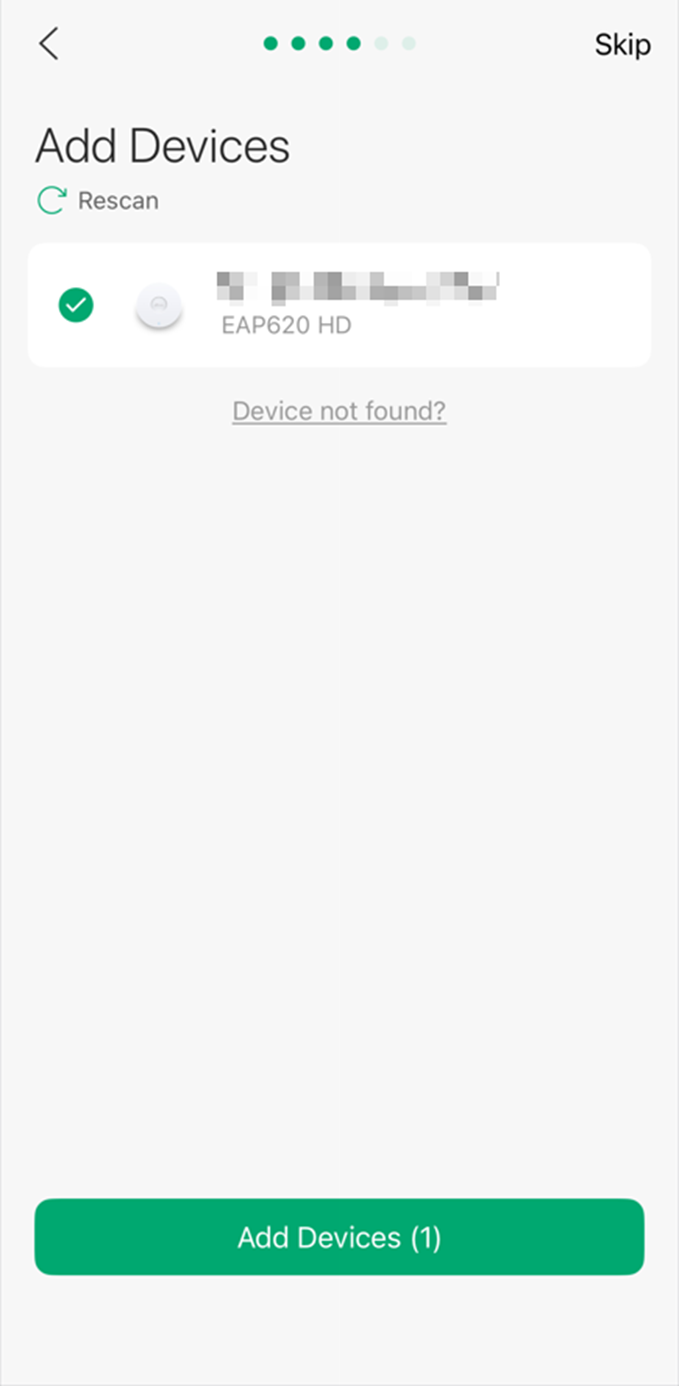
Step 9. If you have already connected other Omada switches or wireless access points in factory mode to the Omada Fusion Gateway, you will be able to find and add them here. If not, click Skip.
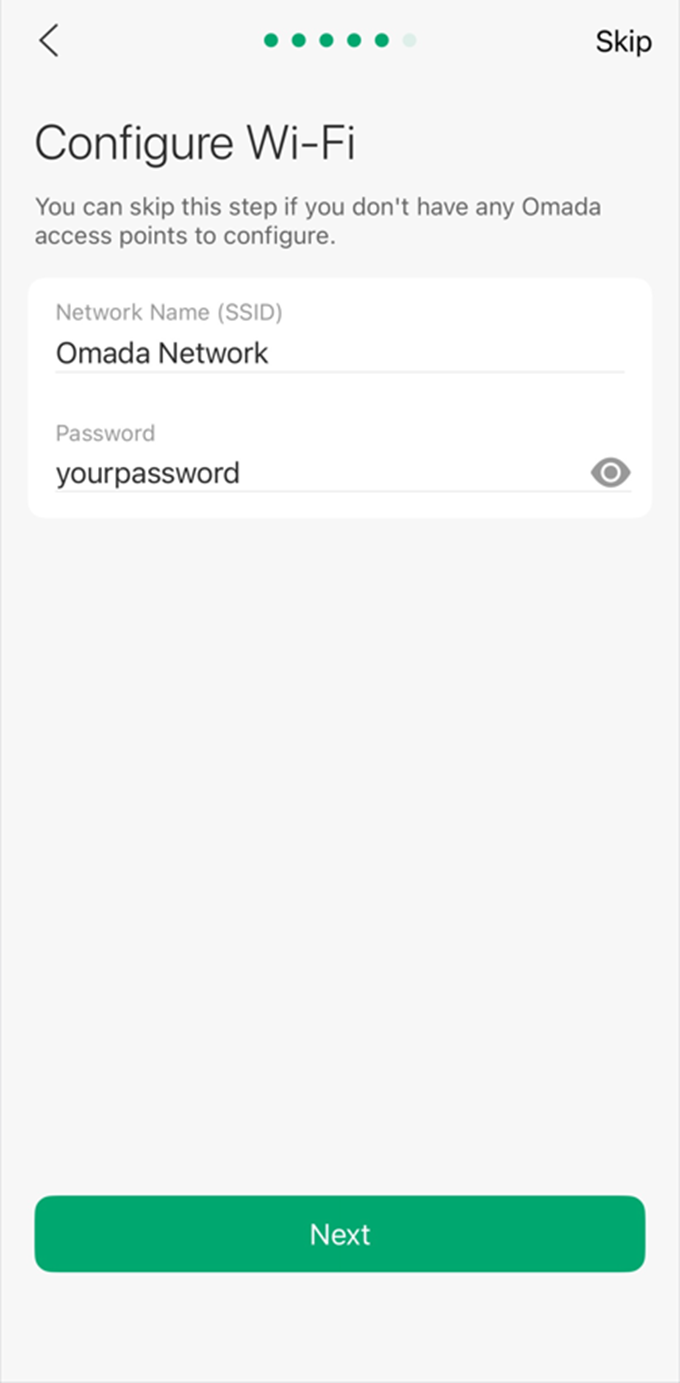
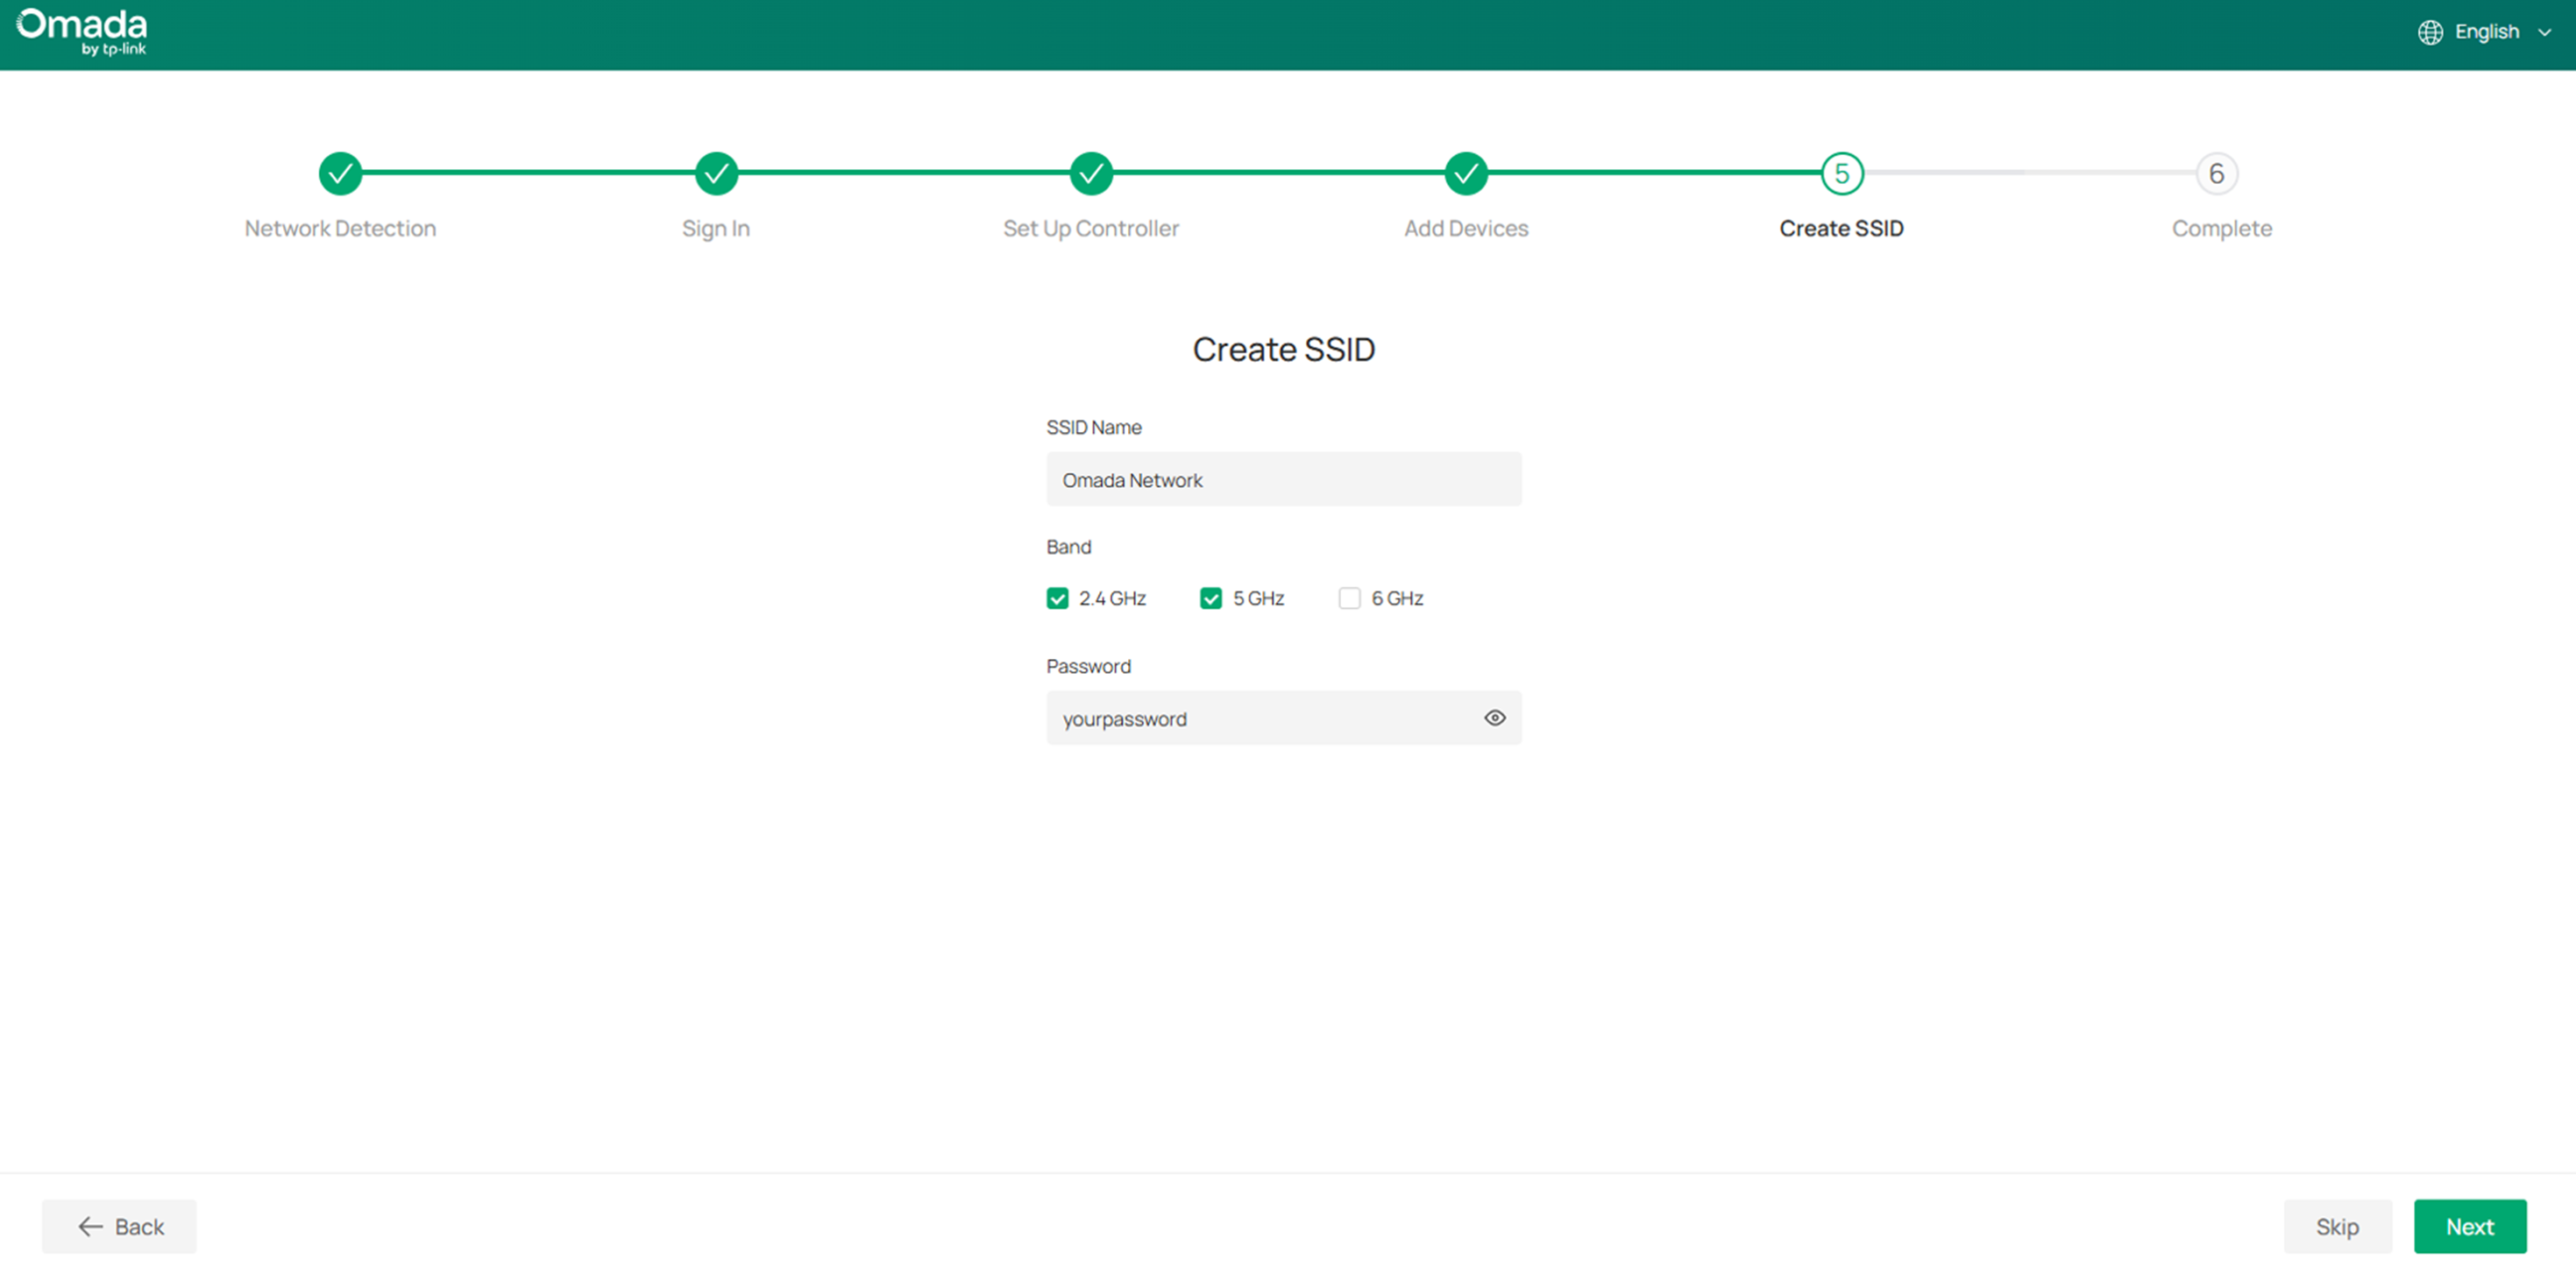
Step 10. If you have added one or more Omada wireless access points, you can create an SSID here that uses a simple password.
Step 11. At this point, we have completed the initial setup of the Omada Fusion Gateway and have automatically entered the Omada Fusion Gateway’s Dashboard.
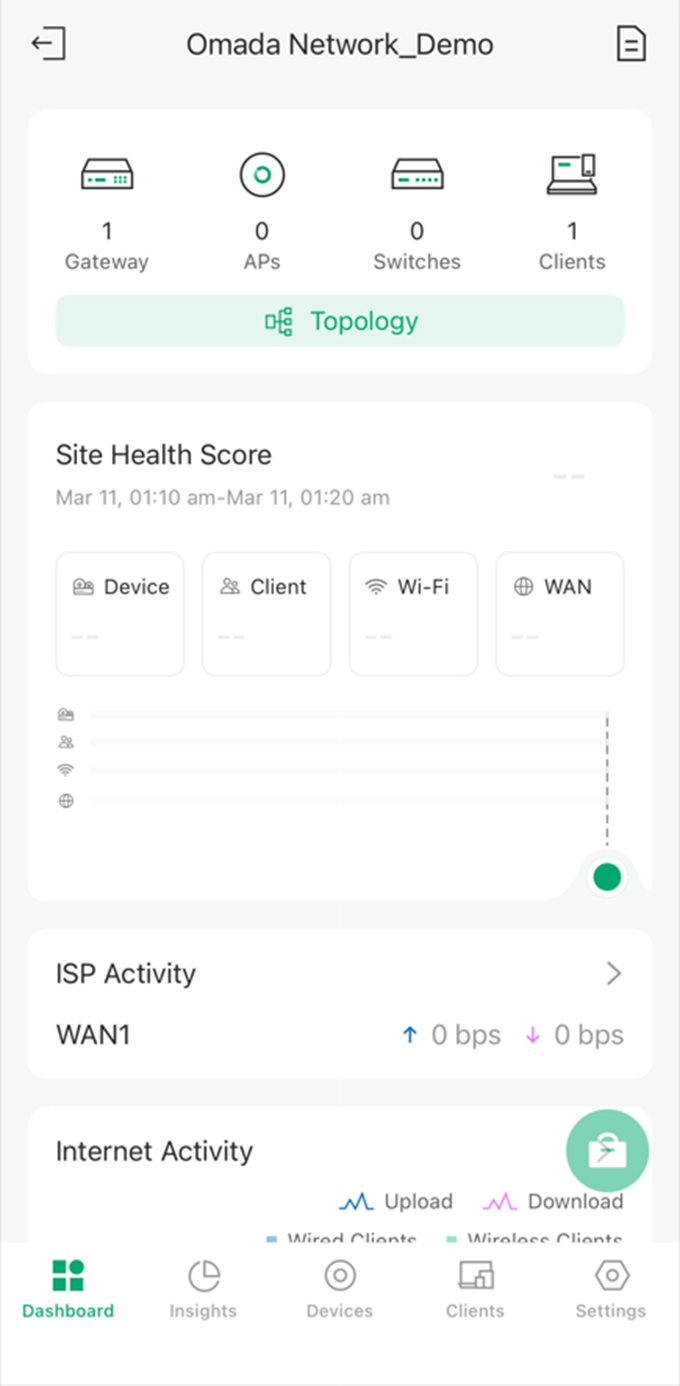
And from now on, you can view network health, port status, throughput, and more directly on the screen.
Get started using a computer
Step 1. Power on your Omada Fusion Gateway, connect the WAN port to the ISP modem using an Ethernet cable. Wait for the device to finish booting up.

Once the device has finished booting up, the screen will display “Ready for setup”.
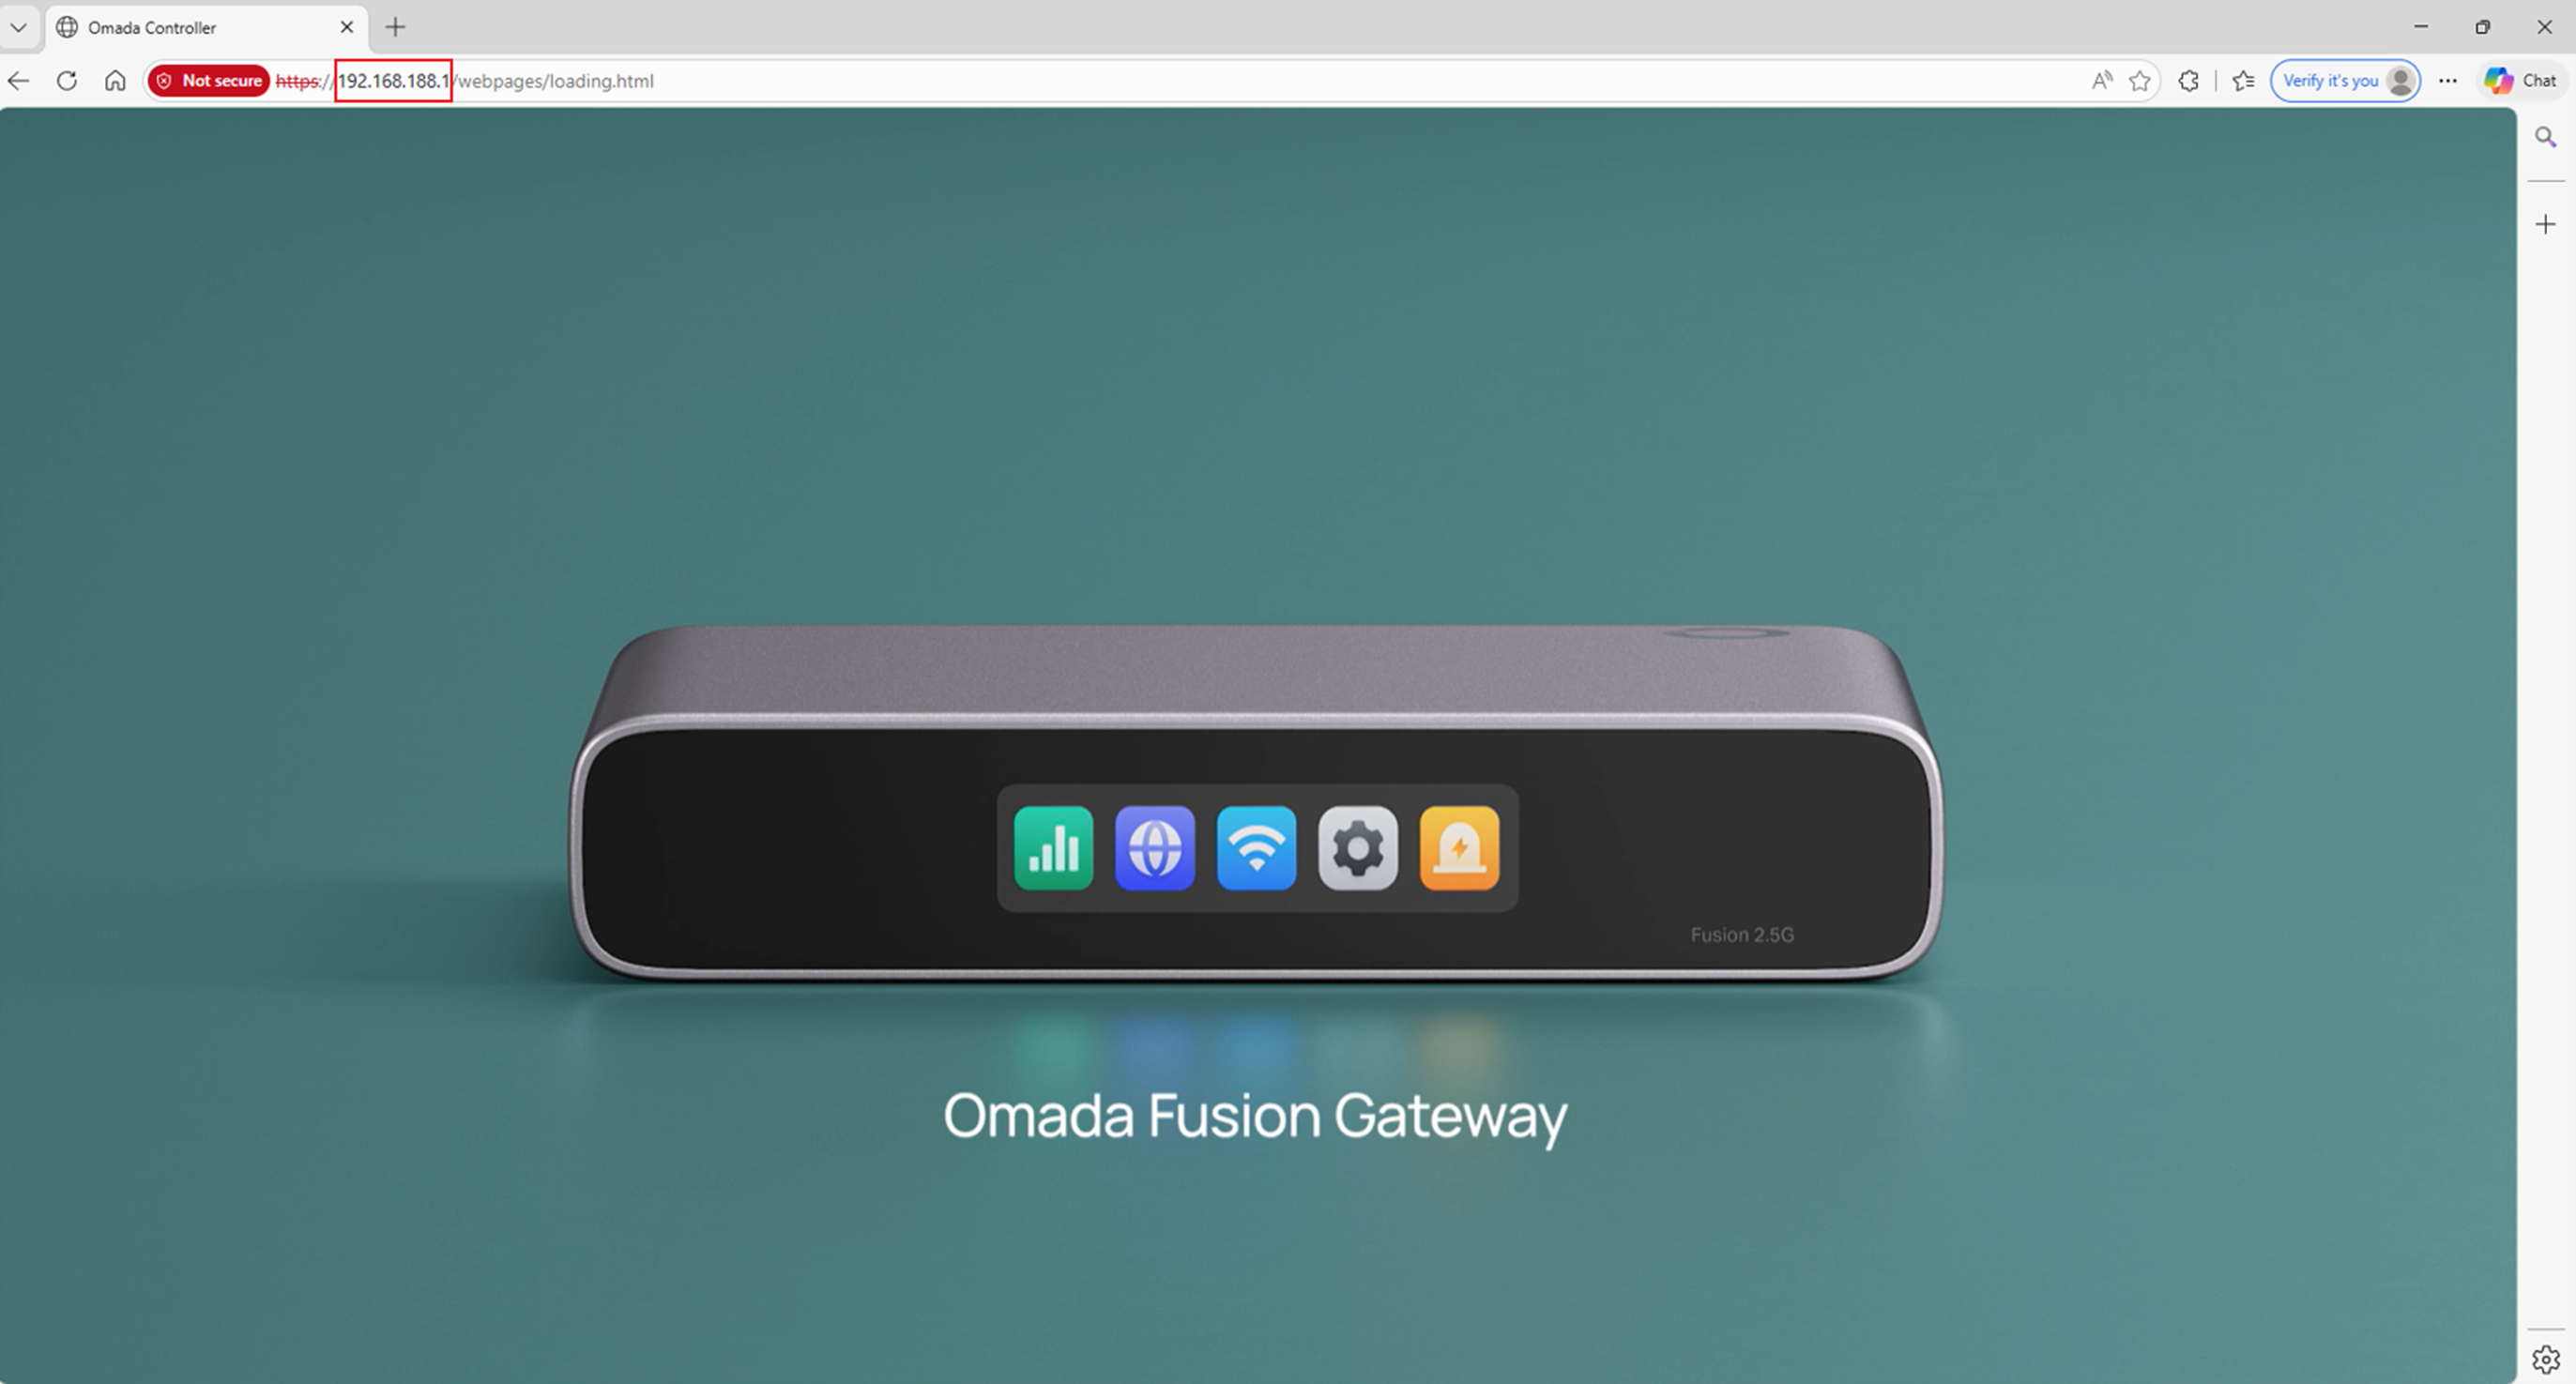
Step 2. Connect your computer to any LAN port on the Omada Fusion Gateway using another Ethernet cable and obtain a valid IP address via DHCP. And open a browser on your computer to access the IP address 192.168.188.1 (Default IP).
Step 3. After the Gateway boots up, check the WAN port status here. By default, the Omada Fusion Gateway dials up via DHCP. If you need to use a different dial-up method or configure VLAN ID/DNS Server/MAC Clone, click Internet Settings.
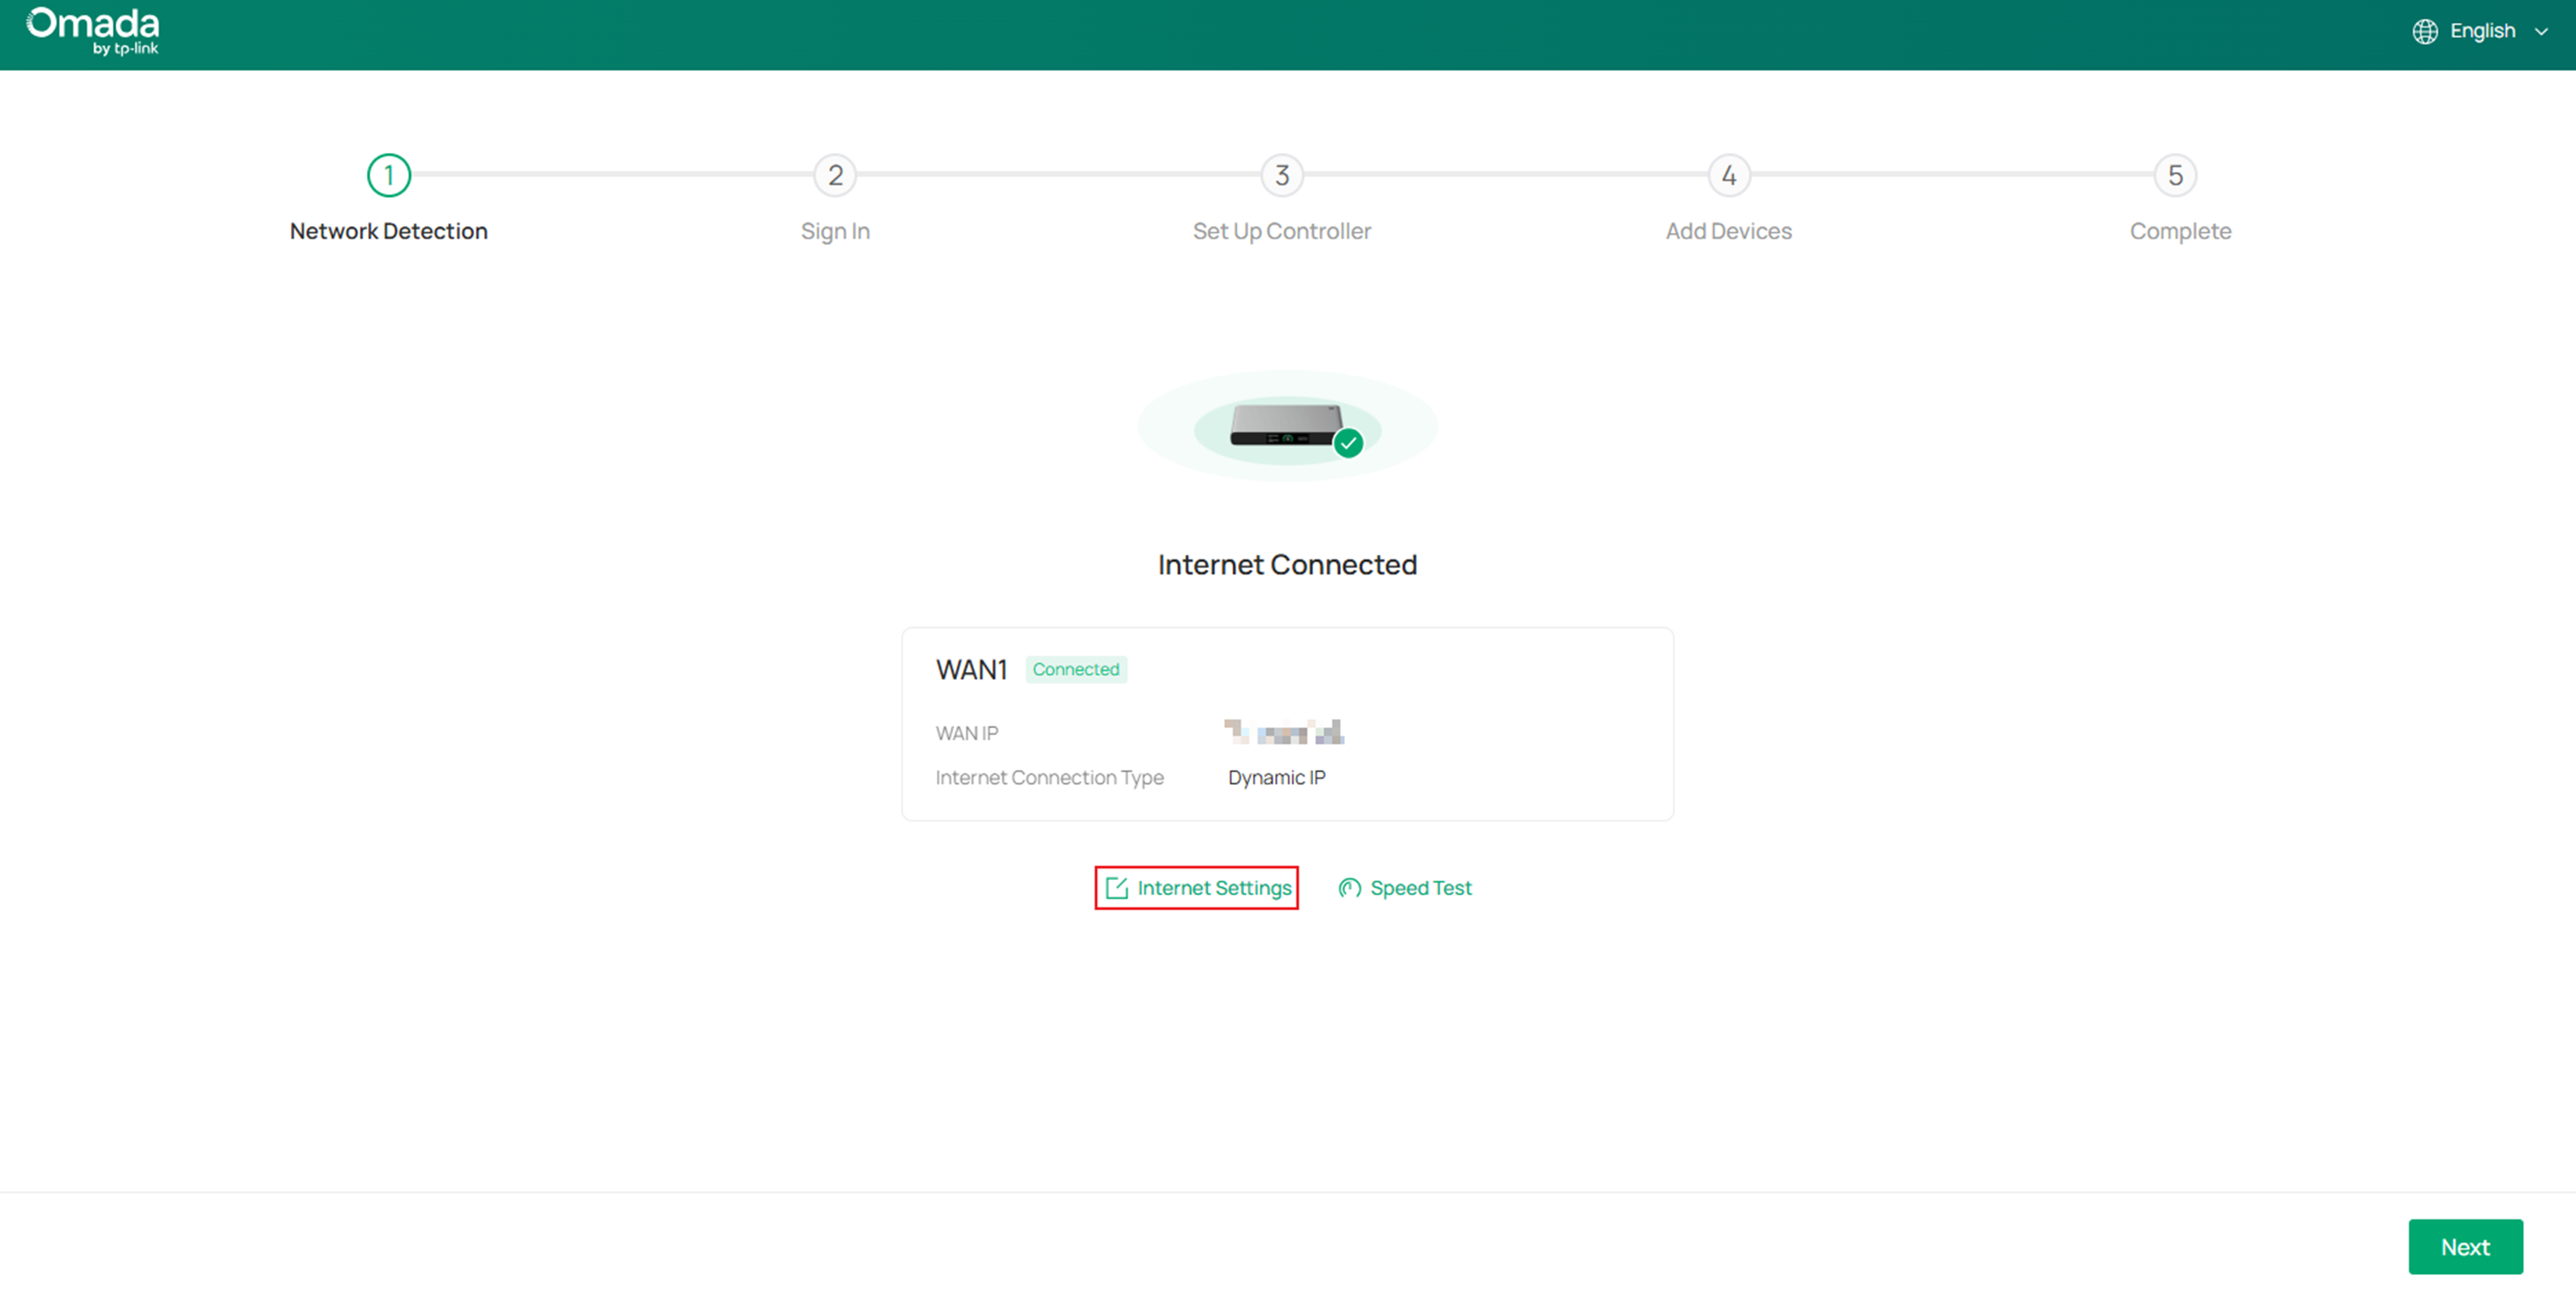
Besides Dynamic IP (DHCP), the Omada Fusion Gateway also supports Static IP, PPPoE, MAP-E, and DS-Lite as dial-up methods.
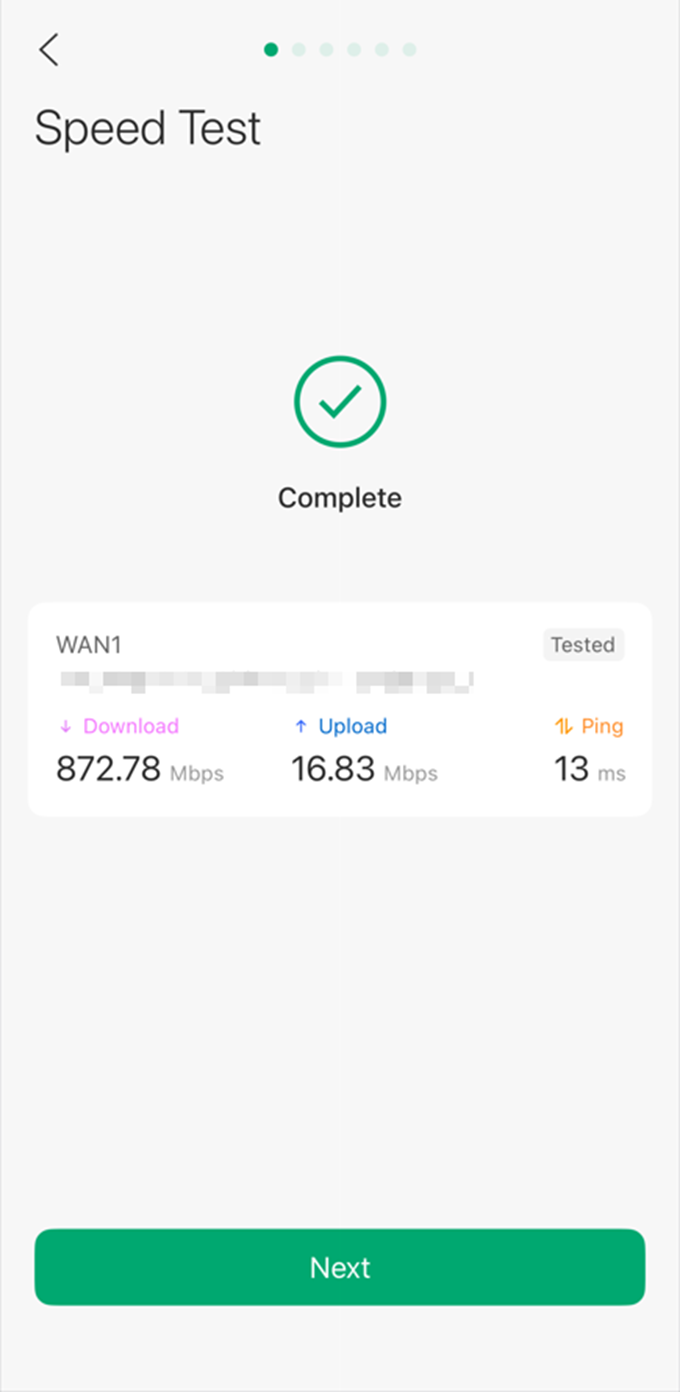
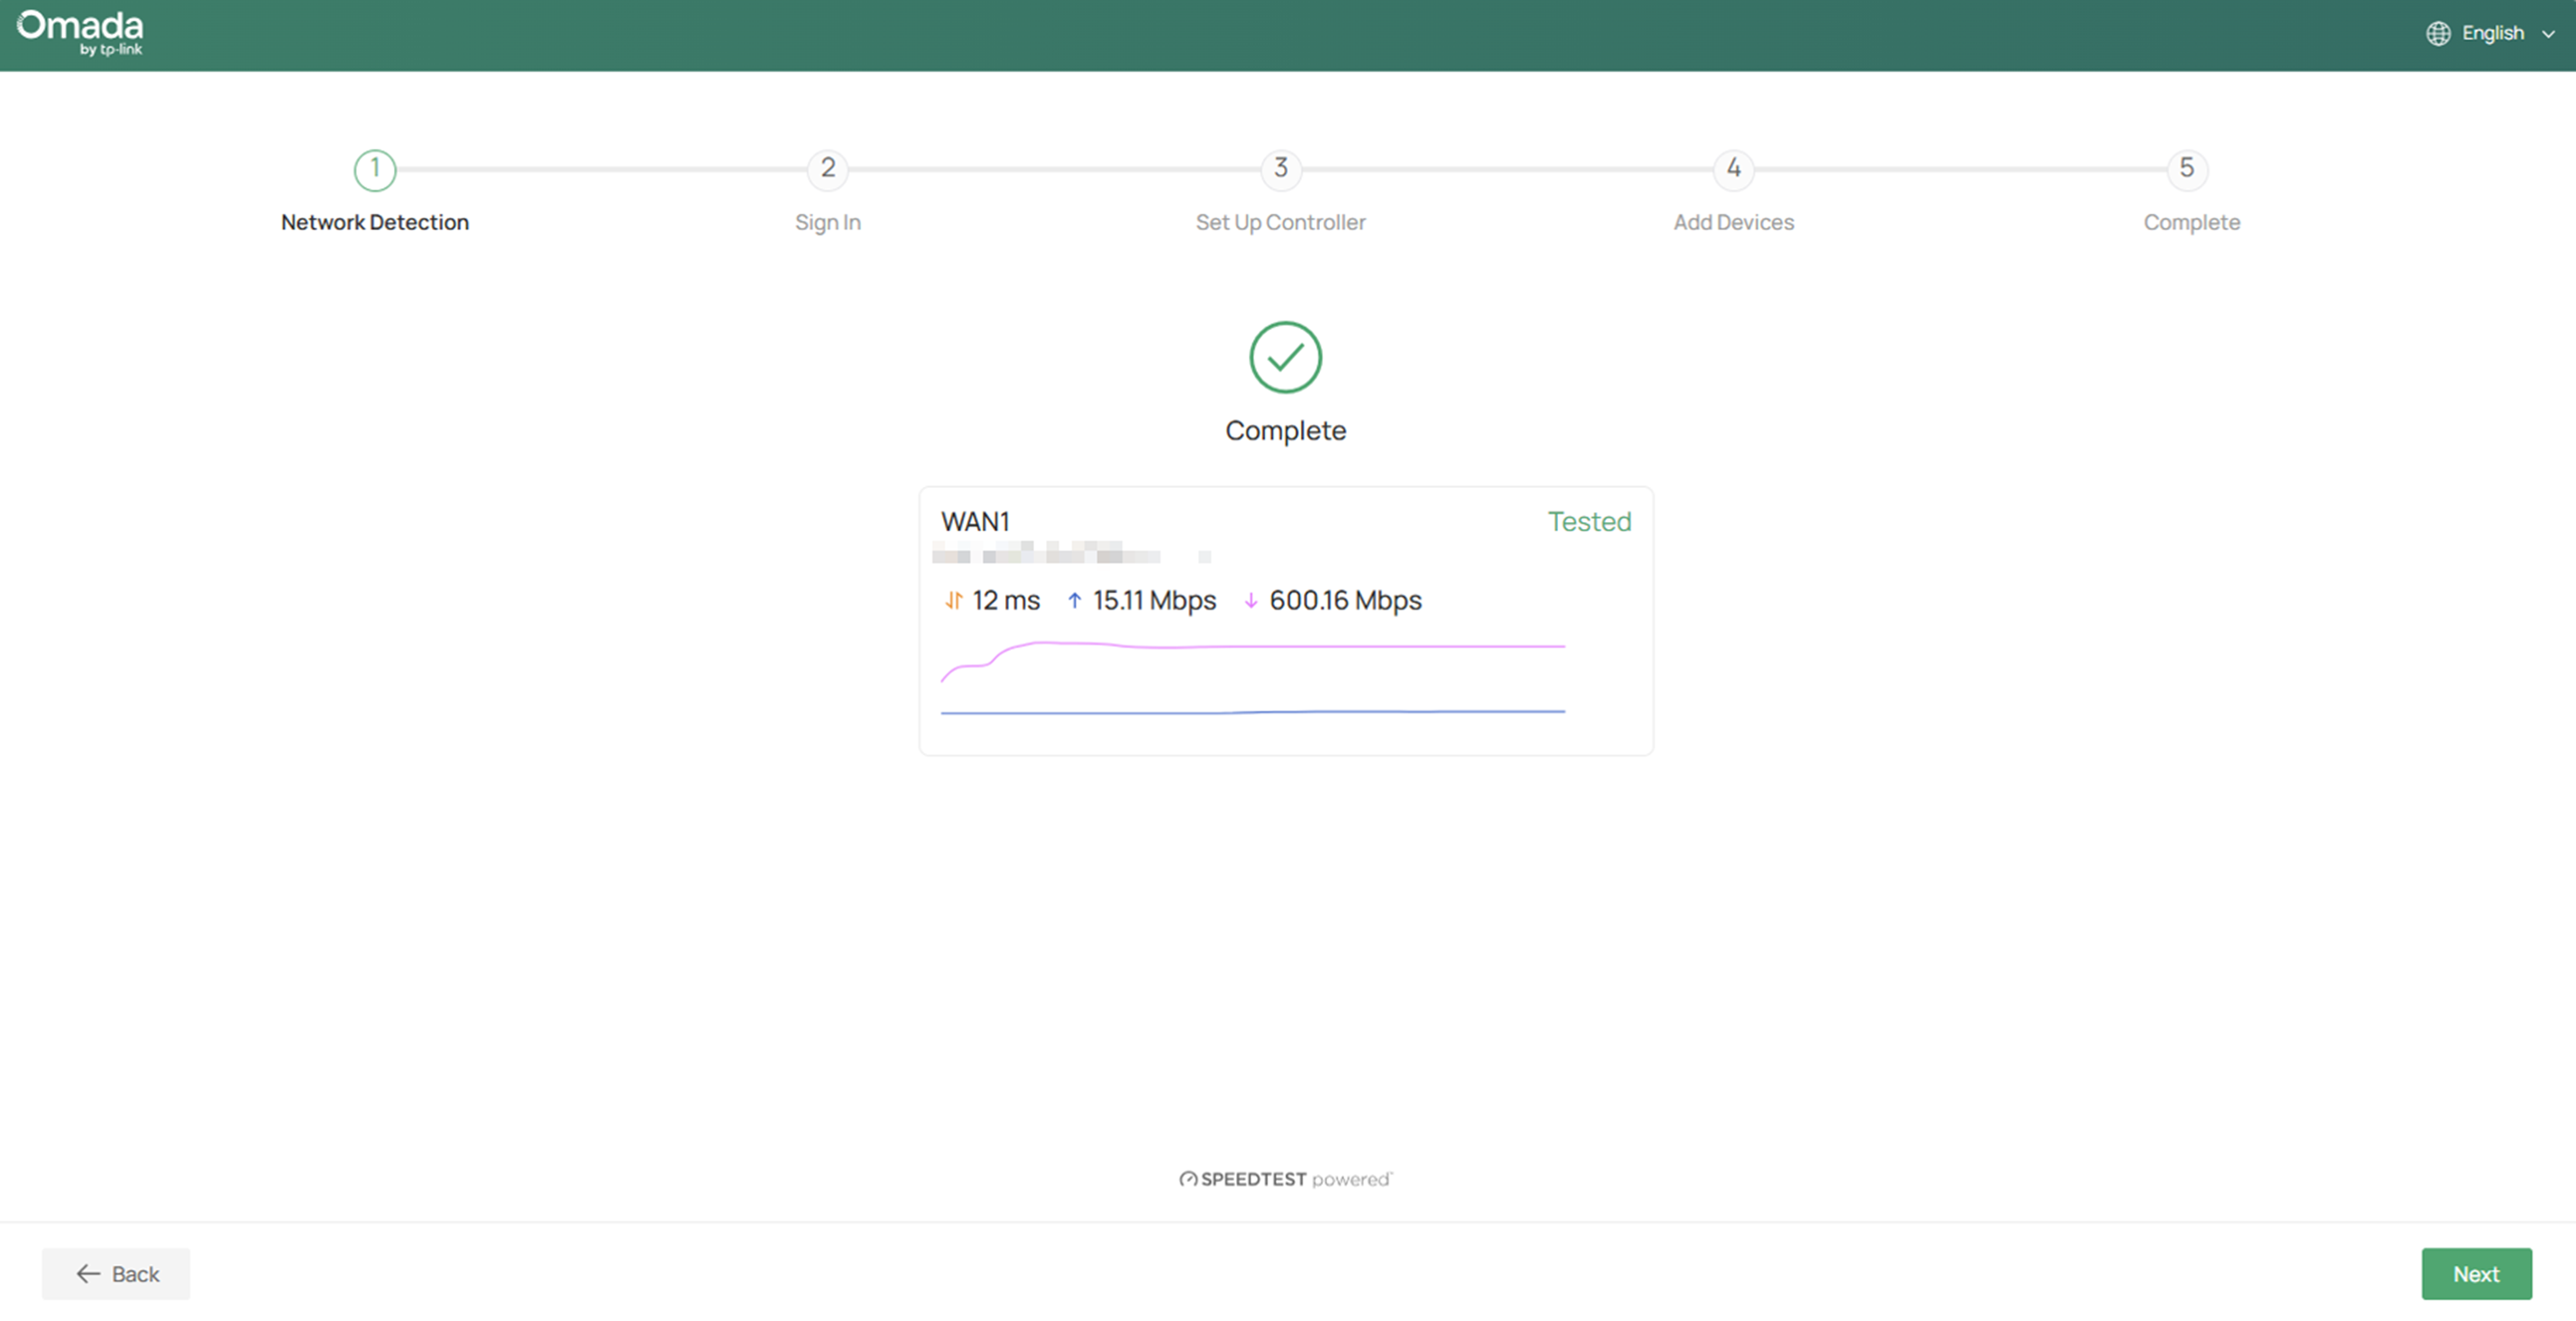
Step 4. Once the Omada Fusion Gateway successfully connects to the network, you are able to click Speed Test to measure your internet speed here.
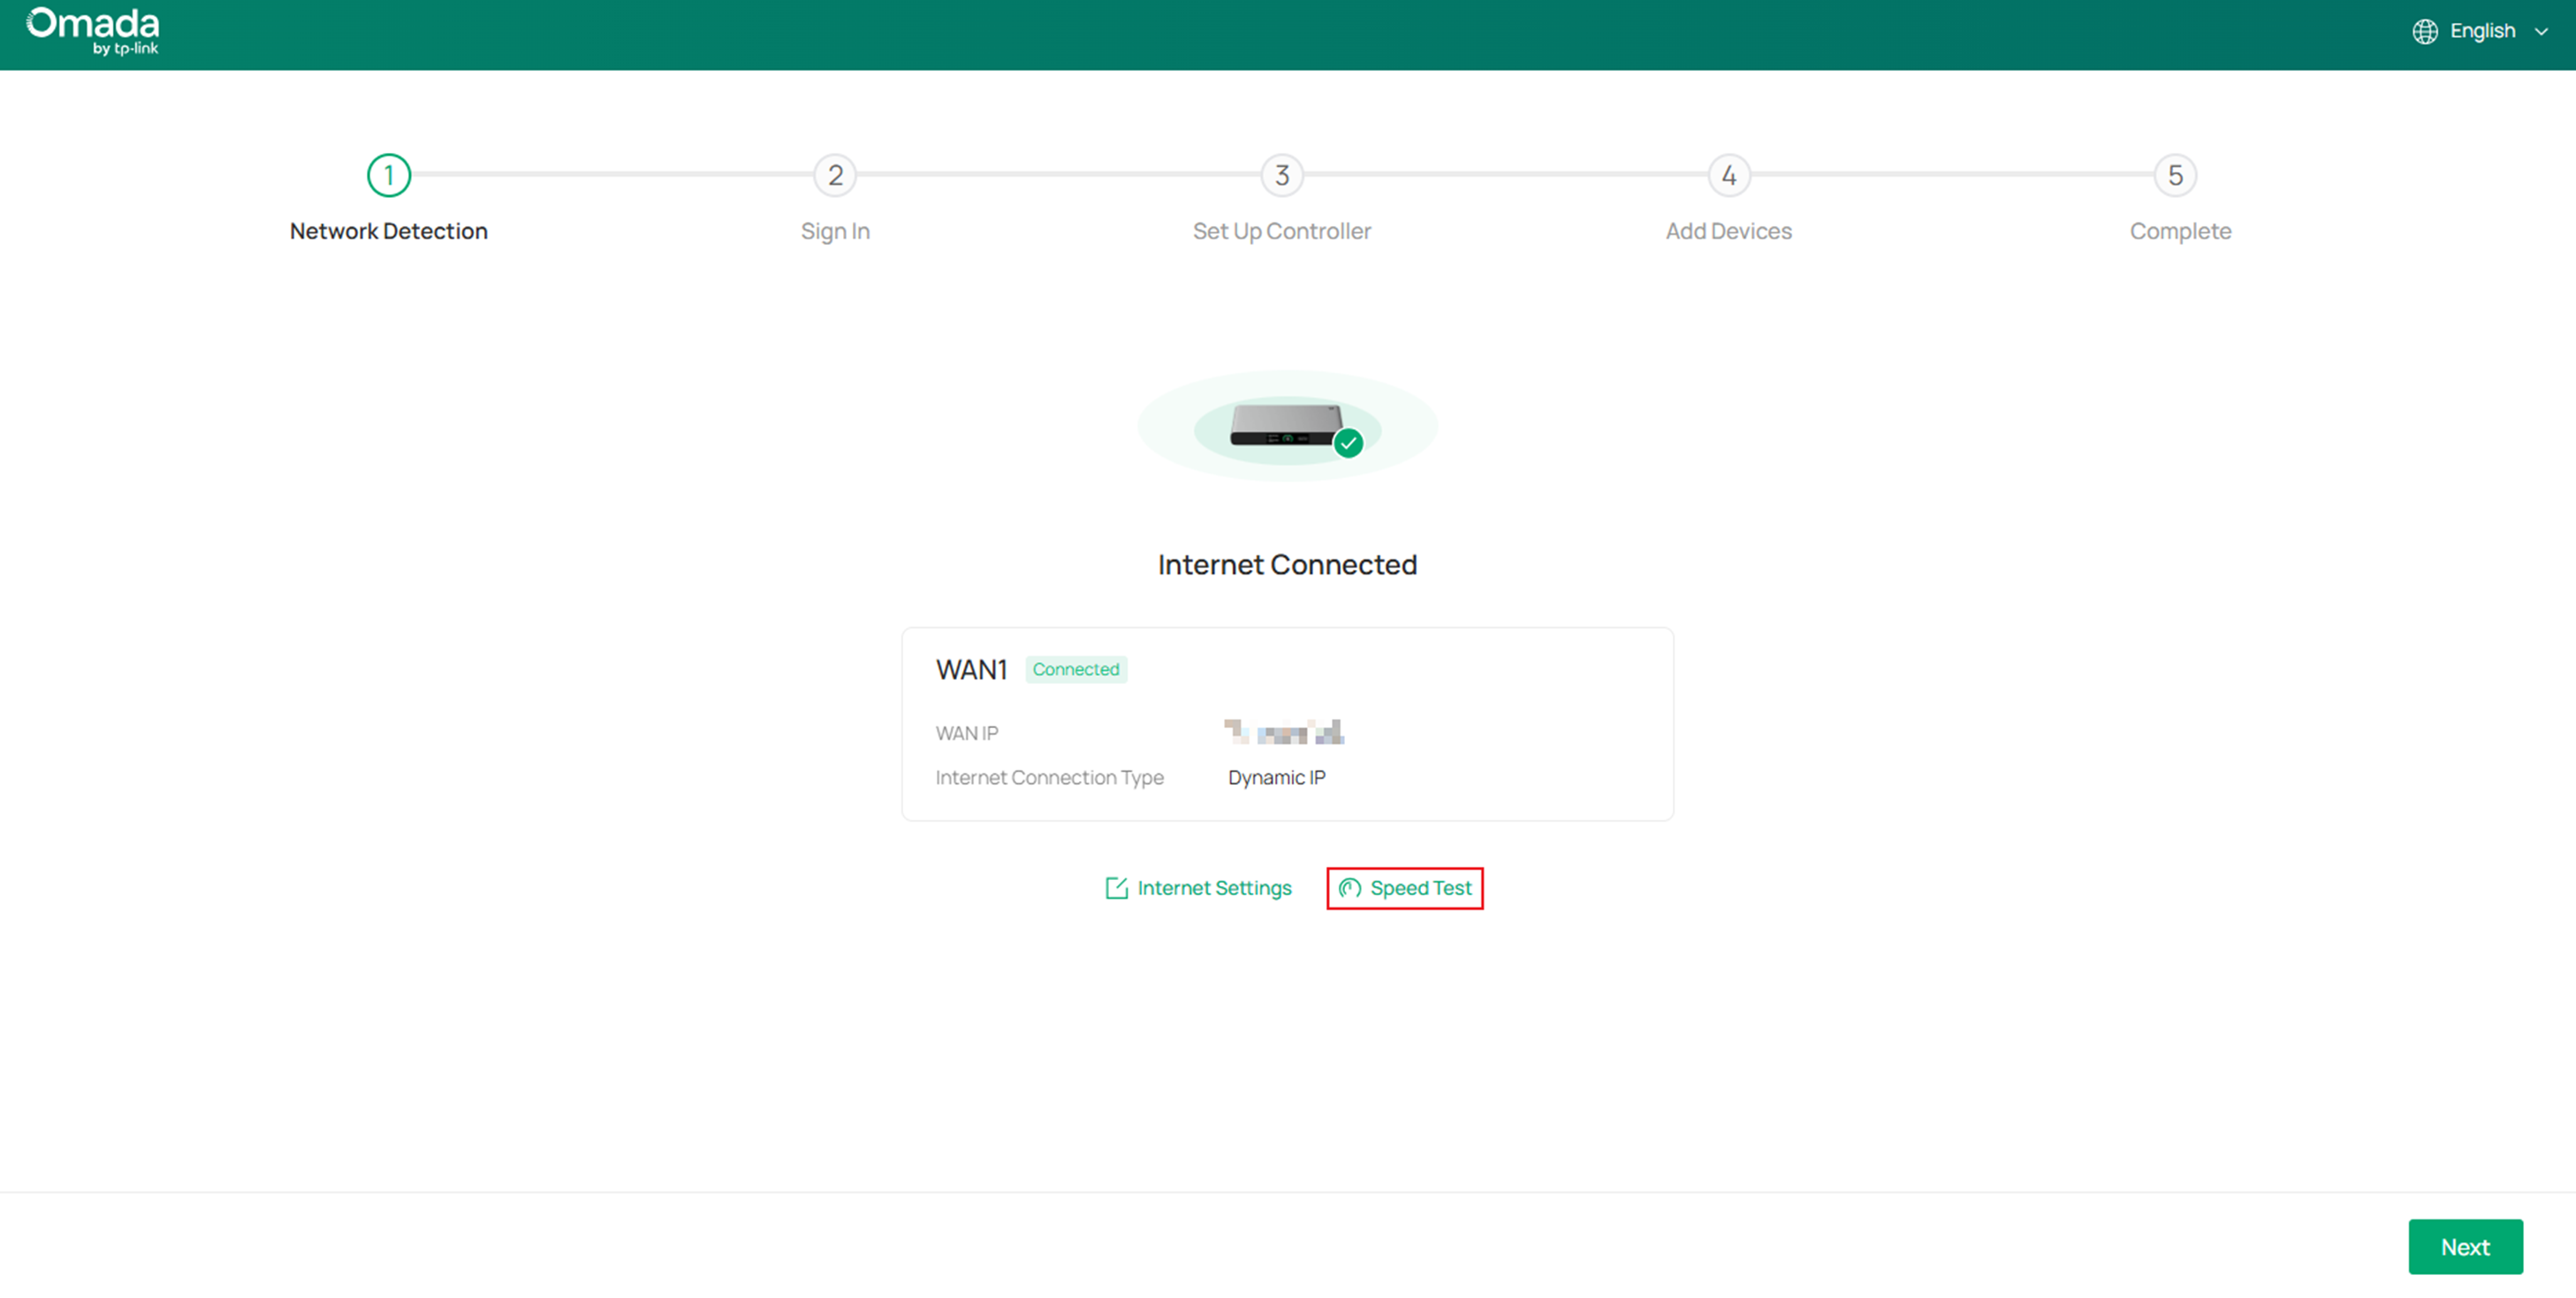
For example:
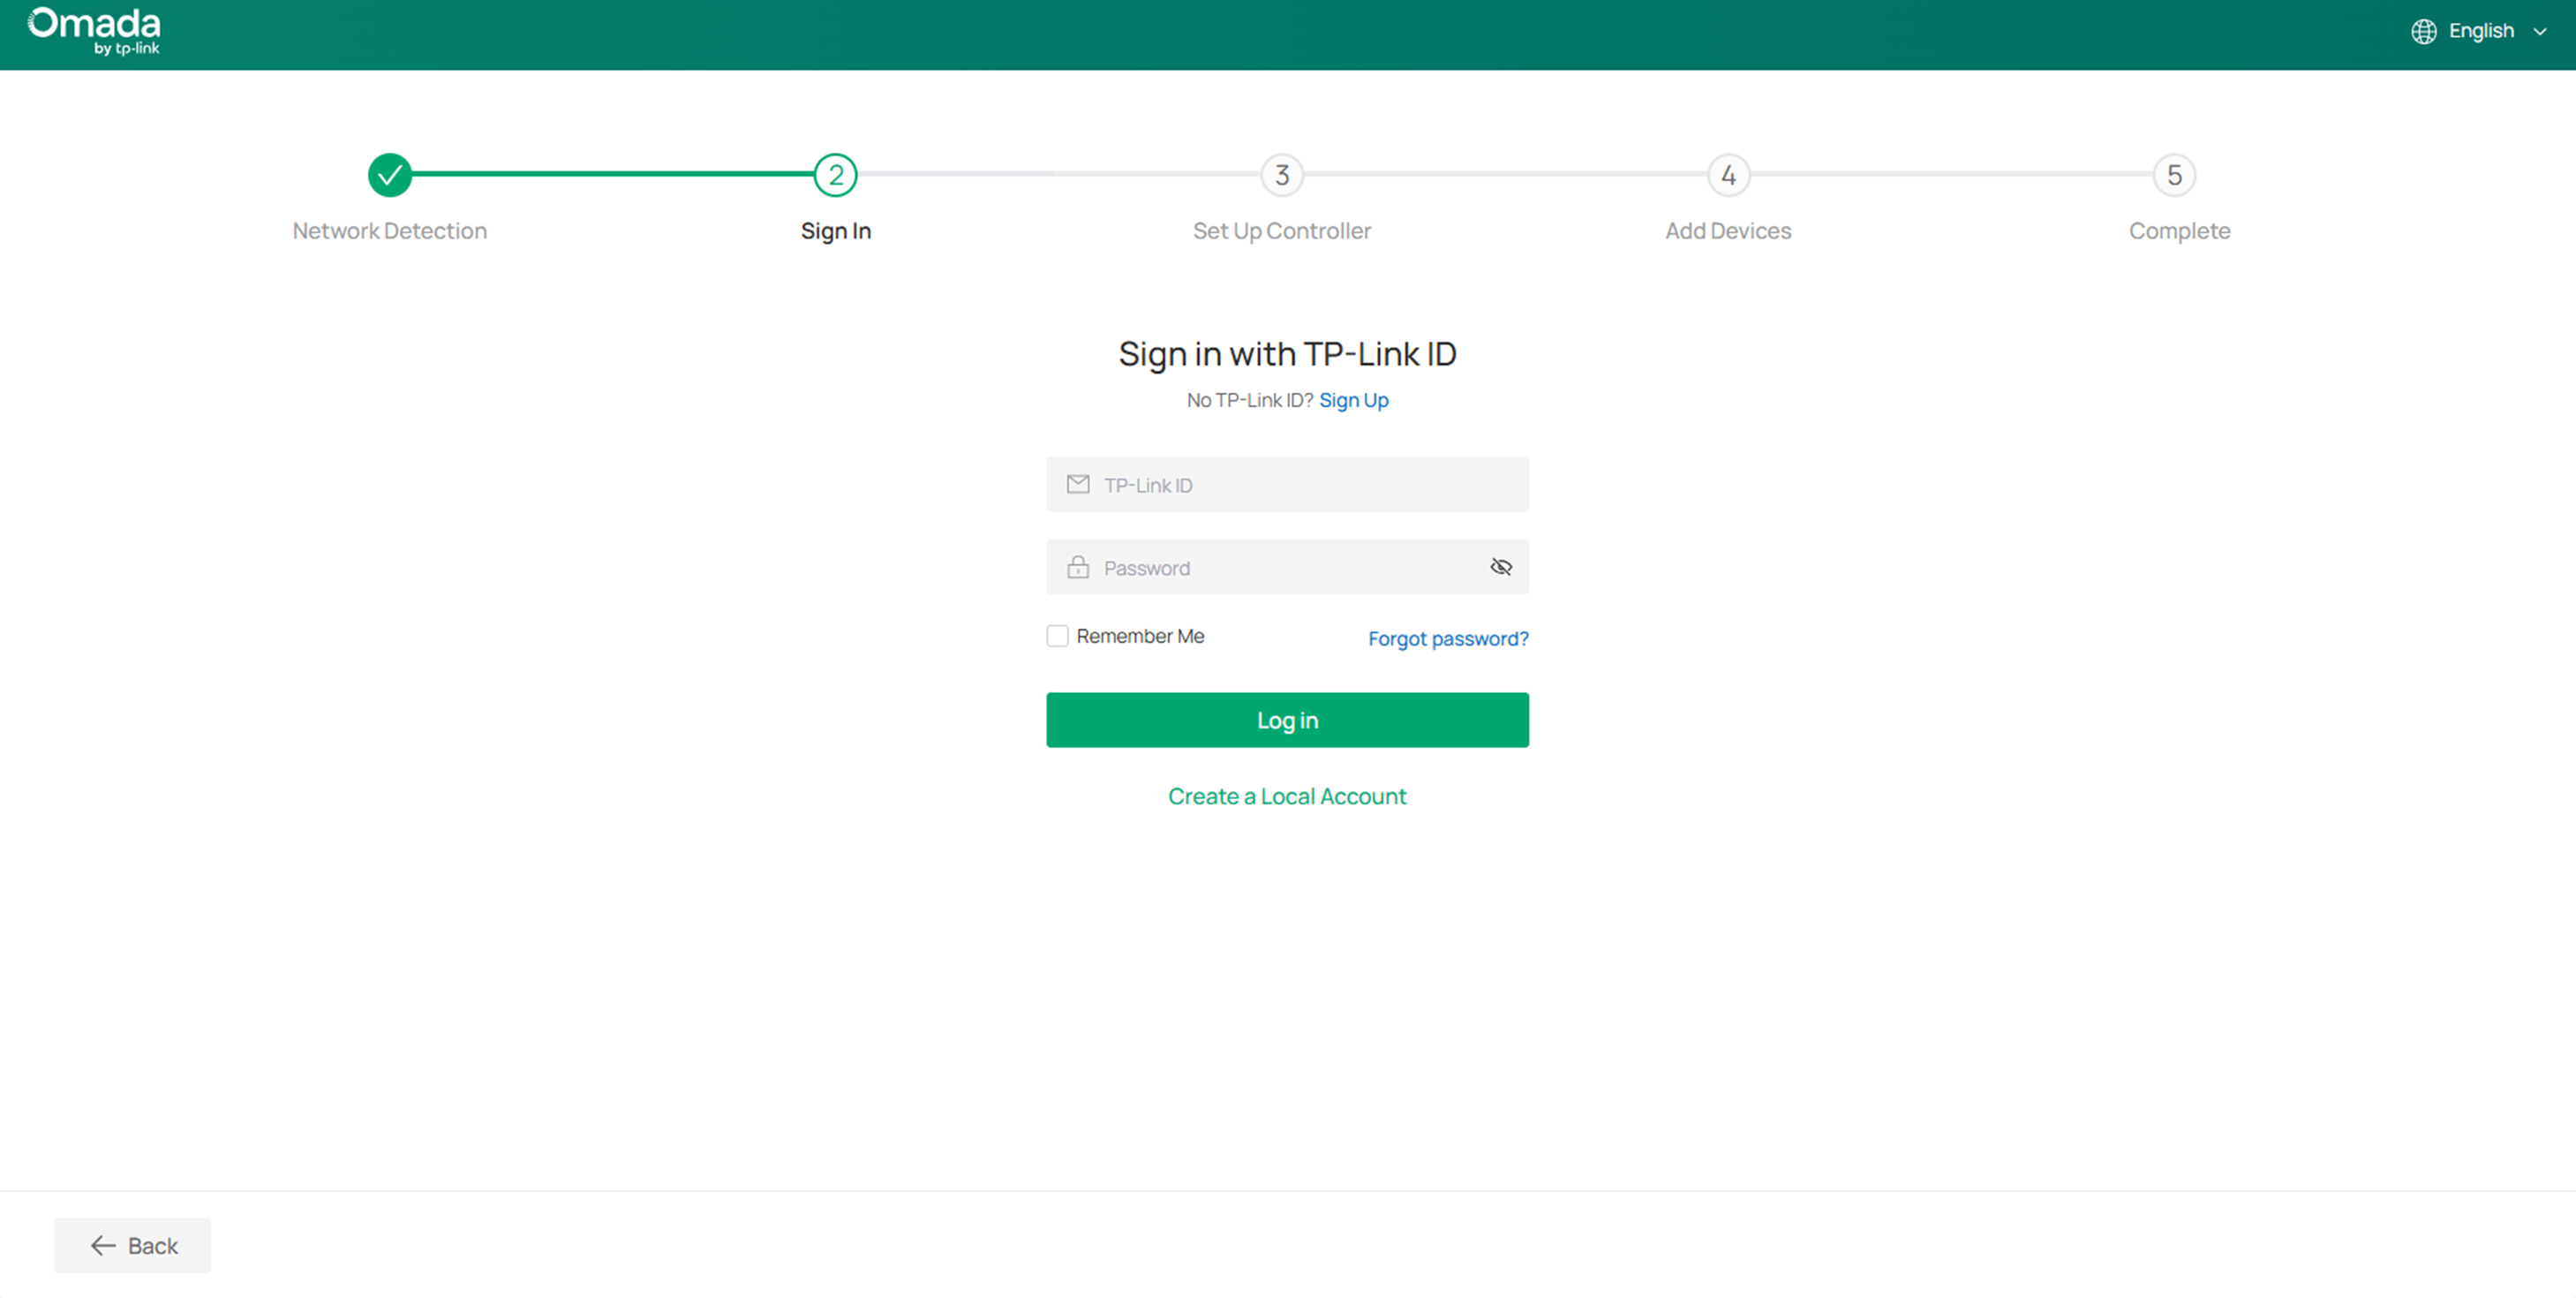
Step 5. To enable Omada Cloud Management and unlock more features, it is recommended to bind the Omada Fusion Gateway to your TP-Link ID.
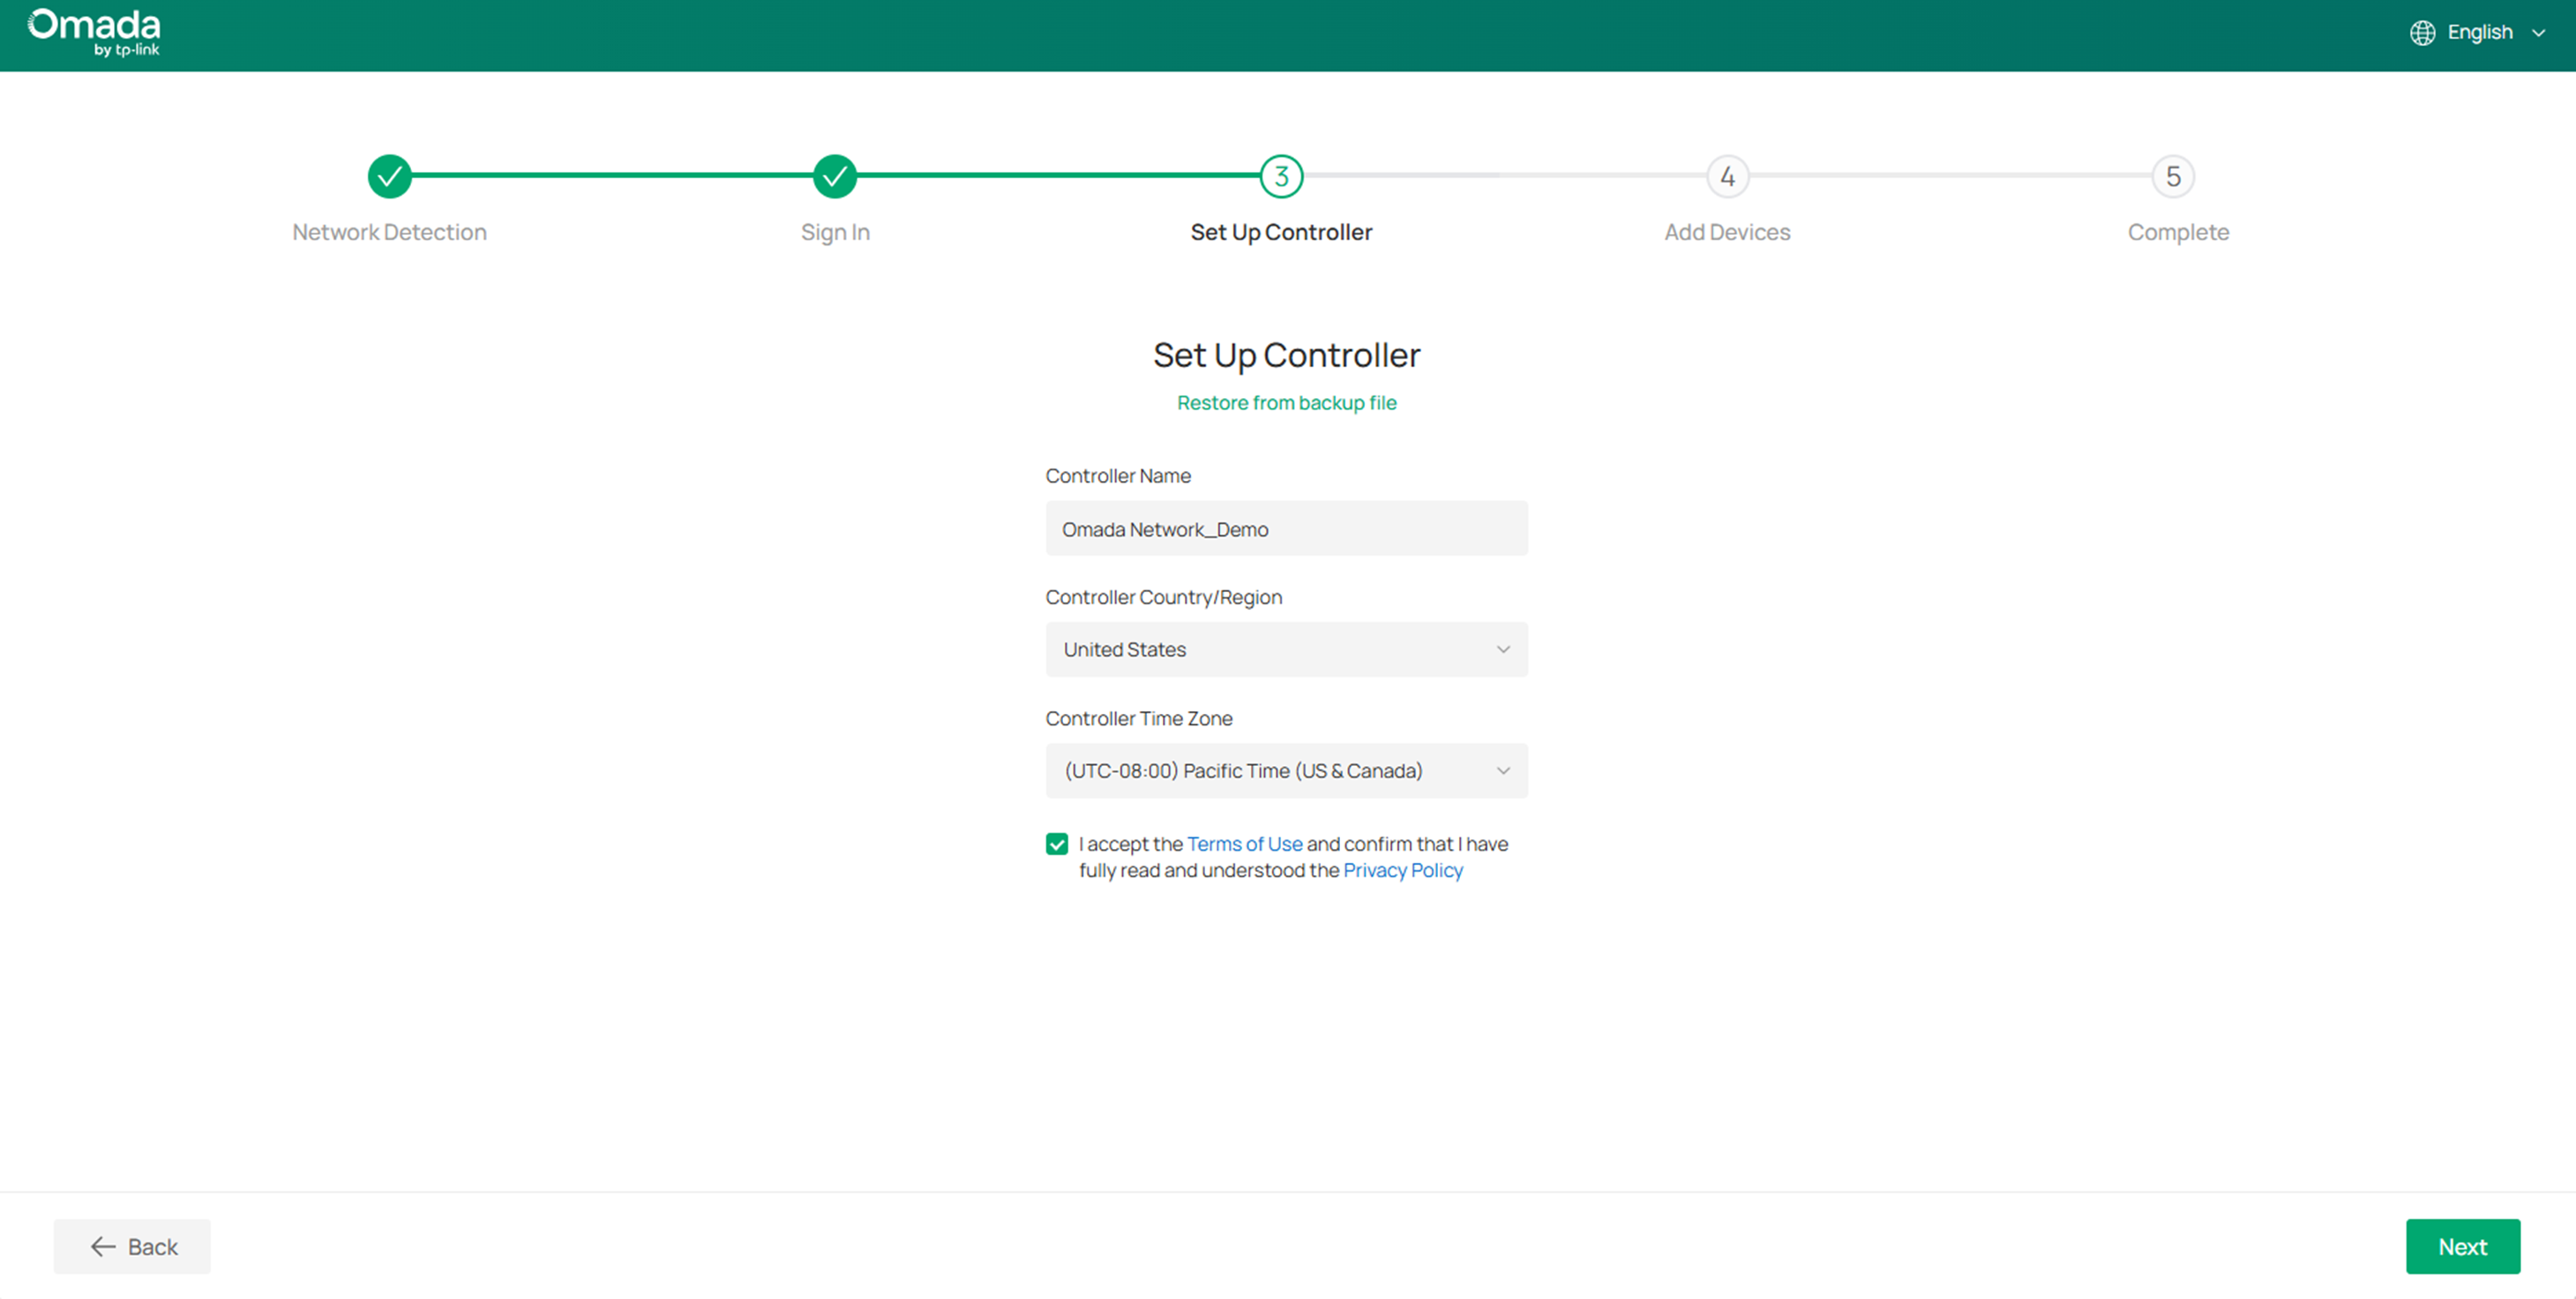
Step 6. Next, name your Omada Fusion Gateway and select the country/region and time zone.
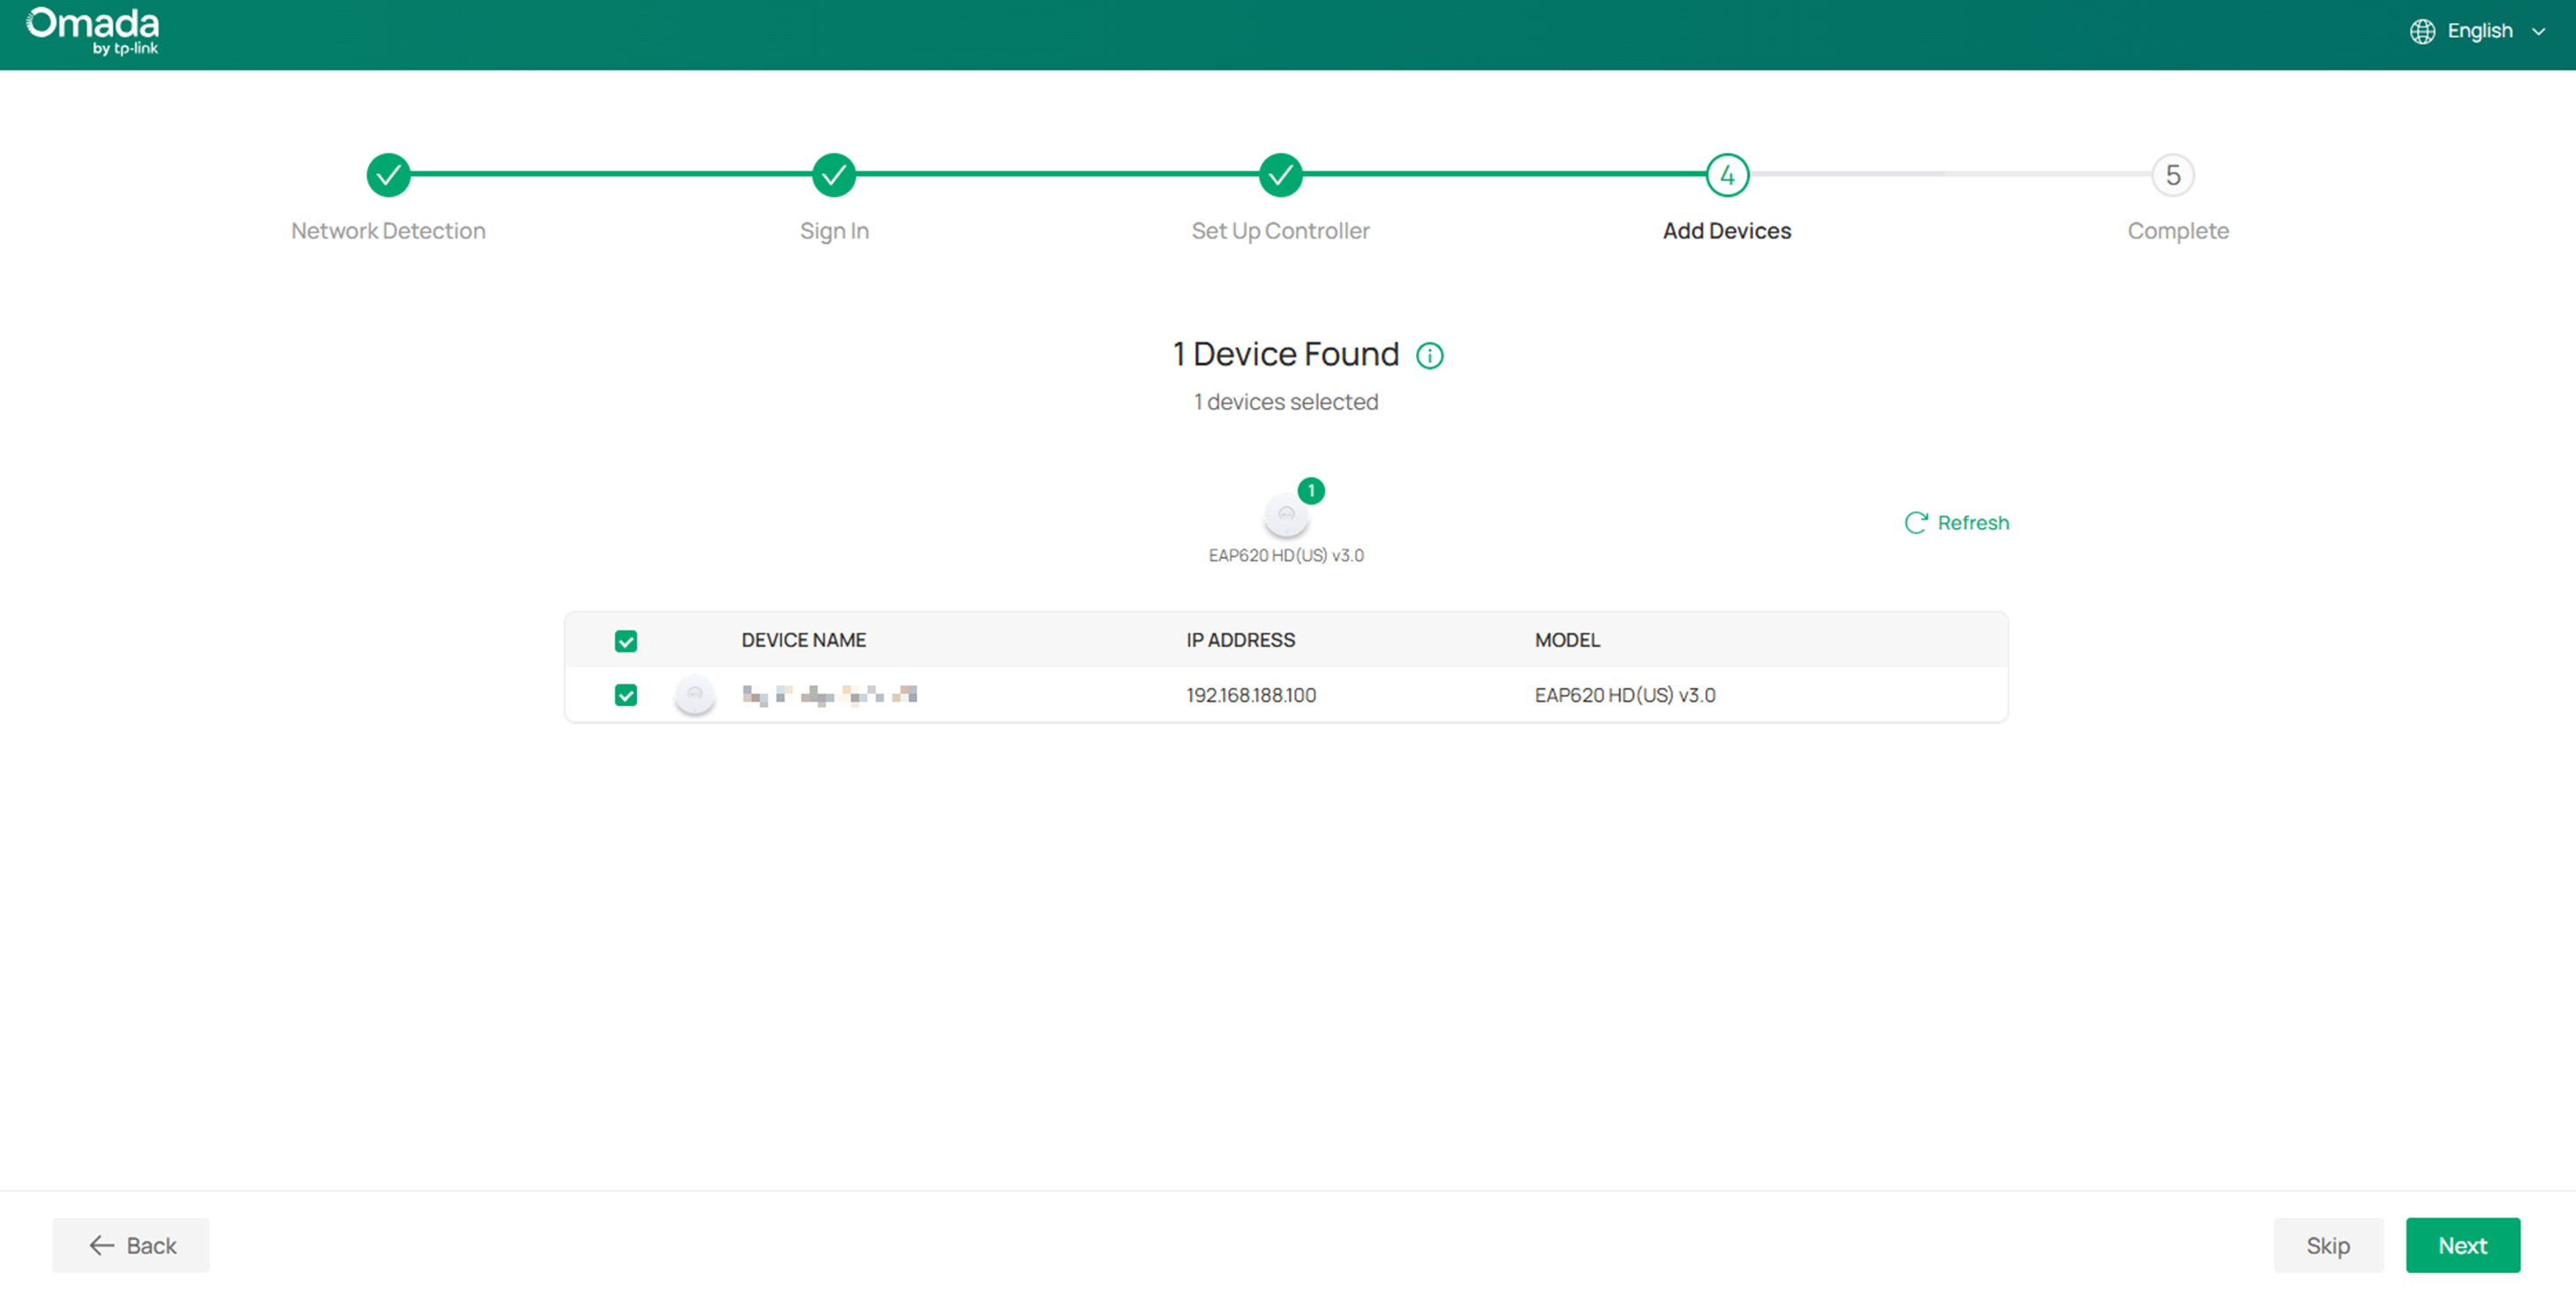
Step 7. If you have already connected other Omada switches or wireless access points in factory mode to the Omada Fusion Gateway, you will be able to find and add them here. If not, click Skip.
Step 8. If you have added one or more Omada wireless access points, you can create an SSID here that uses a simple password.
Step 9. At this point, we have completed the initial setup of the Omada Fusion Gateway. And you are able to review the configuration summary here.
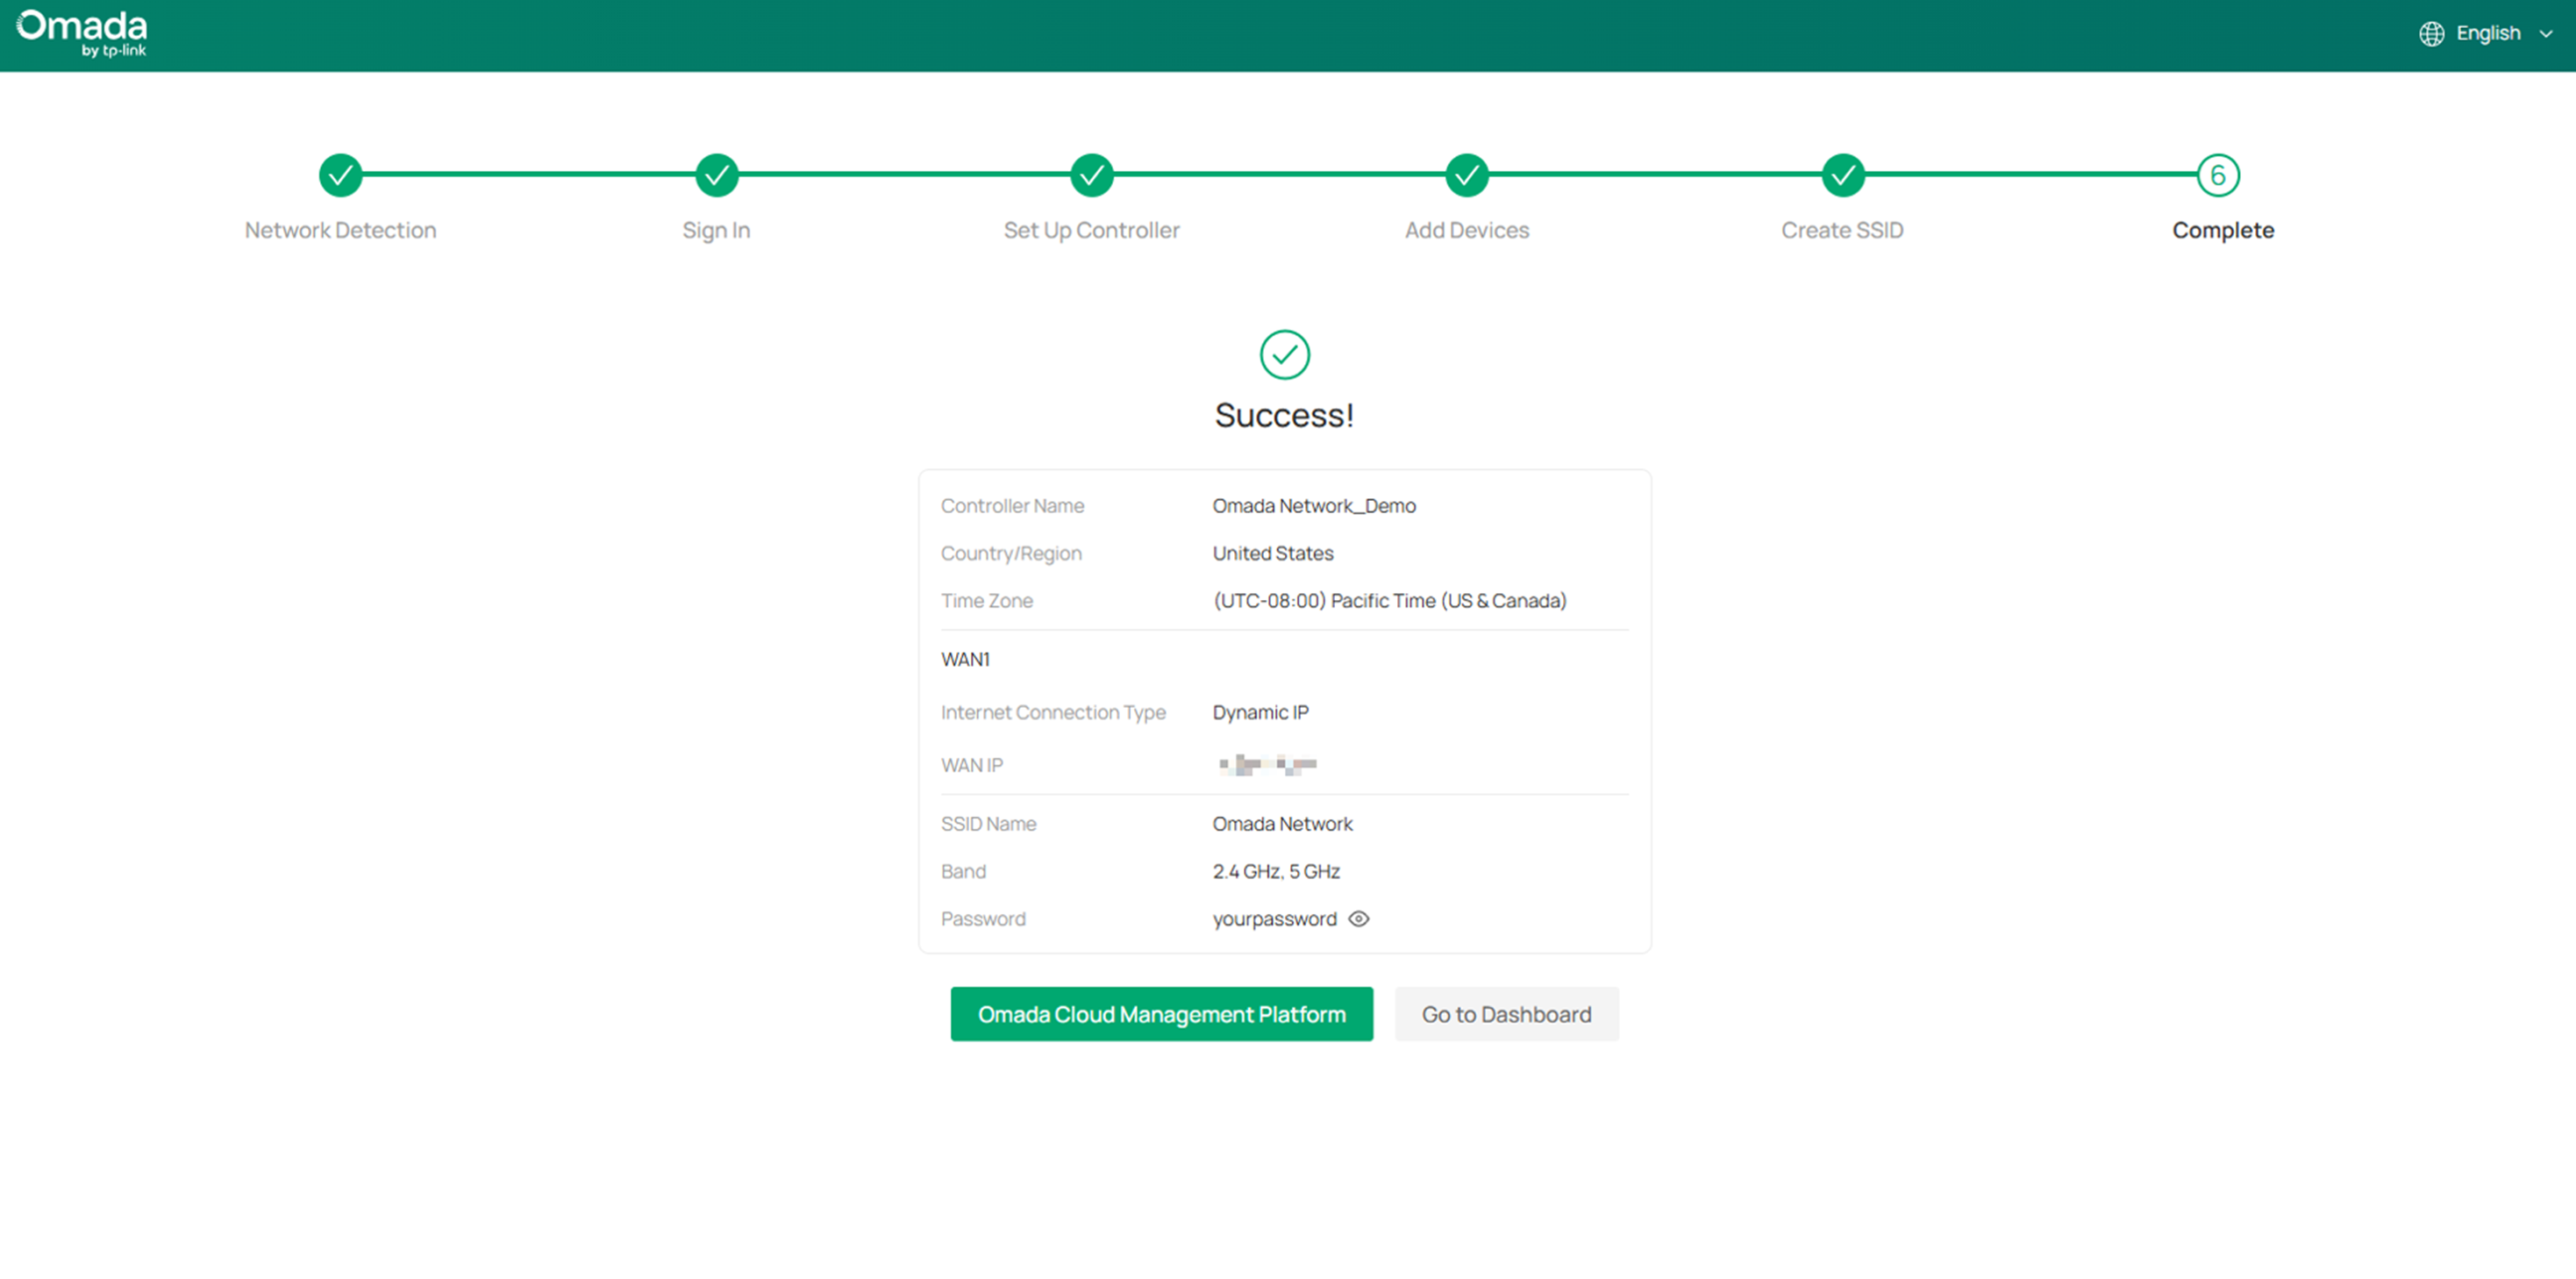
Starting now, with your tp-link ID bound, you can access your Fusion Gateway not only locally but also remotely through the Omada Cloud Management Platform.
And you can also view network health, port status, throughput, and more directly on the screen.
Conclusion
With the initial setup of the Omada Fusion Gateway completed, it's time to dive deeper!
Get to know more details of each function and configuration, please go to Download Center to download the manual of your product.
This article applies to: Fusion 2.5G, Fusion G+
