


How to Configure Remote Access for Omada Devices Using Omada Controller and Omada App


Contents
Configuration under Network Tools
Introduction
When you use the Omada Controller today, troubleshooting issues like device disconnections can be a bit tedious—you often need to export logs, configuration files, and other data, which takes time and slows you down.
To make this easier for you, we’ve added a remote access feature. With it, you can set up a reverse tunnel that lets you remotely reach local services inside your network—like the device’s web interface or SSH. This gives you a faster, more direct way to check, troubleshoot, and configure your devices whenever something goes wrong.
Requirements
- Omada Controller (Software Controller / Hardware Controller / Cloud Based Controller (CBC), v6.2 or above)
- Omada App v5.2.1 or above
- To use this feature, at least one device with firmware compatible with Controller v6.2 or later is required, capable of acting as an intermediate device for access.
Configuration
For different types of Omada devices, each model supports different protocols and provides different options on the Web interface.
|
Device Type |
Supported Protocols |
Web Capabilities (Adopted) |
Web Capabilities (Disconnected) |
Notes |
|
Gateway |
HTTPS, HTTP, SSH |
View device info, reboot/reset, export logs, enable SSH, run network diagnostics |
View device info, reboot/reset, export logs, enable SSH, run network diagnostics, WAN Setting |
- v6.2: SSH/HTTPS/HTTP effective in Cloud-Based Controller; HTTPS/HTTP effective in local Controller; - v6.3: SSH enabled for local scenarios
|
|
SDN Managed Switch |
HTTP、HTTPS、SSH、Telnet |
v6.3: Partial configuration available v6.4: Full decoupling (all configurations available) |
Full Web configuration access |
- v6.2: SSH/Telnet effective only in Cloud-Based Controller - v6.3: SSH/Telnet enabled for local scenarios - v6.4: HTTP/HTTPS access enabled |
|
Access Point (AP) |
HTTPS, HTTP, SSH |
View device info, reboot/reset, enable/disable SSH |
View device info, reboot/reset, enable/disable SSH |
—- v6.2: SSH/HTTPS/HTTP effective in Cloud-Based Controller; HTTPS/HTTP effective in local Controller; - v6.3: SSH enabled for local scenarios.
Only APs with firmware compatible with Controller v6.2 or later support the functions listed in Web Capabilities. |
|
IPC / NVR |
HTTPS |
Configuration available (video playback not supported) |
— |
- Access via Custom tab (Select Online Clients) or Client Details page- Requires a Gateway, Switch, or AP (v6.2+) acting as a proxy |
|
ES Switch |
HTTPS, HTTP (only HTTP is supported after adoption) |
Forbidden, no configuration available |
Reset and Export Configuration File |
- Requires a Gateway, Switch, or AP (v6.2+) acting as a proxy |
|
OLT Device |
HTTP、HTTPS、SSH、Telnet |
Before 202502: Access forbidden
After 202508: Full Web configuration available (pending firmware rollout for some models) |
Same as adopted state |
- Requires a Gateway, Switch, or AP (v6.2+) acting as a proxy |
Configuration under Network Tools
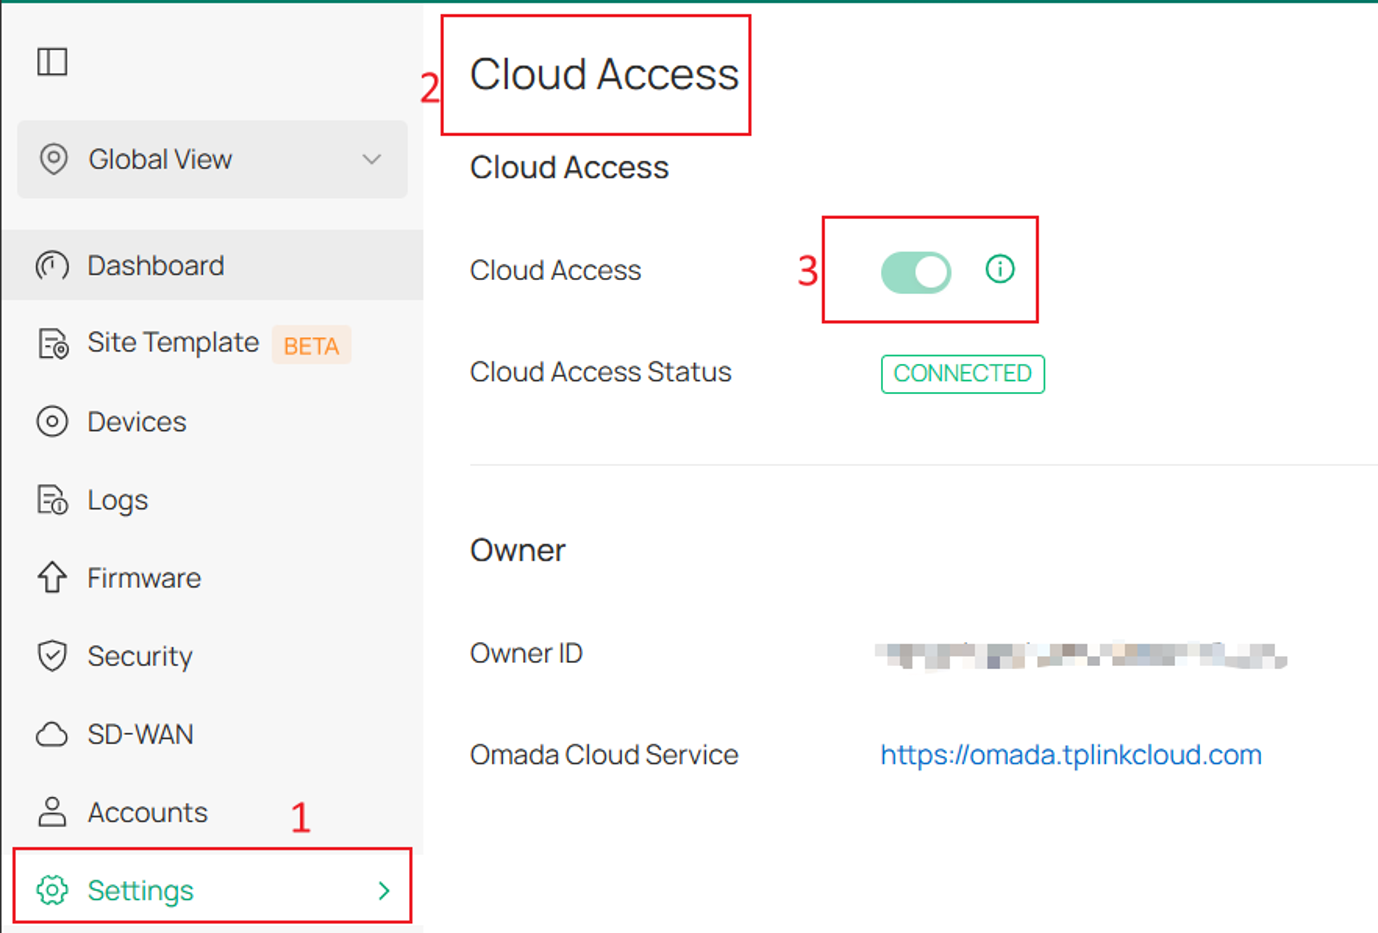
Step 1. We’ll use the local controller as an example. If you want to use the remote access feature, you must first connect to cloud in Cloud Access. Go to Settings > Cloud Access page, Bind your TP‑Link account, and then wait for the status to change to Connected.
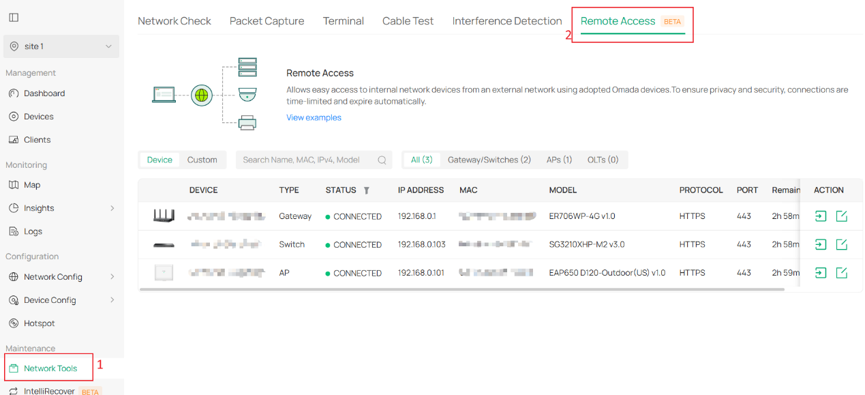
Step 2. Go to Network Tools > Remote Access page. Remote Access is divided into two tabs: Device and Custom.
In the Device tab, devices are automatically populated in the list. The search box enables searches by name, model, IP, MAC, and type. The Device Name column provides sorting capabilities, and the Type and Status columns provide filtering options.
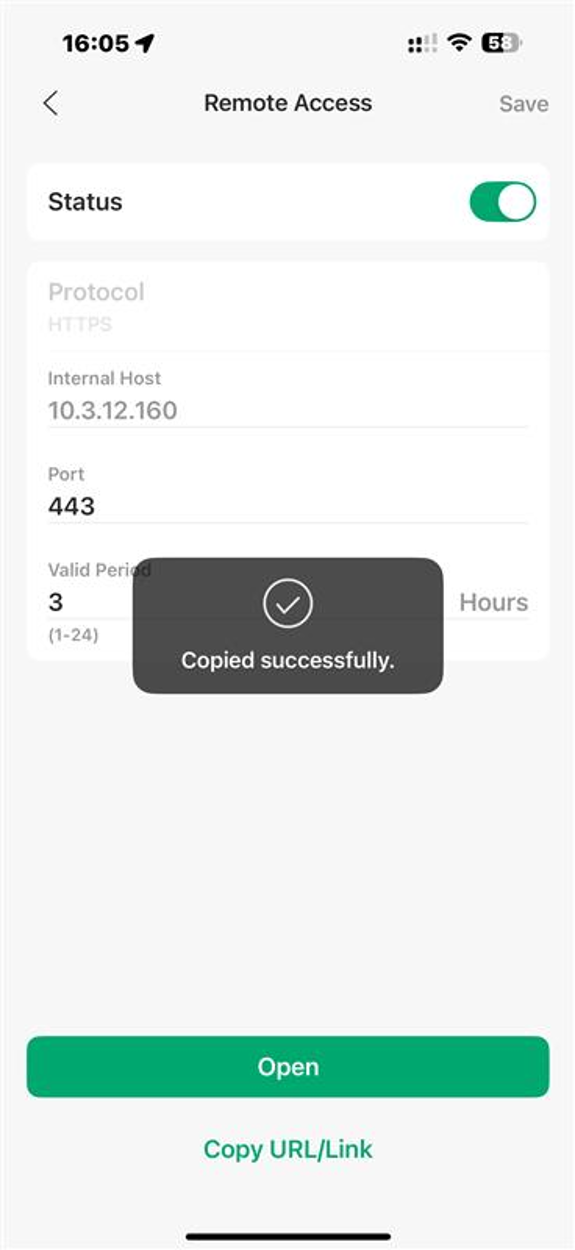
Step 3. Clicking Edit on the right allows you to adjust the tunnel settings. Protocol Type includes HTTP, HTTPS, SSH, and TELNET, each with its own default port, which will be filled in automatically when selected. If the device uses a non‑default port for its protocol, you can manually modify the port value.
By default, a tunnel remains active for 3 hours, but you can set the expiration time anywhere between 1 and 24 hours. The URL redirected through an HTTP/HTTPS tunnel can be copied and shared with others for use as long as the tunnel remains valid. When the tunnel expires, or if the system detects that the tunnel connection has dropped, the tunnel switch will automatically turn off.
An Auto‑Login option is also available. When enabled, it automatically signs you into the device’s interface for remote access.
After the tunnel is created, you can enter the device page directly.
Notes:
1. Only devices in Connected status support “Auto‑Login” feature, and the device must be an adopted Omada device (Gateway, Switch, or AP).
2. Currently, not all Omada models support enabling “Auto‑Login”, as the Controller 6.2 firmware is still being gradually adapted for different devices.

In Controller 6.2, the Local and Cloud Access scenarios currently support only HTTP and HTTPS tunnels, while the Cloud-Based Controller scenario fully supports all four protocols—HTTP, HTTPS, SSH, and Telnet. Support for SSH and Telnet in the Local and Cloud Access scenarios will be added in future versions.
|
Scenario |
Cloud-Based Controller Scenario |
Local Scenario (with Cloud Access) |
|
Supported Protocols |
HTTP / HTTPS / SSH / Telnet |
HTTP / HTTPS |
|
Prerequisites for Local Access |
N/A |
Cloud Access must be enabled |
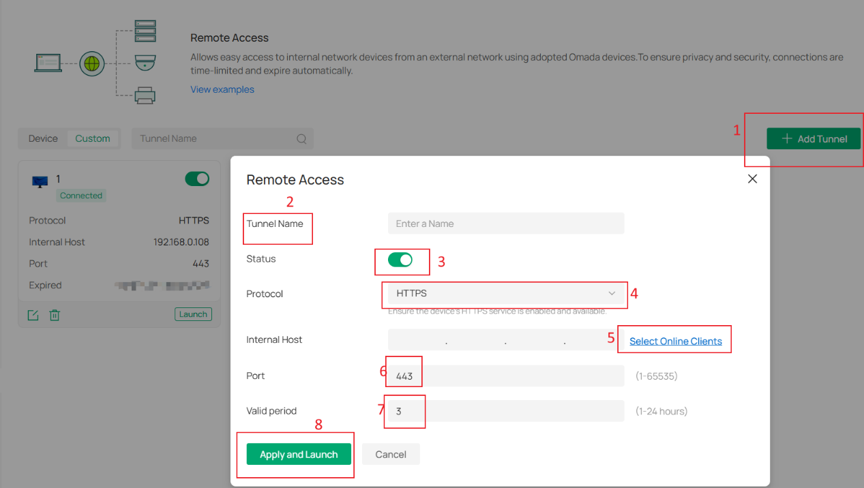
Step 4. In the Custom tab, a search box is available and supports searching by tunnel name.
Click Add Tunnel to create a tunnel manually. You’ll need to enter the Tunnel Name, toggle the Status, select the Protocol Type, and specify the Internal Host and Port.
By default, the tunnel is enabled and has a 3‑hour validity period.
Internal Host refers to the IP address of the device you want to access through the tunnel. You can also click Select Online Clients to choose from currently online devices.
Notes:
The Tunnel feature under both the Device tab and the Custom tab currently does not support the following scenarios:
1. Uploading or downloading large files, such as during firmware upgrades.
2. Accessing web servers that use WWW-Authenticate for authentication, where the browser triggers a pop-up window for entering credentials (for example, SIP servers).
Configuration under Clients
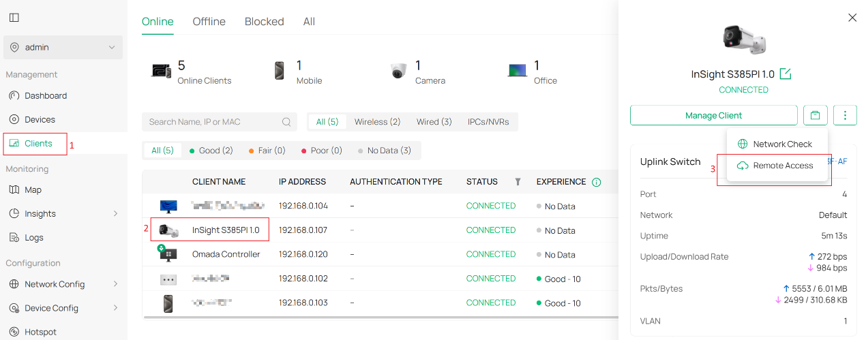
In addition to configuring Remote Access under Network Tools, it can also be configured from the client details page.
However, this method only supports client s identified as IPC/NVR in the client recognition results. For non‑Omada IPC/NVR devices, if they are successfully recognized by the Controller, Remote Access will also be made available.
Step 1. You can go to Clients > device > Network Tools > Remote Access to configure it.
Step 2. The second method is through Manage Client > Tools > Remote Access. The default settings are consistent with those under Network Tools.

Configuration on Omada App
Remote access configuration is also supported on the Omada App, and it likewise only applies to Omada IPC/NVR devices that are recognized as clients in your Omada Controller.
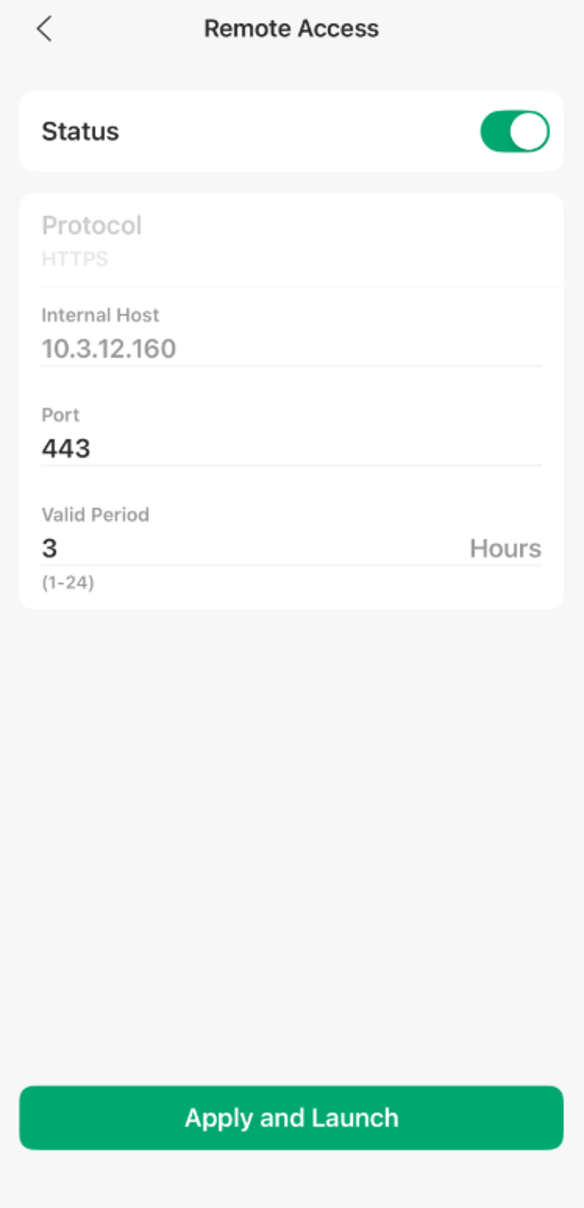
Notes: IPC and NVR only support the HTTPS protocol.
Step 1. Log in with your TP-Link ID, access the Omada Controller interface, and enter the corresponding site, go to Clients.
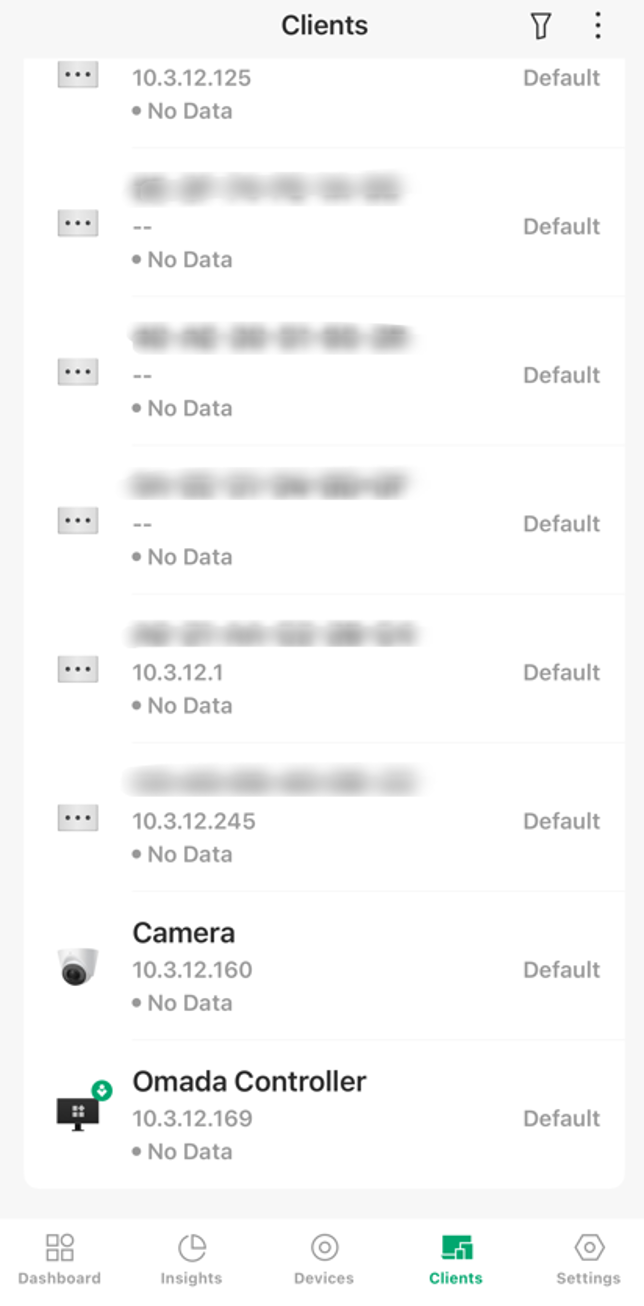
Step 2. Tap the client device to enter its private page, then tap “Remote Access”.
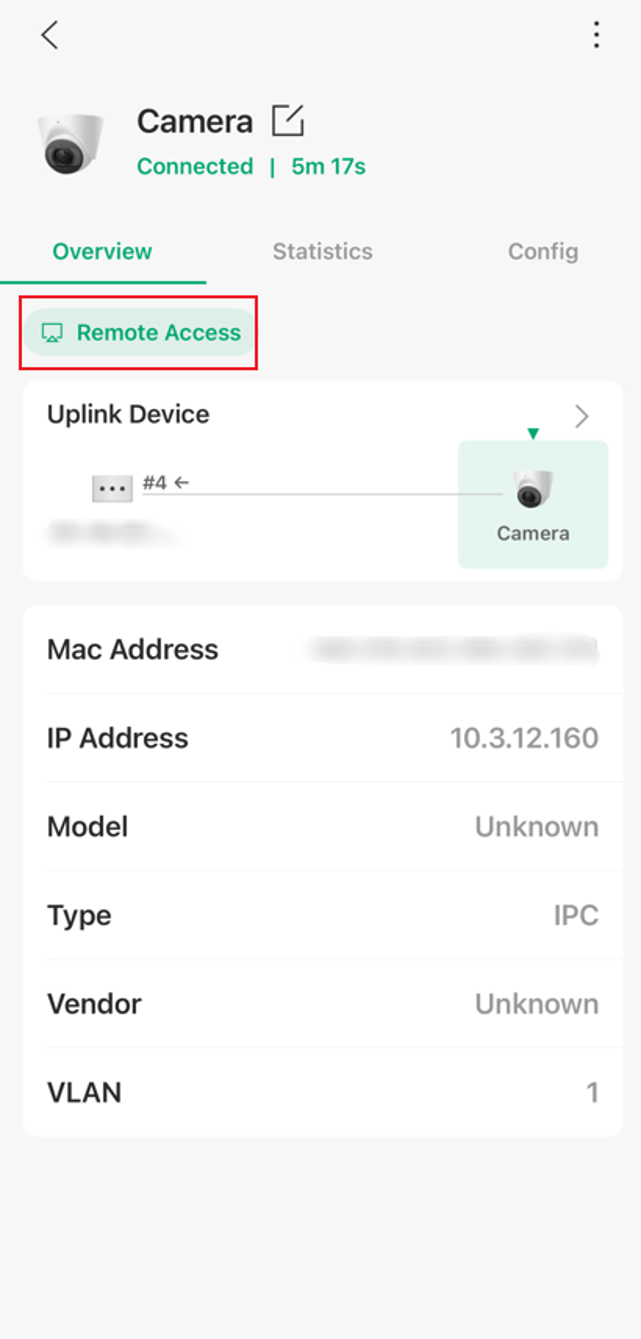
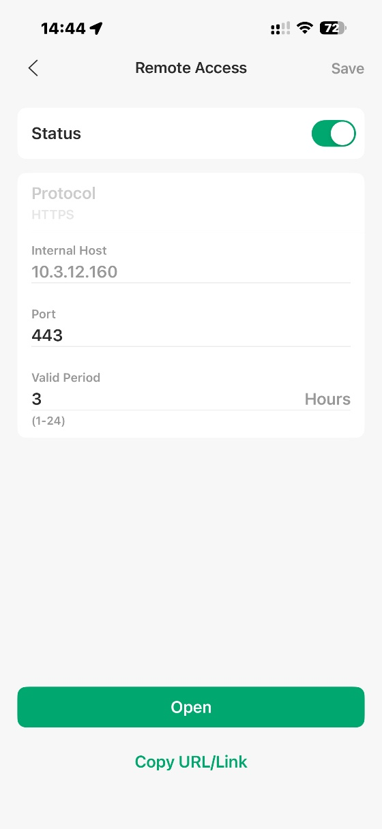
Step 3. If this is your first time configuring Remote Access for this device, confirm that the settings are correct, then tap “Apply and Launch”.
Step 4. Then, the channel will begin to be carated. Once it is successfully created.
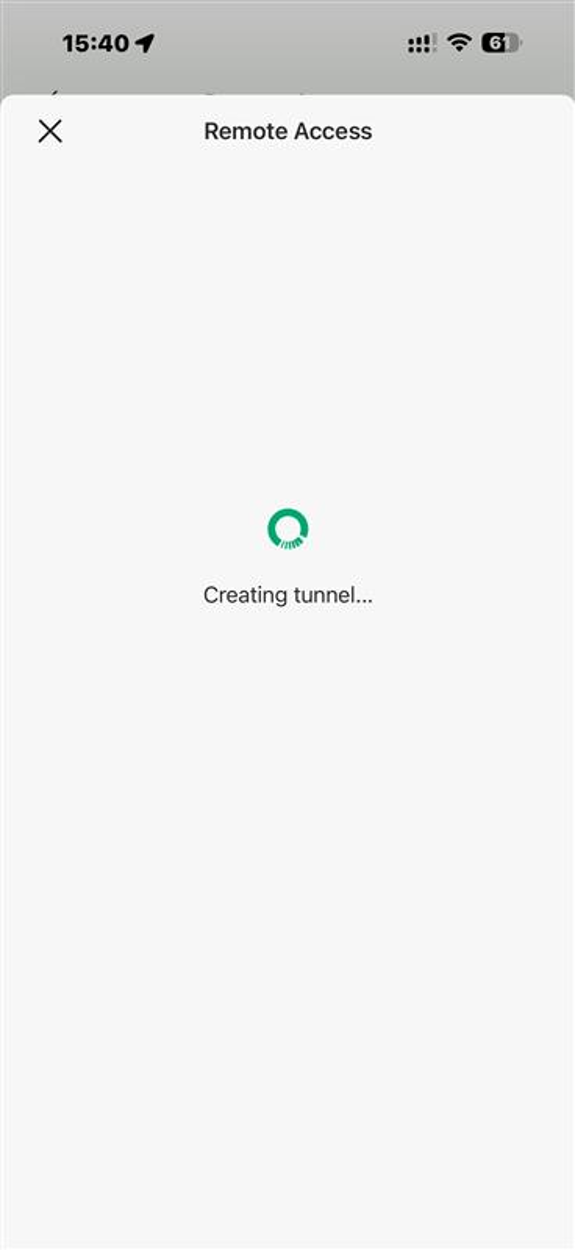
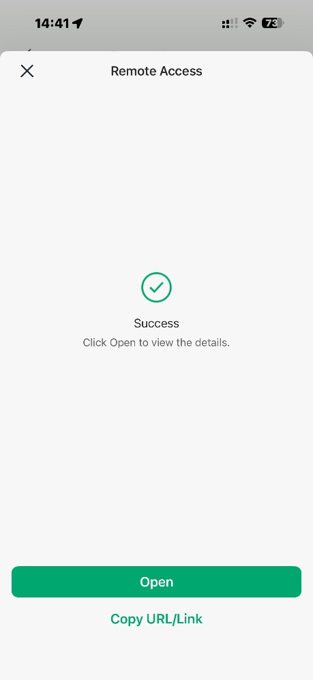
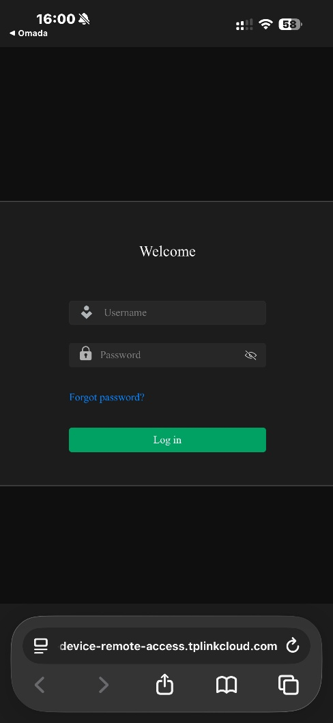
Tap “Open” to jump to the browser and access the device’s internal host.
Tap “Copy URL/Link”, and the remote access URL of the device will be automatically copied to your phone.
If the tunnel creation fails, you can perform the following checks and then try creating the tunnel again:
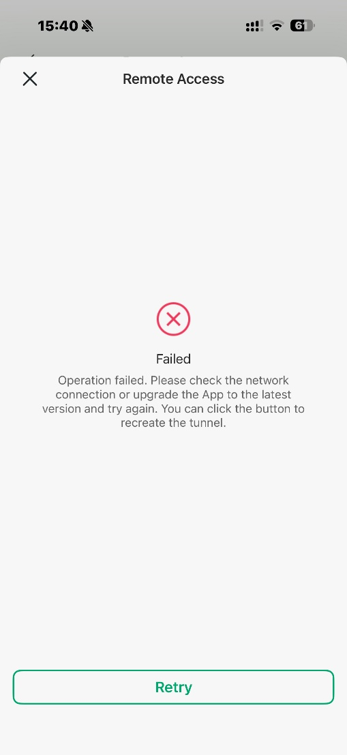
- Check network connectivity and confirm whether the device is in a connected status.
- Upgrade the app to the latest version.
- Upgrade device firmware to the latest version.
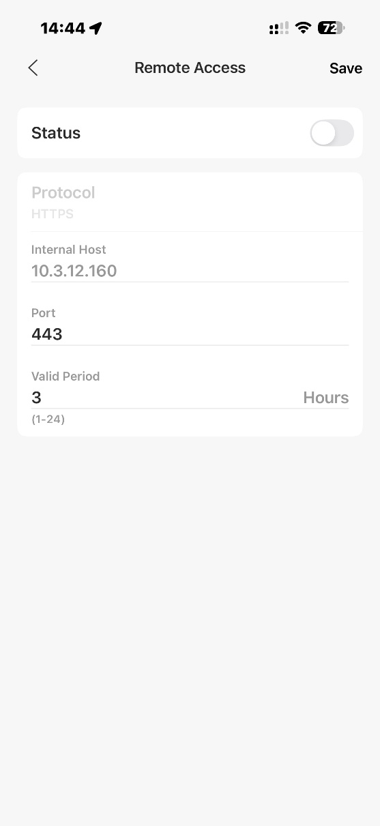
Step 5. When you re-enter the Remote Access details page, or tap a device that already has Remote Access configured, you can modify the device settings or disable this feature.
QA
Q1: The tunnel status shows Enabled, but the page does not load after clicking Launch. What could be the cause?
A1: This issue may be caused by one of the following scenarios. In most cases, it can be resolved by disabling the tunnel and then enabling it again.
1. Local Controller scenario: The Controller was rebooted or experienced a network interruption, which caused the tunnel connection to be disconnected. Since Cloud Access was also disconnected, the tunnel status could not be updated accordingly.
2. Target device IP address change: The IP address of the target device has changed, resulting in the route becoming unreachable.
Conclusion
This FAQ mainly explains the purpose of the Remote Access feature, along with its configuration methods in controller mode.
Get to know more details of each function and configuration please go to Download Center to download the manual of your product.
