


Contents
Adjust the limitation of Customer
Introduction
The MSP (Manager Service Provider) mode extends the management structure of the Omada Controller.
With MSP mode enabled, you can add multiple customers for higher-level management of sites and users. In MSP mode, you can monitor each customer's real-time status, manage all customers to oversee the entire network and handle all accounts.
The MSP mode is recommended for centralized management of sites and devices across different regions.
The article describes how to configure the MSP mode on the Omada Controller and the functional changes that occur when it is enabled.
Requirements
One of the Omada Controller types:
-
Omada Software Controller
-
Cloud-Based Controller Network Only Standard Organization
Configuration
Enable MSP Mode
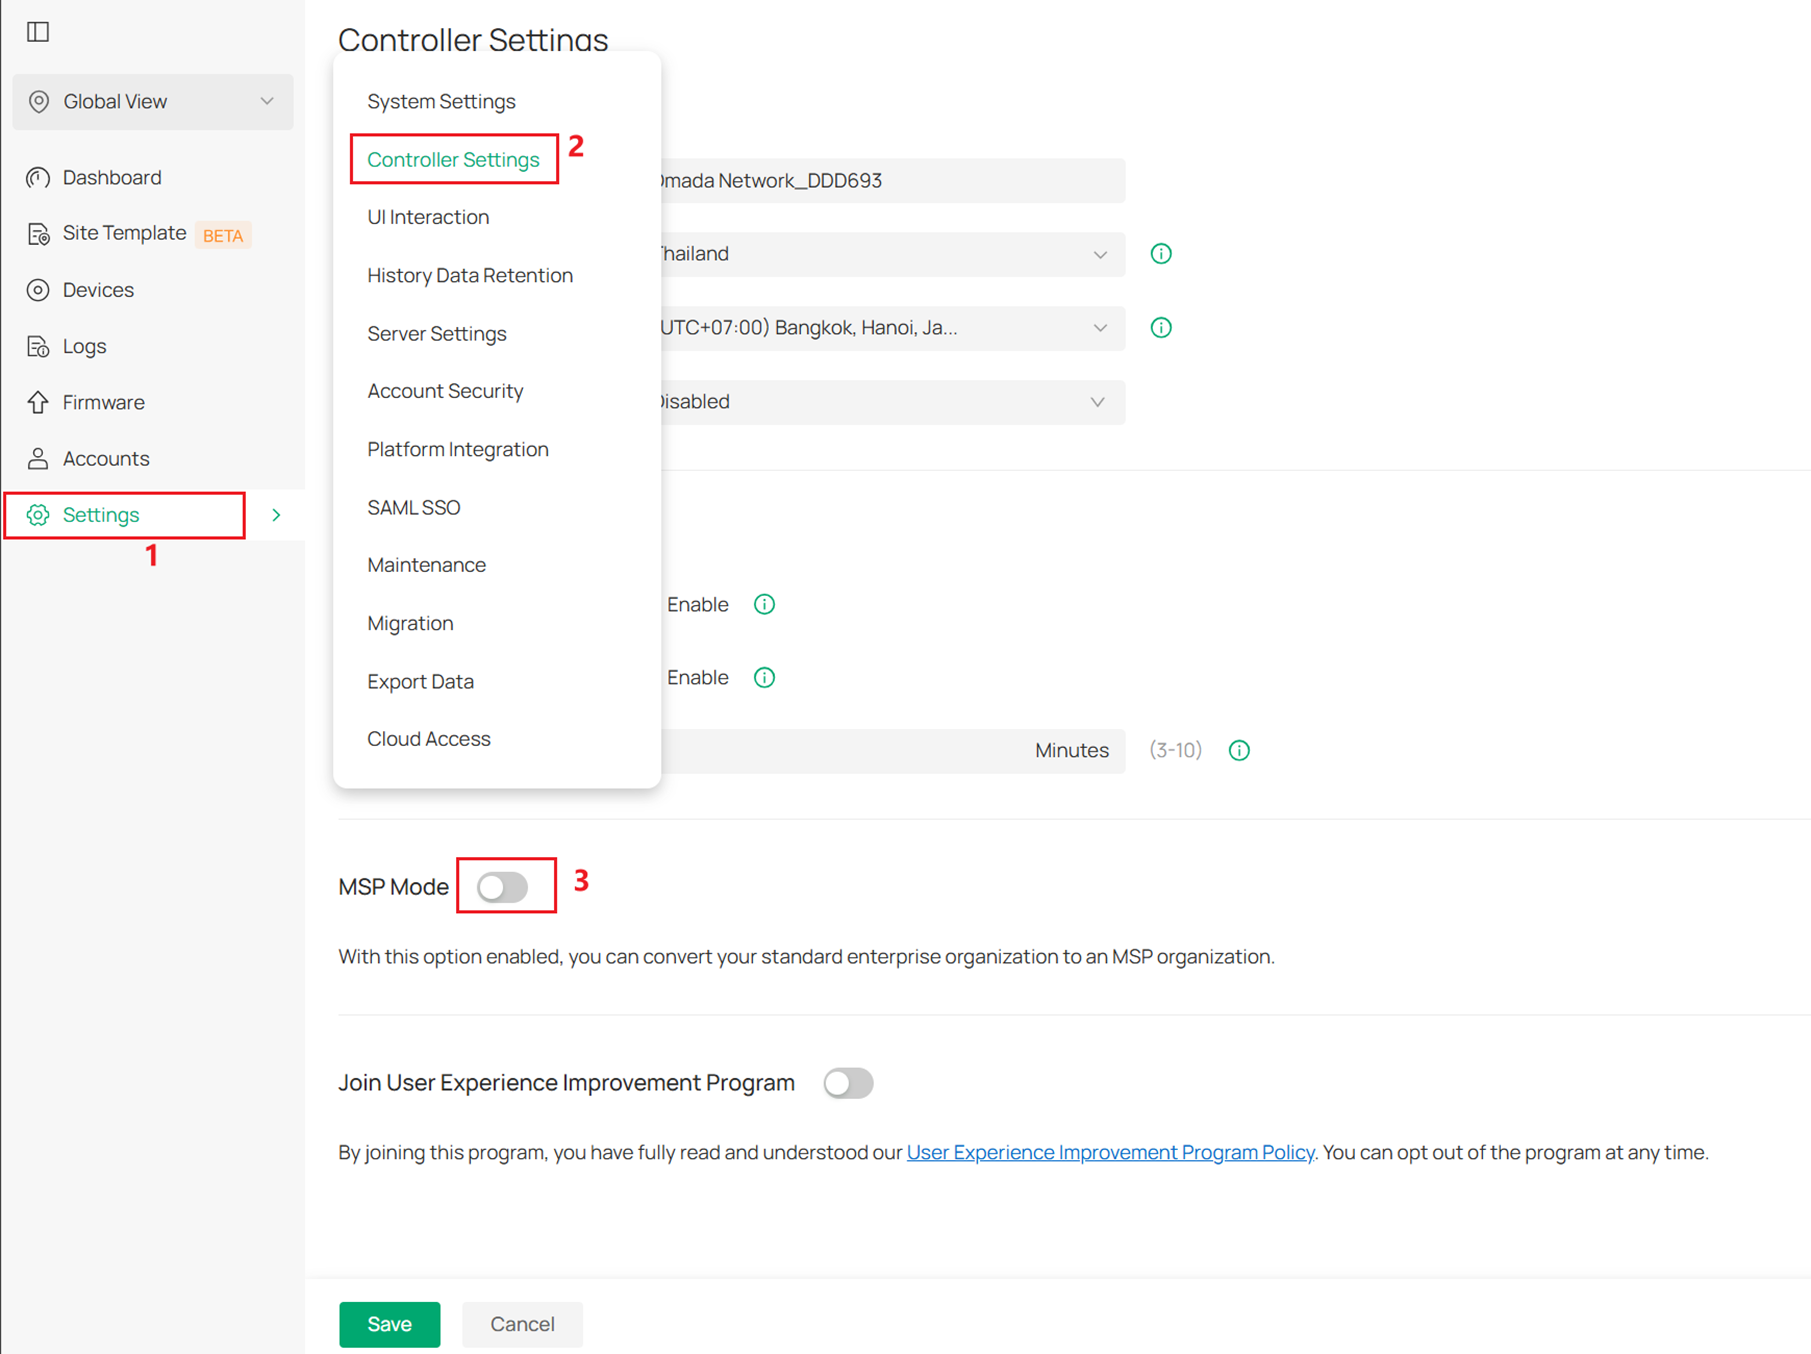
Step 1. Enable the MSP Mode in Global Settings > Controller Settings.
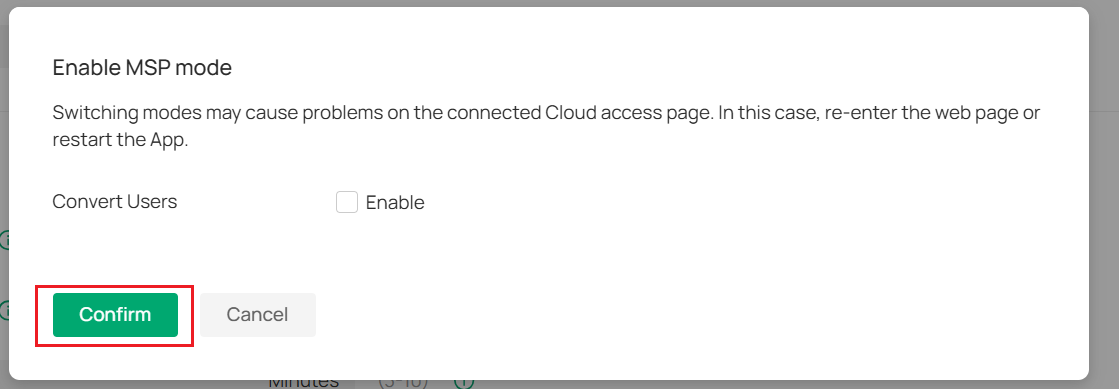
Step 2. Click the Confirm button.
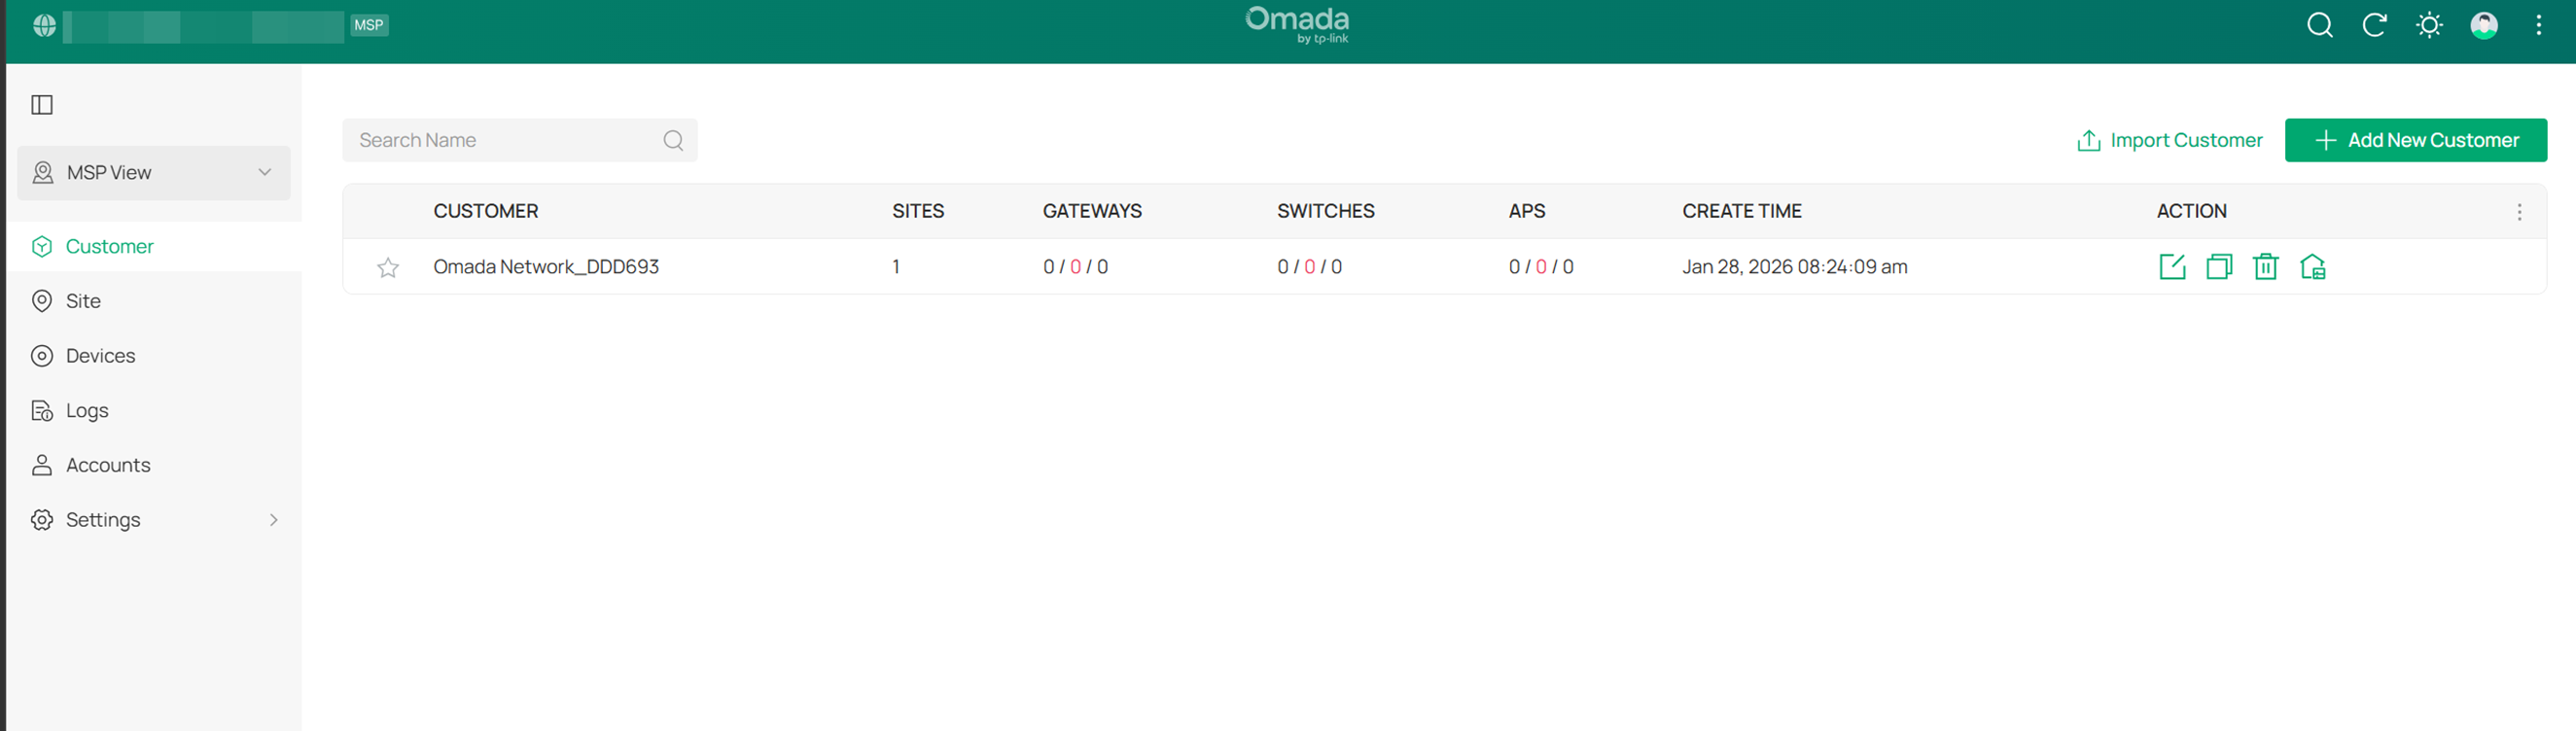
Step 3. After enabling the MSP mode, you will enter the MSP view by default.
Add and Manage Customers
You can add a customer in three ways:
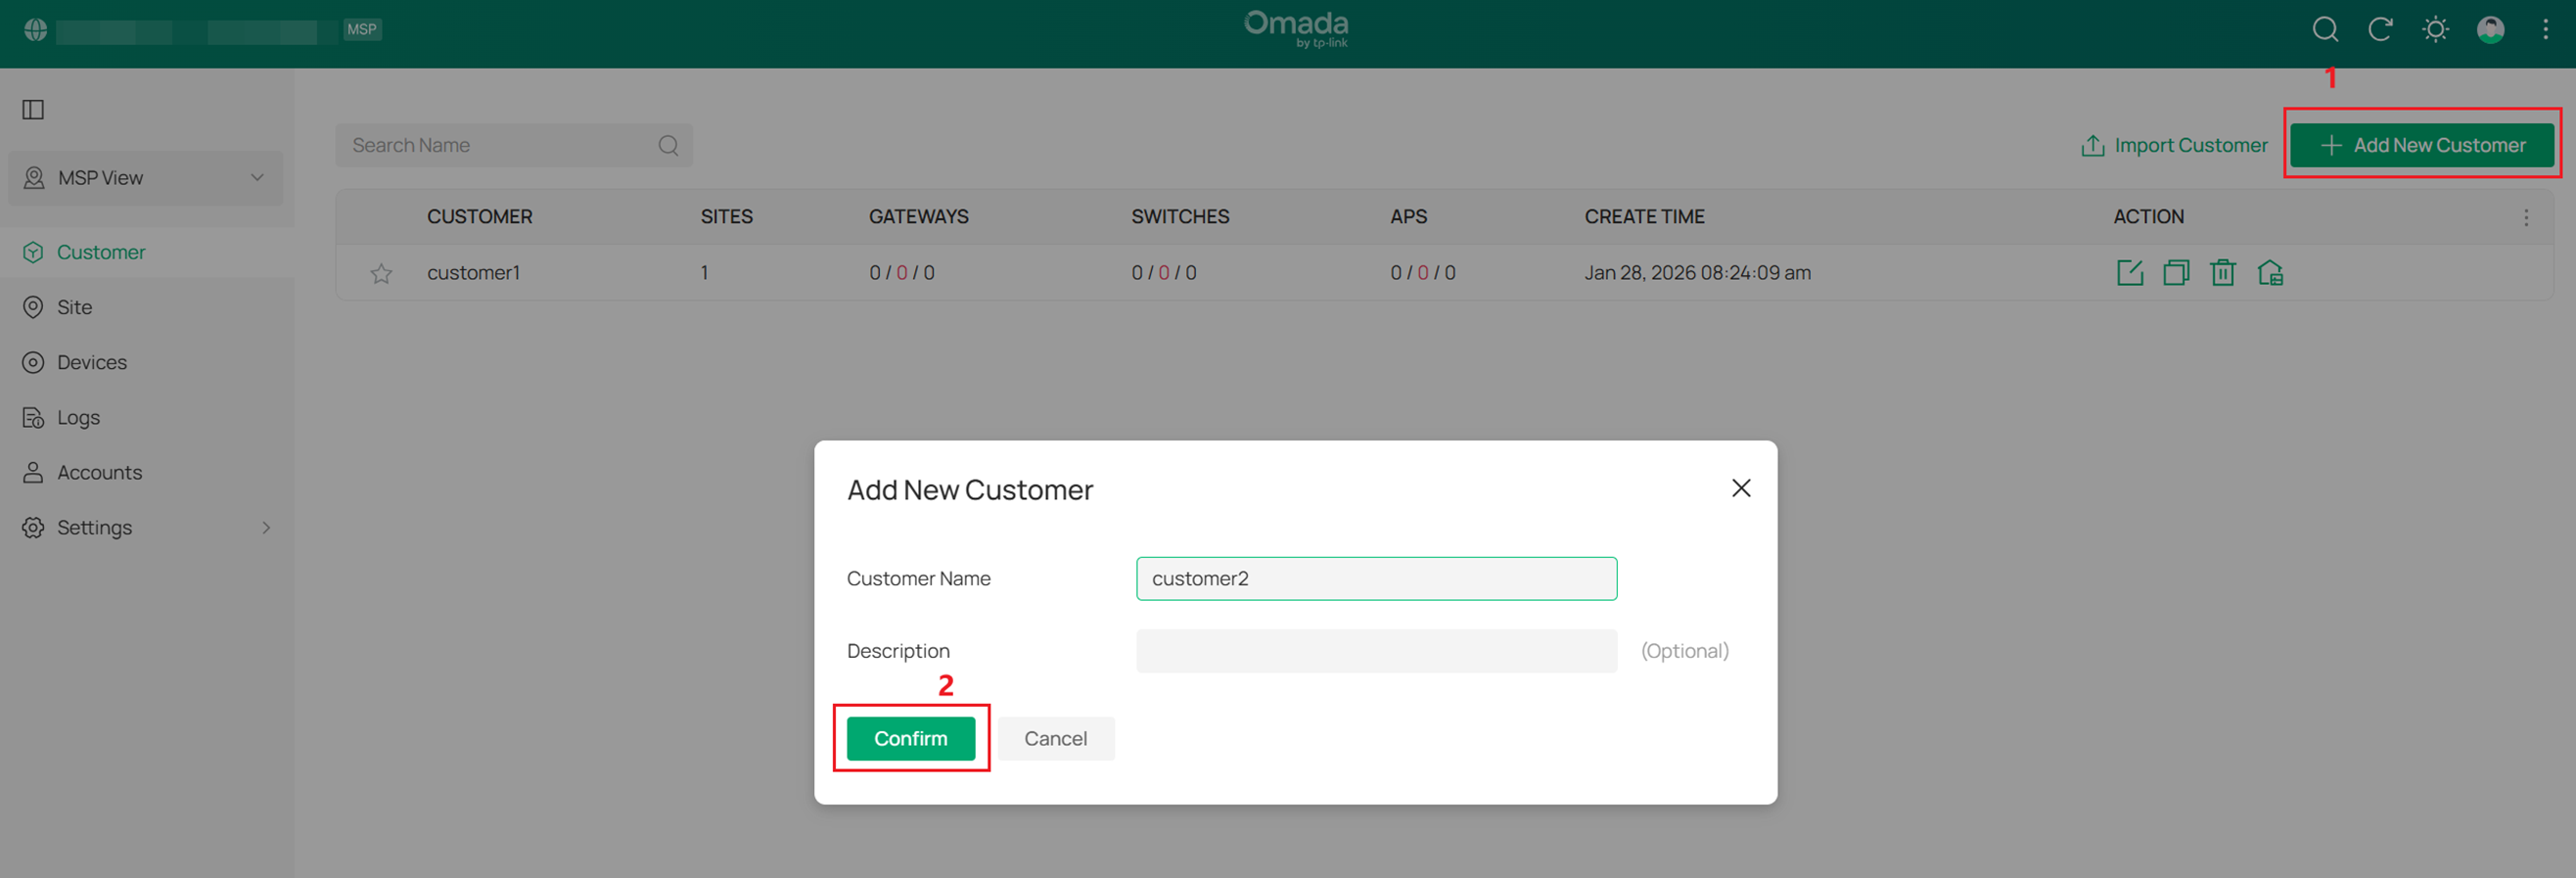
- Add New Customer: Click Add New Customer above the Customer List, enter the Customer Name and Description, and click Confirm to add a new customer.
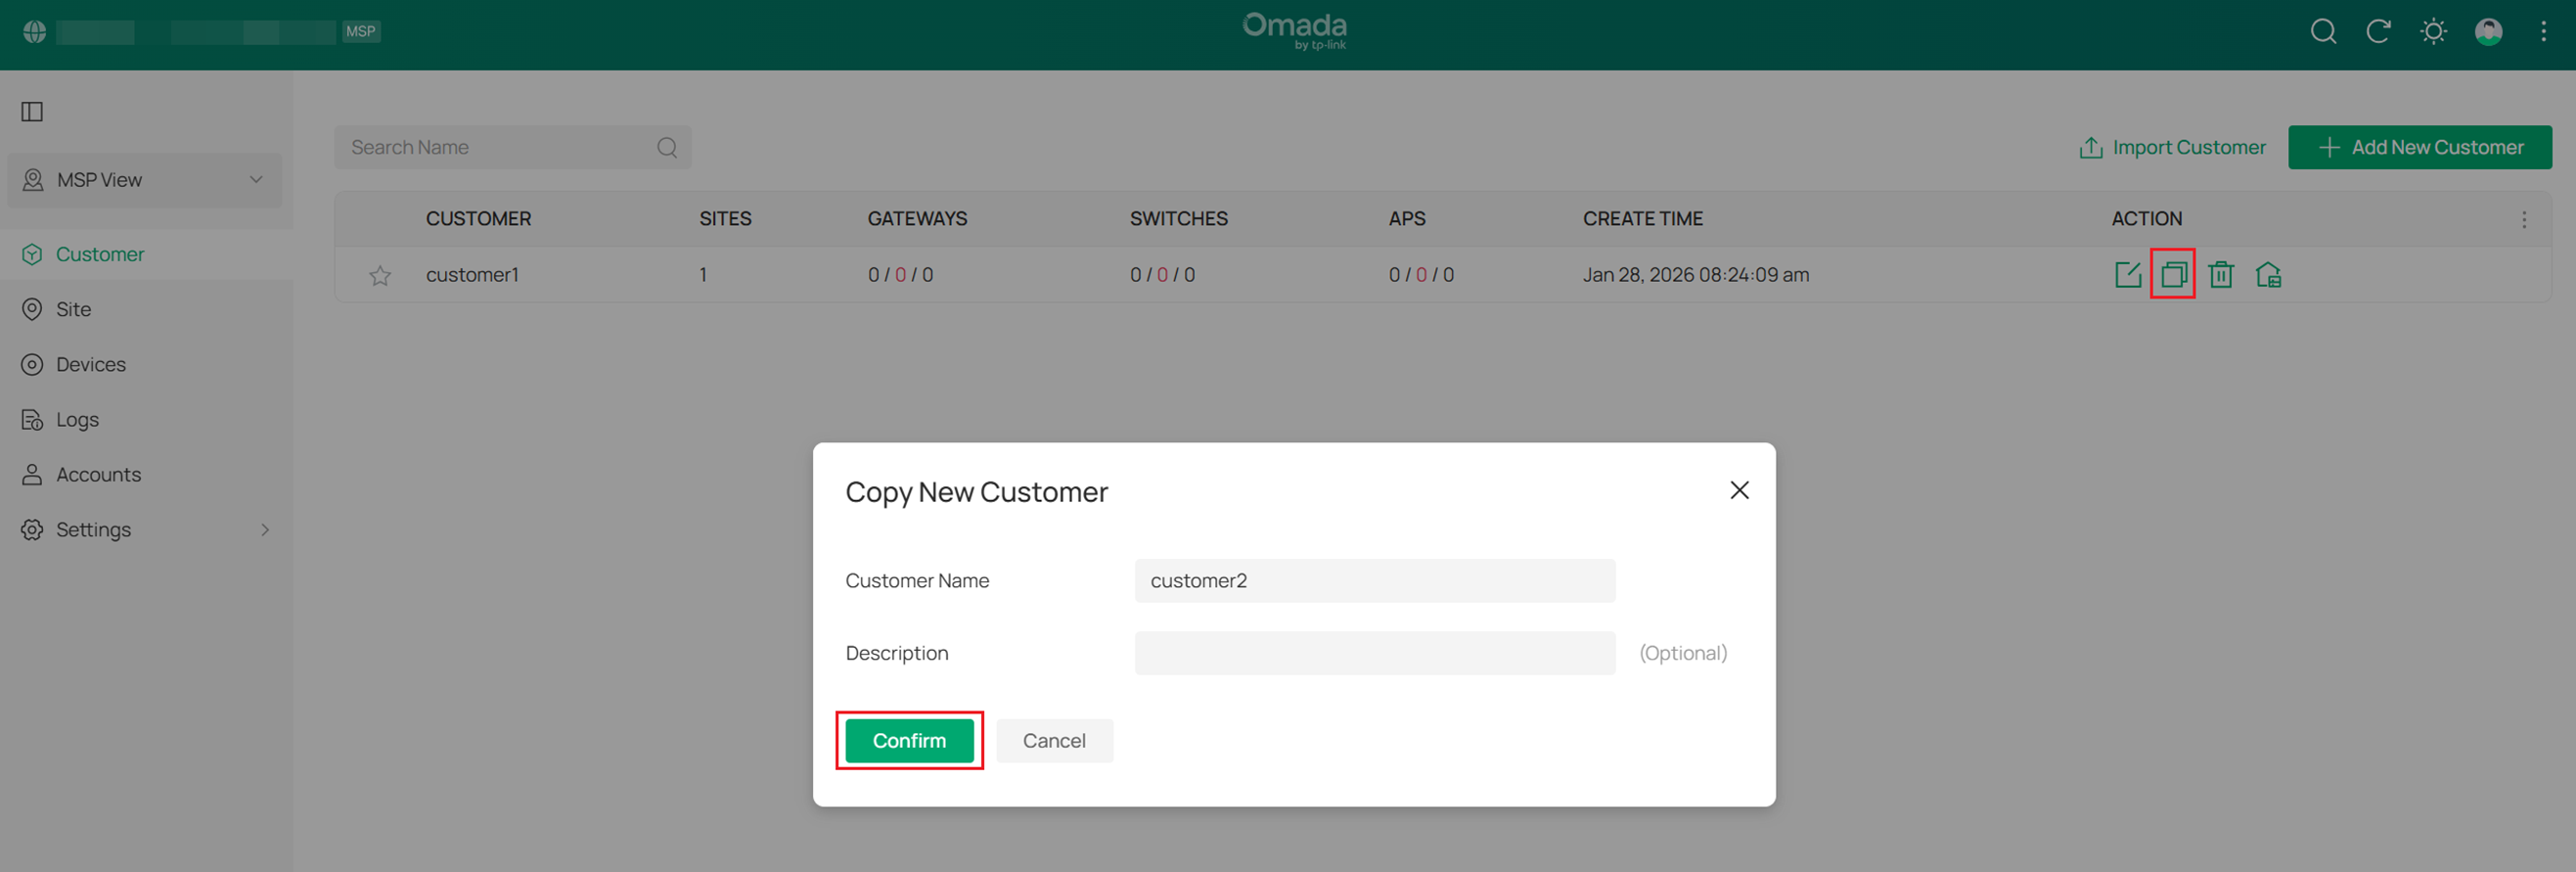
- Copy Existing Customer: Click the copy icon next to an existing customer entry, enter the Customer Name and Description, and click Confirm to copy the existing customer's configuration.
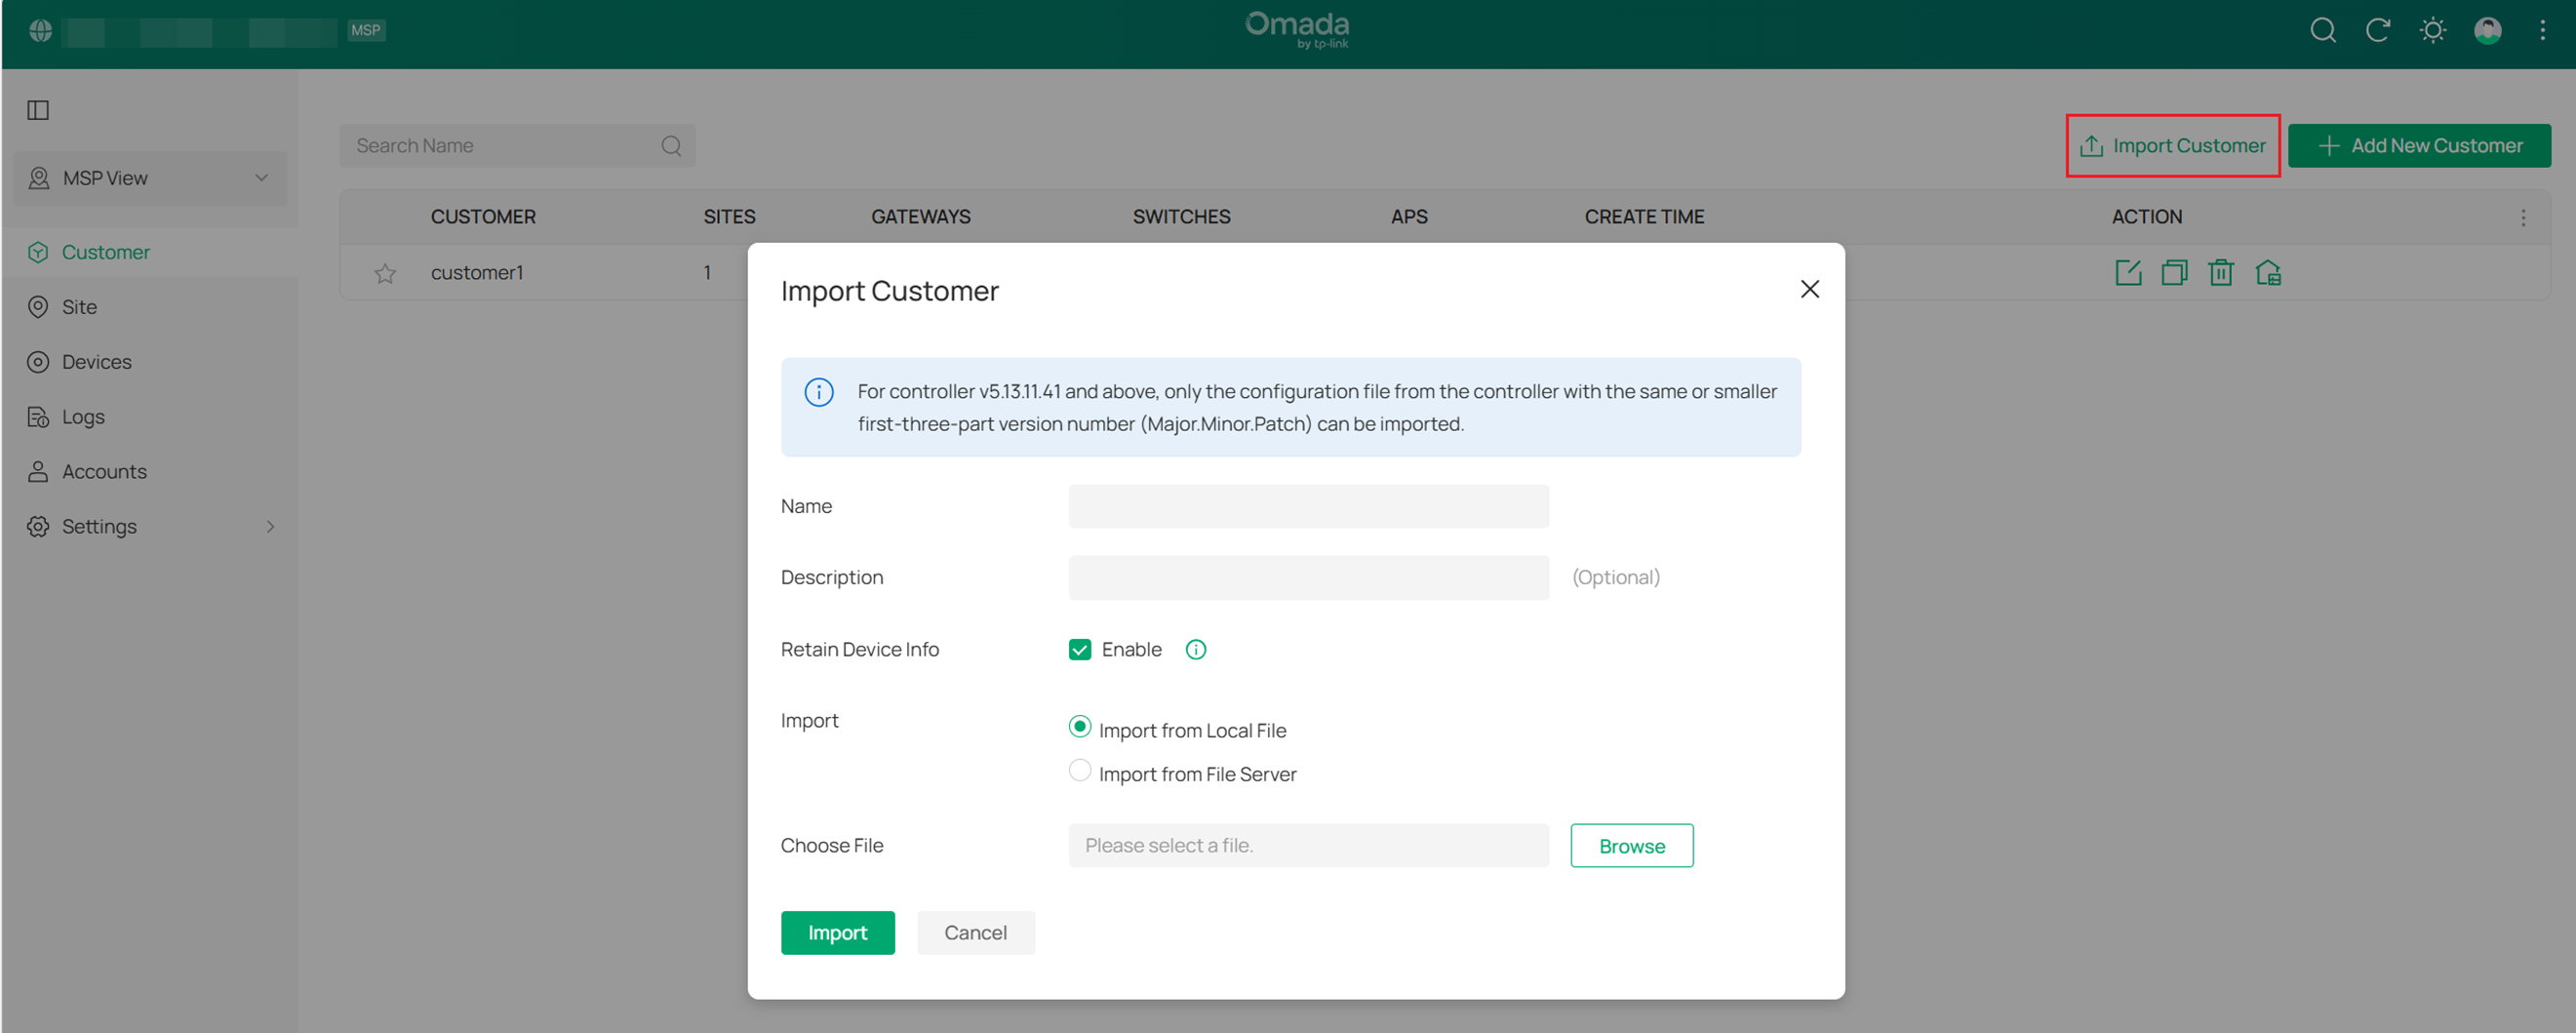
- Import Customer: Click Import Customer above the Customer List, fill in the Customer Name and Description, and decide whether to retain device information. Then, import the configuration file from a local file or file server.
Note: You can only import configuration files from Controllers with the same or smaller first three version numbers.
Add and Manage Accounts
The new customer will be added to the Customer List, where you can view customer information and use the ACTION icons to edit, copy, delete, or log into each customer's controller.
The system provides two levels of roles:
- MSP Role: for managing configurations in the MSP view
- Customer Role: for managing configurations in the Global view and Site view
Each role level has three default account roles: Main Administrator, Administrator, and Viewer. You can also create new account roles and customize their access permissions.
- Main Administrator
The Main Administrator can access all features in the corresponding view. The account that first starts the controller will be the Main Administrator.
- Administrator
Administrators can access most features in the corresponding view, but some modules are restricted. For instance, they do not have permission to perform customer migrations or automatic data backups, and they have view-only access to license management and custom account roles.
- Viewer
Viewers can view the status and settings of certain features in the corresponding view.
- Customer Role
Custom roles can be configured to access different features in the corresponding view.
To create a custom role, follow the steps below:
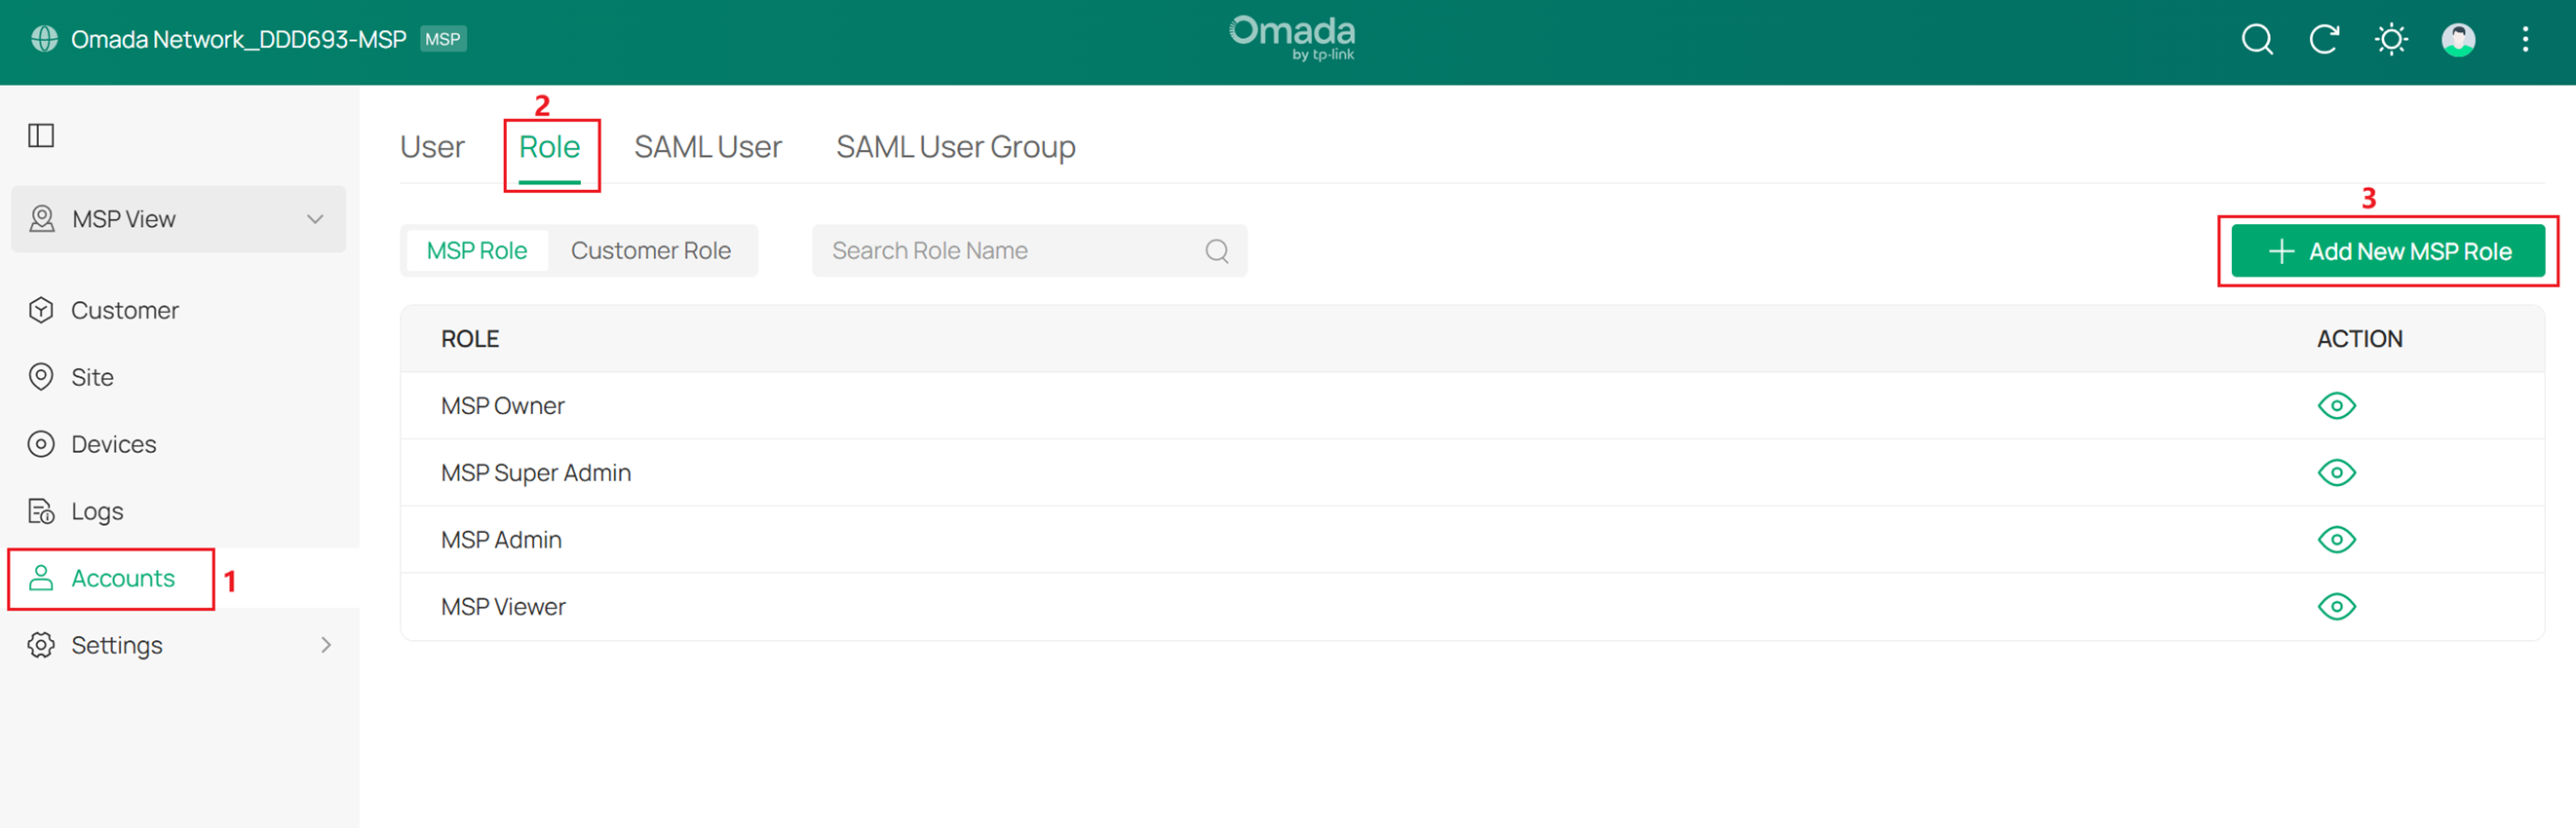
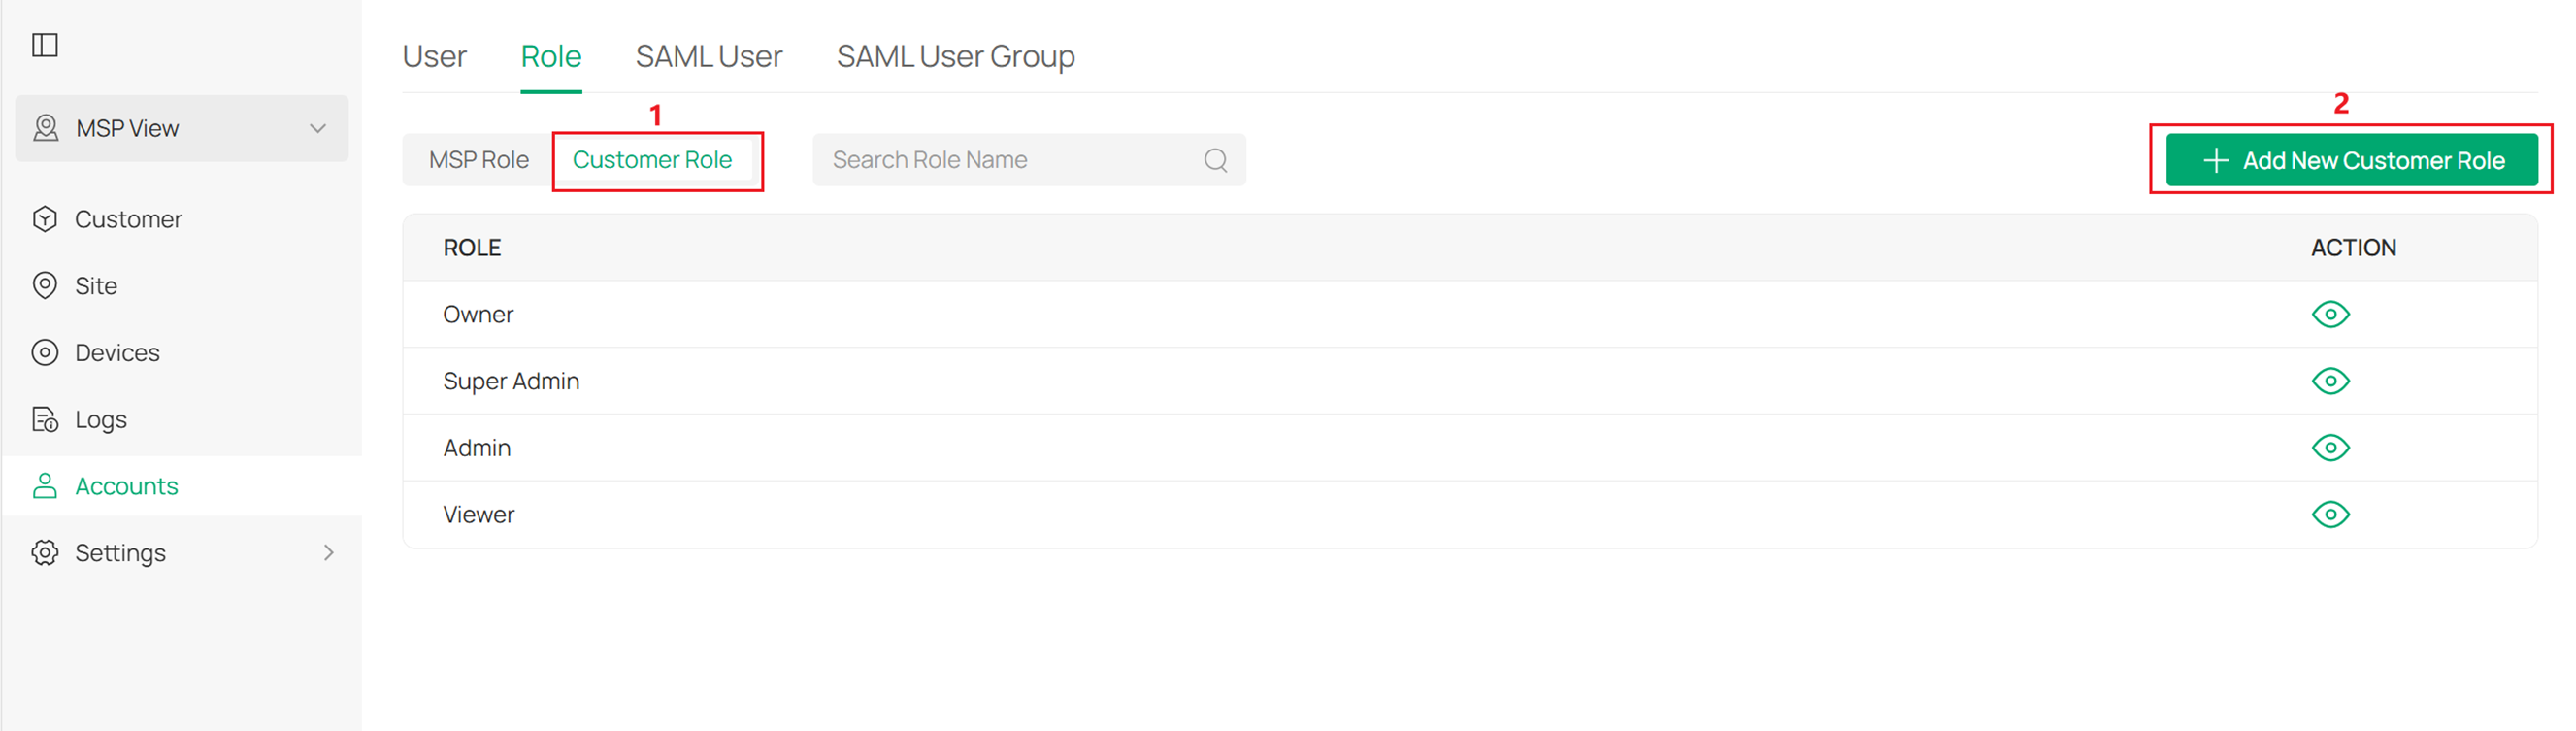
Step1. In the MSP view, go to Account > Role. On the MSP Role tab, click Add New MSP Role.
Step2. Specify the role type name and customize the permissions of the role. The MSP role is to manage configurations in the MSP view.
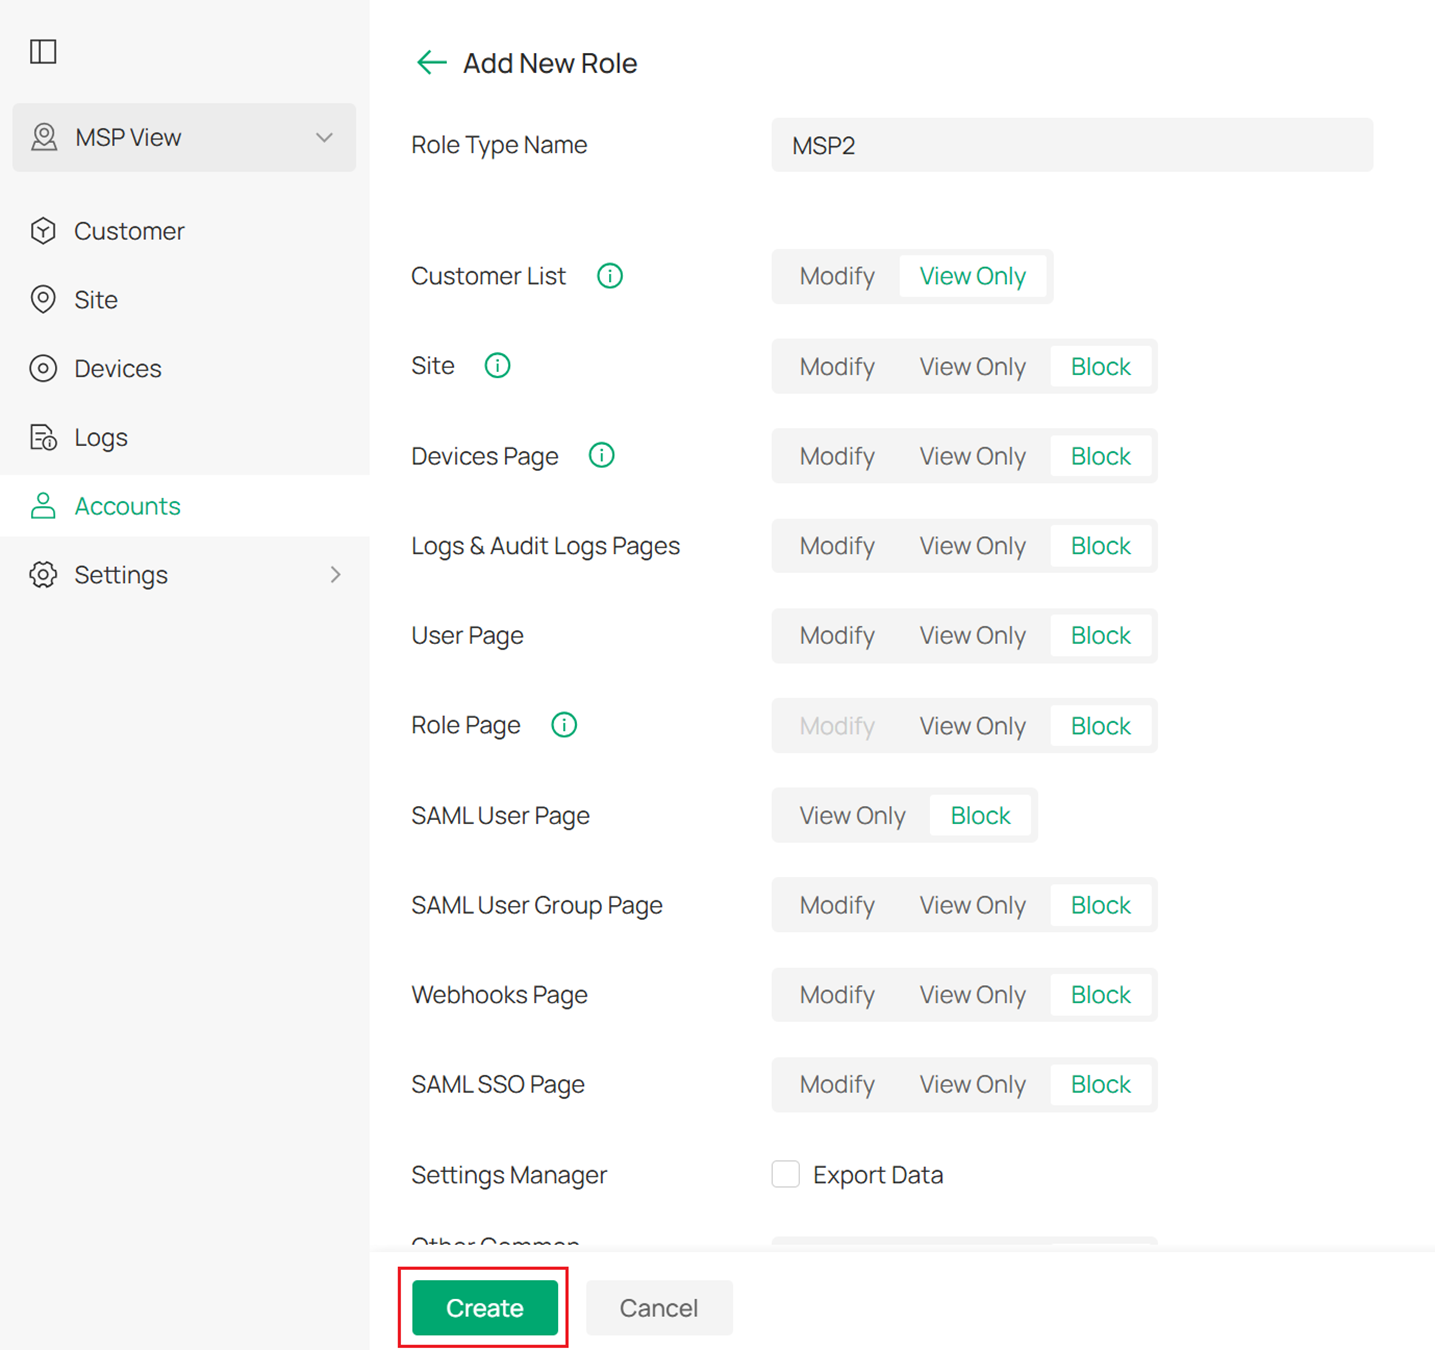
Step3. On the Customer Role tab, click Add New Customer Role. Specify the role type name and customize the permissions of the role. The Customer role is to manage configurations in the Global view and Site view.
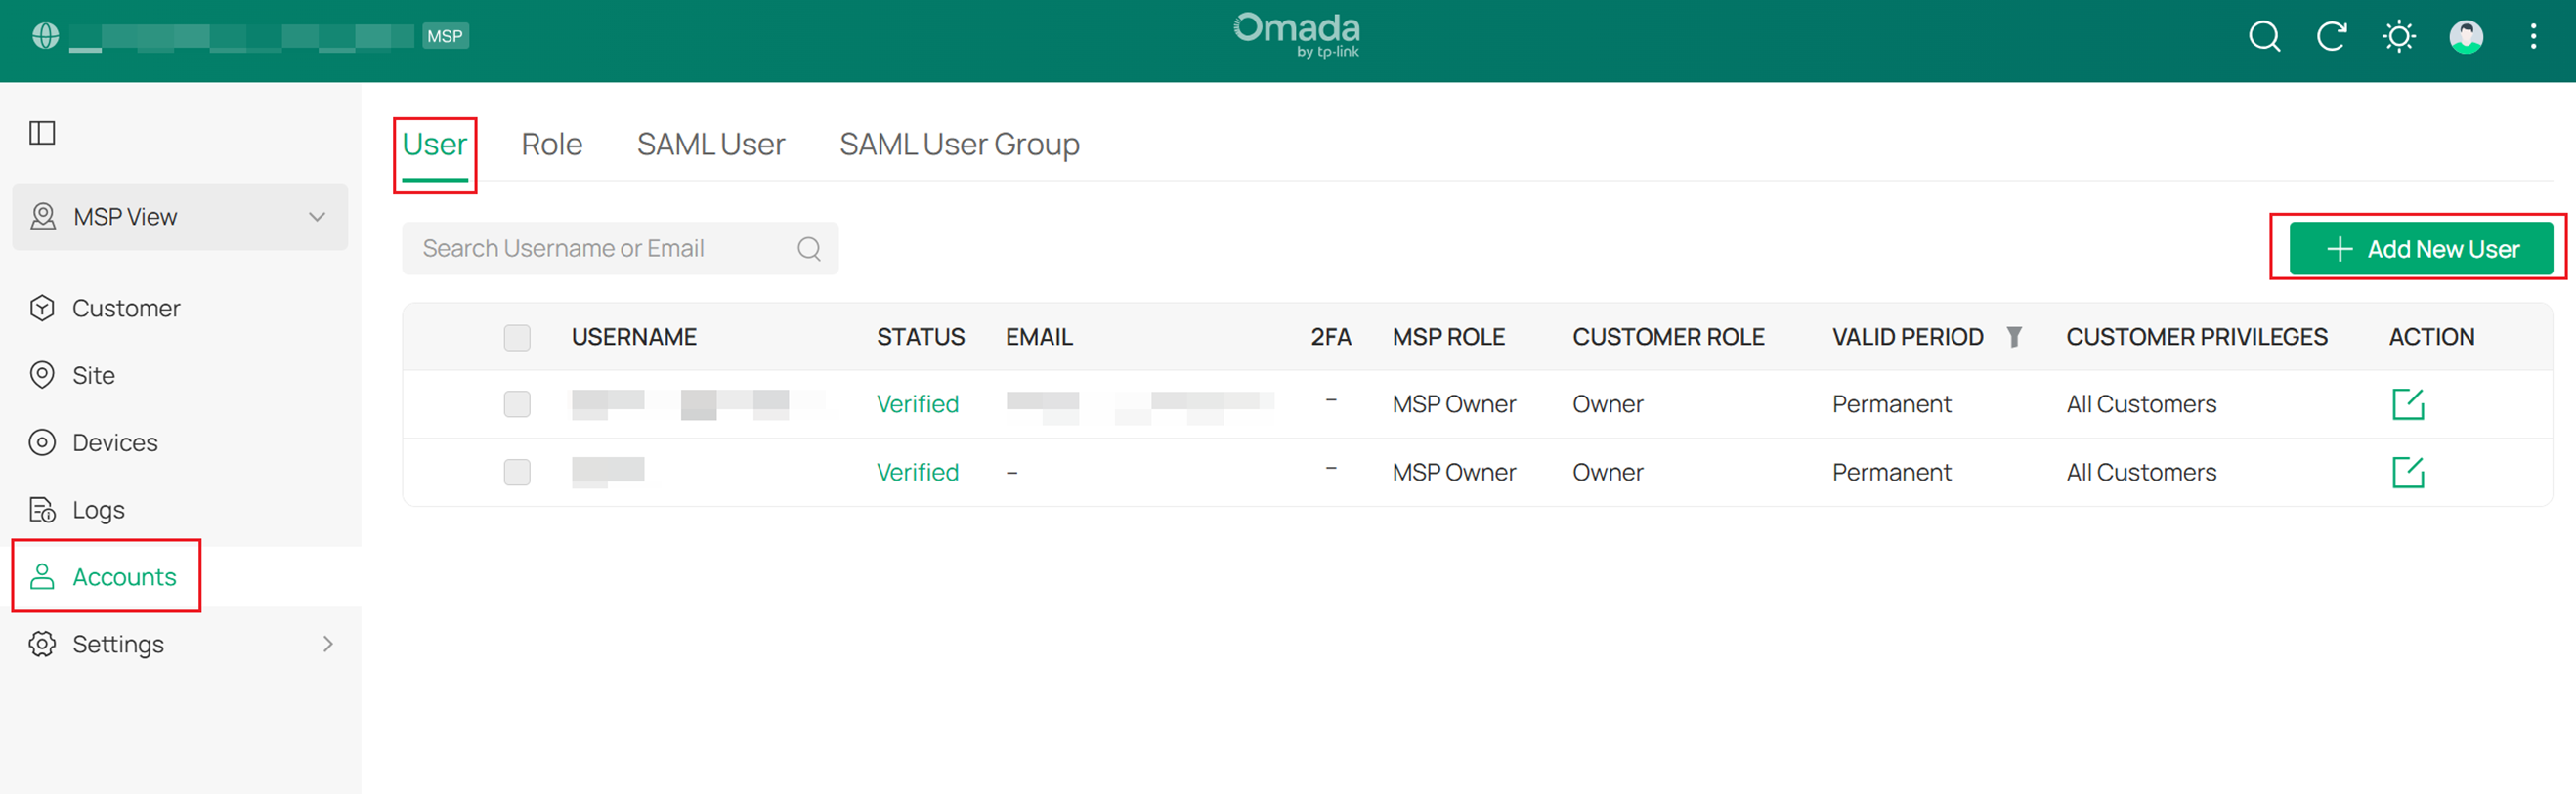
Add New User
Step 1. In the MSP view, go to Account > User. Click Add New User.
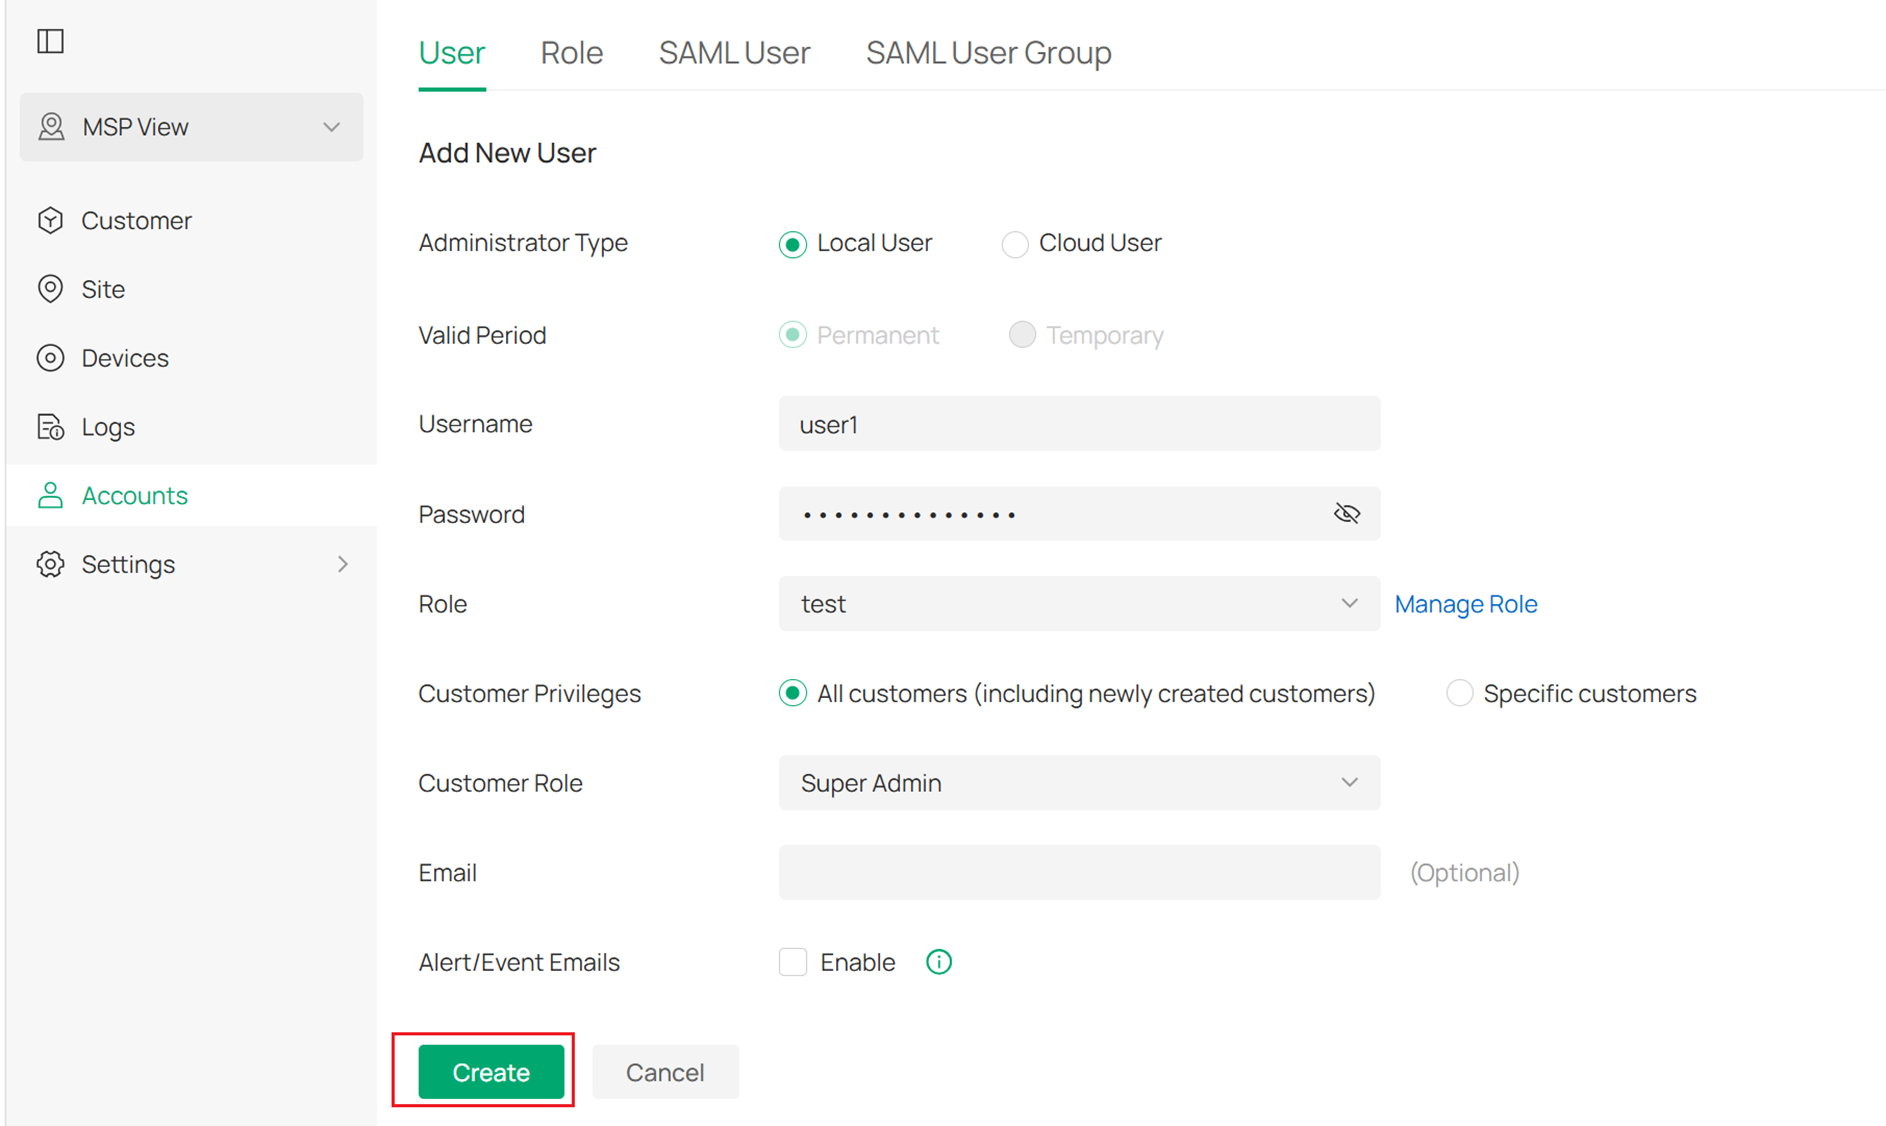
Step 2. Specify the Username, Password, and TP-Link ID, and bind the user to the MSP Role and Customer Role according to your needs.
Adjust the limitation of Customer
Step 1. Edit the omada.properties under the path: Omada Controller > properties.
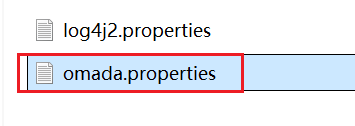
Step 2. Add a line as follow:customer.limit=xxx (the number of Customer limitation)
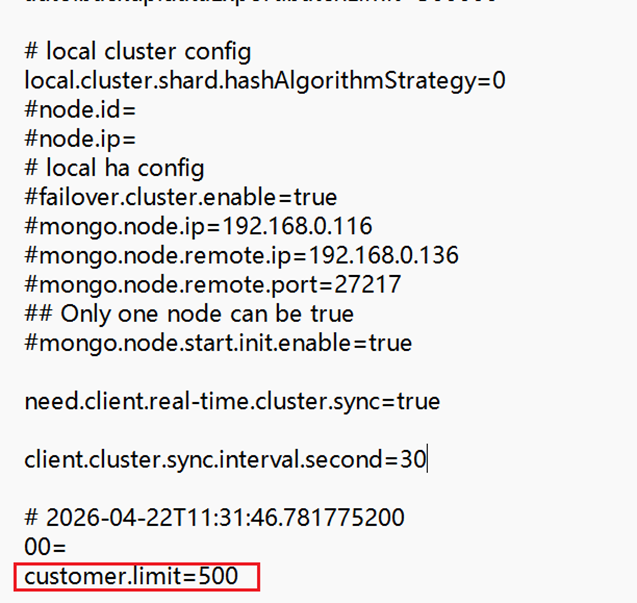
Step 3. Save the change and restart the controller. Then the number of Customer will be limited to the number you set.
Note:
1. For Omada controller v5, the upper limitation of MSP Customer is 100.
2. For Omada controller v6, the upper limitation of MSP Customer is 500.
3. Increasing the number of customers does not increase the scale of equipment management.
Conclusion
Now, you have configured the MSP mode to manage devices and accounts.
To learn more about each function and configuration, please visit Support Home to download or check the manual for your product.
QA
Q1: Why can't I see the MSP switch option?
A1: Please check your controller type. Some controller types may not support MSP mode.
MSP Supported:
-
Omada Software Controller
-
Cloud-Based Network Only Standard Organization
Not supported:
- Omada Central (includes network and guard systems)
- Cloud-Based Controller Essential
