Contents
Discover devices via the Inform URL
Discover devices via Omada Discovery Utility
Introduction
This article will show the detailed steps for discovering and adopting an Omada device to an Omada Central’s specified site via the site URL.
Requirements
- Omada Central
- Omada devices
Configuration
We are using the Omada Central Essentials controller as an example.
Note:
Currently, OLT devices do not support this function.
Discover devices via the Inform URL
Step 1. Visit https://omada.tplinkcloud.com and log in with your TP-Link ID. Then log in to the Cloud-Based Systems of the target organization.
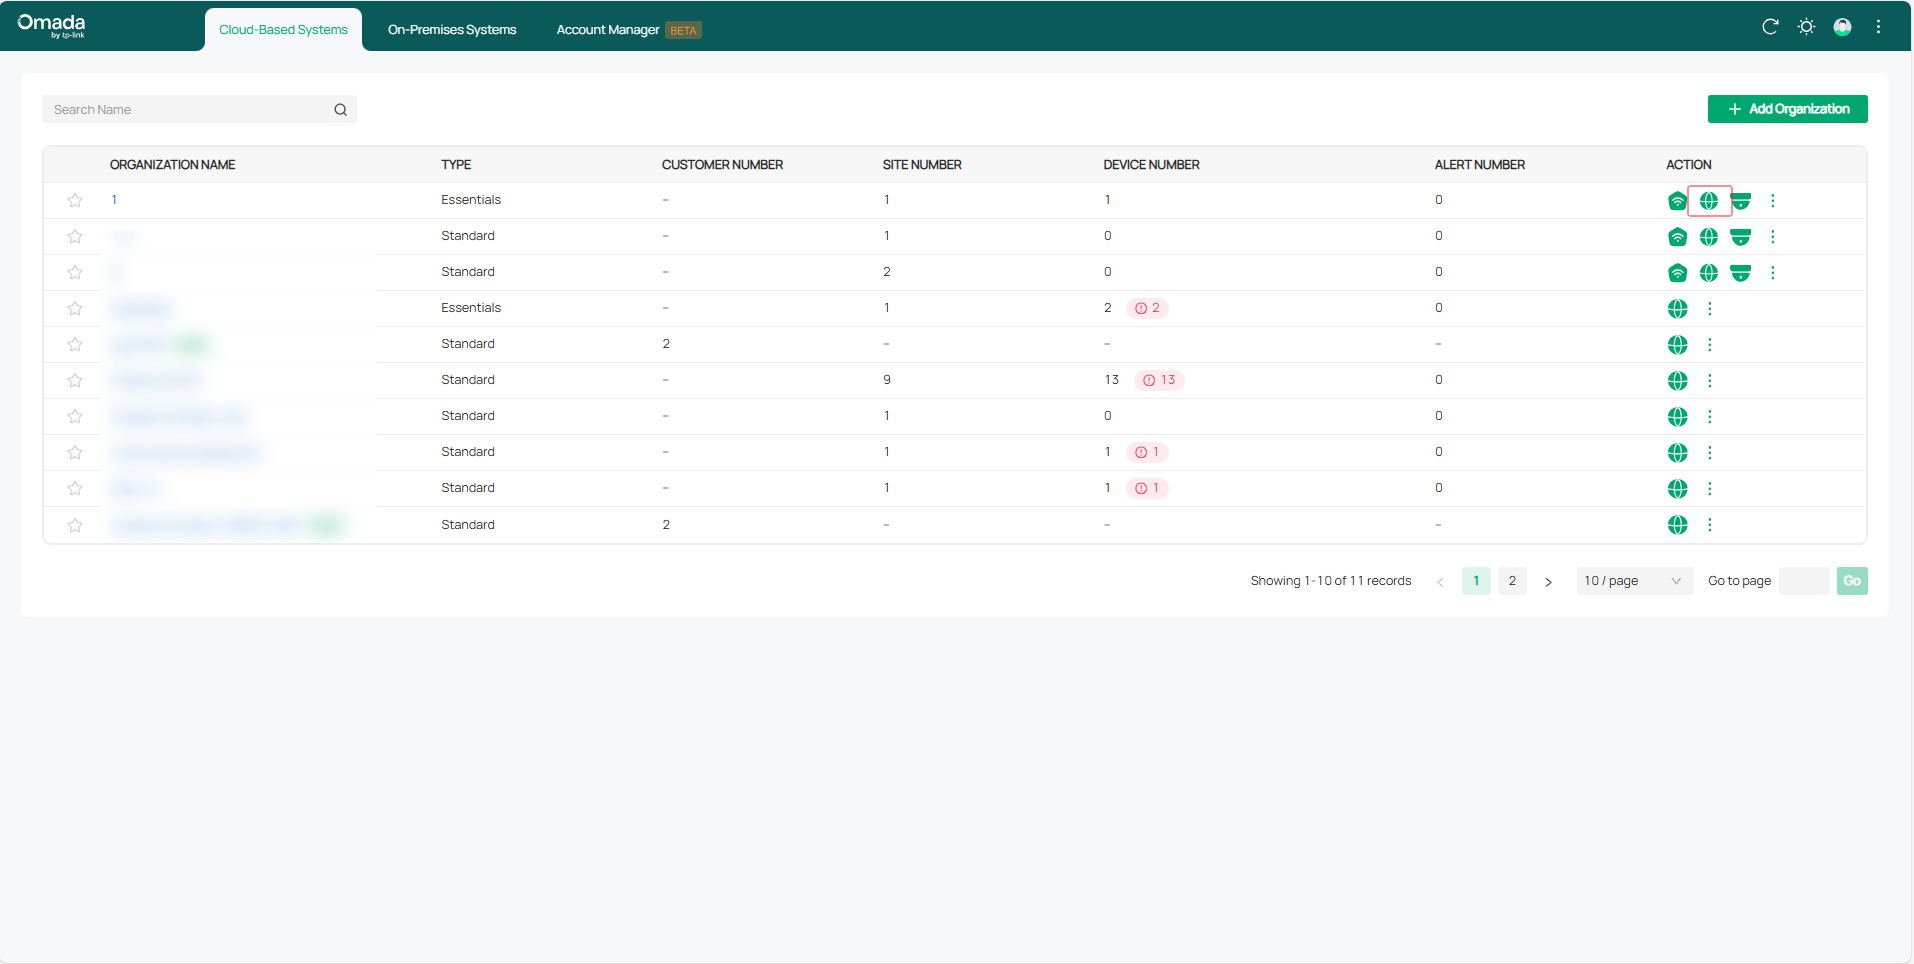
Step 2. Go to Global View > Dashboard, select the site, and then click on Copy URL.

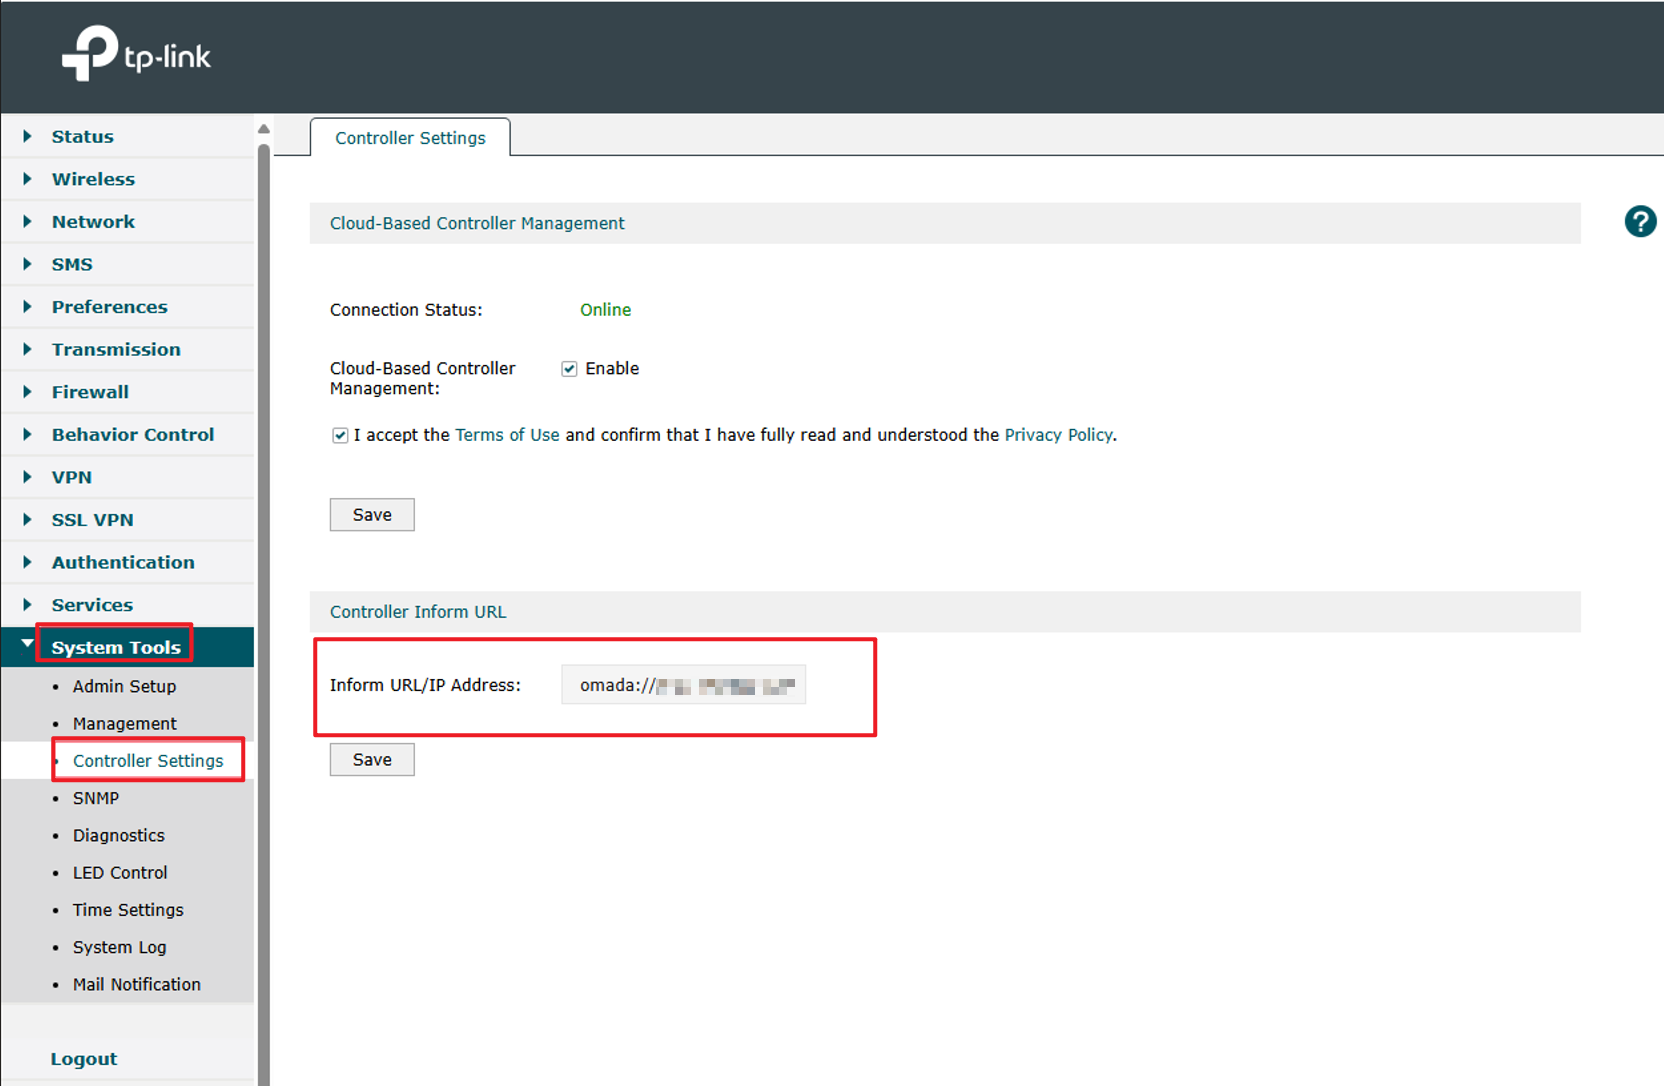
Step 3. Enter the IP address of the device to be managed in the browser address bar and log in to the device web management page. The device username/password for the first login is admin/admin. You need to set up a new account before you can log in. Go to System Tools > Controller Settings to enable Cloud-based Controller Management. Then, paste the Site URL copied from the controller into the Inform URL/IP Address field and click the Save button.
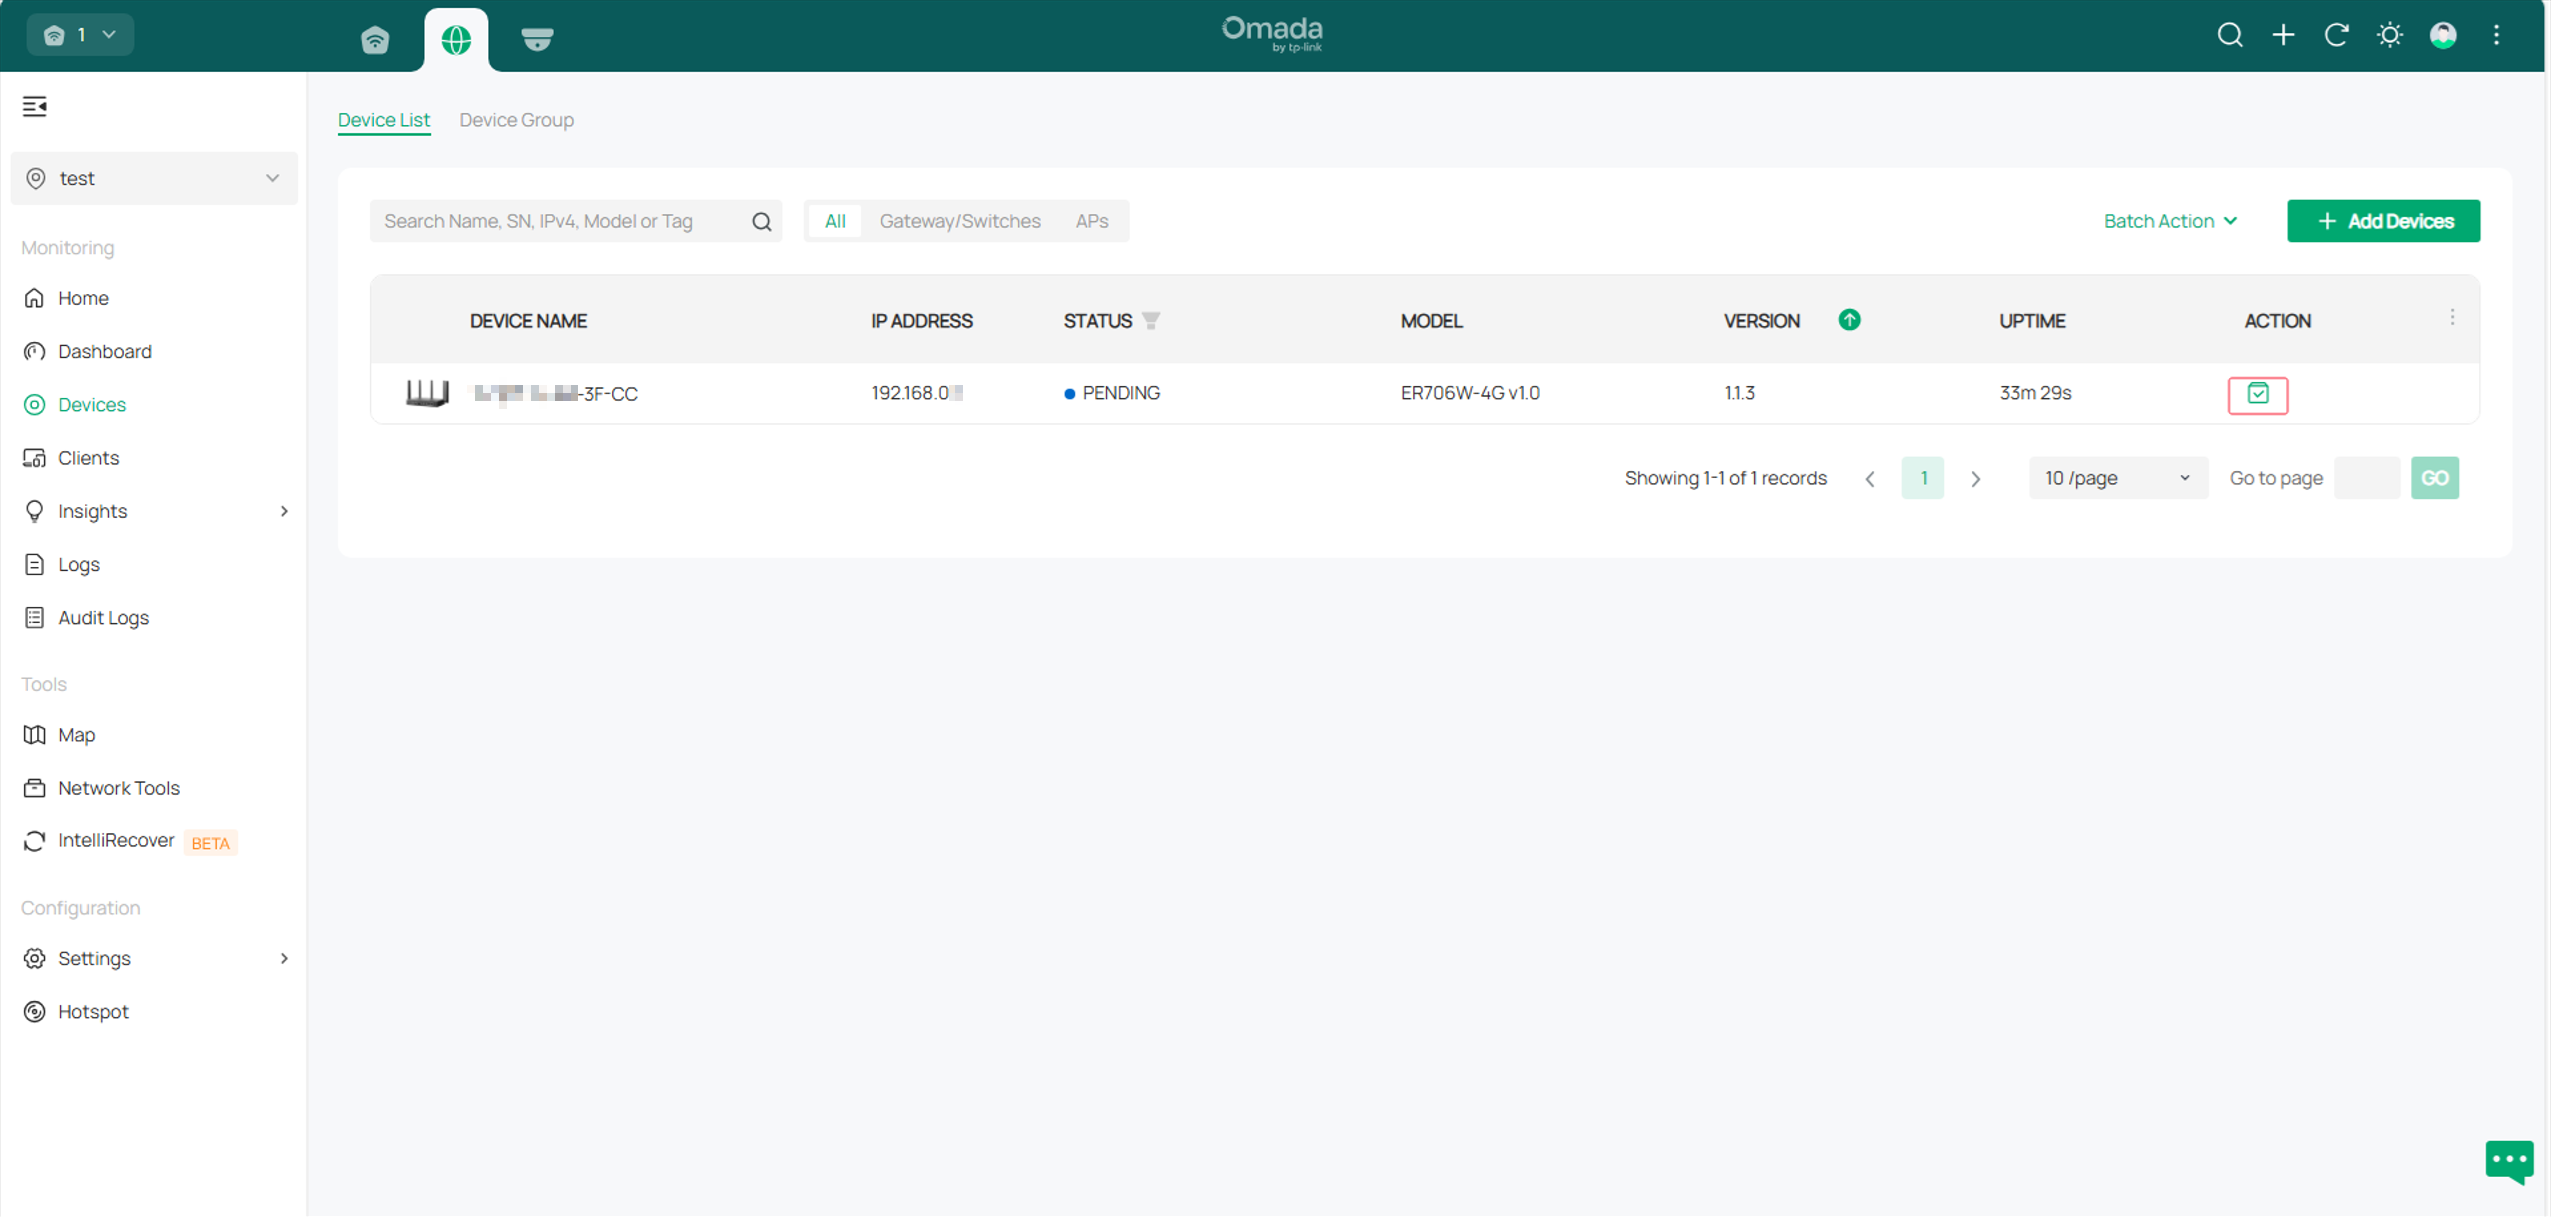
Step 4. Re-login to the controller’s site, and you can see the added device in the PENDING state. Then you can adopt the Omada device by clicking the Adopt button.
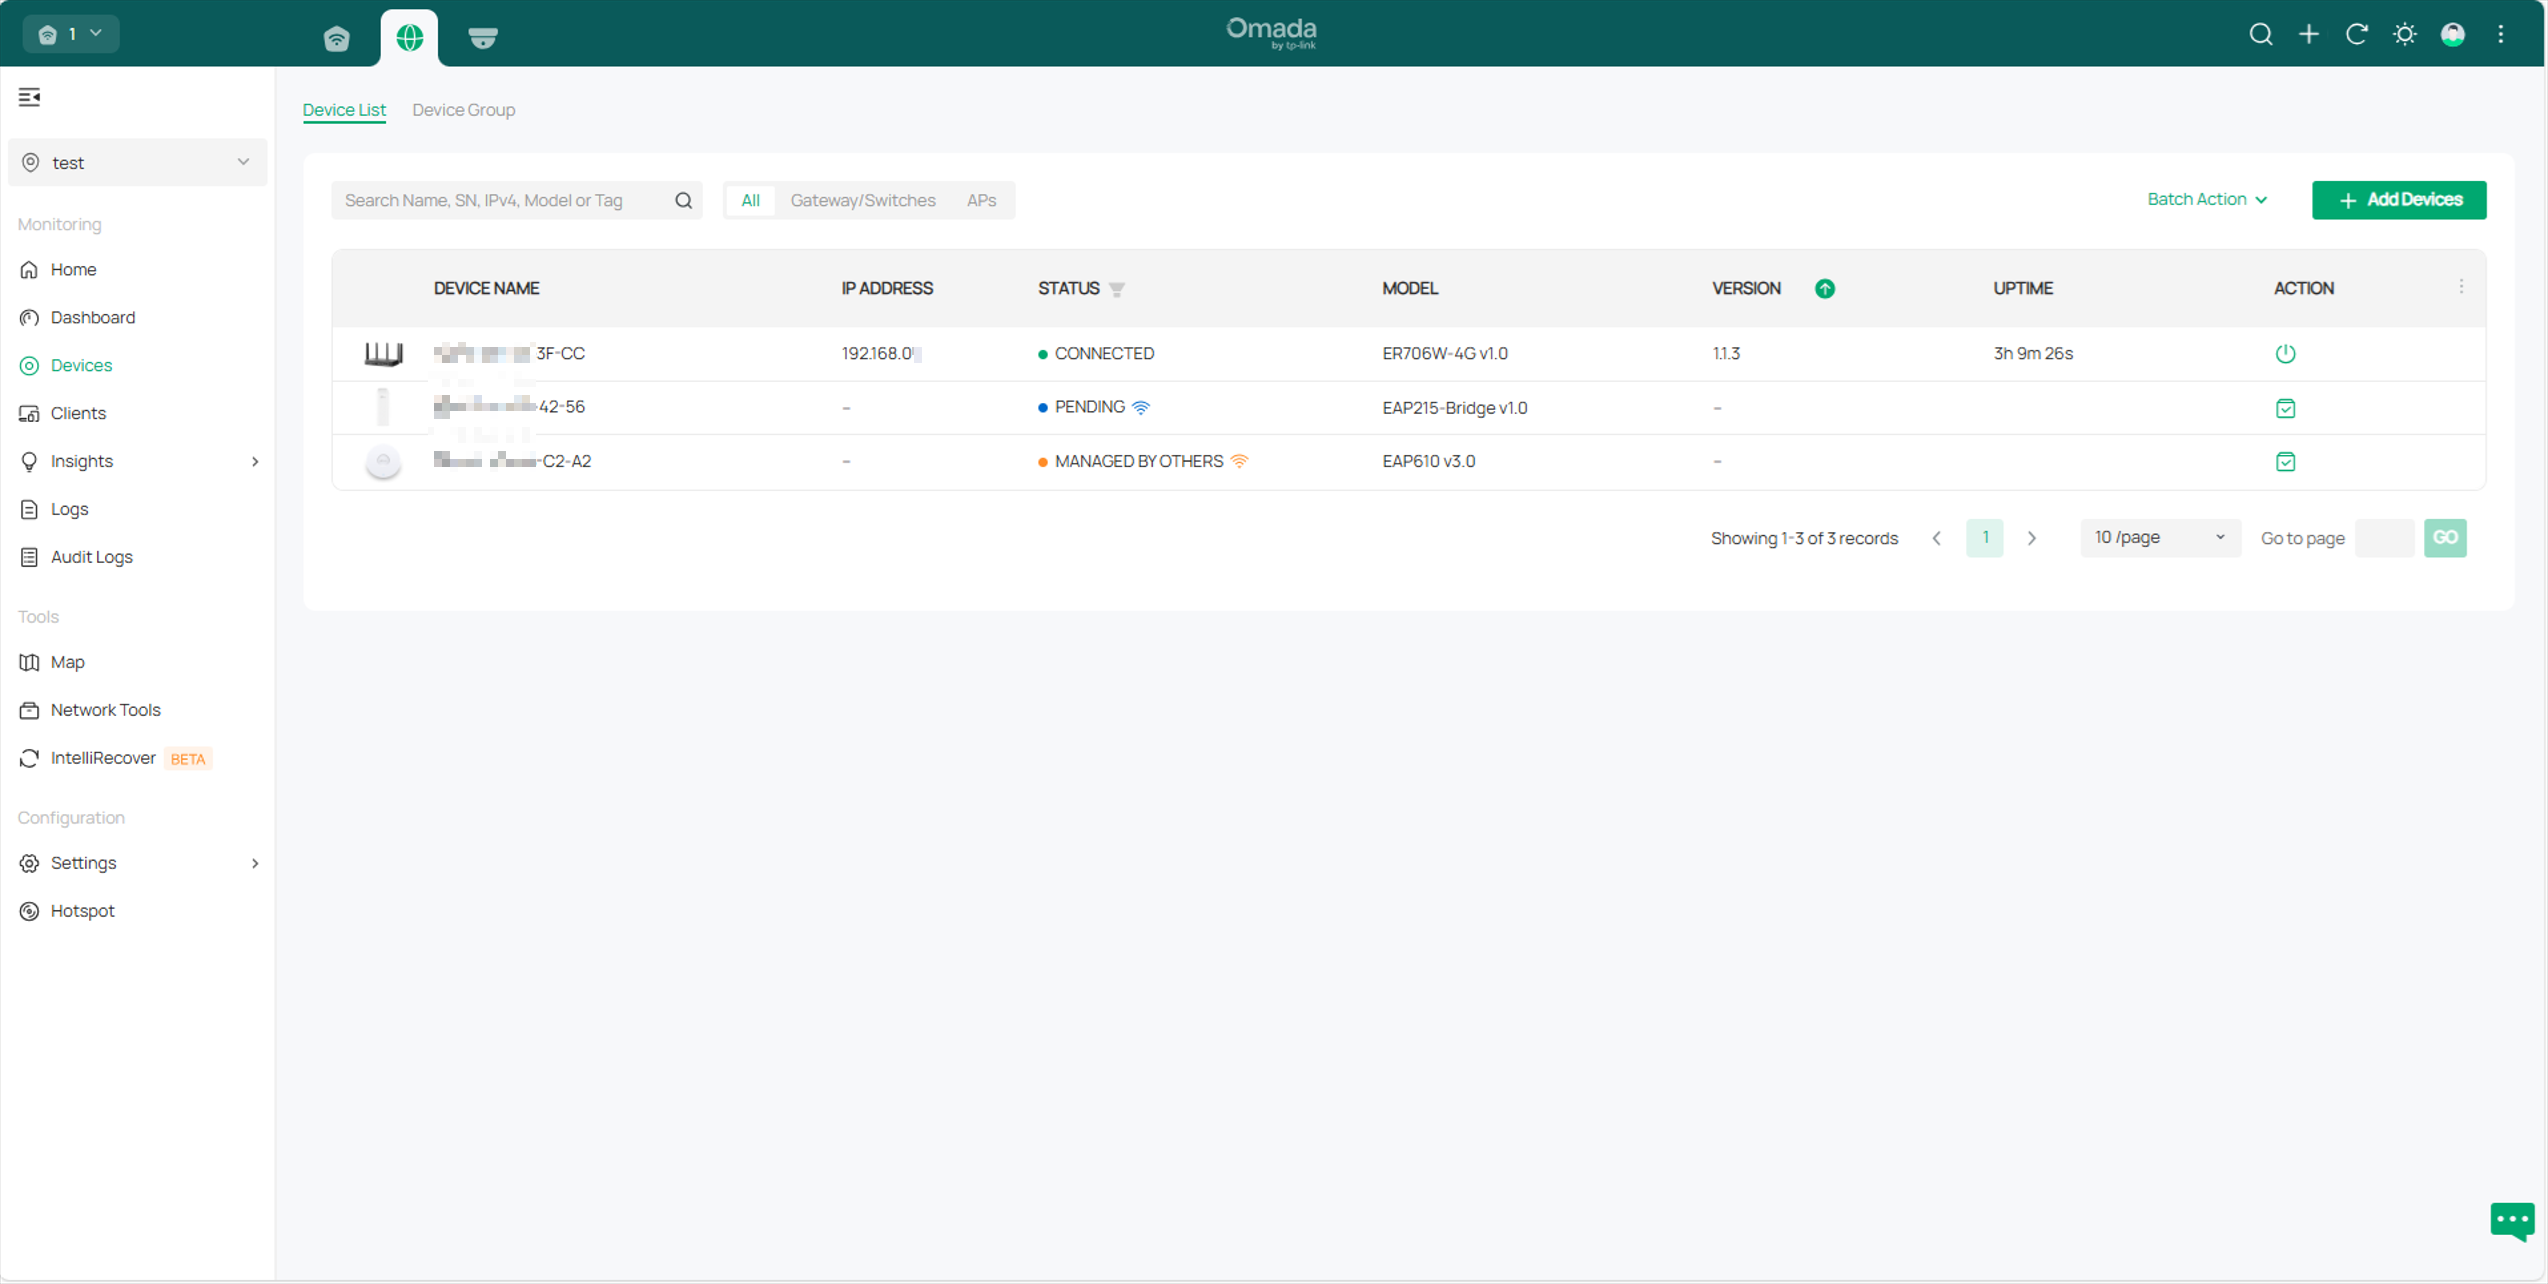
Step 5. When the device state switches from PENDING to CONNECTED, it indicates that you can manage the device successfully.
Discover devices via Omada Discovery Utility
Step 1. Log in to the controller, navigate to Global View > Dashboard, select the site, and then click on Copy URL.

Step 2. Download the latest Omada Discovery Utility from the TP-Link official website. After opening it, the Utility will automatically search for all network devices in the LAN. For instructions about how to install Omada Discovery Utility, please refer to How to Install TP-Link Omada Discovery Utility on Windows and MacOS PCs(V5.2.1 and below)
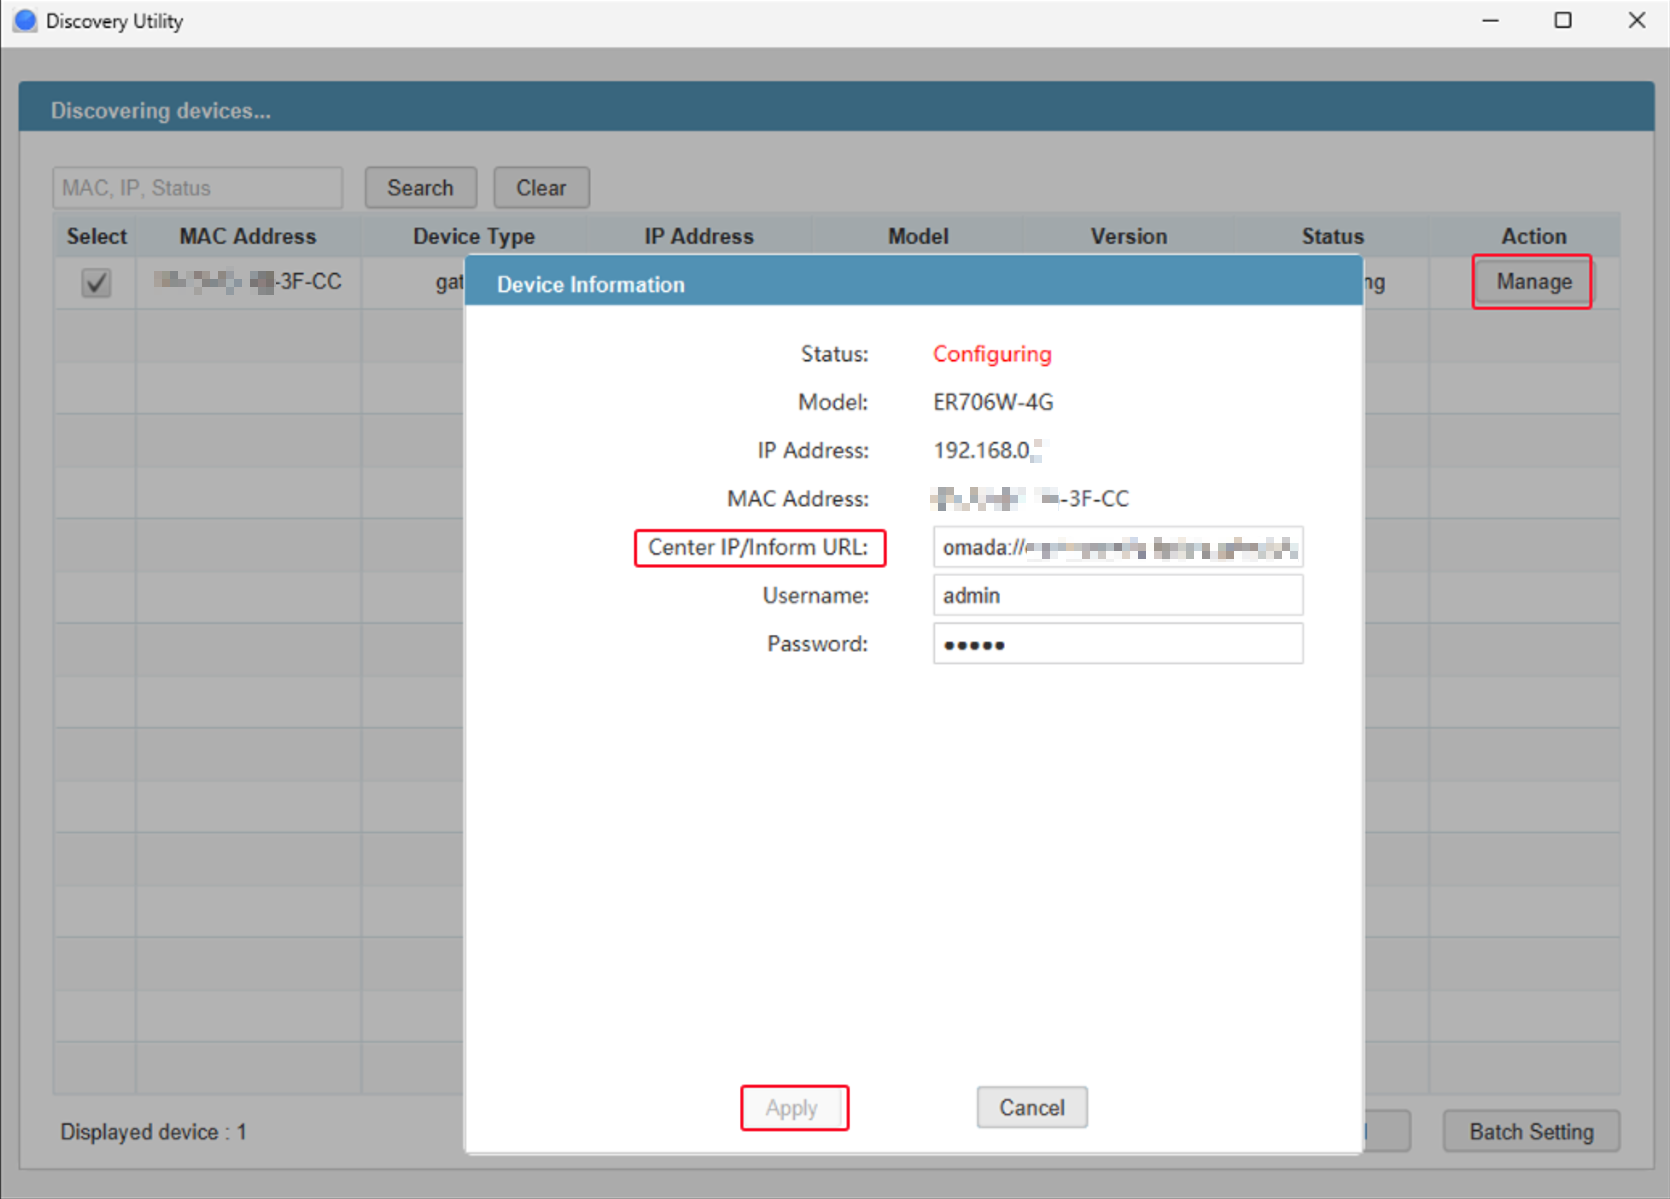
Step 3. Click the Manage button for the device you want to add. In the Center IP/Inform URL field, enter the URL you copied, enter the device username and password, and click Apply to add the device.
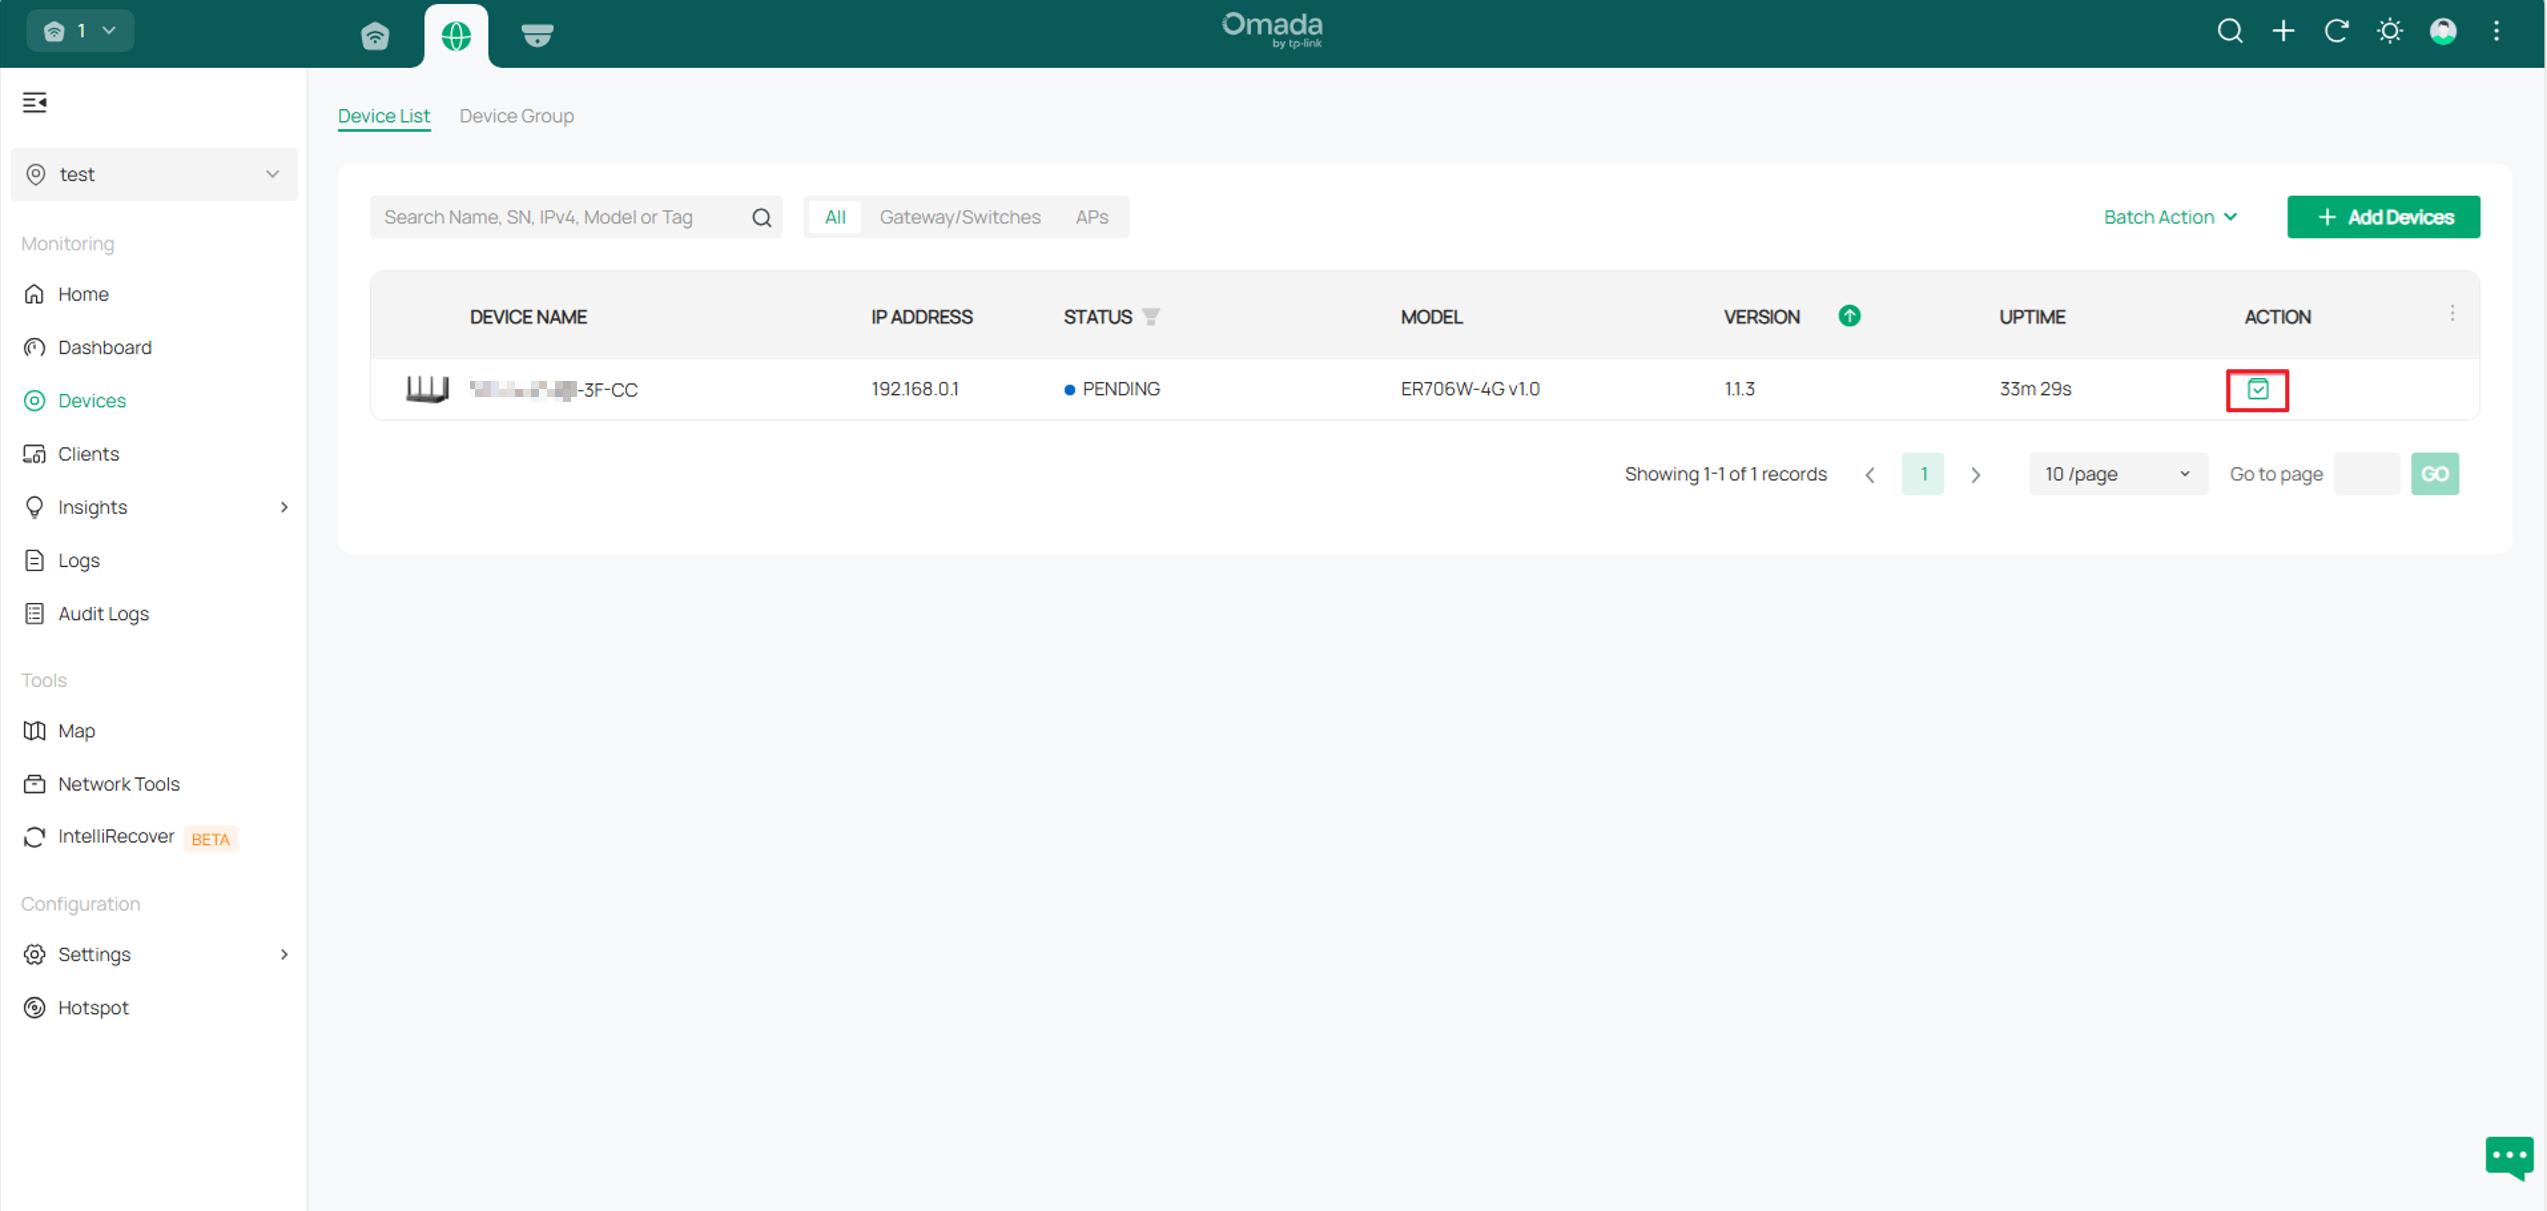
Step 4. Log in to the Controller’s site, and go to the Devices page. You can see the added device in the PENDING state. Then you can adopt it normally.
Note:
Please visit the following link for compatibility between Omada Central and Omada devices you have.
Devices Supported by Omada Cloud-Based Controller (Omada Cloud Standard)
Omada Devices Supported by Omada Cloud Essentials
Conclusion
Now you have successfully discovered and adopted your Omada devices via the site URL.
Get to know more details of each function and configuration please go to Download Center to download the manual of your product.


