


Contents
Firmware upgrade for Standalone Mode
Firmware upgrade for Controller Mode
Objective
The objective of this article is to provide instructions for upgrading the Omada Gateway firmware.
Requirements
- Device: Omada Gateway (Standalone or Managed by an Omada Controller Version: v6.0 or higher).
- File Format: bin file. Firmware file downloaded from the official https://omadanetworks.com website.
Introduction
Keeping the Omada Gateway firmware up to date is important for security, stability, and performance. This article explains how to upgrade Omada Gateway firmware using either the Standalone Web UI or the Omada Controller.
Before proceeding with the configuration steps, please note the following:
- Do not turn off the power or disconnect the Ethernet cable during the upgrade process.
- It is recommended to back up the current settings so you can restore the settings manually after the upgrade.
- It is recommended to upgrade the firmware with Chrome or Firefox.
Configuration
Firmware Download
Step 1. Go to https://omadanetworks.com and search your Omada gateway model. Then go to Support page.
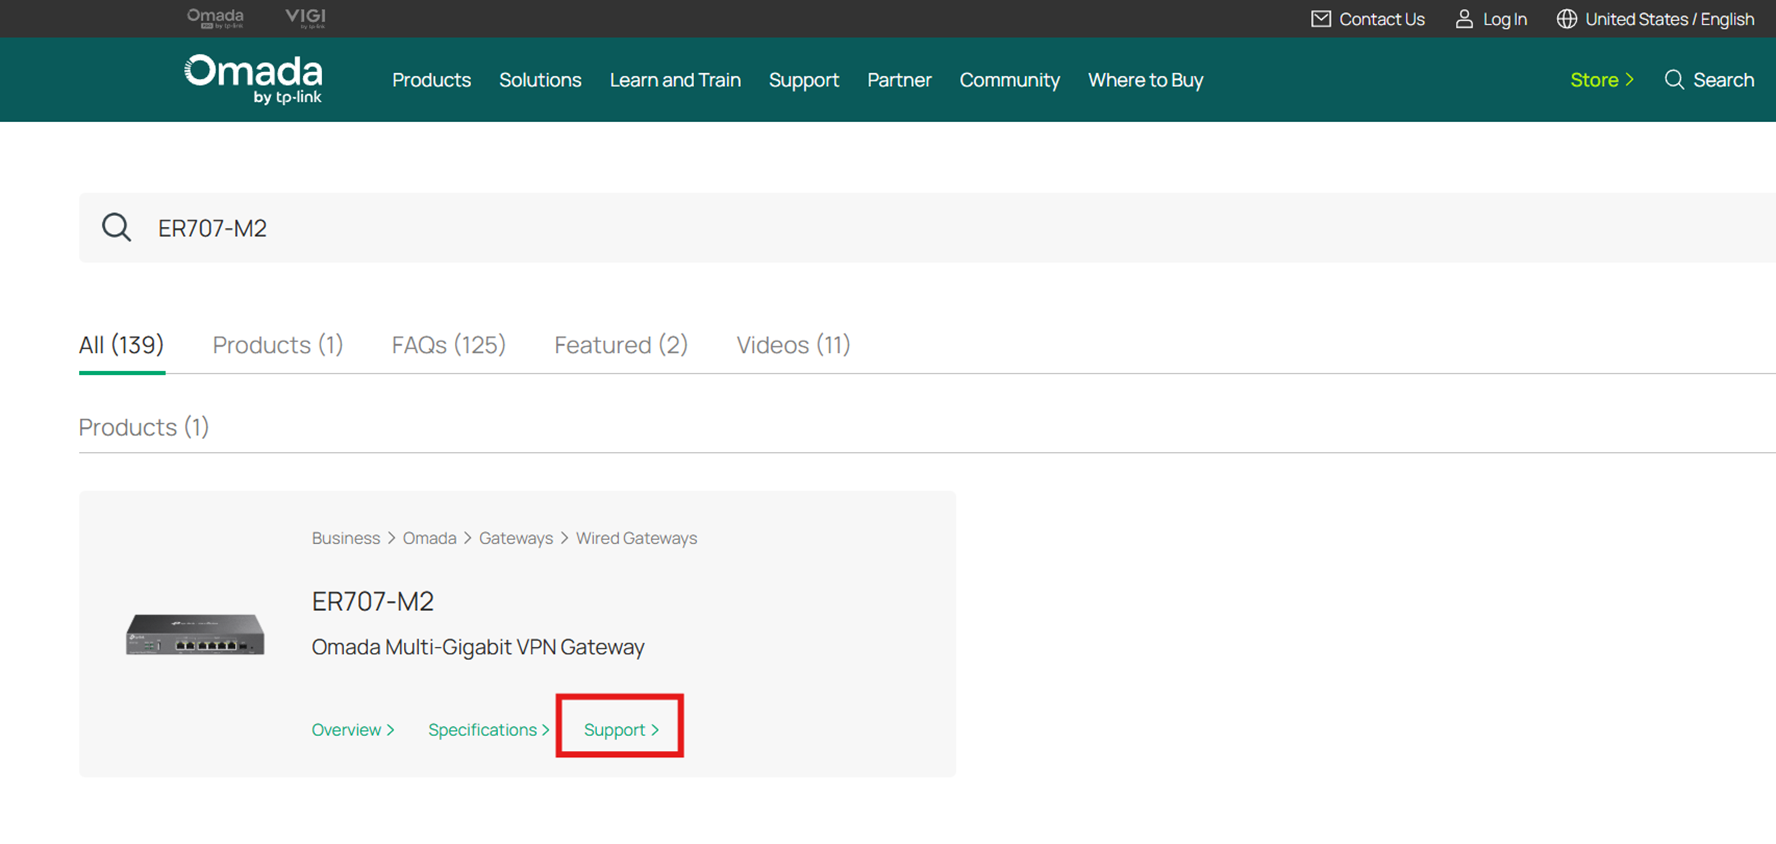
Step 2. Verify the hardware version of your gateway and select the corresponding version on the support page. Navigate to the Downloads section, set the Filter Type to 'Firmware,' and download the appropriate file.
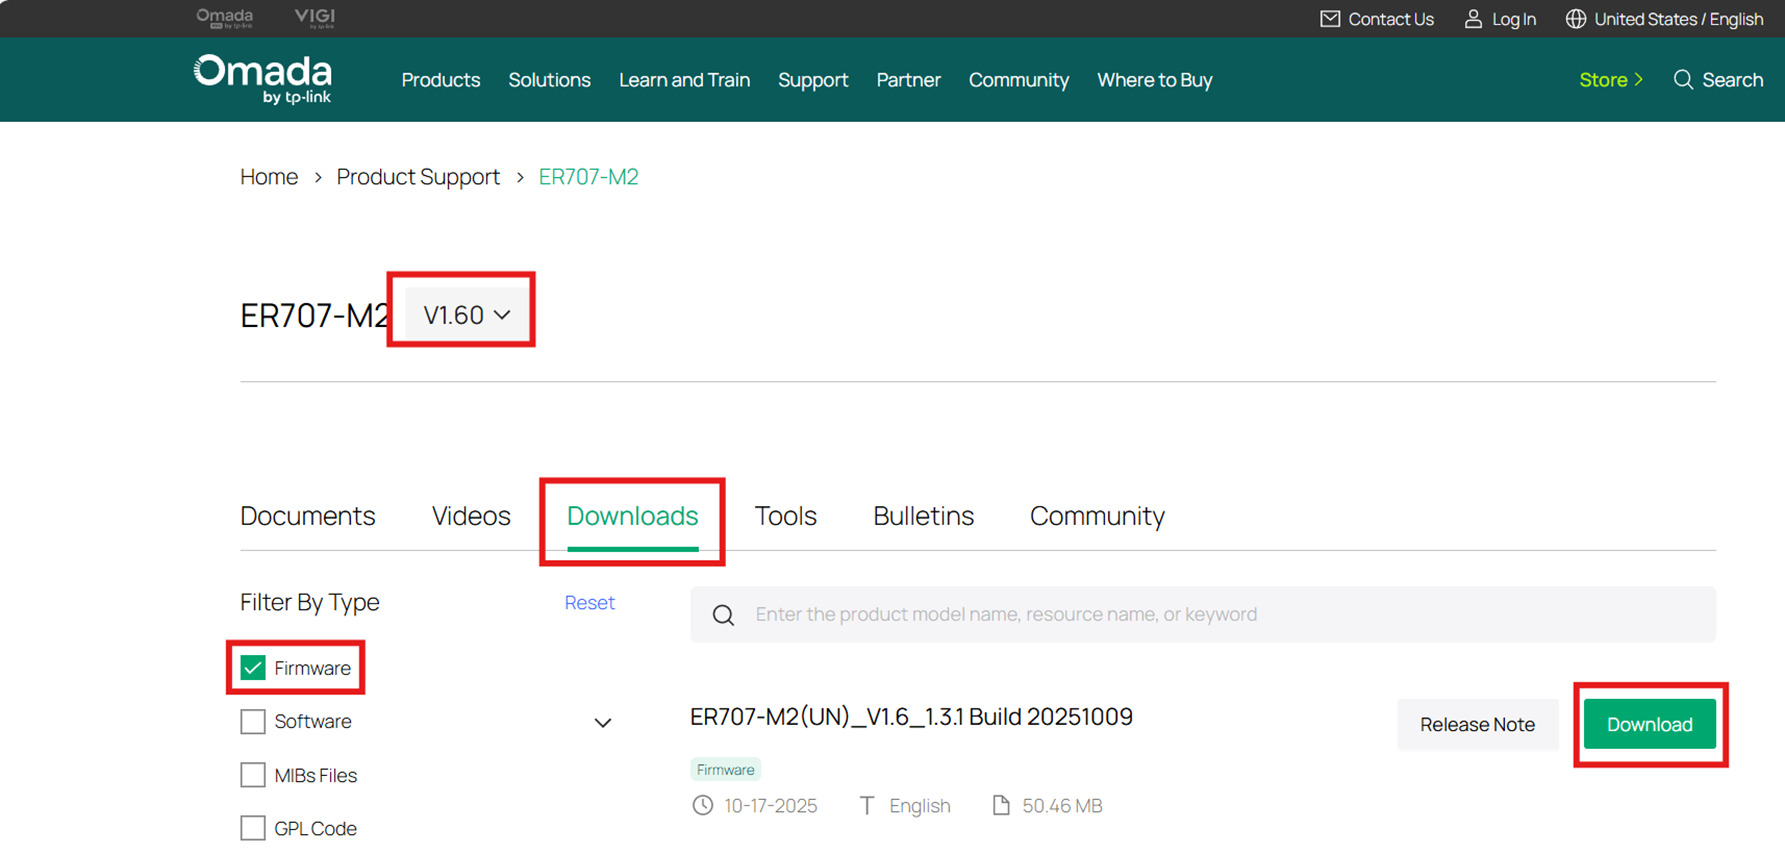
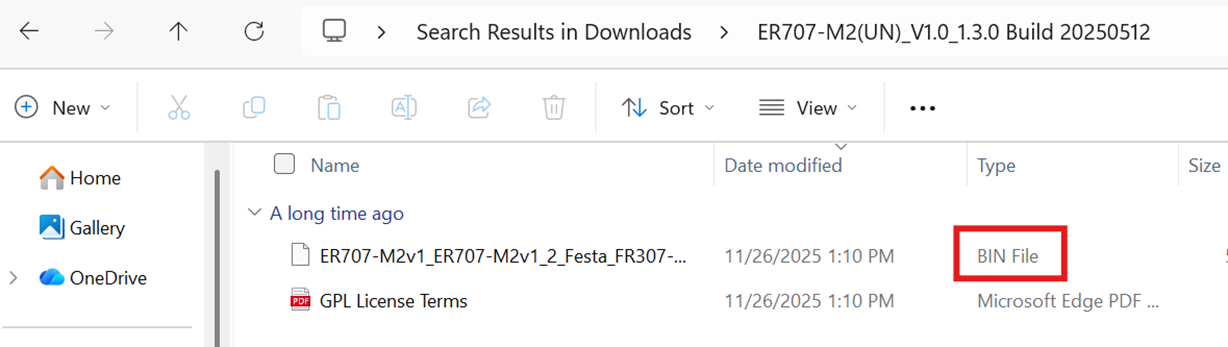
Note: After downloading the file, please use decompression software to extract the firmware file to a folder. The file we use to upgrade should be a .bin file.

Firmware upgrade for Standalone Mode
Step 1. Make sure you successfully downloaded the firmware and extracted the .bin file .
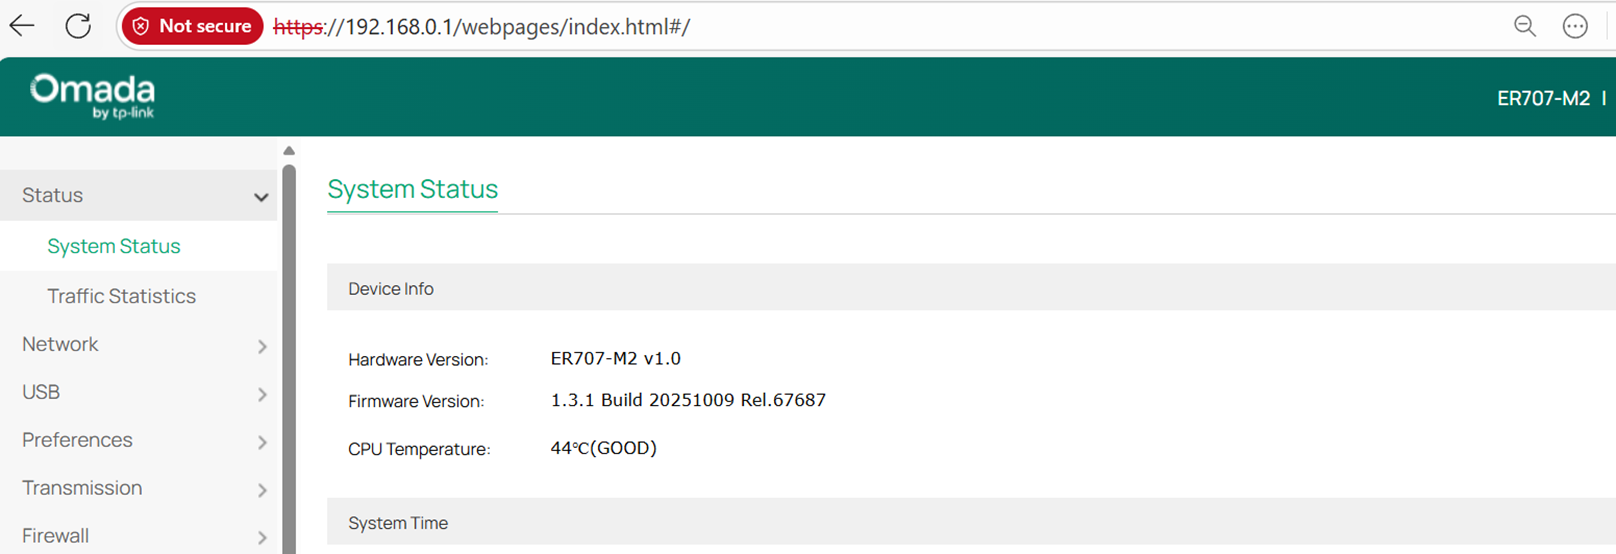
Step 2. Enter the device’s IP address (192.168.0.1 by default) into your web browser's address bar. Log in to the Omada gateway using your credentials; the default username and password are both admin. If you have previously changed these, use your custom login information.
Note: If you have changed the IP address manually or allocated an IP address automatically via an external DHCP server, please use the changed IP address.
Note: Your browser may display a 'Not Secure' or 'Connection is not private' warning. This is expected behavior for local network devices. Click 'Advanced' and then 'Proceed' to access the login page. Your data remains secure within your local network. (You may find more details here: Why TP-Link HTTPS web interface is detected as unsecure by some web browsers?).
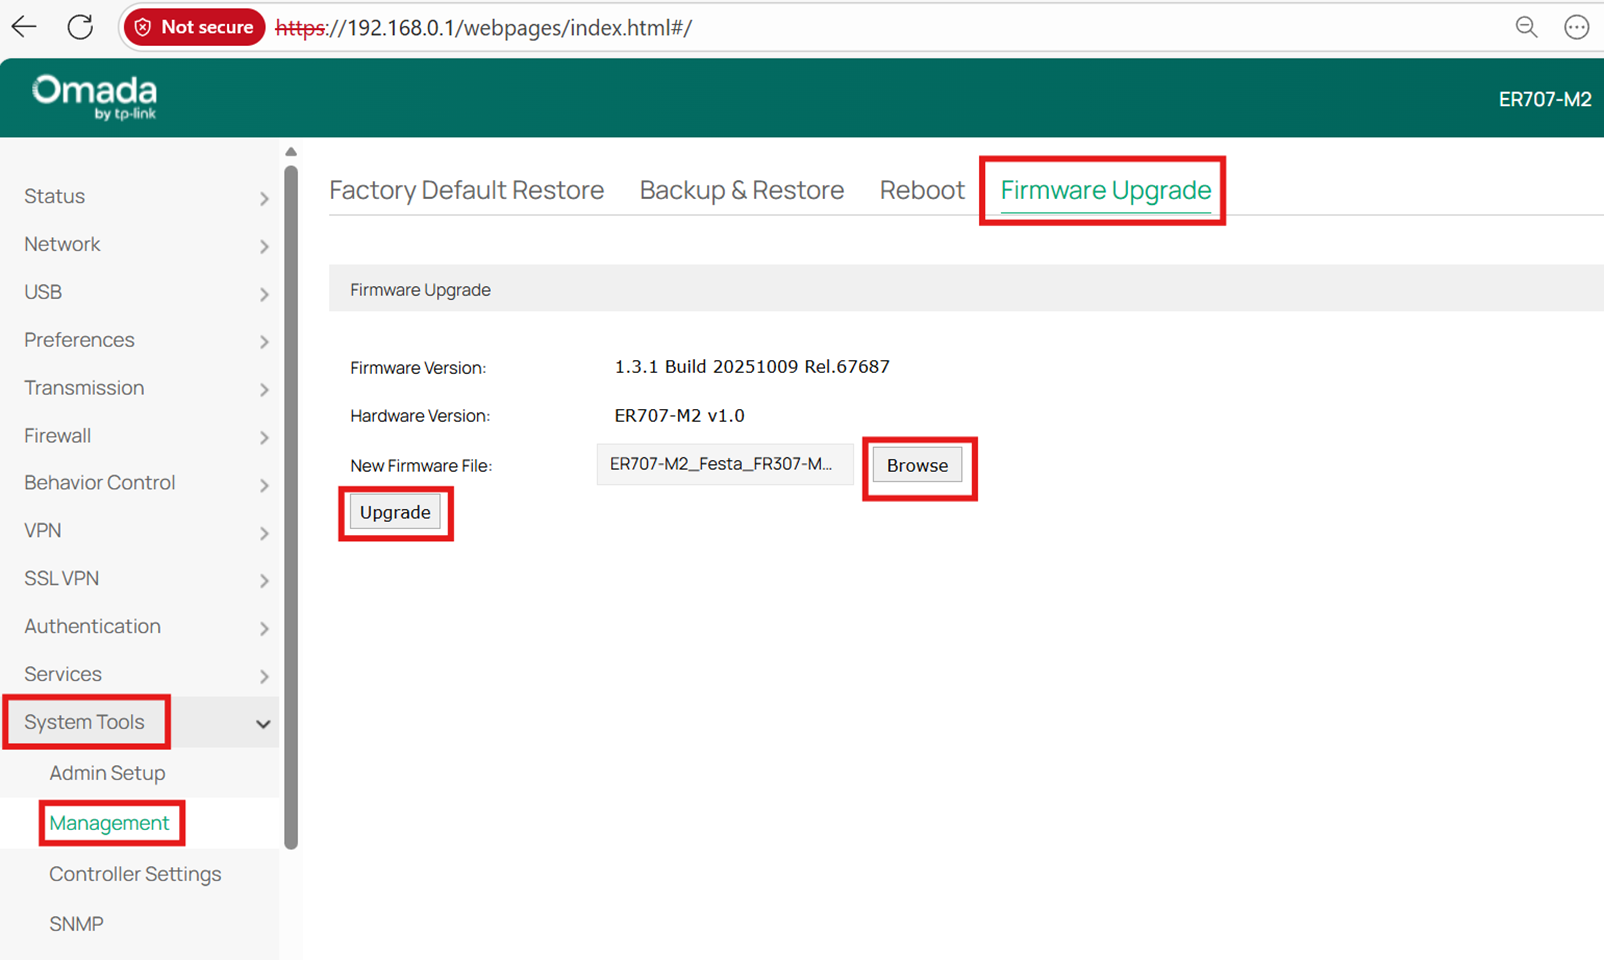
Step 3. Go to System Tools->Management->Firmware Upgrade, then click Browse and choose the firmware file you’ve extracted on step 2. Then click Upgrade.
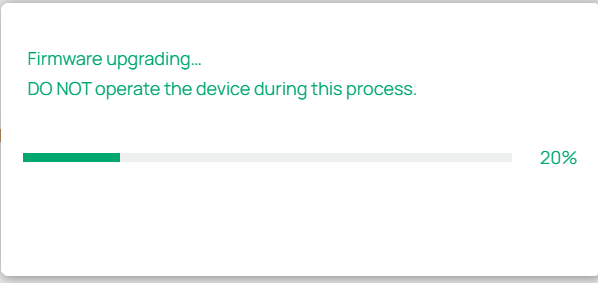
Step 4. Wait for the upgrade to complete. After the upgrade process, the device will reboot automatically.

Firmware upgrade for Controller Mode
Step 1. Make sure you successfully downloaded the firmware and extracted the .bin file .
Step 2. Log in to your controller, go to Site View > Devices, and click on the adopted Gateway. From the right-side drawer view, select Custom Upgrade from the “more options” menu.

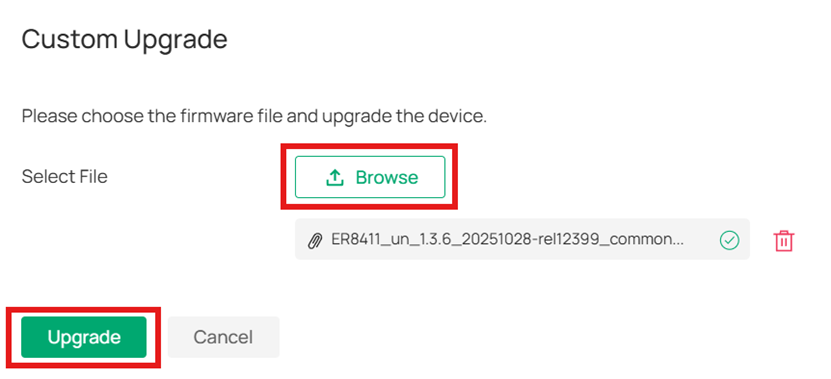
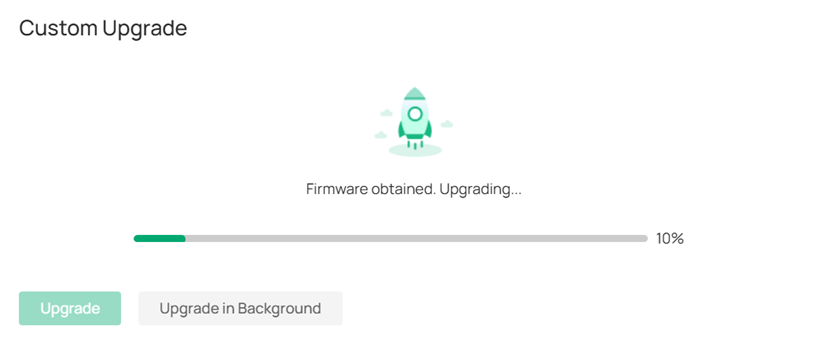
Step 3. In the Custom Upgrade pop-up window, click Browse to select the .bin firmware file you previously downloaded on Firmware Download step. Once the file is selected, click Upgrade to start the firmware update process.
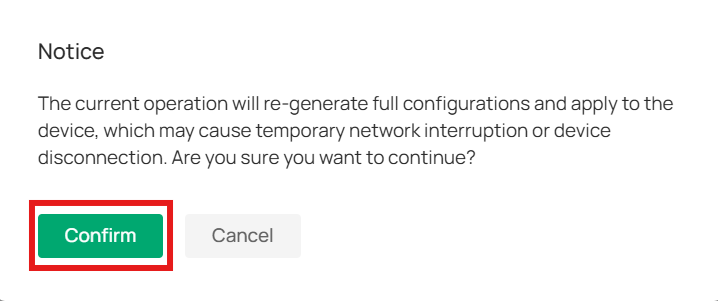
Step 4. Confirm to acknowledge that a temporary network interruption will occur during the upgrade process.
Step 5. Wait for the upgrade to complete. After the upgrade process, the device will reboot automatically.
Verification
Standalone Mode
After the device restarts, log in again and check Status > System Status to confirm the new firmware version is active.

Controller Mode
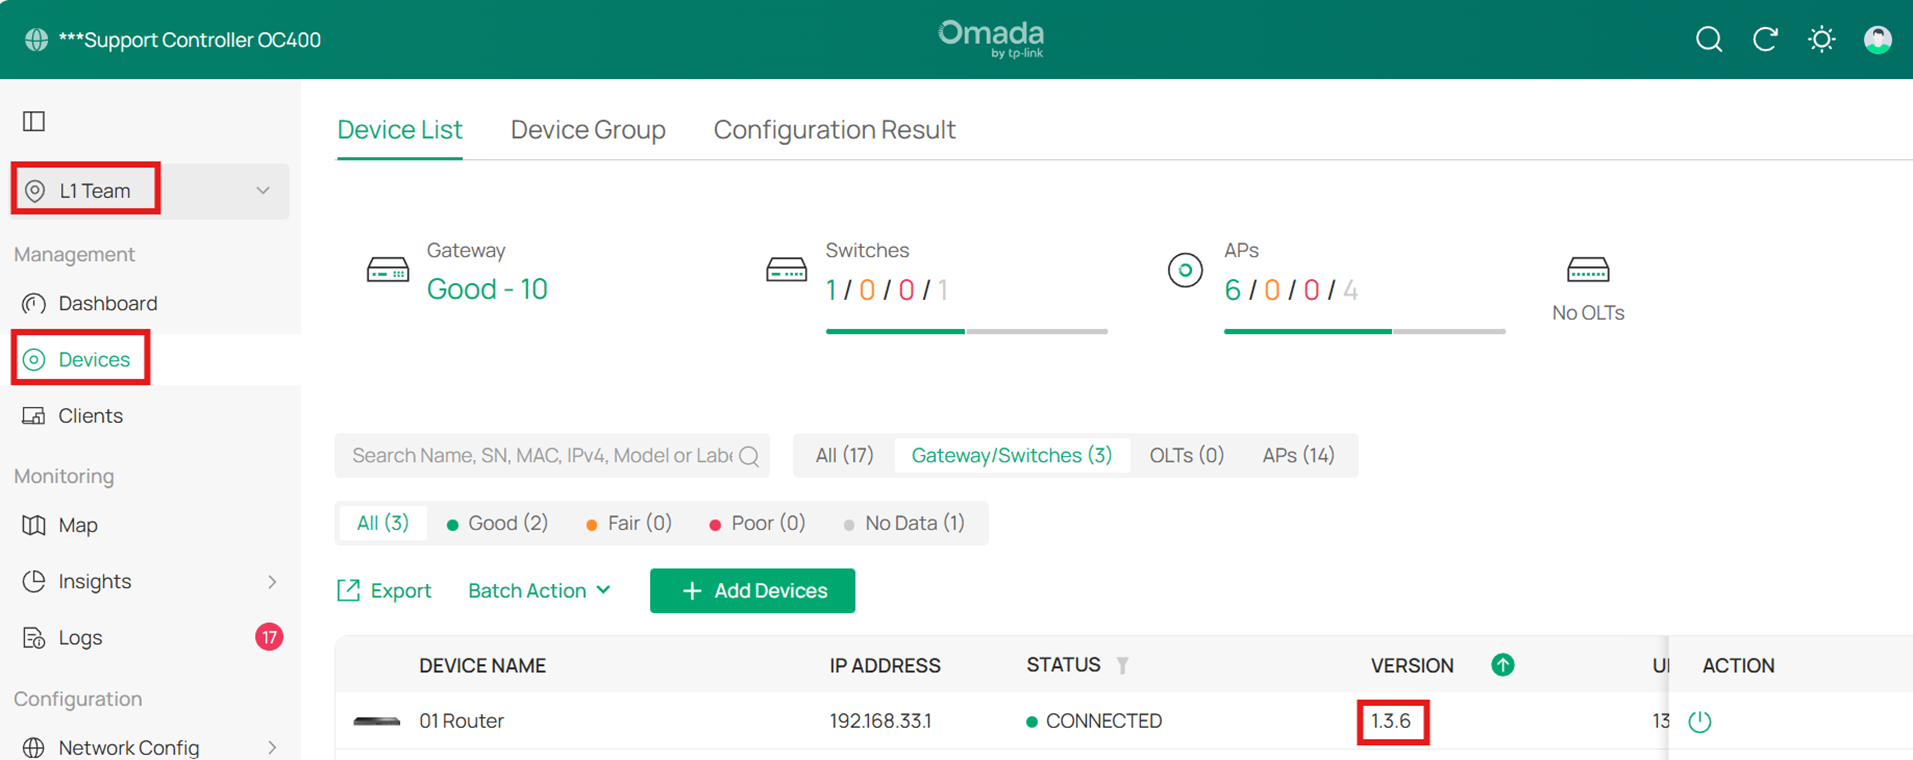
After the device restarts, log in to your controller and go to Site View > Devices. Check the Version column to see if the new firmware is displayed for your Gateway.
Conclusion
Keeping your Omada Gateway firmware up to date is essential for security, performance, and access to the latest features. Always use firmware from our official website https://omadanetworks.com , and if you encounter any issues during or after the upgrade, contact Technical Support or visit the Omada Community forums for assistance.
Get to know more details of each function and configuration please go to Download Center to download the manual of your product.
FAQ
Q1: Can I upgrade the Omada Gateway firmware without interrupting network traffic?
A1: No. A temporary network interruption will occur during the upgrade process. It is recommended to perform the upgrade during off-peak hours to minimize impact on users.
Q2: Can I use unofficial or modified firmware for the upgrade?
A2: No. Tampered or unofficial firmware will be rejected by the gateway. Always download firmware from the official Omada website to ensure device security and stability.
Q3: How long does the firmware upgrade usually take?
A3: The process generally takes a few minutes. During this time, the Gateway will reboot and internet connectivity will be temporarily interrupted.
Q4: Will upgrading the firmware delete my configuration settings?
A4: No. The configuration is preserved after a firmware upgrade. However, it is always recommended to back up your configuration before performing the upgrade.
