


Contents
Configuration in Controller Mode
Configuration in Standalone Mode
Introduction
One-to-One NAT (Network Address Translation) is a technology that exclusively binds a single private IP address within an internal network to a single public IP address in an external network, establishing a fixed and unique bidirectional mapping between internal and external addresses. This enables internal hosts to appear as having an independent public identity on the external network, allowing external users to directly access specific internal server resources (such as Web or mail services) while effectively hiding the actual topology of the internal network. Commonly utilized in scenarios requiring stable access services.
Requirements
- Omada Gateway series
- Omada Network 6.0 and above
Configuration
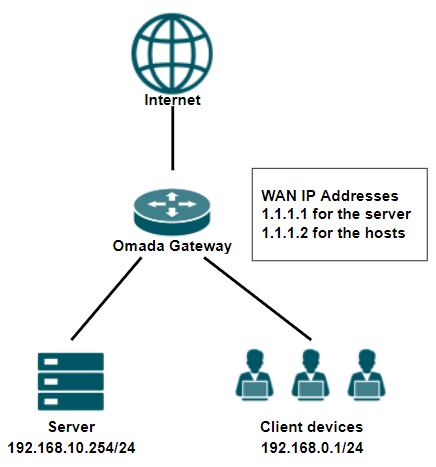
This article will guide you on how to configure One-to-One NAT using the topology below. The gateway has multiple available WAN IP addresses: 1.1.1.1 is dedicated to the server for direct external access, while 1.1.1.2 is allocated for client devices.’
Configuration in Controller Mode
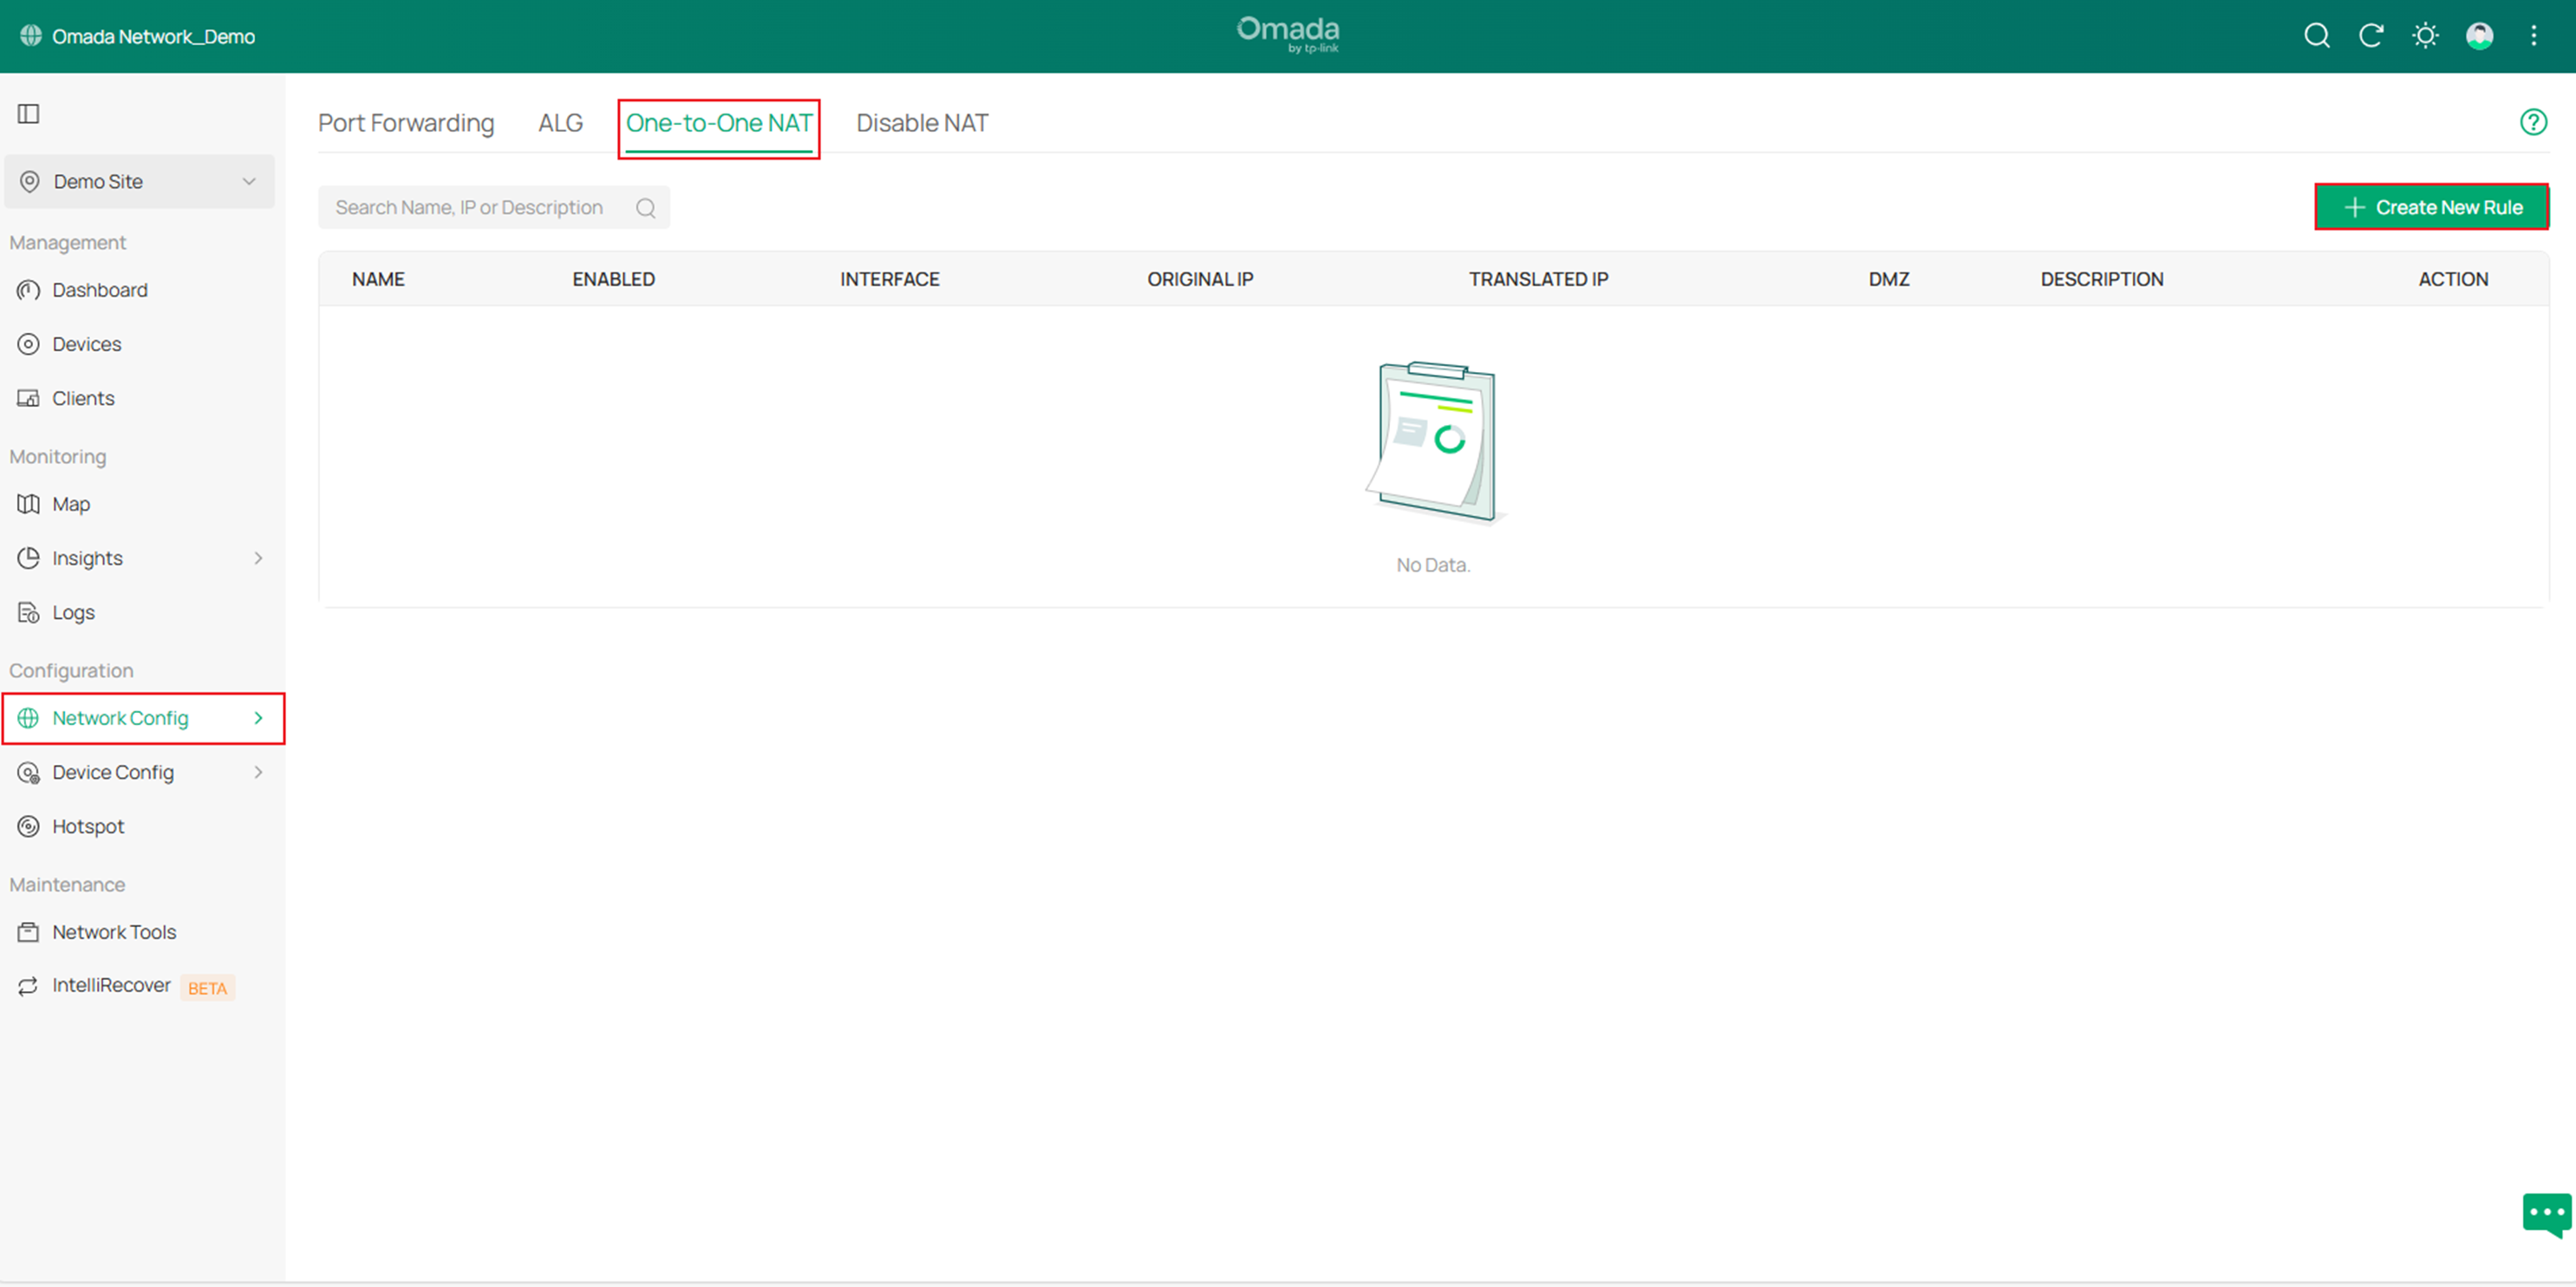
Step 1. Go to Network Config > Transmission > NAT > One-to-One NAT and click Create New Rule to start creating a new One-to-One NAT rule.
Step 2. Configure the rule as needed, then click Create.
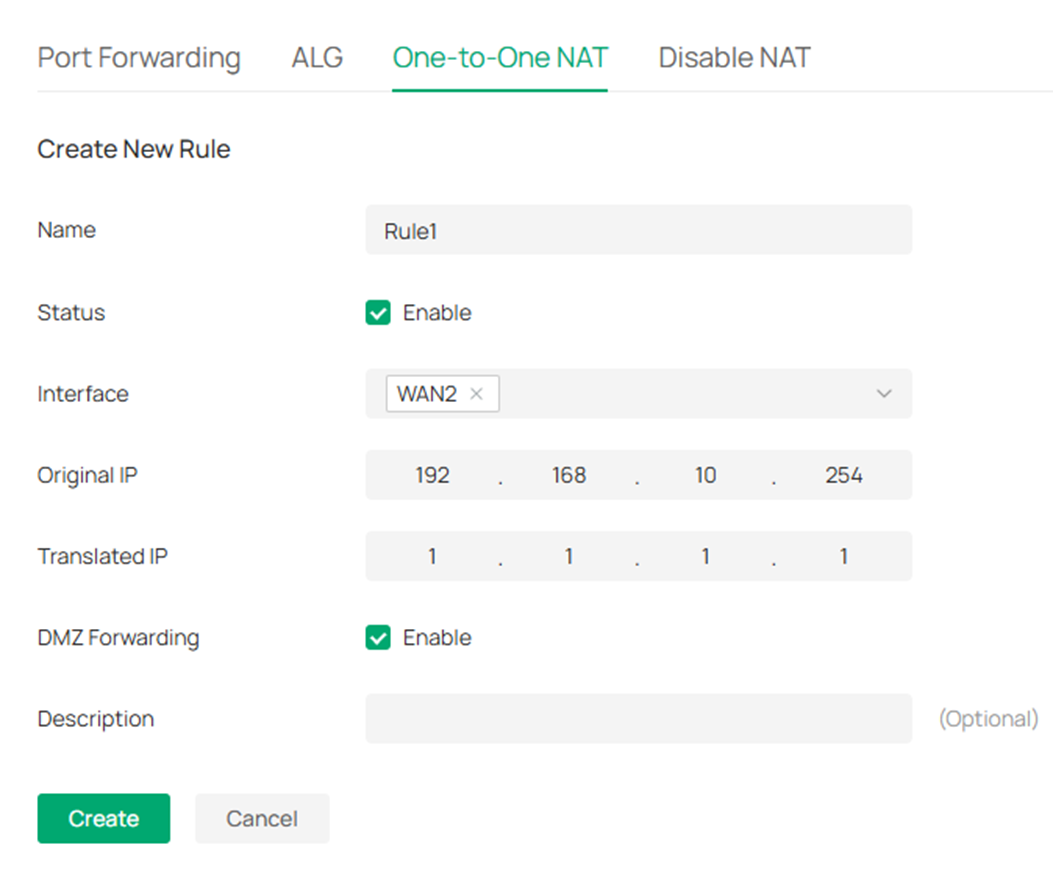
- Name: Enter a name to identify the one-to-one NAT rule.
- Status: Click the checkbox to enable the one-to-one NAT rule.
- Interface: Specify the effective WAN interface for the rule. Currently, only WAN interfaces with the connection type Static IP are supported.
- Original IP: Specify the original IP address for the rule, which means the device's private IP. The original IP address cannot be the broadcast address, network segment, or interface IP. With One-to-One NAT enabled, the original IP will map to the translated IP.
- Translated IP: Specify the translated IP address for the rule, which means the public IP address of the device. The translated IP address cannot be the broadcast address, network segment, or interface IP. With One-to-One NAT enabled, the original IP will map to the translated IP.
- DMZ Forwarding: Choose to enable DMZ Forwarding. The packets transmitted to the translated IP address will be forwarded to the host with the original IP address if DMZ Forwarding is enabled.
- Description: Enter a brief description for the rule entry to facilitate your management.
Configuration in Standalone Mode
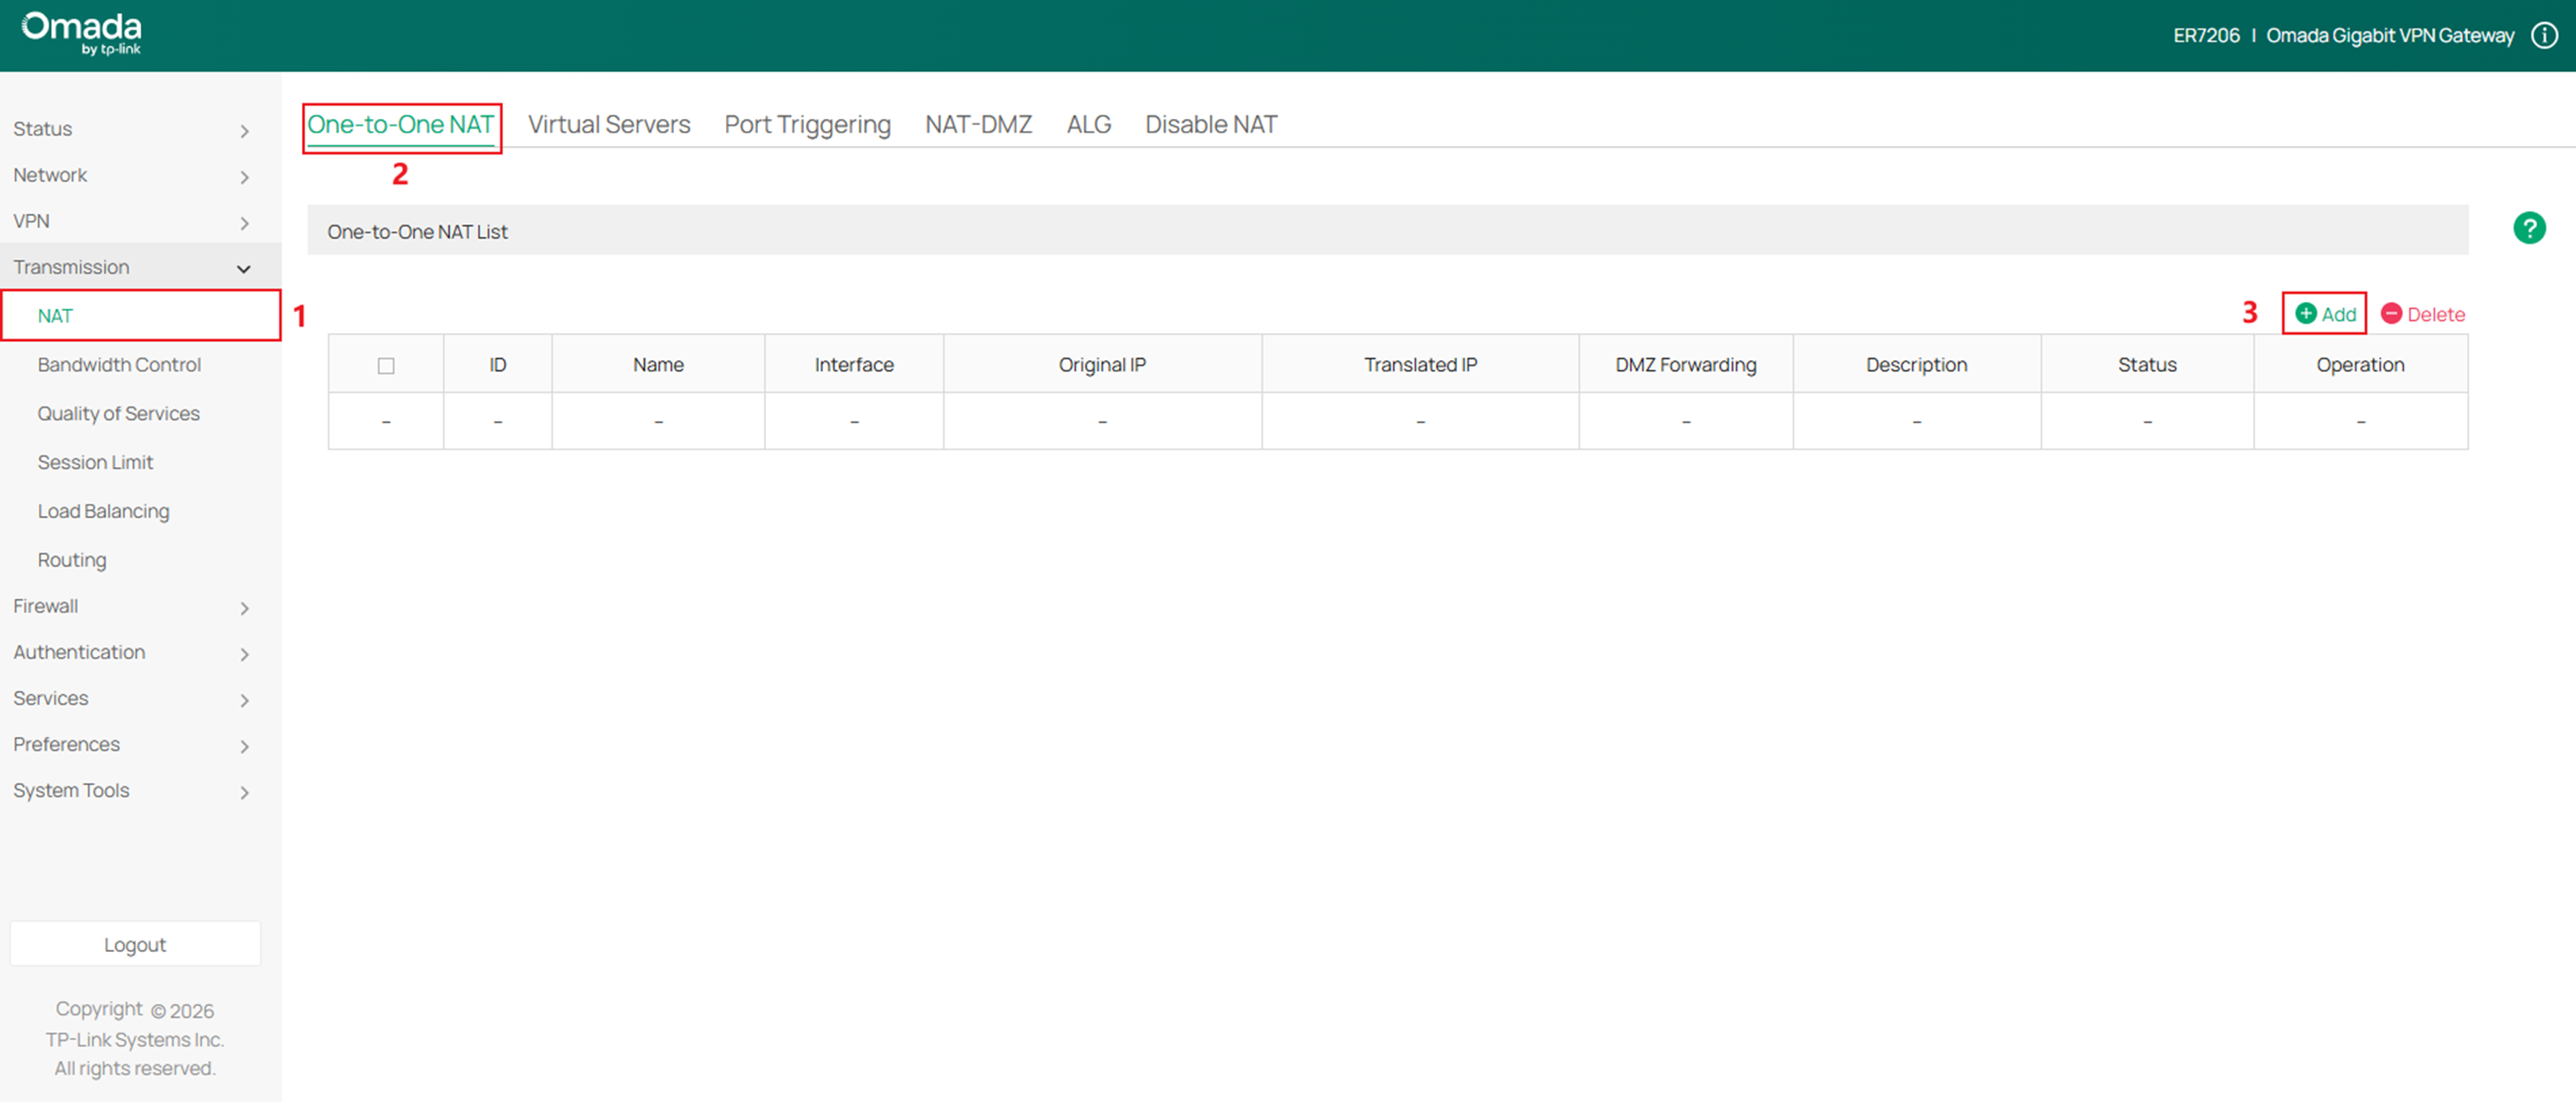
Step 1. Go to Transmission > NAT > One-to-One NAT and click + Add to start creating a new One-to-One NAT rule.
Step 2. Configure the rule as needed, then click OK.
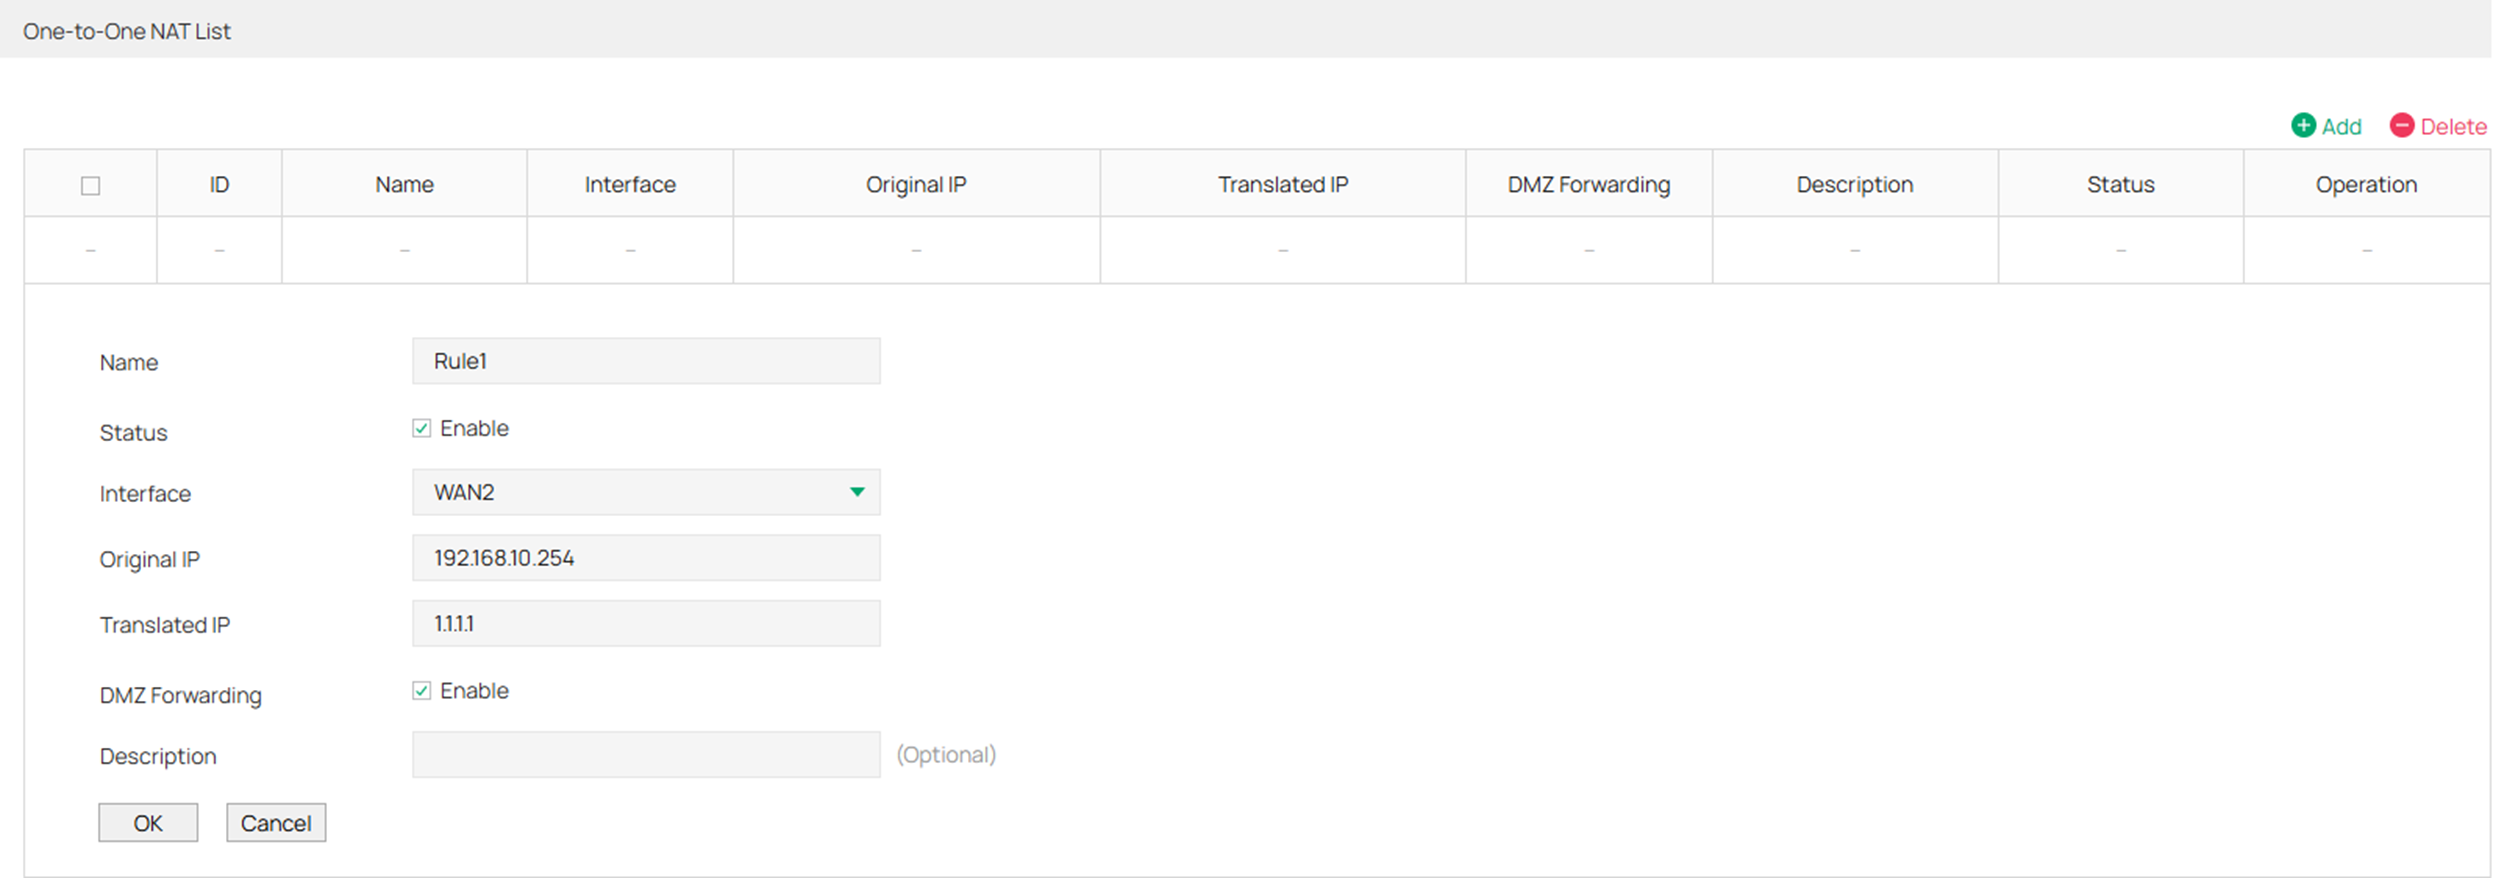
- Name: Enter a name to identify the one-to-one NAT rule.
- Status: Click the checkbox to enable the one-to-one NAT rule.
- Interface: Specify the effective WAN interface for the rule. Currently, only WAN interfaces with the connection type Static IP are supported.
- Original IP: Specify the original IP address for the rule, which means the device's private IP. The original IP address cannot be the broadcast address, network segment, or interface IP. With One-to-One NAT enabled, the original IP will map to the translated IP.
- Translated IP: Specify the translated IP address for the rule, which means the public IP address of the device. The translated IP address cannot be the broadcast address, network segment, or interface IP. With One-to-One NAT enabled, the original IP will map to the translated IP.
- DMZ Forwarding: Choose to enable DMZ Forwarding. The packets transmitted to the translated IP address will be forwarded to the host with the original IP address if DMZ Forwarding is enabled.
- Description: Enter a brief description for the rule entry to facilitate your management.
Conclusion
We have now completed our introduction to how to configure One-to-One NAT on an Omada Gateway in both Controller mode and Standalone mode.
Get to know more details of each function and configuration please go to Download Center to download the manual of your product.
QA
Q1: Why can't I select a specific interface when configuring a one-to-one NAT rule?
A2: Your WAN connection type is not Static IP.
