


Contents
Configuration in the Controller Mode
Configuration in the Standalone Mode
Introduction
Policy routing allows users to customize rules for the router to forward the packets. Once policy routing is configured and enabled, the router will check the source, destination, and protocol of the network traffic first. When the traffic matches the user-defined policies, it will be forwarded according to the specific polices. In this way, policy routing provides great flexibility for networking.
Requirements
- Omada Gateway series
- Omada Network 6.0 and above
Configuration
We will go through how to configure policy routing in both Controller Mode and Standalone Mode through the following case.
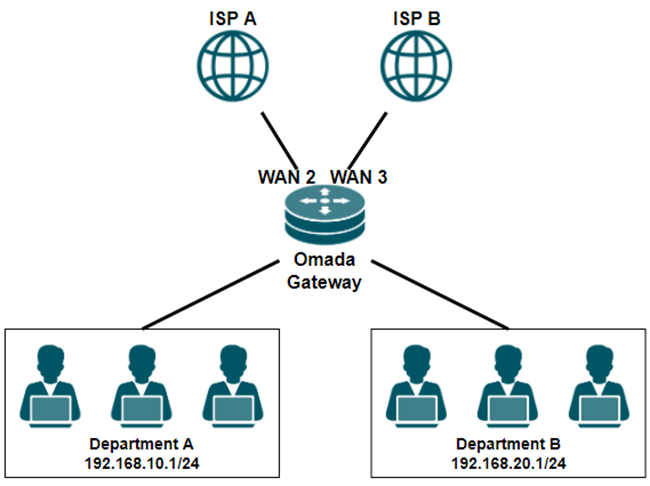
A company has subscribed to broadband services from two different Internet Service Providers (ISPs):
- ISP A: offers a stable connection with low latency but provides limited bandwidth (100 Mbps) at a higher cost.
- ISP B: offers greater bandwidth (1000 Mbps) at a lower cost, but experiences occasional network instability.
The company's network administrator is going to route internal traffic to different external internet connections based on departmental functions. Department A (192.168.10.1/24), which handles more critical operations, requires stable and reliable internet access from ISP A, while Department B's routine operations (192.168.20.1/24) utilize the high bandwidth from ISP B.
Configuration in the Controller Mode
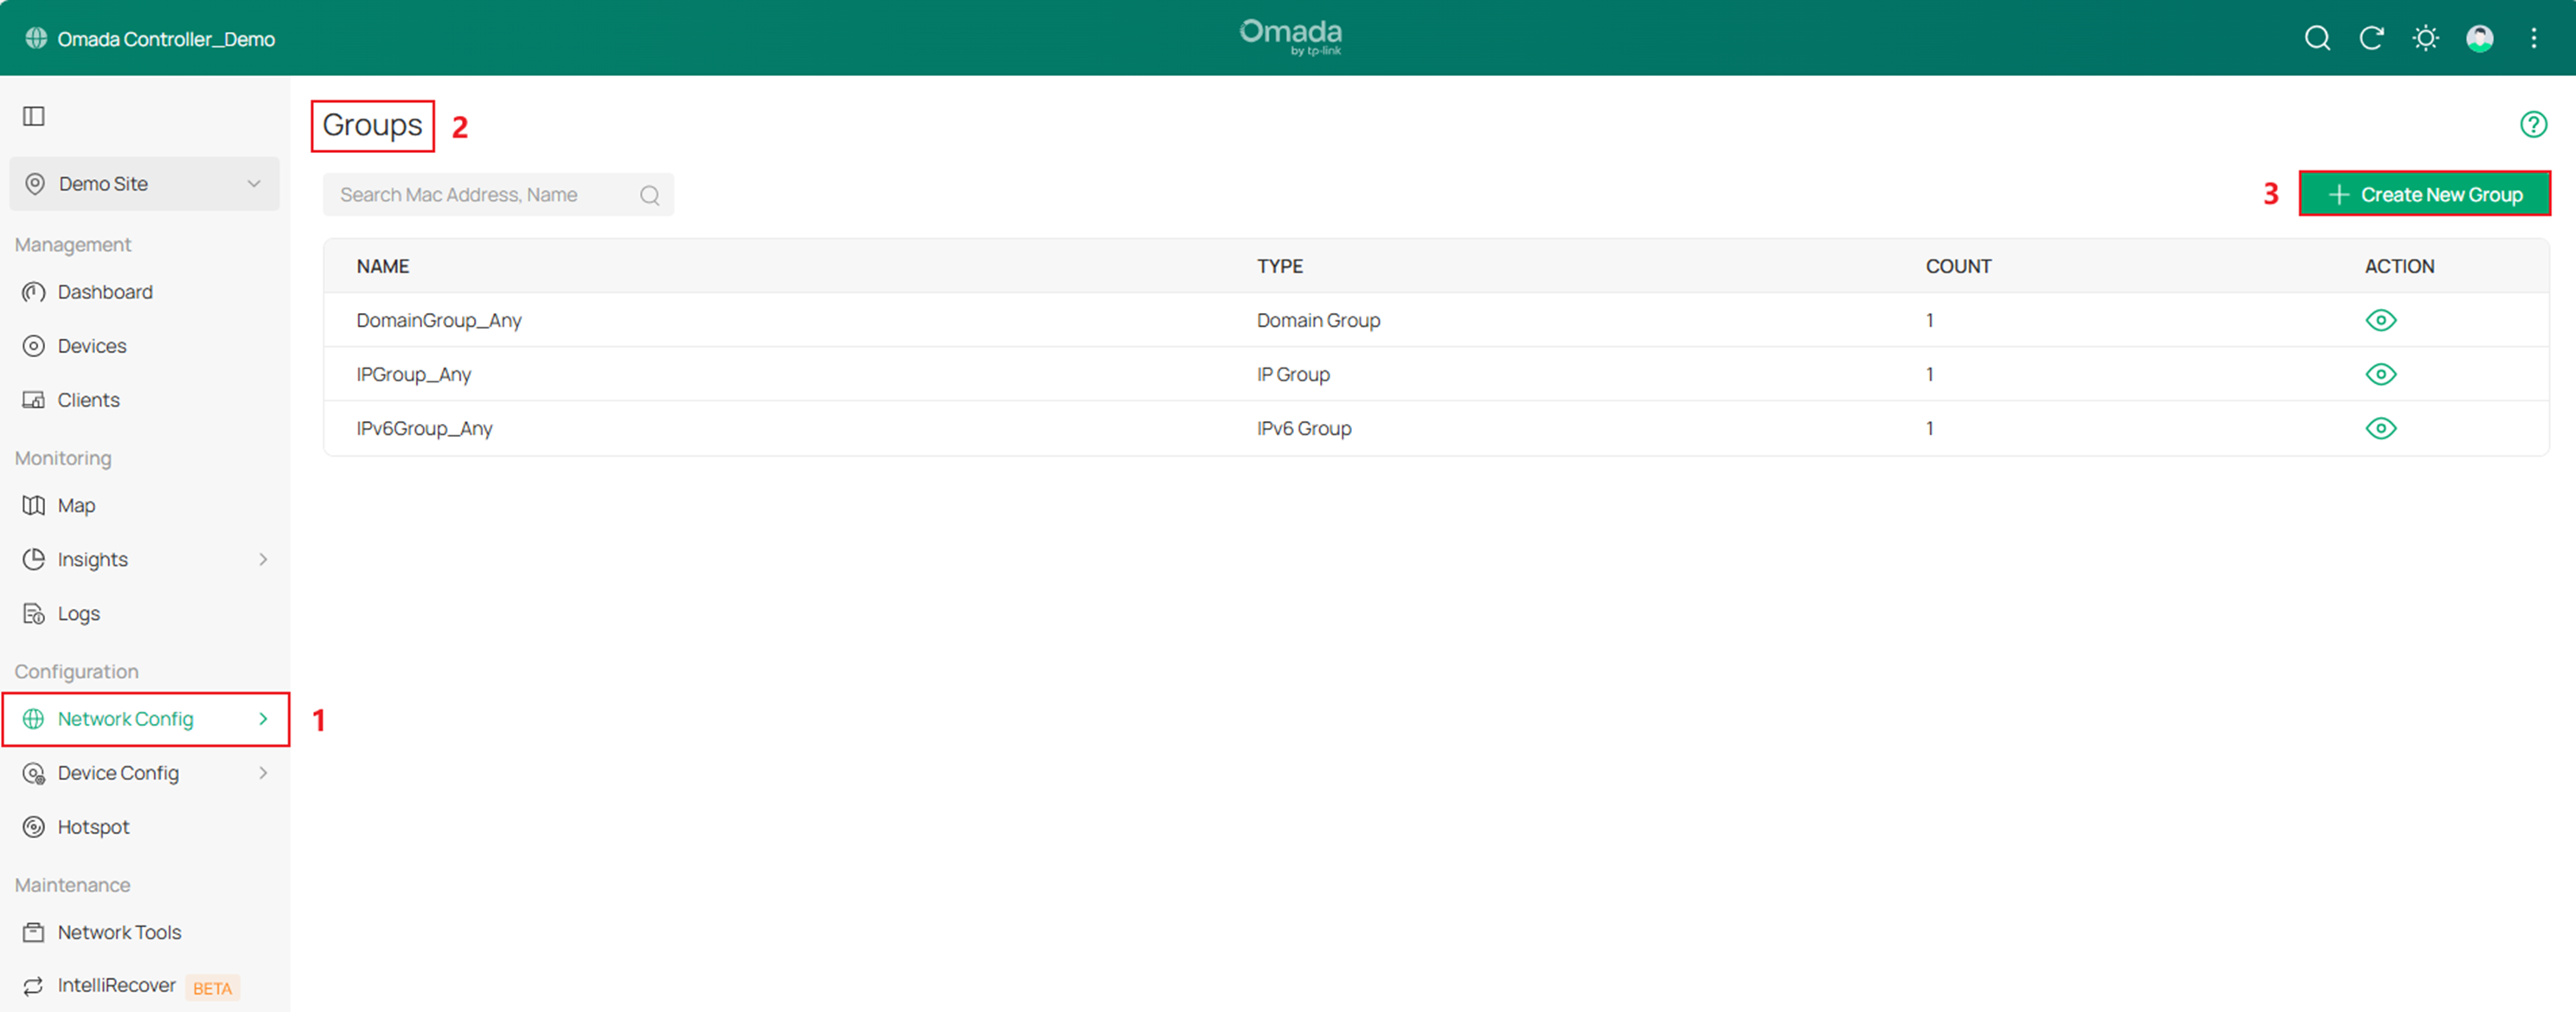
Step 1. Go to Network Config > Profile > Groups, click Create New Group.
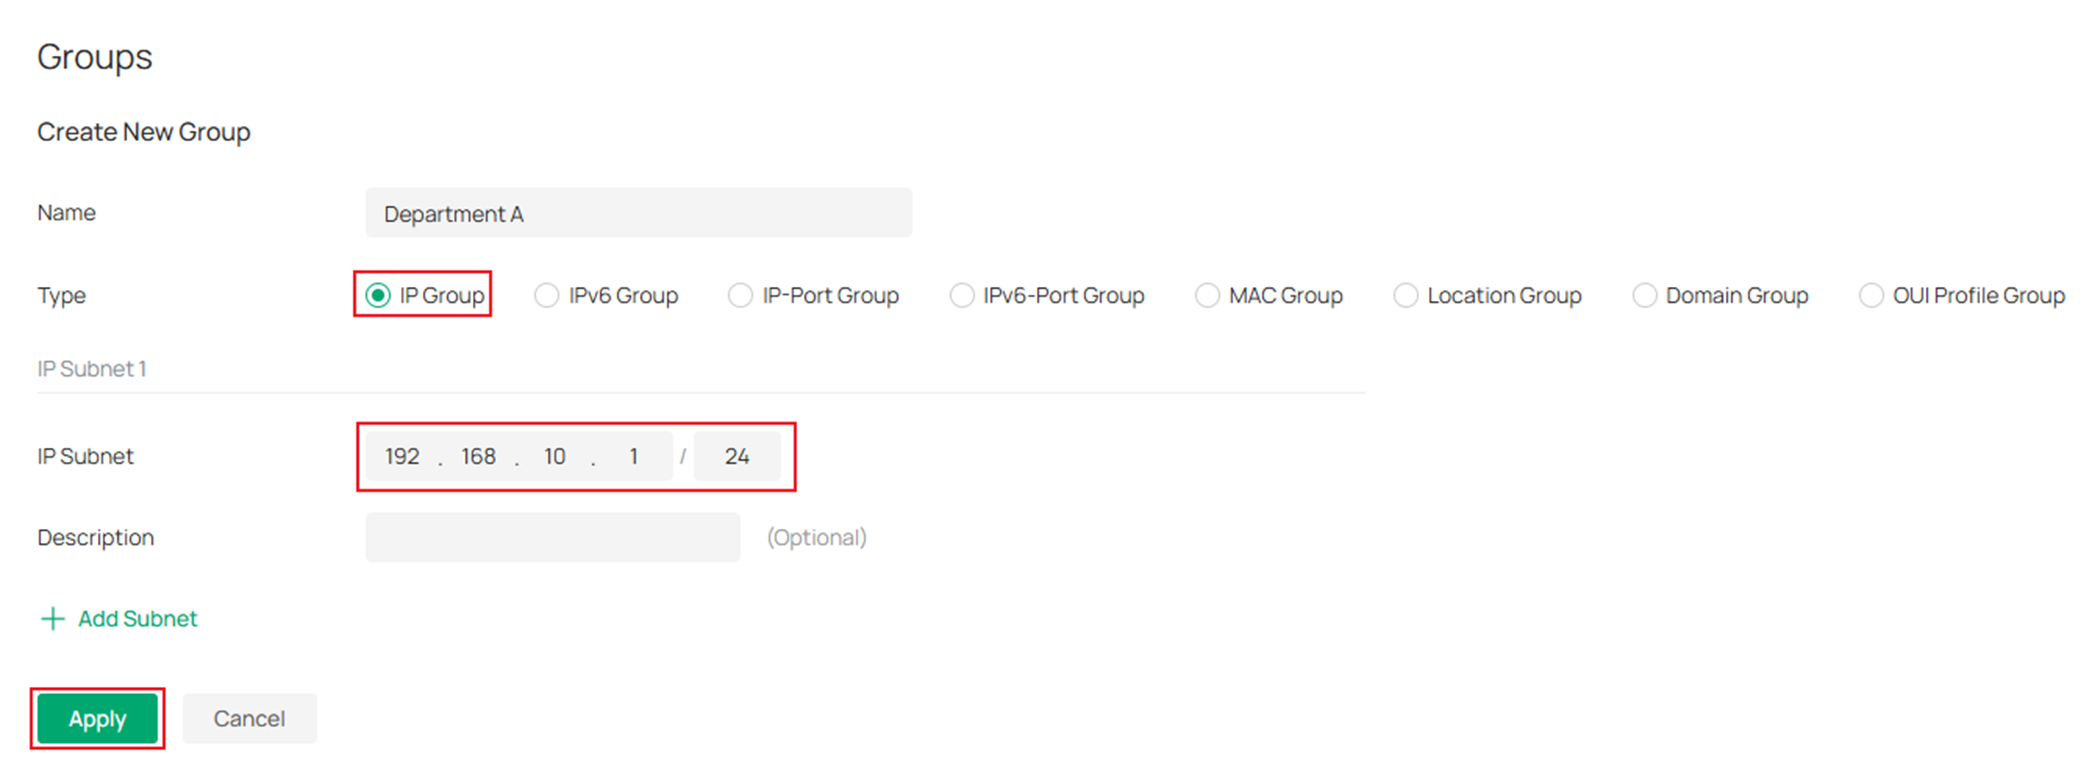
Step 2. Create an IP Group for Department A.
Select the Type as IP Group and fill in the IP Subnet as 192.168.10.1/24 and click Apply to save the configuration.
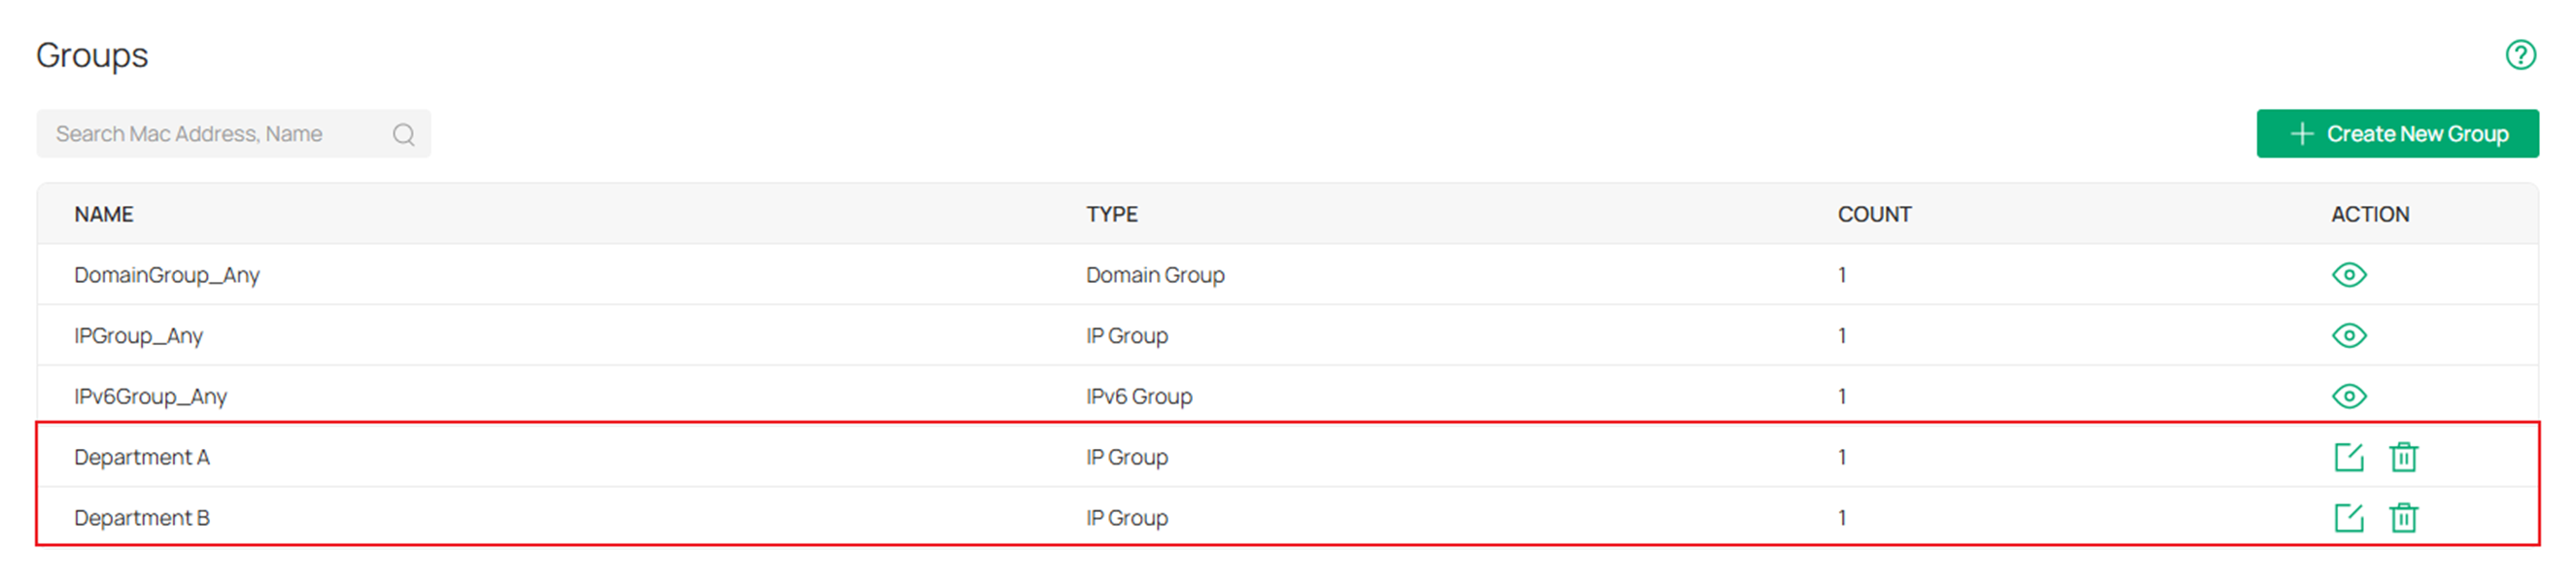
Step 3. Create another IP Group for Department B (192.168.20.1/24) in the same way.
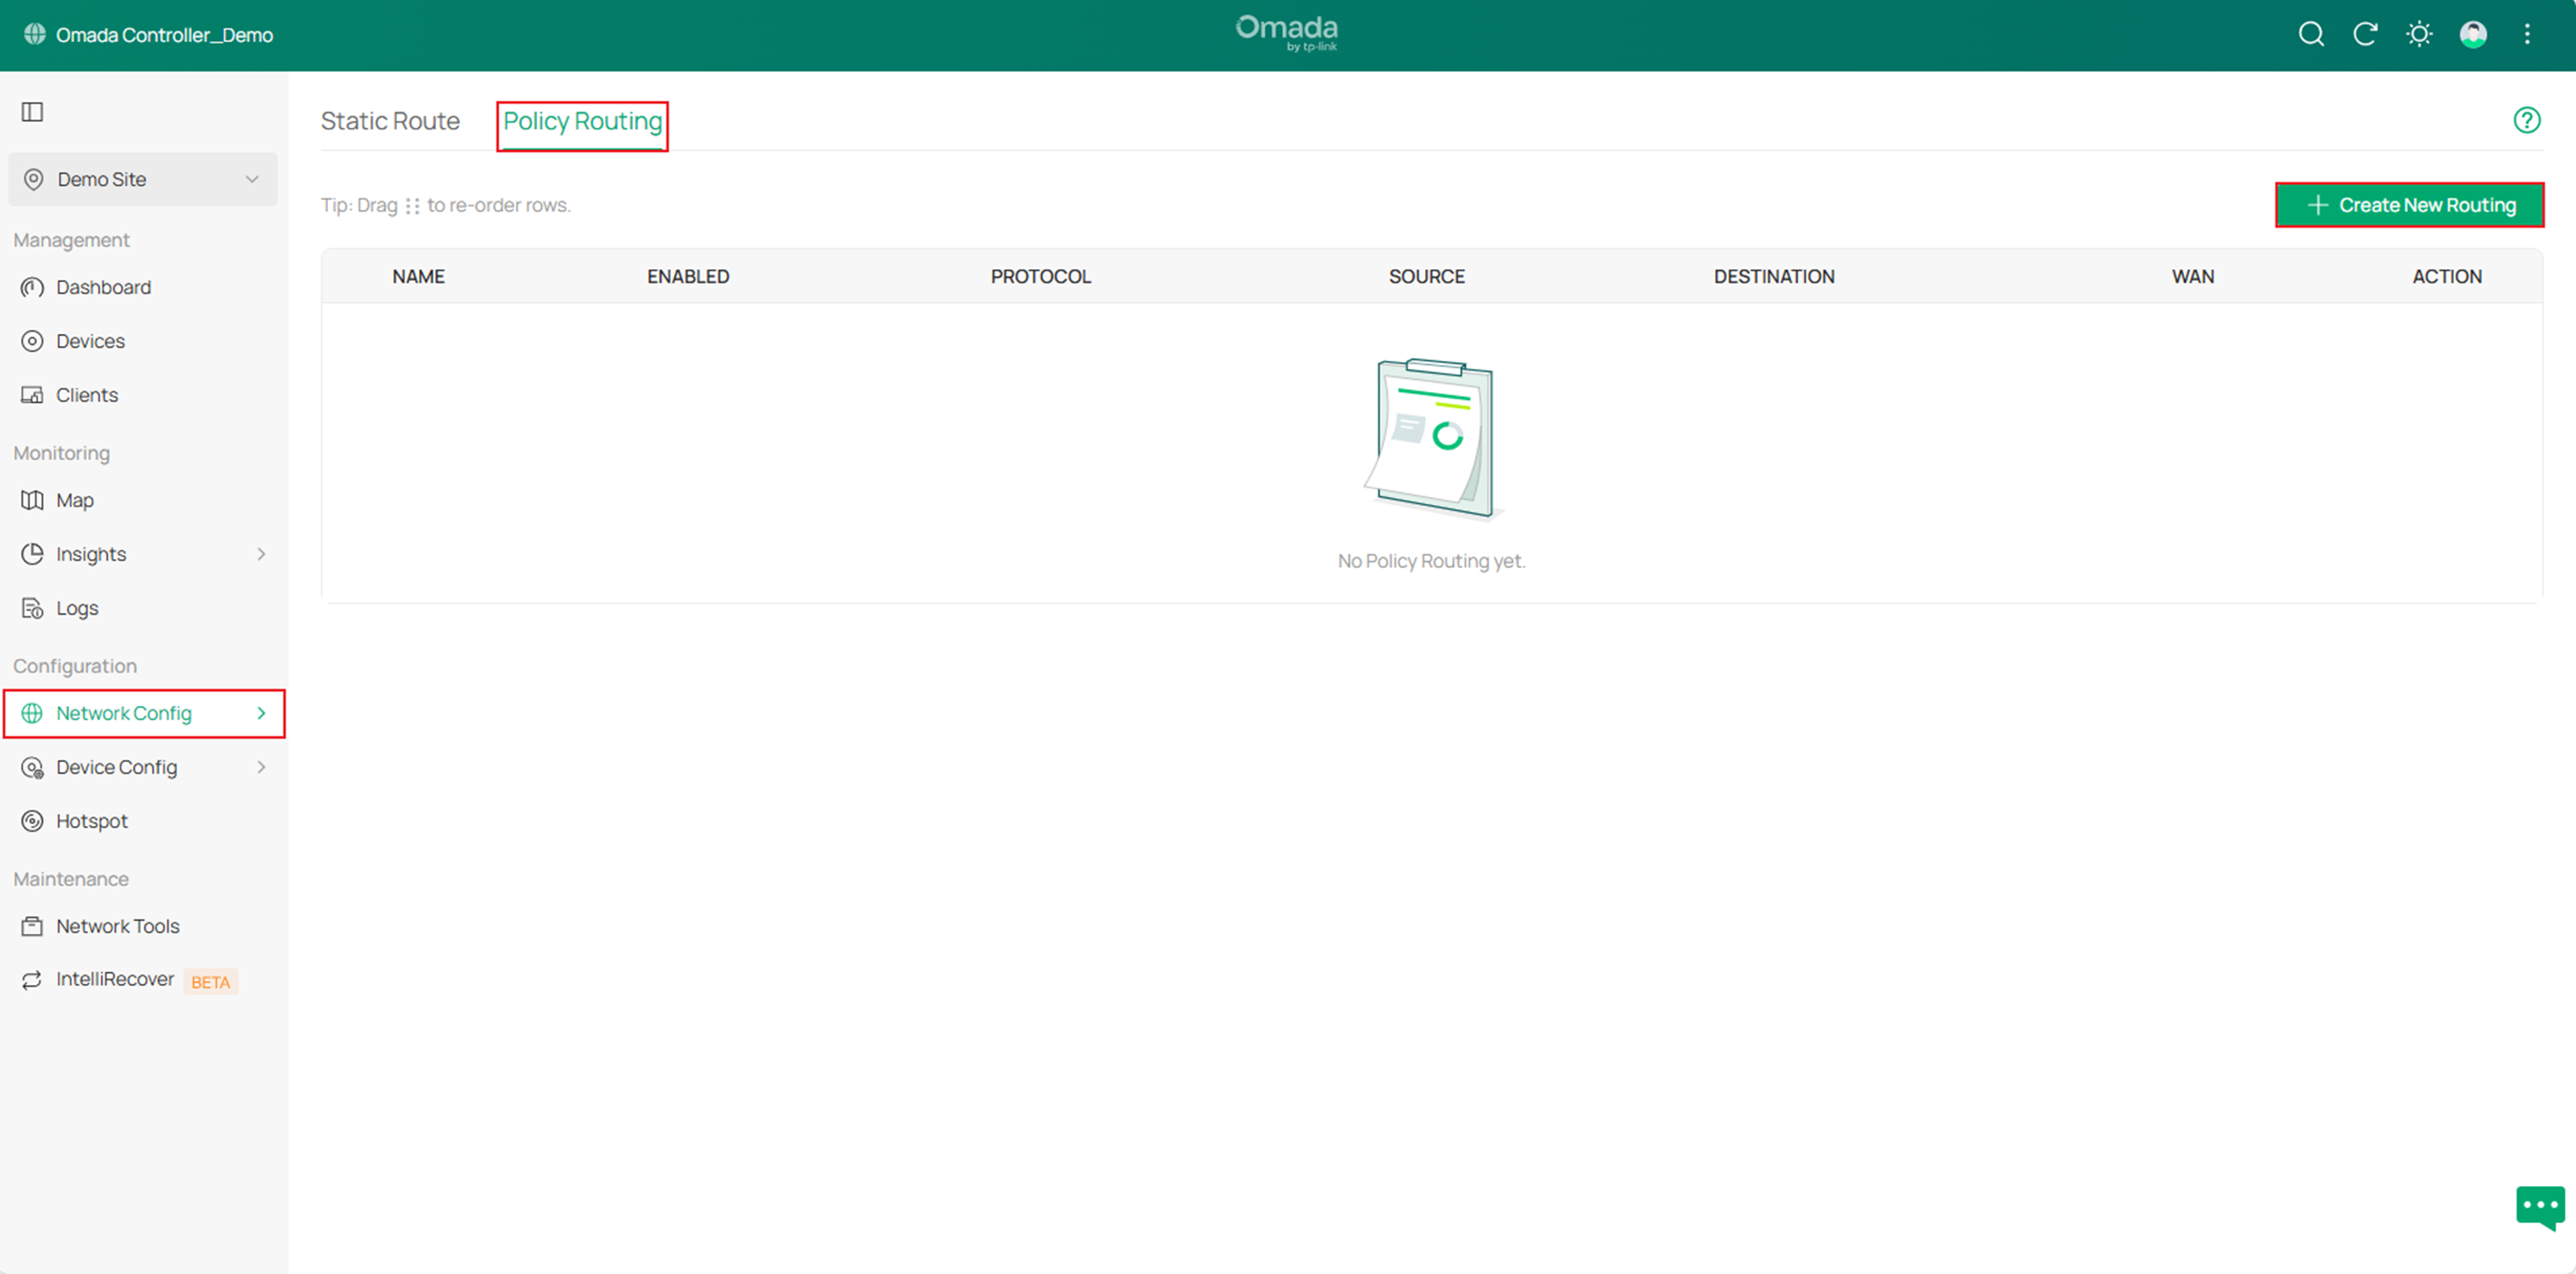
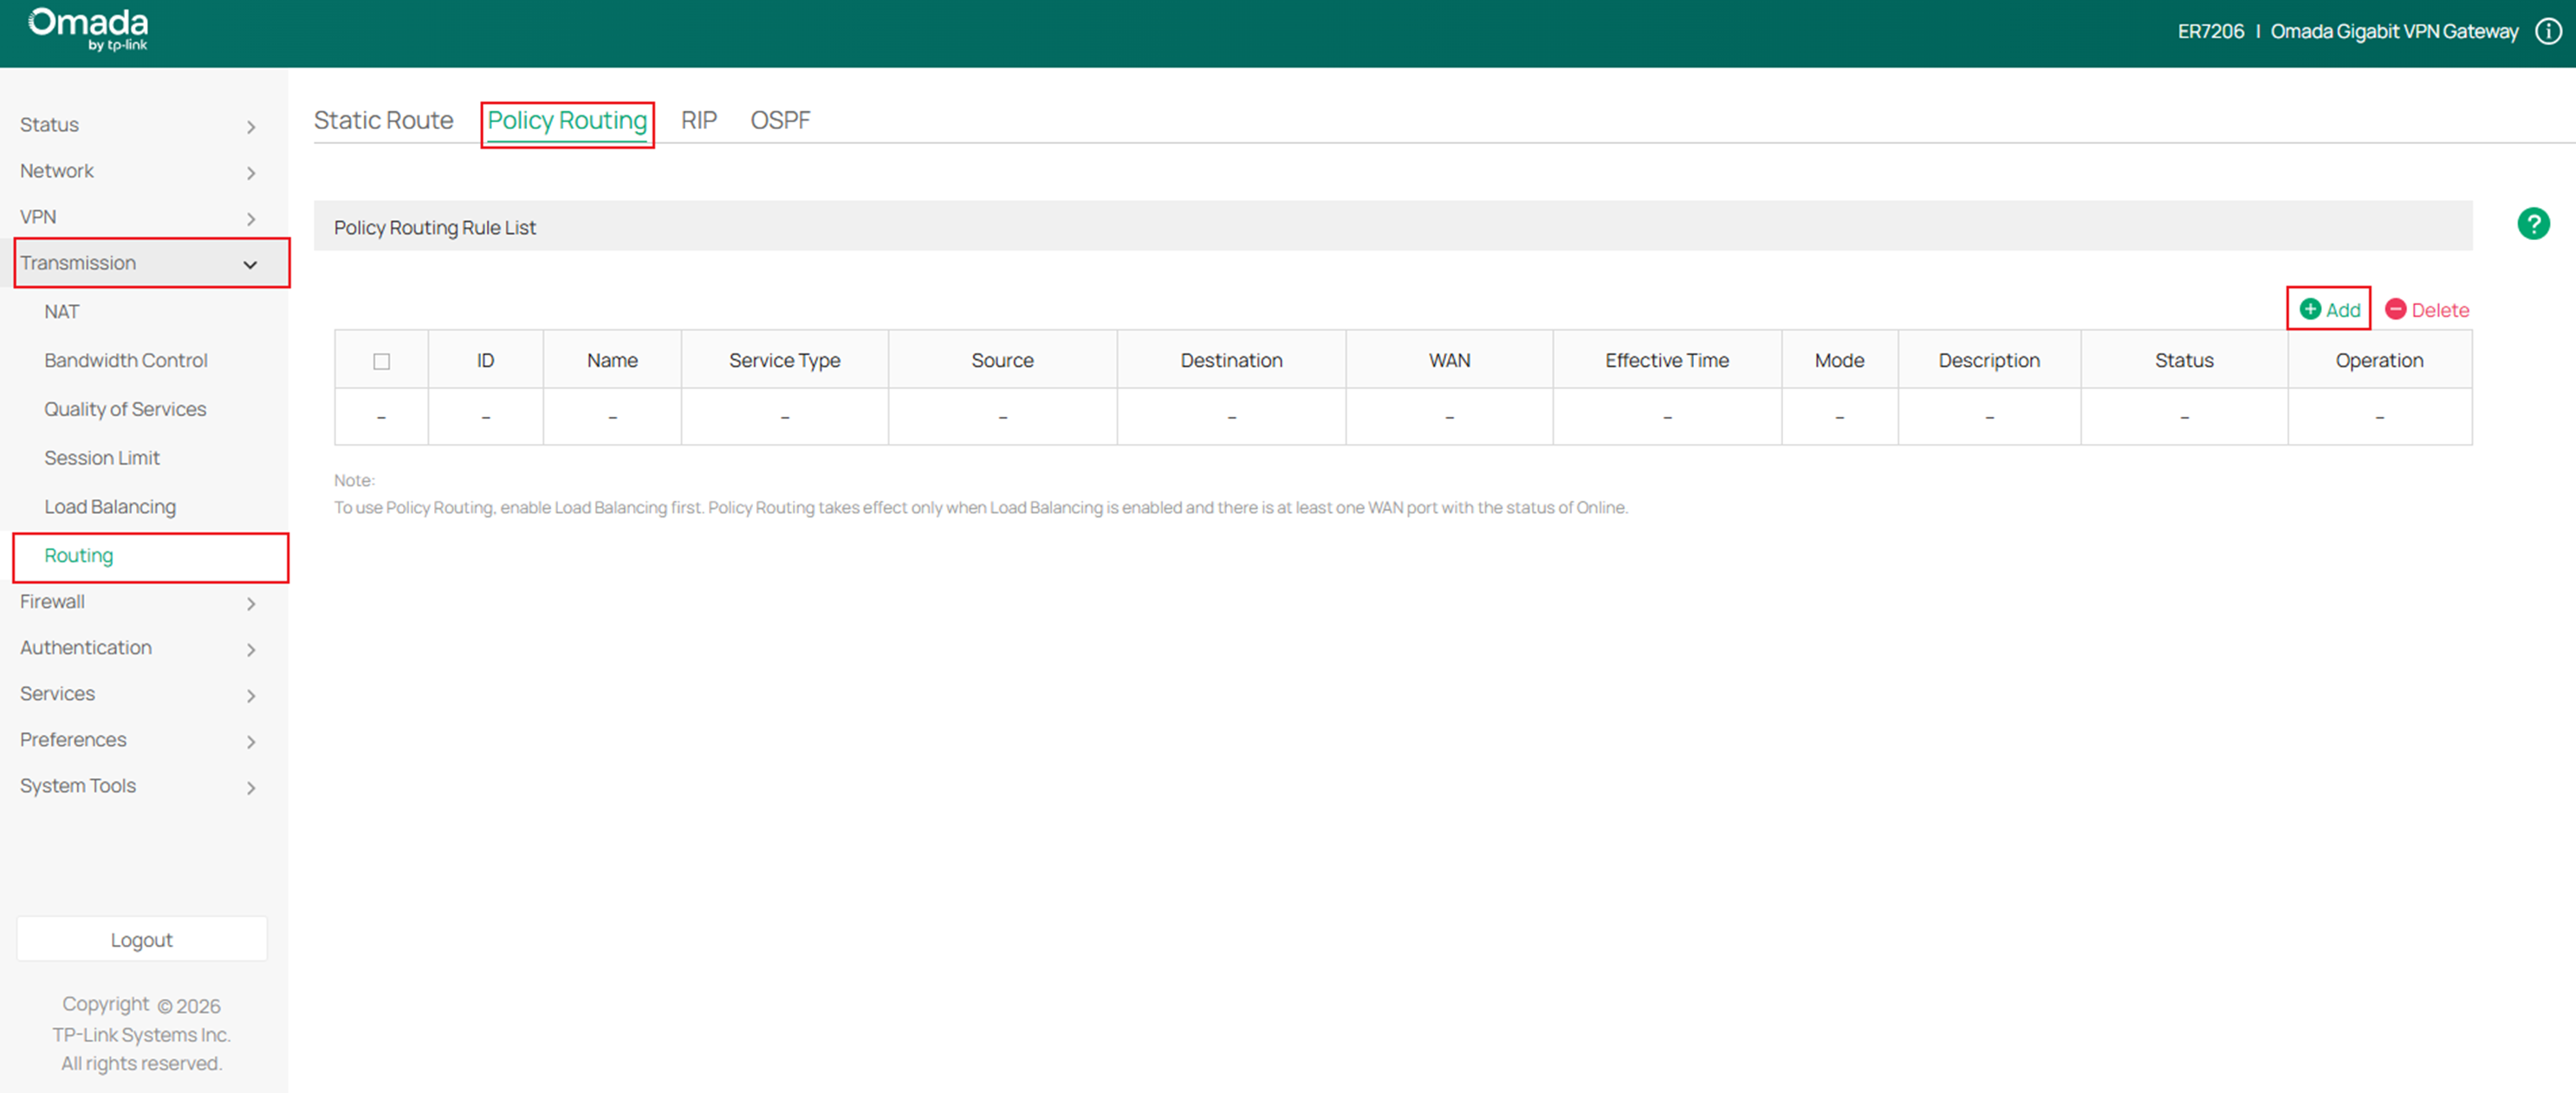
Step 4. Go to Network Config > Transmission > Routing > Policy Routing, click Create New Routing.
Step 2. Create a new rule to route all the data from department A to ISP A (connected to port WAN2) only. Please see the picture below for details.
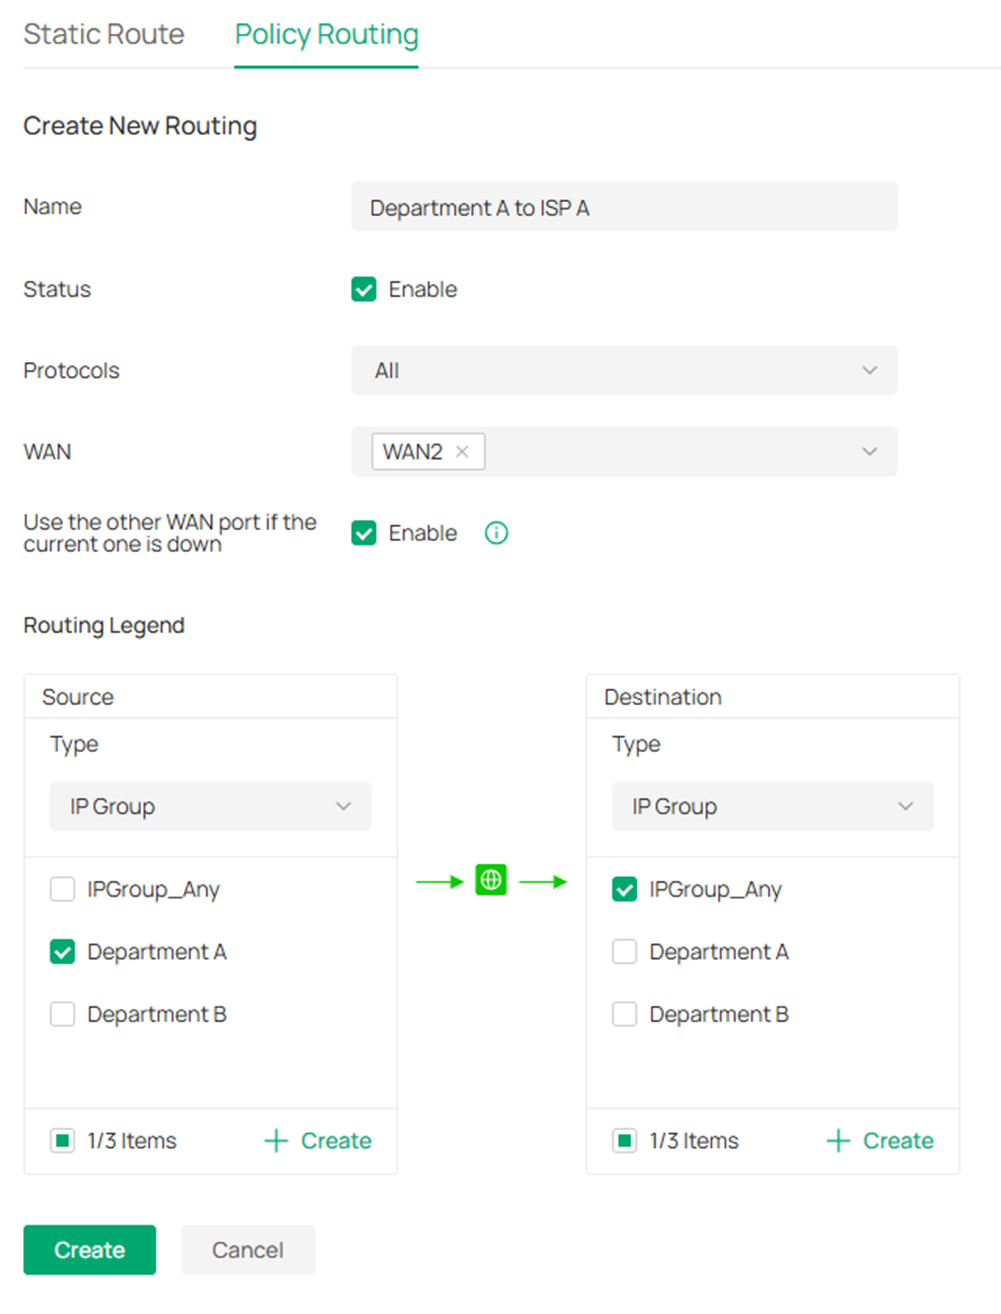
Note: “Use the other WAN port if the current one is down” is usually enabled. When it is enabled, the gateway checks if the WAN port is online before routing traffic. If the WAN port were offline, data would go through the other WAN. While it is not enabled, if the specified WAN port is down, the rule always takes effect, no matter whether the selected WAN is online or offline, resulting in the client losing the network connection.
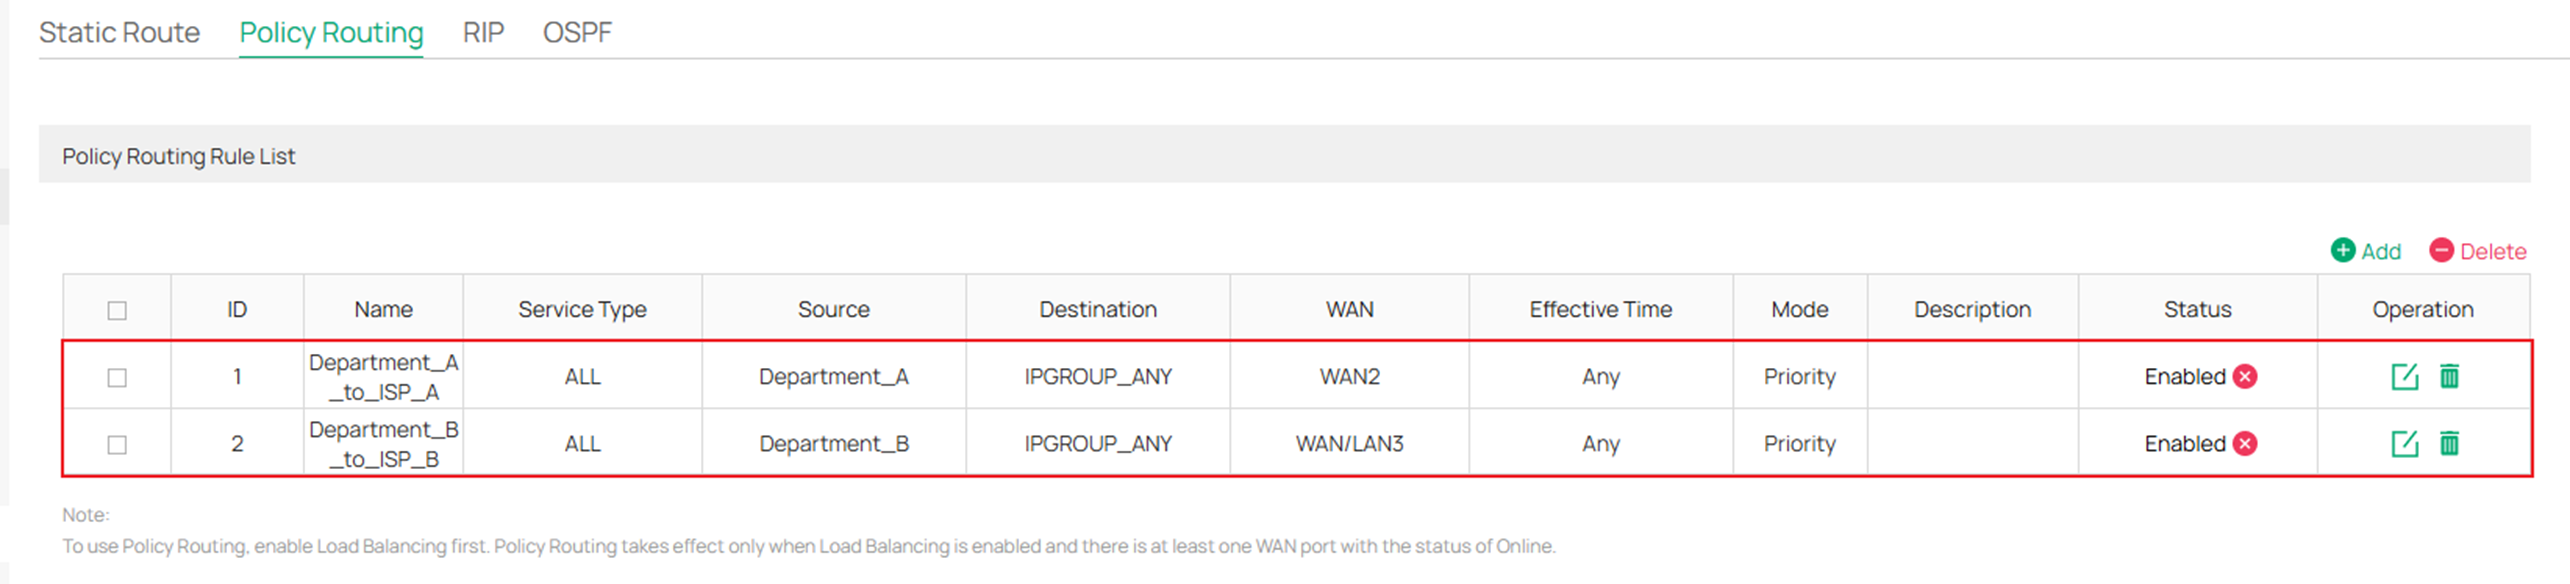
Step 3. Create another rule to route all the data from department B to ISP B (connected to port WAN/LAN3) only in the same way.

Configuration in the Standalone Mode
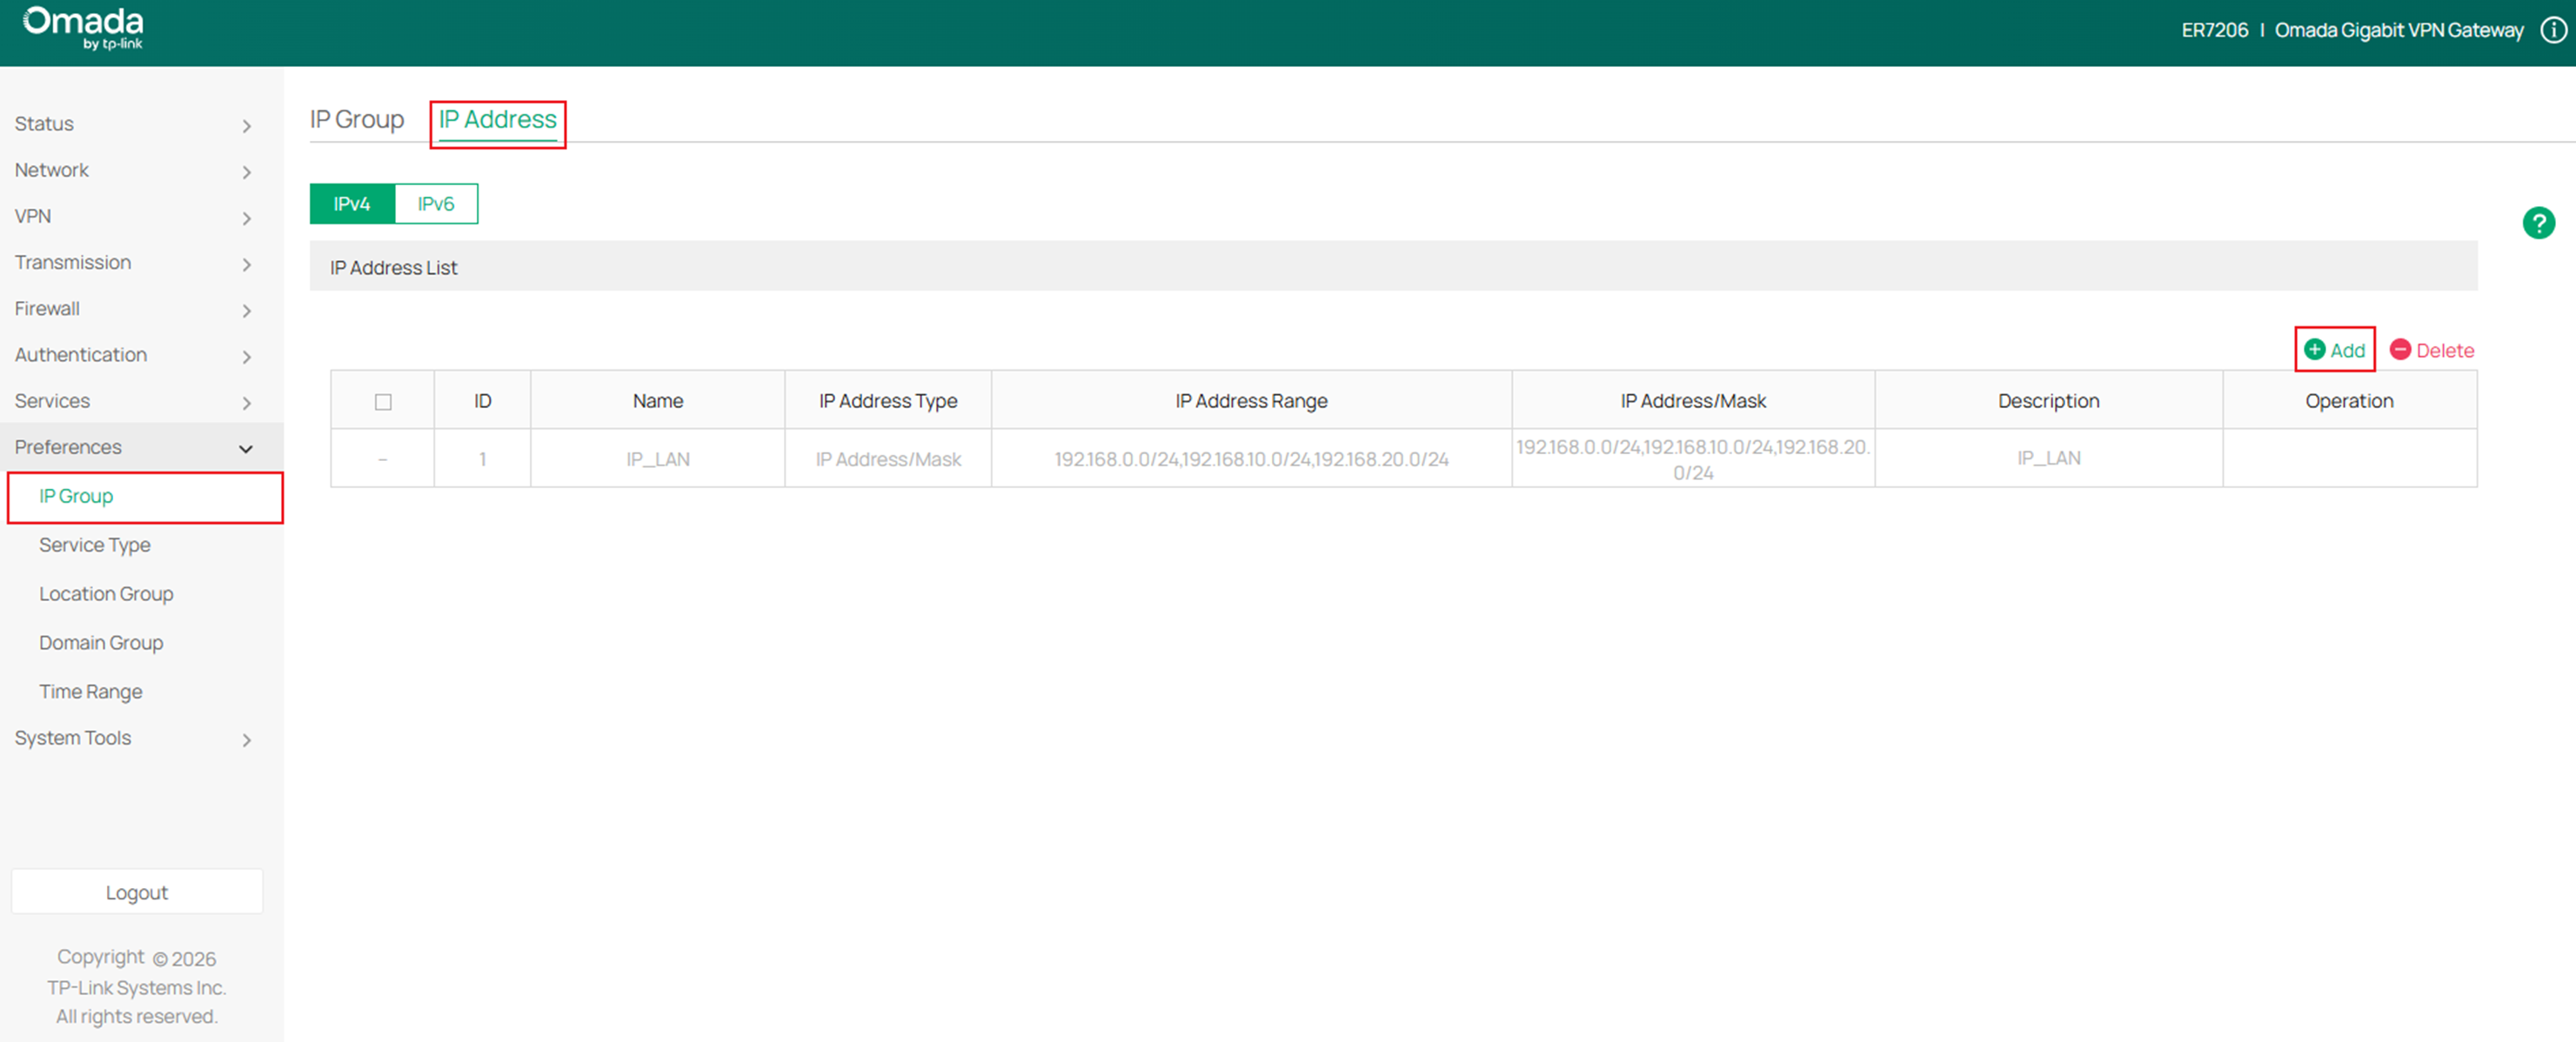
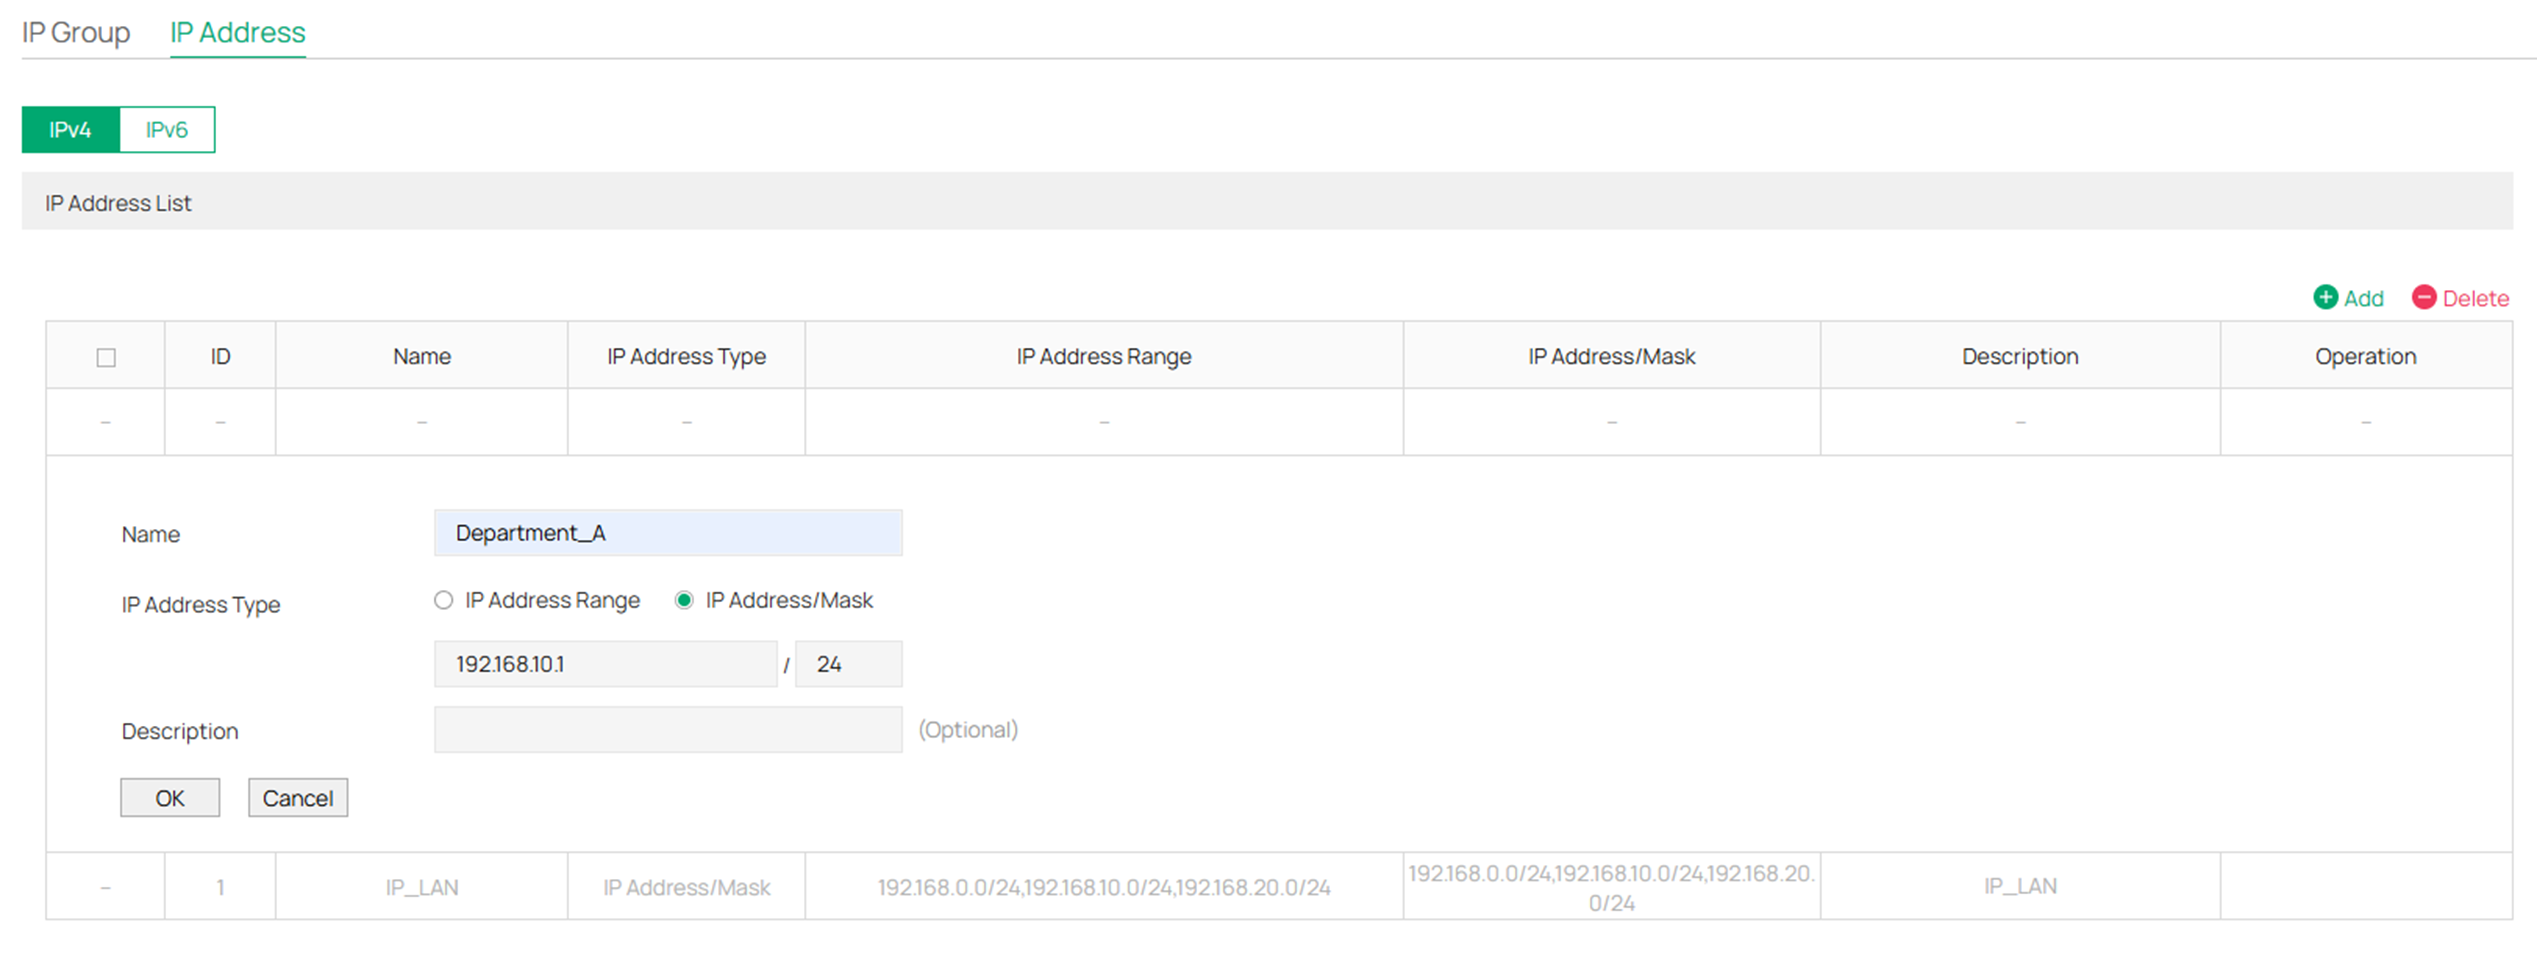
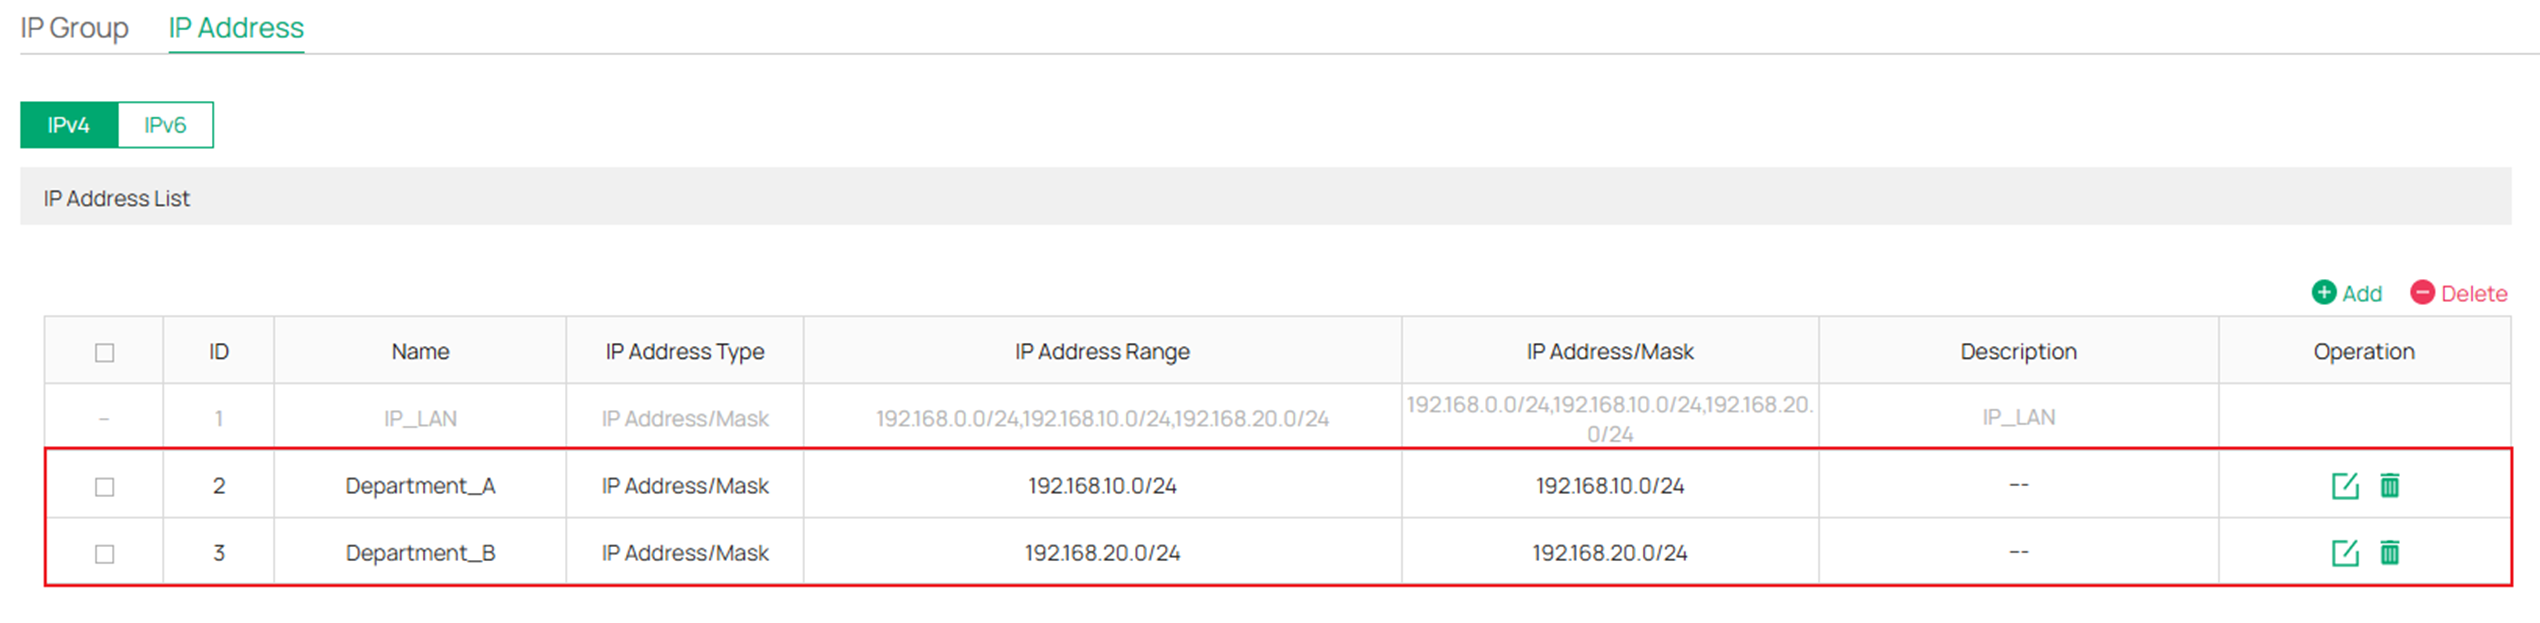
Step 1. Go to Preference > IP Group > IP Address and click Add to set an IP range.
Step 2. Select the IP address Type as needed. Here we select it as IP Address/Mask and enter 192.168.10.1/24.
Step 3. Create another IP range for Department B (192.168.20.1/24) in the same way.
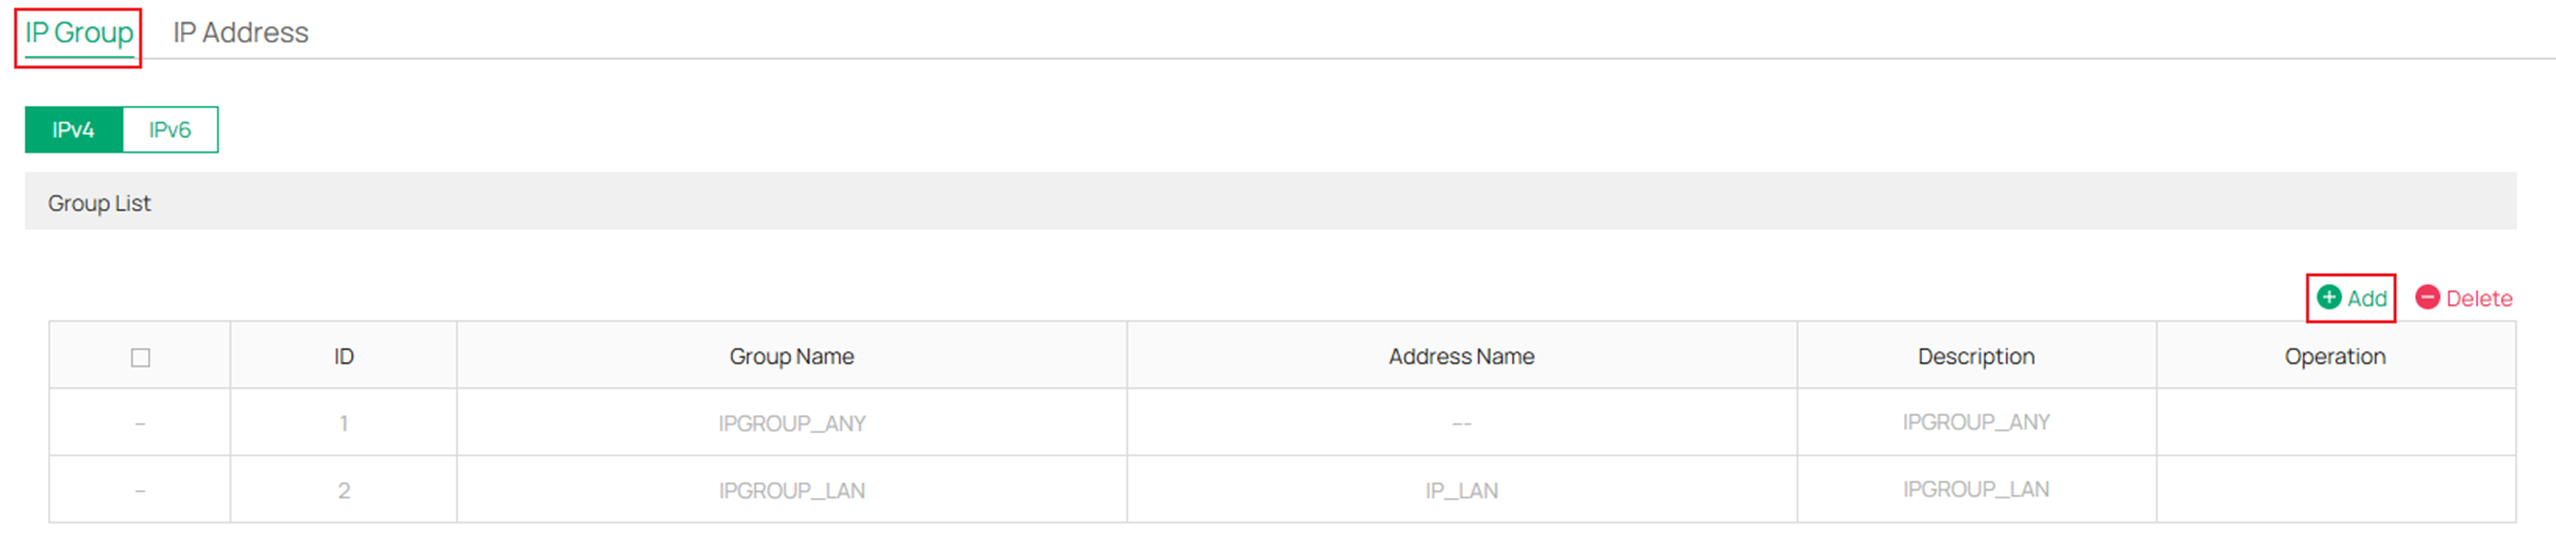
Step 4. Go to IP Group and click Add to create a new IP group.
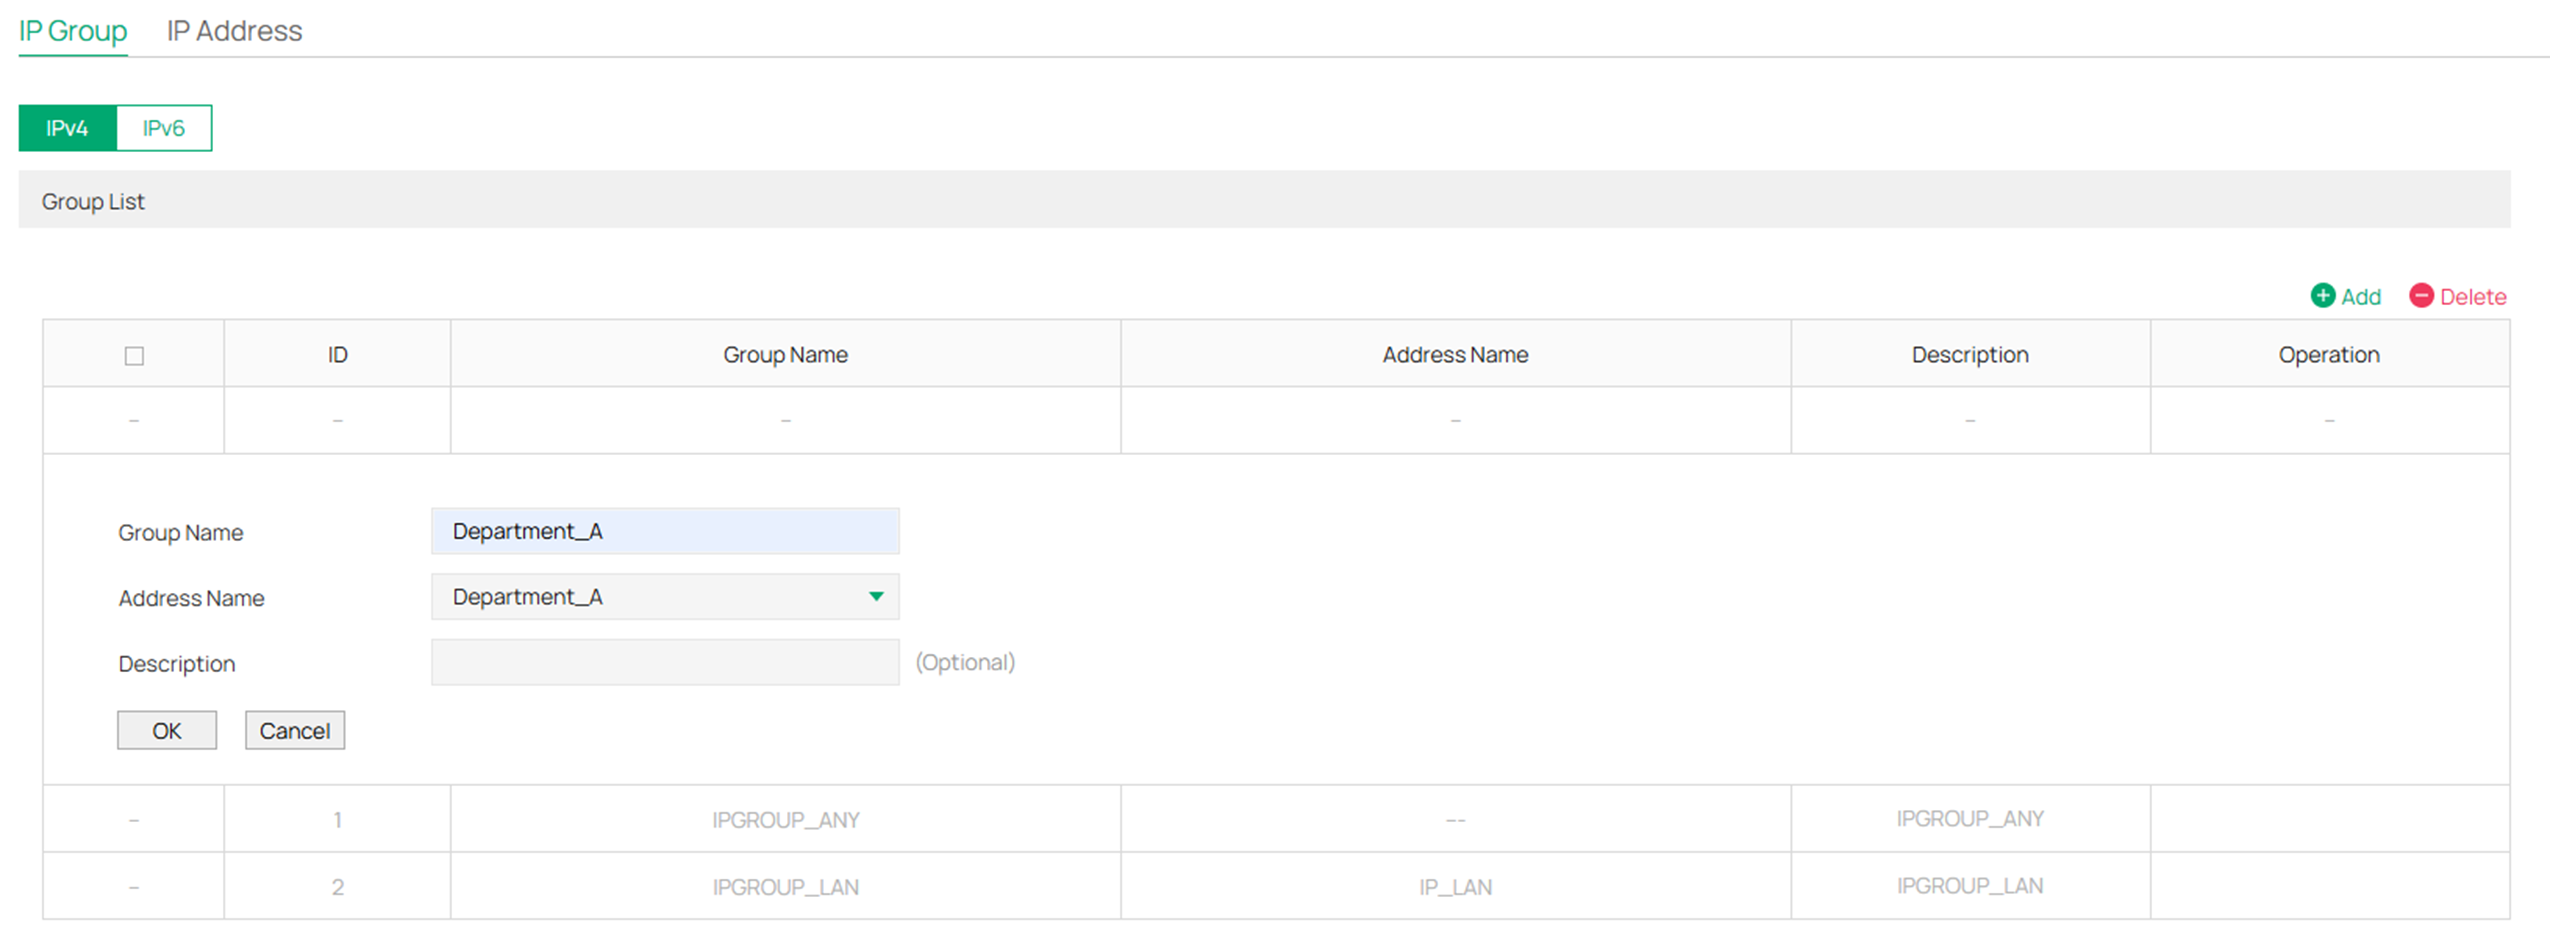
Step 5. Set a Group Name for the new IP Group and select the Address Name as the IP range we just created for department A.
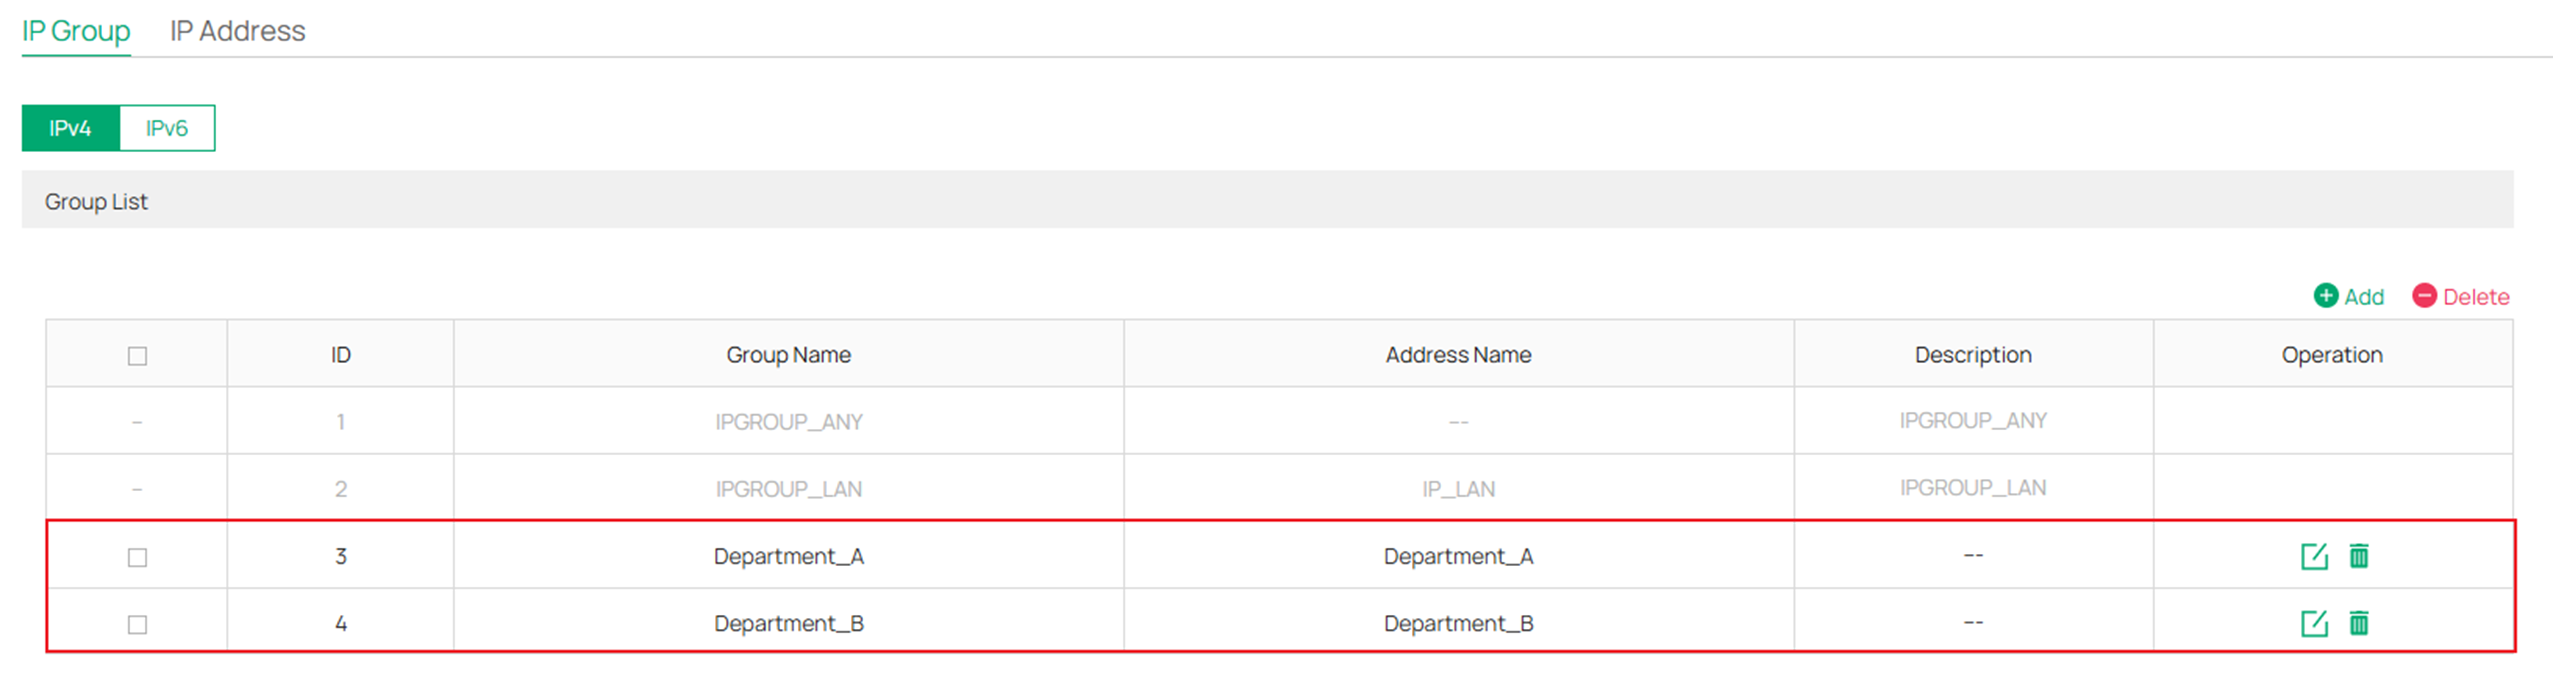
Step 6. Create another IP group for department A in the same way.
Step 7. Go to Transmission > Routing > Policy Routing and click Add to create a new rule.
Step 8. Configure the new rule to route all the data from department A to ISP A (connected to port WAN2) only. Please see the picture below for details.
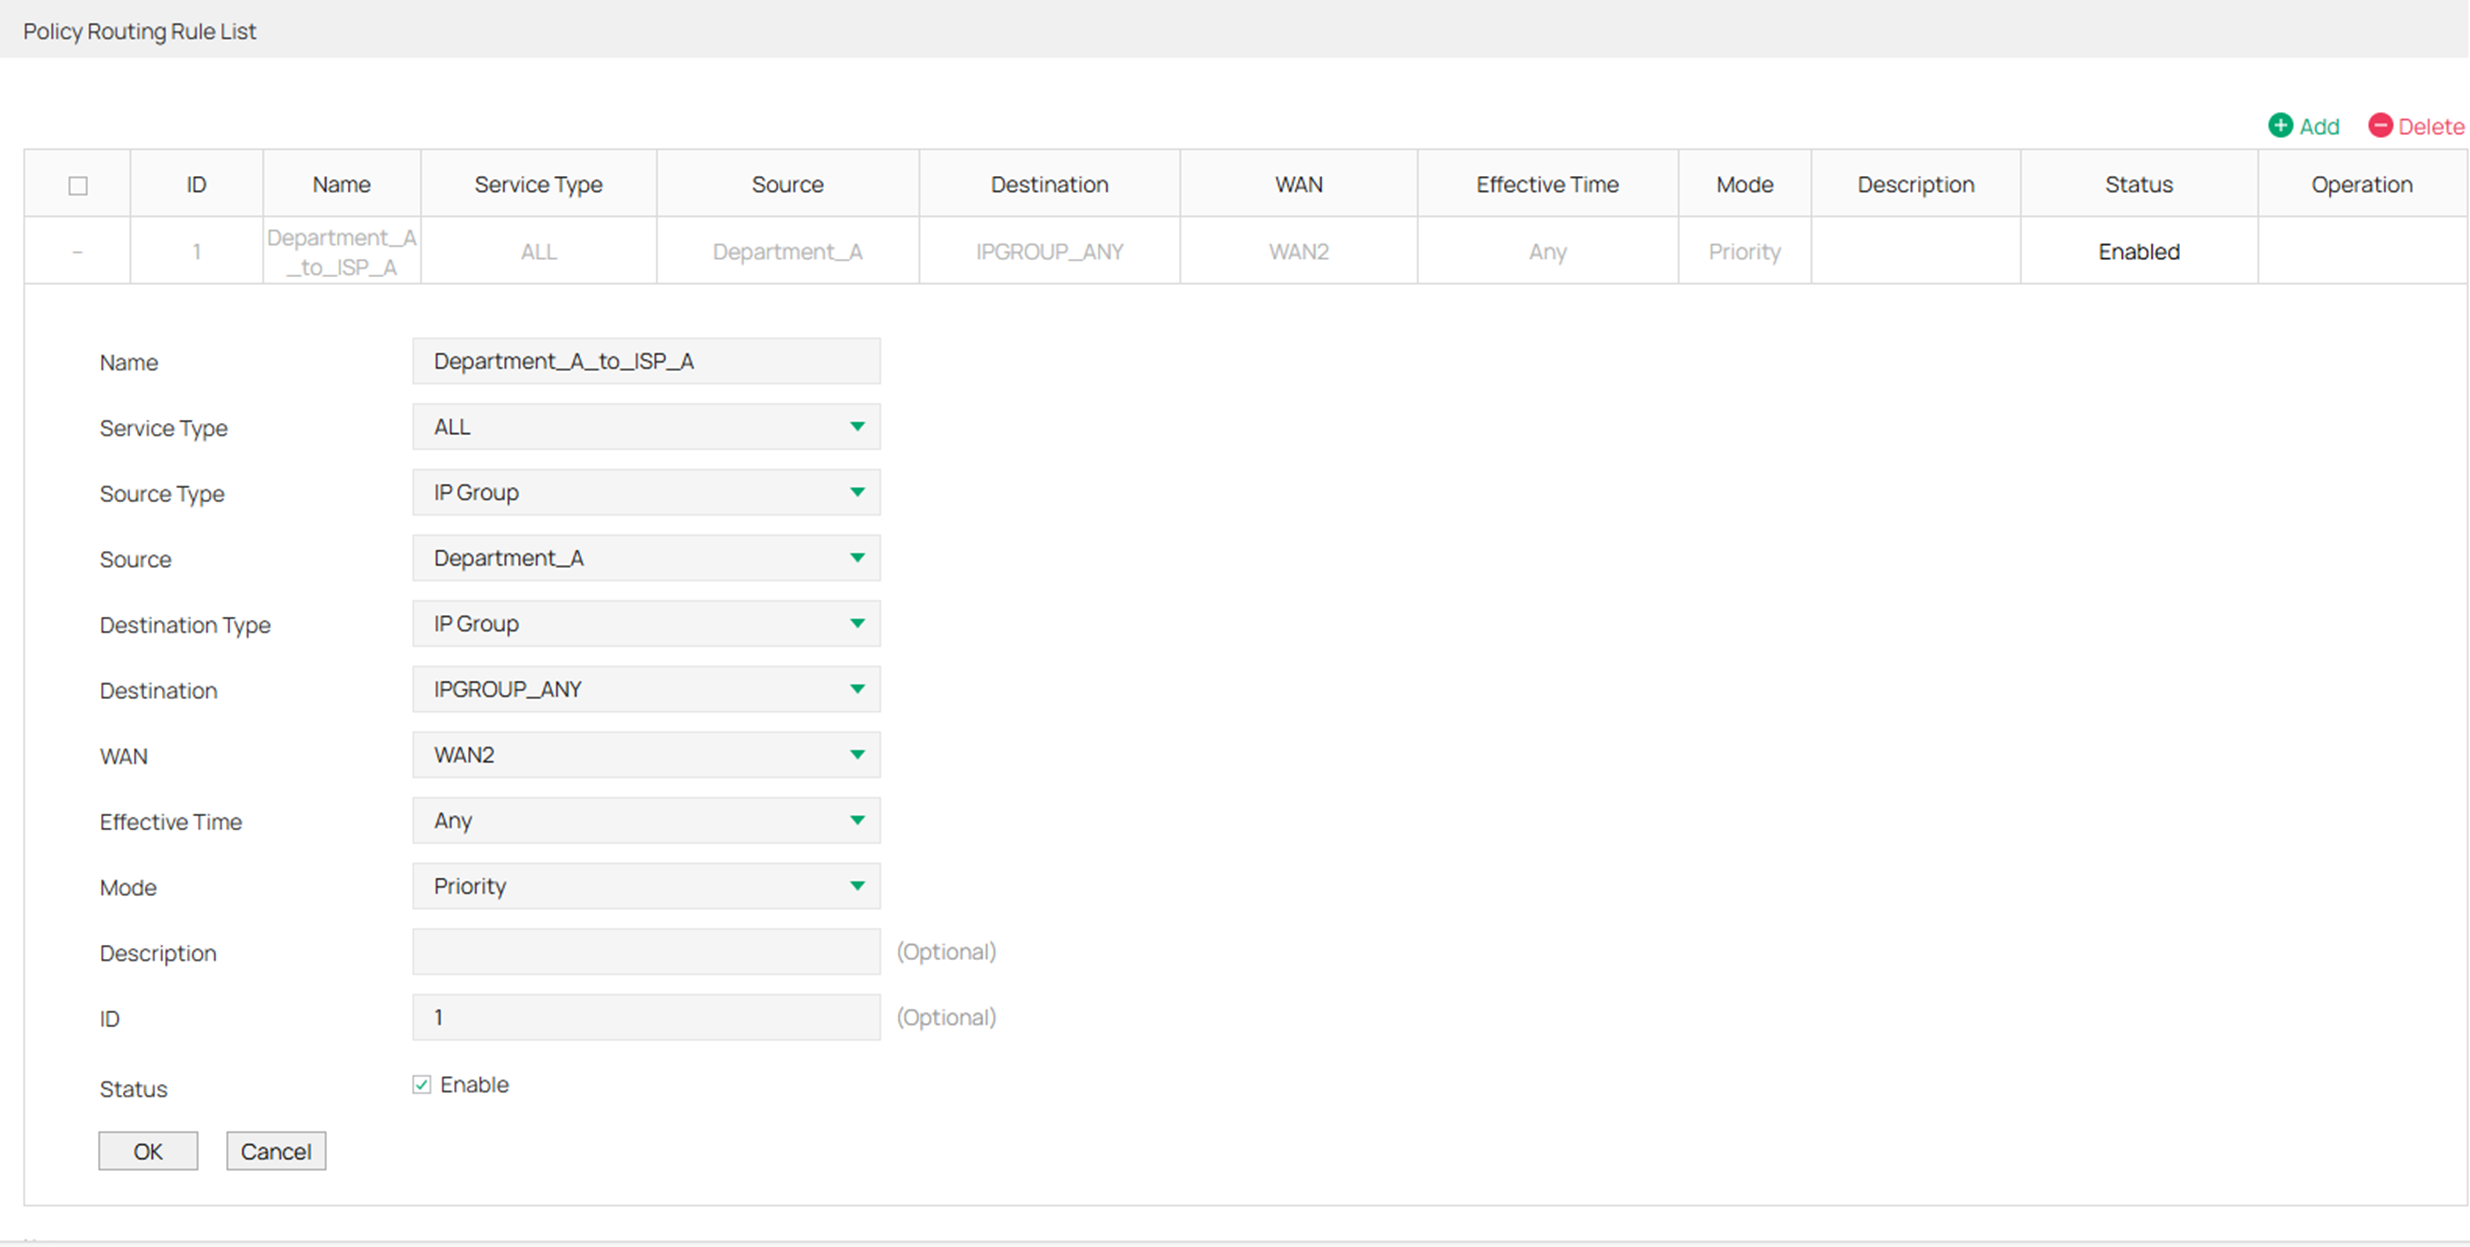
Note: The mode is usually selected as ” Priority”. In Priority Mode, the rule depends on the online detection result. If any WAN port that you specify is online, the rule will take effect. If all the WAN ports that you specify are offline, the rule will not take effect. While in Only Mode, the rule always takes effect regardless of the WAN port status or online detection result, resulting in the client losing the network connection.
Step 9. Create another rule to route all the data from department B to ISP B (connected to port WAN/LAN3) only in the same way.
Verification
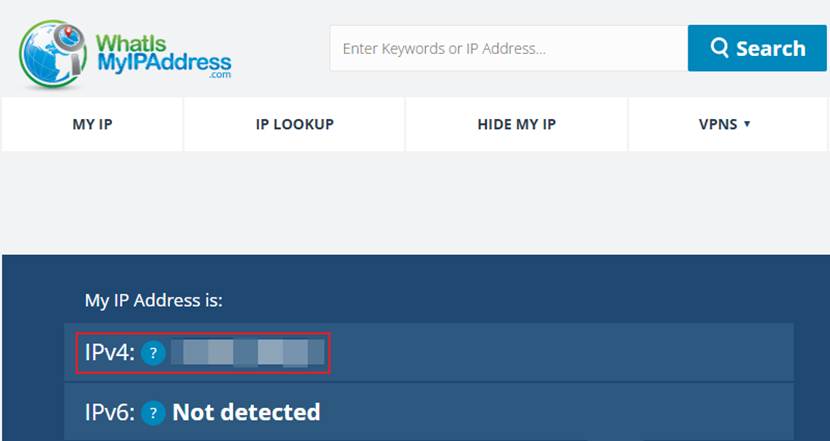
Visit https://whatismyipaddress.com/ with computers in Department A and B, and verify that the displayed IP matches the expected WAN IP.
Conclusion
We have now covered how to configure Policy Routing in both Controller Mode and Standalone Mode.
Get to know more details of each function and configuration please go to Download Center to download the manual of your product.
QA
Q1: Which WAN port will subnets without policy routing configured use to access the internet?
A1: For subnets without Policy Routing configured, the Omada Gateway will forward data based on other configured rules, such as Load Balance, and Static Routes.
