


Contents
Configuration Guide for Virtual WAN in IPTV Scenario
Configuration Guide for Virtual WAN in Multi-WAN Senarios
Introduction
This article serves a step-by-step configuration guide for the Virtual WAN feature on the Omada Gateway series, making it easier for users to configure Virtual WAN connections.
Requirements
- Omada Gateway (models that support this feature)
- Omada Software/Hardware/Cloud-Based Controller V6.2 and above
Note: Earlier controller versions also support this feature, but the user interface and locations may differ from what is shown in the screenshots.
Configuration
Configuration Guide for Virtual WAN in IPTV Scenario
This section explains how to configure Virtual WAN in dedicated line service scenarios.
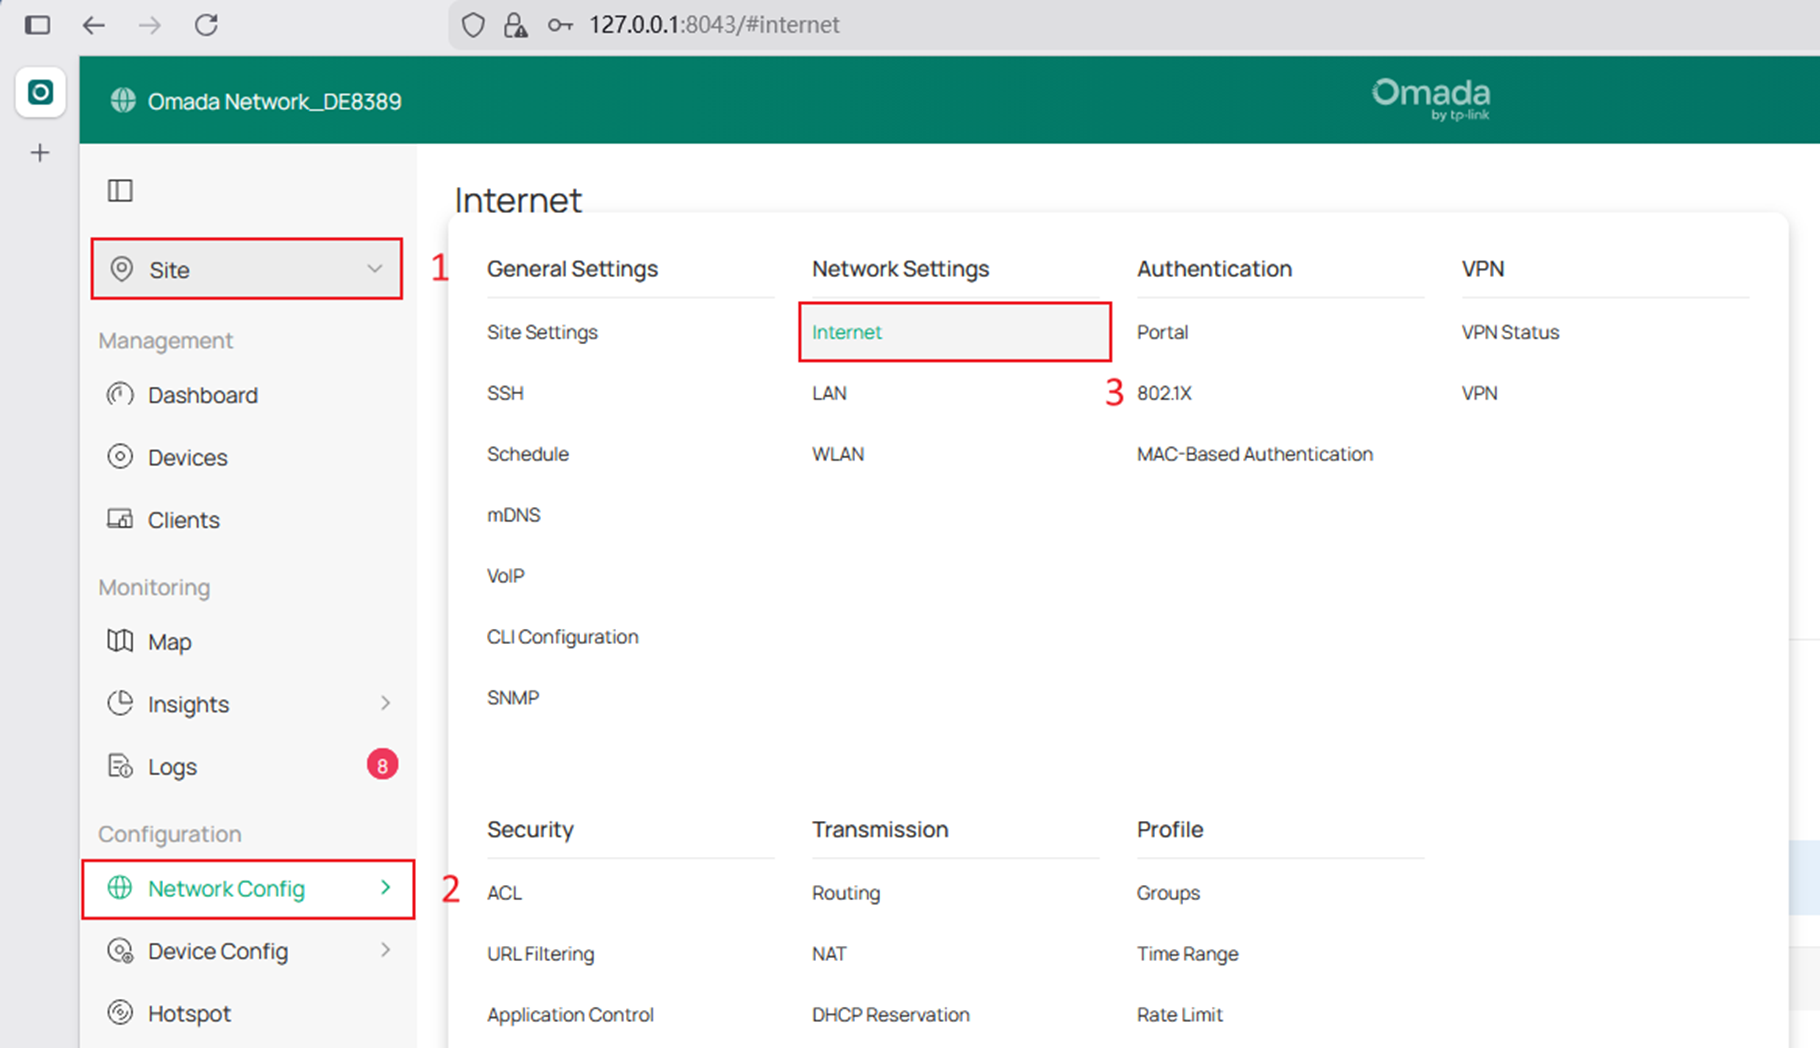
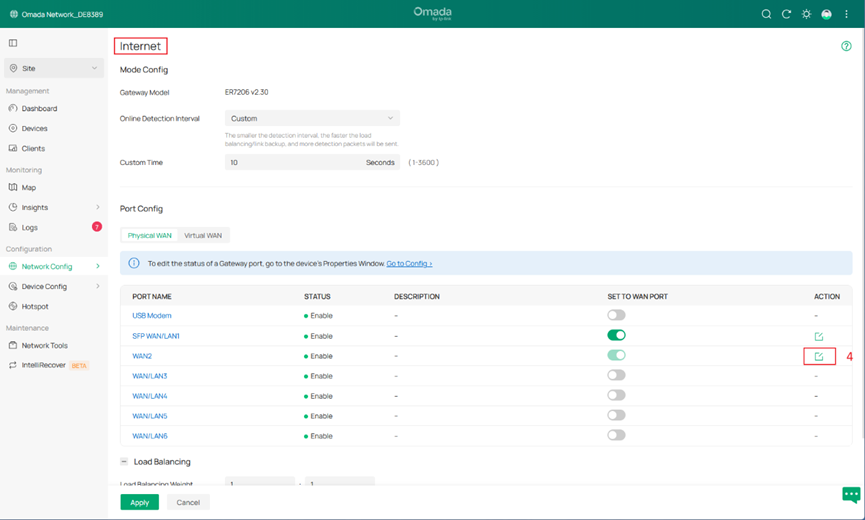
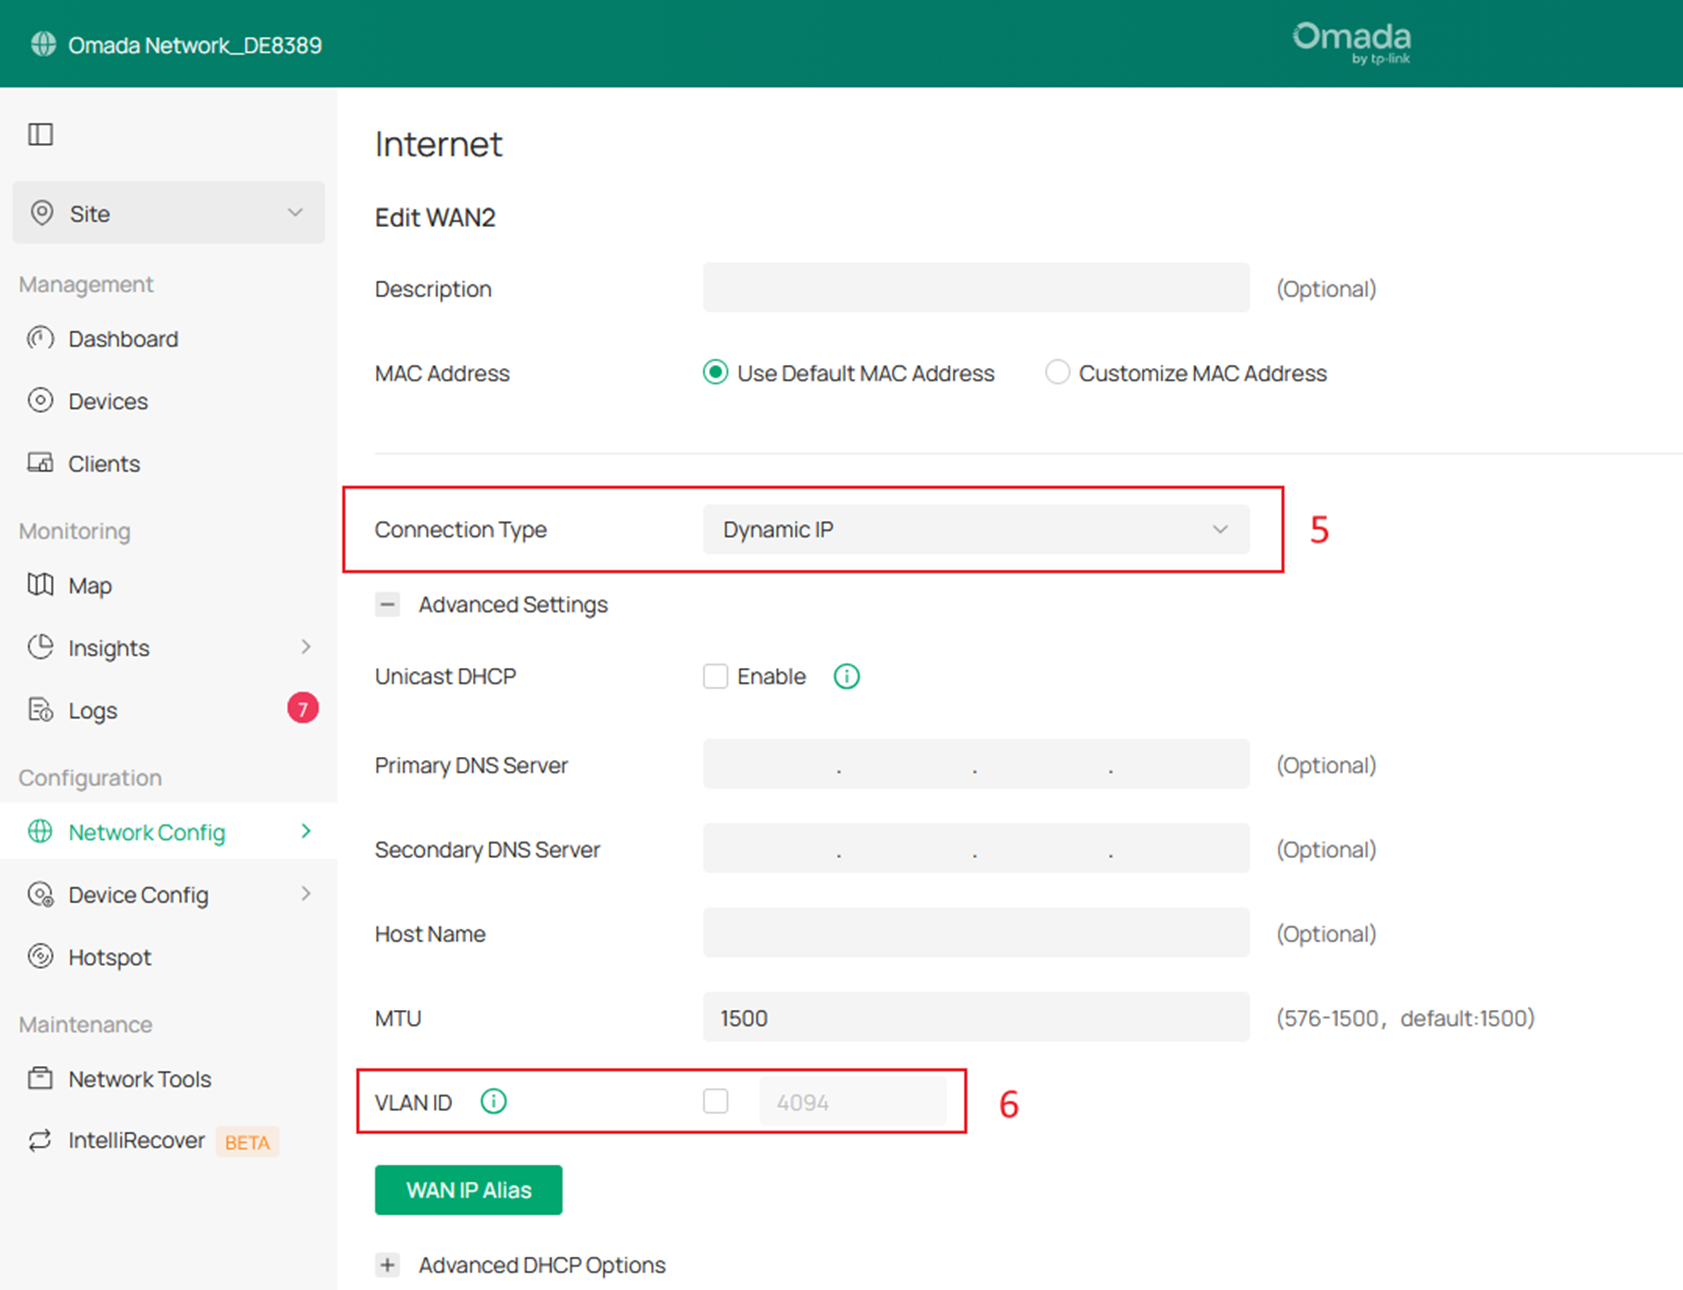
Step 1. Go to Site View > Network Config > Internet, and configure the physical WAN port you intend to use. Enter the Internet connection method according to your ISP’s requirements.
Note:
- For both physical WAN connections and Virtual WAN connections, only one connection can be established at the same time if no VLAN ID is enabled.
- When a VLAN ID is enabled on a physical WAN port, only one Virtual WAN connection(up to three Virtual WAN connections on the same physical WAN port) can be established without enabling a VLAN.
- If the VLAN ID is not enabled on the physical WAN port, the Virtual WAN connection must be configured with a VLAN ID.
Step 2. Go to Site View > Network Config > Internet > Virtual WAN and click Create New Virtual WAN to add a Virtual WAN connection. Configure the connection method and VLAN ID according to your ISP’s requirements.
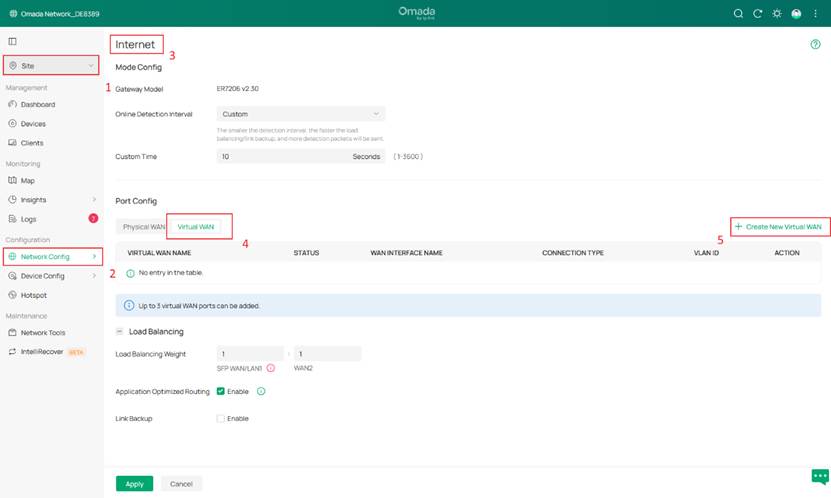
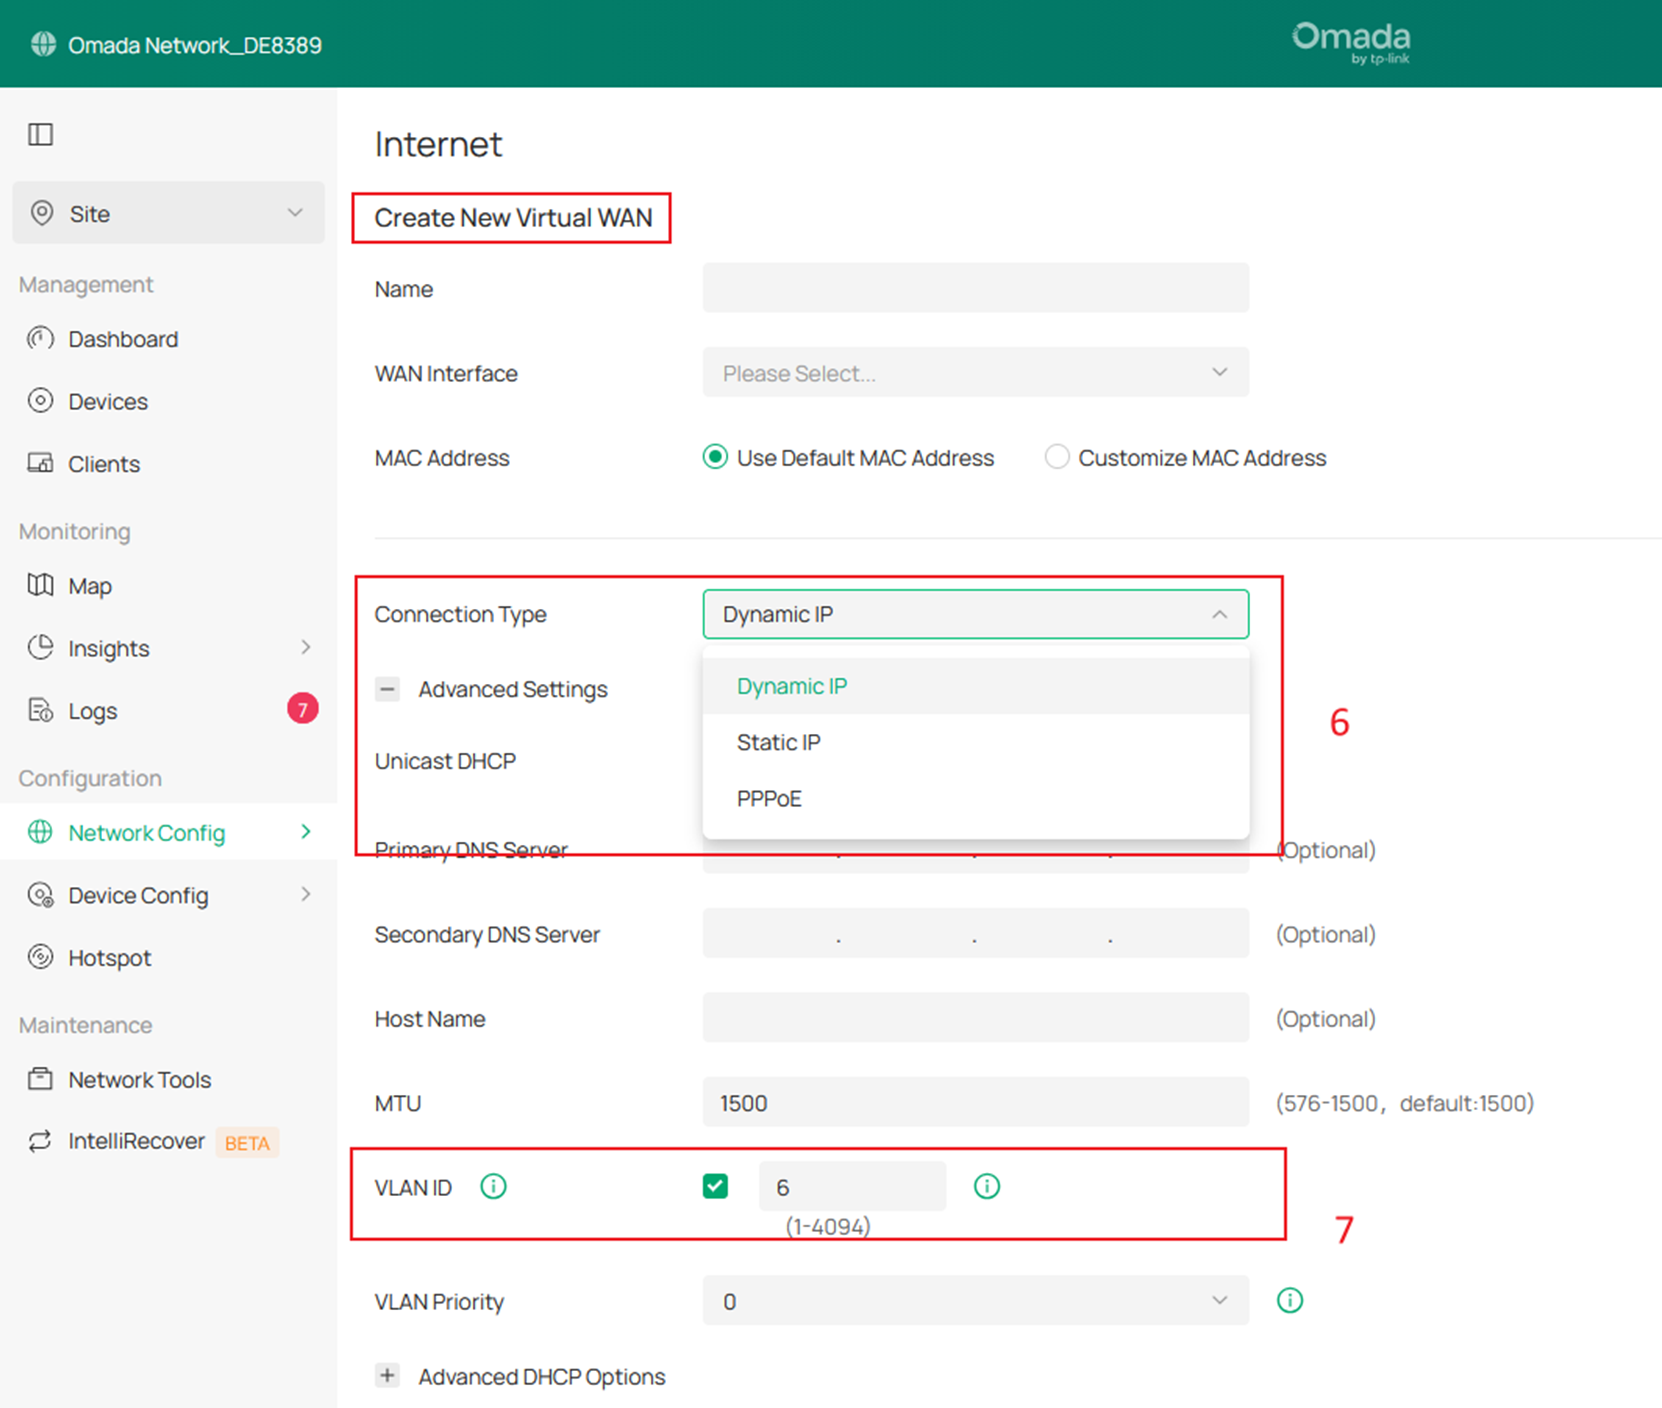
Note: The maximum number of Virtual WAN connections is three. A single physical WAN port can be bound to up to three Virtual WAN connections, and different Virtual WAN connections can be bound to different physical WAN ports.
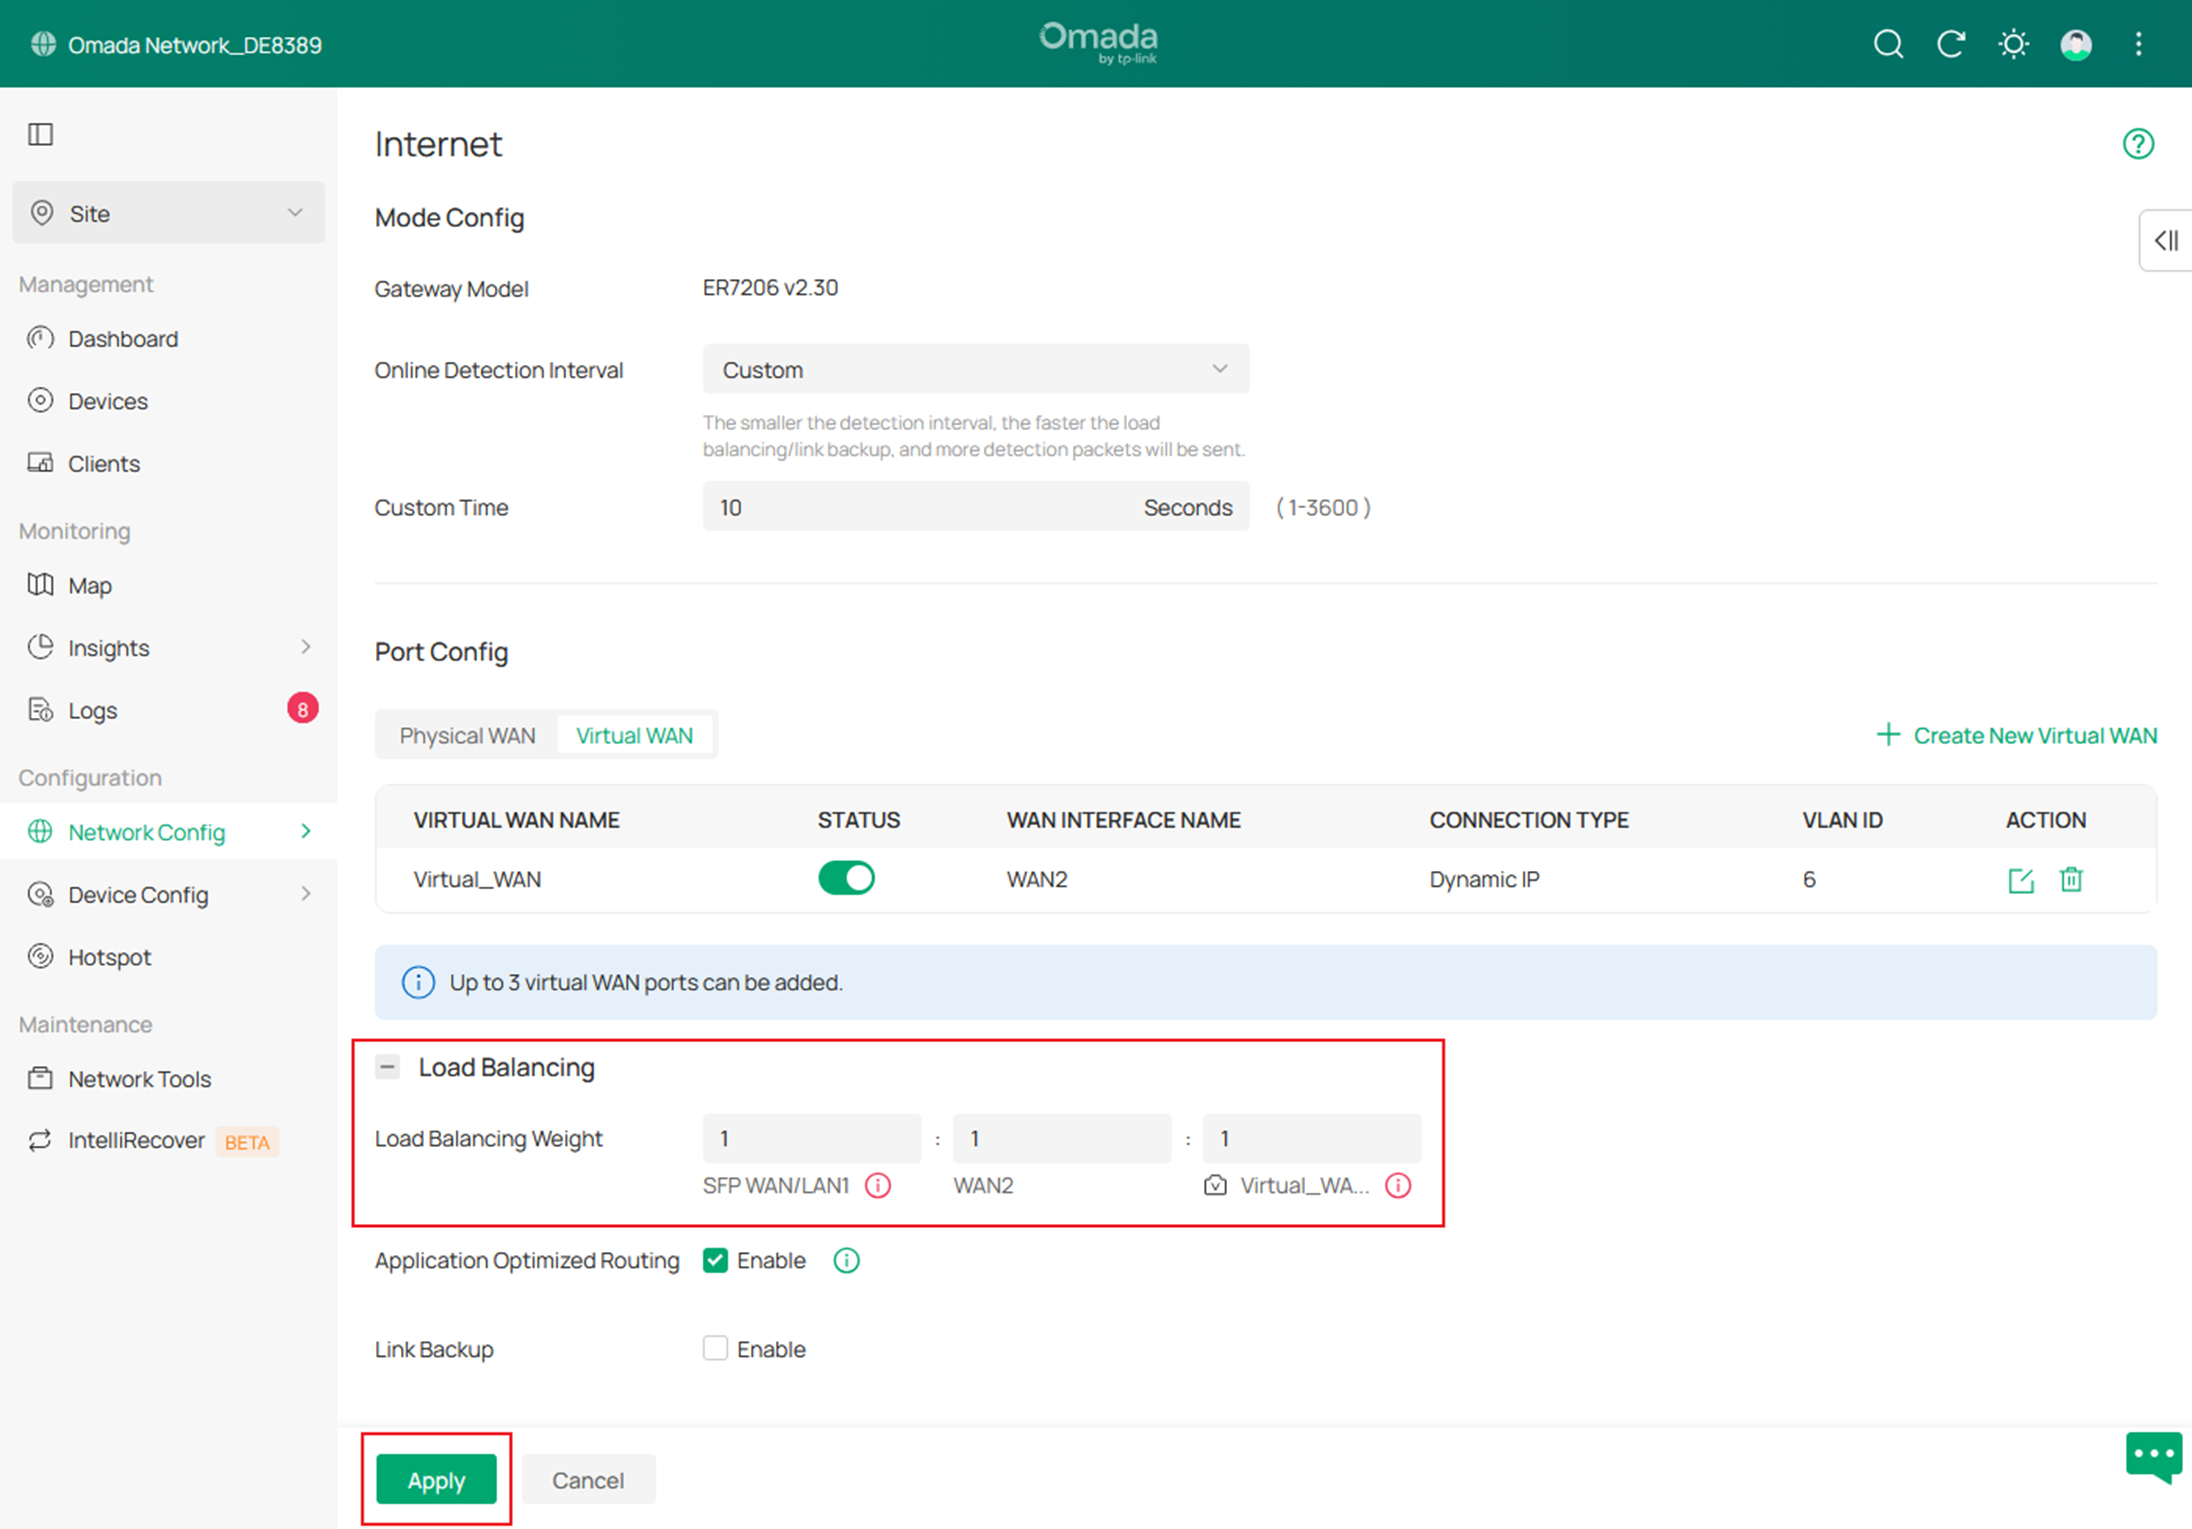
Step 3. Specify the traffic ratio for Virtual WAN.
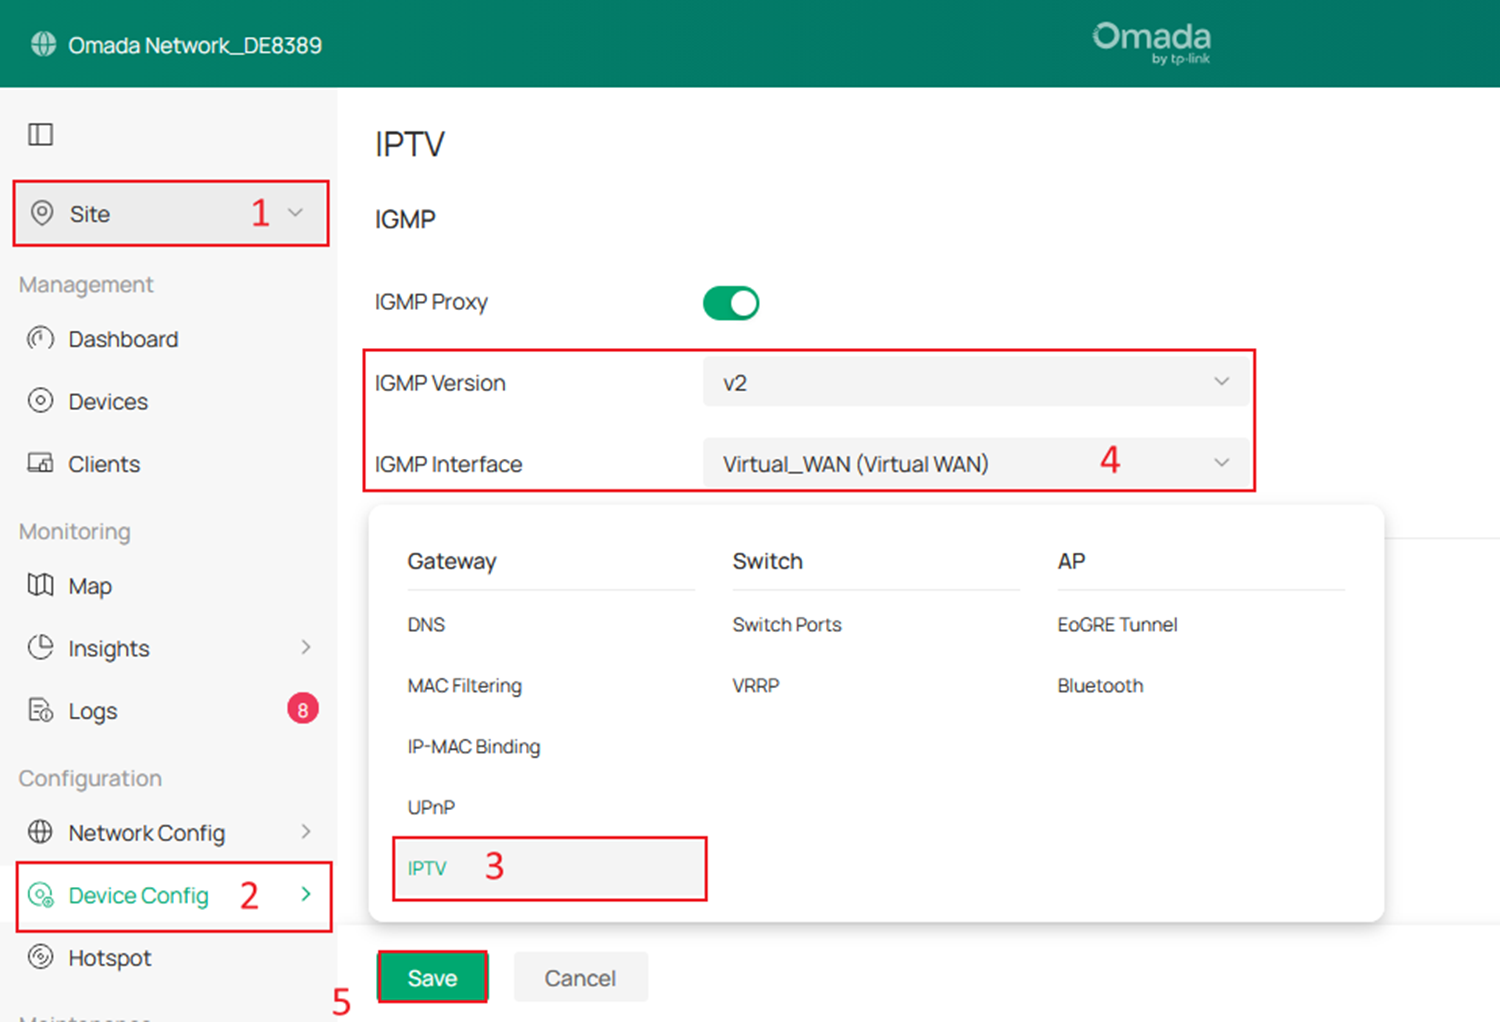
Step 4. Navigate to Site View > Device Config > IPTV, enable the IGMP Proxy, configure the IGMP Version, and select the Virtual WAN connection created in Setp 2 from the IGMP Interface options.
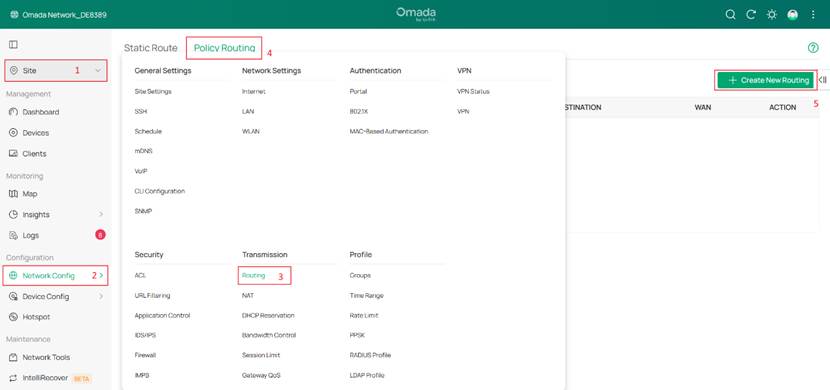
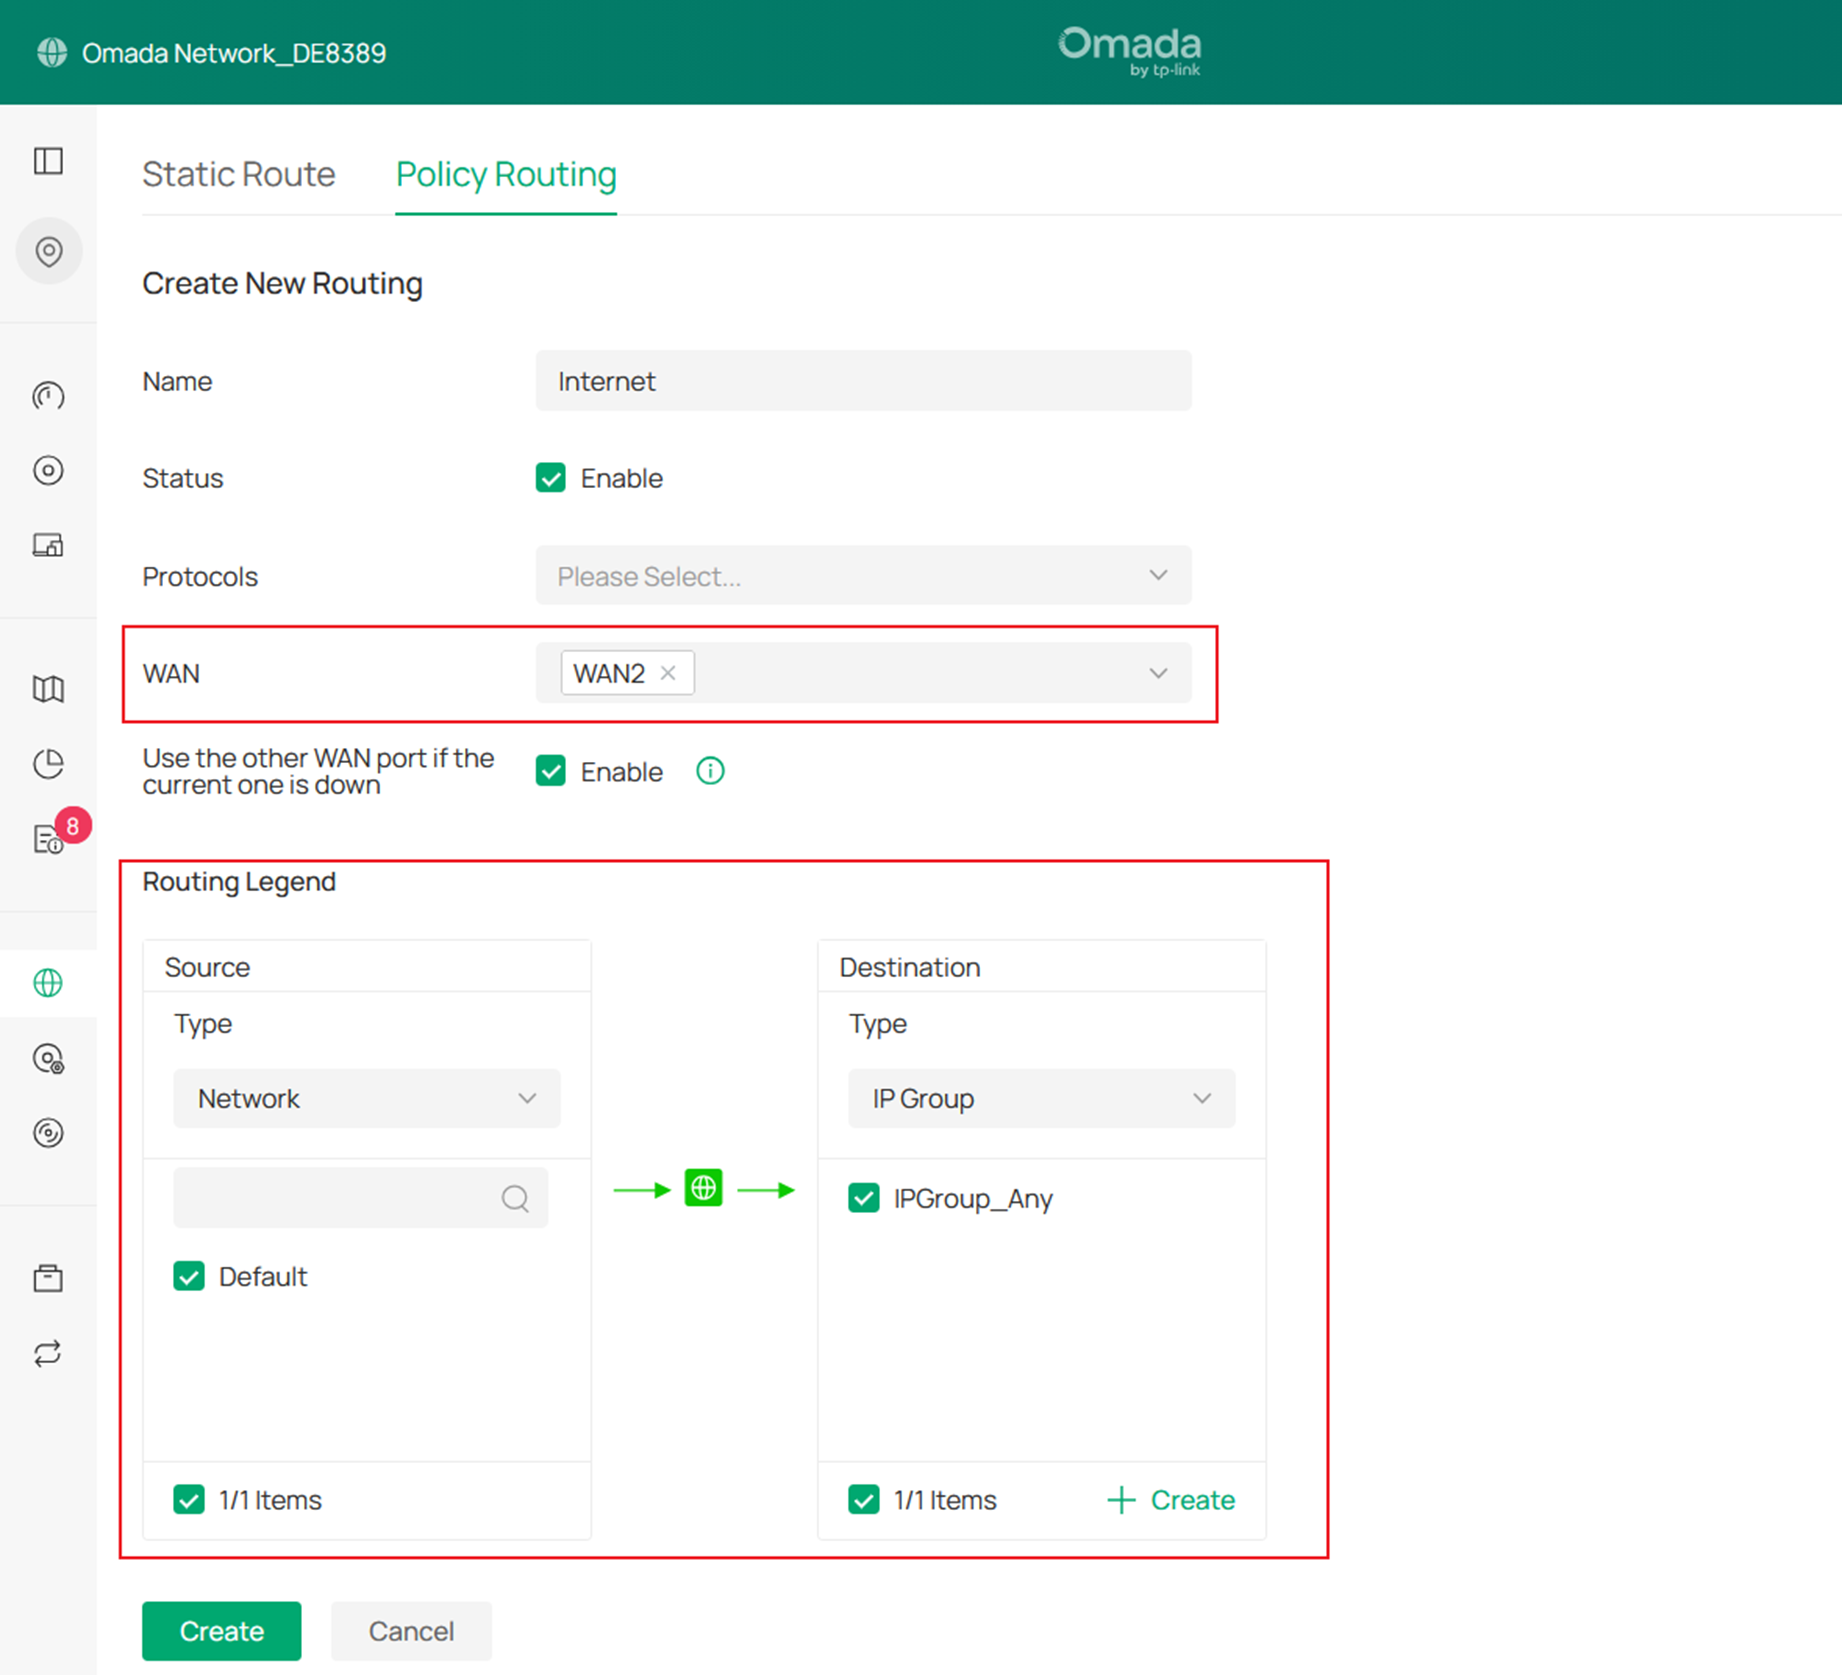
Step 5. Go to Site View > Network Config > Routing > Policy Routing, and click Create New Routing to create a policy routing entry that forwards Internet-bound traffic through the WAN2 port. In the policy routing rule, select the WAN2 port (set up in Step 1) as the WAN interface, and configure source/destination as needed.
Configuration Guide for Virtual WAN in Multi-WAN Senarios
This section describes how to configure Virtual WAN for specific Internet service scenarios.
Note: Currently, only modules such as IGMP, Routing, Load Balancing, and Port Forwarding support the selection of Virtual WAN interfaces. Features like VPN and ACL are not supported.
Step 1. Create Virtual WAN entry, the process is the same as in the previous scenario. Don’t forget to configure Load Balancing Weight for your Virtual WAN, as referenced in Step 3 above.
Step 2. Configure Policy Routing or Port Forwarding according to your requirement.
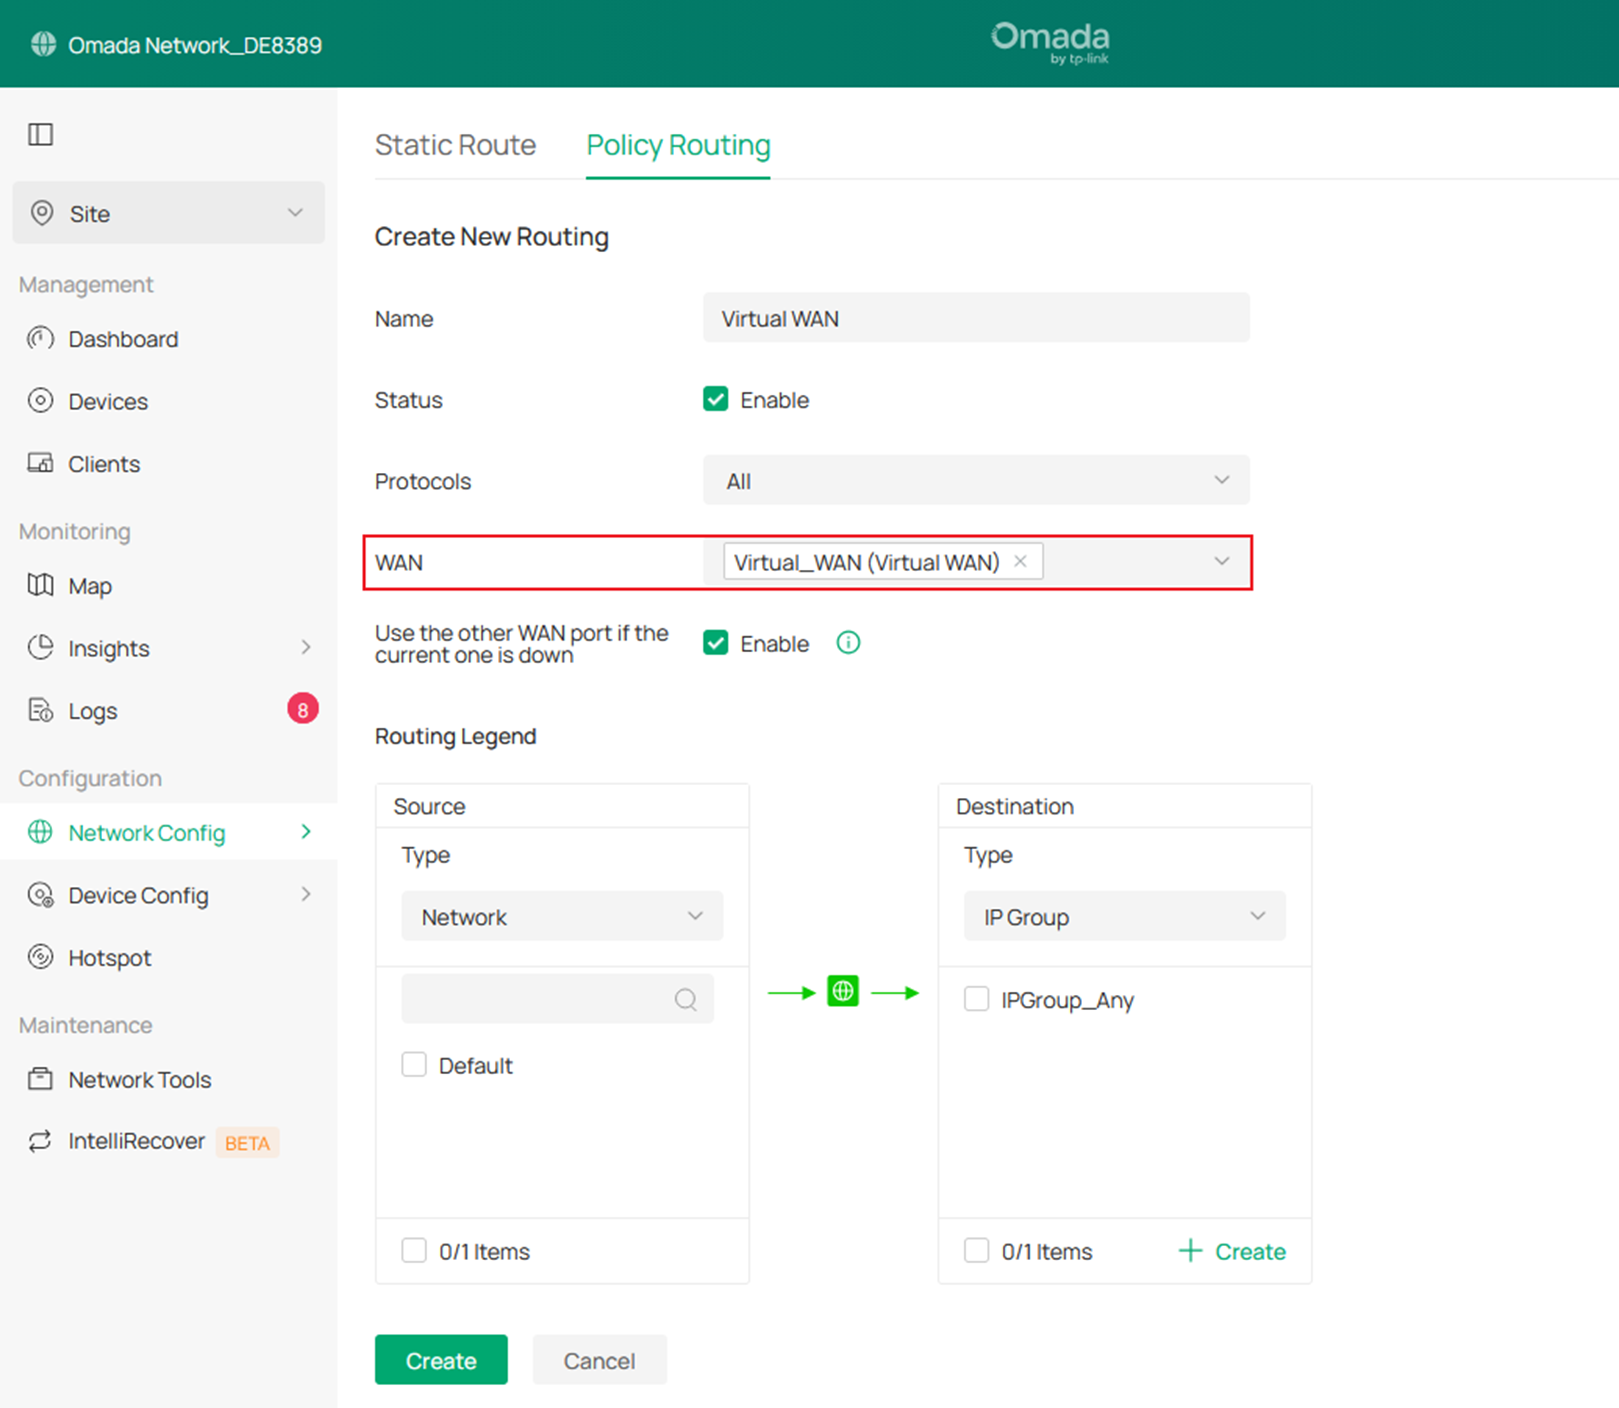
- To configure policy routing or static routers, go to Site View > Network Config > Routing and click Create New Routing to create a rule that forwards Internet-bound traffic through the Virtual WAN port.
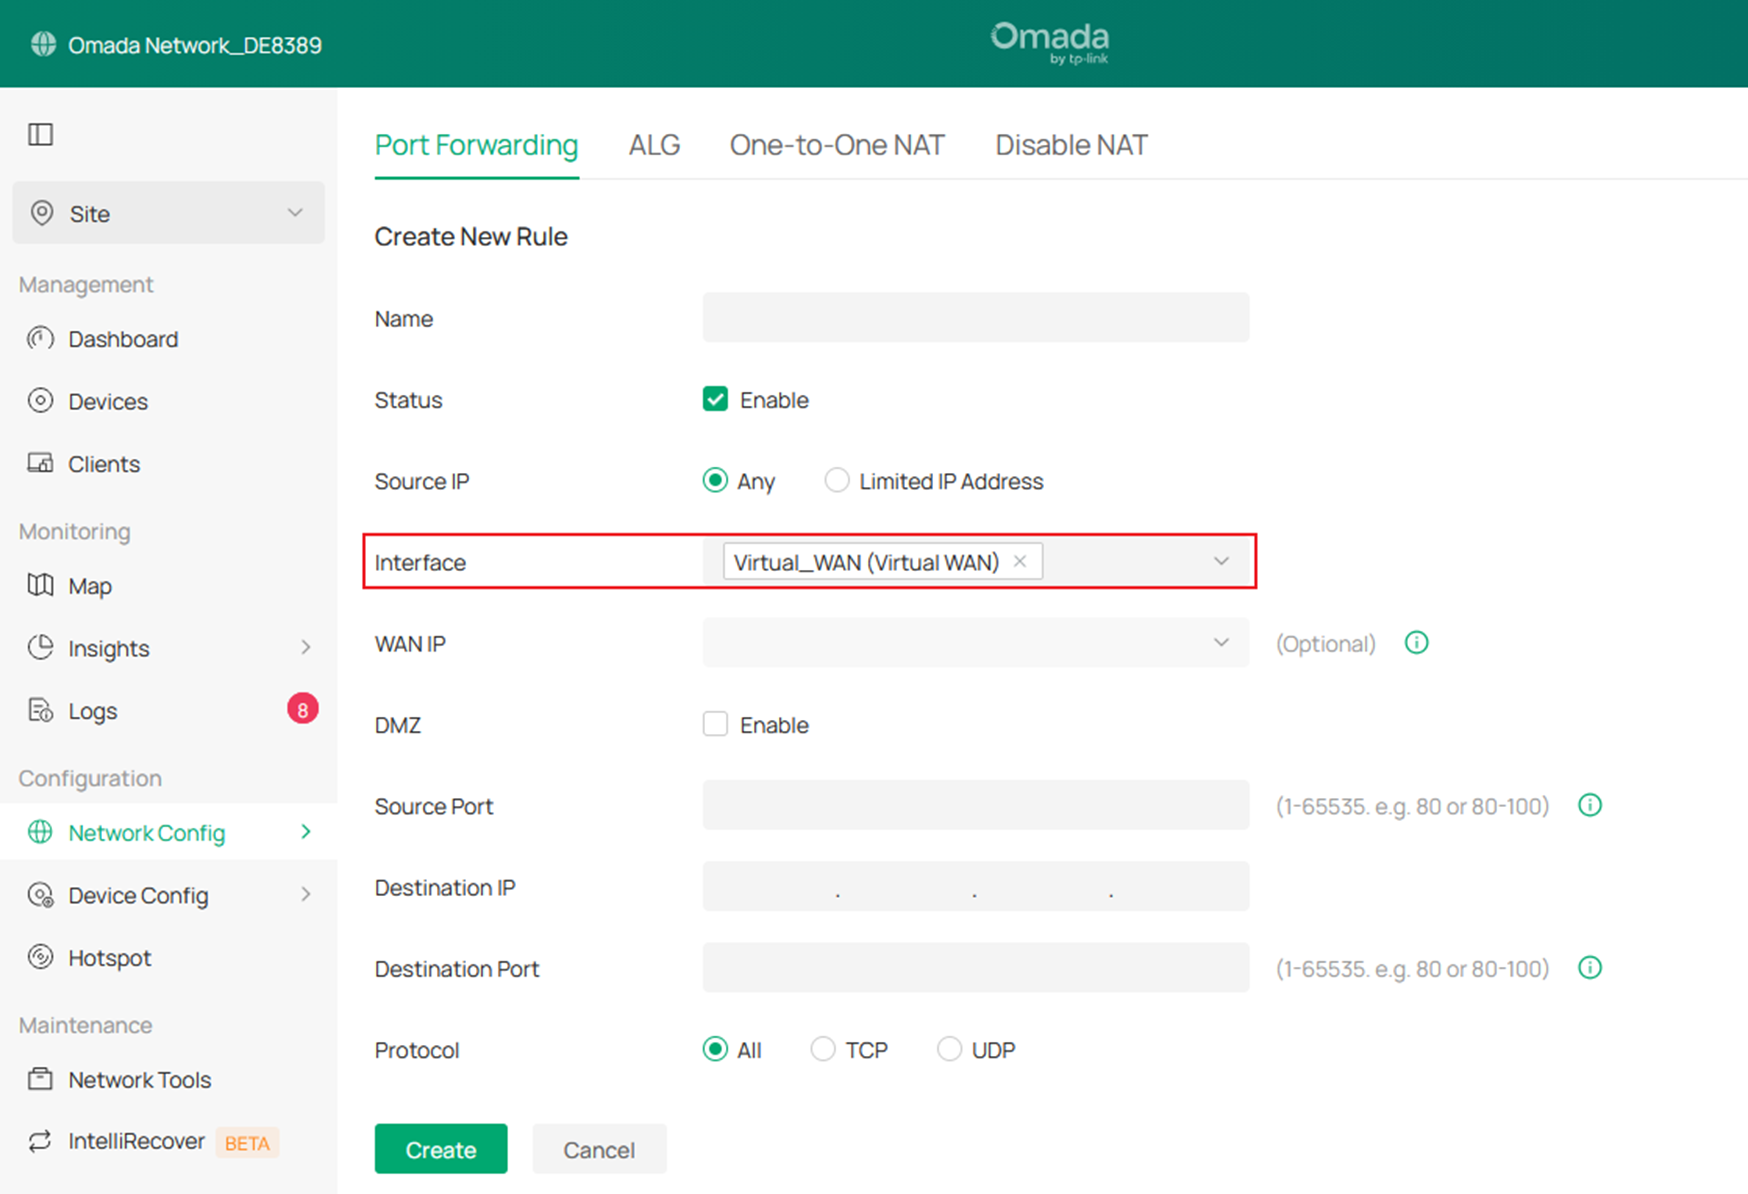
- To configure Port Forwarding, navigate to Network Config > NAT > Port Forwarding, and click Create New Rule to create an entry that directs Internet-bound traffic to be forwarded through the Virtual WAN port. In the Port Forwarding rule, select Virtual WAN port as the Interface, and configure the remaining settings according to your actual usage requirements.
Conclusion
The preceding text introduces the configuration steps for Virtual WAN on Omada Gateway series devices compatible with the Omada Controller V6.2.
Get to know more details of each function and configuration please go to Download Center to download the manual of your product.
