


Contents
Connecting via Omada Controller
Connecting via Standalone Management
Multiple Bridges Auto-Pairing (only supported by hardware version v3.0)
Introduction
In scenarios such as wireless connections between distributed buildings and security video transmission, PtP (Point-to-Point) and PtMP (Point-to-MultiPoint) wireless bridges are necessary to facilitate data backhaul from the front-end. The Omada wireless bridge APs support auto-pairing, providing more convenience to set up a bridge network.
As shown in the topology diagram, you can use EAP-Bridge to transmit data streams over a long distance by setting up a PtP connection.
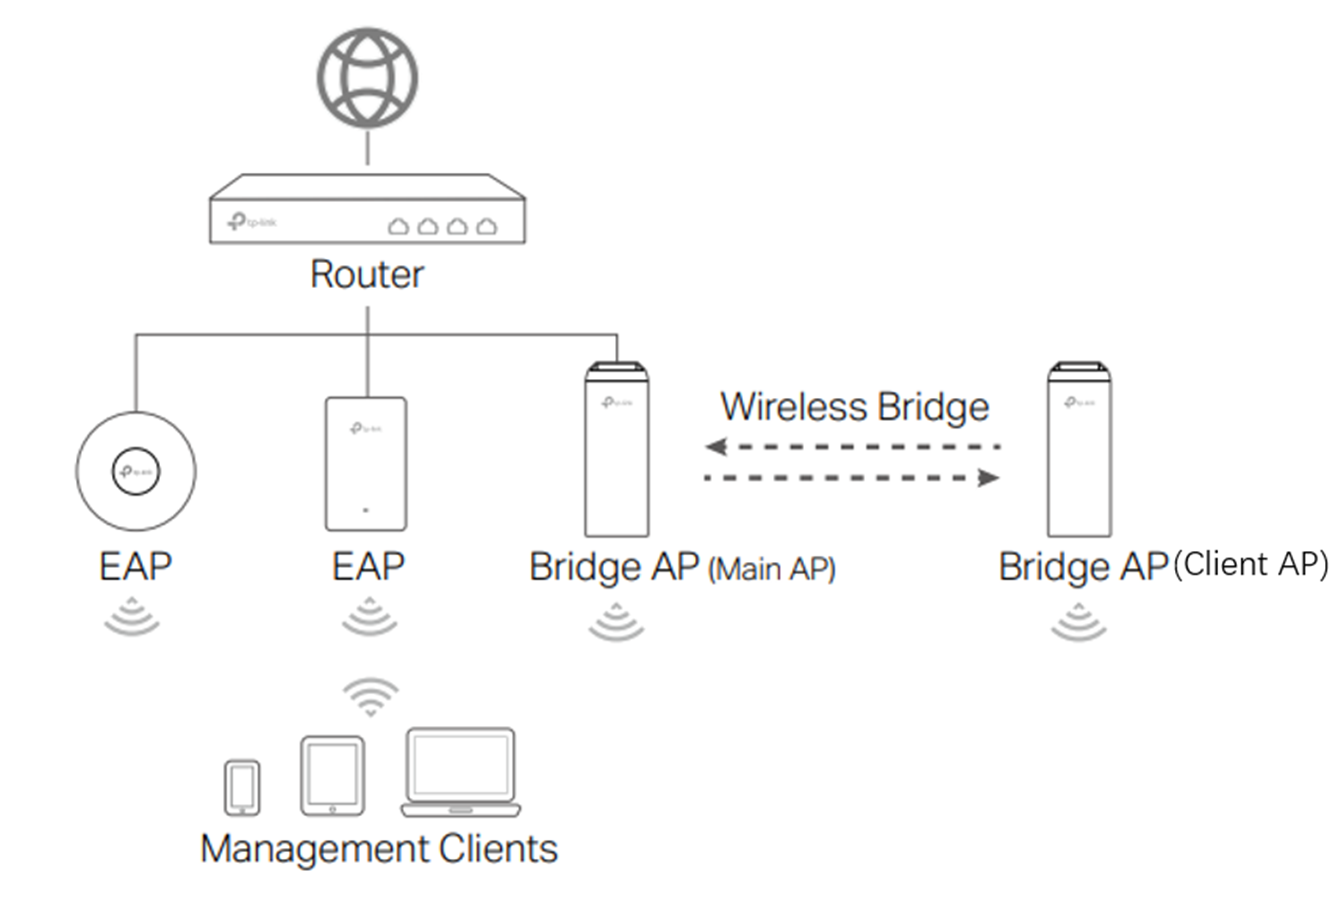
Omada supports different approaches to configure the EAP wireless bridge. This FAQ will introduce those approaches one by one.
Requirements
- Omada wireless bridge EAPs
- Omada Controller (Software Controller / Hardware Controller, v5.13 and above)
- Omada Central
- PC or Omada App (version 4.11 and above)
Configuration
Connecting via Omada Controller
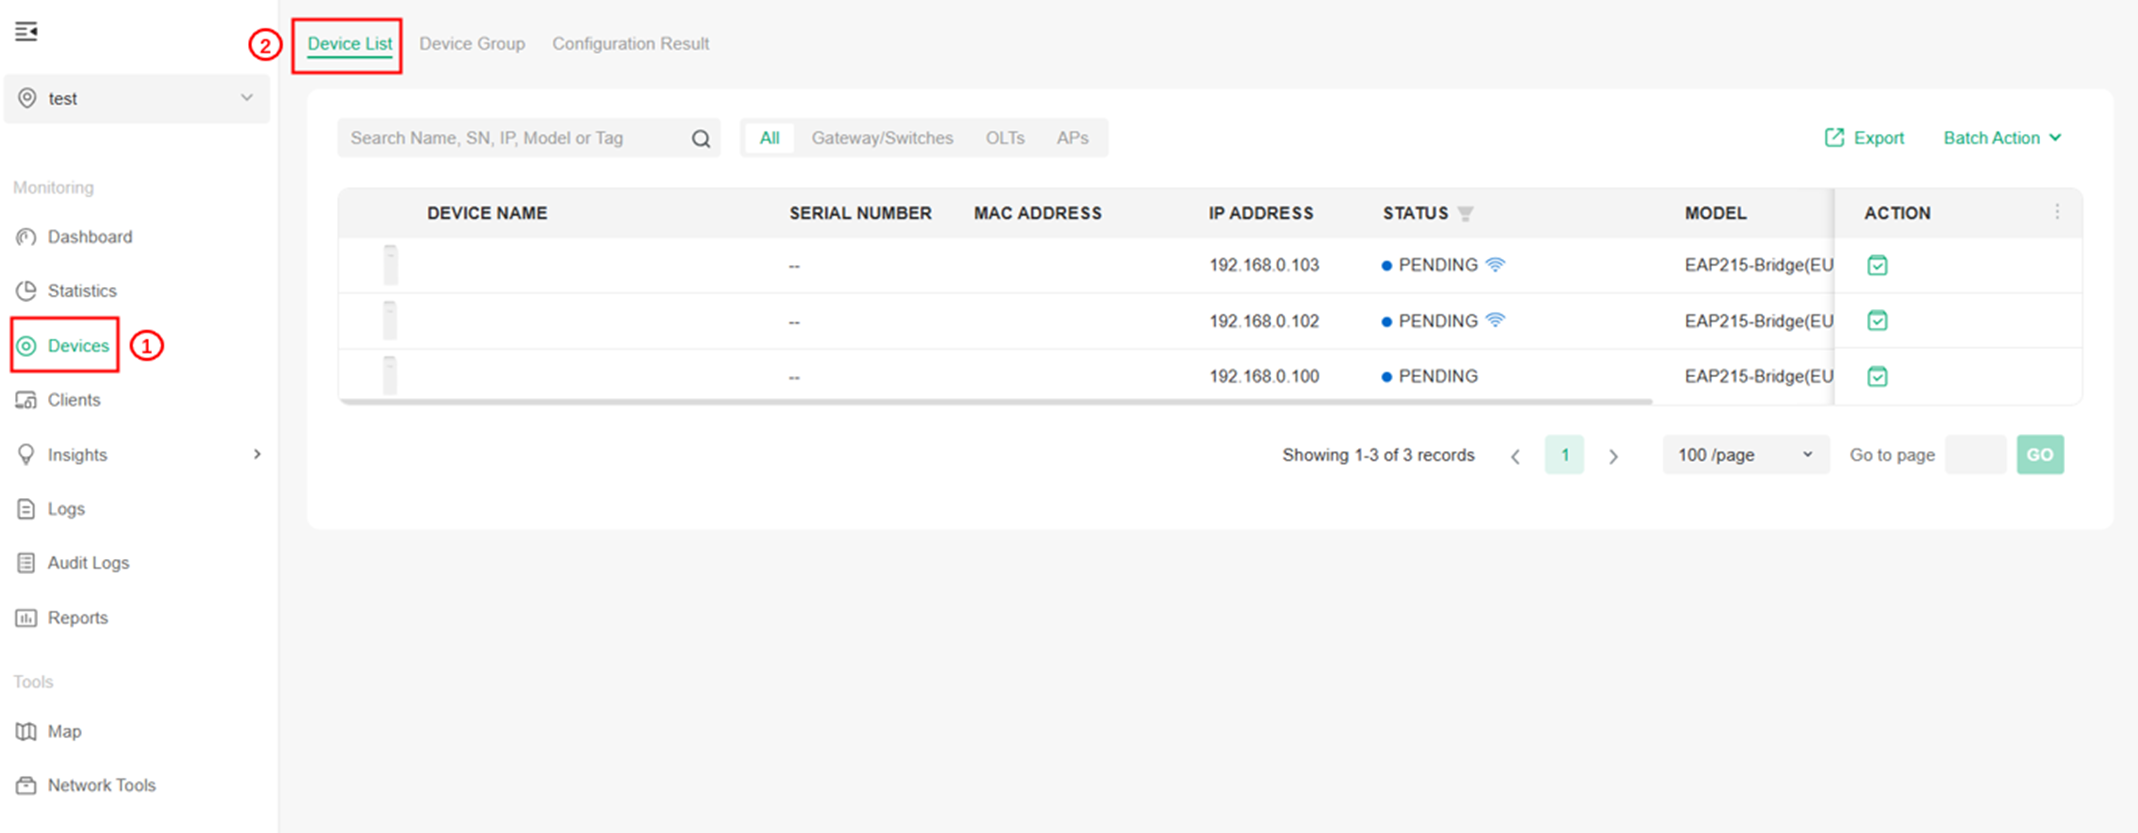
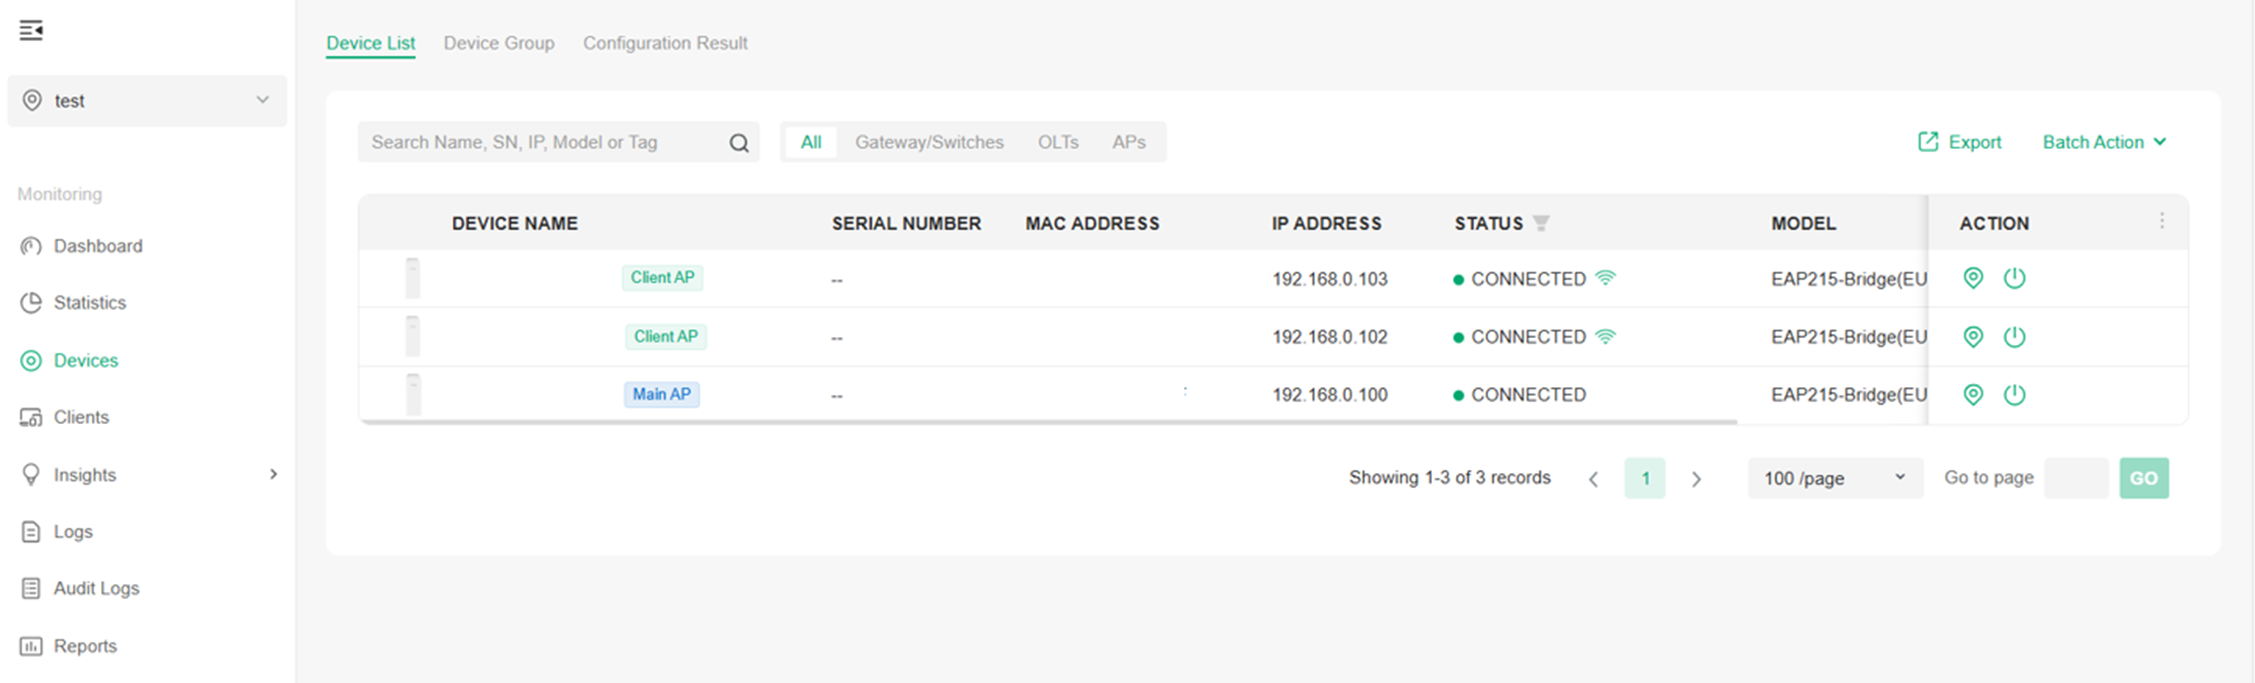
Step 1. Ensure the Main AP is connected to the same network as the Controller, and that the Client AP is powered on. Next, navigate to Devices > Device List. You can then discover both the Main AP and Client AP in the same kit by the Controller, which is in a Pending status. And there may be APs from other kits found by the Controller, too.
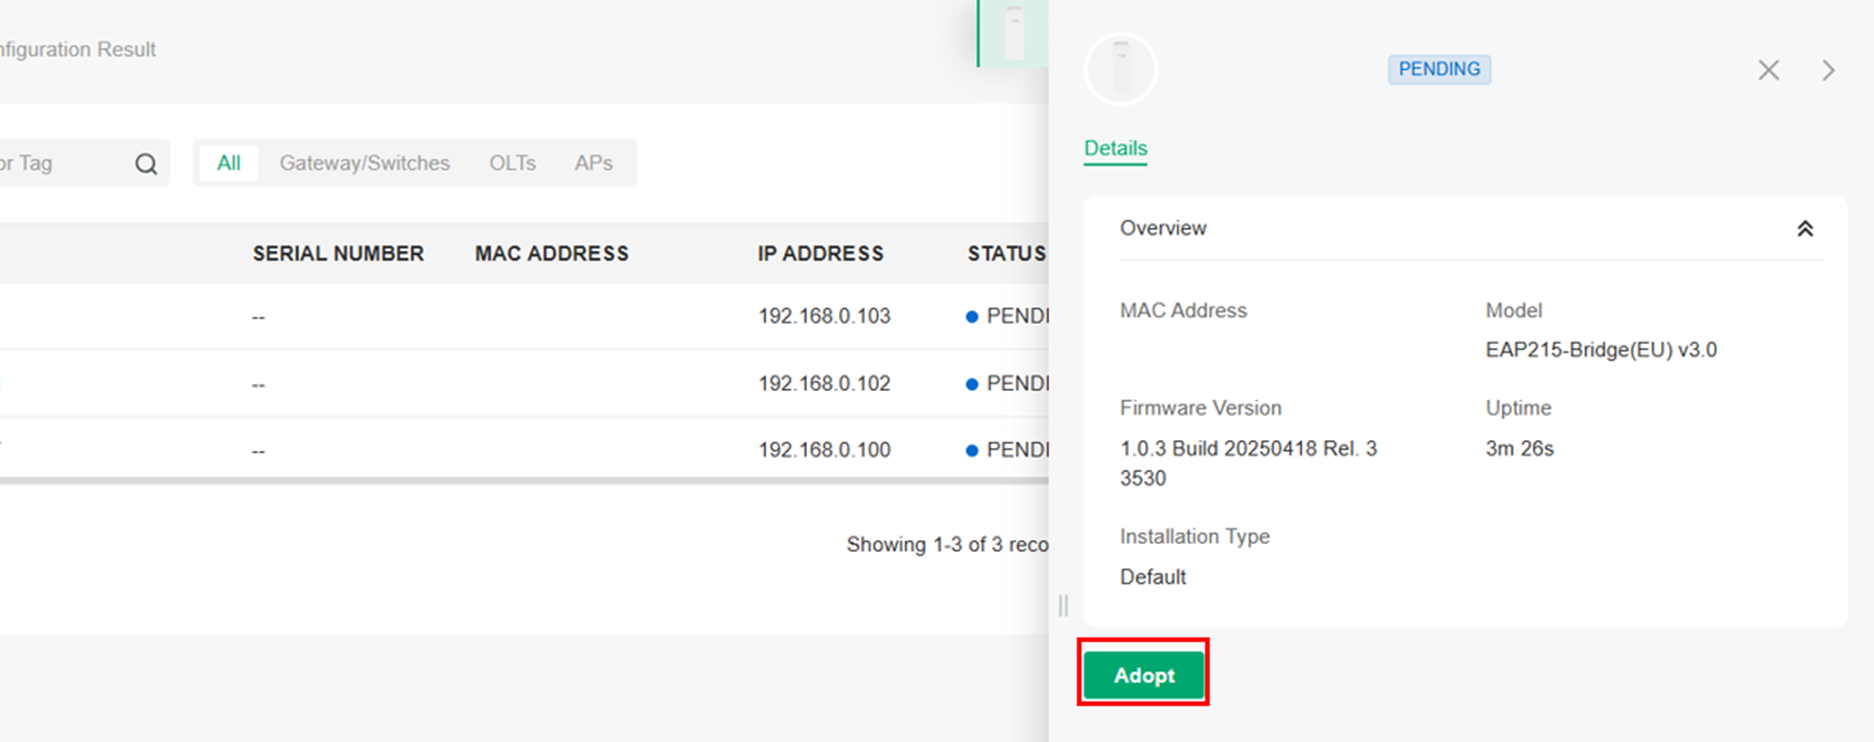
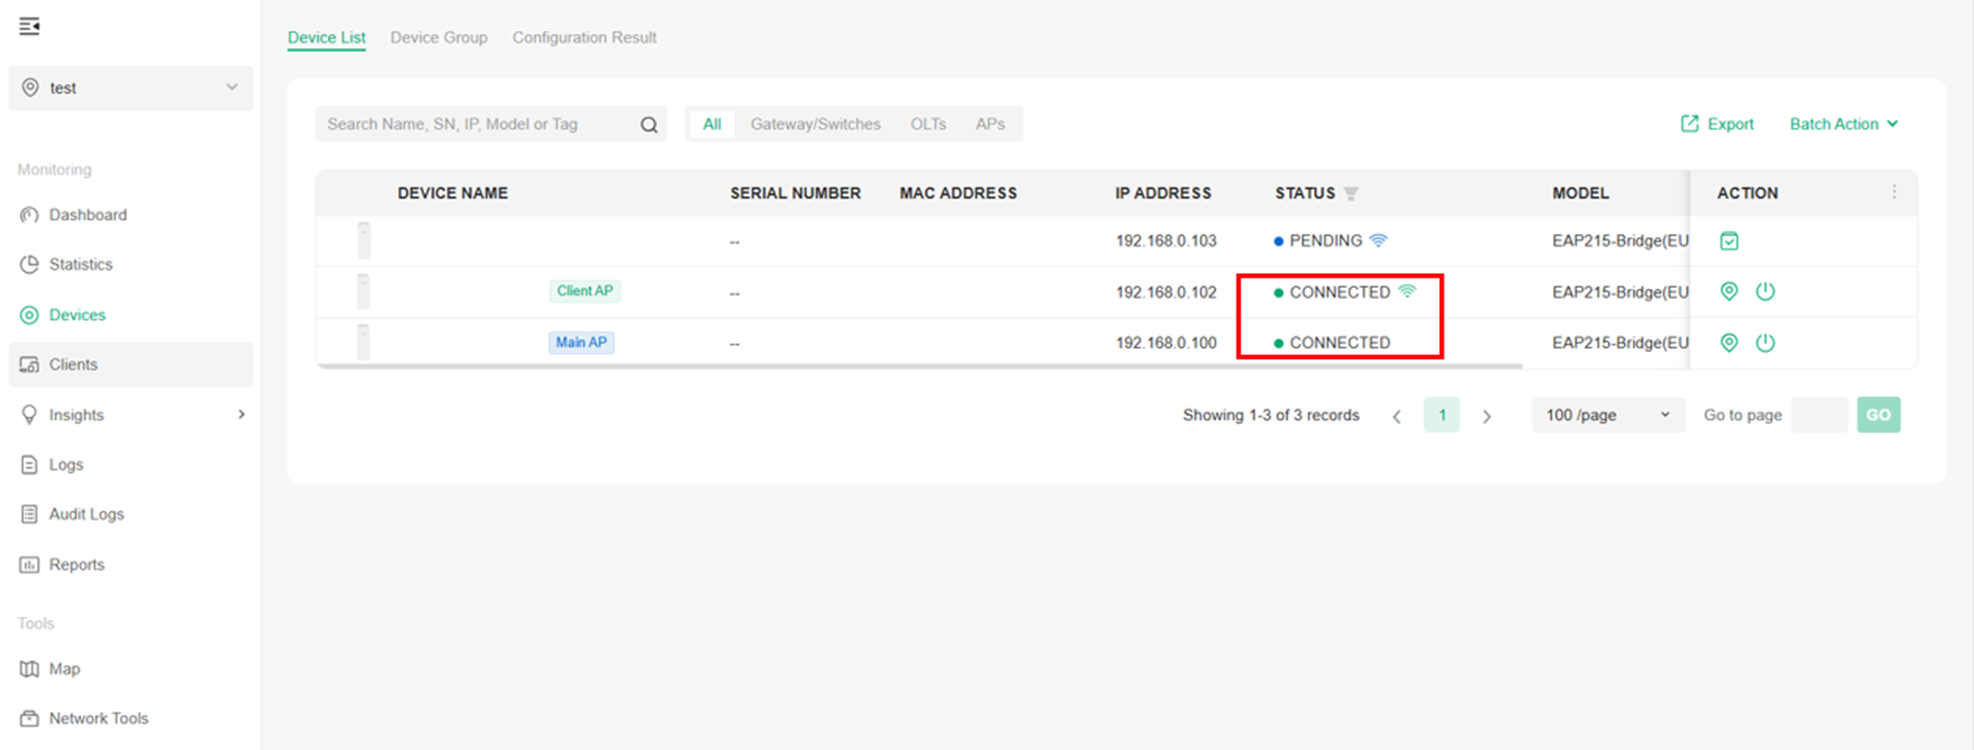
Step 2. Adopting the Main AP first, after which the Controller will automatically adopt the Client AP. The bridge network between EAP-Bridges in the same kit is now set up.
Step 3. (Optional) Similarly, building a PtMP network with another AP in a different kit is also simple. The Client AP in a different kit will also be displayed as wireless PENDING in the device list, as shown above.
You can directly try to adopt the Client AP, and a window will pop up. Select the Uplink AP for the Client AP and click Confirm.
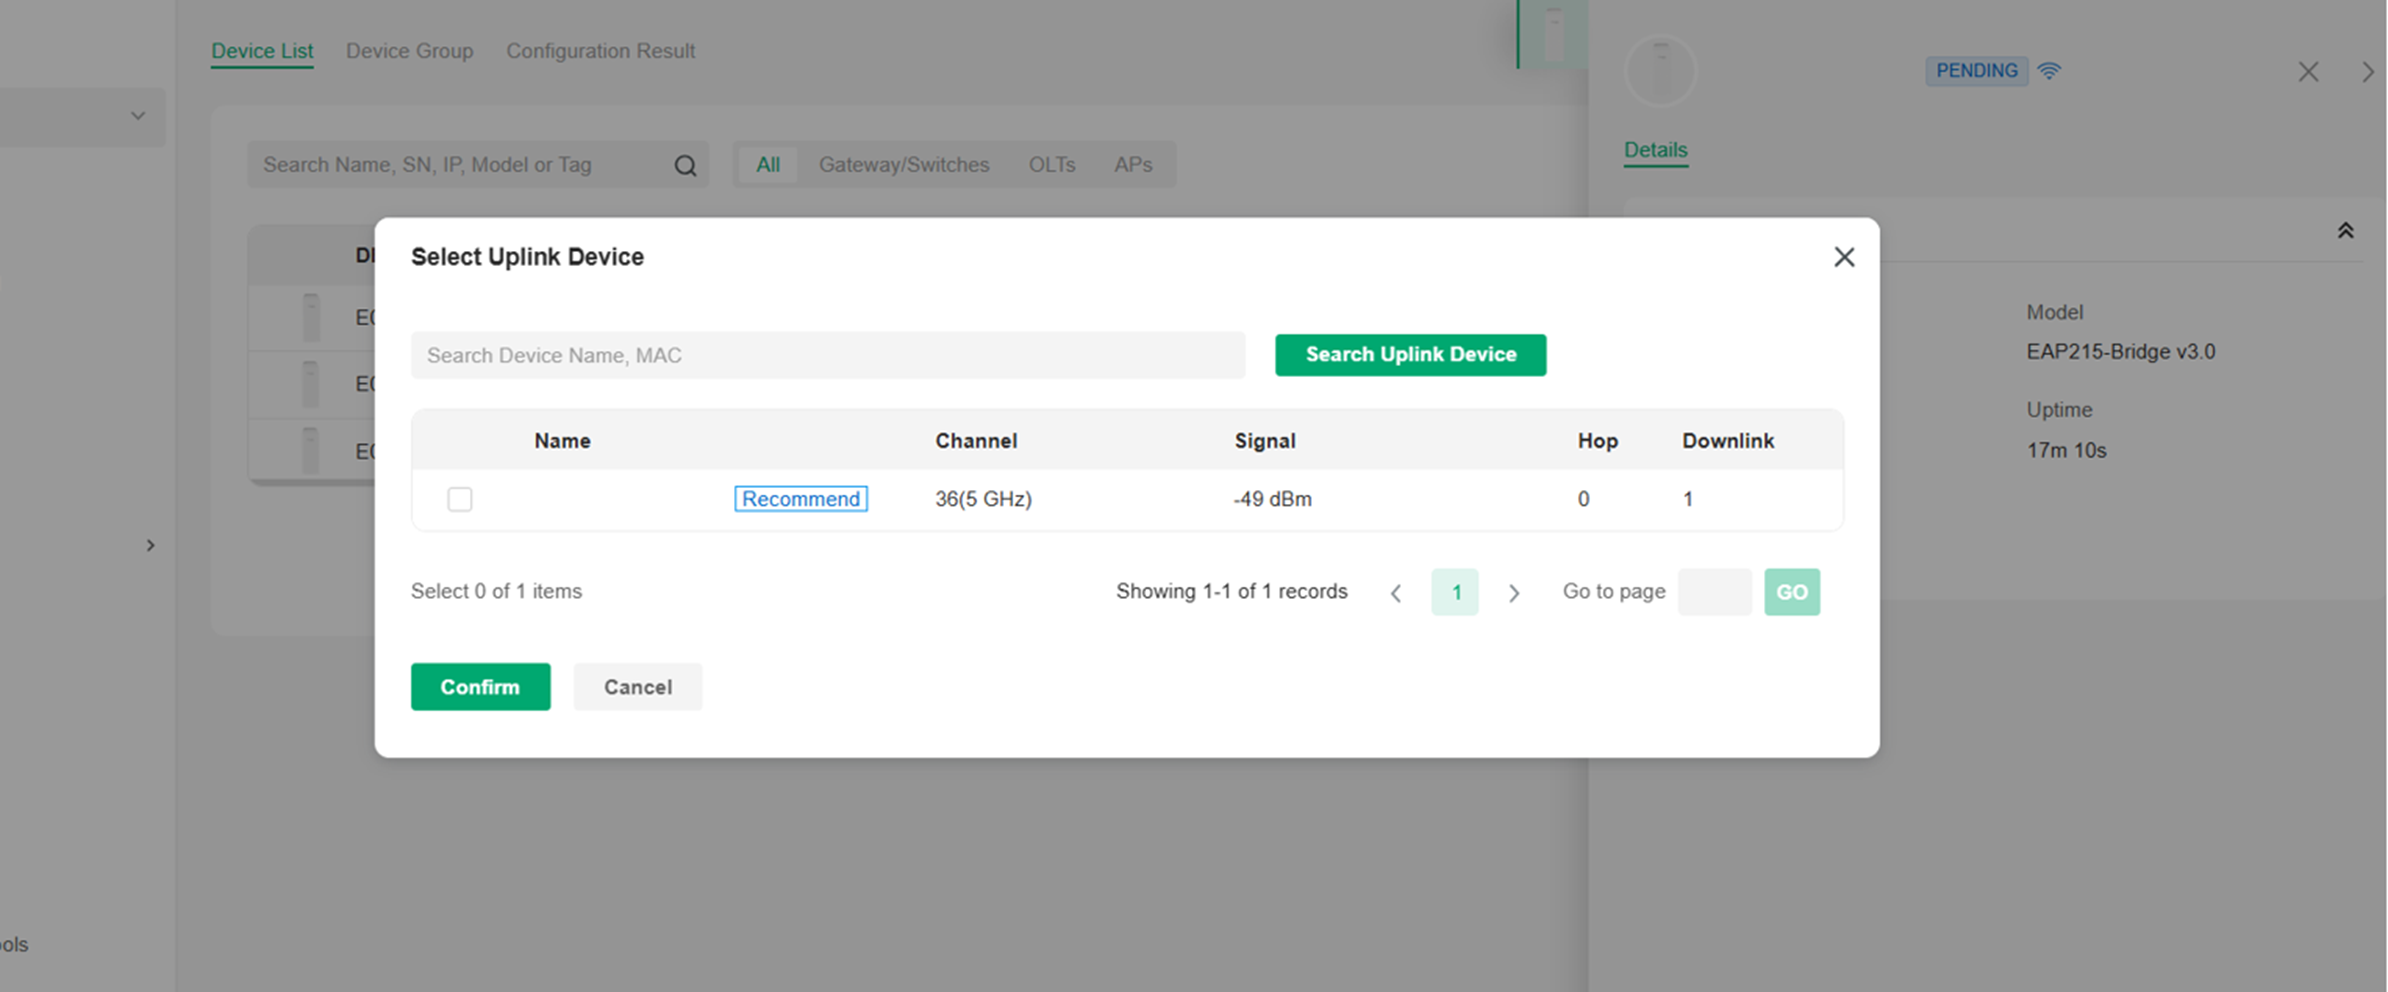
The Main AP will then build a bridge network with the Client AP, and eventually, a PtMP network will be set up.
Note: You can modify the channel settings in the properties window of the Main AP, after which the Client AP will automatically update its settings. More Client APs (up to 4) can be added via the same process.
Connecting via Standalone Management
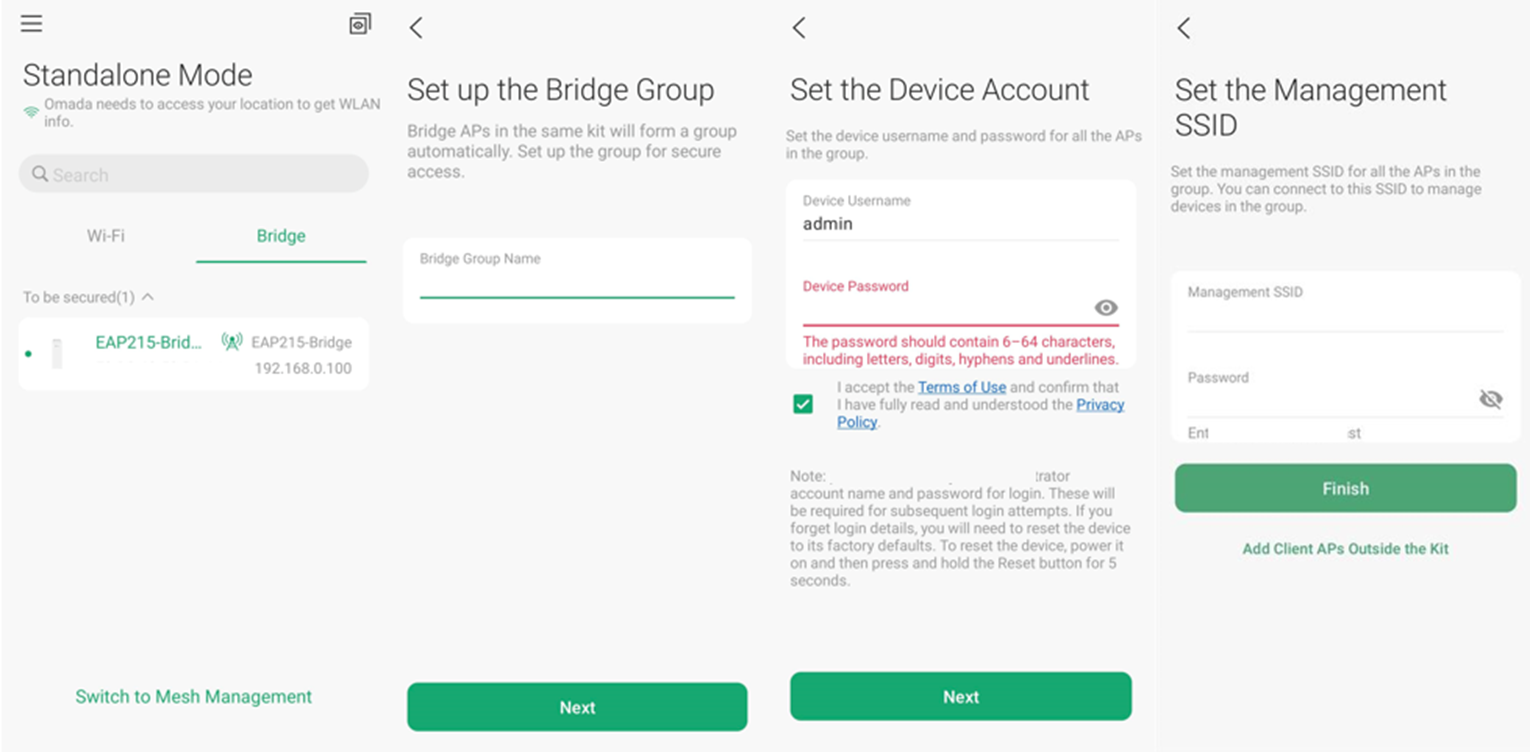
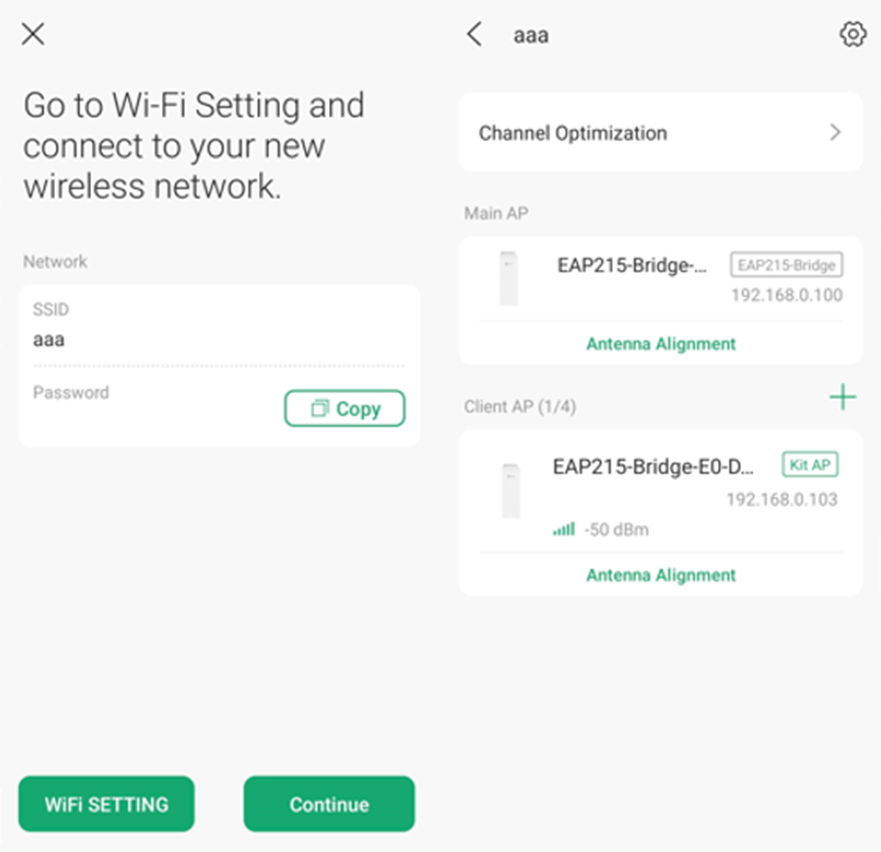
Step 1. Power on the Bridge APs, and log in to the Standalone web GUI of the Main AP on the PC. For example, the IP address of the Main AP is 192.168.0.10; you should type https://192.168.0.10 in your web browser's address bar to log into the web GUI. First, create the device’s account, and then you can log in to it.

Step 2. Then, in the Quick Setup, you will see the following scanning page.
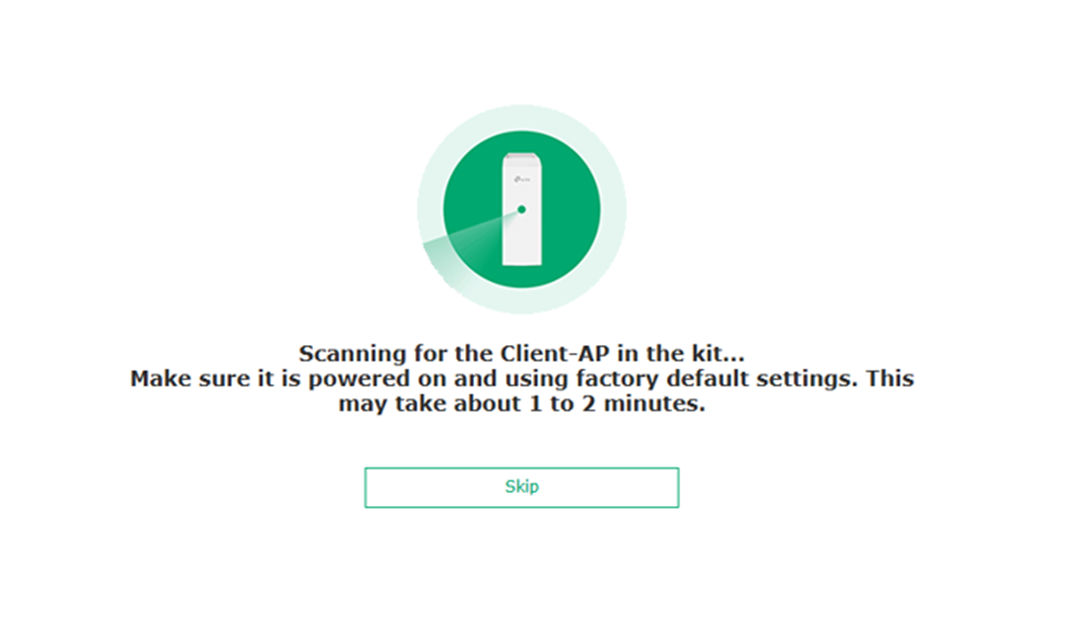
The two Bridge AP devices in the same kit support auto-pairing after being powered on. They can automatically find each other. If the network has not been set up because the Client AP has not been powered on yet, you can click Skip first, and the bridge network will be automatically built after the Client AP starts up.

After setting up the SSID for the EAP-Bridge devices, the quick setup is finished.
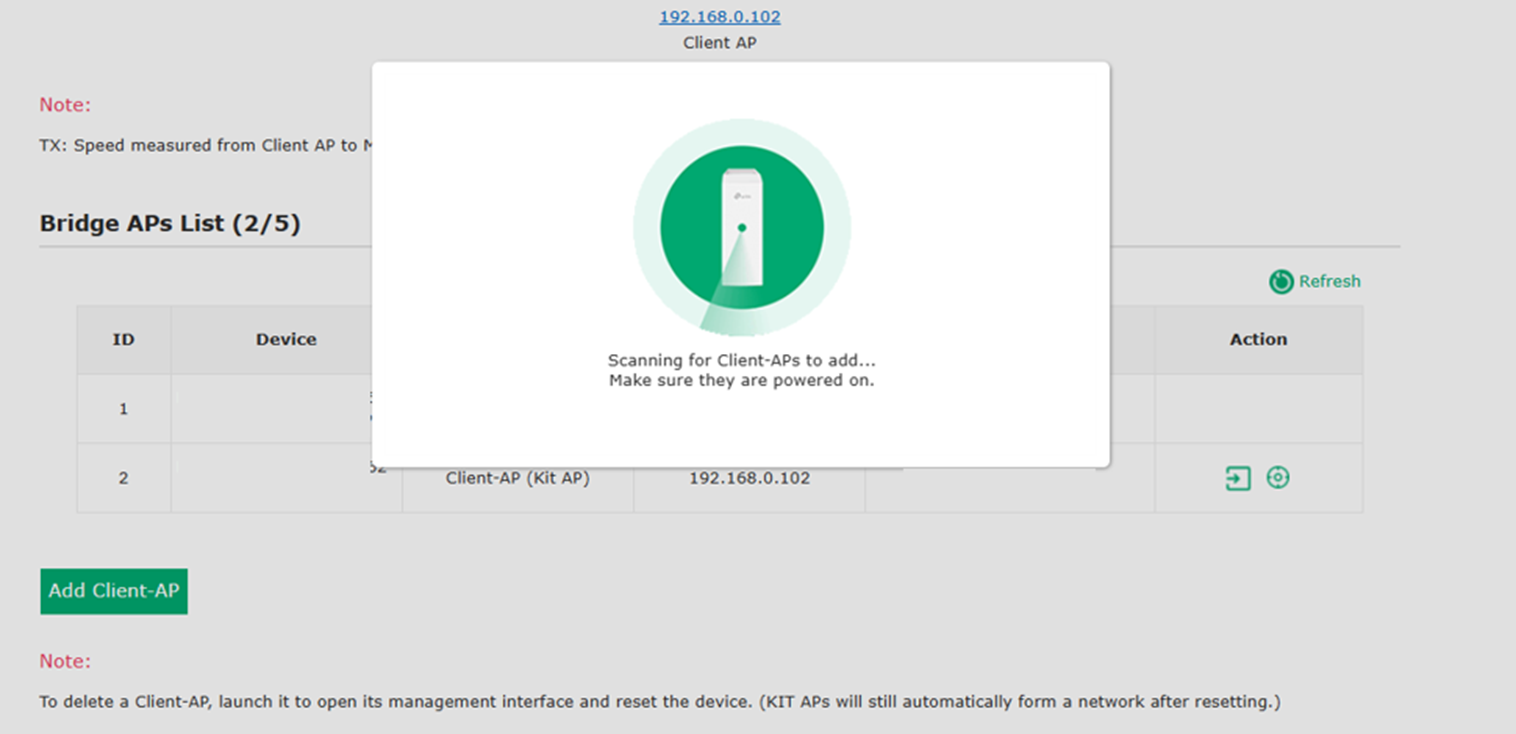
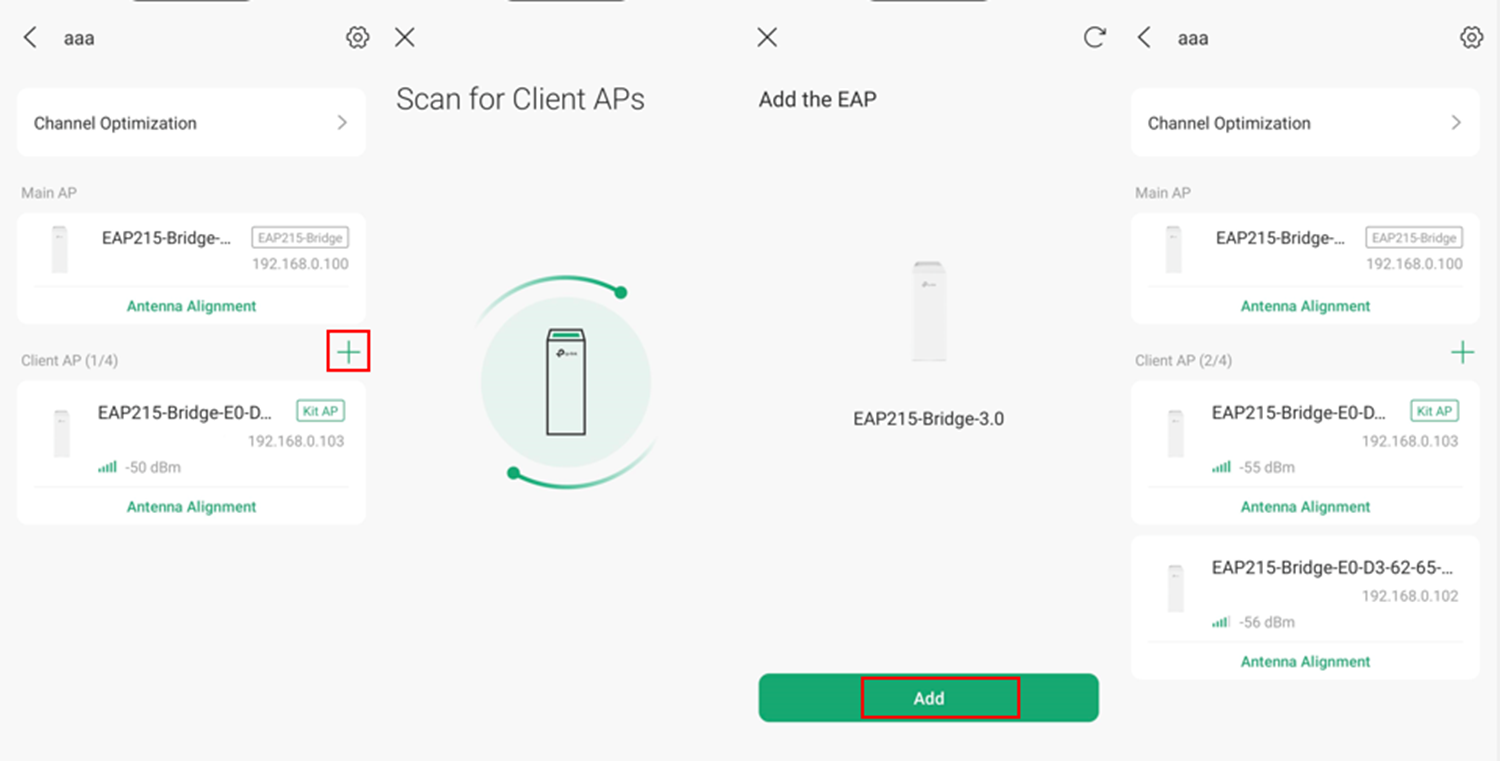
Step 3. You can check your bridge connection status in Bridge Network. Additionally, you can add another EAP-Bridge from a different kit to build a PtMP connection if needed.
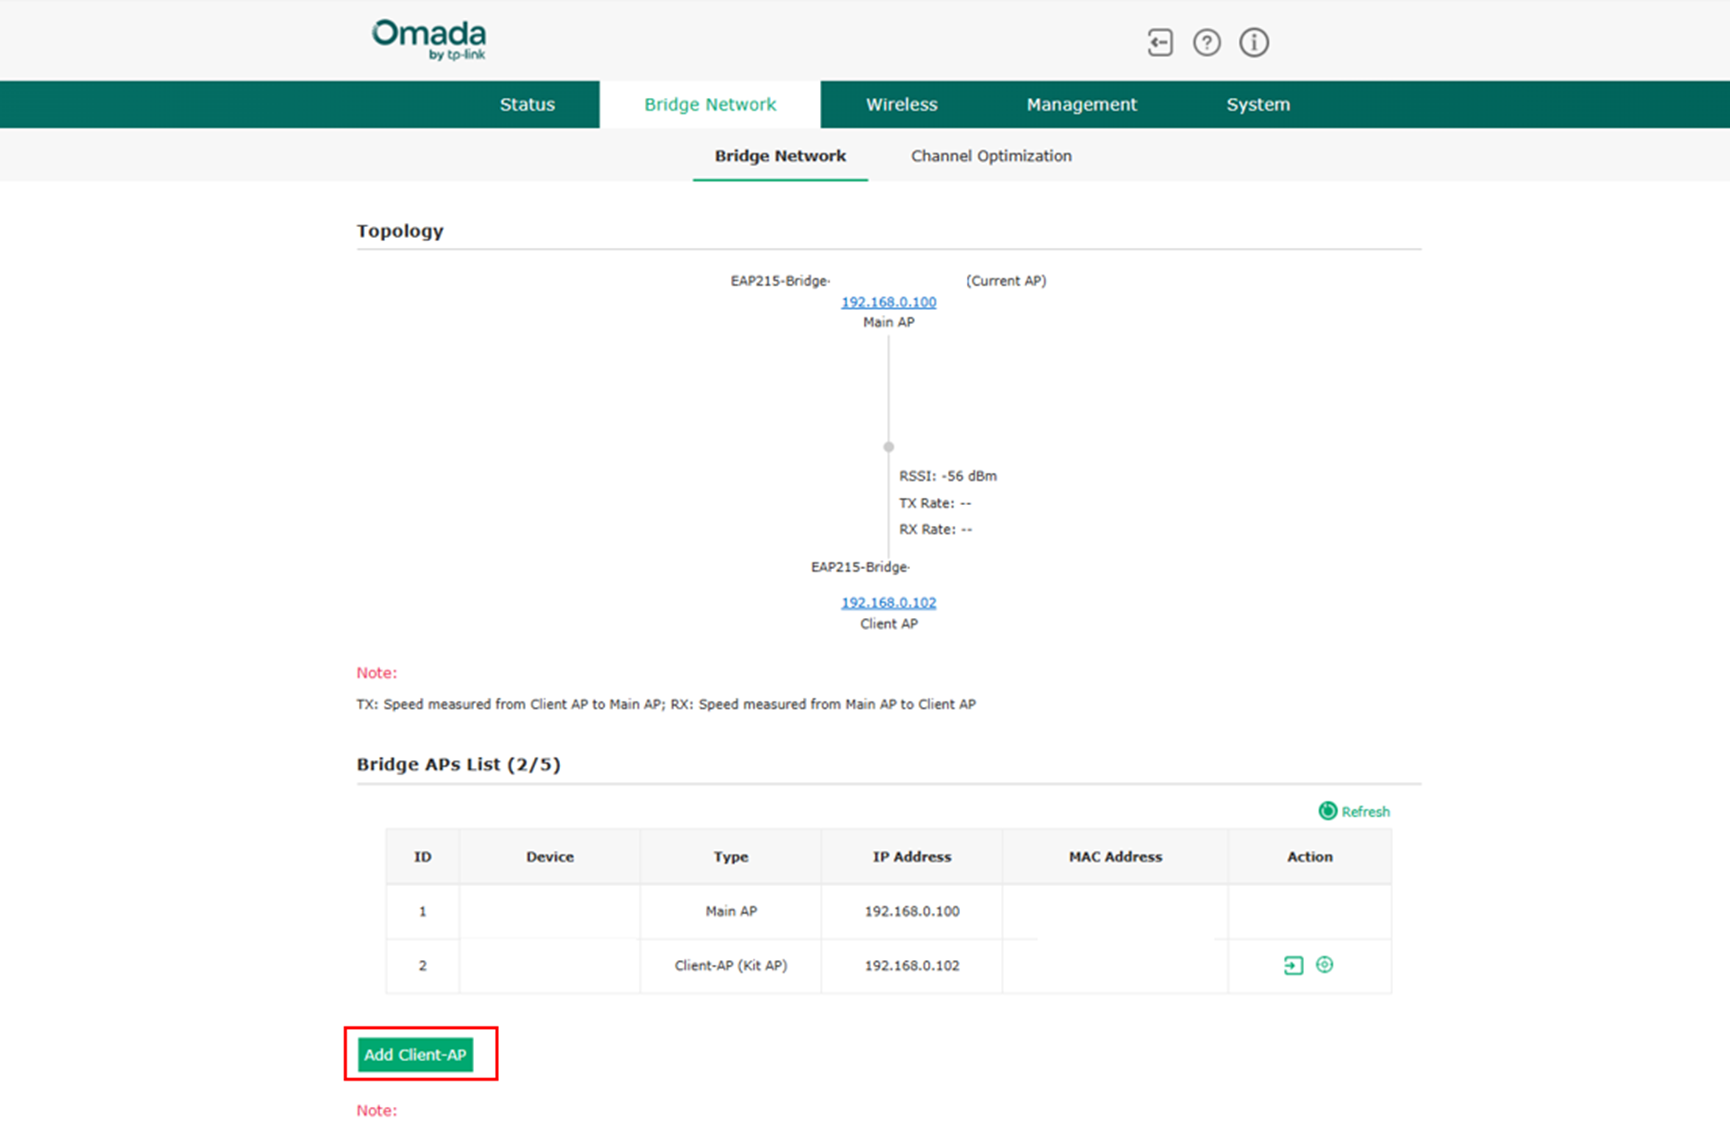
Step 4. (Optional) After clicking on the Add Client AP button, the Main AP will then scan the surroundings for the available Client AP.
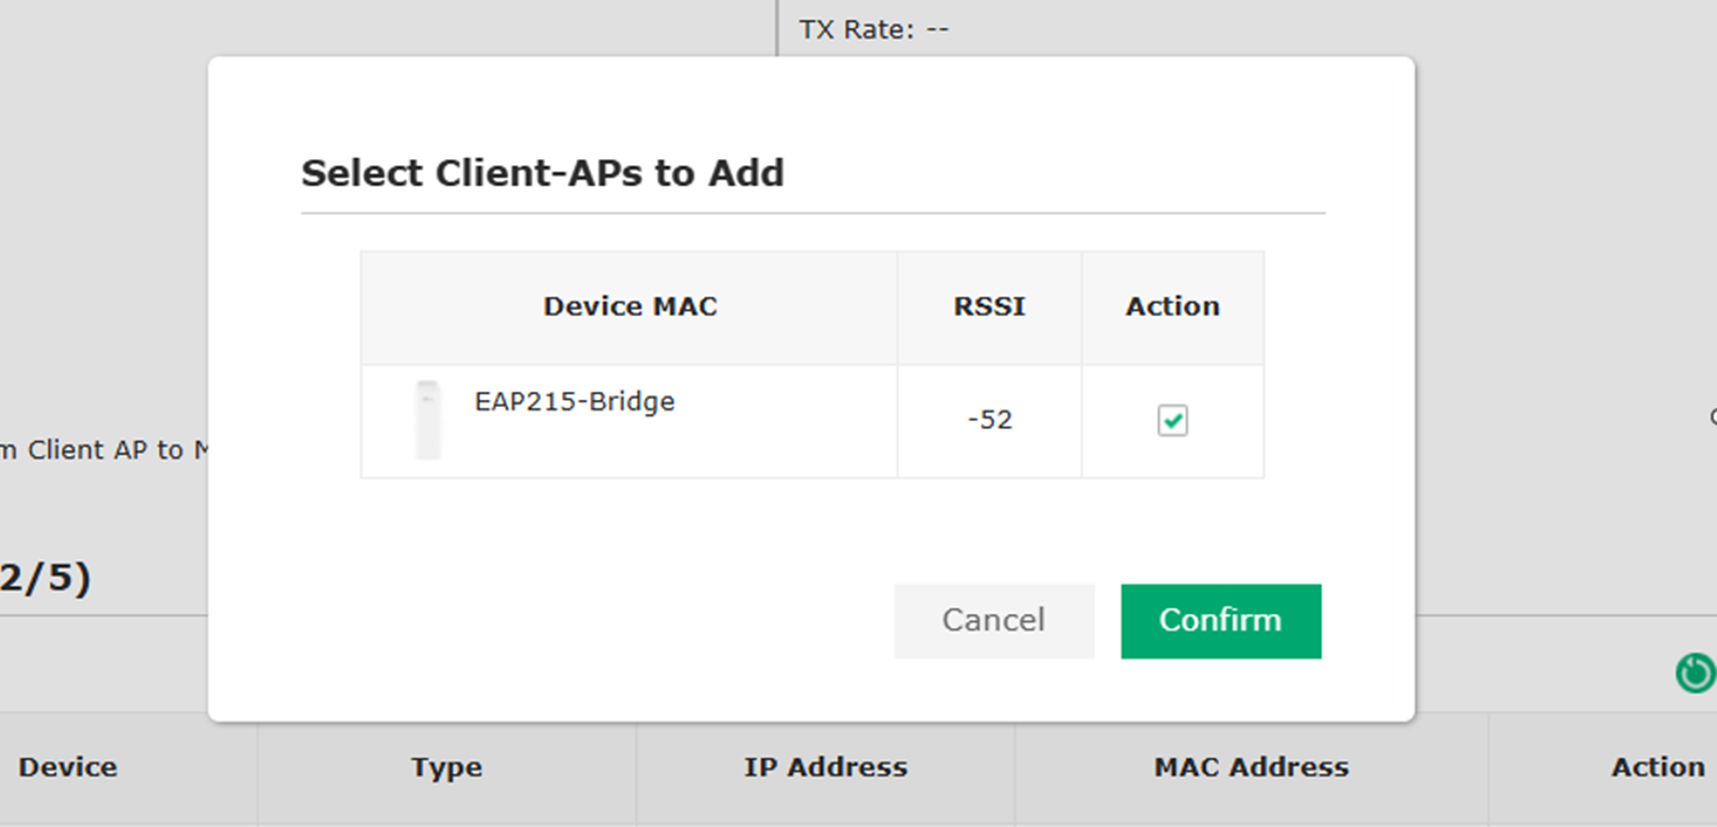
After the main AP finds the Client AP, as shown in the following, select the Client AP you want to add and click Confirm.
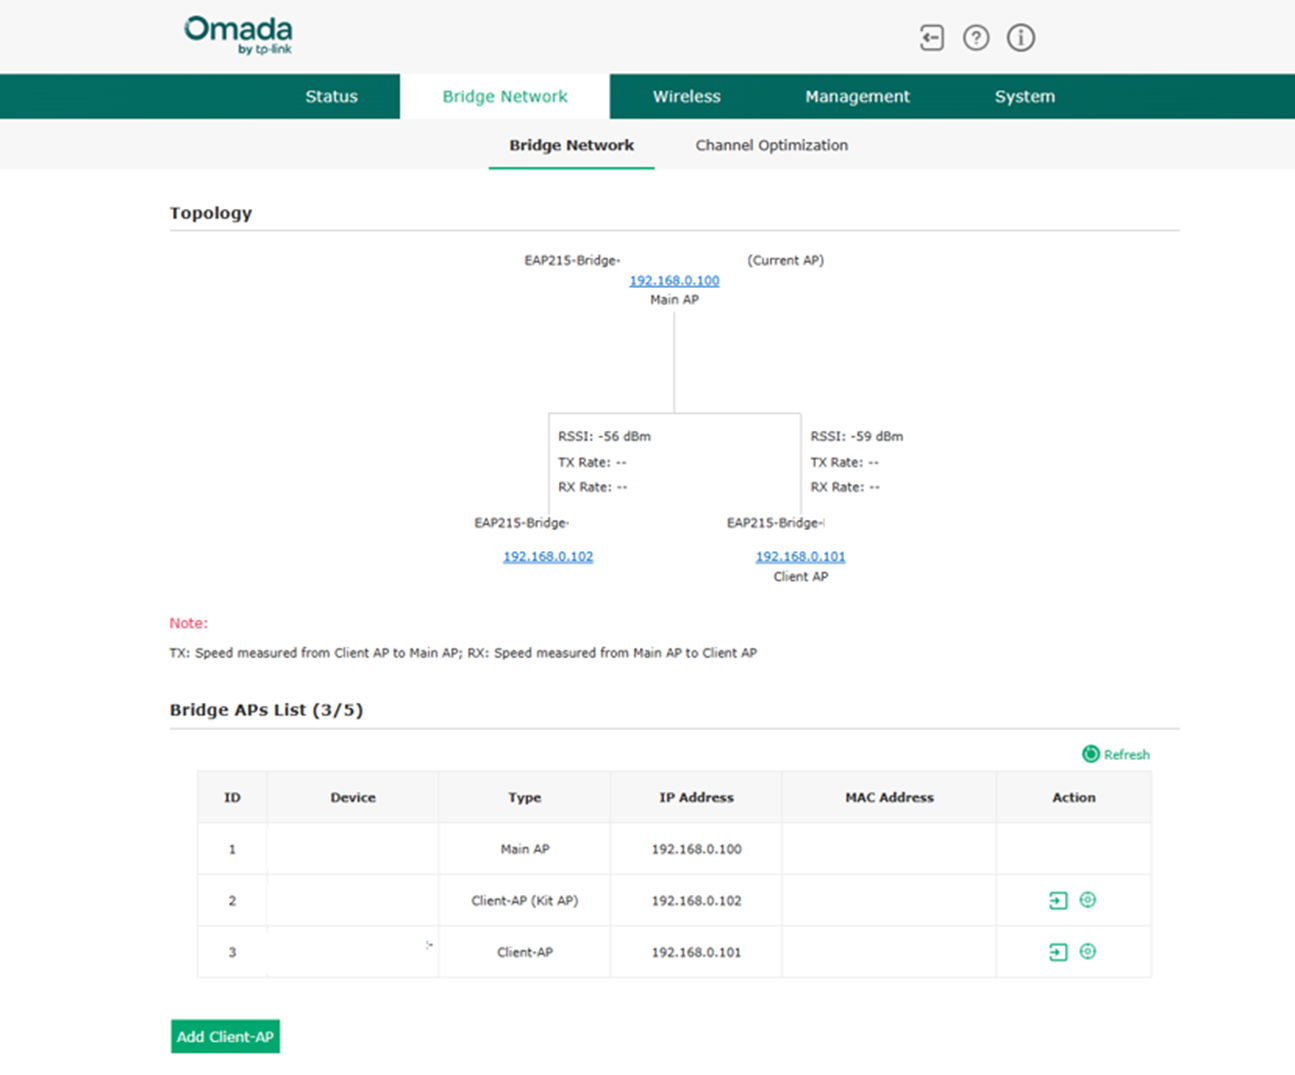
After setting up the PtMP bridge connection, you can also check it in Bridge Network.
Connecting via the Omada App
Step 1: Connect your Phone to the default SSID of the EAP-Bridge (you can find it on the device’s label), then log into the Omada App. In standalone mode, you will find the EAP to which you’re connecting. Click and fill in the information to complete the quick setup.
Step 2. Connect your Phone to the SSID you’ve just set up, then open the Omada App again. Then you will find that both APs in the same kit are automatically added to your Omada App, provided they are both powered on and can scan each other.
Step 3: (Optional) You can also click on the ‘+’ icon in the bridge group page to add another Client AP from a different kit to configure a PtMP connection. After scanning and adding, the added one could also be found in the group page.
Multiple Bridges Auto-Pairing (only supported by hardware version v3.0)
EAP-Bridge v3.0 also supports the function of Multiple Bridge Auto-Pairing. For example, with EAP-Bridge v3.0, by pressing the button on both the Main AP and the Client AP, you can open a bridging window. The two devices will then automatically form a bridge network, whether they come from the same kit or not.
Press and hold the button for less than 1 second to open the pairing window. The window will automatically close after 2 minutes. During this period, all RSSI LEDs of both the Main AP and the Client AP will blink 1 second on, 1 second off, indicating that pairing is in progress.
Since the EAP-Bridge within the same kit automatically finds each other when powered on, the Multiple Bridge Auto-Pairing feature is typically used to connect EAPs from different kits. Below is how you can configure it.

Step 1: Check if your EAP-Bridges are v3.0 or not. If they are, ensure there is only one Main AP and that the rest of the EAP-Bridge v3.0’s role is switched to Client AP properly.
Step 2. Press all the EAP-Bridges’ buttons for less than 1 second to make them enter the pairing window. In the pairing window, the Client AP will automatically connect to the Main AP that is also in the window, even if they are not in the same kit. The window lasts for 2 minutes and can’t be closed.
Step 3. You can log into the Web UI to examine if the pairing is successful.
Conclusion
Now that you've finished configuring EAP-Bridge in Point-to-Point topology using different approaches.
Get to know more details of each function and configuration please go to Download Center to download the manual of your product.
QA
Q1. How do two devices self-organize the network?
A1. For devices of the same kit, one AP is wired connected to the gateway or switch, obtains a dynamic IP address and becomes the Main AP, while the other becomes the Sub AP after powered on. The PtP network will then be automatically set up.
Q2. How can I build the network if there is no DHCP server?
A2. To build a network without a DHCP server, you need to log in to the web GUI of the Main AP and the Sub AP first to set a static IP address and a reachable gateway for each AP. For more help please refer to the article: How to set up Bridge APs in a network without a DHCP server | TP-Link
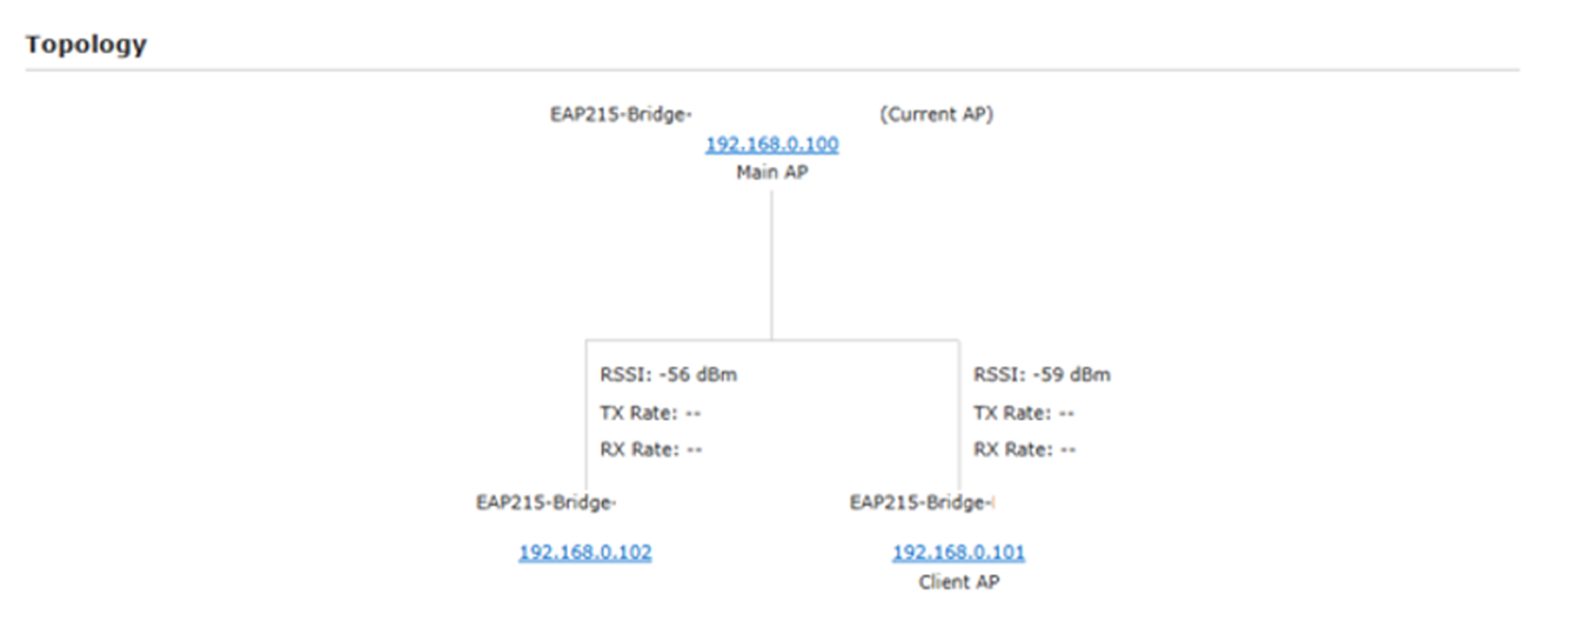
Q3. How can I know the antennas in the PtP network have been aligned properly?
A3. You can check the RSSI shown by the LED on the APs or check the negotiated rate of the Mesh uplink on the Controller.
Q4. How many Sub APs can a Main AP connect to? How many hops does it support at most?
A4. EAP-Bridge only supports one hop, and a Main AP can connect to a maximum of 4 Sub APs.
Q5. Is EAP-Bridge compatible with Omada Mesh?
A5. Only the Bridge APs working on the same frequency band can build a bridge network with each other. The Bridge AP models cannot build a Mesh network with non-Bridge ones.
Q6. Can different hardware models of EAP Bridge be used together?
A6. For EAP215-Bridge, EAP211-Bridge and EAP115-Bridge, their V1 can only work with another V1, not V2 or V3. However, their V2 and V3 can be used together.
