


Contents
Configuration for Scenario 1: Via Omada App
Configuration for Scenario 2: Via Web Browser
Introduction
If you are using the Omada Controller to manage the EAP, please refer to How to Configure Wireless Settings on an Omada EAP in Controller Mode
Note:
1. If it is the first time to install and configure your EAP devices, please refer to the Setup Video instead for more detailed guidance.
2. To learn the difference between the two configuration modes, please refer to the setup video A Quick Overview of EAP Management Methods.
Requirements
This guide uses the EAP610 V3 running in Standalone Mode as an example; the actual UI may vary slightly depending on your EAP model.
- Method 1 (Via Omada App) requires a mobile device with the Omada App installed, connected to the EAP's Wi-Fi network.
- Method 2 (Via Web Browser) requires a computer or mobile device that can access the EAP's Web UI through a web browser.
Configuration
In Standalone Mode, there are two easy methods to configure the basic wireless settings.
Configuration for Scenario 1: Via Omada App
Step 1. Connect your mobile device to the EAP's Wi-Fi network and launch the Omada App.
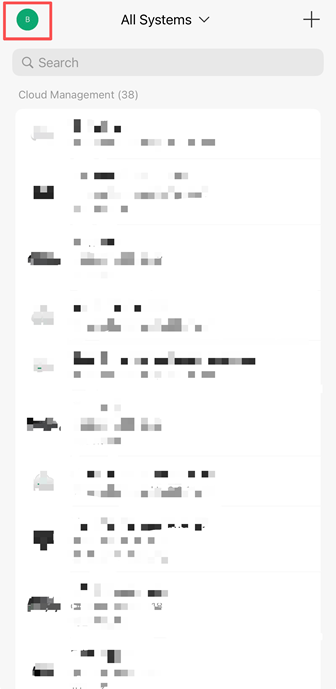
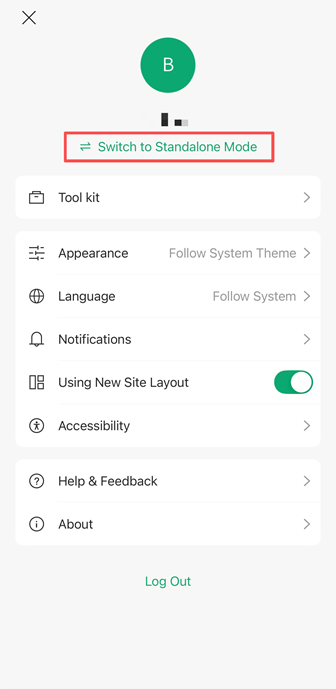
Step 2. Tap on your profile picture on the top left corner of the main page and tap on the "Switch to Standalone Mode". Then your EAP device will appear on the Wi-Fi page.
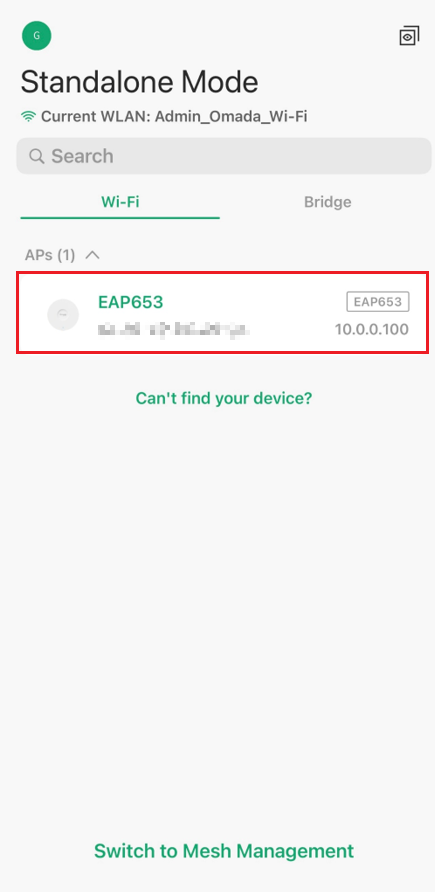
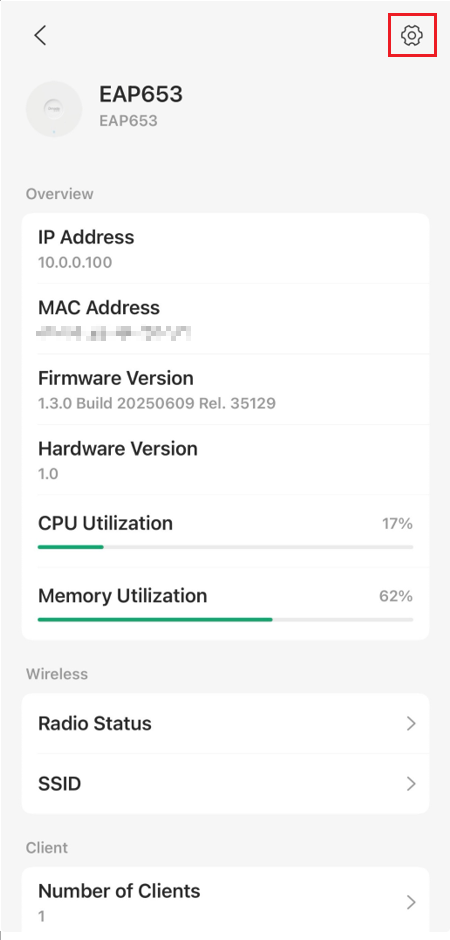
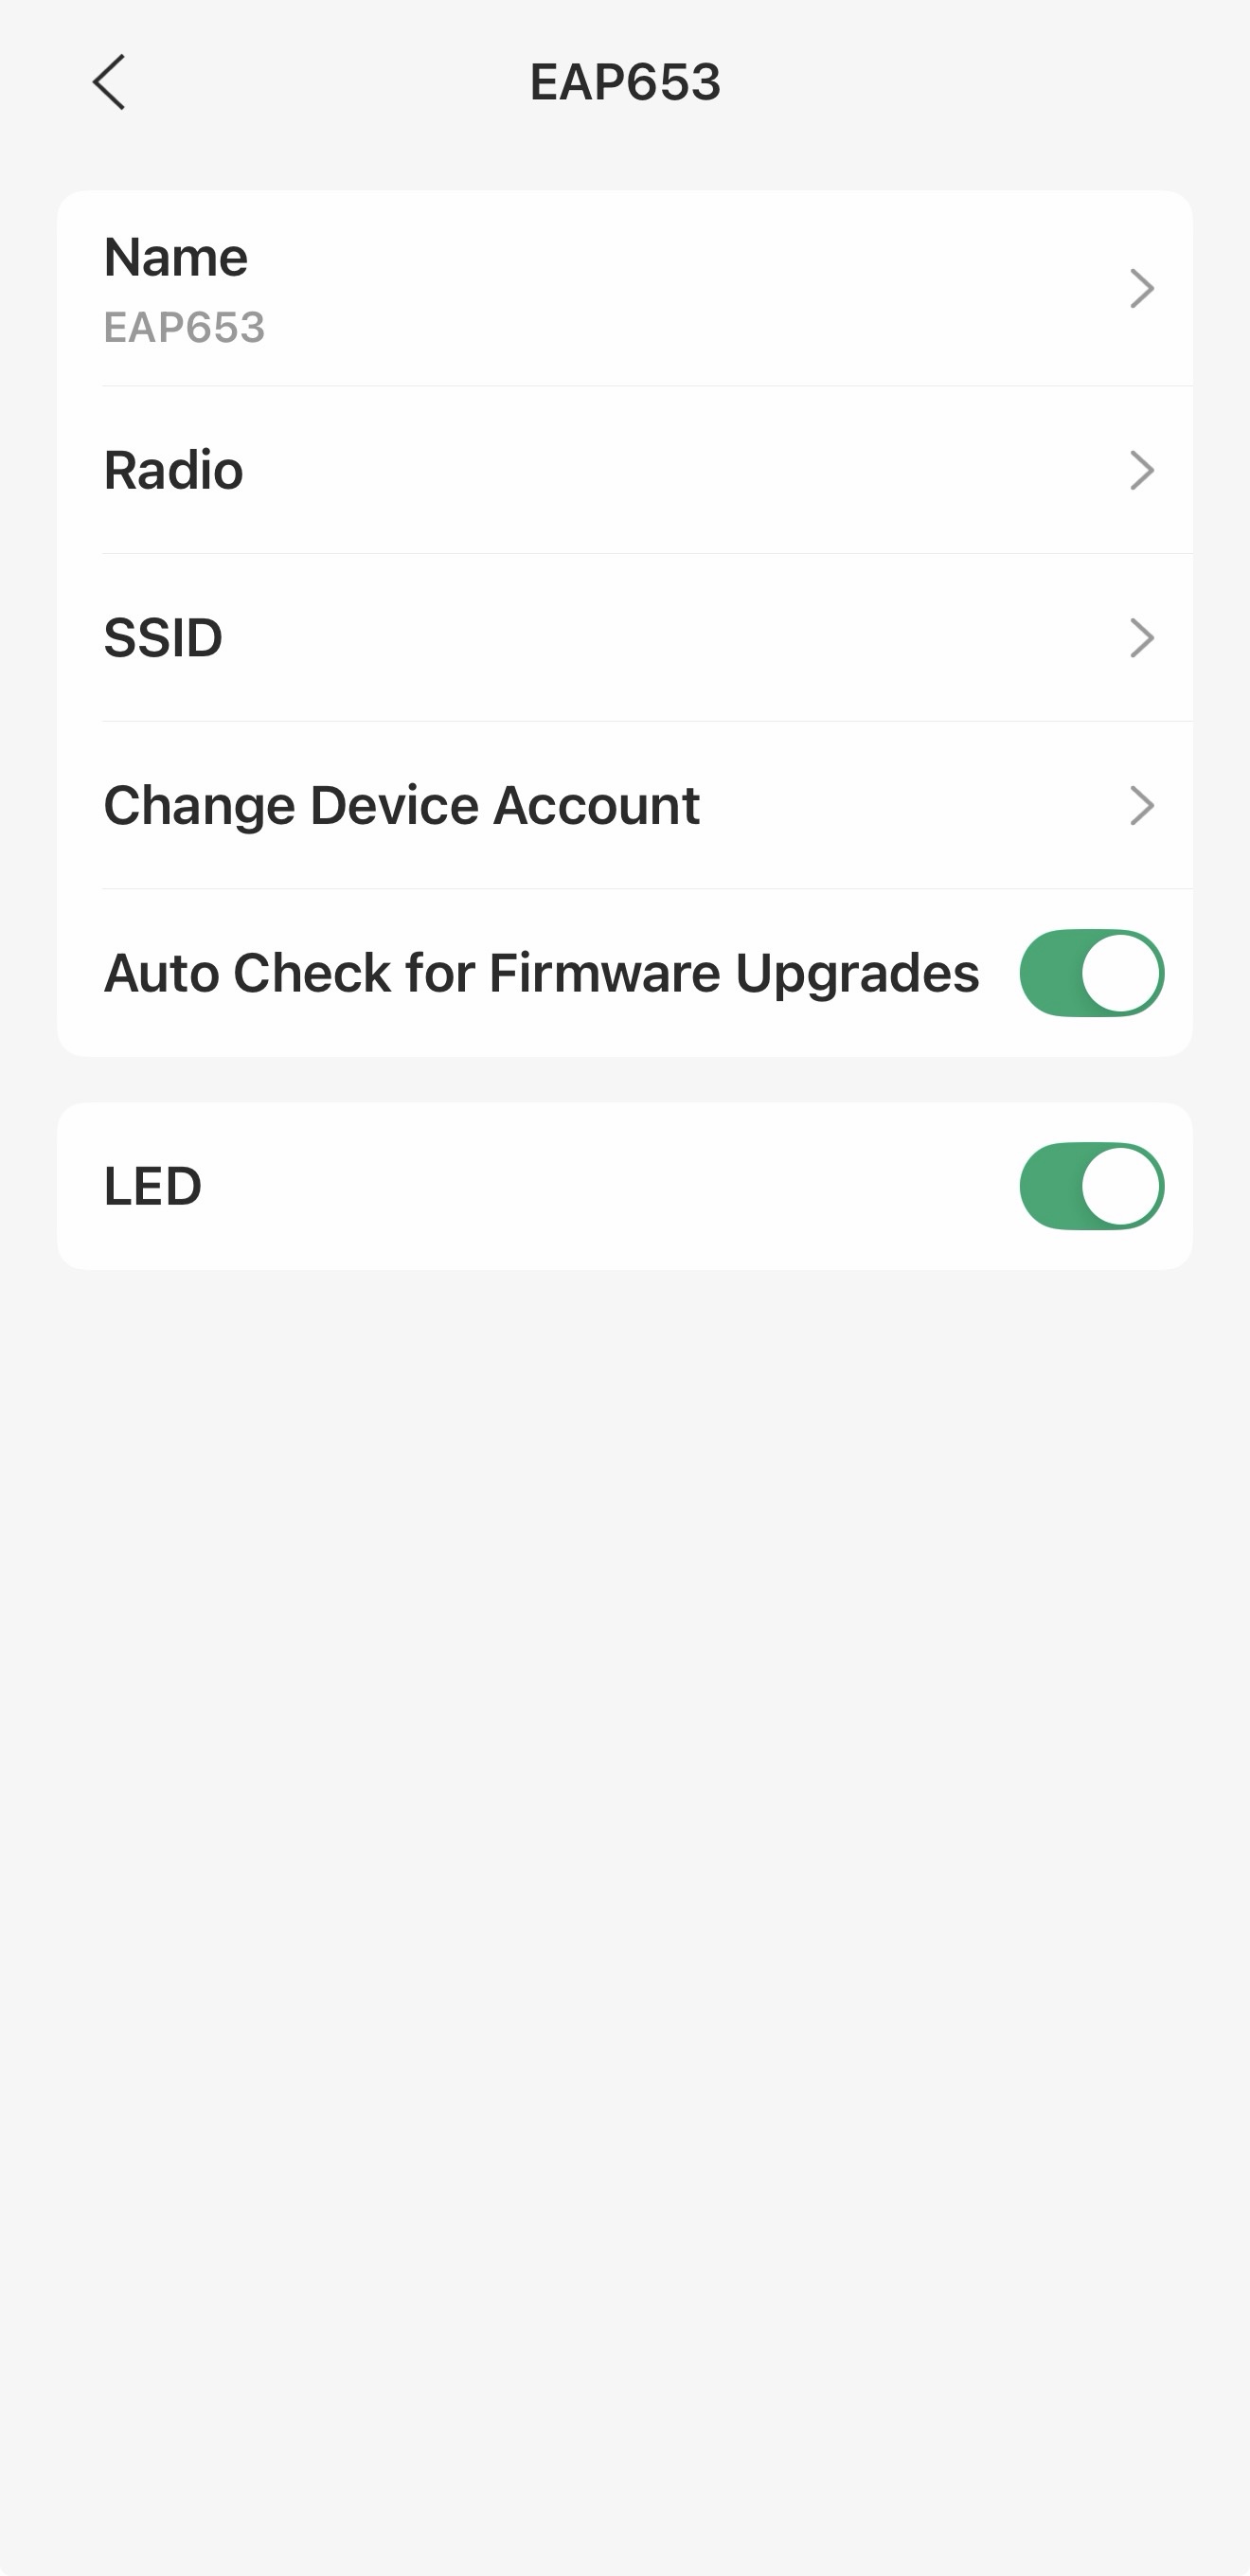
Step 3. Check basic info on the device page. To change info, please click the Edit button in the upper right corner. You can modify Radio and SSID for your EAP.
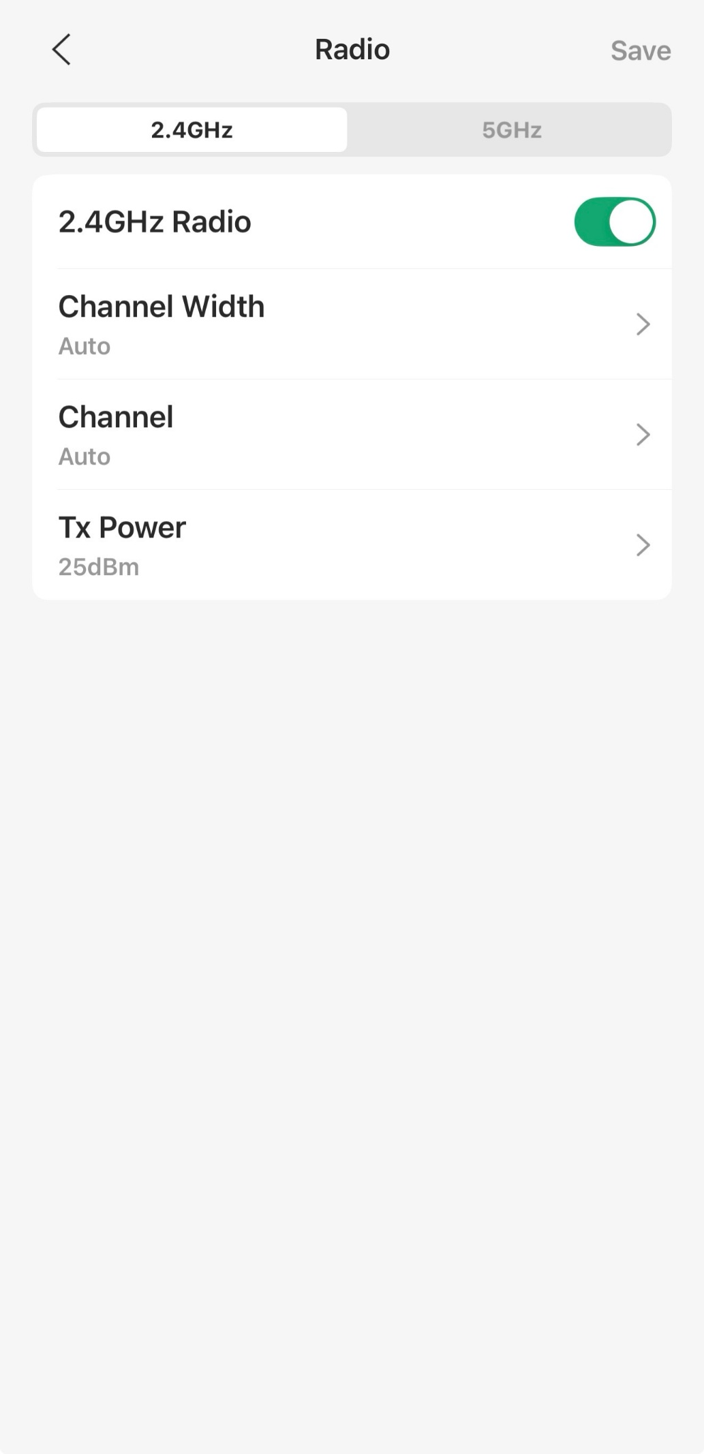
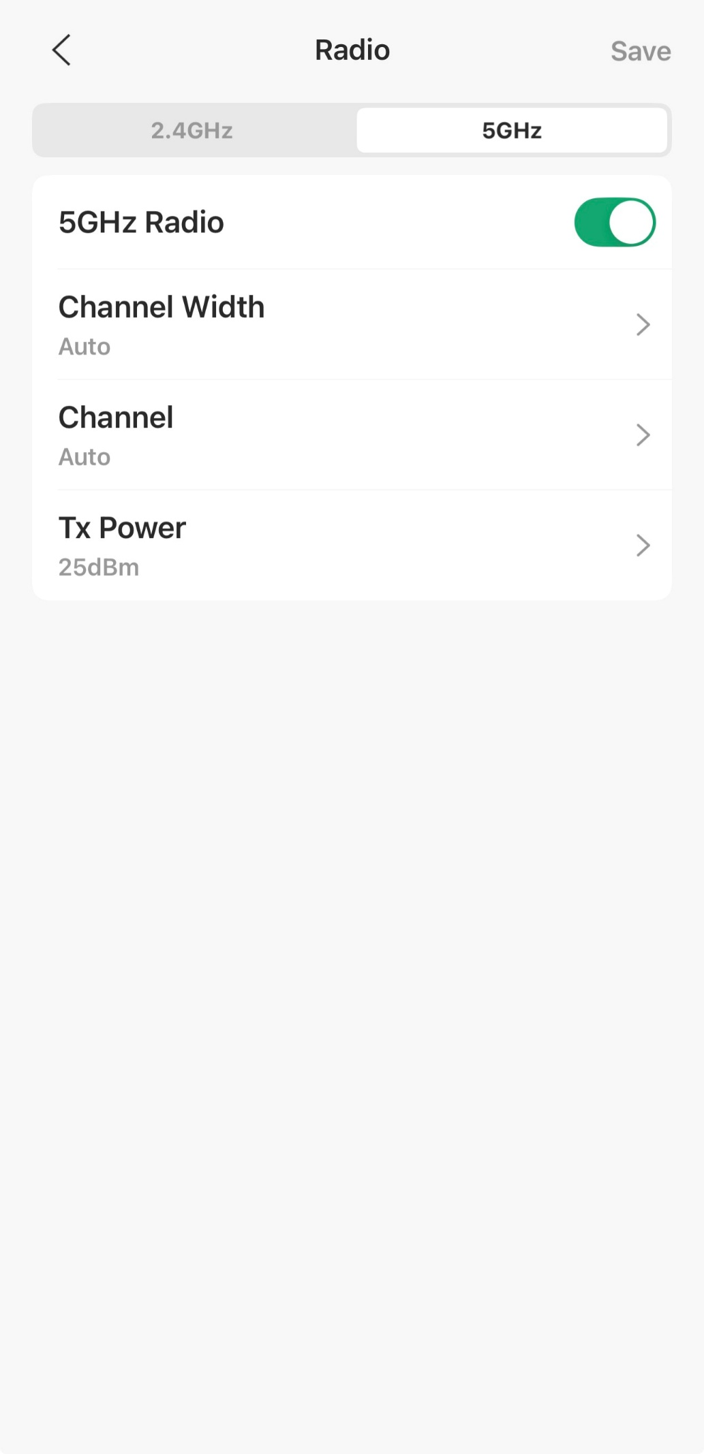
Step 4. Under Radio settings, you can change Channel Width, Channel, and Tx Power based on the different Radio.
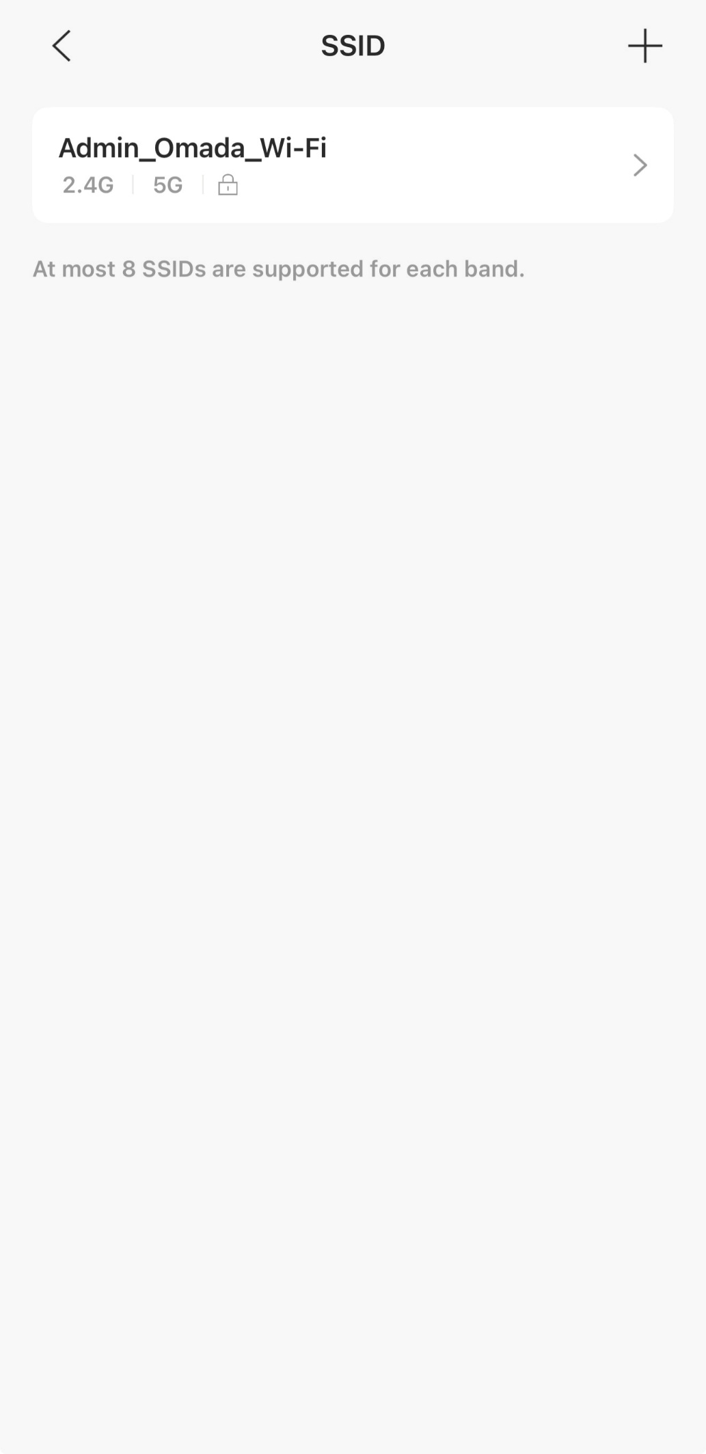
Step 5. Under SSID settings, you can add more SSIDs by using the + button or modify the existing SSID.
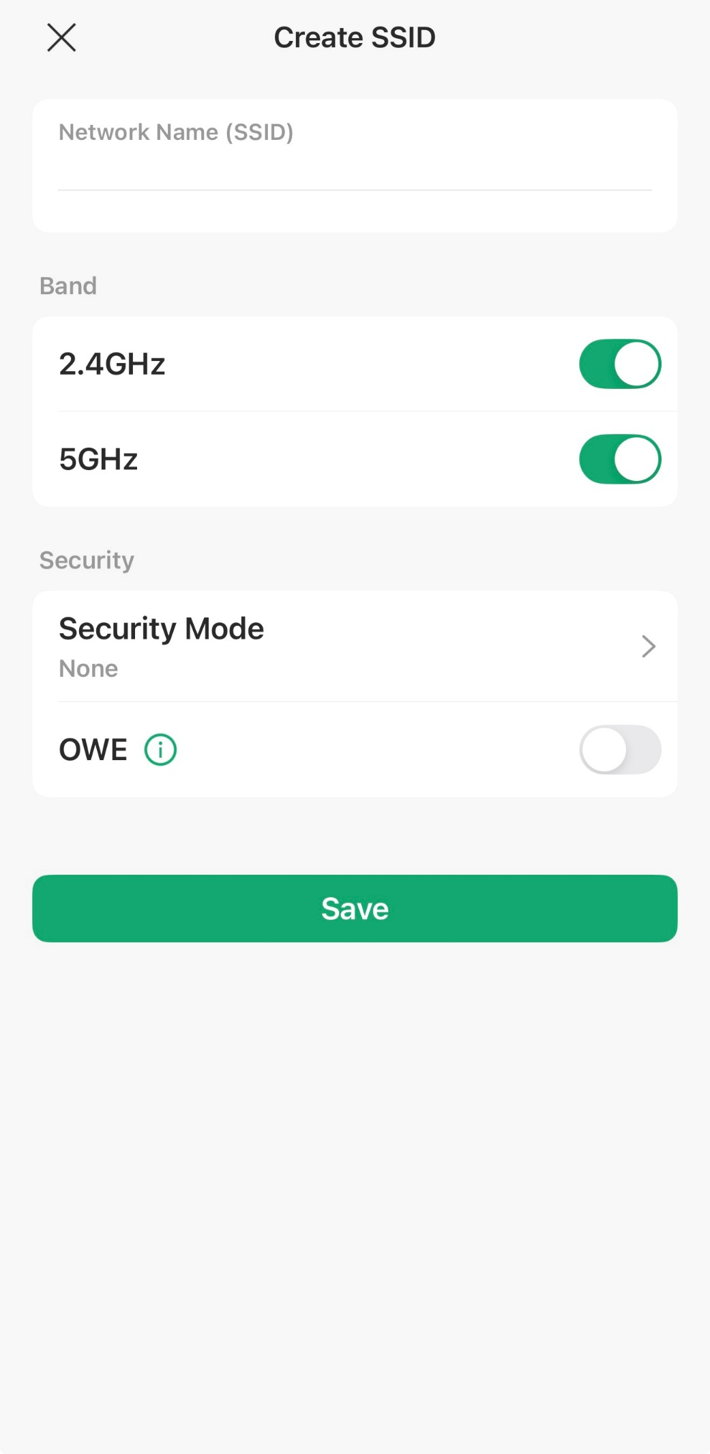
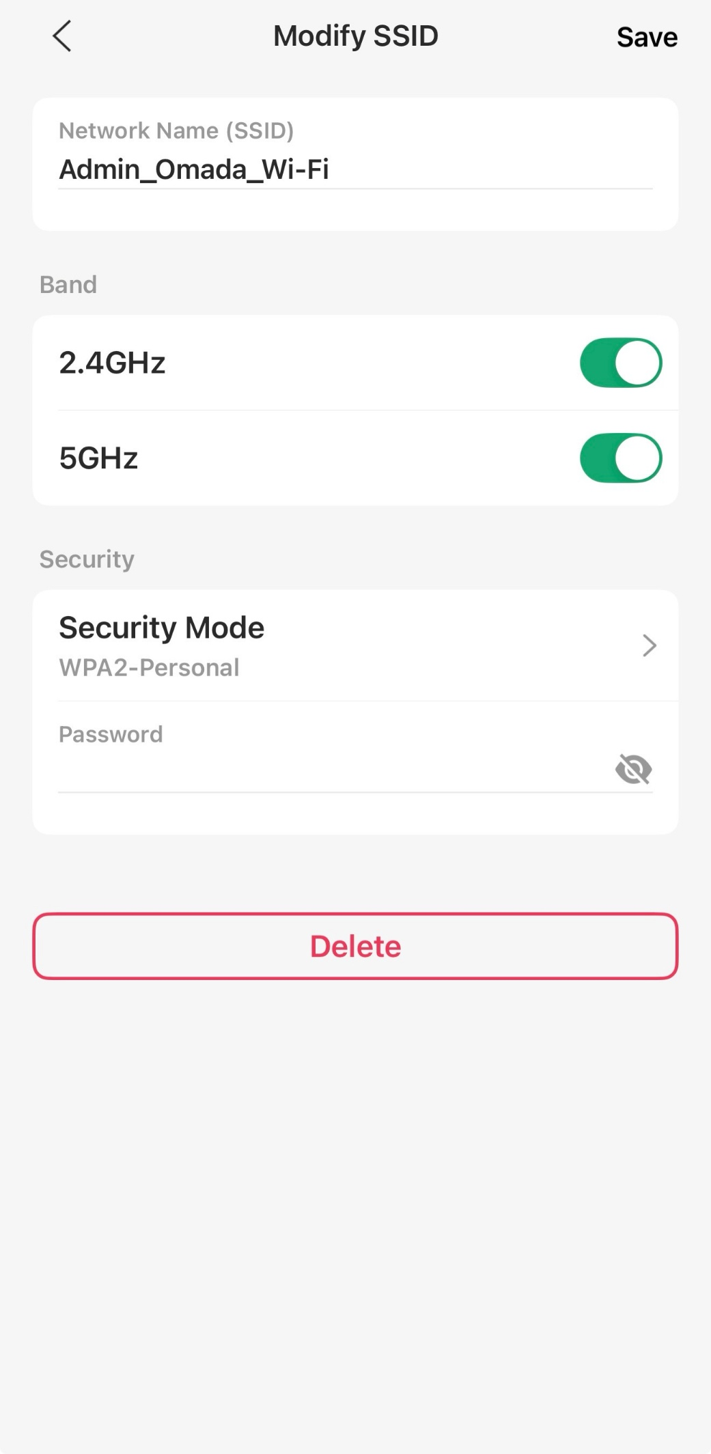
Step 6. After you change the settings for both 2.4G and 5G, remember to save the changes and reconnect to the Wi-Fi network you just set. Enjoy surfing the Internet.
Configuration for Scenario 2: Via Web Browser
Step 1. Log into the Web GUI of the EAP. If you don't know how to do that, please refer to How to login to the web management page of the Omada Device (Standalone mode)
Step 2. After you login, choose the menu Wireless > Wireless Settings. Click 2.4GHz or 5GHz to choose a frequency band on which the SSID will be changed.
Tips: When you change 2.4G SSID or password, we suggest you connect to 5GHz SSID and login the web GUI to change it, vice versa.
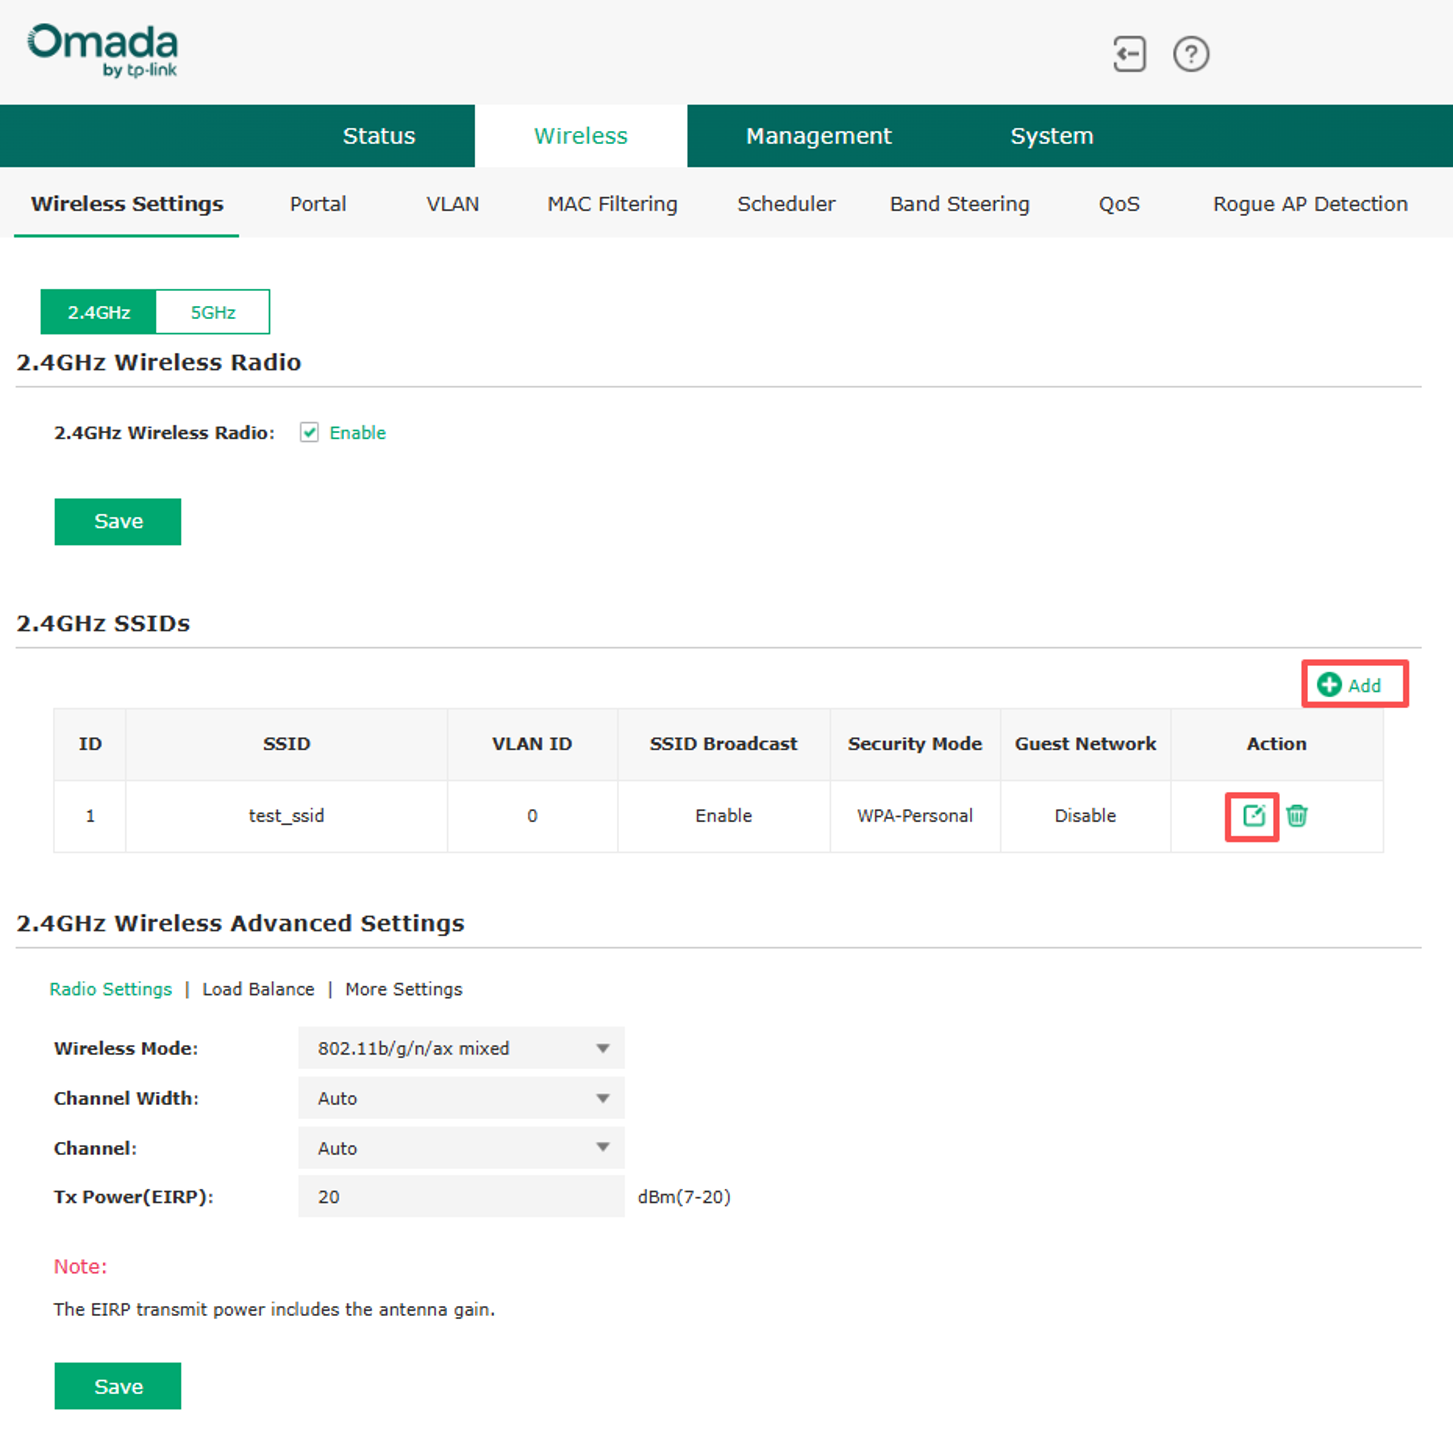
Step 3. In the SSIDs section, you can click Edit icon to modify the wireless settings of the existing SSID, OR tap the "+ Add" icon on the upper bottom corner to add a new SSID. Here we click Edit icon, customize the SSID, select Security as WPA-Personal and create the Wireless Password to secure the Wi-Fi.
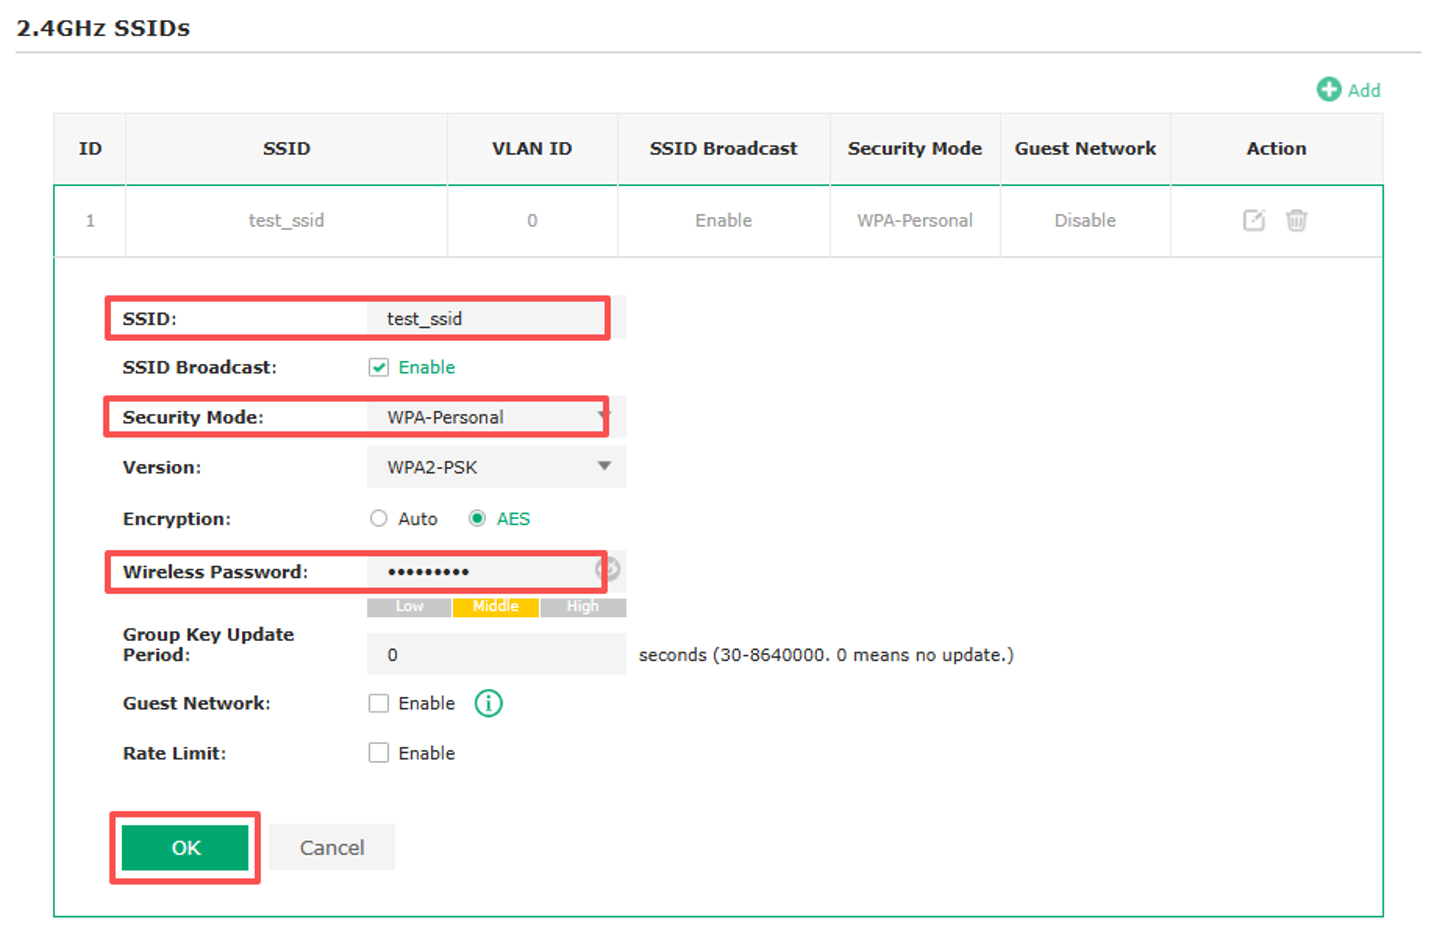
Step 4. If your EAP is dual-band, remember to configure the SSID of the 5GHz band in the same way.
Conclusion
The SSID configuration changes will take effect immediately after you save the settings. Check the Wi-Fi list on your mobile devices. Reconnect to the Wi-Fi network you just set and enjoy surfing the Internet. You have now successfully configured the basic wireless settings of your TP-Link EAP in Standalone Mode via the Omada App or the Web Browser.
To learn more about each function and configuration, please visit Support Home to download or check the manual for your product.
QA
Q1: Can I configure the wireless settings without installing the Omada App?
A1: Yes. You can log into the EAP's Web GUI via a web browser and configure the wireless settings under Wireless > Wireless Settings. Refer to Configuration for Scenario 2 above for details.
Q2: I forgot the username or password used to log in to my EAP. What should I do?
A2: If you connect to the SSID of your Omada EAP, the Omada app will not ask for a login account to access the management page. You can check and modify the device account by using the Omada app. If you forget the SSID password and login password at the same time, please reset your Omada EAP and reconfigure it.
Q3: Do I need to configure the 2.4GHz and 5GHz bands separately?
A3: Yes. If your EAP supports multiple frequency bands and your wireless devices support different bands, please configure a separate SSID for each band.
