Contents
Objective
This guide provides instructions for configuring Management VLAN for Omada Devices.
Requirements
- Omada Controller
- Omada AP/Omada Switch
Introduction
The management VLAN is a VLAN created to separate the management network from the data network. By default, the management VLAN is the LAN network in a network centrally managed by Omada SDN Controller.
You can change the management VLAN to improve network security. With a separated management VLAN, it is much harder for unauthorized users to modify the configurations or monitor the network.
Note:
1. Configurations in Omada Hardware Controller and Software Controller are the same. Before configuring the Management VLAN, refer to the User Guide to add the devices to the controller, and set up the computer running the controller to obtain an IP address dynamically.
2. When using the Omada Cloud-Based Controller, you do not need to configure the Management VLAN because it has separated the management data from the user data to ensure privacy. No user data will pass through the cloud.
Configuration
1. Use the default management VLAN
Note: In default mode, only untagged and VLAN 1 frames can communicate with the device.
When using the default management VLAN, set the Network Tags Setting of the port connected to the EAP to Allow All.
2. Use custom management VLAN
Note: When set to a specific VLAN, only packets carrying that VLAN tag can communicate with the EAP.
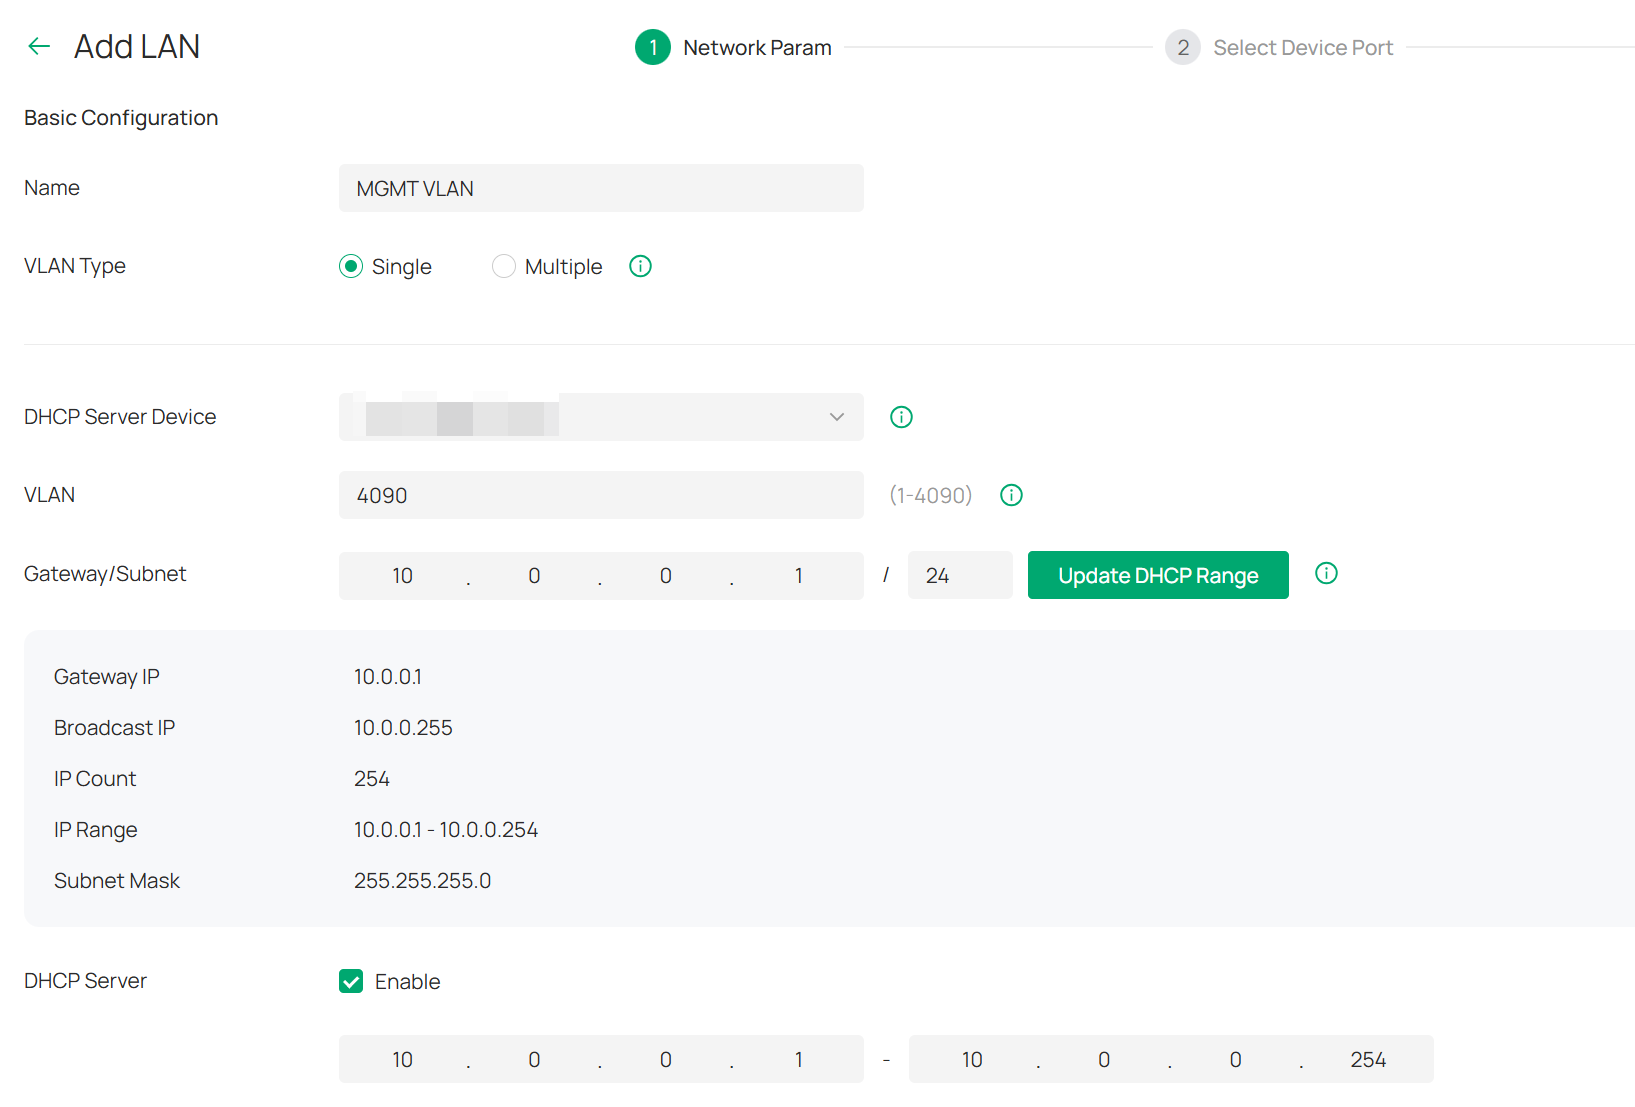
Step 1. Go to Settings > Wired Networks > LAN Networks and click Create New LAN to create a network (named MGMT VLAN with VLAN ID 4090 in this example) as Interface. Click the box of the associated LAN interface (LAN1), enable the DHCP Server, and fill in the DHCP range to assign IP addresses to devices in this network. After being created, a profile with the same name will be added automatically, and its PVID is 4090.
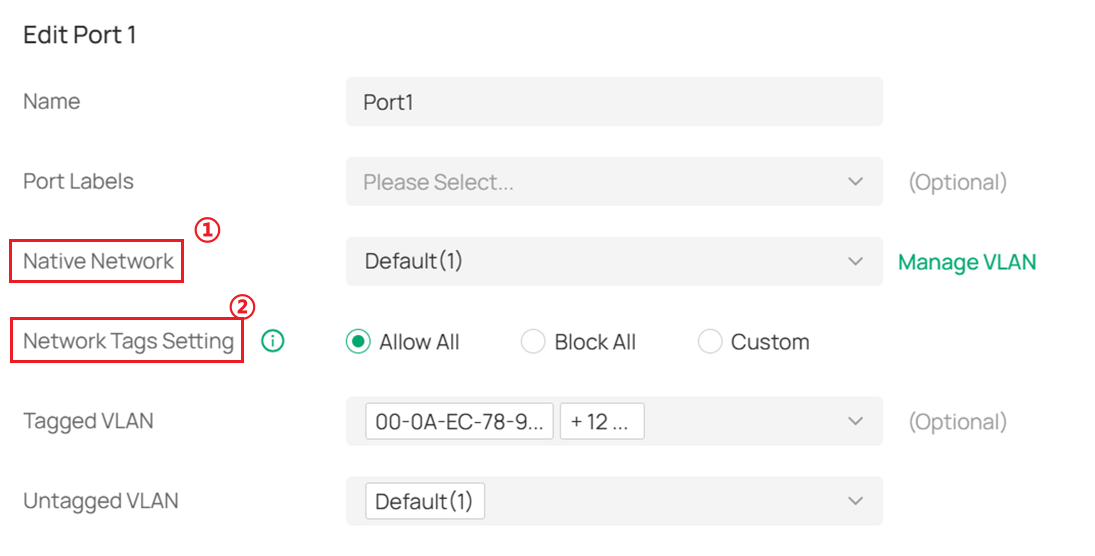
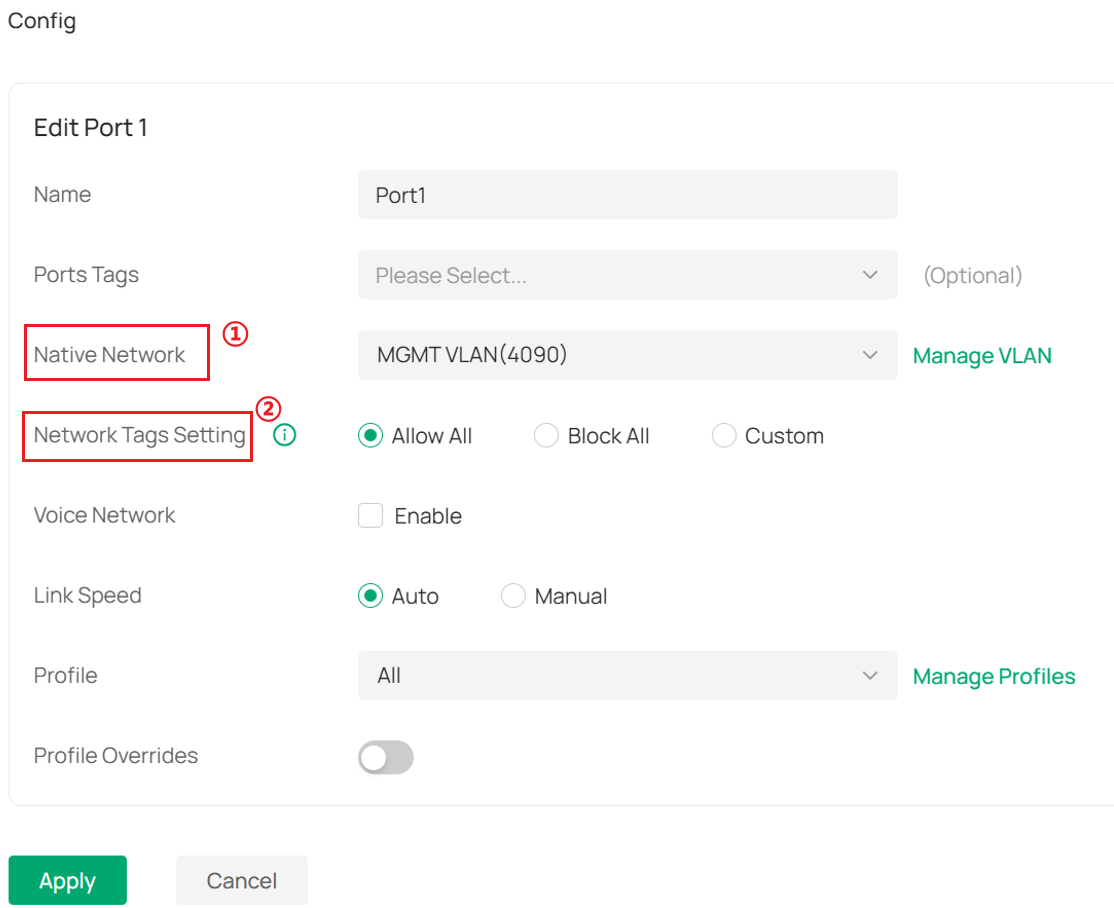
Step 2. Set the Native Network of the port connected to the EAP to the corresponding VLAN and the Network Tags Setting to Allow All.
Step 3. Go to Devices and add the devices to MGMT VLAN (VLAN 4090). The steps for switches and EAPs are similar.
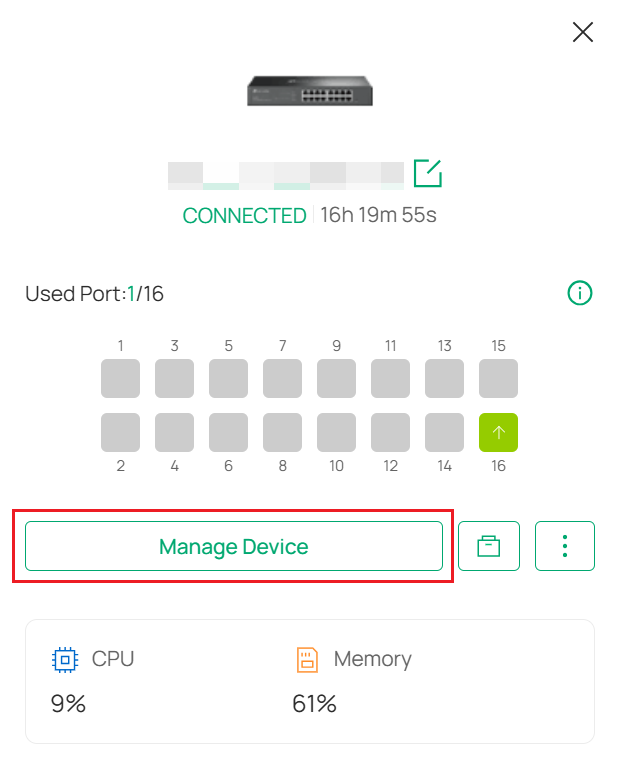
For the switch, click Manage Device to enter the configuration page.
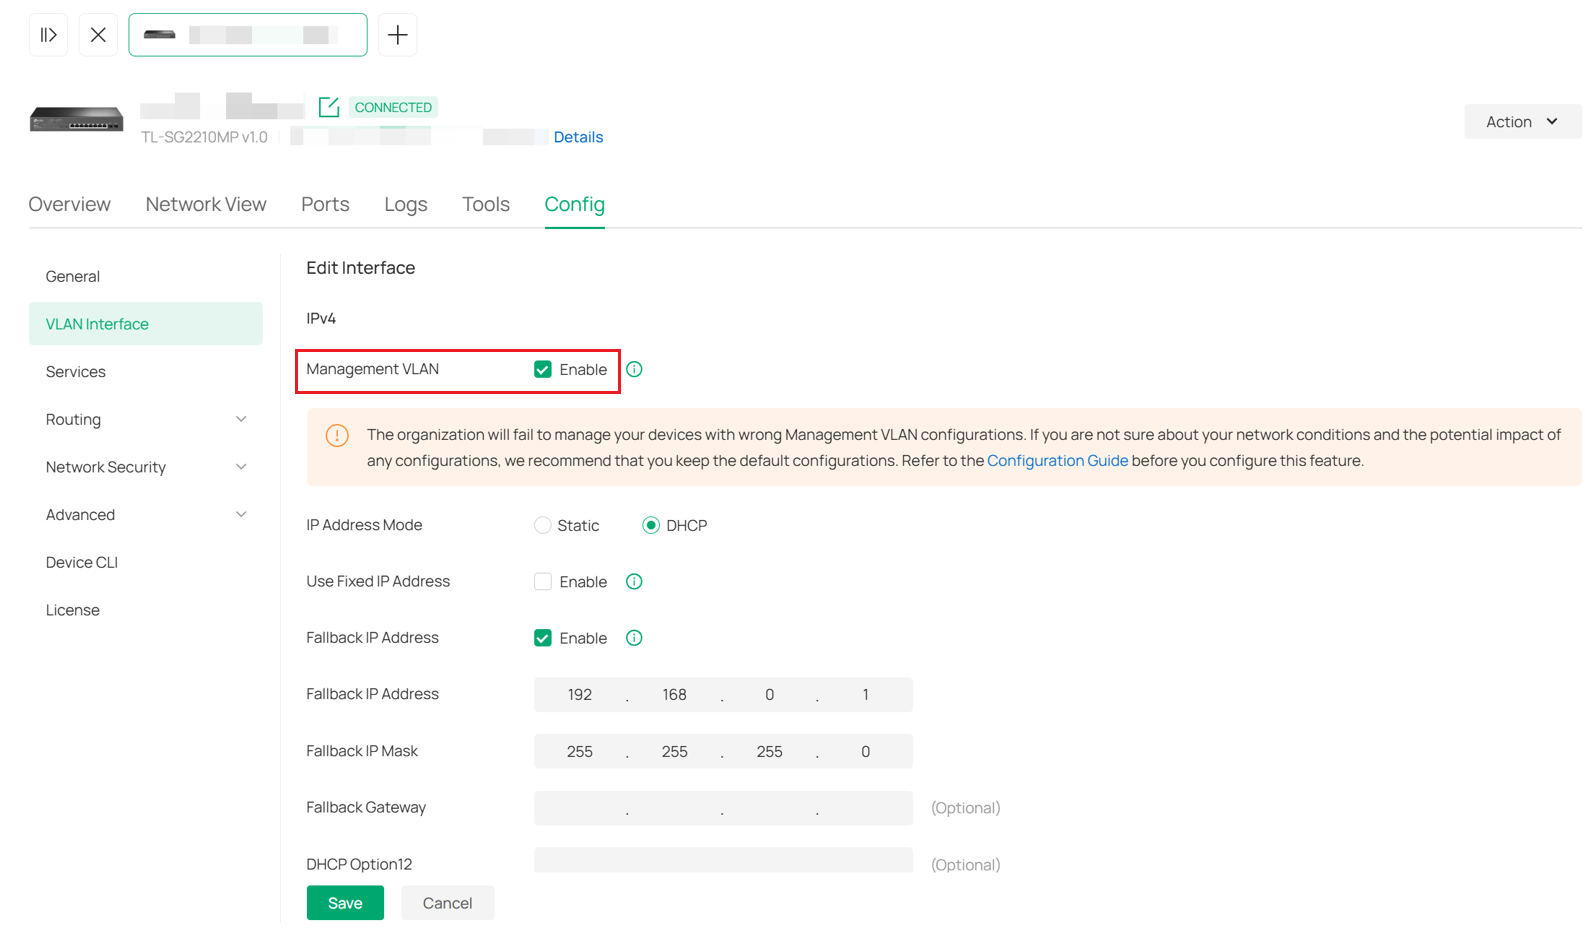
Go to Config > VLAN Interface. Enable MGMT VLAN, and click the action icon to configure it.
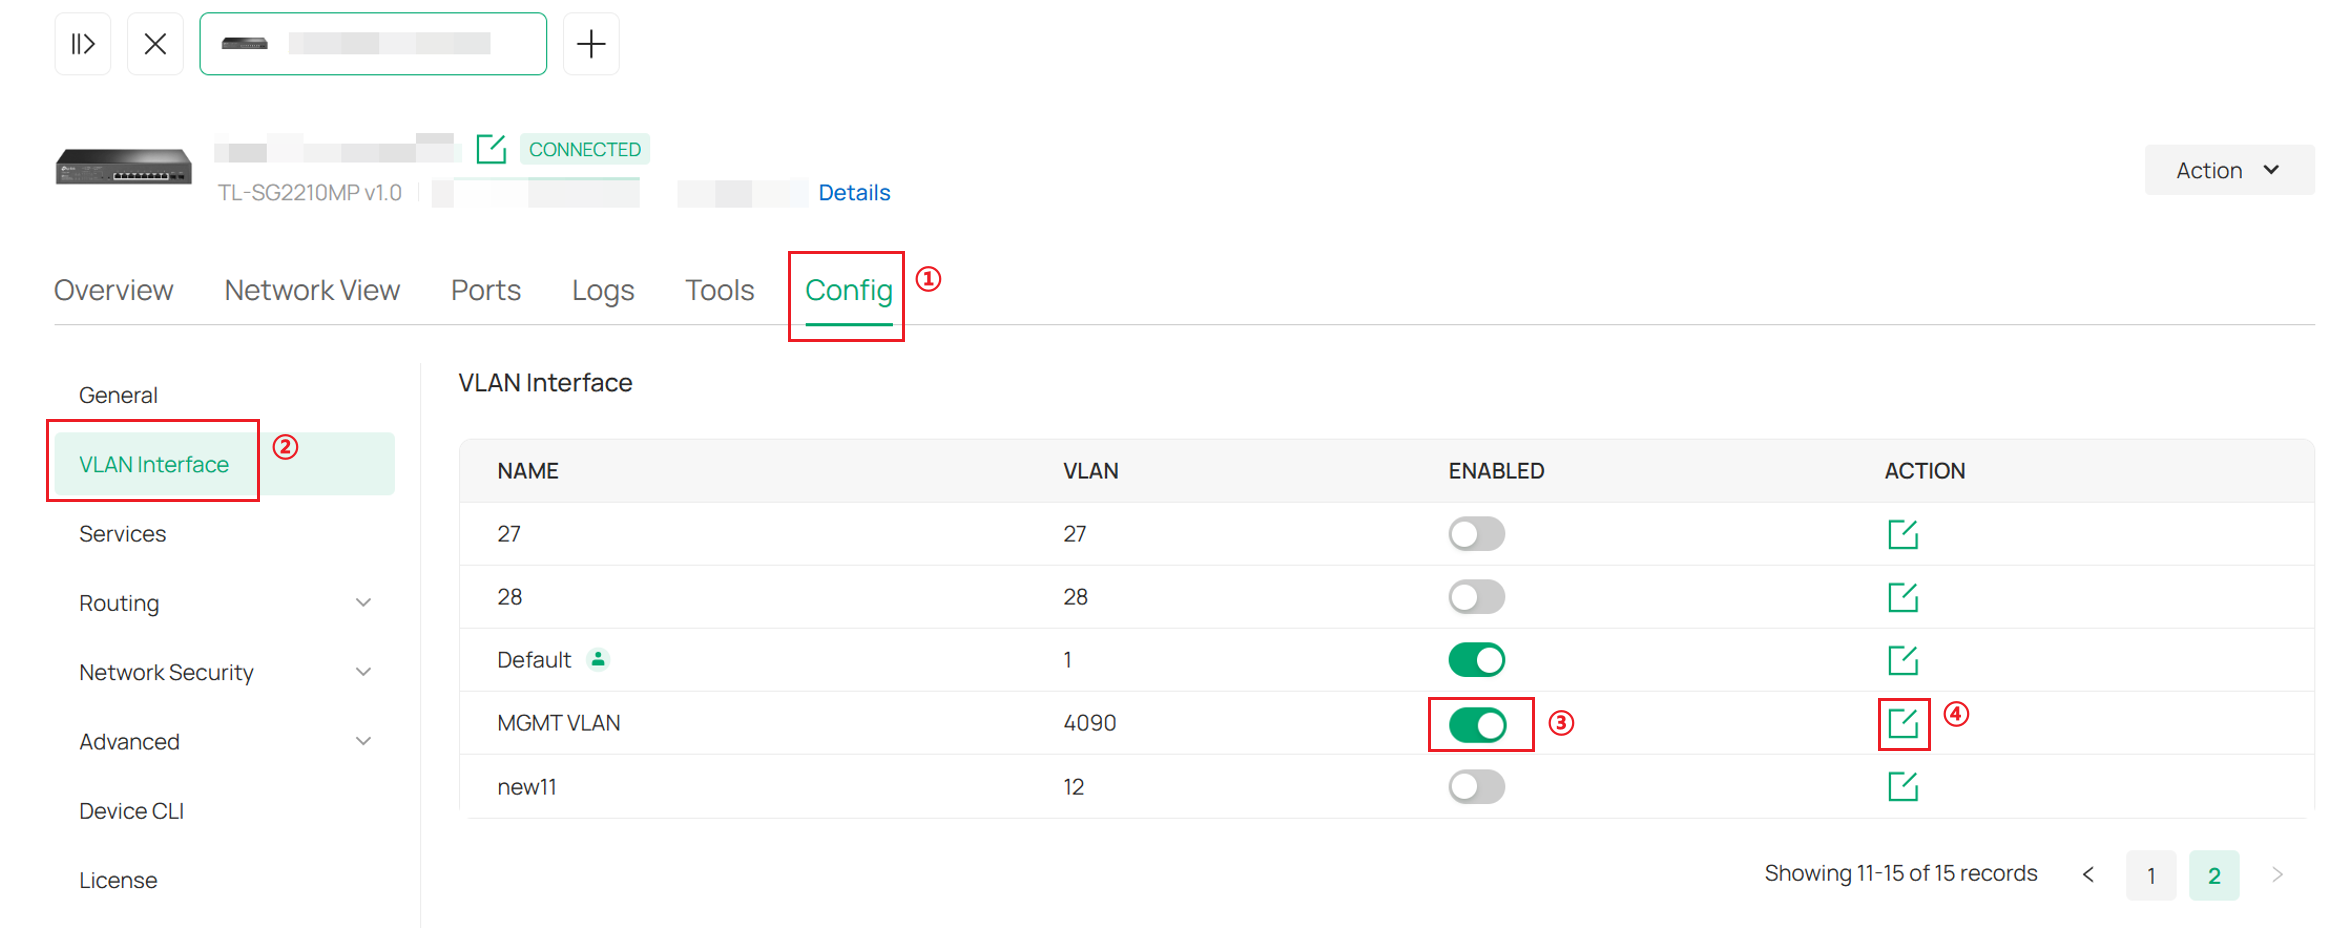
Enable Management VLAN.
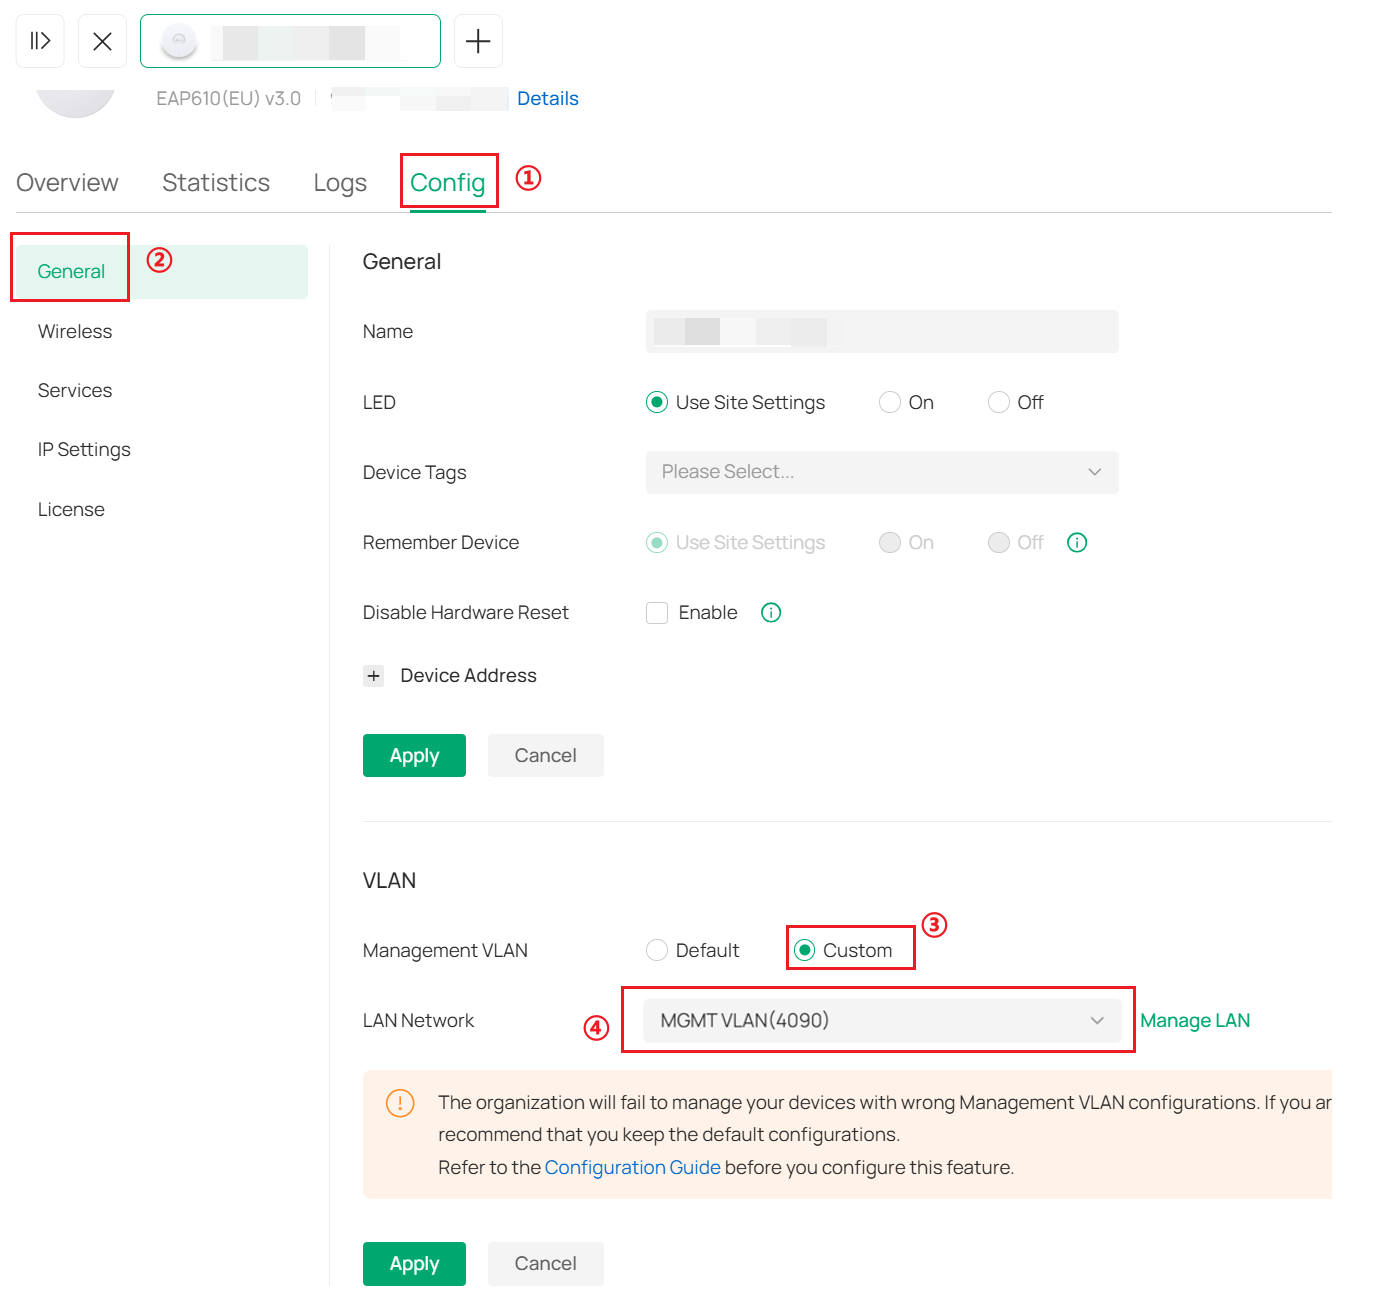
For AP, go to Config > General. Then change Management VLAN to Custom and choose MGMT VLAN.