


Contents
Configuration for DHCP Snooping
Introduction
DHCP Snooping and Dynamic ARP Inspection (DAI) are essential Layer 2 security features designed to enhance network protection. Both features are parts of IP-MAC-Port Binding (IMPB) on Omada switches.
For DHCP Snooping, the feature dynamically builds and maintains an IP-MAC-Port binding table by snooping legitimate DHCP transactions. This table records valid associations between a client's IP address, MAC address, connected port, VLAN, and lease duration.
On the port with DHCP Snooping enabled, it will record the DHCP client information and drop any DHCP server response packet sent by the client connected on this port.
For DAI, it protects against ARP spoofing (also known as ARP poisoning), a common man-in-the-middle attack where an attacker sends falsified ARP messages to associate their MAC address with another host's IP. On the switch port with DAI enabled, the port will check each ARP packet and see if the MAC addresses are matched with correct IP addresses. The source of validation is the IMPB mentioned above. If the network is DHCP engaged, DHCP Snooping is often used together to dynamically snoop and form the binding table. If the network involves static IP addresses only, it’s recommended to disable the feature where DHCP Snooping entries taking effect on the validation of DAI and manually add the binding entries and make DAI work. If a packet cannot match any entry on the port with DAI enabled, it will be recognized as illegal traffic and dropped.
Requirements
- Omada Access, Access Plus, Access Pro, Access Max and Aggregation Switches with latest firmware
- Omada Controller V6.1 and above
Configuration
In the following section, we will give simple steps guiding the configuration of DHCP Snooping and DAI on Omada Switches when adopted by Omada Controller.
Before configuring, make sure the switches are having the latest firmware installed and the Omada Controller is on version 6.1 and above, adopt the switch on controller first.
Configuration for DHCP Snooping
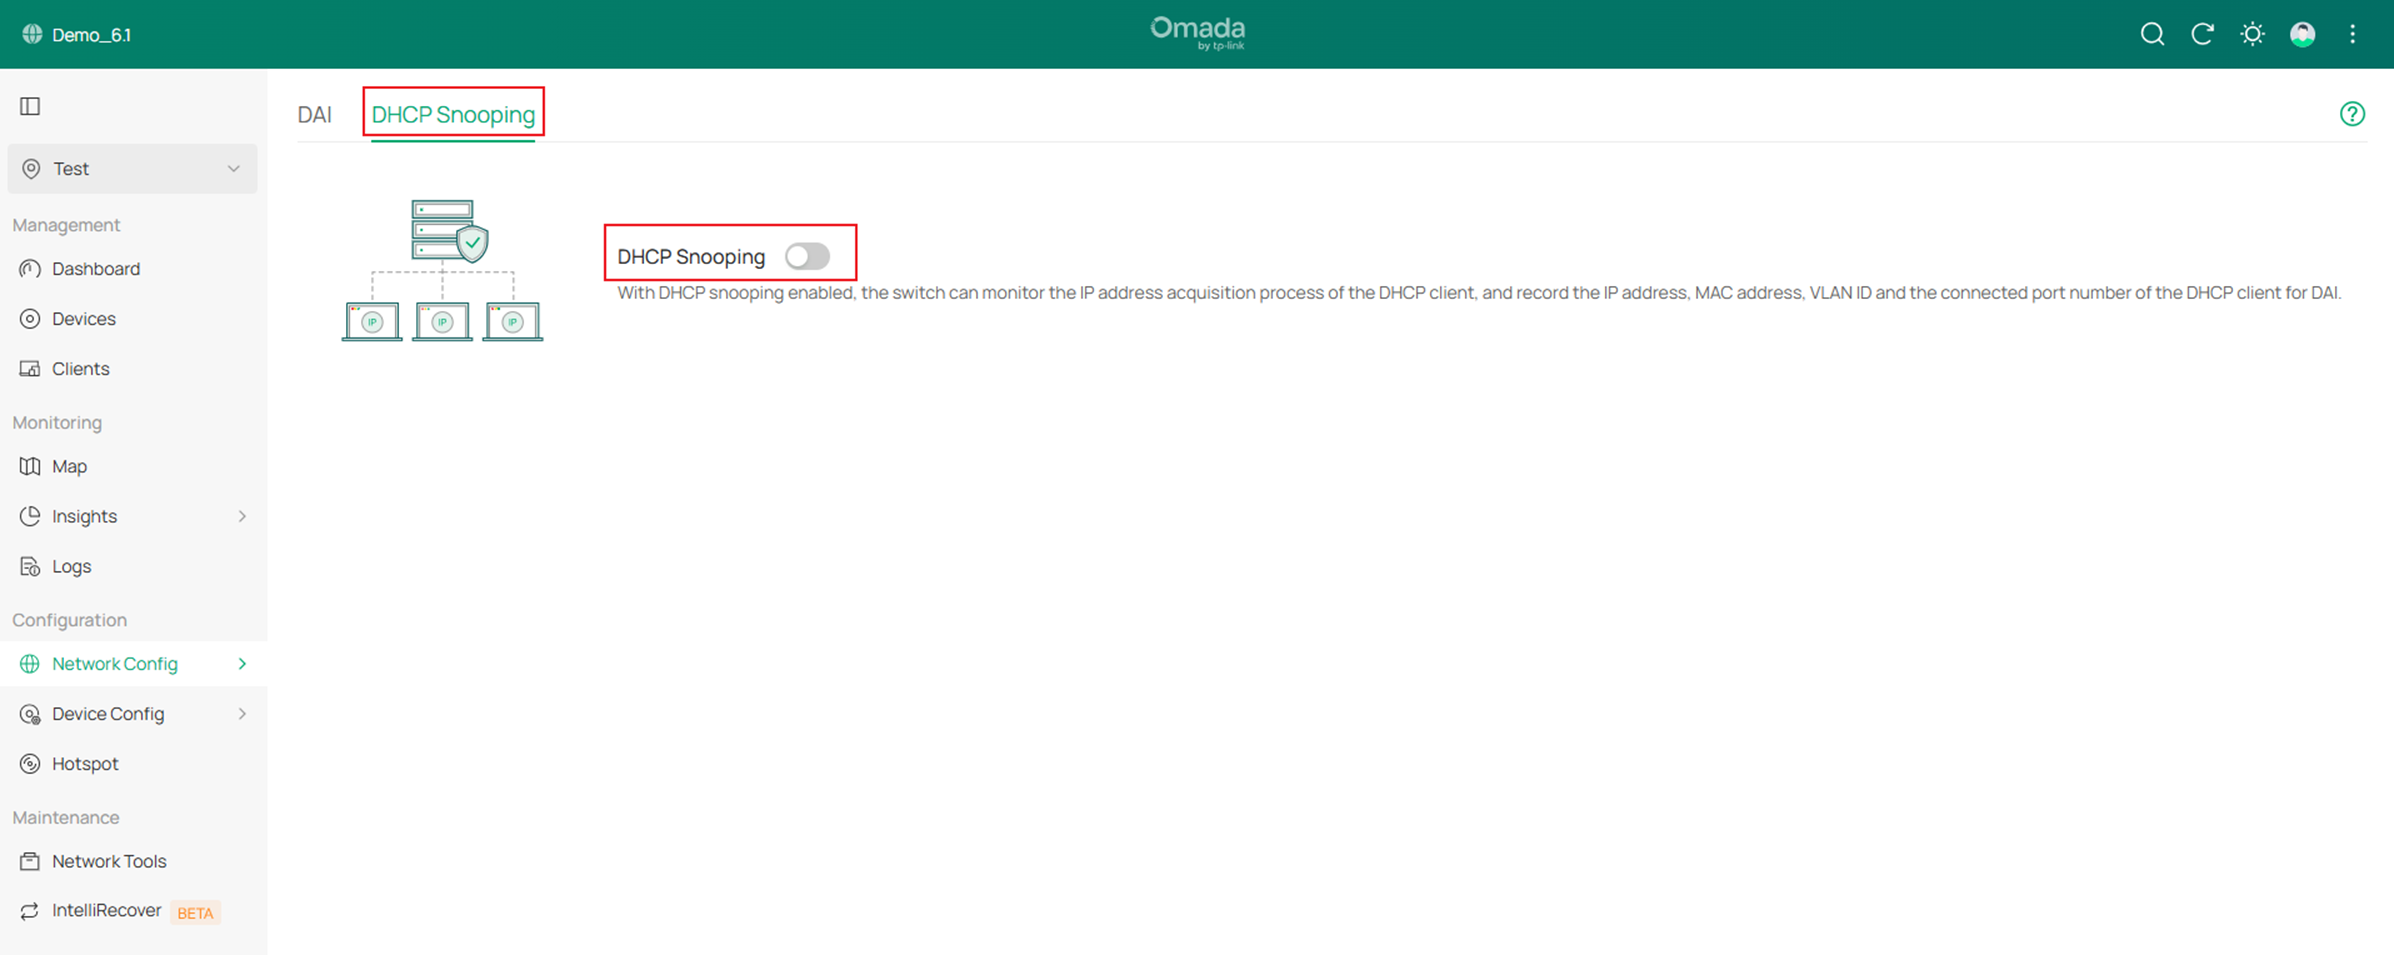
Step 1. Go to Network Config -> Security -> IMPB.
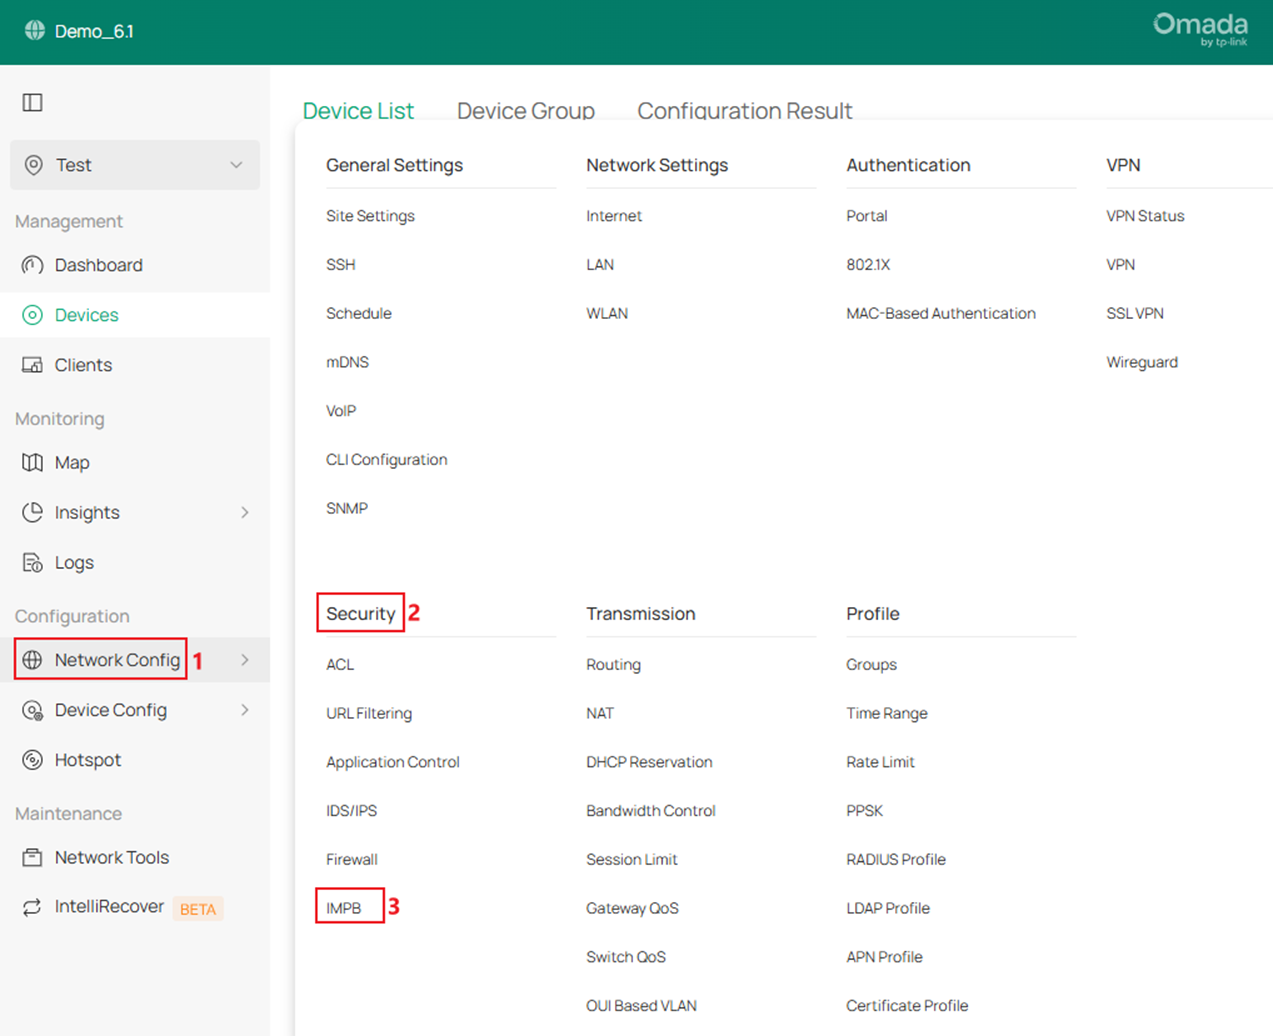
Go to DHCP Snooping, tick to enable DHCP Snooping globally.
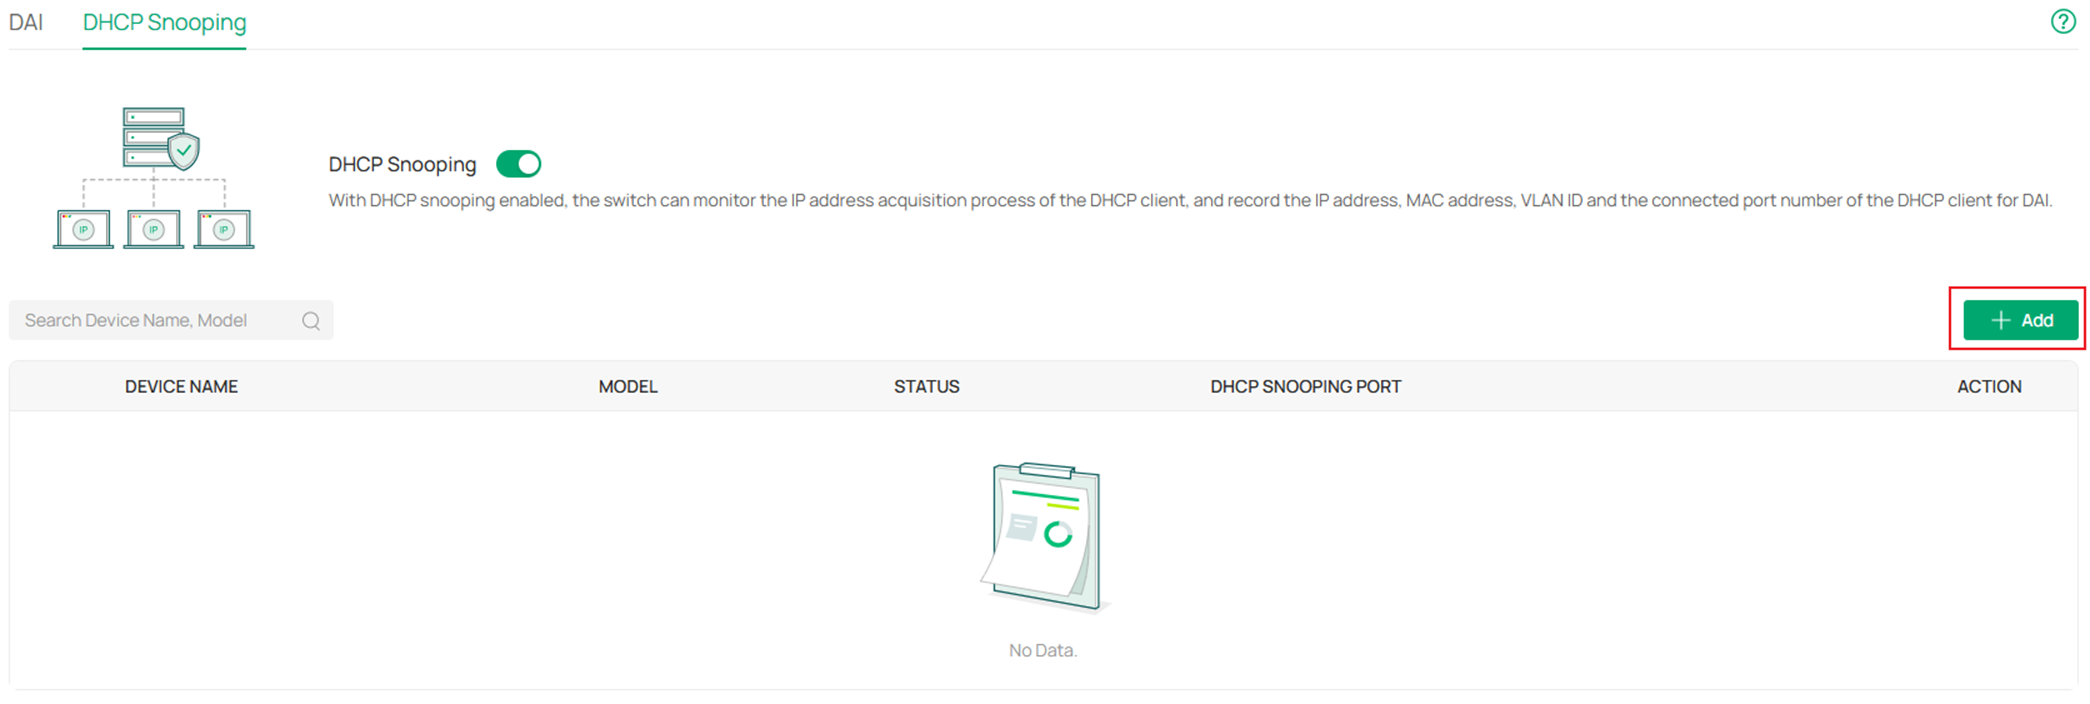
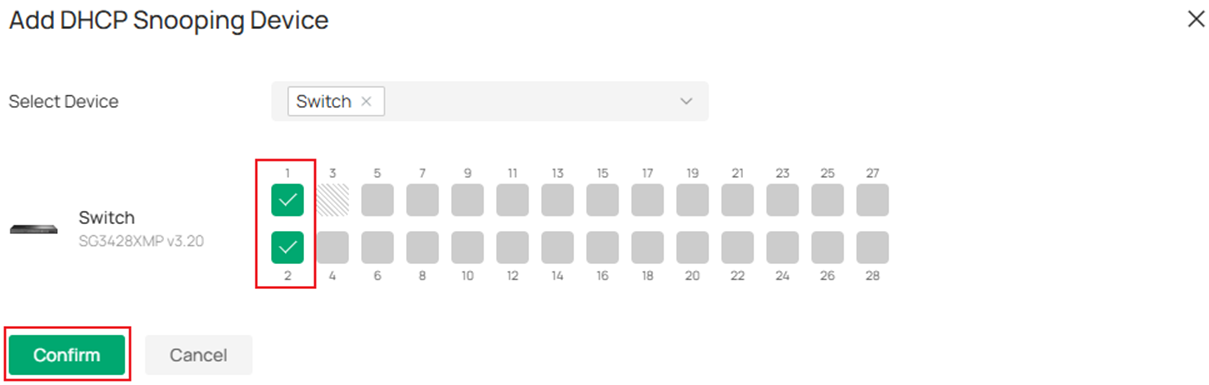
Step 2. After enabling DHCP Snooping globally, click Add button to choose a switch to enable DHCP Snooping on.
In the Add DHCP Snooping Device page, expand the Select Device scroll down page and select the switches you wish to enable DHCP Snooping on.
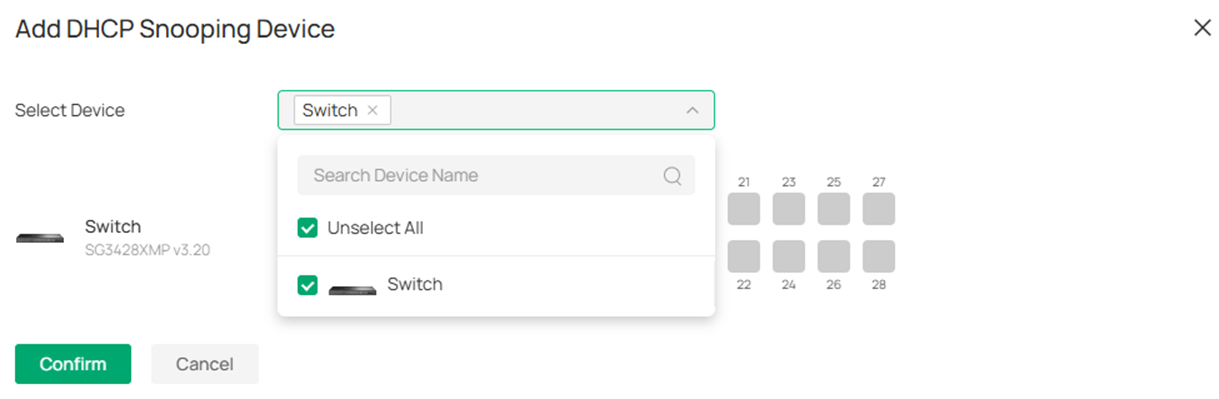
Choose the ports you wish to enable DHCP Snooping on, by choosing a port, the DHCP packets will be snooped to form IMPB entries, and the DHCP server response packets sent from the client connected will be dropped. To ensure that the switch itself could obtain IP address via DHCP, the cascade port cannot be selected. Click Confirm to finish the configuration.
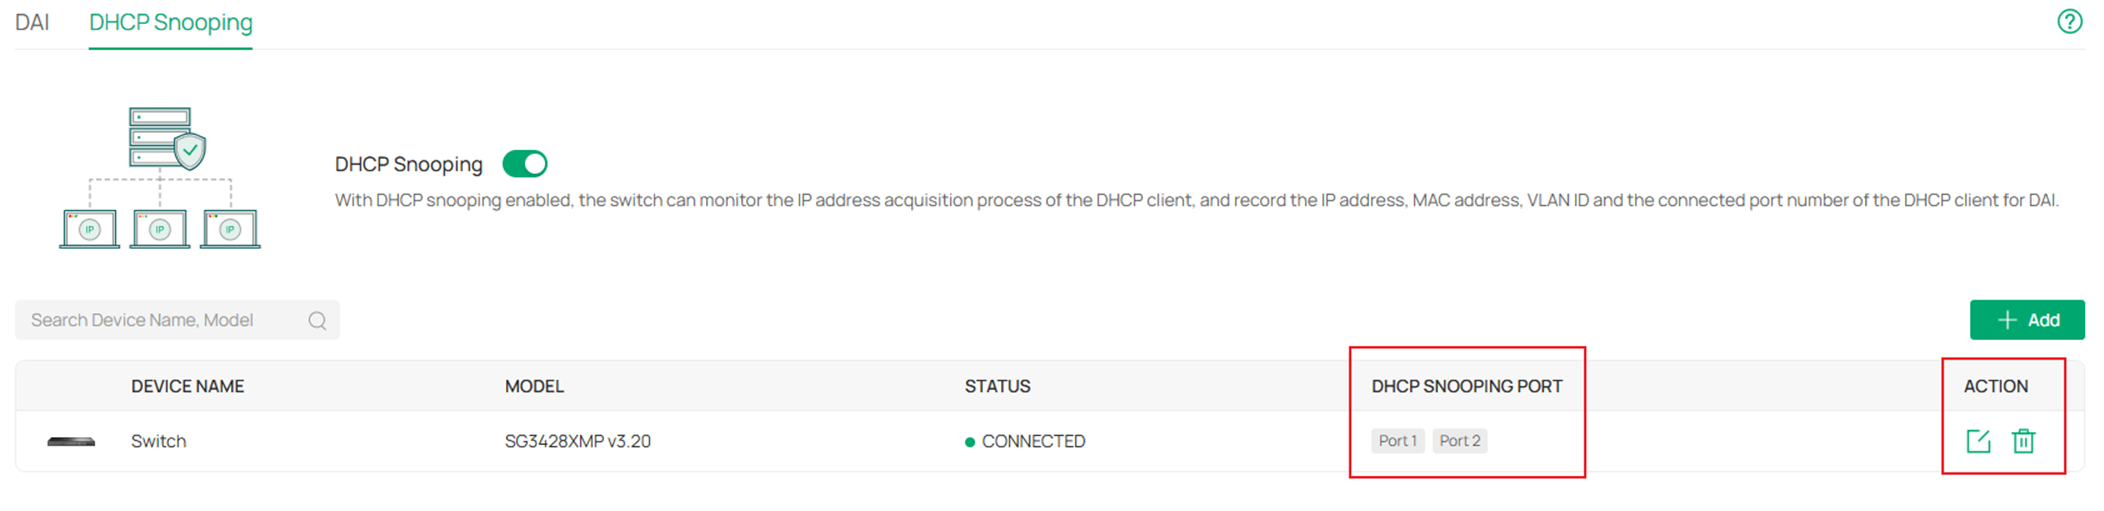
Here we have finished the configuration of DHCP Snooping, the current configuration of DHCP Snooping could be checked and edited in the same menu.
Configuration for DAI
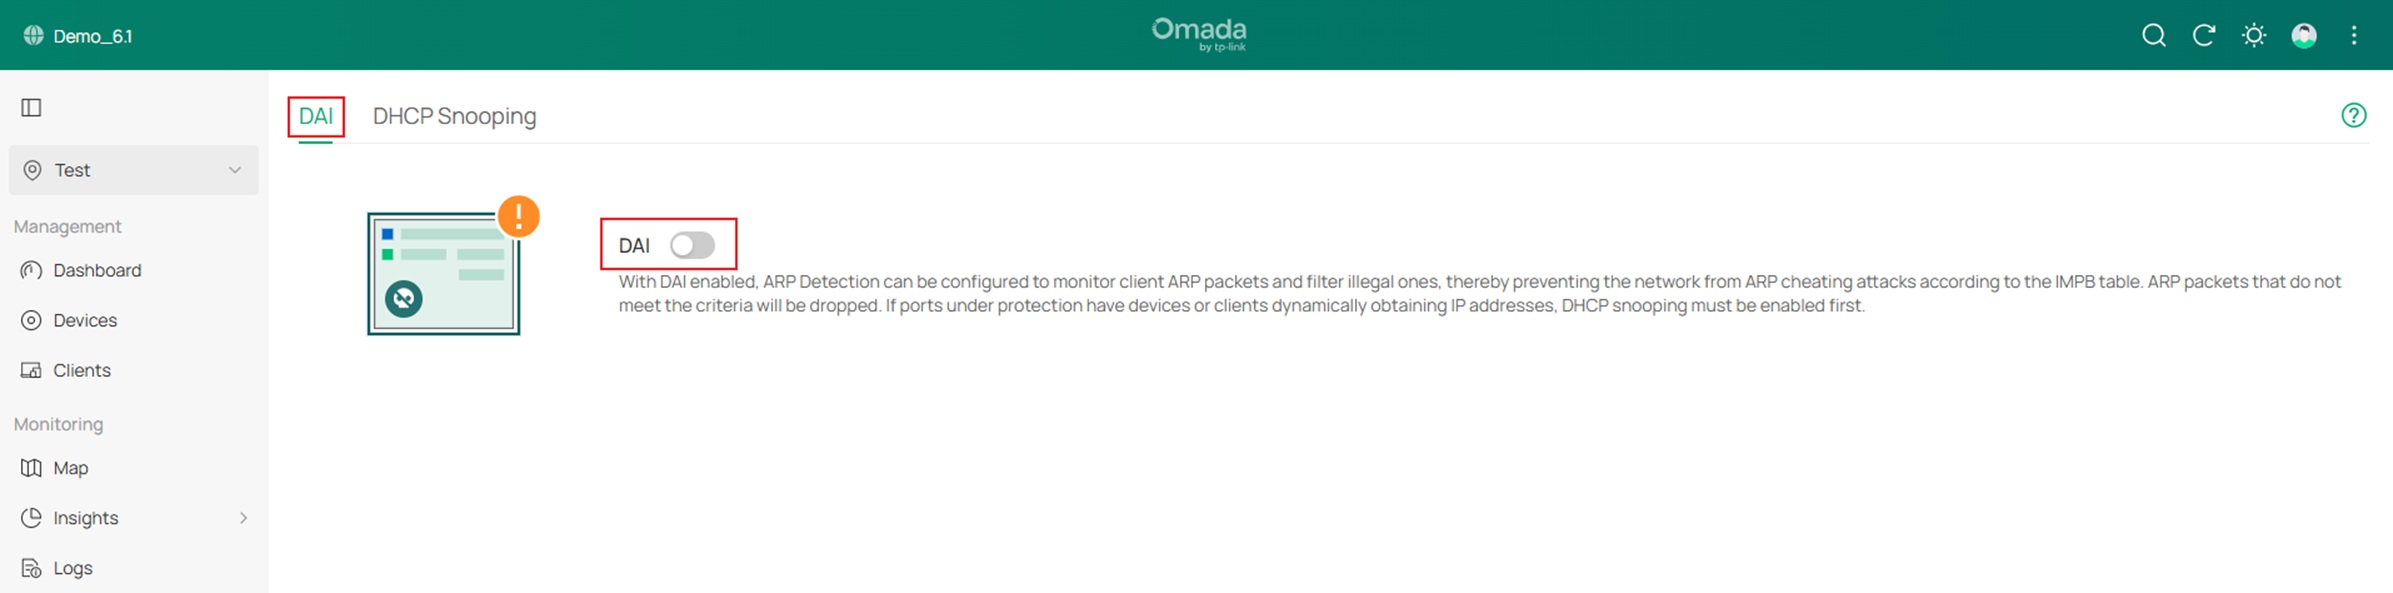
Step 1. Go to Network Config -> Security -> IMPB.

Go to DAI, tick to enable DAI globally.
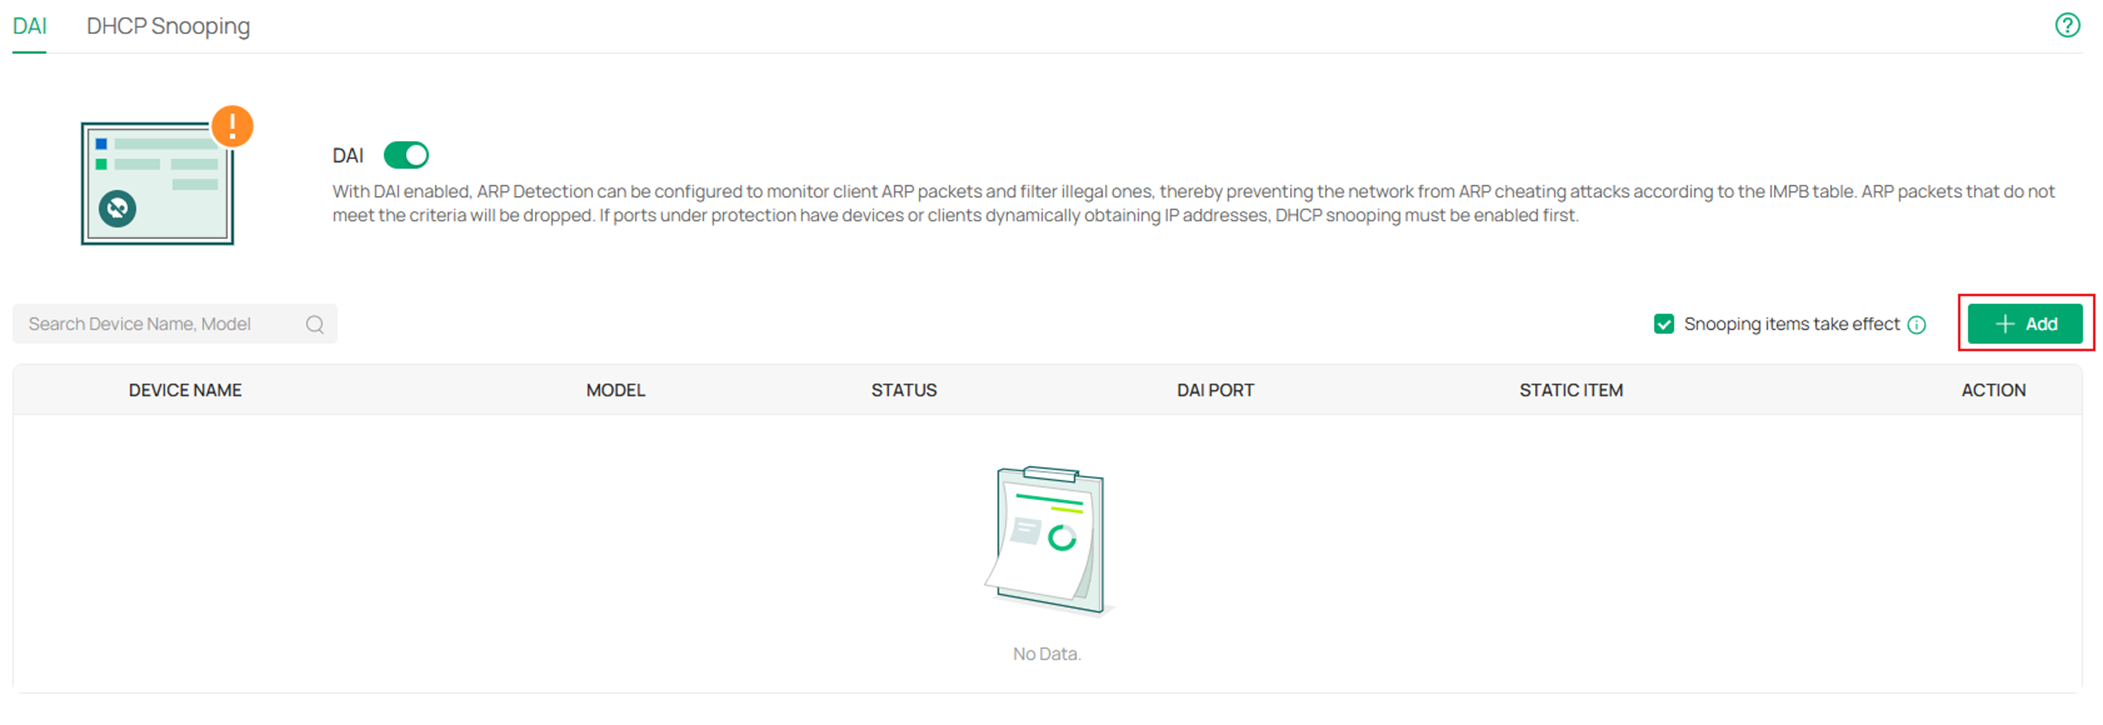
Step 2. After enabling DAI globally, click Add button to choose a switch to enable DAI on.
In the Add DAI Device & Port page, expand the Select Device scroll down page and select the switches you wish to enable DAI on.
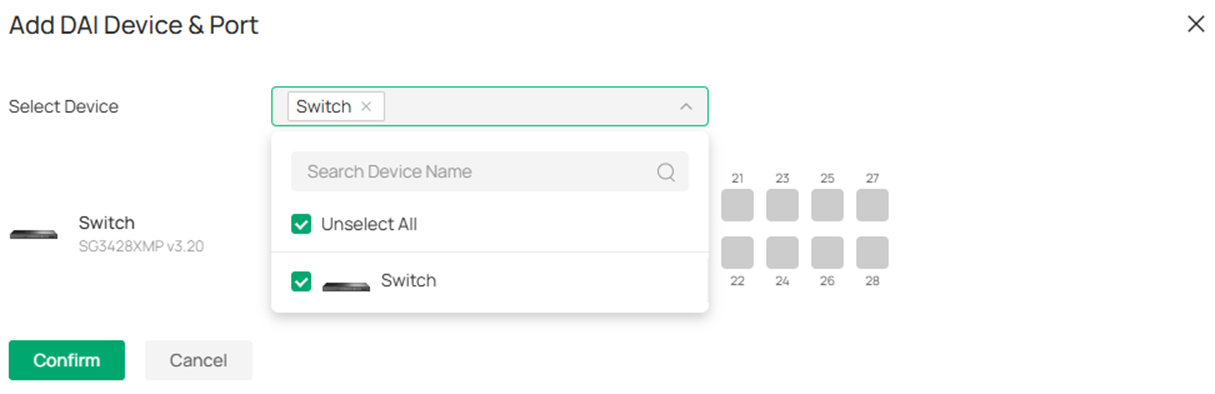
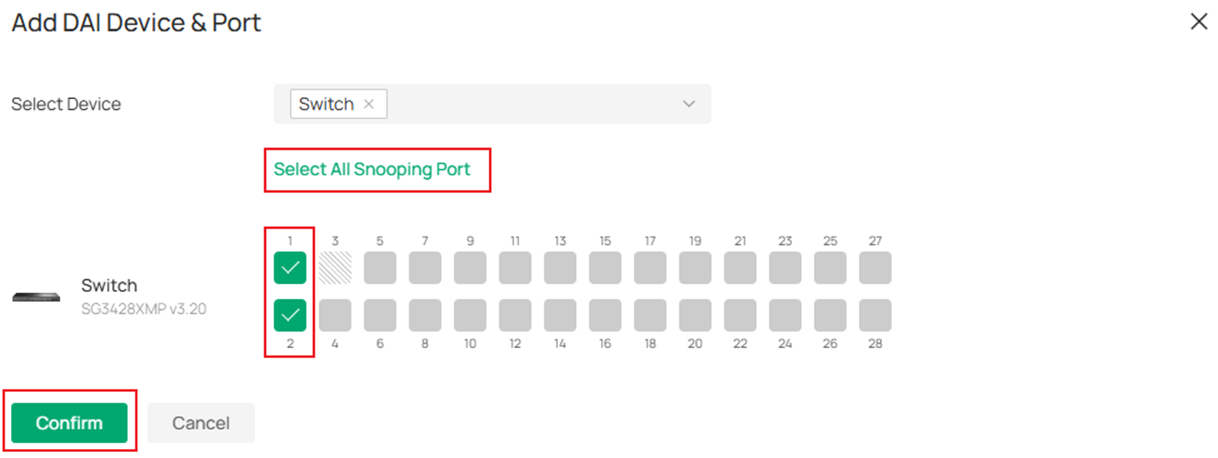
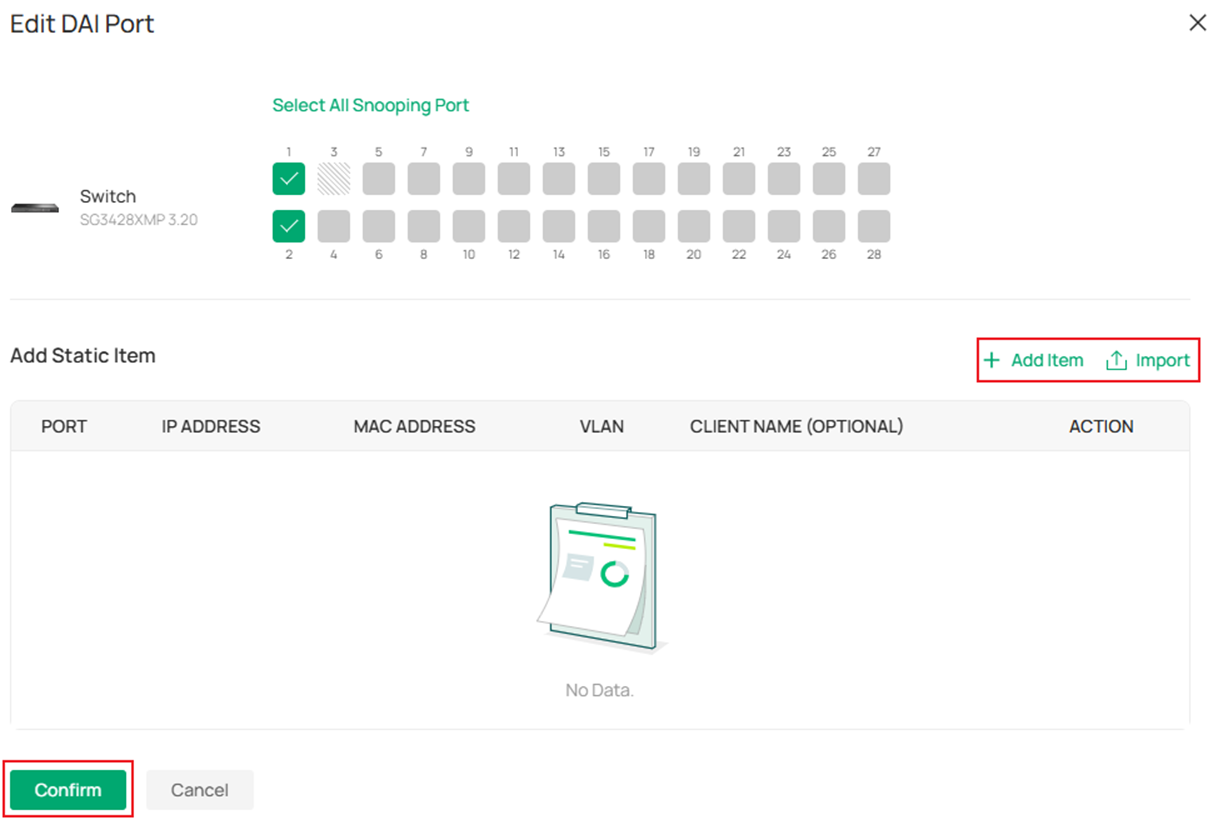
Choose the ports you wish to enable DAI on, please mind that if you have enabled DHCP Snooping on some of the ports on the same switch, you may select the same range of ports to enable DAI on by clicking Select All Snooping Port as the DHCP Snooping and DAI are often used together under DHCP network. Click Confirm to finish the configuration.
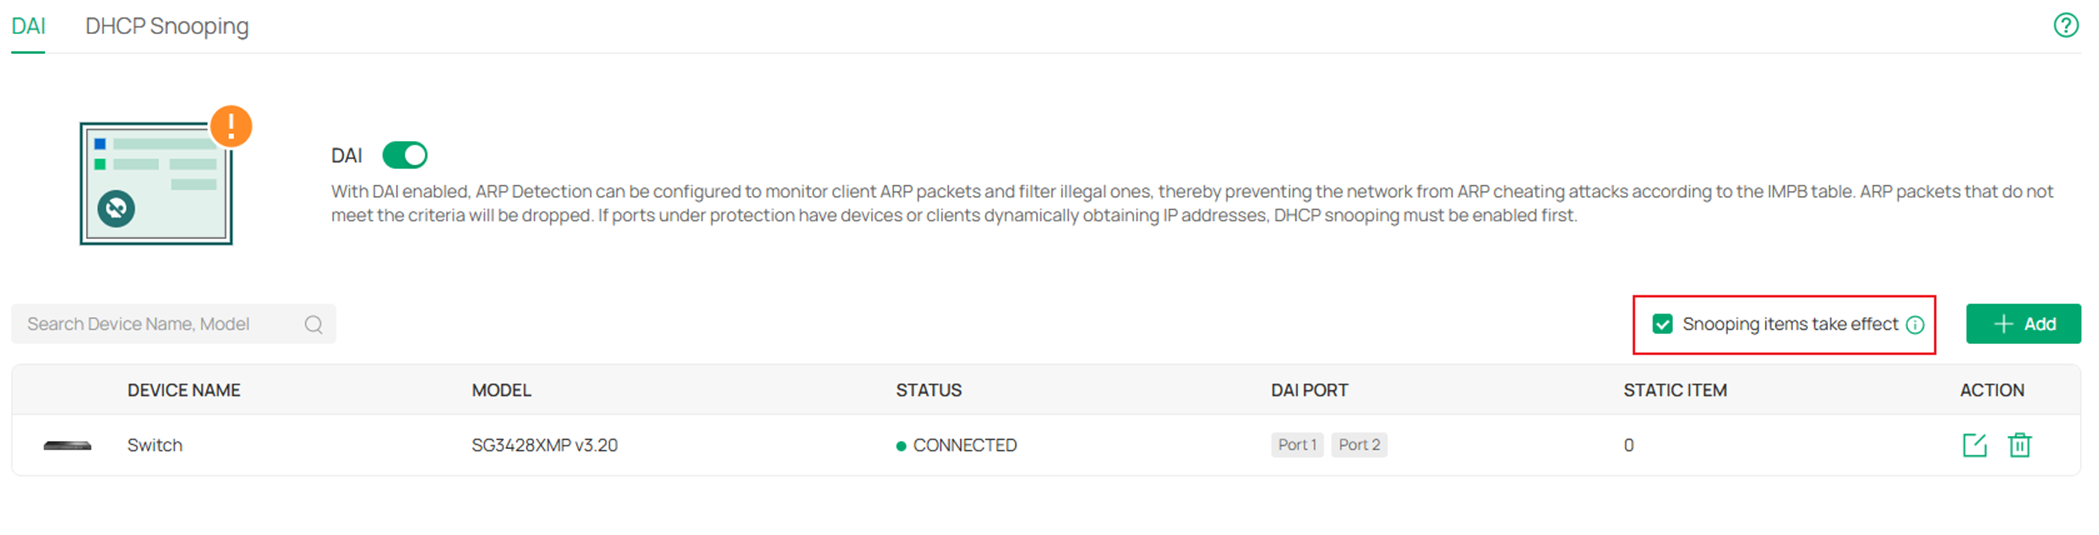
Step 3. As introduced previously, the source of validation for DAI comes from either entries created dynamically by DHCP Snooping or static entries created manually. By default, the Snooping items take effect option is enabled, this means the entries created by DHCP Snooping will be used for DAI validation. If your network is DHCP engaged, both DHCP Snooping and DAI need to be enabled on the ports and leave the Snooping items take effect option enabled to make sure the DHCP clients could access the Internet. If the network is non-DHCP, it’s recommended to disable this option to make sure the clients with illegal dynamic IP addresses could not get access to network.
Step 4. To create static entries manually, click Edit button on the device.
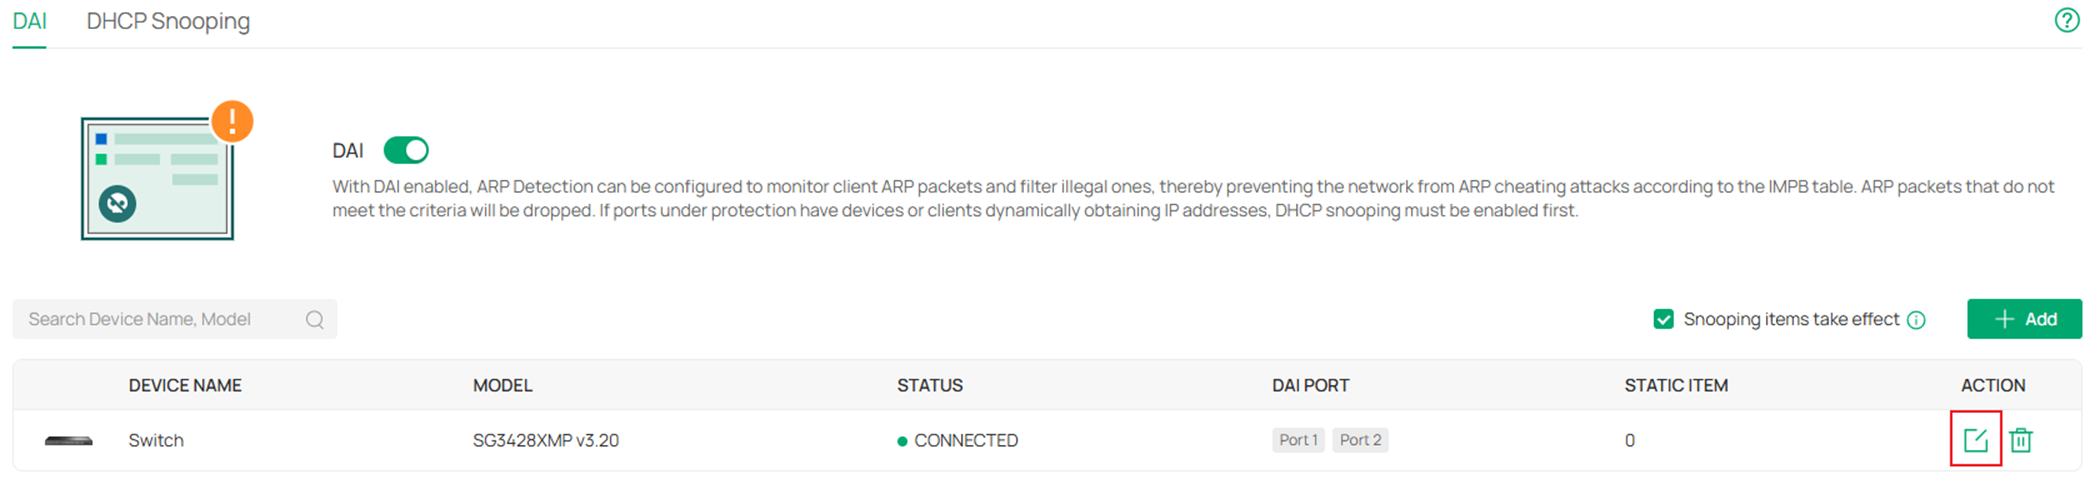
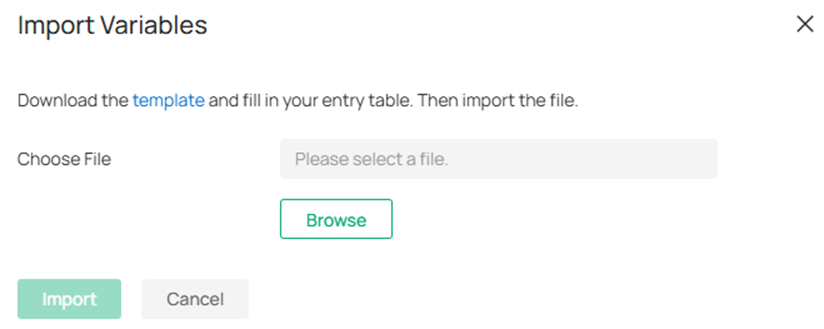
In the Edit DAI Port page, click Add Item to manually input the binding entries or click Import to batch import the entries through a template sheet. After finishing the edit, click Confirm button to take effect.

Conclusion
Here we have finished introducing what DHCP Snooping and DAI is, as well as the configuration.
Get to know more details of each function and configuration please go to Download Center to download the manual of your product.
QA
Q1: Is there a way to only snoop DHCP packets on the port but not dropping any illegal DHCP packets at the same time?
A1: No, once a port is ticked in the DHCP Snooping option, it will snoop to form the IMPB entries and drop illegal DHCP packets to prevent rogue DHCP server at the same time, these two features could not operate separately.
