


Contents
SSID VLAN Override Configuration
Introduction
Omada APs support SSID VLAN configuration to effectively control the broadcast domain in the wireless network and to meet the requirements of creating virtual workgroups flexibly in business networks. Currently, the Omada Controller supports two ways of configuration for SSID VLAN: SSID VLAN and SSID VLAN Override.
- SSID VLAN: This configuration applies to all Omada APs in the same WLAN Group.
- SSID VLAN Override: This is a private configuration for the Omada AP, which will override the original VLAN configuration of the SSID, and will only be effective for the specific AP.
Note: The priority of the SSID Override VLAN is higher than the SSID VLAN.
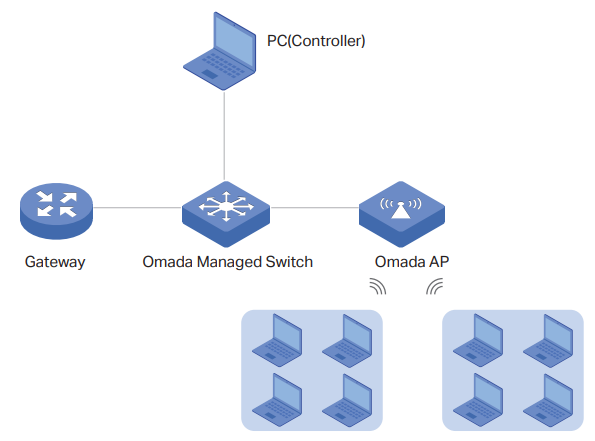
Build the network based on the following topology, in which the Gateway, the PC and the Omada AP are connected to different ports of the Omada Switch. The Omada Software Controller is running on the PC. Configure the Gateway according to your actual needs. If multiple VLAN interfaces have been configured, clients in an SSID VLAN can communicate with those in another VLAN through Layer 3 routing; otherwise, clients in different SSID VLANs cannot communicate with each other.
Note: The Omada Controllers of different versions offer different ways of SSID VLAN configuration. The Omada Controllers below version 5.14.0 only support entering the VLAN ID directly, while version 5.14.10 and above also support selecting a network to configure the SSID VLAN. The following configuration steps will take the Omada Controller v6.1 as an example.
Requirements
- Omada Controller (Software Controller / Hardware Controller / Cloud-Based Controller v6 and above)
- Omada Managed Switch
- Omada AP
SSID VLAN Configuration
Step 1. Build the network topology, log in to the Omada Controller, and adopt the devices.
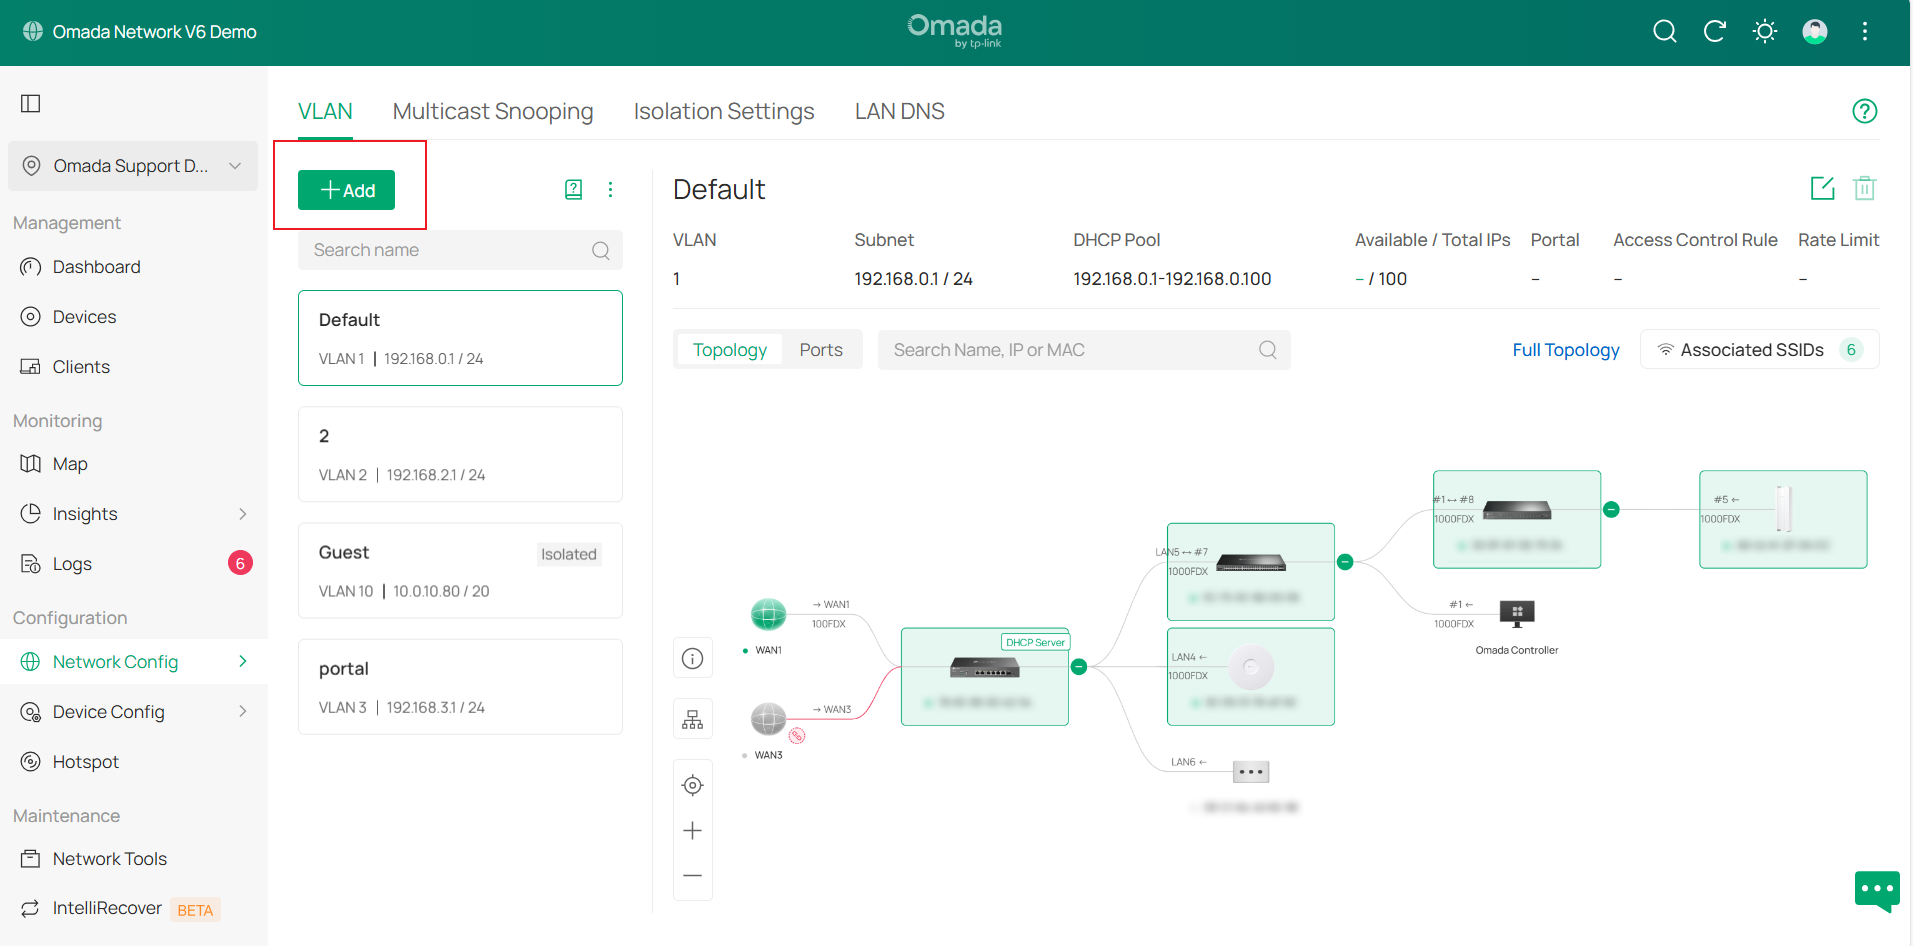
Step 2. Go to Network Config > Network settings > LAN > VLAN. Here, it displays all the Network entries. Click the Add button to create a new network.
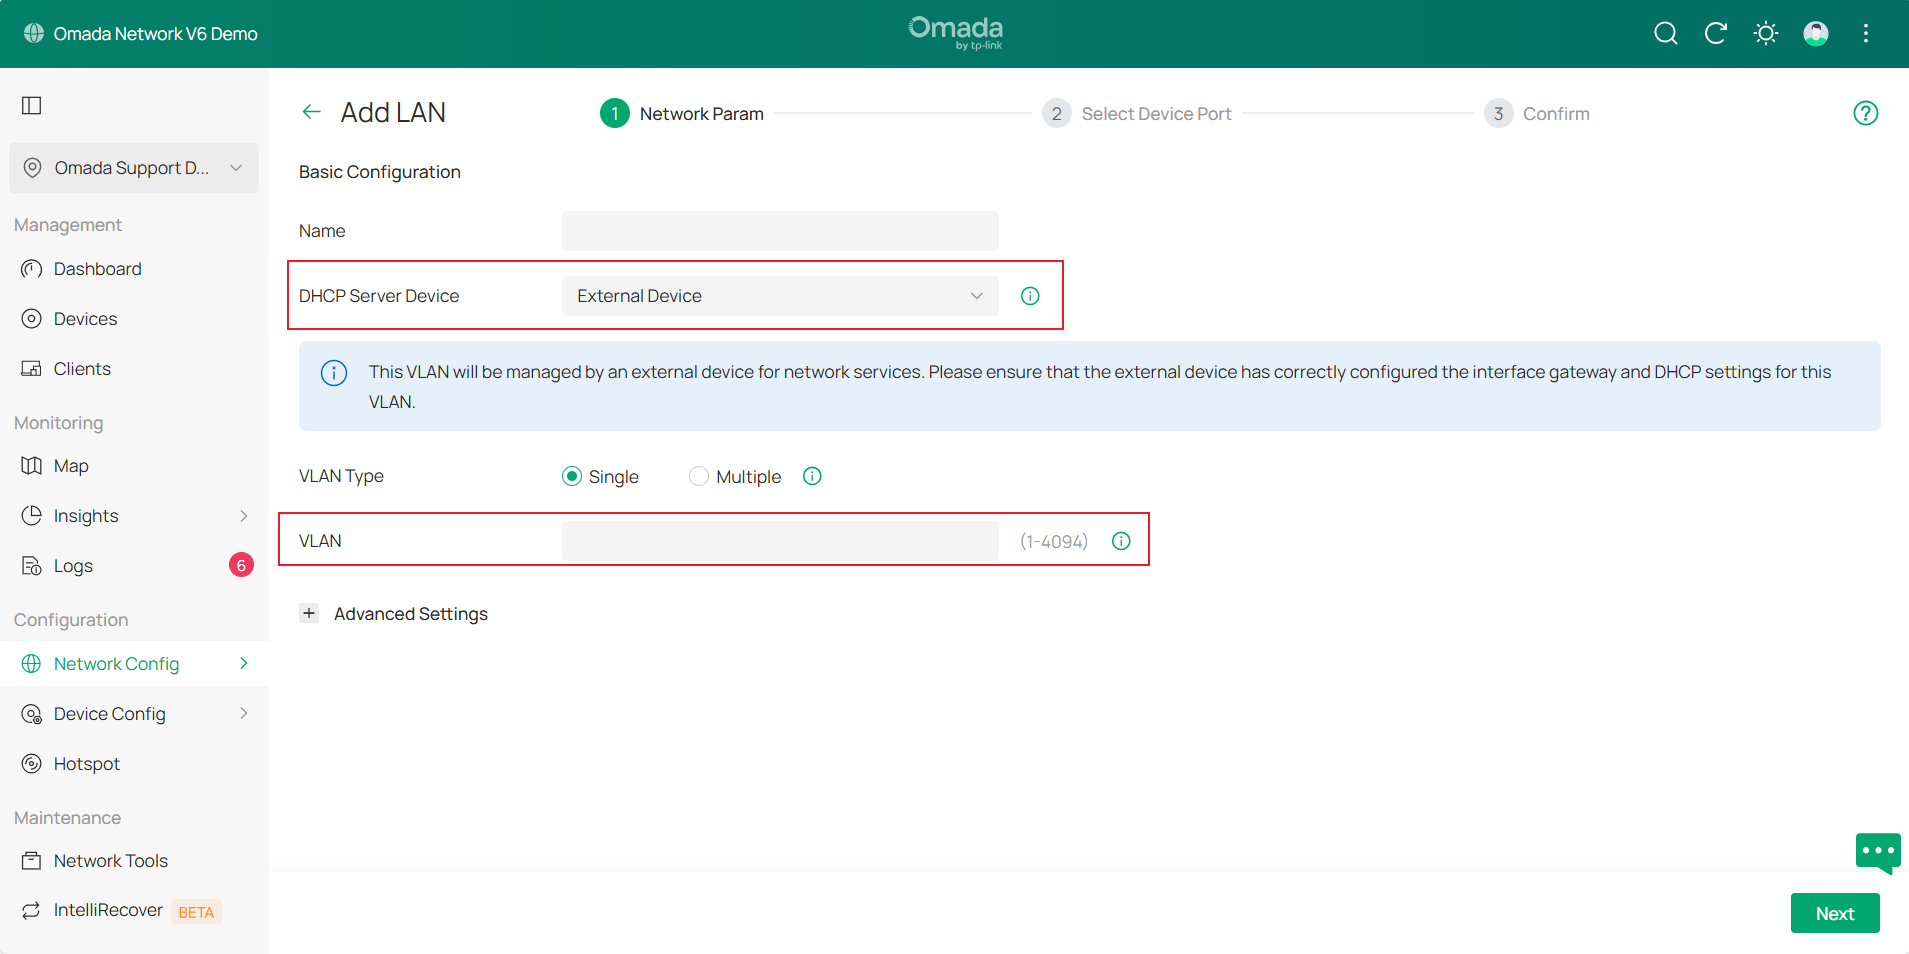
Step 3. Specify the name of the network. Select the External device as the DHCP Server Device and enter the VLAN ID. Then click the Next button.
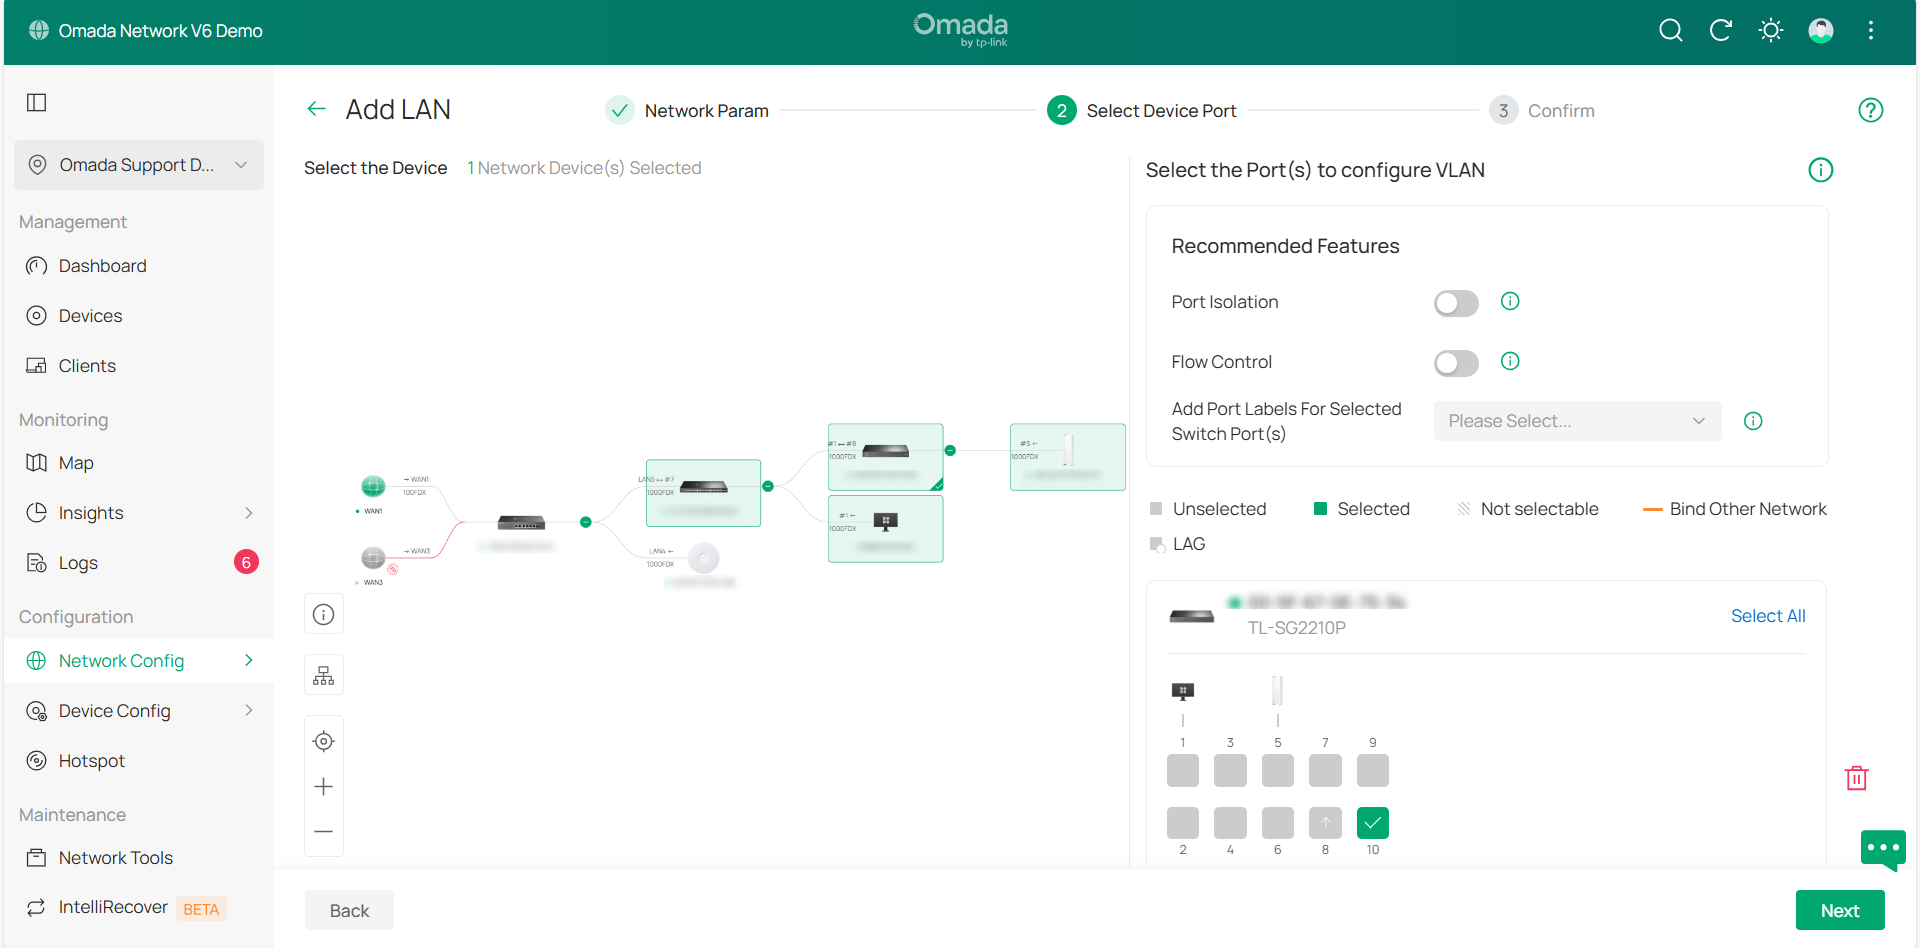
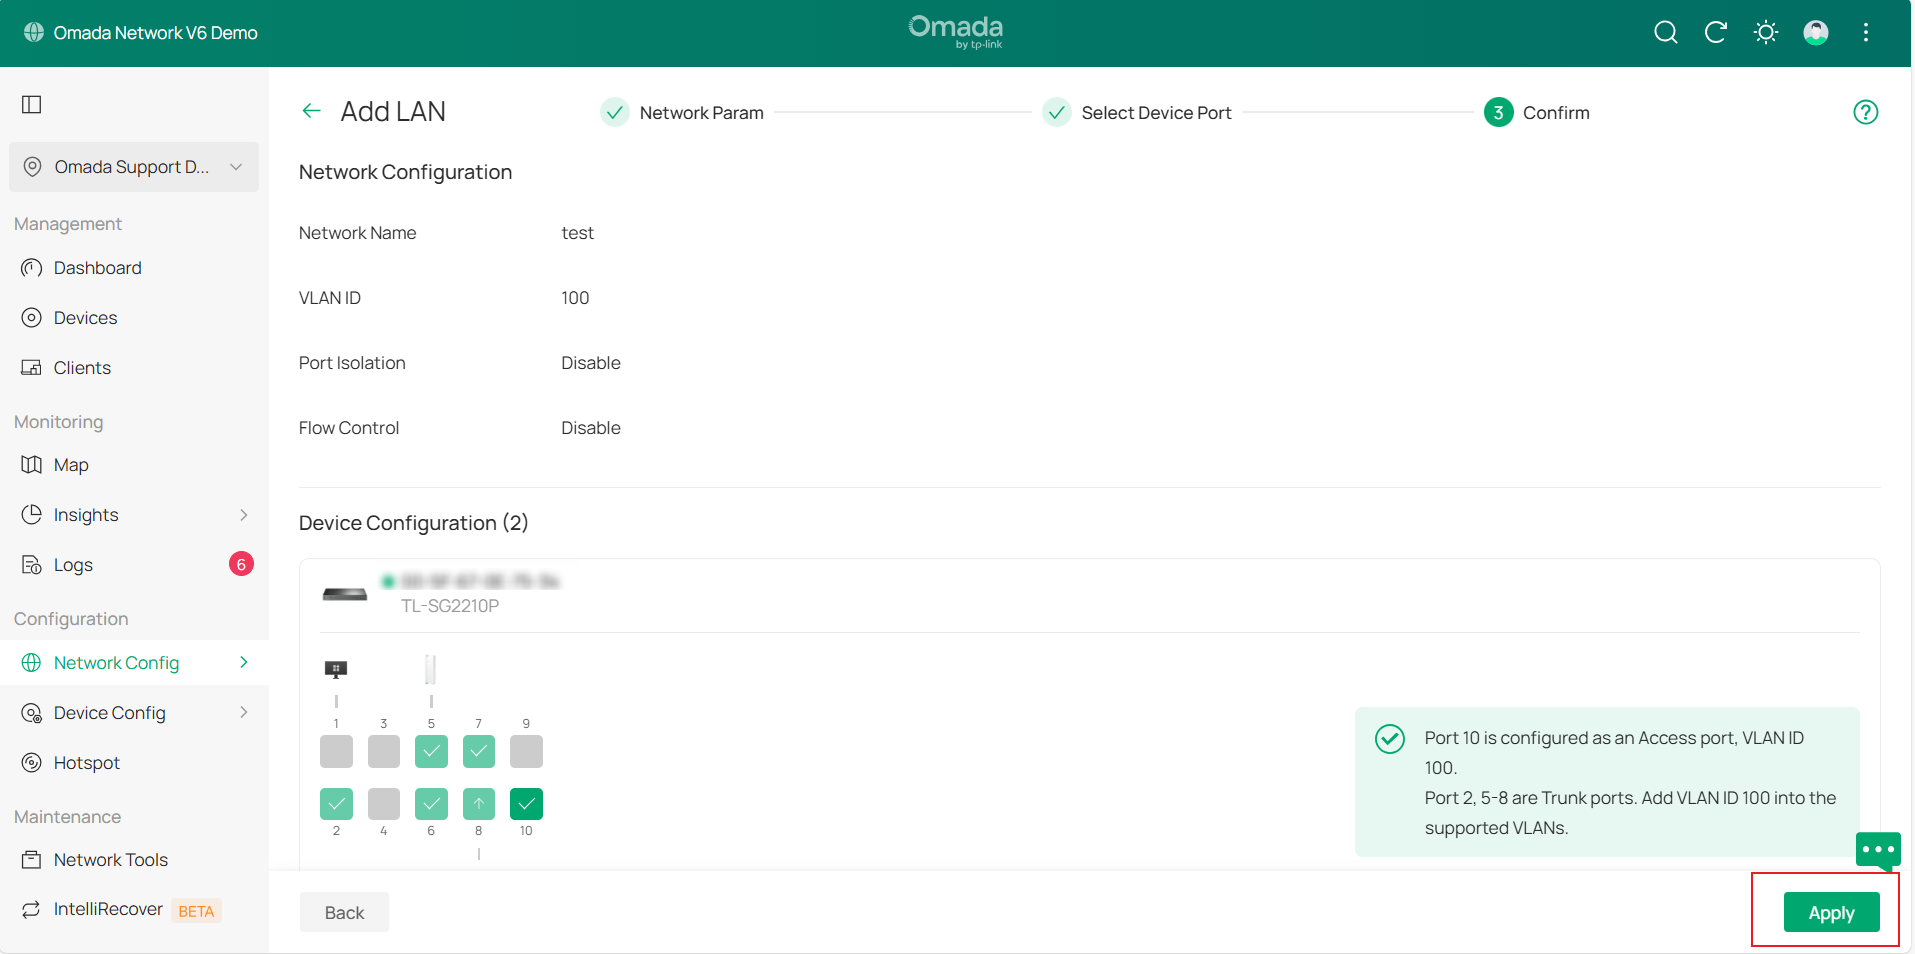
Step 4. Select the device and configure VLAN on the corresponding port. Click Next and verify the information. Once confirmed, click Apply to save the settings.
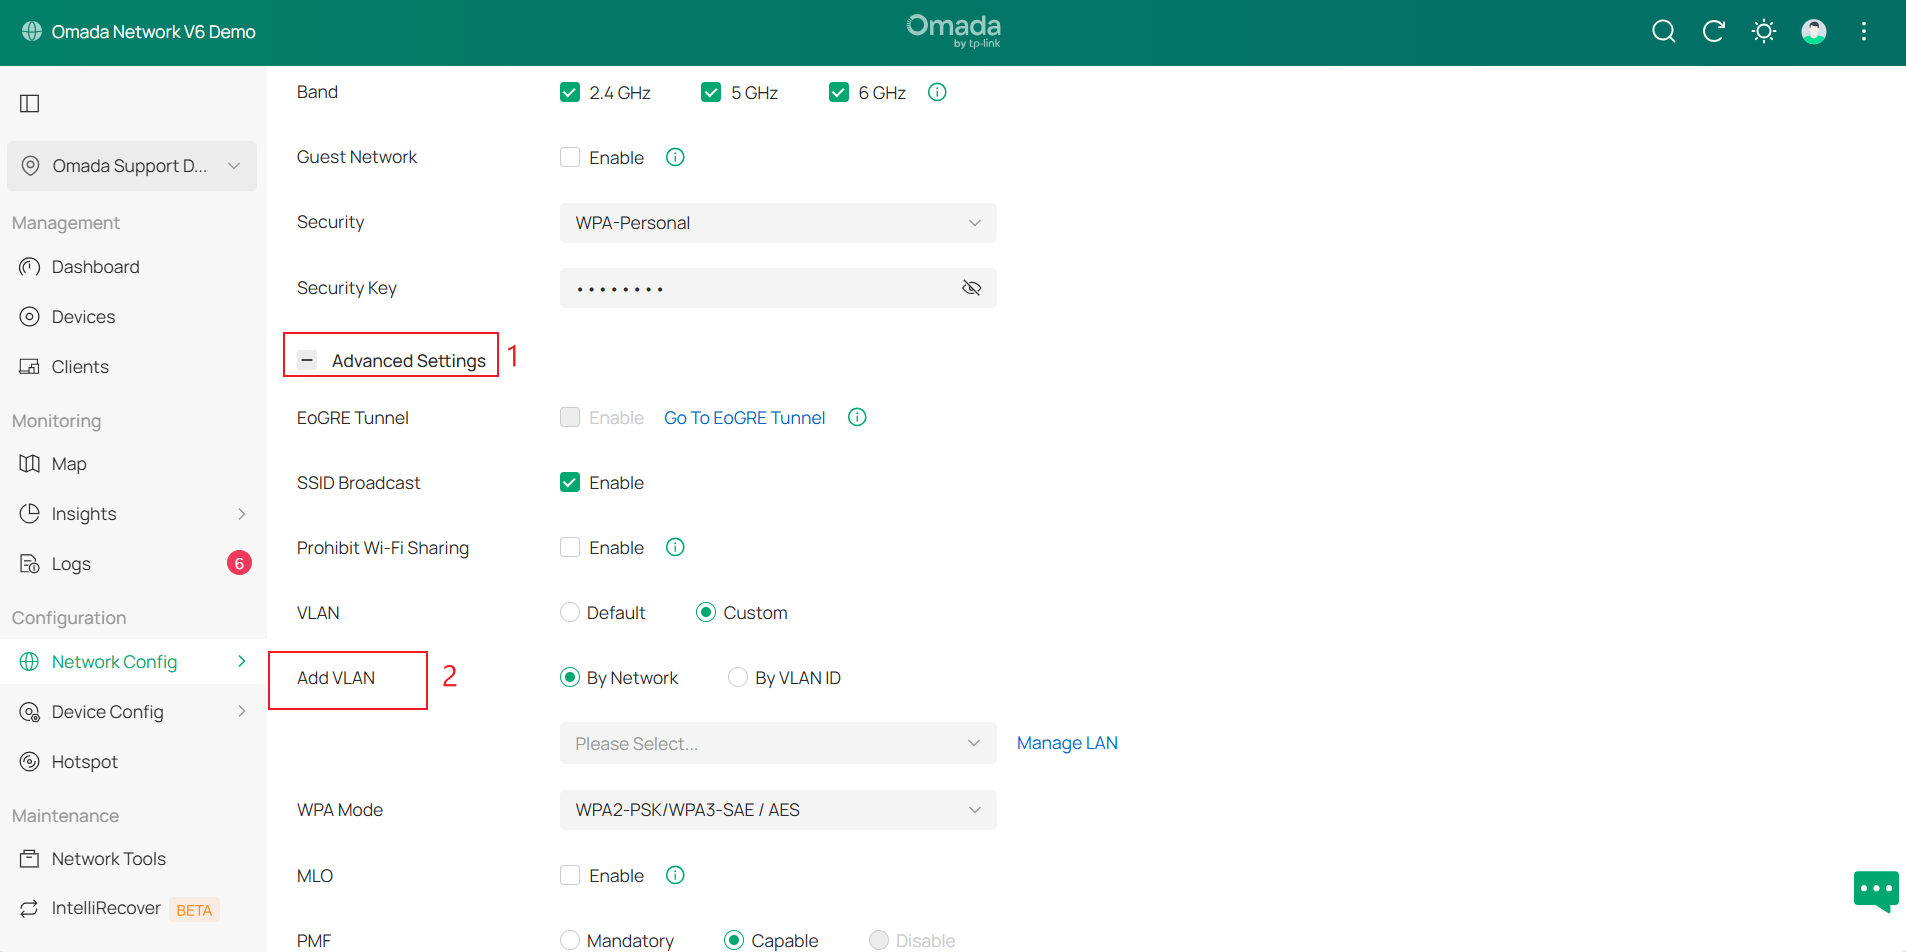
Step 5. Go to Network Config > Network settings > WLAN > SSID > Advanced Settings and find the VLAN-related settings. VLAN is disabled and displayed as Default. Select Custom to enable the function. Here are two ways to configure VLAN: By Network and By VLAN ID.
- By Network: Select a network created in Step 3. By selecting a network, you can configure the same VLAN for different SSIDs easily.
- By VLAN ID: Set a VLAN ID, which will only take effect in the current SSID.
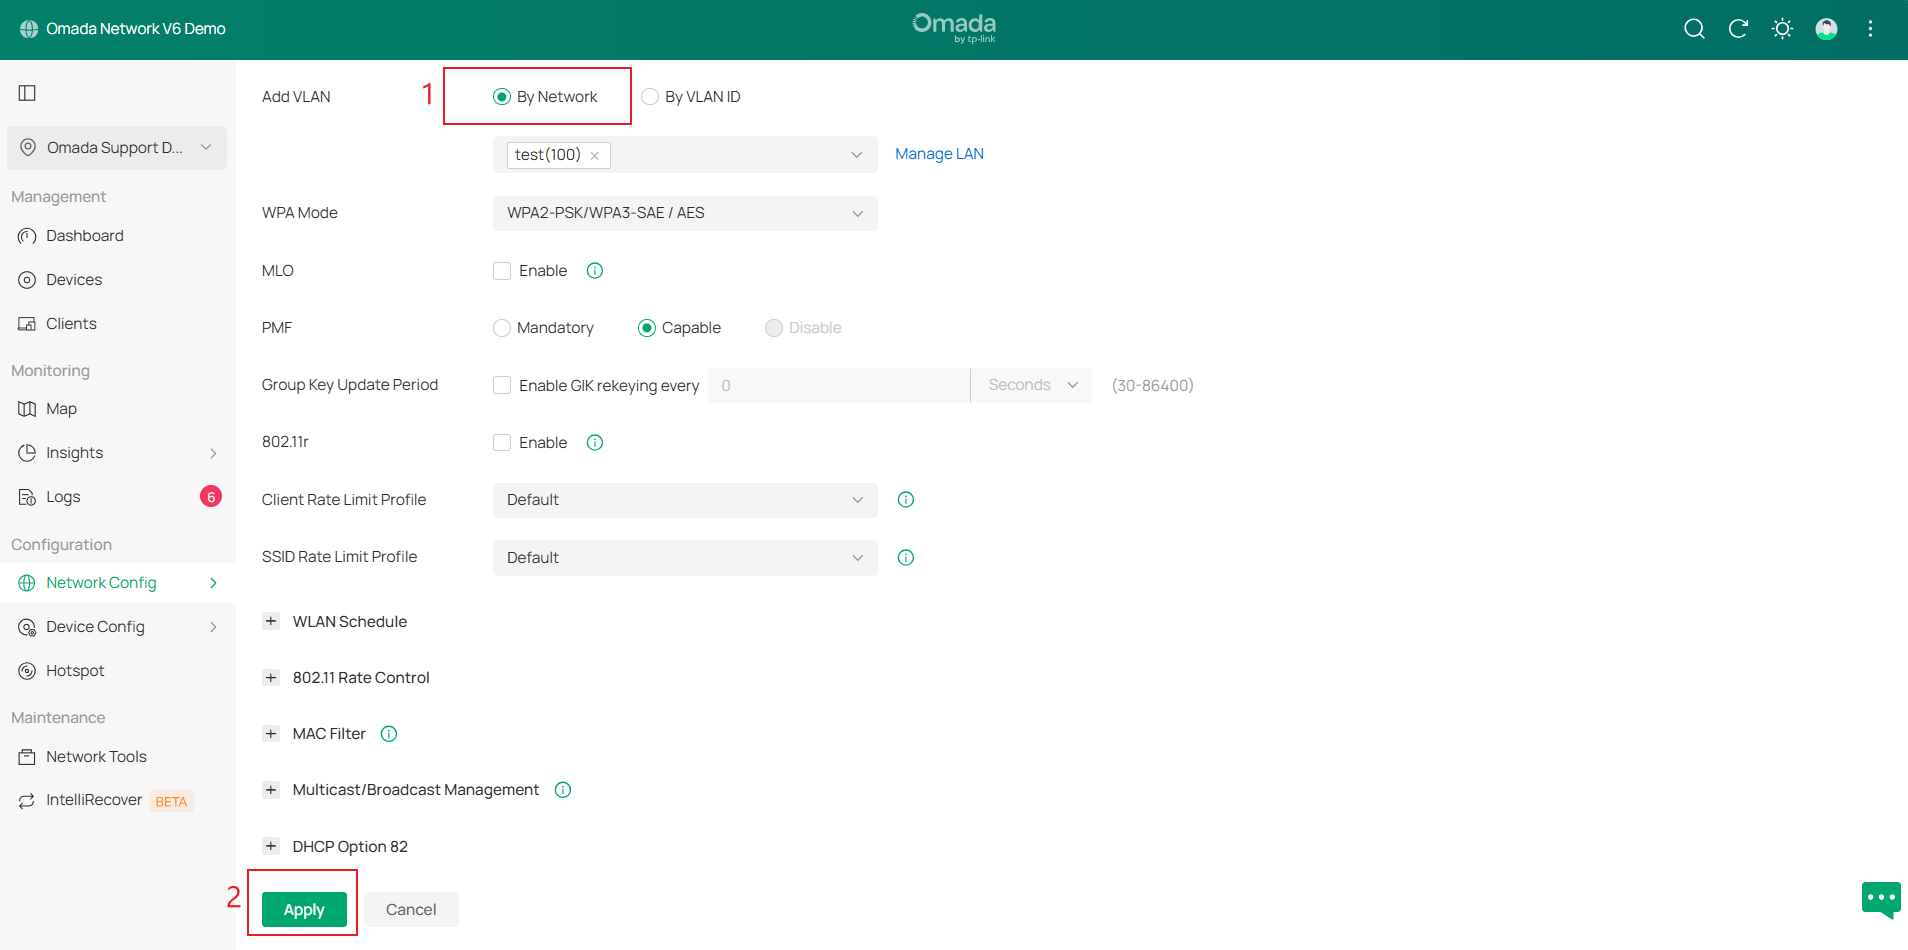
Step 6. Select By Network or By VLAN ID based on your needs. Here, we select By Network as an example. Choose the VLAN entry and click Apply.
SSID VLAN Override Configuration
Step 1. Build the network topology, log in to the Omada Controller, and adopt the devices. Go to Devices and find the target Omada AP. Click the device to open its Properties window.
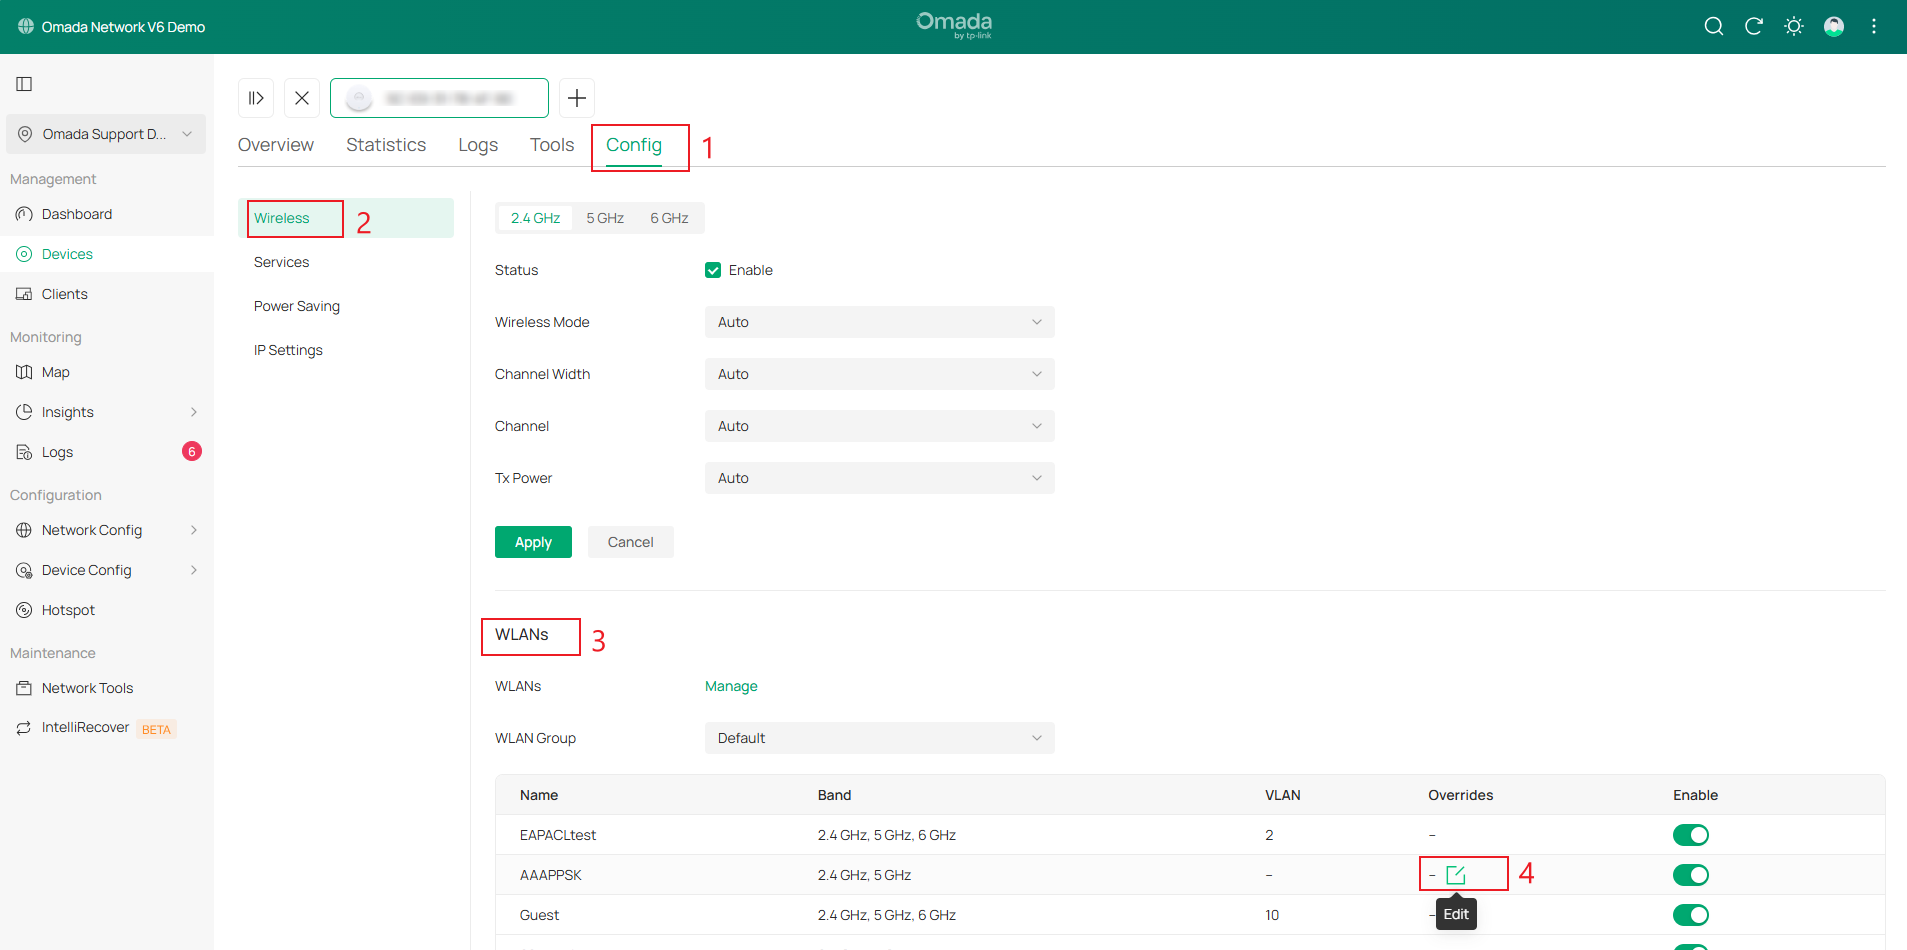
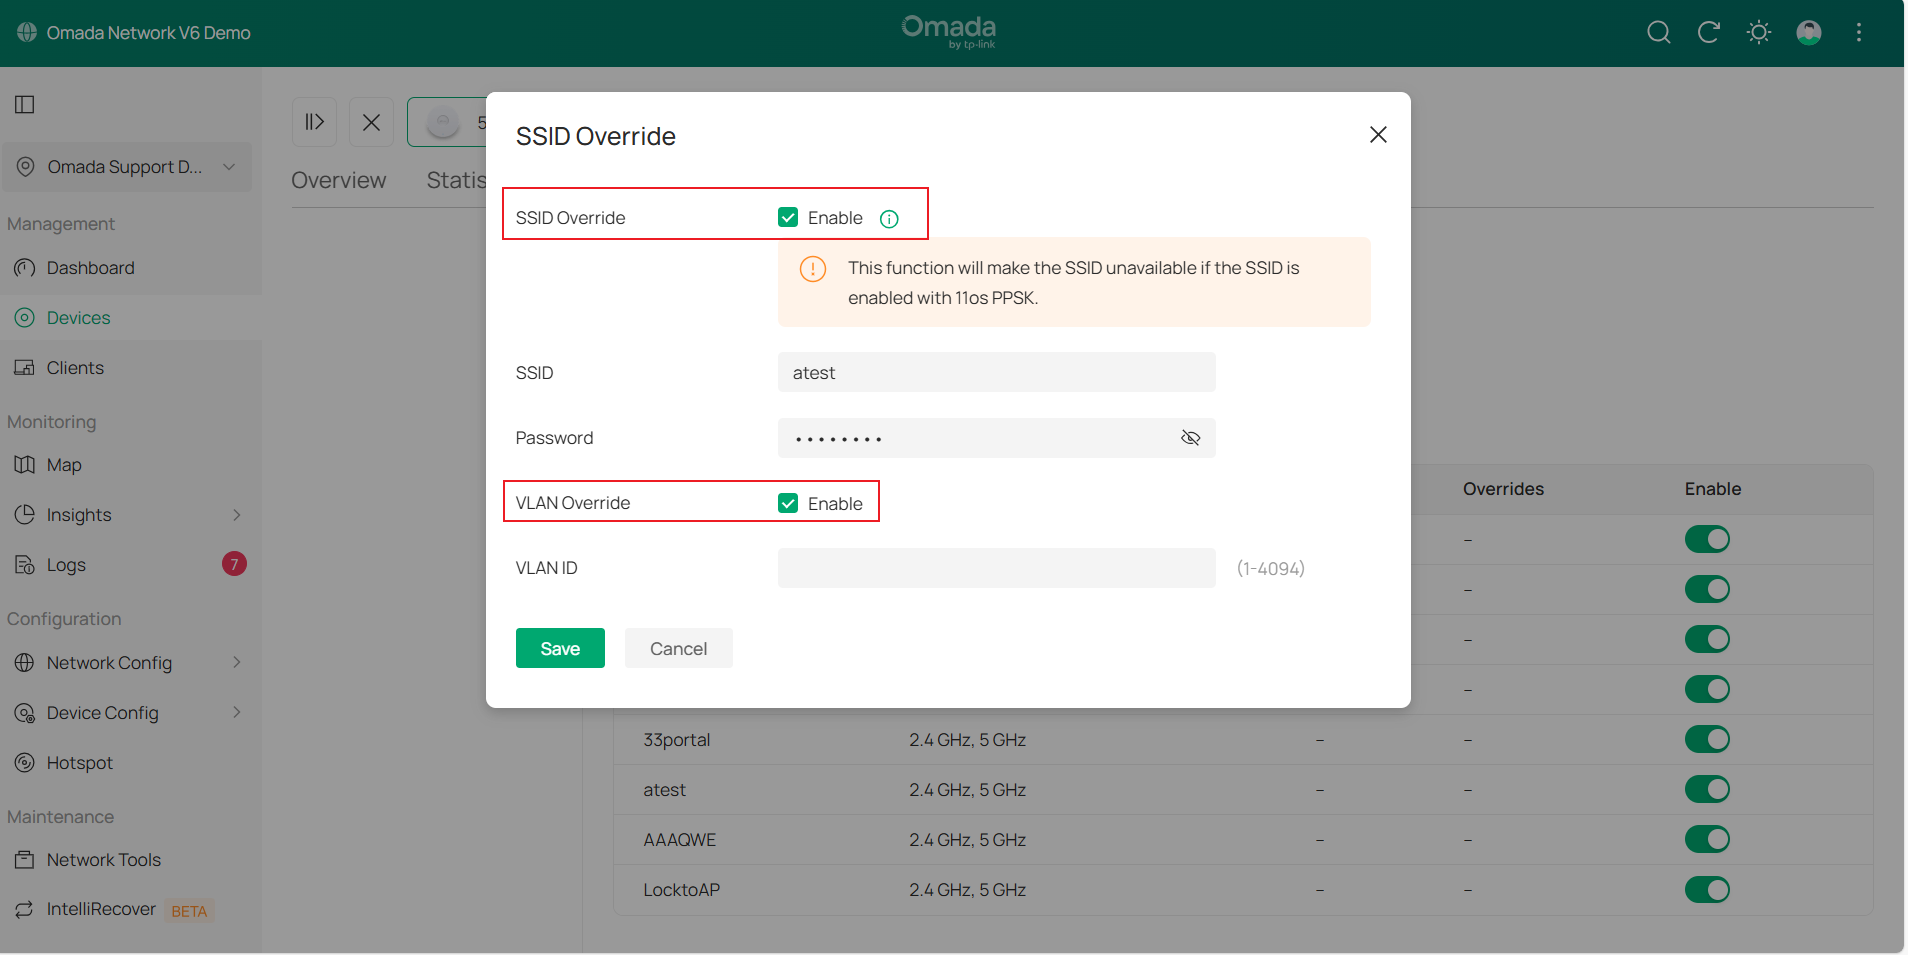
Step 2. In the Properties window, go to Manage Device > Config > Wireless > WLANs. Here, it displays all the editable SSIDs. Select the SSID and click Edit to configure SSID Override.
Step 3. Click the checkboxes of SSID Override and VLAN Override. Enter the VLAN ID and click Save.
Conclusion
You have successfully configured SSID VLAN on the Omada AP via the Omada Controller.
Get to know more details of each function and configuration please go to Download Center to download the manual of your product.
QA
Q1: What are the effects of simultaneously configuring Dynamic VLAN, SSID VLAN Override, and SSID VLAN?
A1: The wireless VLAN configurations currently supported by the Omada AP take effect following such a priority order: Dynamic VLAN (OUI VLAN > Auth VLAN > VLAN Pool) > SSID VLAN Override > SSID VLAN.
Note: OUI VLAN requires the future controller version 6.3 for support.
