
Introduction
TP-Link BootUtil menu enables some advanced features, such as activating the backup image, recovering the password, and factory resetting. If you forget the username or password, you can access the menu to recover the password or reset the switch, directly using the RJ45 console cable or Micro-USB console cable. In this article, we will show how to reset the switch using the BootUtil menu and a Micro-USB cable.
Requirements
- Omada Sx3,5,6 series switches.
Configuration
This guide explains how to perform a factory reset on an Omada switch via the console port using a Windows PC. This method is useful when the switch is inaccessible through the web interface, controller, or SSH due to configuration issues, unknown credentials, or network communication problems. This guide will also demonstrate how to establish a console connection using terminal emulator software such as PuTTY and Tera Term to access the switch CLI and perform the factory reset procedure.
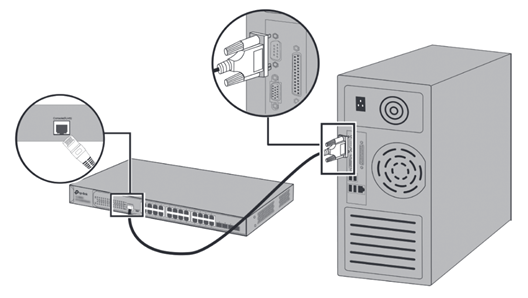
Step 1. Connect a console cable from the Omada switches' RJ45 console port to a device.
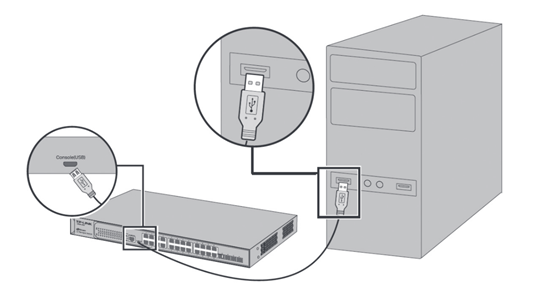
You can also choose a Micro-USB cable that supports data transfer to connect your computer to the switch. It is recommended to use the RJ45 console port when accessing the BootUtil menu. Unlike the RJ45 console, the Micro-USB console relies on the switch to fully initialize and power the USB driver before the connection becomes active. Because the BootUtil menu is only accessible during the first few seconds of the boot process, the Micro-USB console may not initialize in time, causing users to miss the U-Boot prompt.
For Mac, please follow: How to manage the switch with Mac via Micro USB cable
Step 2. Install a terminal emulator.
If you use the console cable, you can choose the Terminal Emulator according to your custom.
This guide will cover/include the parameters for both PuTTY and Tera Term.
PuTTY: https://putty.org/index.html
Tera Term: https://teratermproject.github.io/index-en.html
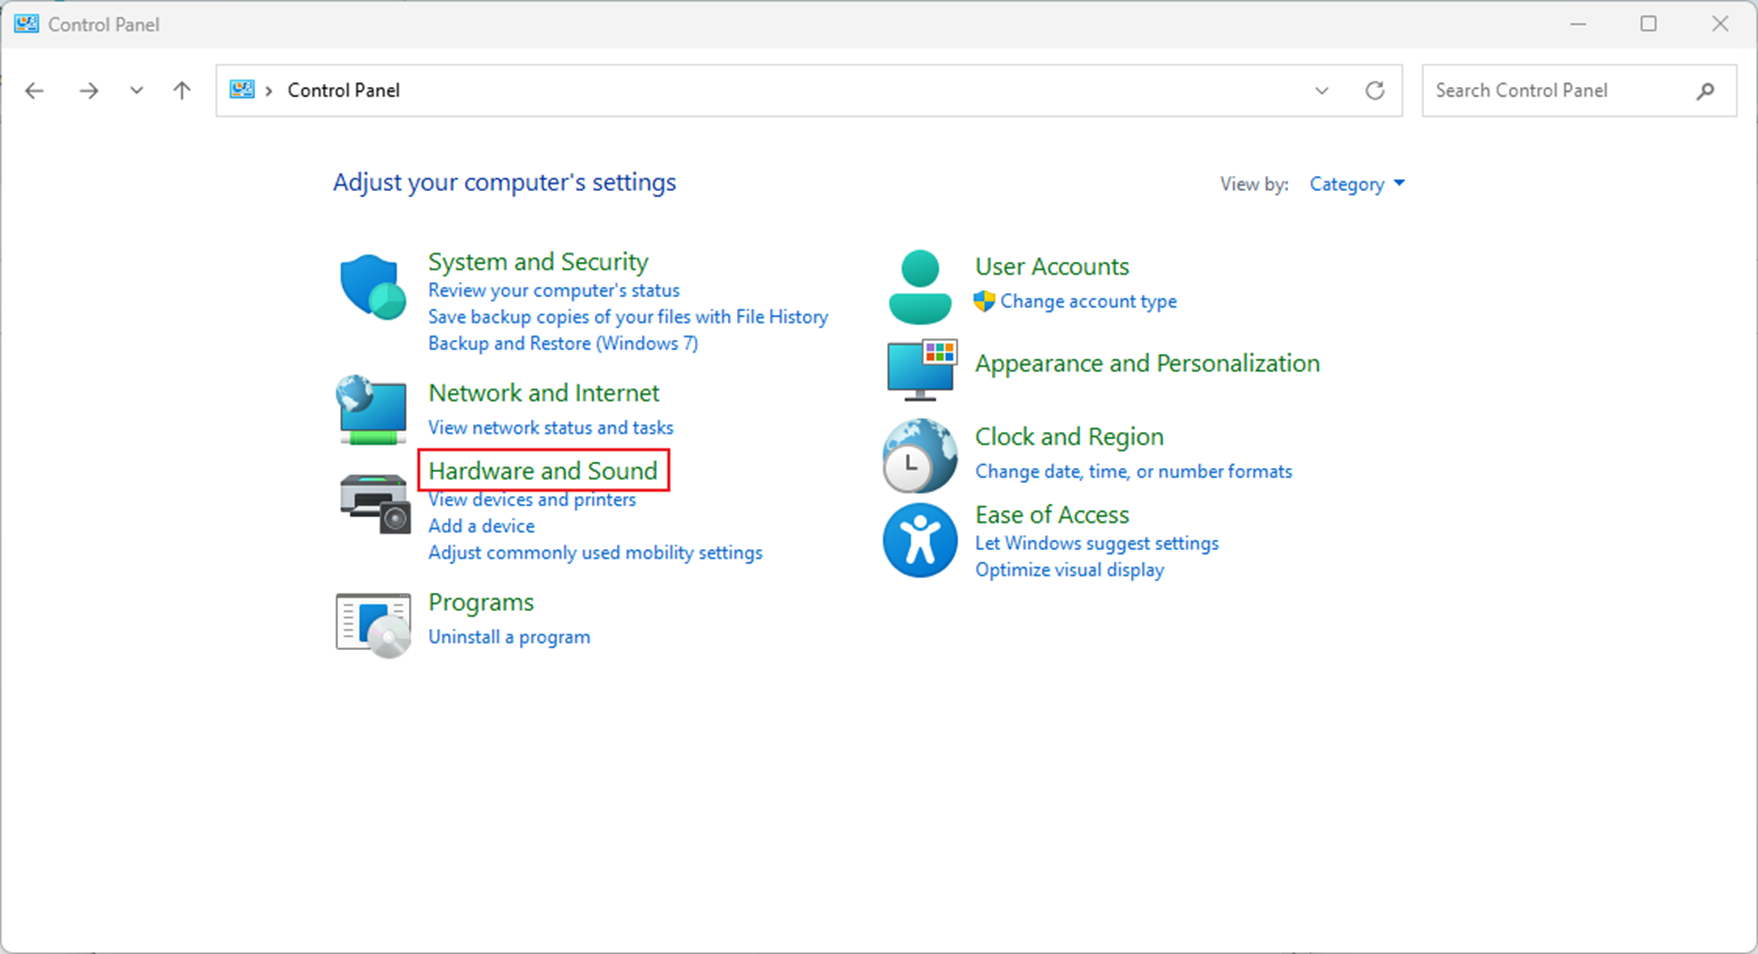
Step 3. After hardwiring the console cable to the switch and the device the next step is to figure out the COM port that the console cable is utilizing.
In Windows, navigate to Control Panel > Hardware and Sound
Step 4. Next find Device and Printers and in the section click on Device Manager

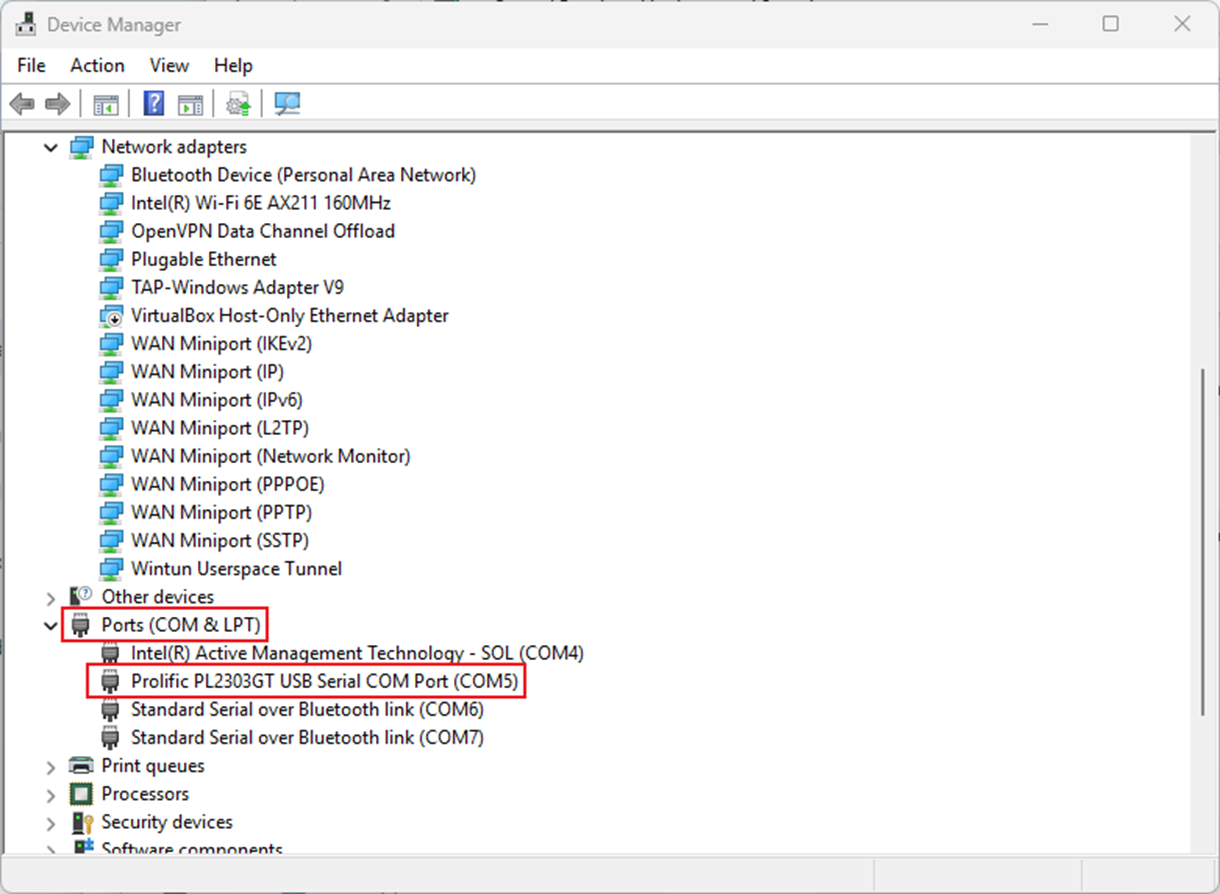
Step 5. In the Device Manager look for Ports (COM & LPT) and expand that section.
In this section, you can find which COM port the console cable is using. Below is the example where I am utilizing COM5.
Step 6. Open the terminal emulator that is being utilized and fill in the proper parameters.
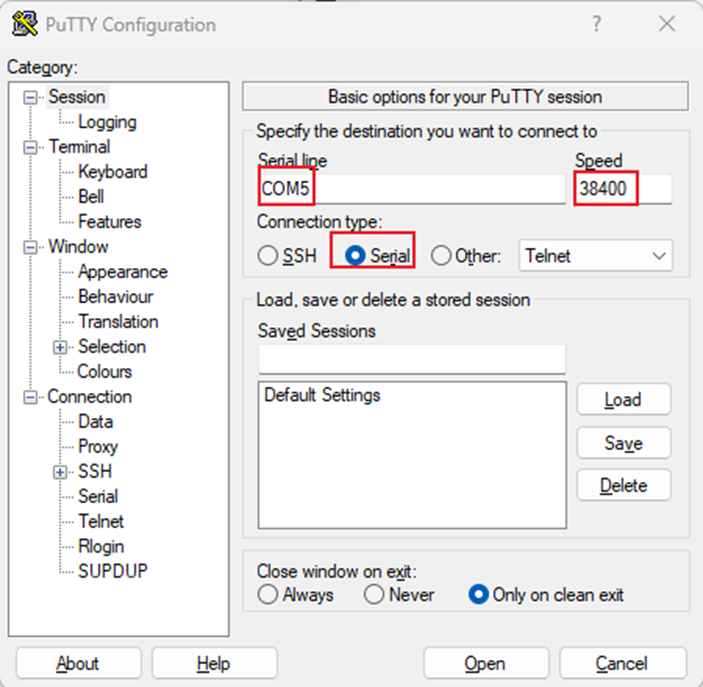
For PuTTY:
Check Serial under Connection Type > Serial Line will be your COM port > Speed will be the baud rate, which is defaulted to 38400 for switches but can be changed via CLI.
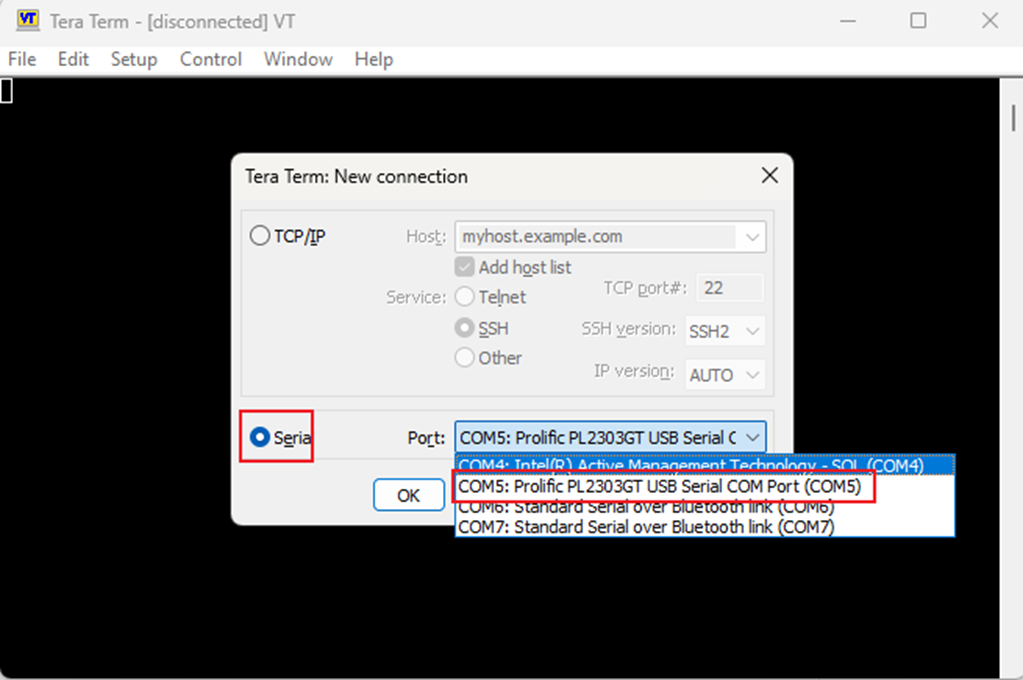
For Tera Term:
As soon as the application opens, it asks you to choose TCP/IP or Serial. Click on Serial and choose your correct COM port.
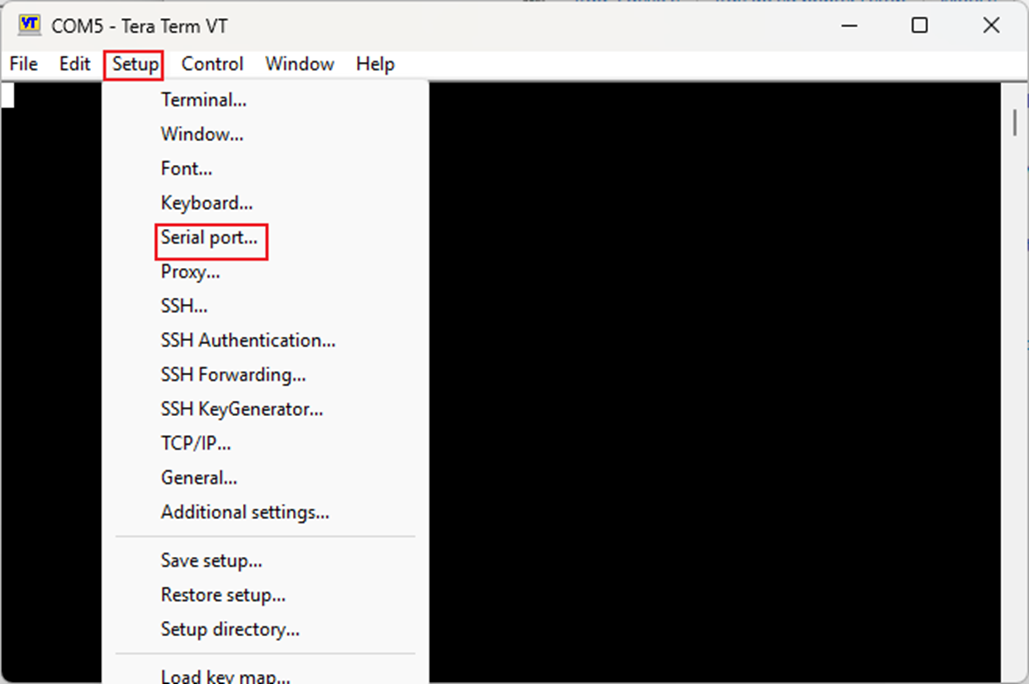
Next, in Tera Term, the baud rate defaults to 9600; to edit it, navigate to Setup > Serial Port. Change the speed to 38400.
Please follow the sequence below.

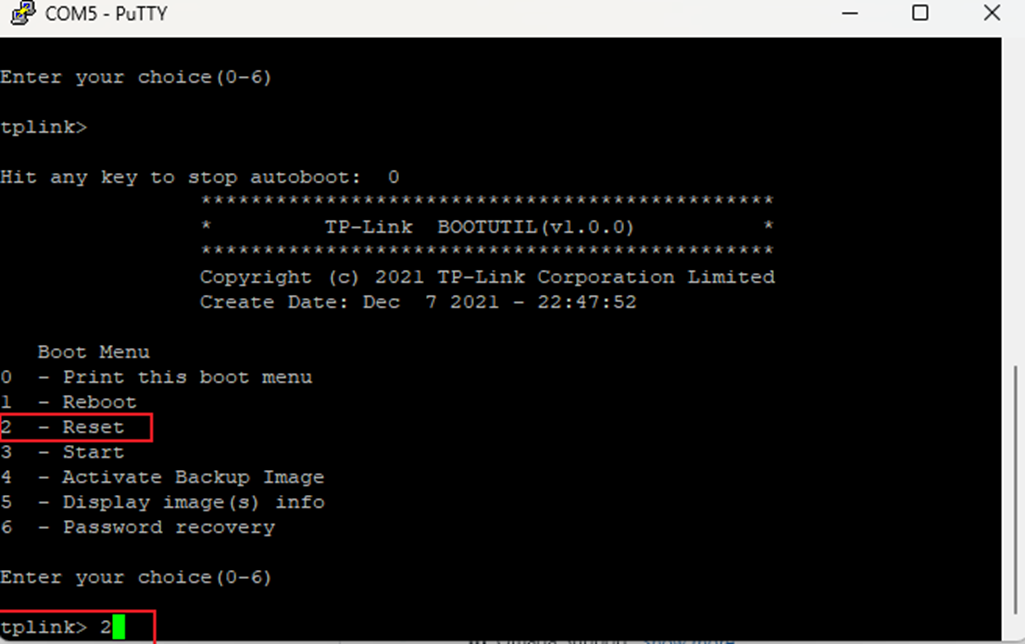
Step 7. After opening the terminal session, power cycle the switch and repeatedly press any key during boot to access the BootUtil menu.
To reset the switch type 2 and press Enter.
Step 8. Type Y and hit enter to continue.

Step 9. After the completion of a factory reset, login to the devices local IP address with the default credentials of admin for both username or password.
If adopting the device to a controller, the switch will populate as pending as long as the devices are in the same LAN.
Conclusion
By following the steps in this guide, you can successfully access the BootUtil menu and perform a factory reset on your Omada switch through the console port. This recovery method is especially useful when the switch is inaccessible through normal management interfaces due to configuration issues, unknown credentials, or network communication problems.
Get to know more details of each function and configuration please go to Download Center to download the manual of your product.
QA
Q1: What should I do I fail to connect to the console port?
A1: Make sure that you are using a console cable and not a regular Ethernet cable.
This article applies: Switches | TP-Link
