

Contents
Introduction
802.1X is a port-based network access control mechanism whose core principle is “authenticate before granting access.” By restricting network access until a user or device (such as a computer, camera or AP) successfully completes authentication, 802.1X effectively prevents unauthorized devices from freely connecting to wired or wireless networks, thereby significantly improving overall security.
It works with centralized systems like RADIUS servers. For enterprise and public networks, 802.1X reduces the risk of internal network intrusion and misuse, making it a key foundation for building a secure and well-managed network environment.
This article explains how to configure the 802.1X function for Omada Wall APs on the Omada Controller.
Requirements
- Omada Controller (Omada Software/Hardware/Cloud-Based Controller) v6.1 or above.
- Omada Wall AP with firmware compatible with Omada controller v6.1or above.
Configuration
Follow the steps below to configure 802.1X, using Omada Software Controller V6.2 and EAP725-Wall as an example.
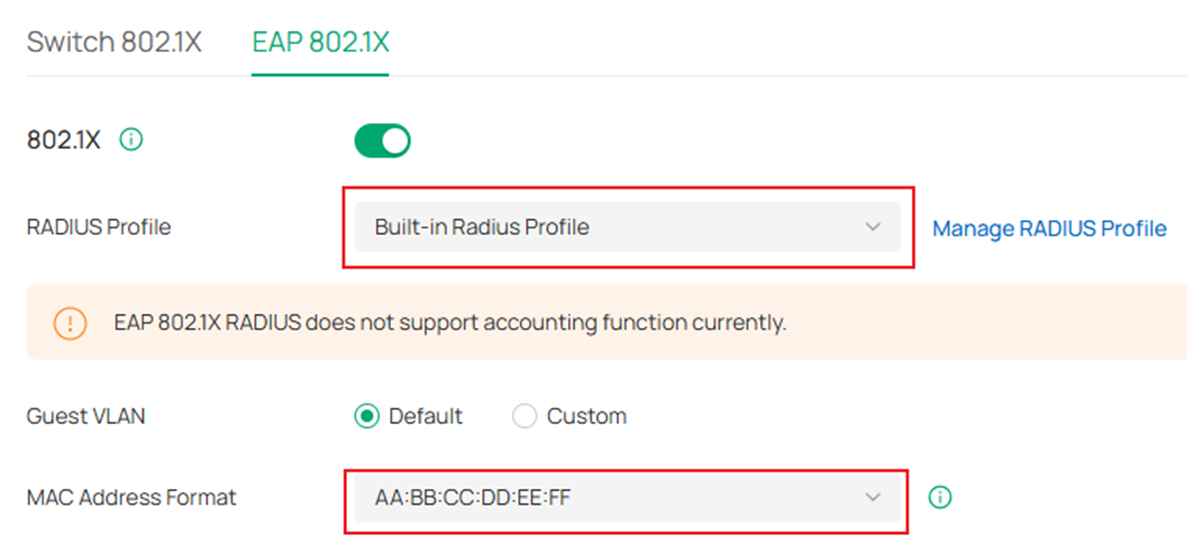
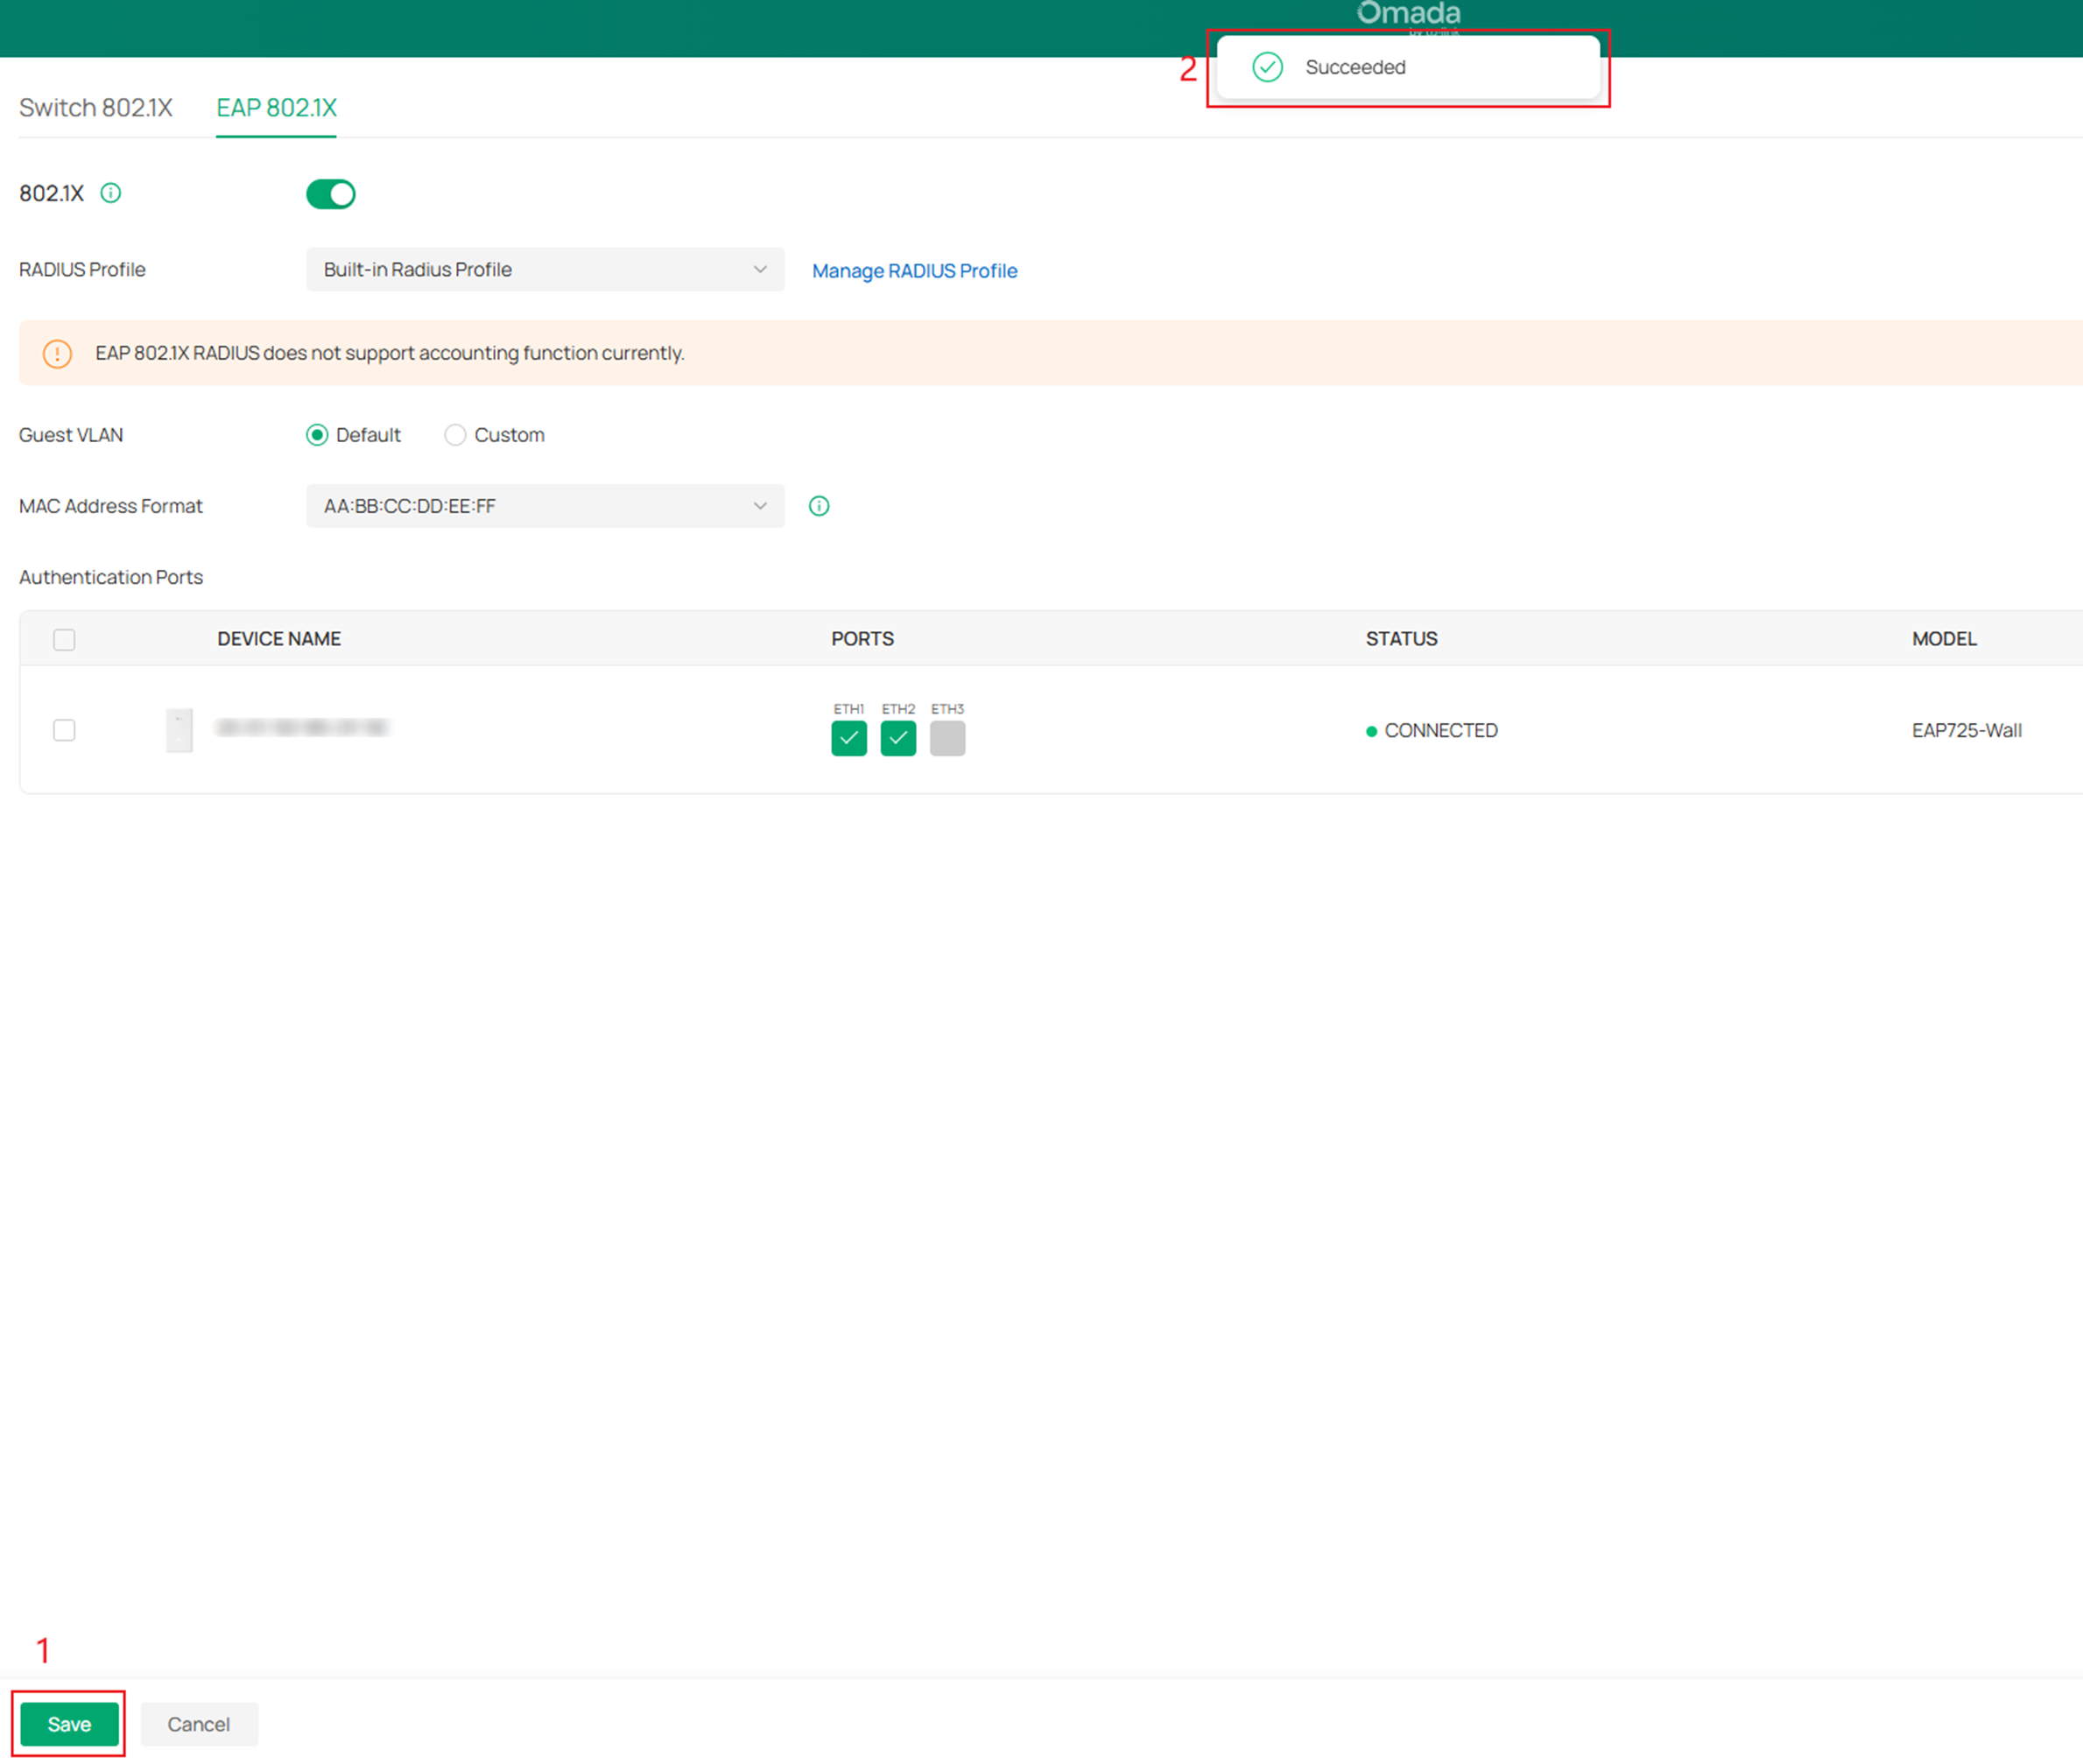
Step 1. Log in to the Controller. Navigate to Site > Network Config > Authentication > 802.1X > EAP 802.1X. Enable the 802.1X feature, then select the RADIUS Profile and MAC Address Format.
Configuration in Built-in-RADIUS
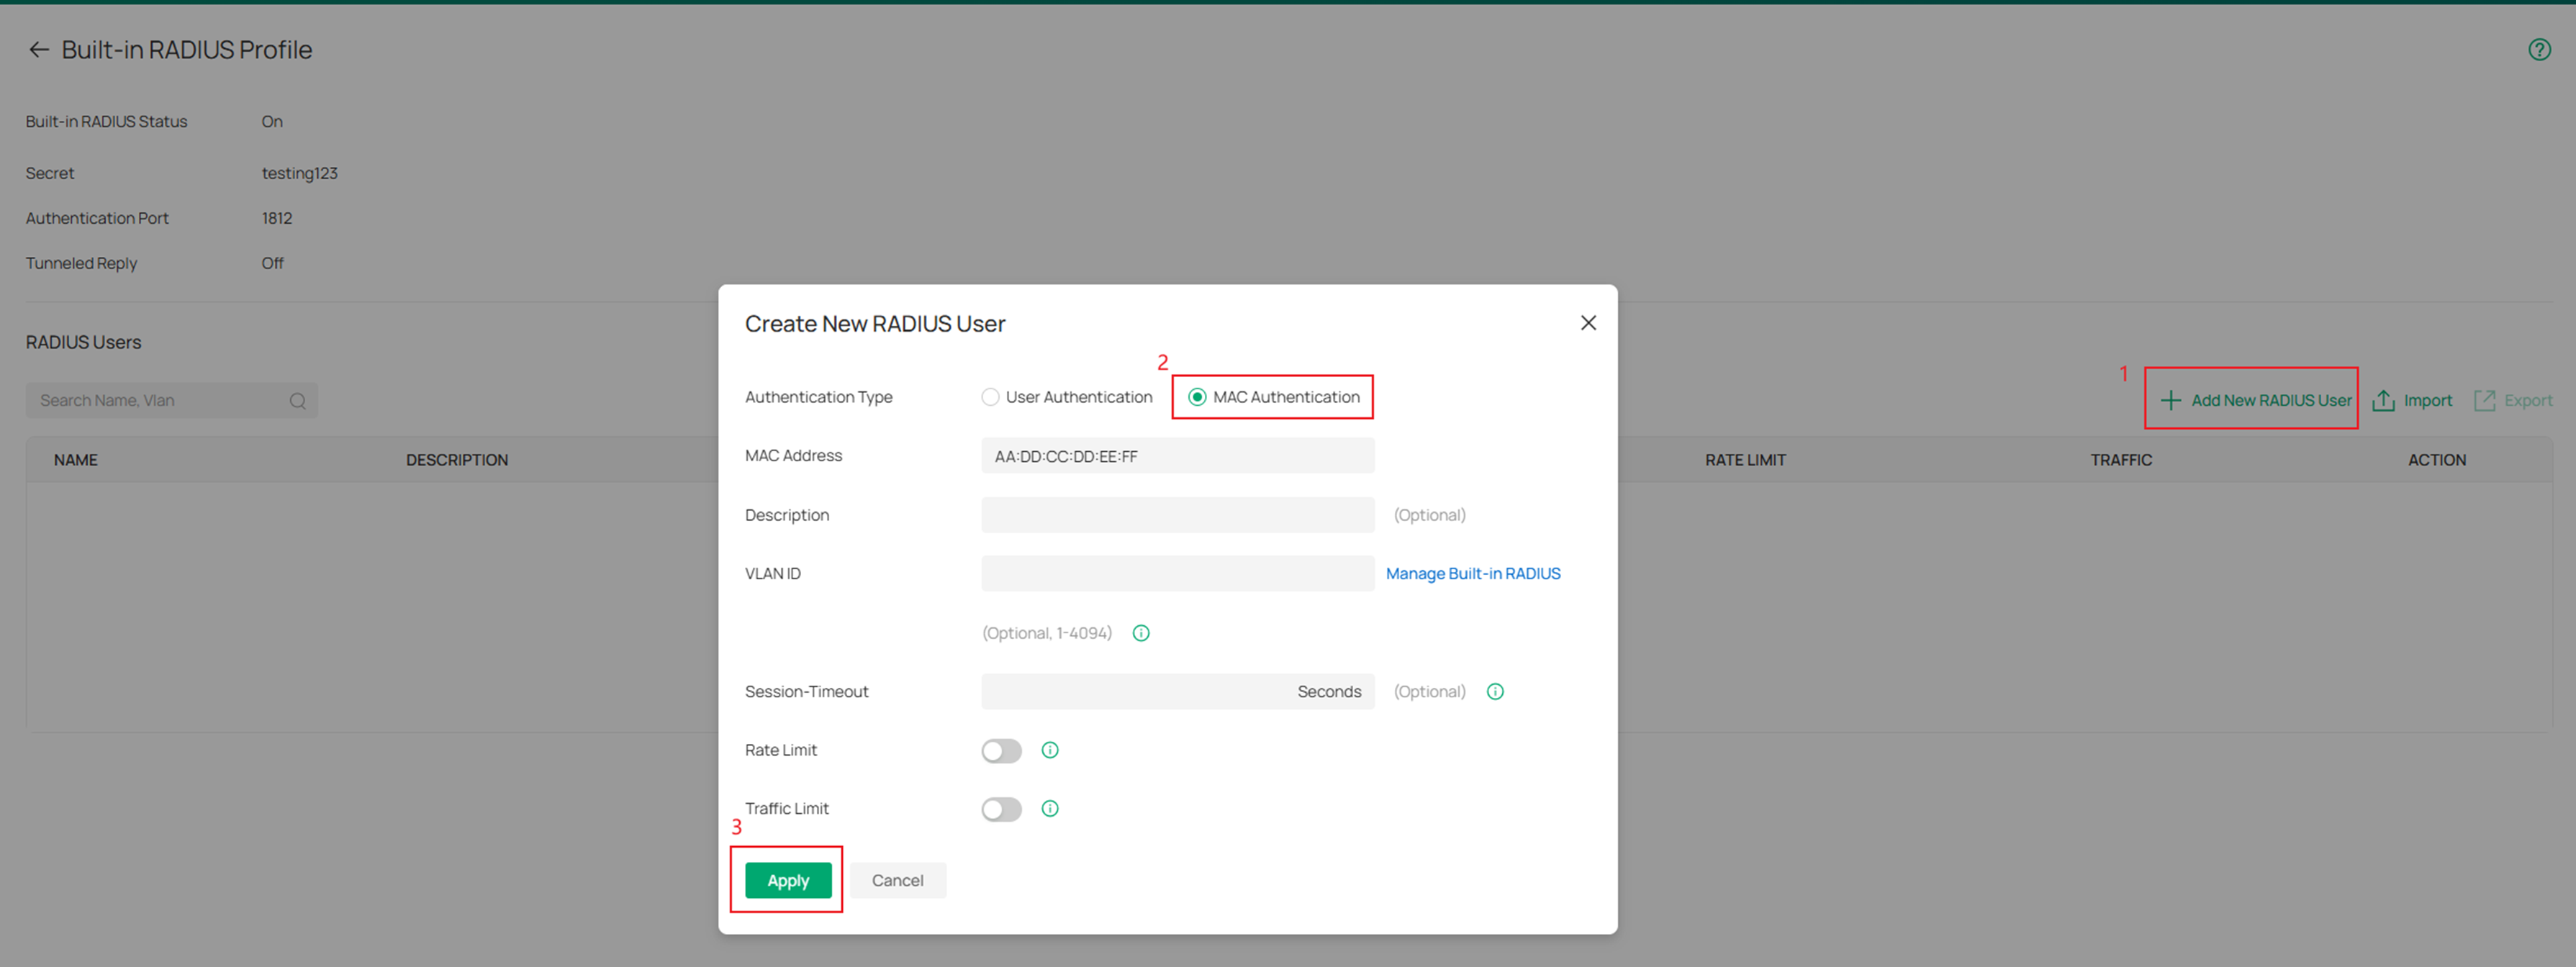
Navigate to Site > Network Config >Profile > RADIUS Profile. Edit the Built-in Radius Profile. Select MAC Authentication as the authentication type, and then enter the client's MAC address and ensure consistency with MAC Address Format.
Configuration in FreeRADIUS Server
Note: There are various RADIUS servers available, FreeRADIUS is used as a demonstration example.
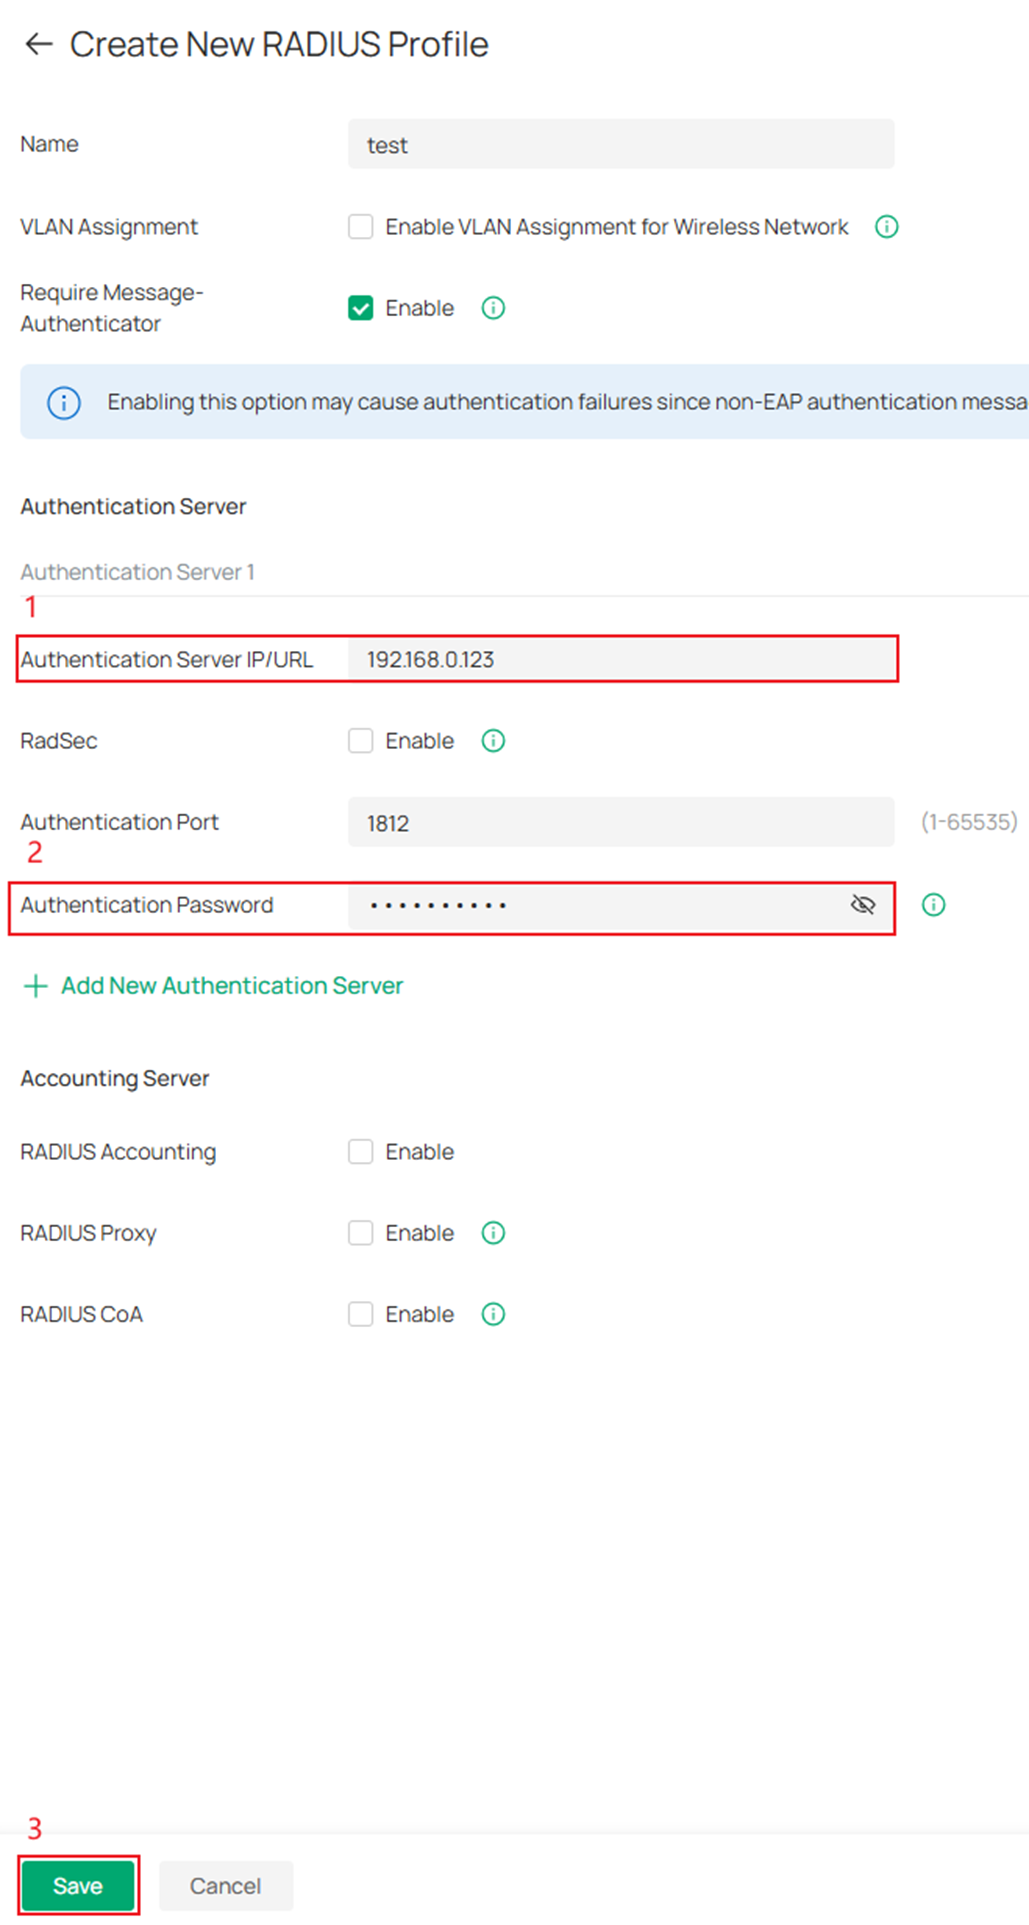
Navigate to Site > Network Config >Profile > RADIUS Profile. Create a new RADIUS Profile.

In the RADIUS profile creation interface, fill in the server's IP and authentication password, and then click save.
Create a user on the FreeRADIUS server whose username and password are both set to the authenticating client’s MAC address. You can add it in the users file under the /etc/raddb path.

Step 2. Under Authentication Ports, choose the downstream ports where you want to enable EAP 802.1X, such as ETH1and ETH2.
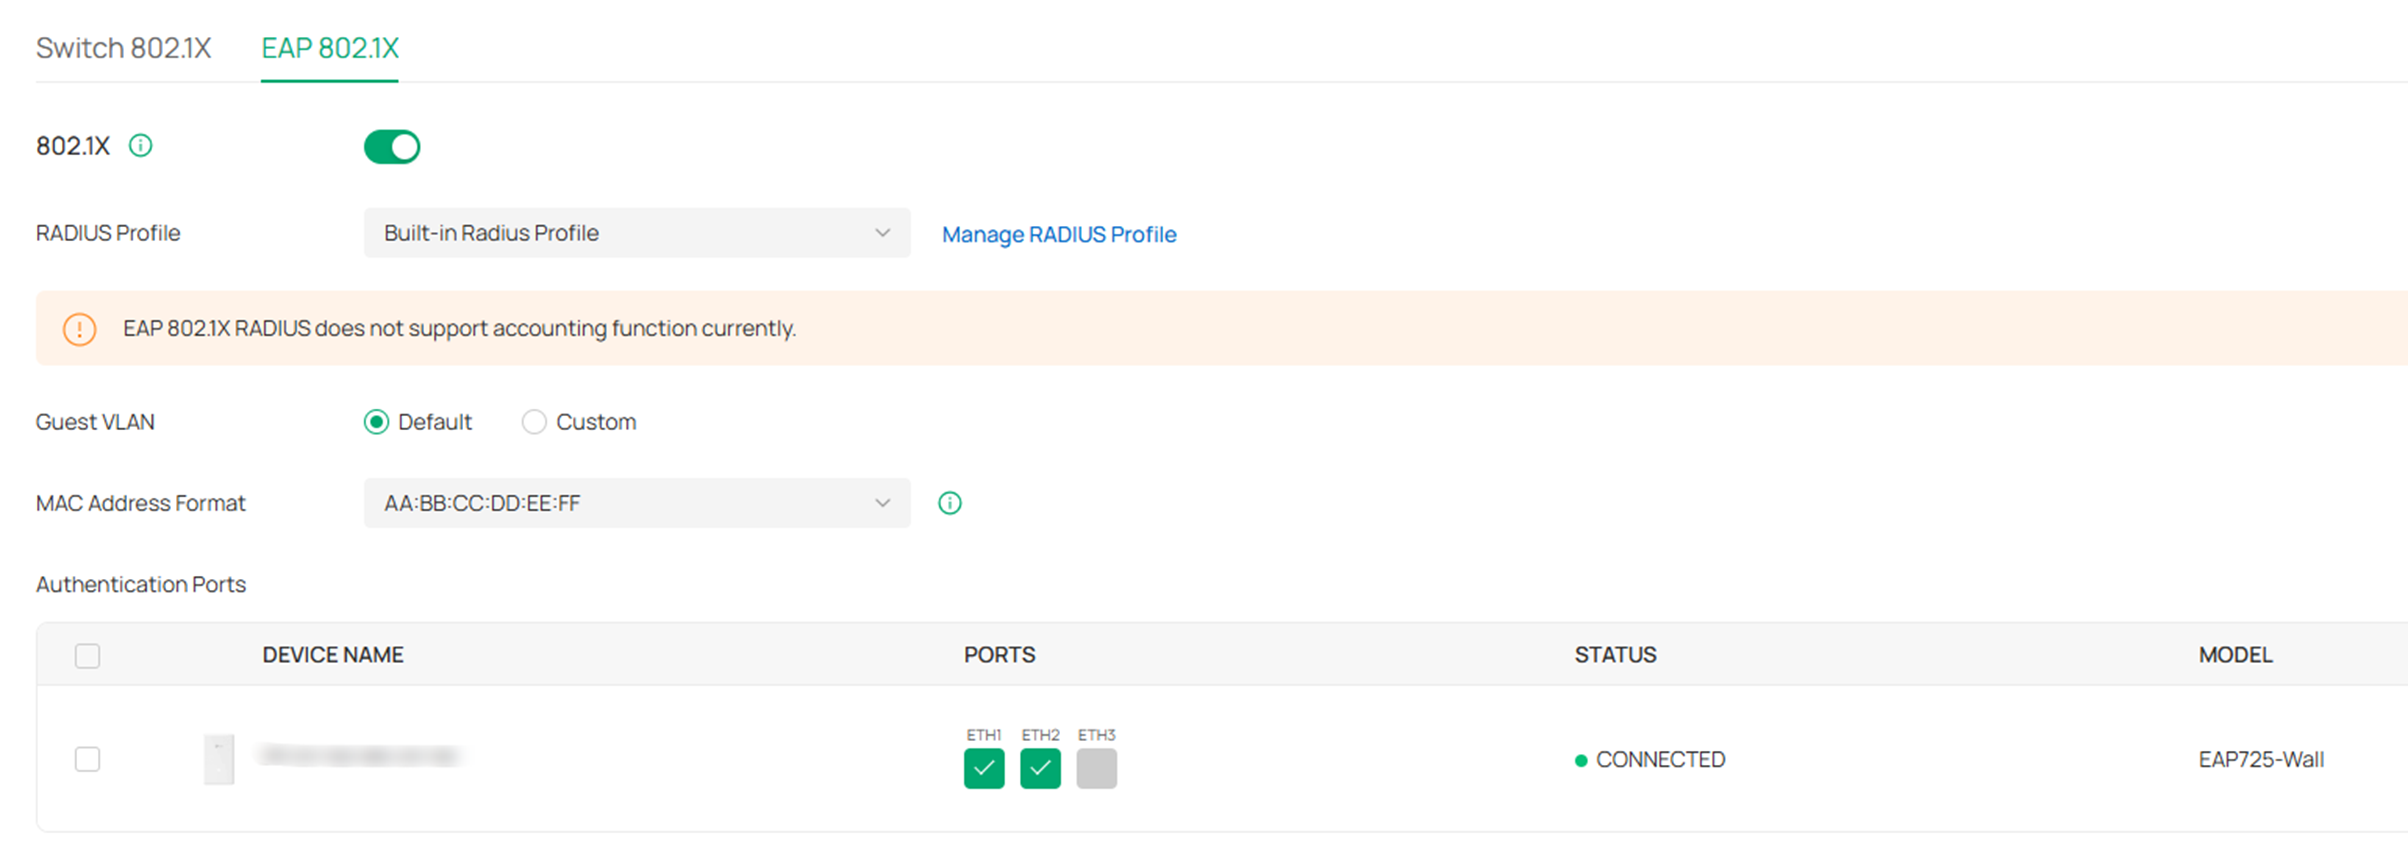
Step 3. After confirming the settings, click Save.
Verification
The following are the steps to verify that the 802.1X interaction between EAP and a wired client is functioning properly through packet capture analysis.
1. The client connects to an Ethernet (ETH) port, and the AP detects the client's MAC address.
2. The AP converts the MAC address according to the configured format, encapsulates it as the username and password in a Request packet, and sends it to the RADIUS server for 802.1X authentication.
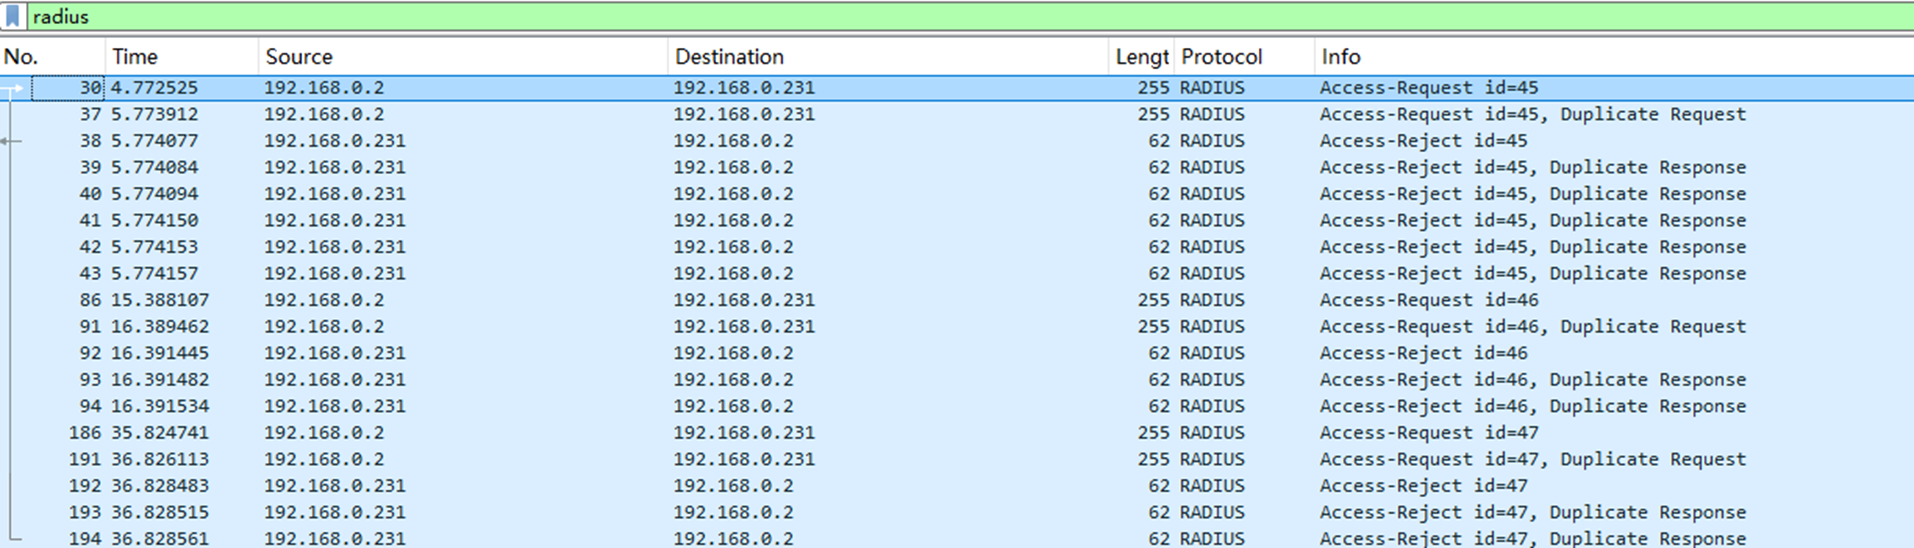
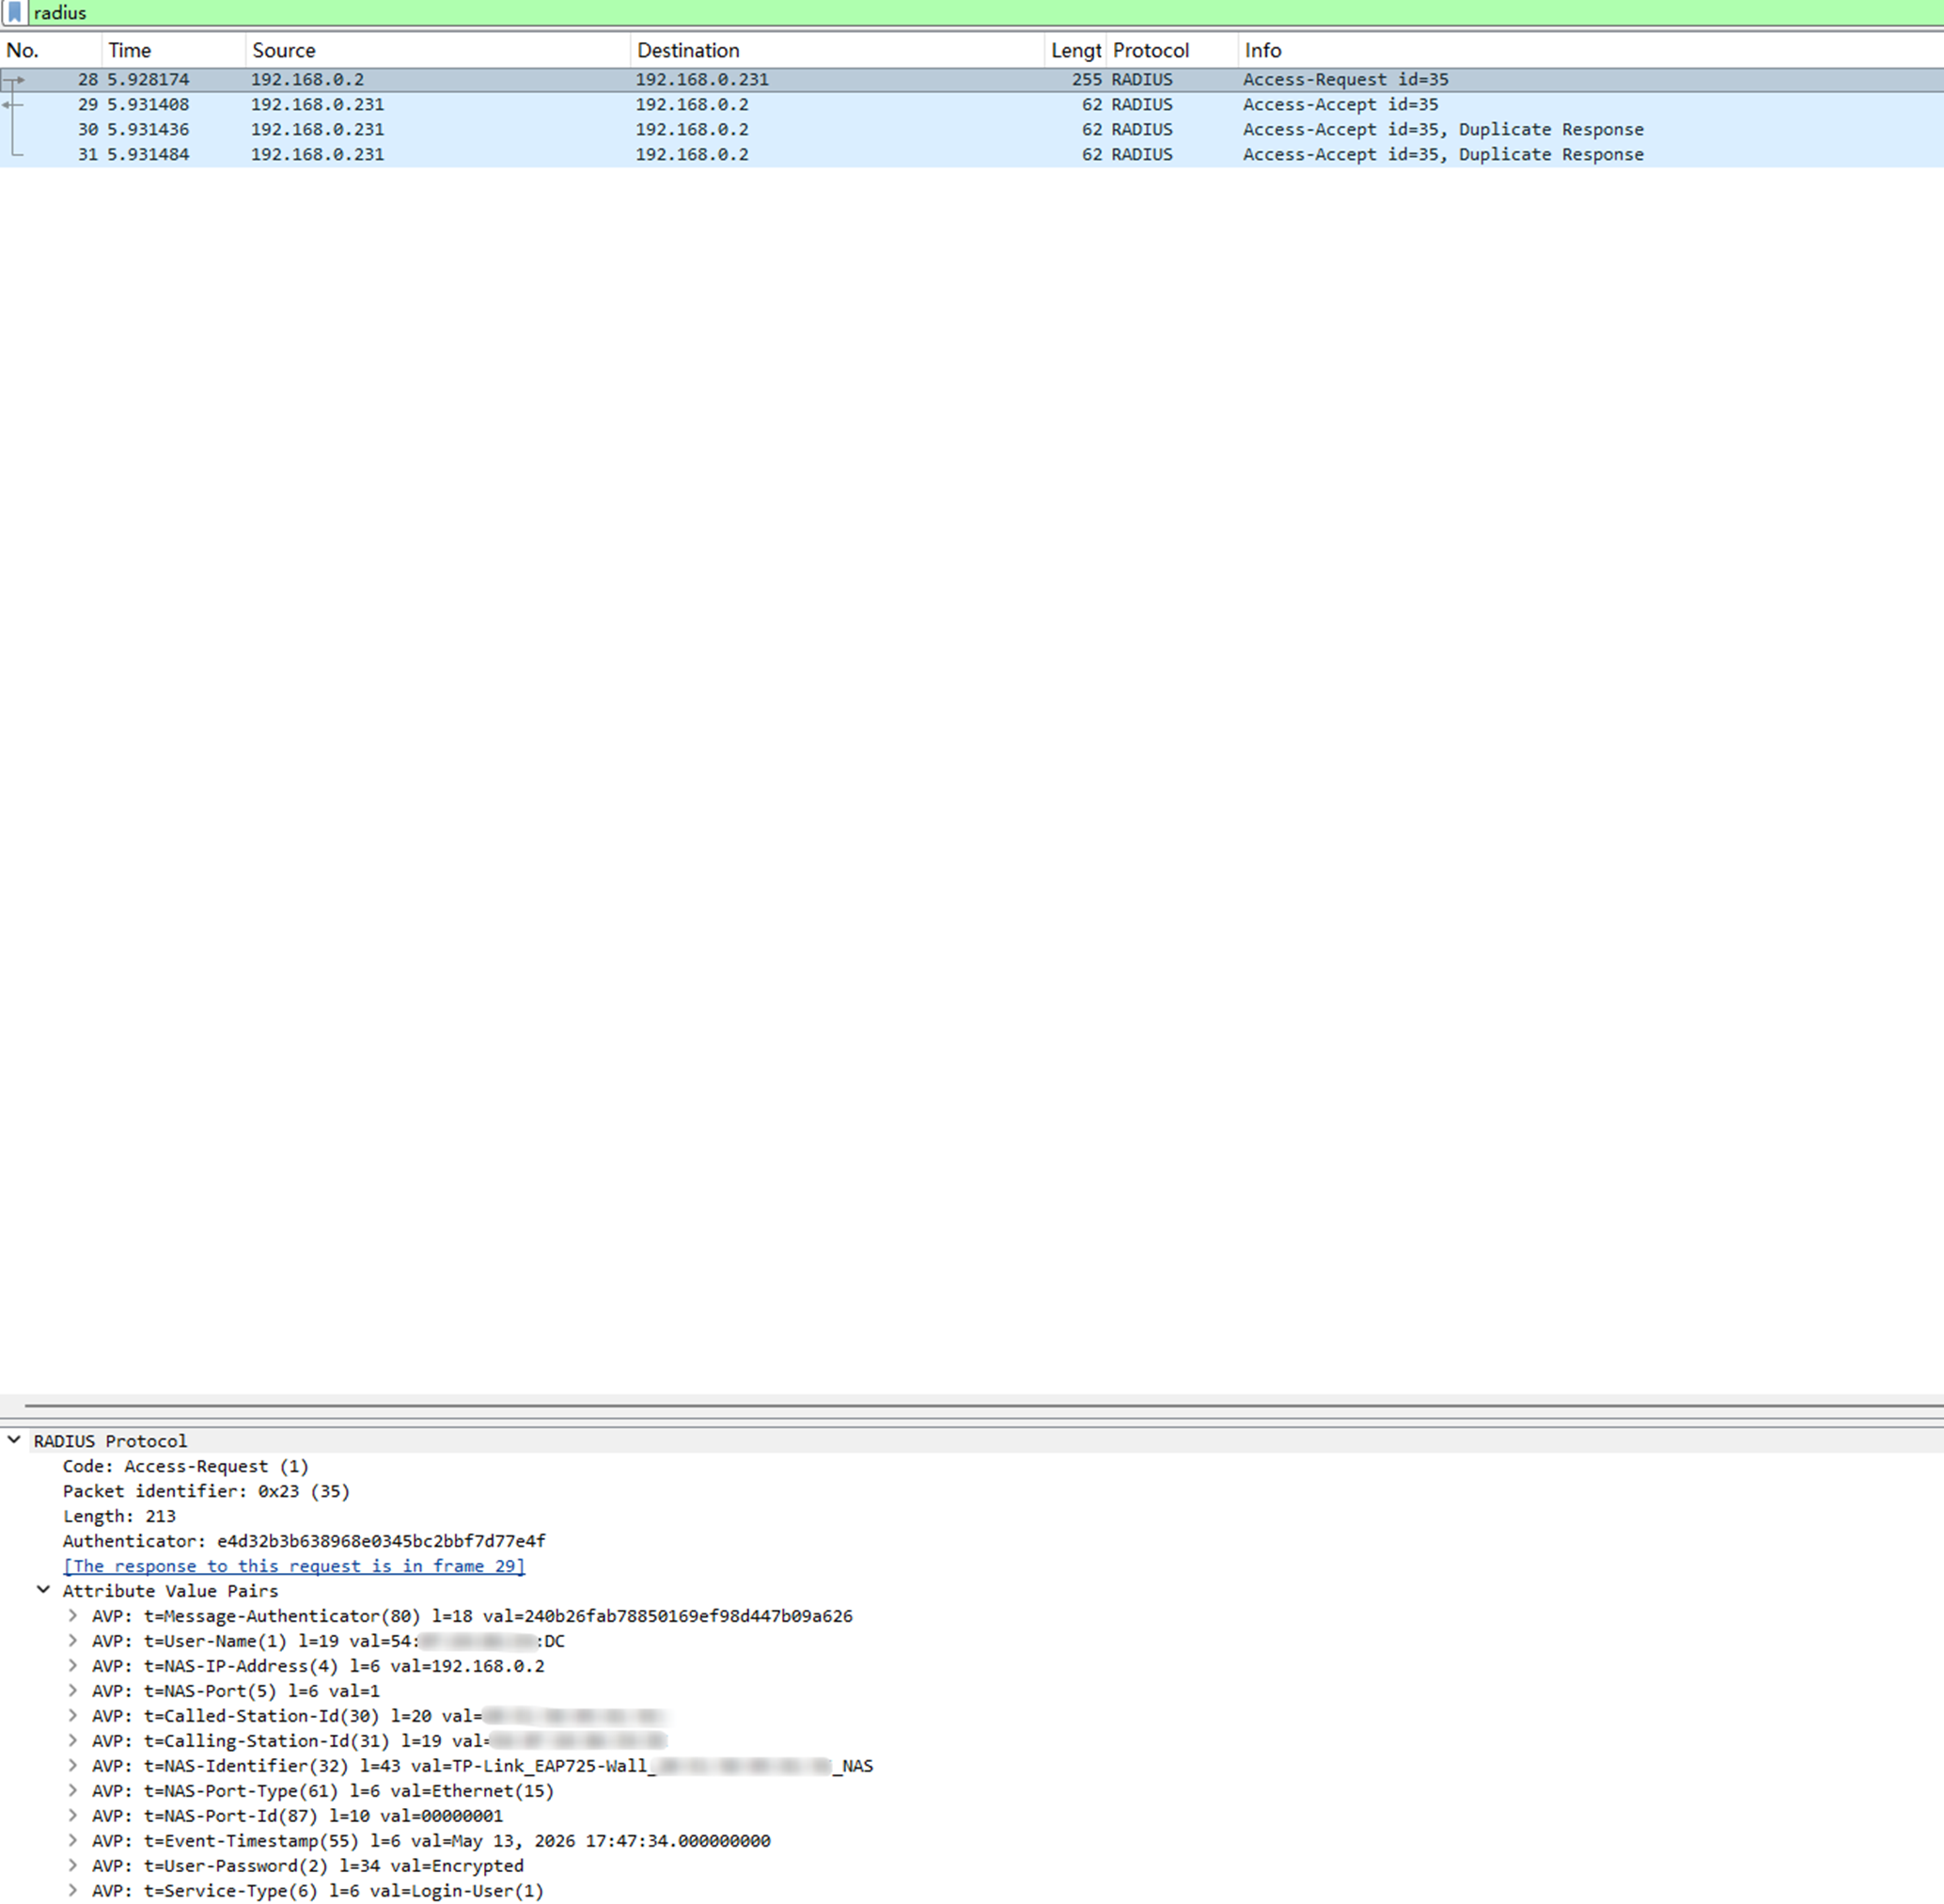
3. If authentication is successful, the RADIUS server replies with an Accept packet, allowing the client to access the network. If it fails, the server sends a Reject packet, the client is unable to access the internet and repeatedly triggers RADIUS authentication requests. The figure below shows the Accept and Reject packet flows.
Packets exchanged when 802.1X authentication fails:
Packets exchanged when 802.1X authentication succeeds:
4. You can check the authentication status of the client in the Clients interface.


Conclusion
This guide outlines the steps to configure 802.1X authentication on the Omada Wall AP using the Omada Controller.
Get to know more details of each function and configuration please go to Download Center to download the manual of your product.
