


Contents
Objective
This guide provides instructions for configuring portal authentication on Omada Controller using Omada APP.
Requirements
- Omada APP
- Omada Controller
Introduction
Portal authentication is a kind of access authentication method, which is also known as web authentication. With portal function configured on Omada Controller, when a wireless client connects to an EAP managed by Omada Controller and tries to access the internet, it will be directed to a pre-set web page which requires additional authentication information. Only the wireless client which has the right authentication information can pass the web authentication to access the internet.
Portal authentication is suitable for managing wireless access in public places such as hotels, malls, airports and so on. It provides flexible method to control the connections to the network and vivid customized authentication portal page for business promotion.
The following gives some instructions on how to configure the portal authentication on Omada Controller.
Configuration
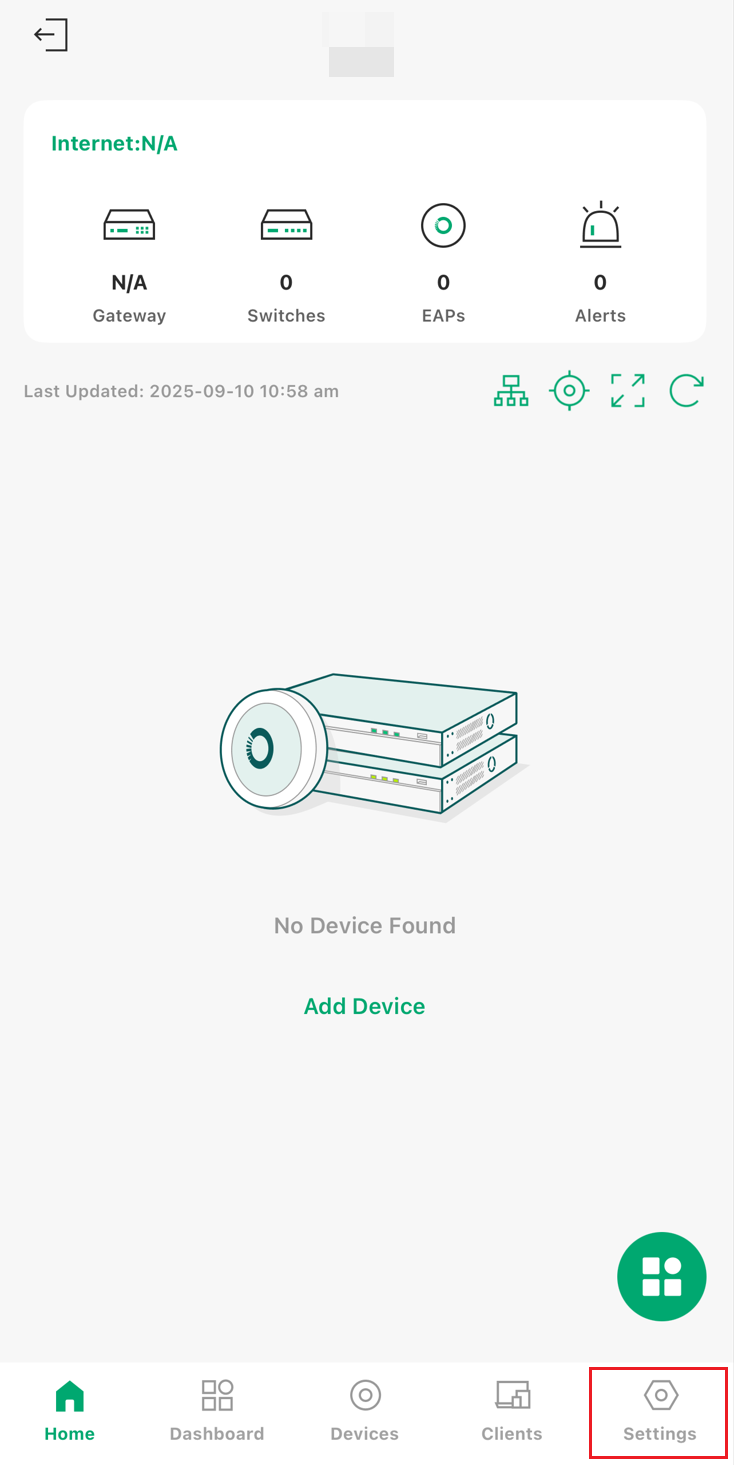
Step 1. Open and login to your Omada APP, then click the lower right icon to enter the Settings.

Step 2. Tap on ‘Authentication’ to configure the authentication.

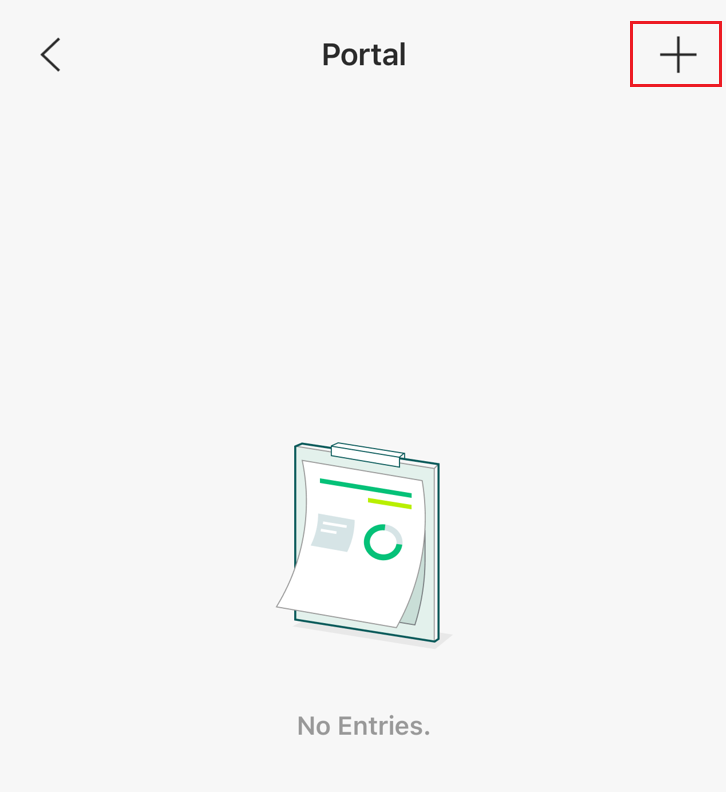
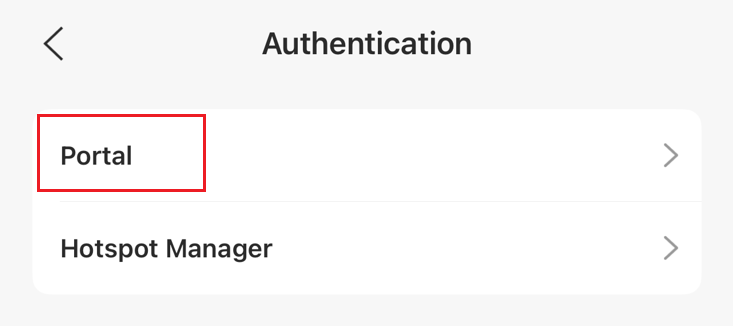
Step 3. Tap on ‘Portal’ to enter the portal configuration page.

Step 4. Tap on the lower right icon to add a portal.
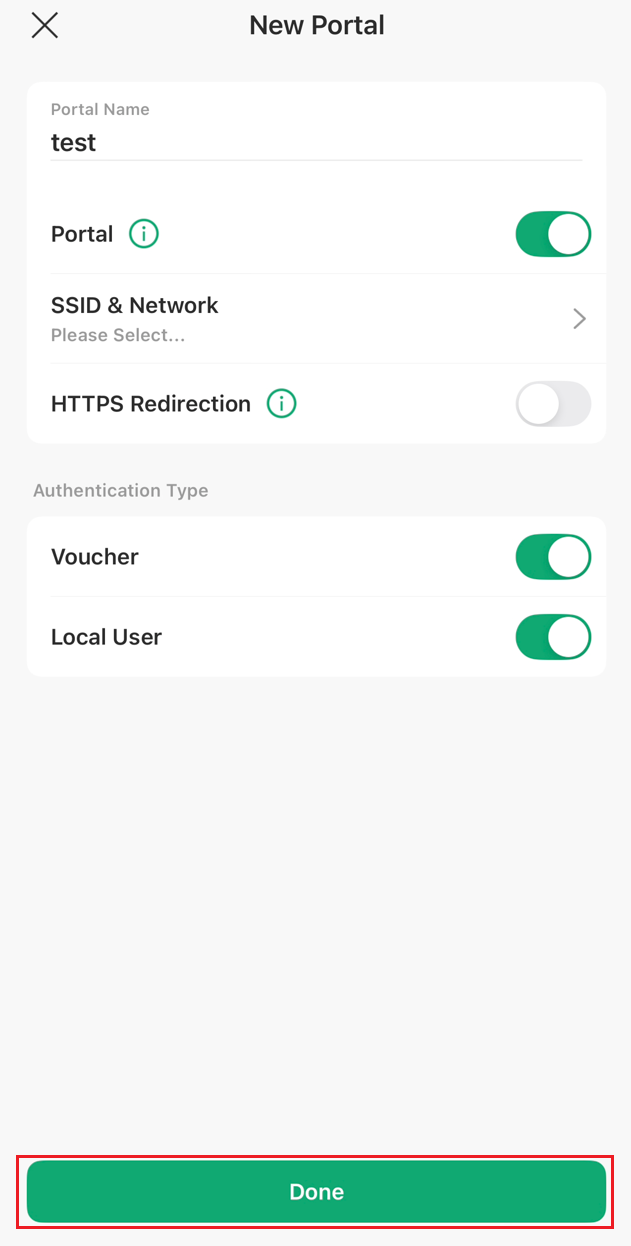
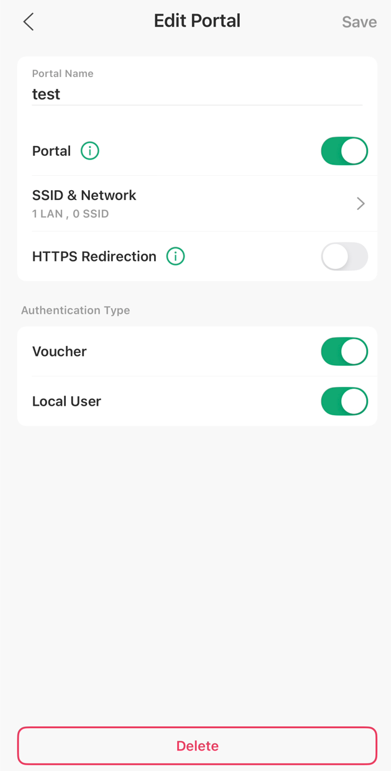
Step 5. Configure the portal name, SSID to be applied, and authentication type, then tap on ‘Done’ to finish the portal creation.
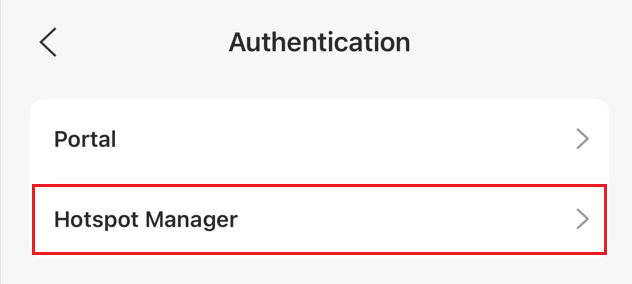
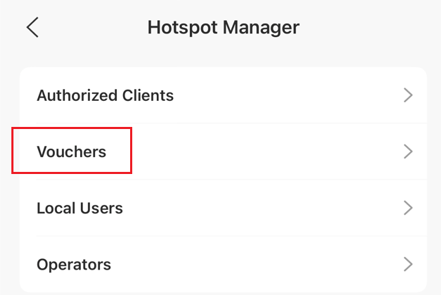
Step 6. Tap on ‘Hotspot Manager’ to enter the portal configuration page.
Step 7. Tap on ‘Vouchers’ to enter the vouchers configuration page.

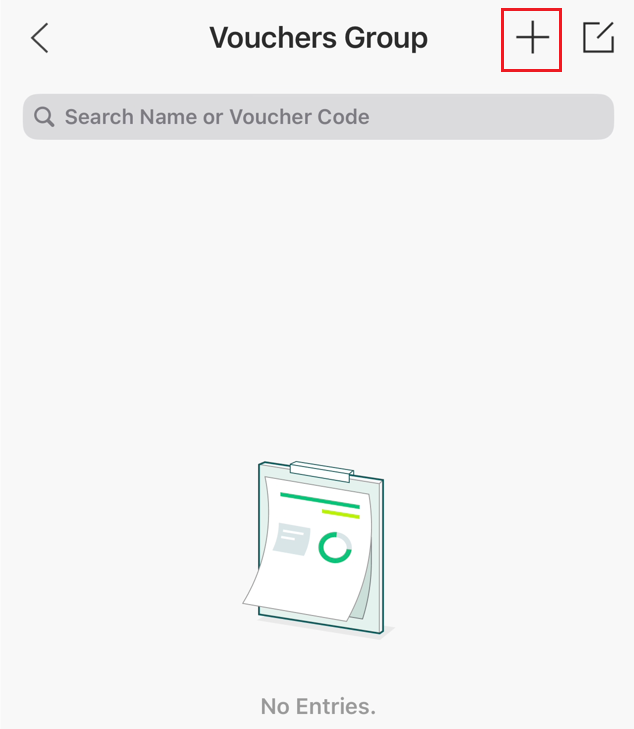
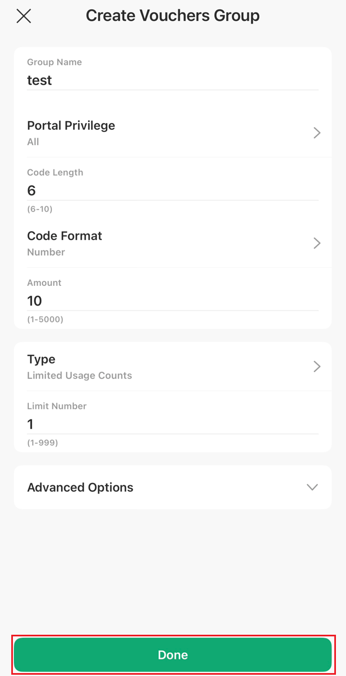
Step 8. Tap on the lower right icon to add a voucher group.
Step 9. Configure the voucher group parameter, then tap on ‘Done’ to finish the voucher group creation.
Step 10. Tap on ‘Local Users’ to enter the vouchers configuration page.

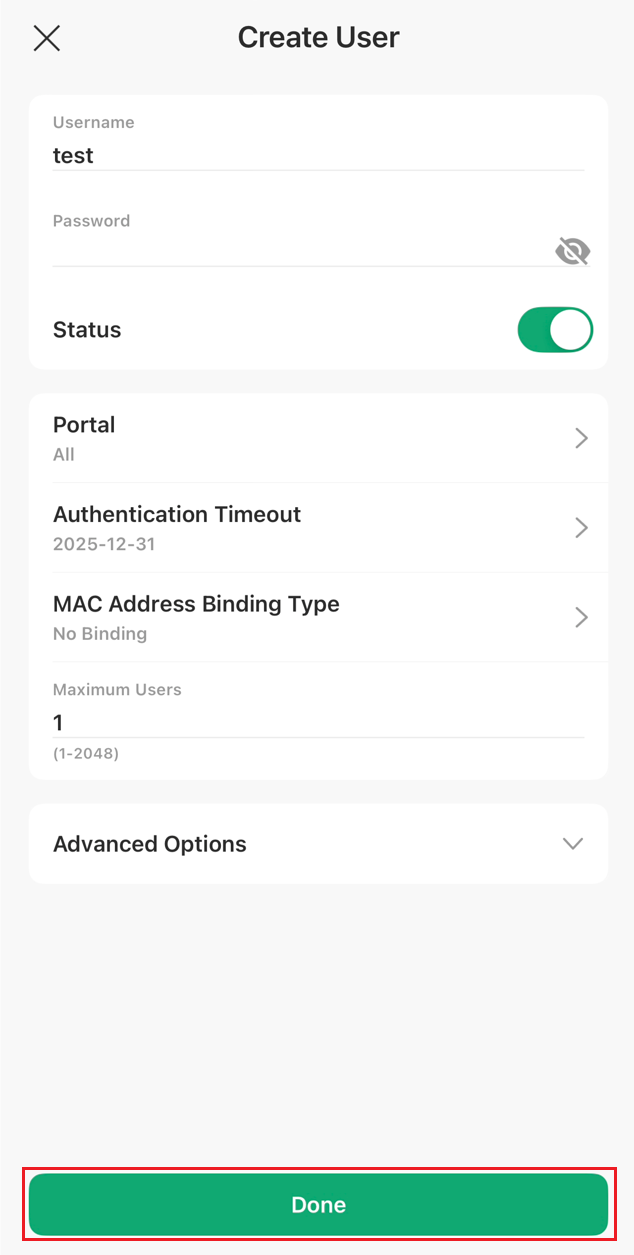
Step 11. Tap on the lower right icon to add a voucher group.

Step 12. Configure the user parameter, then tap on ‘Done’ to finish the voucher group creation.
Verification
Step 1. Open and login to your Omada APP, then click the lower right icon to enter the Settings.
Step 2. Tap on ‘Authentication’ to configure the authentication.

Step 3. Tap on ‘Hotspot Manager’ to enter the portal configuration page.

Step 4. Tap on ‘Vouchers’ to enter the vouchers configuration page.
Step 5. If there is an item in the vouchers list, it verifies that the vouchers group creation was successful.
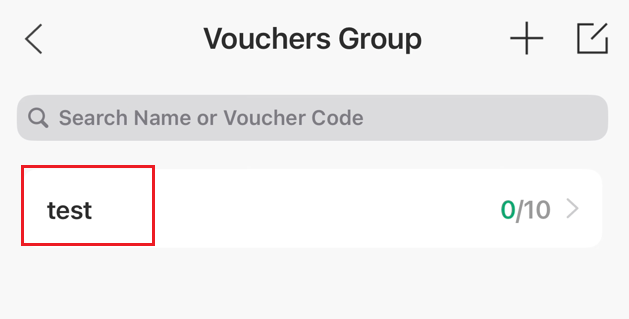
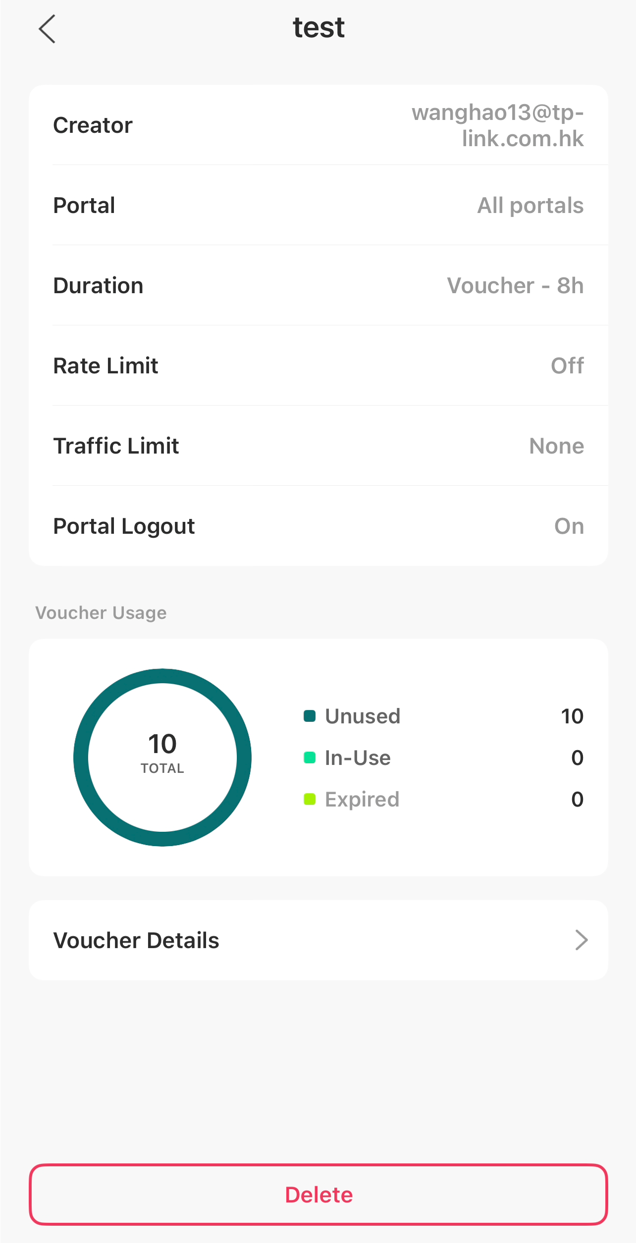
And you can click the item to check the details or delete the item.
Step 6. Tap on ‘Local Users’ to enter the vouchers configuration page.

Step 7. If there is an item in the local users list, it verifies that the user creation was successful.
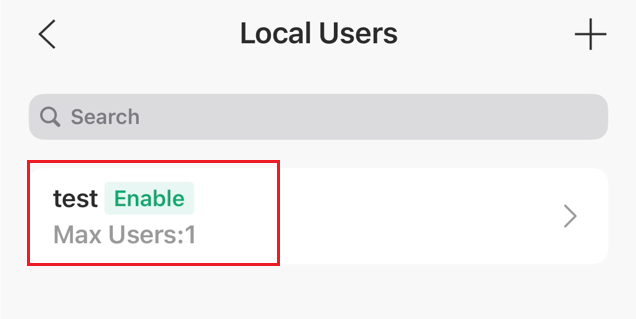
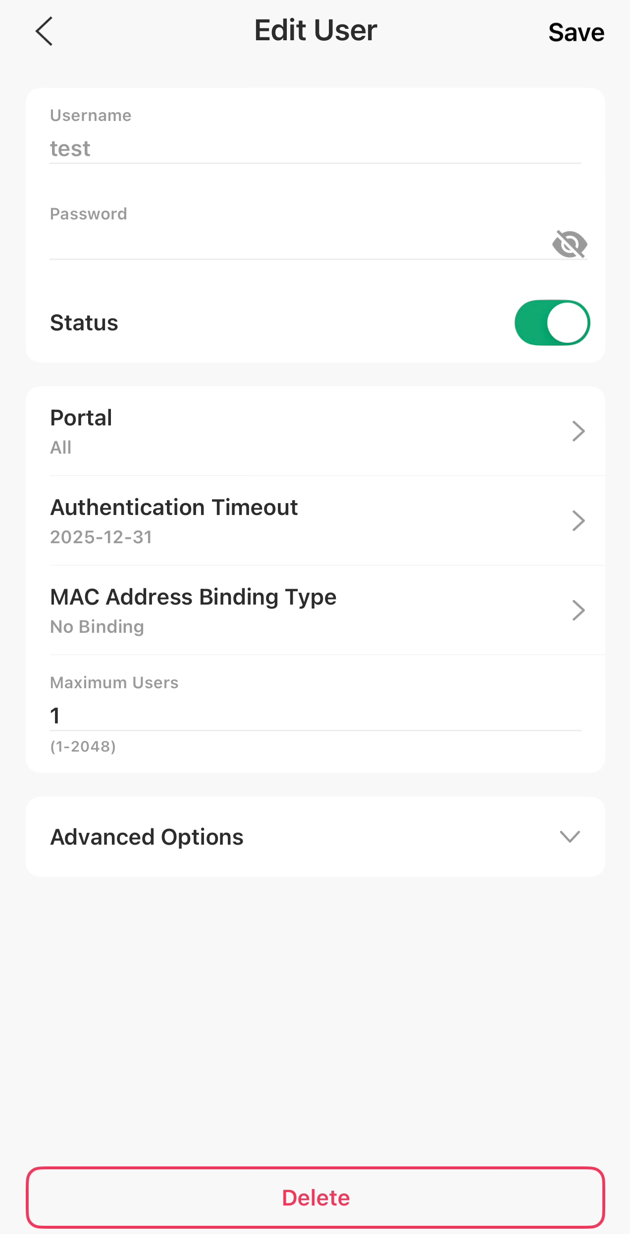
And you can click the item to edit the user or delete the item.
Step 8. Return to the Authentication page and tap on ‘Portal’ to enter the portal configuration page.
Step 9. If there is an item in the portal list, it verifies that the portal creation was successful.
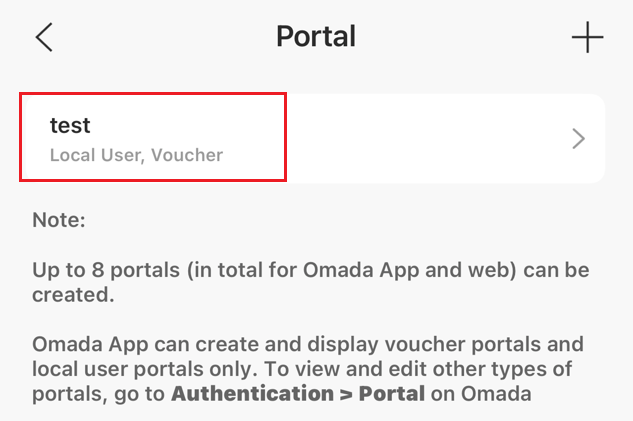
And you can click the item to edit the portal or delete the item.
Get to know more details of each function and configuration please go to Download Center to download the manual of your product.
