


Contents
Introduction
When connected to a network with a DHCP server (typically a gateway/router with the DHCP function enabled), Bridge APs in the same KIT will automatically form a bridge network upon power-on, while other Bridge APs need to be added manually.
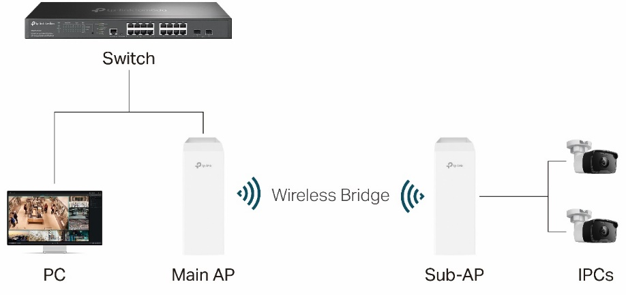
In the case of a network without a DHCP server, you need to set up your PC and the Bridge APs to use the PC as the gateway, then the Bridge APs can form a bridge network.
Requirements
- Omada wireless bridge APs
- PC
Configuration
When connected to a network without a DHCP Server, the Bridge AP will use the default DHCP fallback IP 192.168.0.254. On your PC, you need to add an IP address of the same network segment as this fallback IP so it can access the Bridge AP’s web page.
Step 1. Add an IP address 192.168.0.x on your PC.
Note: The steps below will use a Windows 10 operating system as an example. For operations of other operating systems, refer to How to configure static IP on the computer | TP-Link for help.
- On your PC, right-click the Network icon and choose Open Network & Internet settings.
- Go to Ethernet, then click Change adapter settings on the left.
- Right-click the current network and choose Properties.
- Double-click Internet Protocol Version 4 (TCP/IPv4).
- Click Advanced.
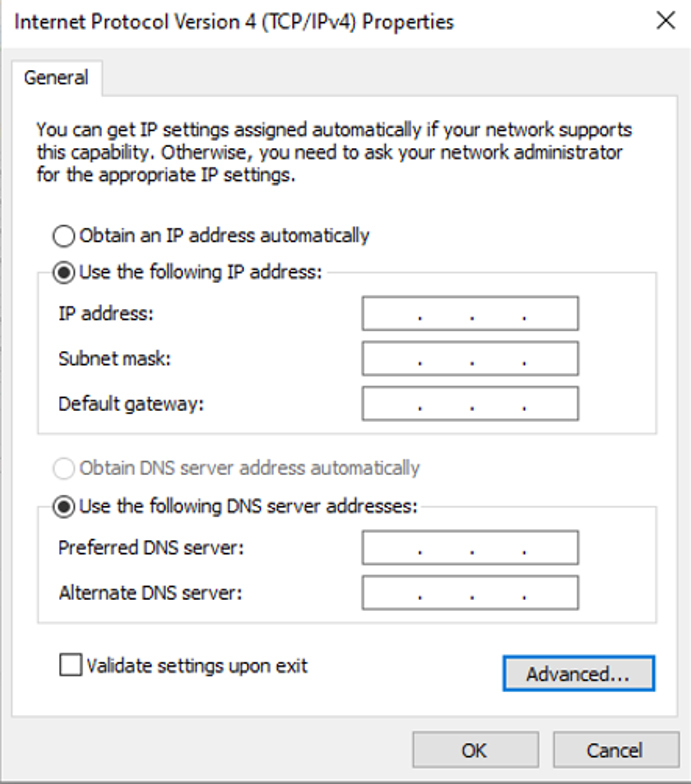
- Click Add and add an IP address of the same network segment as the Bridge AP’s DHCP fallback IP, for example, 192.168.0.100. Set the subnet mask and click Add.
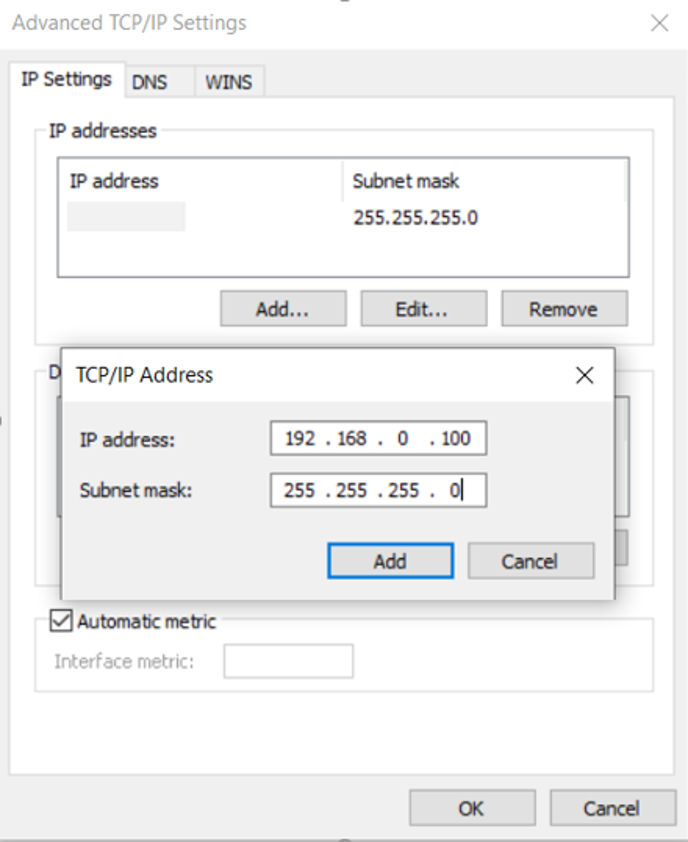
- Save the settings.
Step 2. Set up the first AP.
- Connect your PC to the AP.
- Launch a web browser and visit http://192.168.0.254. The AP’s web page will be displayed.
- Set up the new username and password to log in to the AP’s web page.
- Skip Sub-AP Scanning, configure wireless settings, and finish the initial setup.
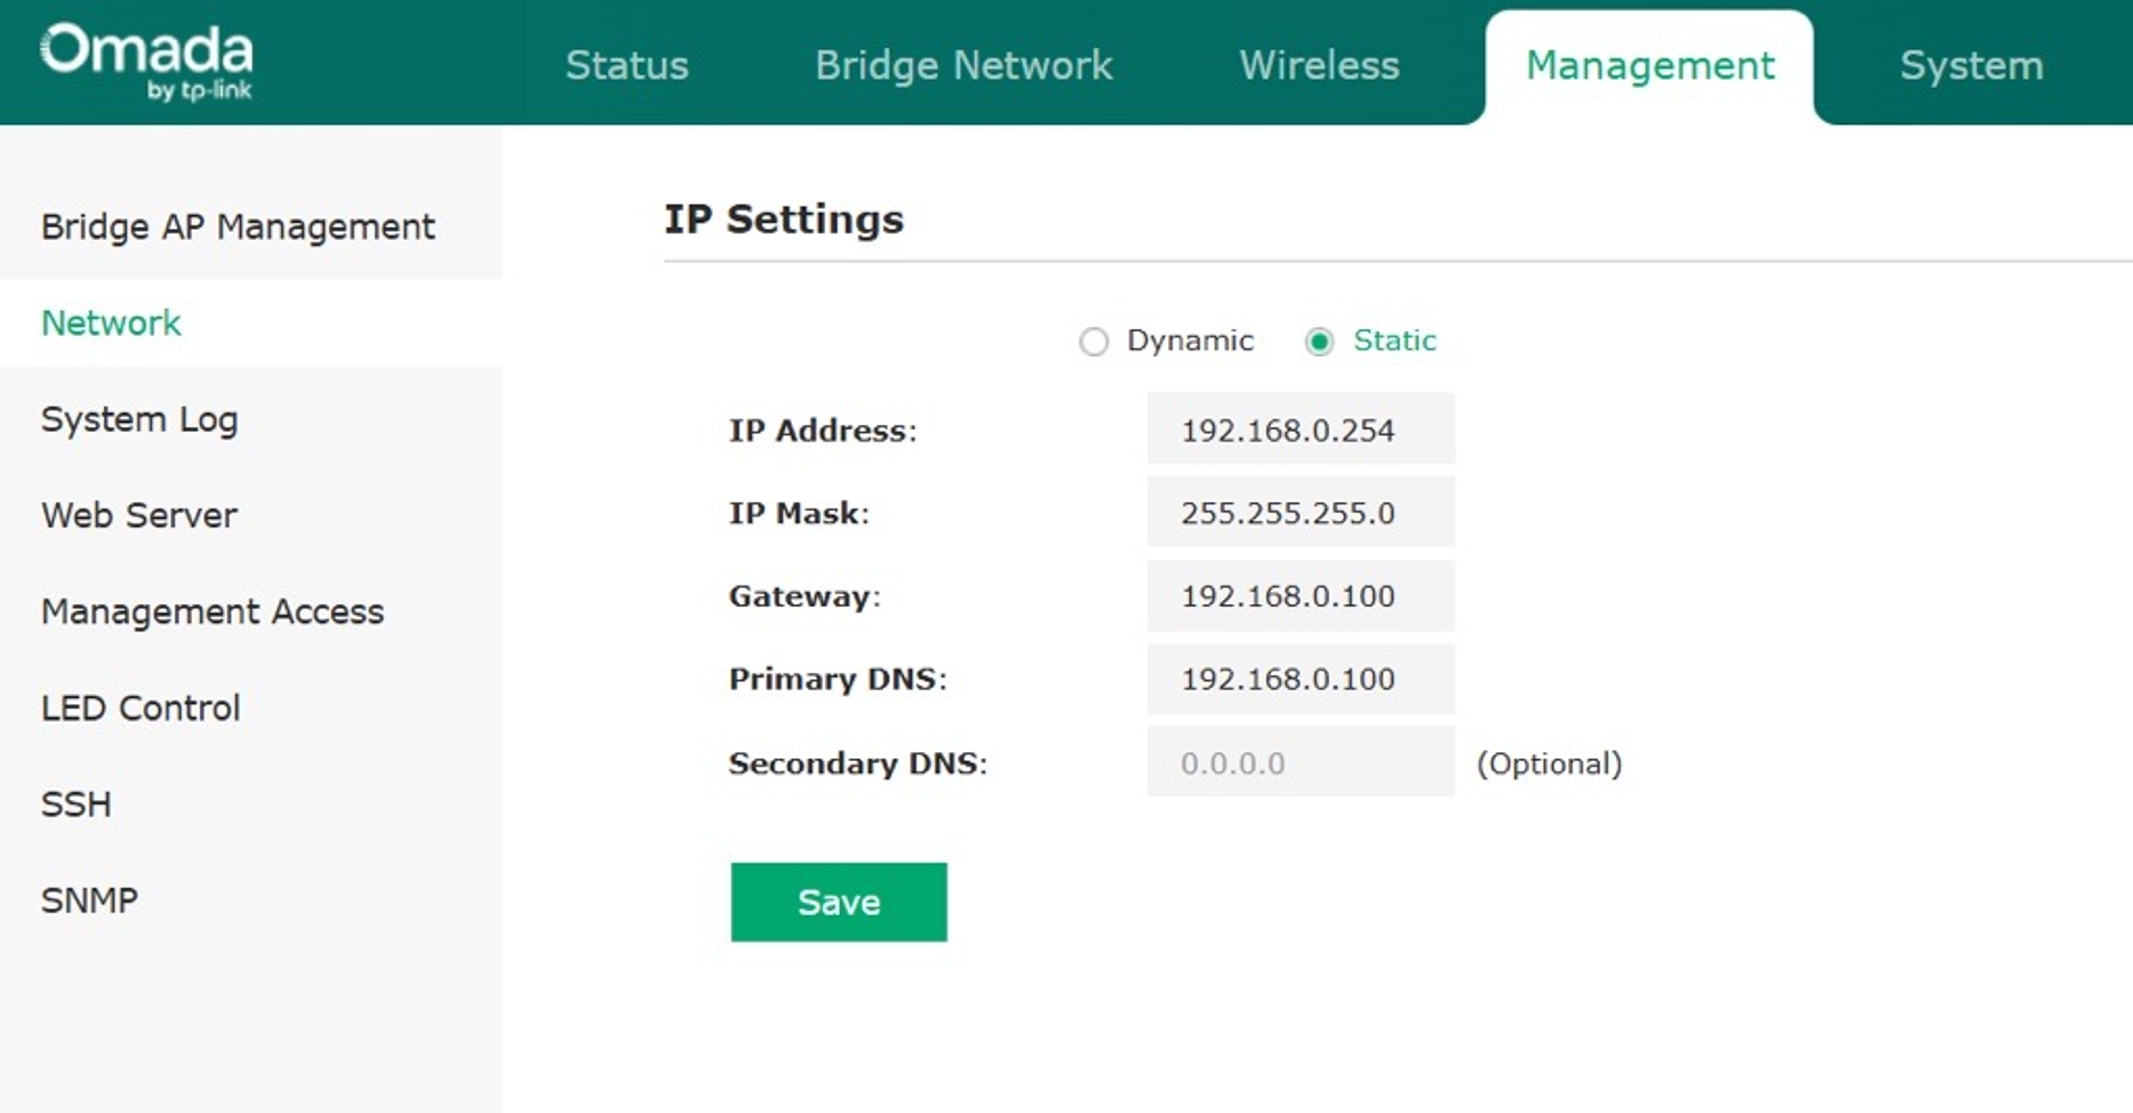
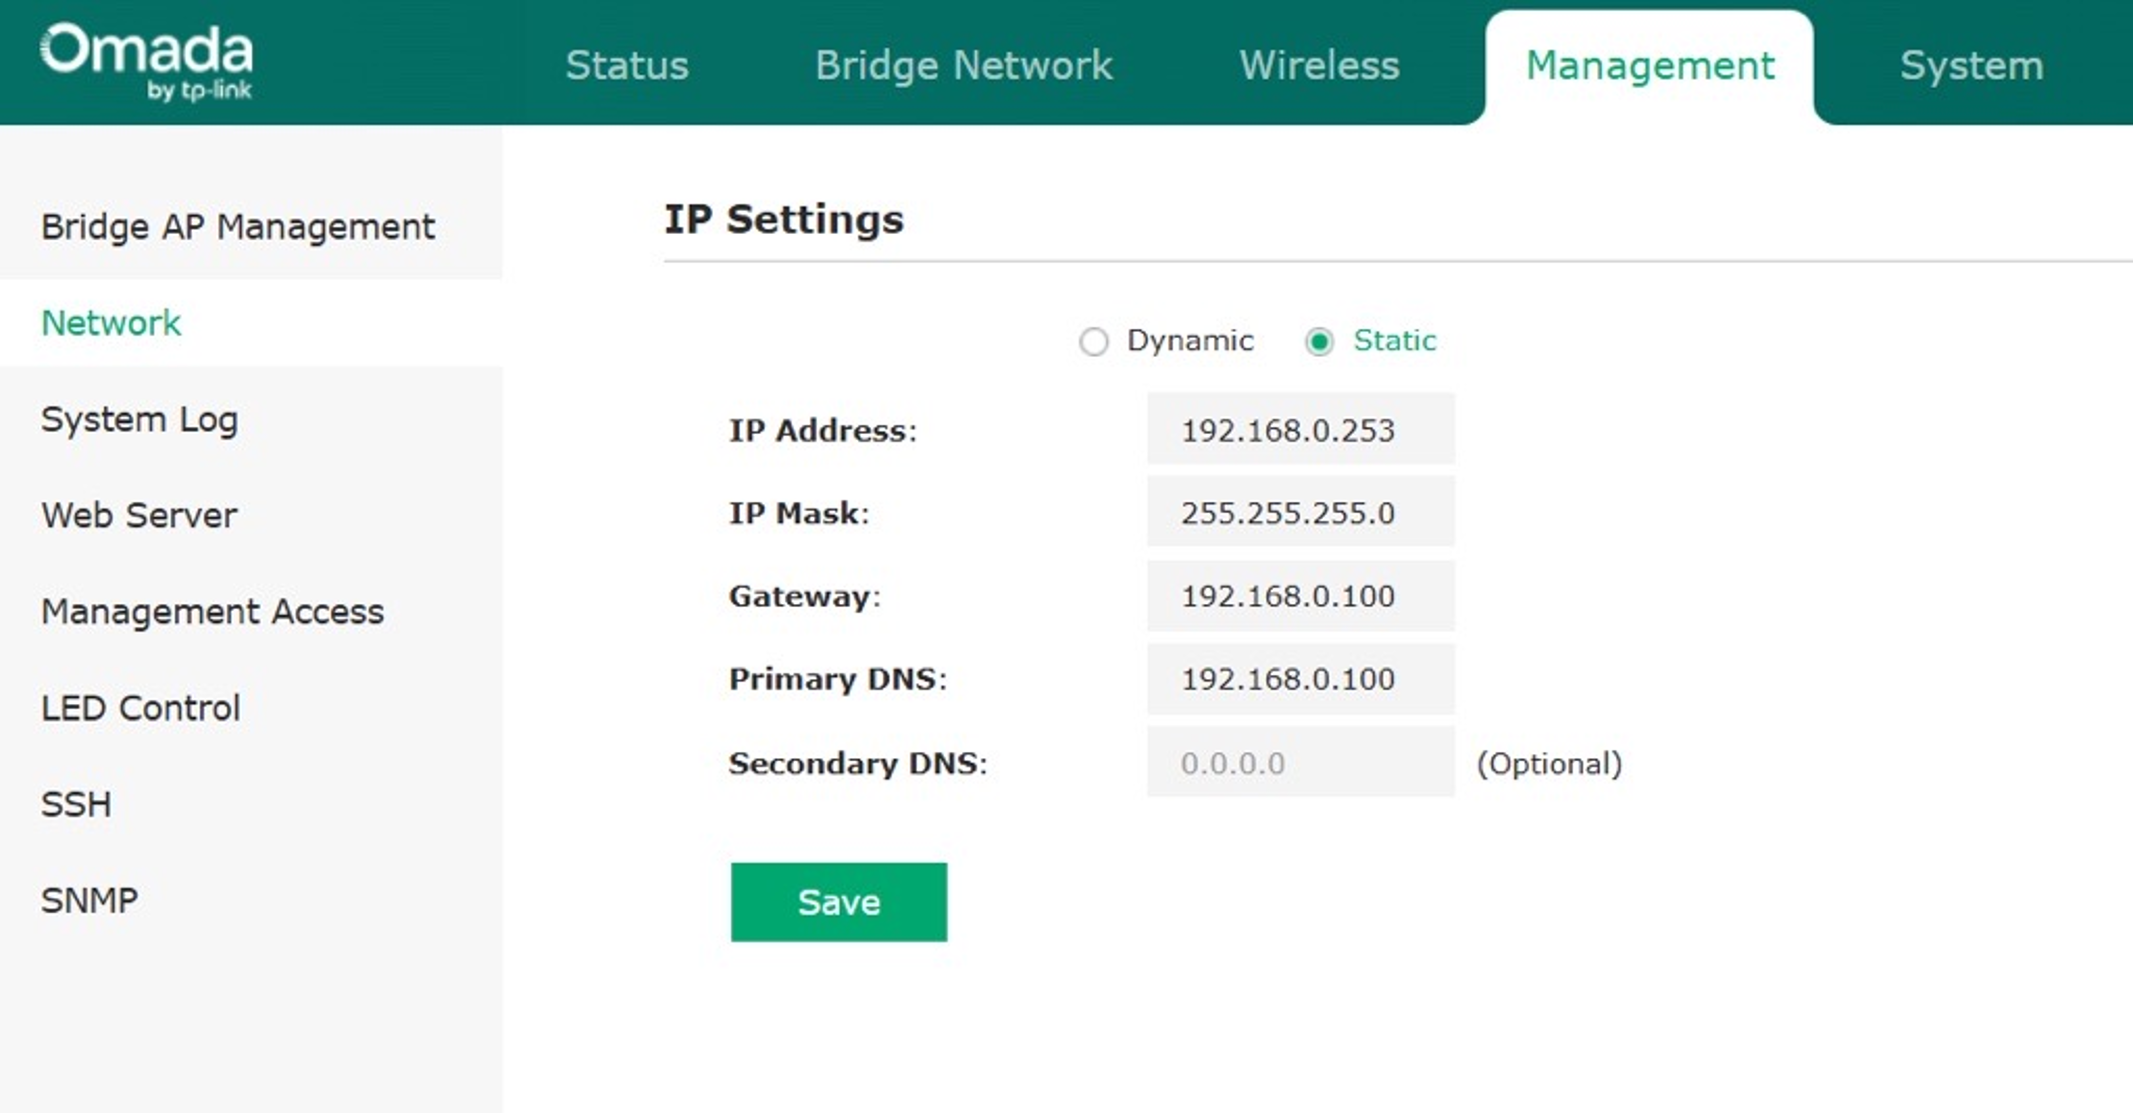
- Go to Management > Network. Select Static and set Gateway and Primary DNS to the IP address you added for your PC in Step 1.
Note: The Gateway IP should be configured as a reachable IP on the network (static IP is recommended), such as the NVR IP or the IP of a PC, here192.168.0.100 in this example).
- Save the settings.
Step 3. Set up the second AP.
- Connect your PC to the AP.
- Follow the instructions in Step 2 to set up this AP. Note that for this AP you need to change the default IP address to another IP in the same network segment (for example, 192.168.0.253) to avoid IP conflict.
- Save the settings. You will be redirected to the AP’s new web page http://192.168.0.253.
Step 4. Wait until the Bridge APs automatically form a bridge network. The Signal LEDs on the APs will turn on.
Note: Always ensure only one AP is connected to your PC (gateway). Each time after powered on, the AP connected to your PC (gateway) will work as the Main AP.
Step 5 (Optional). If you have Bridge APs of different KITs, set up them in a similar way, then go to the Main AP’s Management - Wireless Bridge APs page to manually add them.
Verification
Step 1. On your PC, launch a web browser, and you can access the web pages of the APs via http://AP’s IP address (http://192.168.0.253 and http://192.168.0.254 in this example).
Step 2. On the web page of the Main AP (the one with wired connection to your PC), go to Management > Wireless Bridge APs, and you can find the list of APs in the network.
Conclusion
With the PC working as the gateway, the Bridge APs now can form a bridge network.
To learn more about each function and configuration, please visit Support Home to download or check the manual for your product.
