


Contents
Configuration for Standalone Mode Using PC
Configuration for Standalone Mode Using Omada App
Configuration for Controller Mode Using PC
Configuration for Controller Mode Using Omada App
Introduction
This article introduces the basic configuration, usage, and DIP Switch pairing of the Sector Bridge 5 and Flex Bridge 5 in Standalone Mode and on the Omada Controller via PC and Omada App.
Requirements
- Sector Bridge 5
- Flex Bridge 5
- Omada Network (Software Controller / Hardware Controller / Cloud-Based Controller, v6.2 and above)
- Omada App (Version 5.1 or higher)
Configuration
Configuration for Standalone Mode Using PC
Network Topology
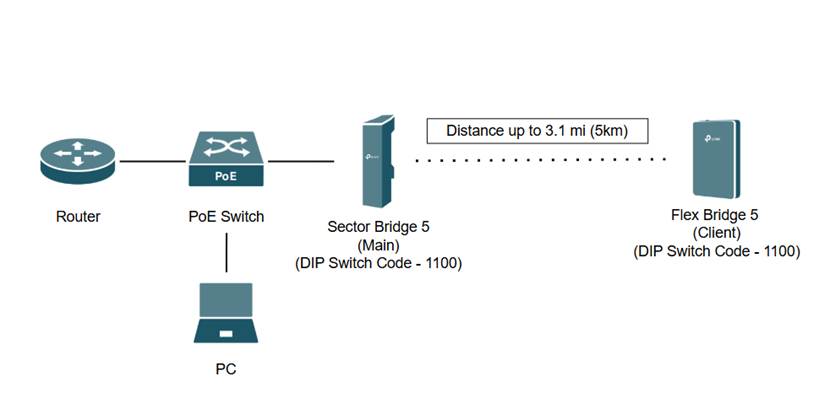
Note: A Windows 11 Laptop is used for this section along with a router, PoE switch, Sector Bridge 5, and Flex Bridge 5.
Note: Pairing DIP Switch code is set to 1100 on the Sector Bridge 5 and the Flex Bridge 5. Role Switch on the Flex Bridge 5 is set to “Client”.
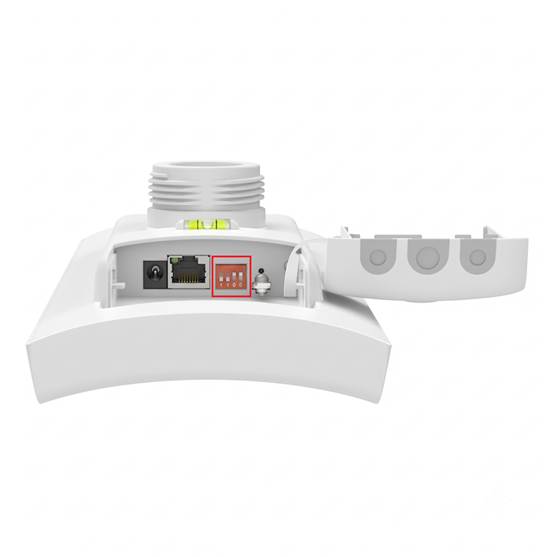
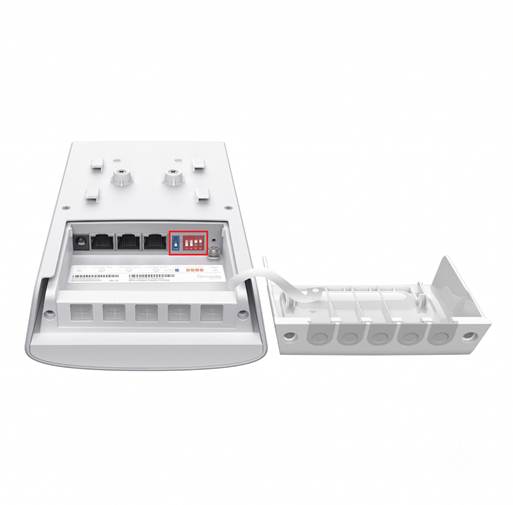
Step 1. Install and power on the Sector Bridge 5 and Flex Bridge 5 and log in to the Standalone Web GUI of the Main AP on the PC. Ensure the devices are using the same Pairing DIP Switch code.
For example, the IP address given to the Main AP via DHCP is 192.168.0.103, so you type https://192.168.0.103 in the web browser address bar to log into the Web GUI.
First, create the device’s account, and then log into it.
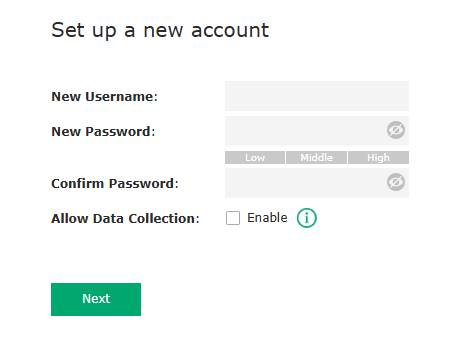
Step 2. Go through the Quick Setup process and set up Management WLAN.
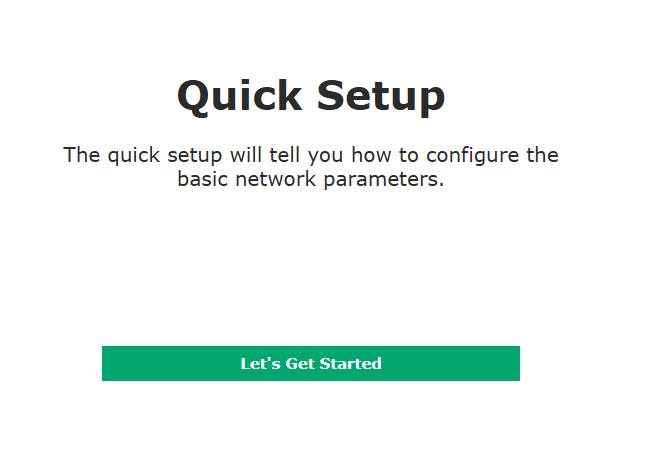
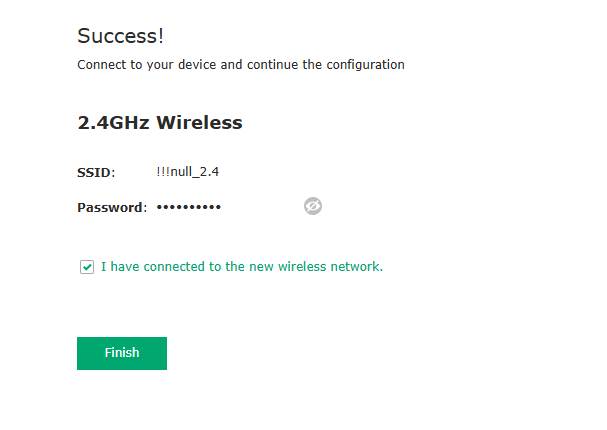
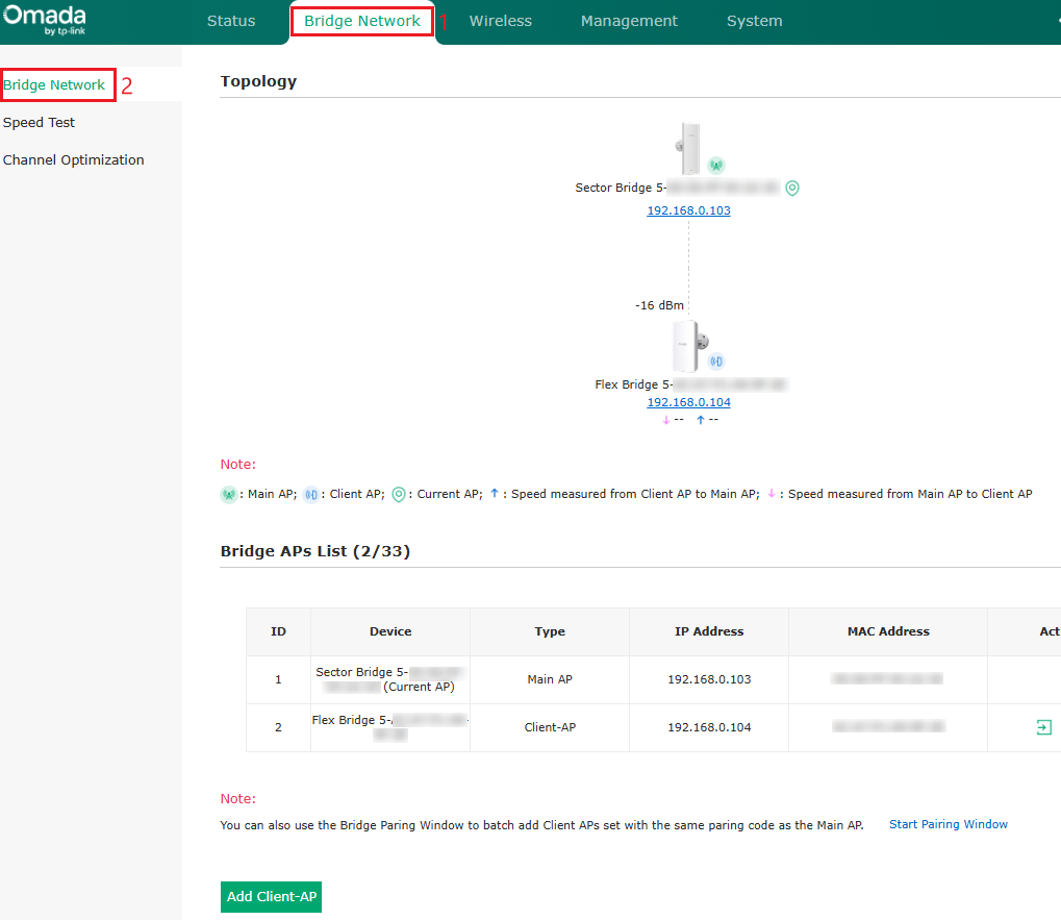
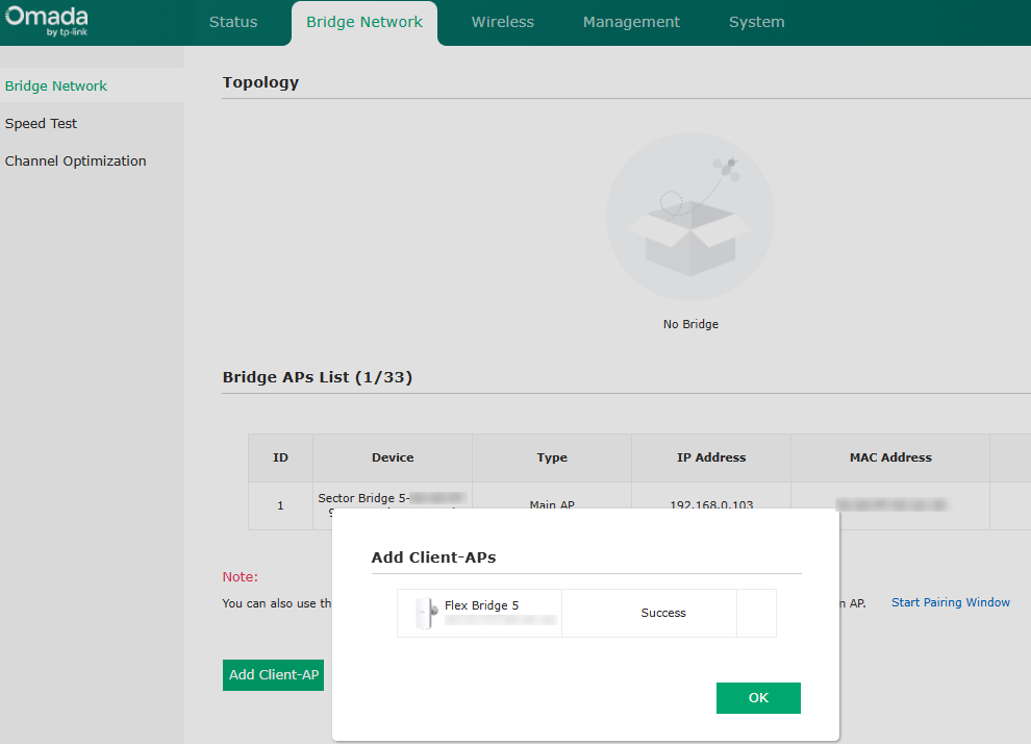
Step 3. Check the bridge connection in Bridge Network tab. The Sector Bridge 5 will automatically pair with the Flex Bridge 5 if configured correctly with matching Pairing DIP Switch codes. Additionally, you can add another Client AP.
You can check the remaining pairing time or stop automatic pairing on the Management > Bridge AP Management page of the Sector Bridge 5.
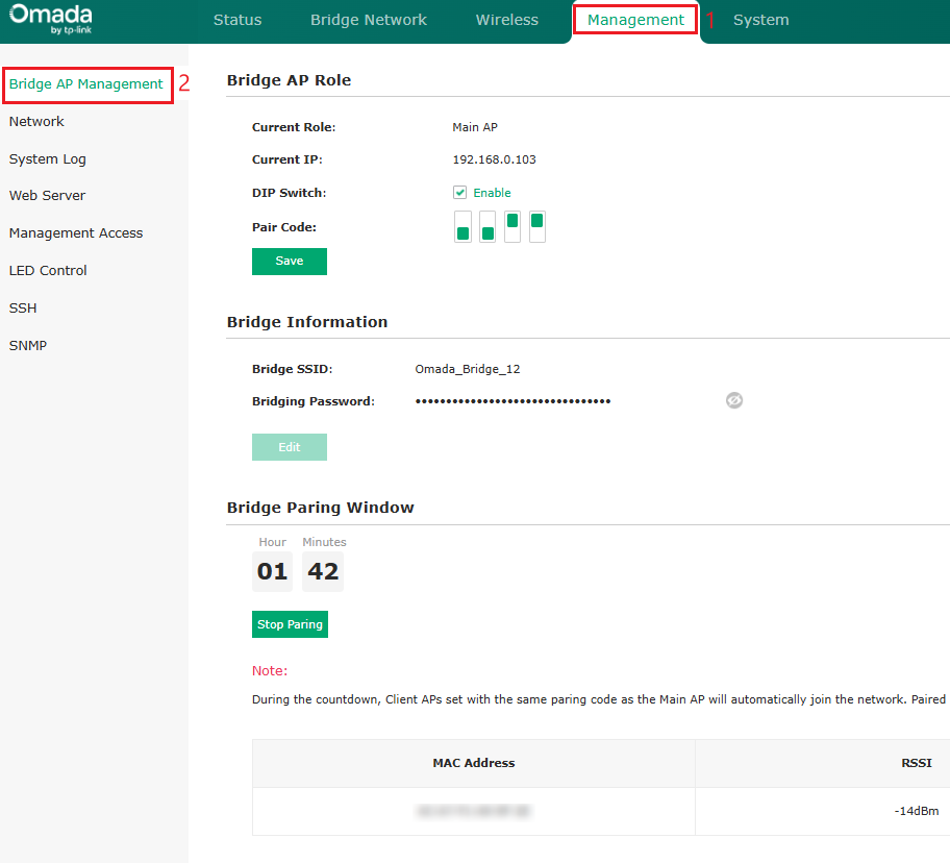
Note: The window period lasts 2 hours, starting from the moment a Client AP establishes a network connection via pairing and a passcode.
Step 4. You can also change the management method of the bridge device on the Bridge AP Management page.
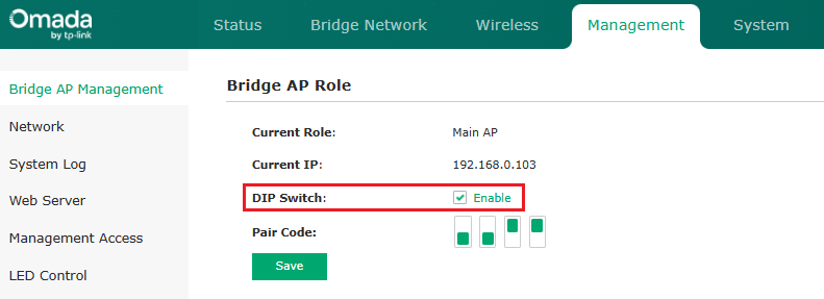
DIP Switch: It is enabled by default, and the client AP can only be adopted when the pairing code is consistent with that of the main AP.
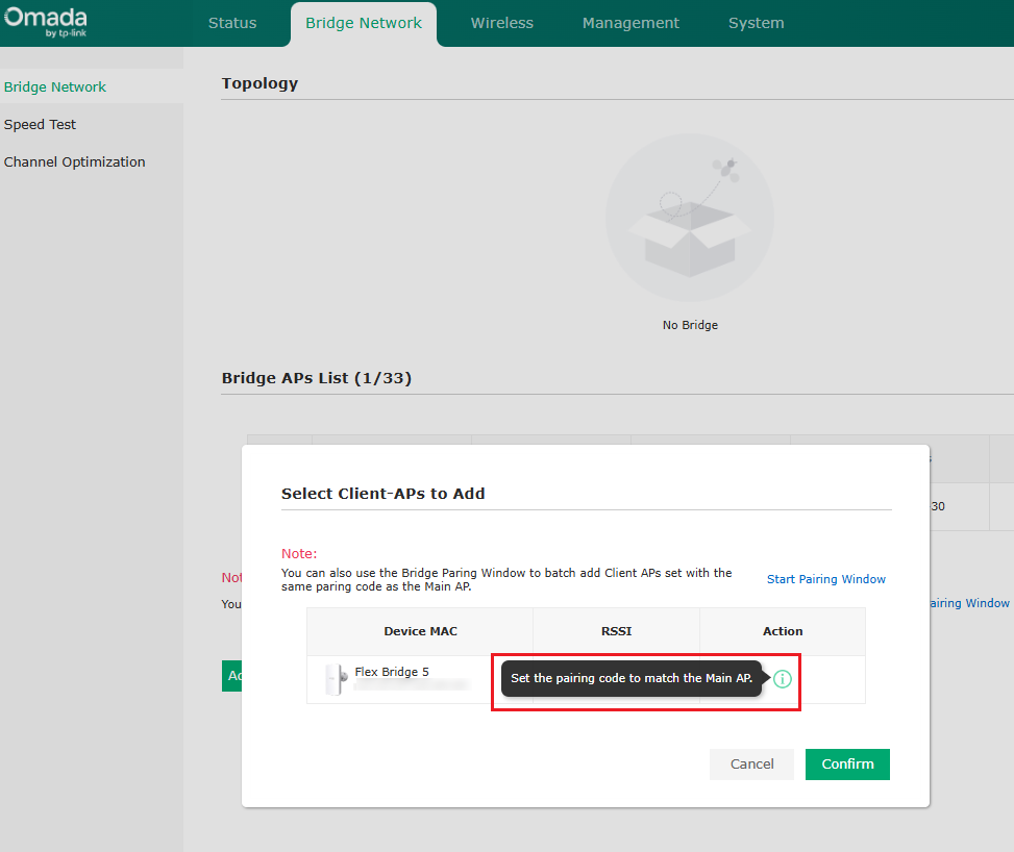
While adopting the device, if the DIP Switch is enabled and the pairing code of the Flex Bridge 5 does not match there will be no Bridge Network topology formed and there will be this warning message:
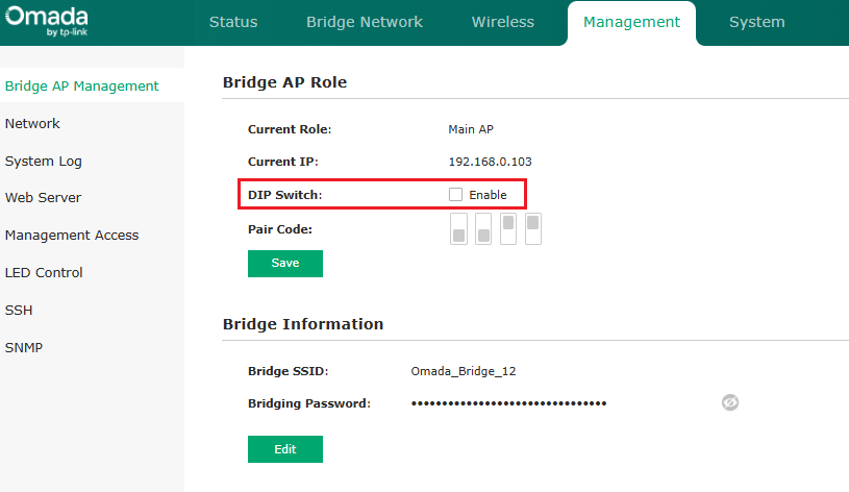
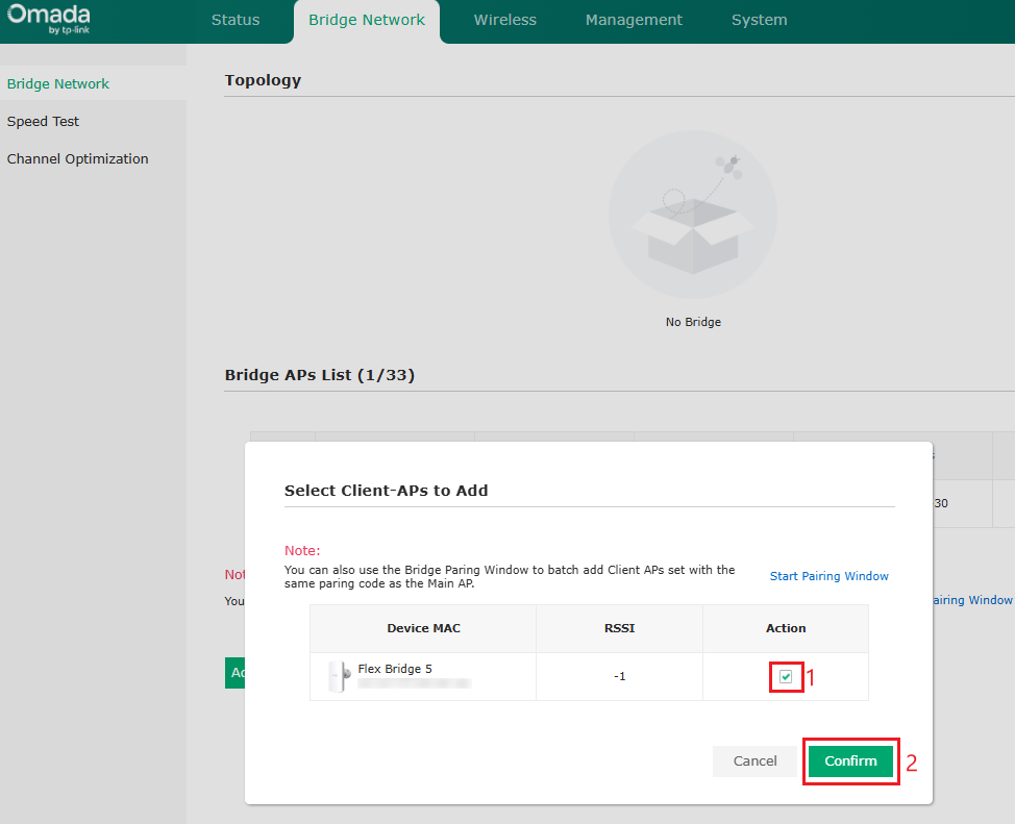
If the Pairing DIP switch is set to Disable, hardware-based pairing is deactivated. To connect the Sector Bridge 5 and Flex Bridge 5, you must configure their roles (Main/Client AP) manually and pair them via software scanning.
Configuration for Standalone Mode Using Omada App
Network Topology
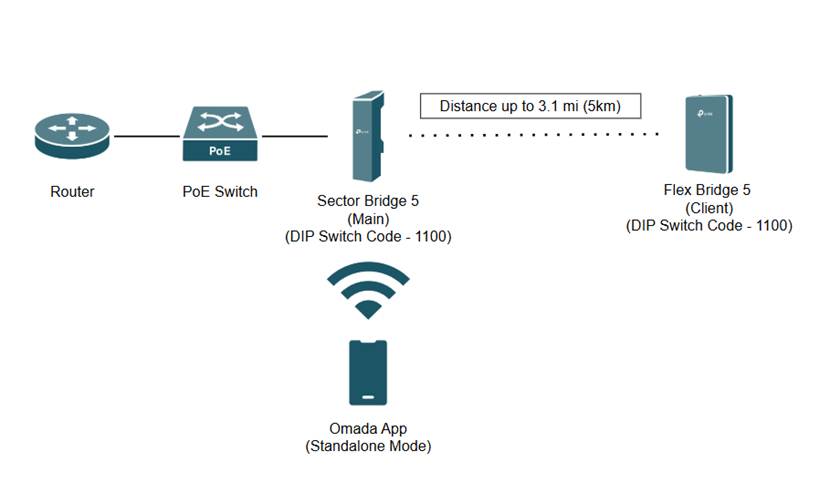
Note: Pairing DIP Switch code is set to 1100 on the Sector Bridge 5 and the Flex Bridge 5. Role Switch on the Flex Bridge 5 is set to “Client”.
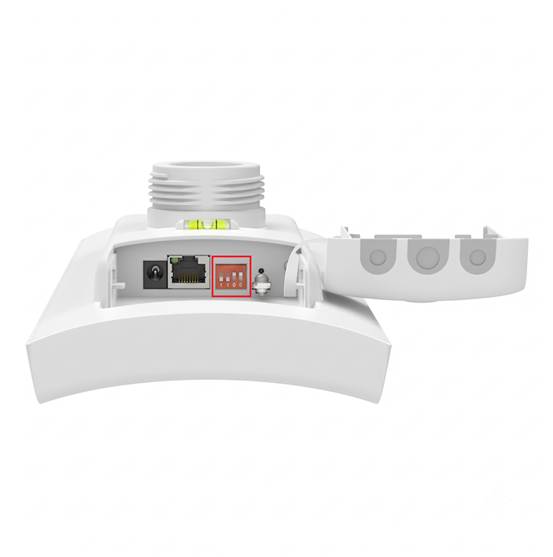
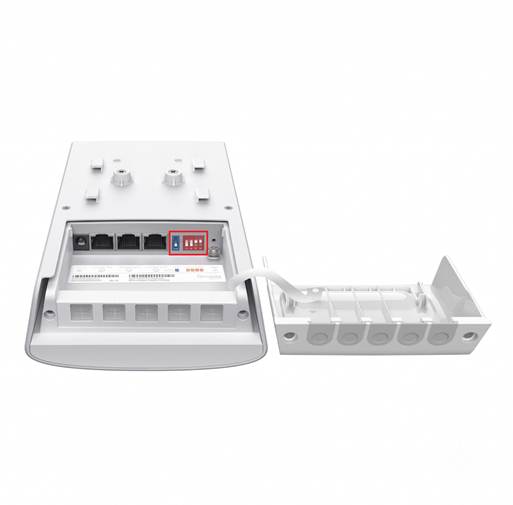
Step 1. Install and power on the Sector Bridge 5 and Flex Bridge 5. Ensure the devices are using the same Pairing DIP Switch code. Connect to the SSID of the Sector Bridge 5 which can be found on the back of the device.
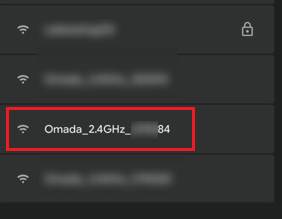
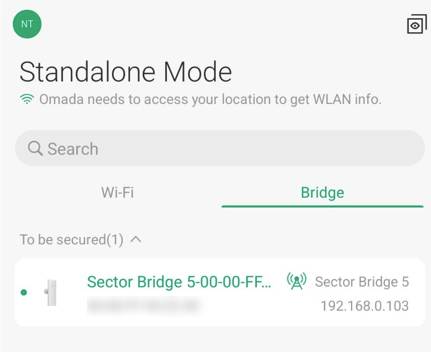
Step 2. Go to Omada App and ensure you are in Standalone Mode. Go to Bridge, and the Sector Bridge 5 will be listed. Click on the device.
Step 3. Follow the on-screen instructions and set up the Device Account, Bridge name, and Management SSID.
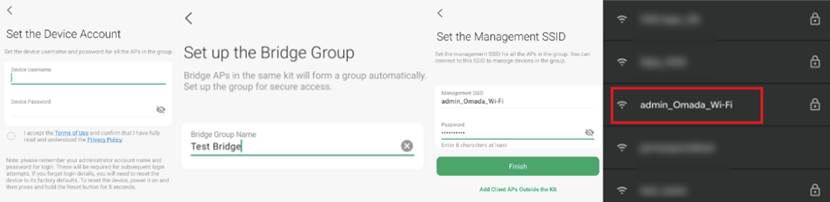
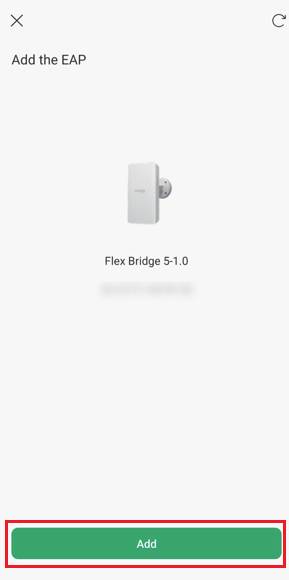
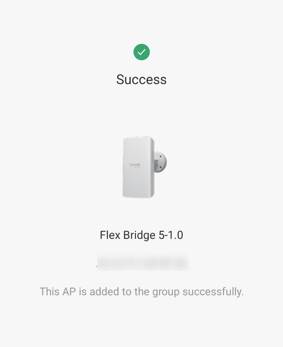
Step 4. Once connected to the Management SSID that was created, go back to the Omada App and the Sector Bridge 5 will automatically pair with the Flex Bridge 5 in the Bridge group that was created.
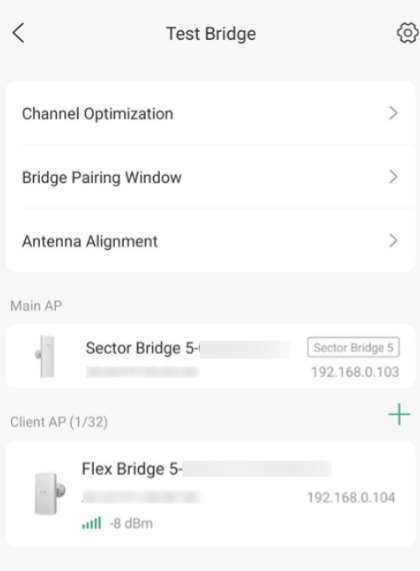
You can check the remaining pairing time or stop automatic pairing on the Bridge Group > Bridge Pairing Window page.
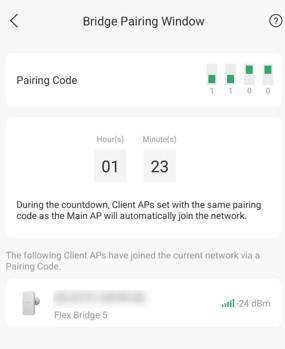
Note: The window period lasts 2 hours, starting from the moment a Client AP establishes a network connection via pairing and a passcode.
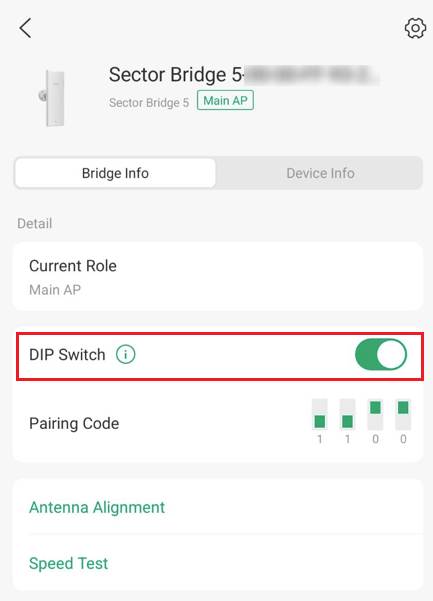
Step 5. You can change the management method of the bridge device on the Device page.
DIP Switch: It is enabled by default, and the client AP can only be adopted when the pairing code is consistent with that of the main AP.
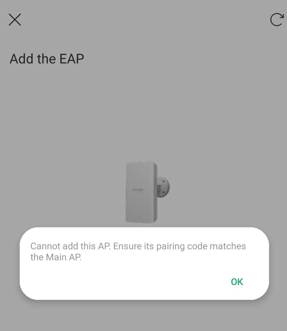
While adopting the device, if the DIP Switch is enabled and the pairing code of the Client AP does not match:
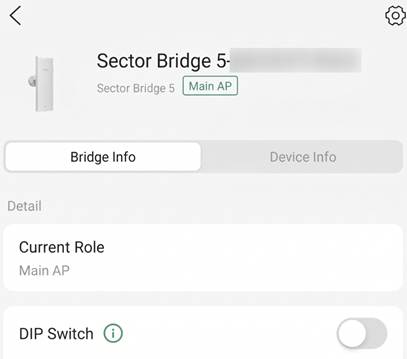
If the Pairing DIP switch is set to Disable, hardware-based pairing is deactivated. To connect the Sector Bridge 5 and Flex Bridge 5, you must configure their roles (Main/Client AP) manually and pair them via software scanning.
Configuration for Controller Mode Using PC
Network Topology
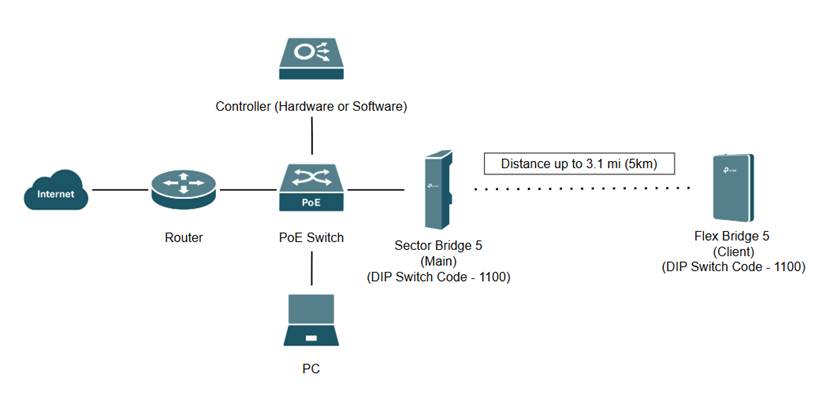
Note: A Windows 11 Laptop is used for this section along with a hardware controller, router, PoE switch, Sector Bridge 5, and Flex Bridge 5.
Note: Pairing DIP Switch code is set to 1100 on the Sector Bridge 5 and the Flex Bridge 5. Role Switch on the Flex Bridge 5 is set to “Client”.
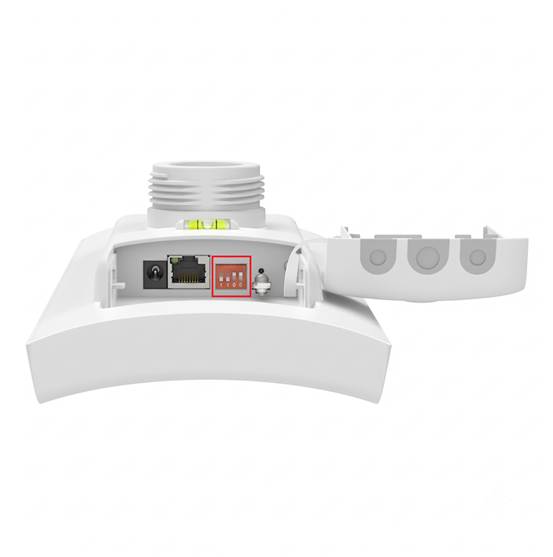
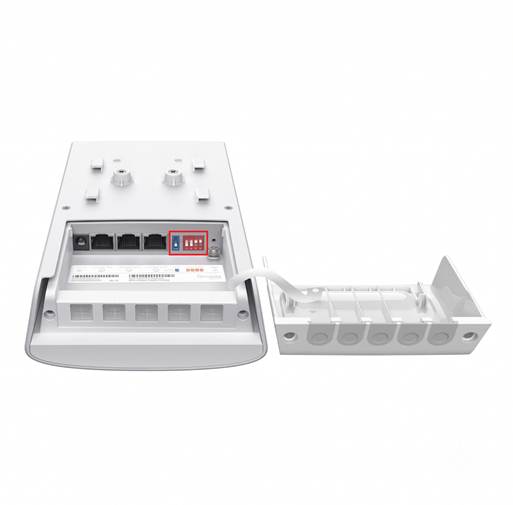
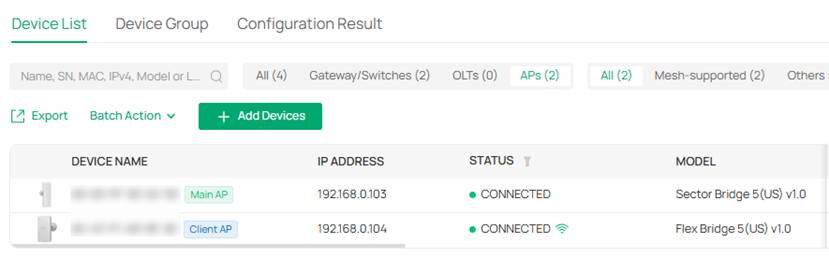
Step 1. Install and power on the Sector Bridge 5 and Flex Bridge 5 and log in to the controller. Ensure the devices are using the same Pairing DIP Switch code.
After the Sector Bridge 5 is adopted, the Flex Bridge 5 (client AP) in the same group with the same pairing code will be automatically adopted as well within a two hour time window.
You can check the remaining pairing time or stop automatic pairing on the Device > Manage Device > Overview > Pairing Window page of main AP.

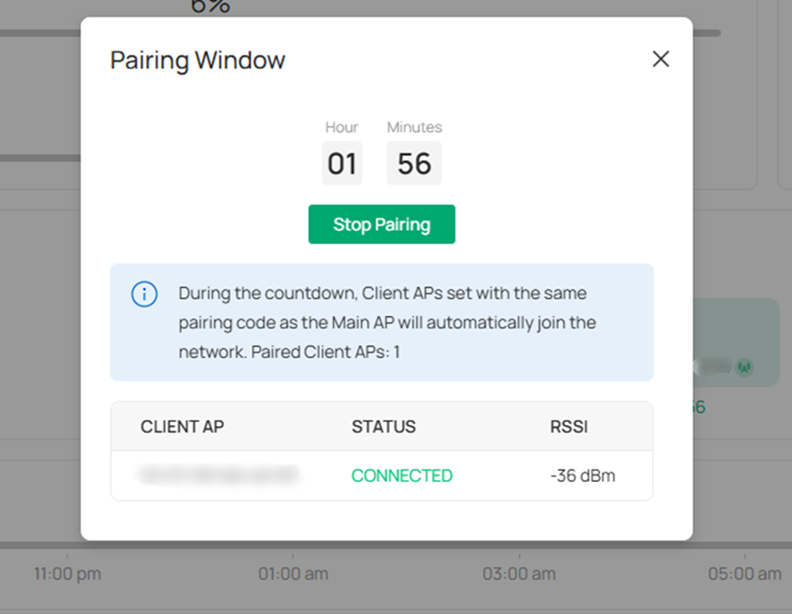
Note: The window period lasts 2 hours, starting from the moment a Client AP establishes a network connection via pairing and a passcode.
Step 2. After the device is adopted, a management WLAN will be automatically created. It is an unencrypted SSID mainly used for device management and is not recommended for internet access.
Note: Disabling Management Radio will terminate wireless management access. Only wired clients can manage the device.
Note: Once a Flex Bridge 5 or Sector Bridge 5 is adopted by the Controller, the automatically generated Management WLAN will automatically shut down after 2 hours and will no longer accept connections. It is highly recommended to manually configure a dedicated Management WLAN and set up your wireless encryption during the initial setup.
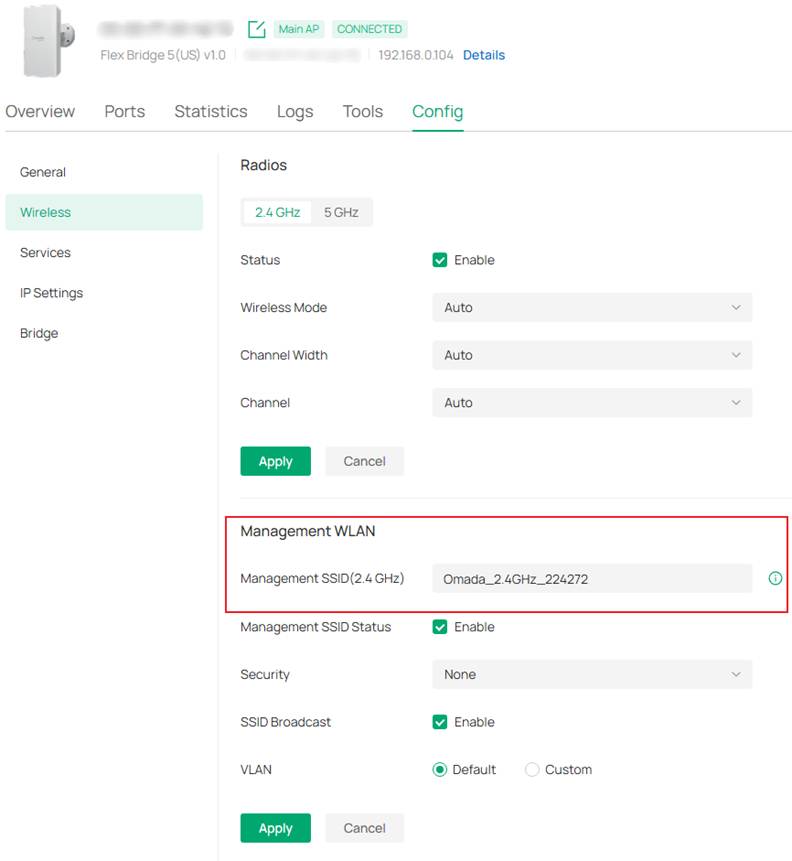
Step 3. You can change the management method of the bridge device on the Bridge page.
DIP Switch: It is enabled by default, and the client AP can only be adopted when the pairing code is consistent with that of the main AP.
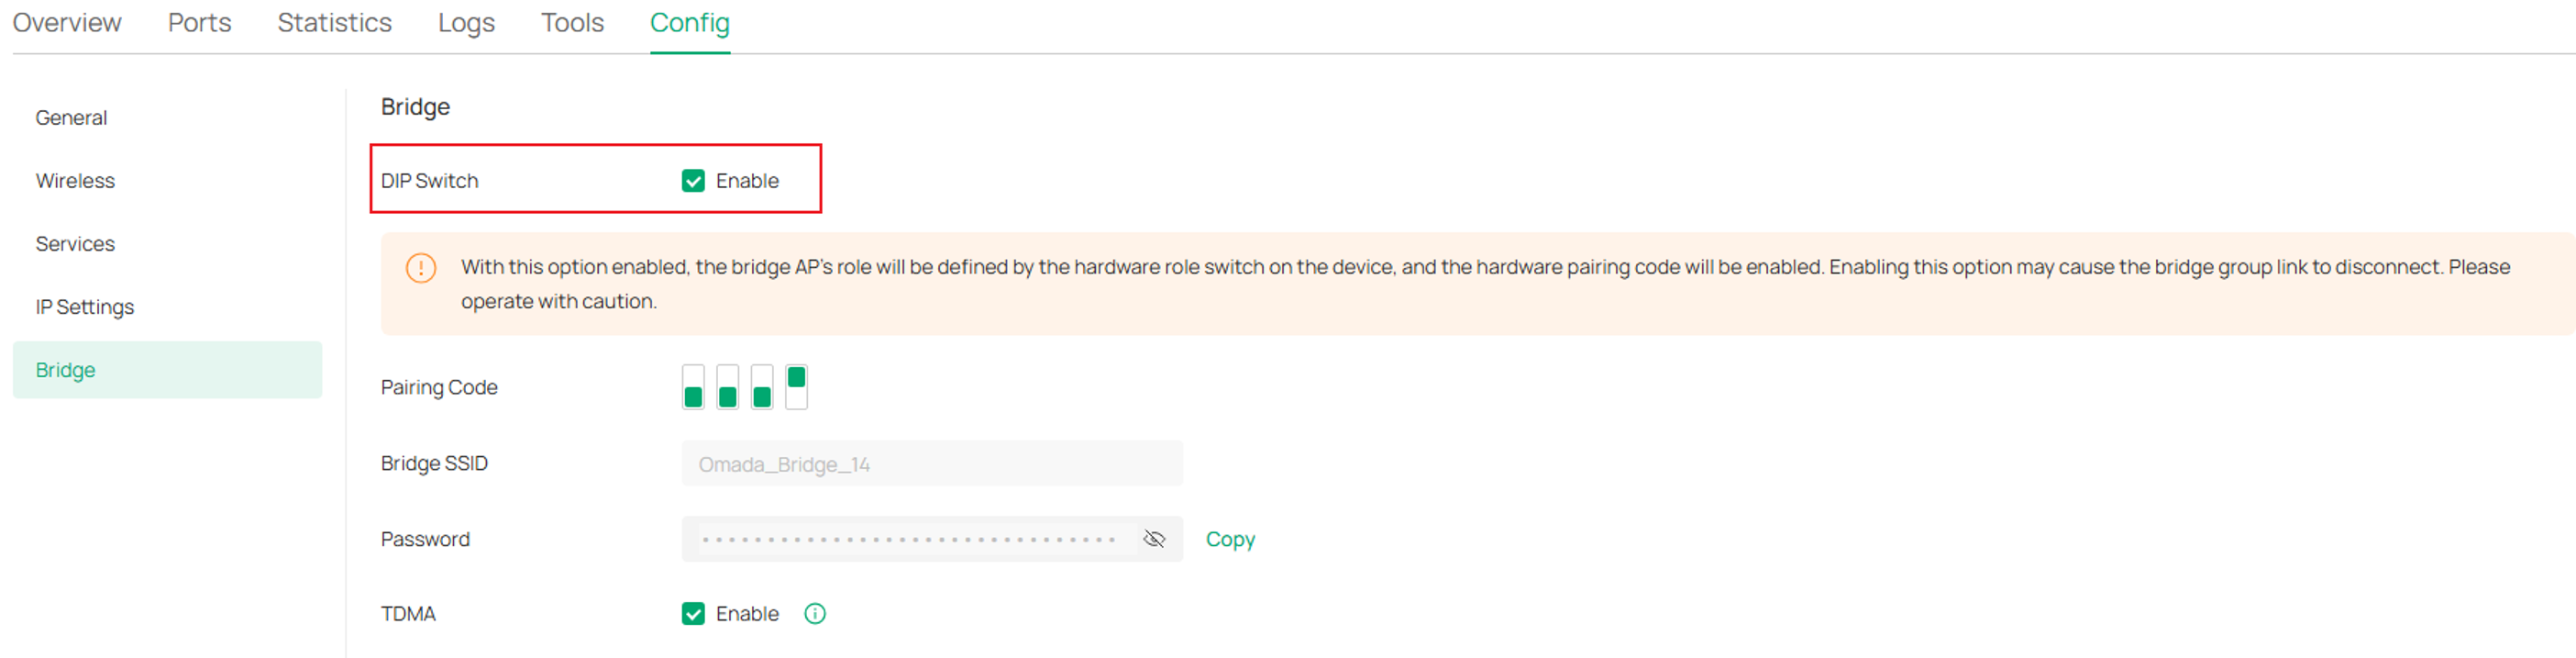
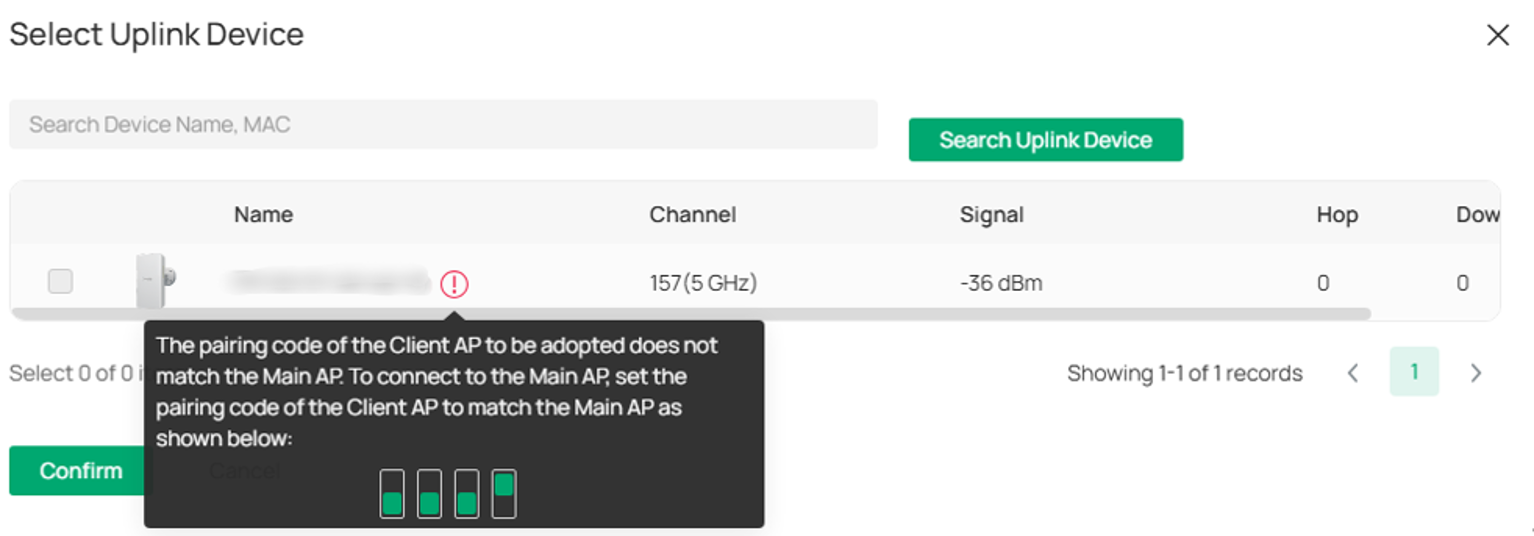
While adopting the device, if the DIP Switch is enabled and the pairing code of the Client AP does not match:
If the Pairing DIP switch is set to Disable, hardware-based pairing is deactivated. To connect the Sector Bridge 5 and Flex Bridge 5, you must configure their roles (Main/Client AP) manually and pair them via software scanning.
TDMA: TDMA can meet the requirements of bridge P2MP scenarios, efficiently scheduling each Client AP to access the Main AP in an orderly manner, thereby achieving optimal resource utilization.
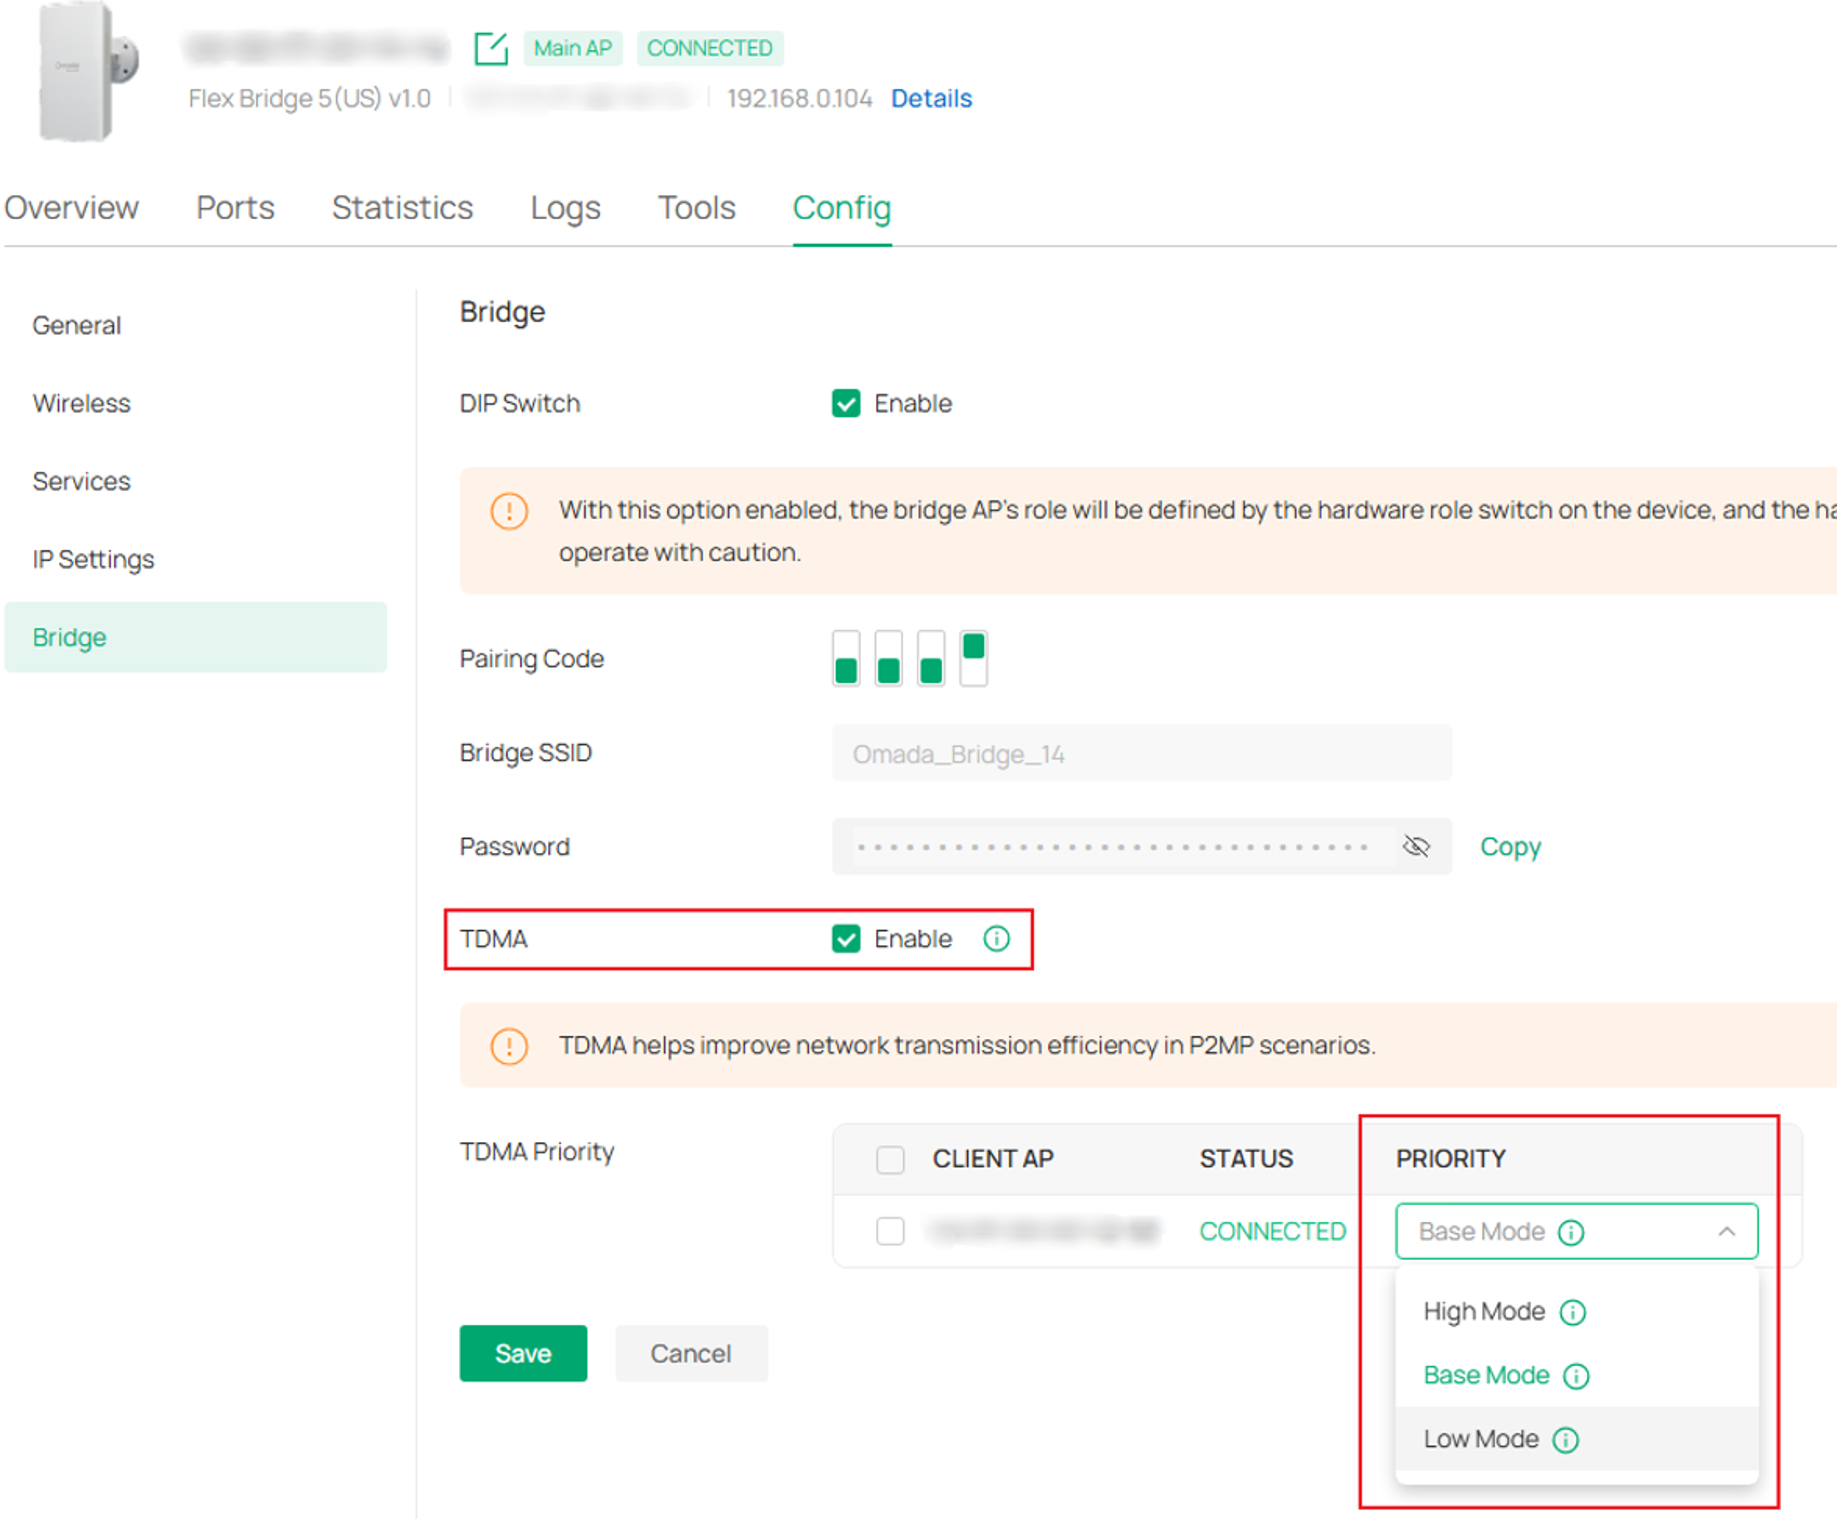
Each client AP can choose three priority levels: Low Mode, Basic Mode, High Mode.
The higher the priority, the higher the average throughput of the Client AP and the lower the average latency.
Configuration for Controller Mode Using Omada App
Network Topology
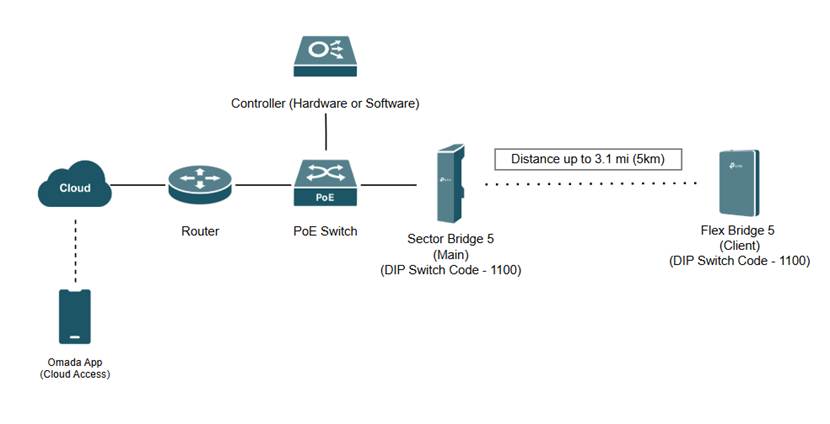
Note: An Android mobile device with Omada App in Controller Mode is connected to a hardware controller via Cloud Access along with a router, PoE switch, Sector Bridge 5, and Flex Bridge 5.
Note: Pairing DIP Switch code is set to 1100 on the Sector Bridge 5 and the Flex Bridge 5. Role Switch on the Flex Bridge 5 is set to “Client”.
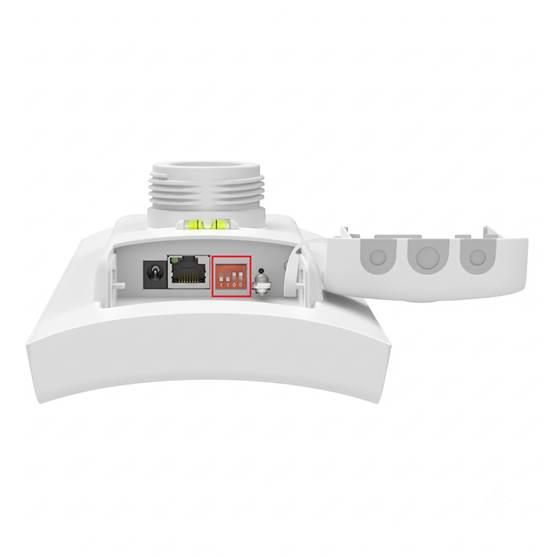
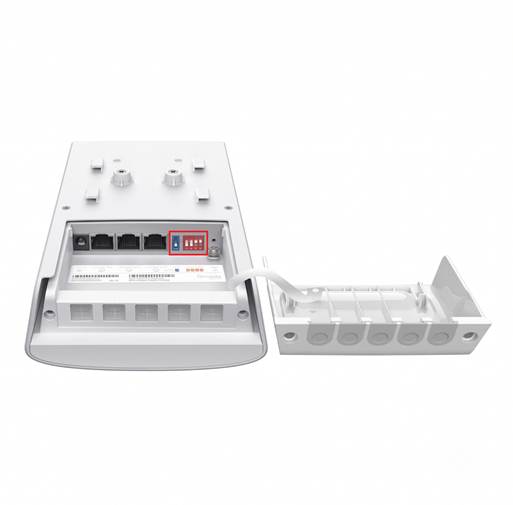
Step 1. Install and power on the Sector Bridge 5 and Flex Bridge 5. Ensure the devices are using the same Pairing DIP Switch code.
After the main AP is adopted, the client AP in the same group with the same pairing code will be automatically adopted as well within a two hour time window.
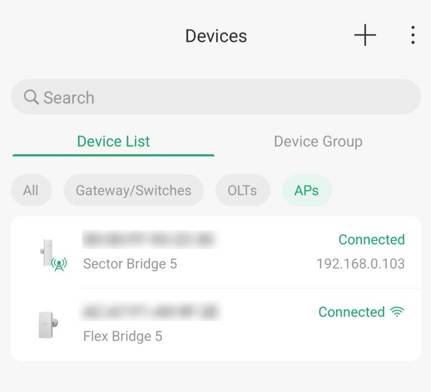
You can check the remaining pairing time or stop automatic pairing on the Device > Overview > Bridge Pairing Window page of main AP.
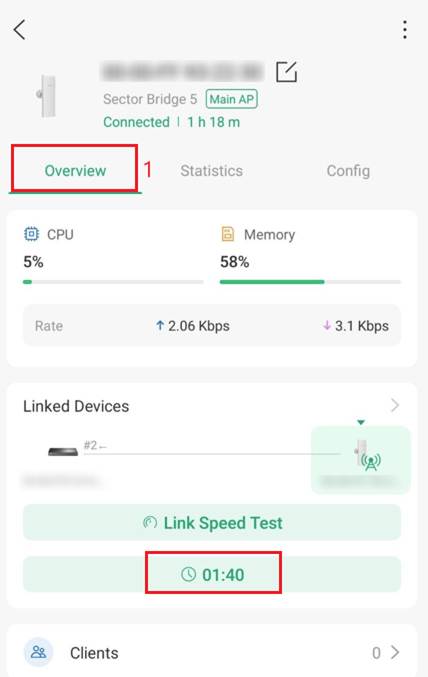
Note: The window period lasts 2 hours, starting from the moment a Client AP establishes a network connection via pairing and a passcode.
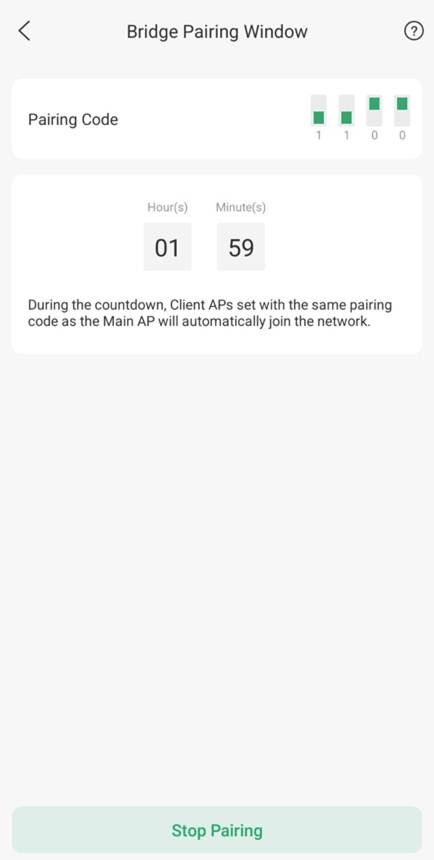
Step 2. After the device is adopted, a management WLAN will be automatically created. It is an unencrypted SSID mainly used for device management and is not recommended for internet access.
You can find the Management WLAN setting in Config > Management WLAN.
Note: Disabling Management Radio will terminate wireless management access. Only wired clients can manage the device.
Note: Once a Flex Bridge 5 or Sector Bridge 5 is adopted by the Controller, the automatically generated Management WLAN will automatically shut down after 2 hours and will no longer accept connections. It is highly recommended to manually configure a dedicated Management WLAN and set up your wireless encryption during the initial setup.
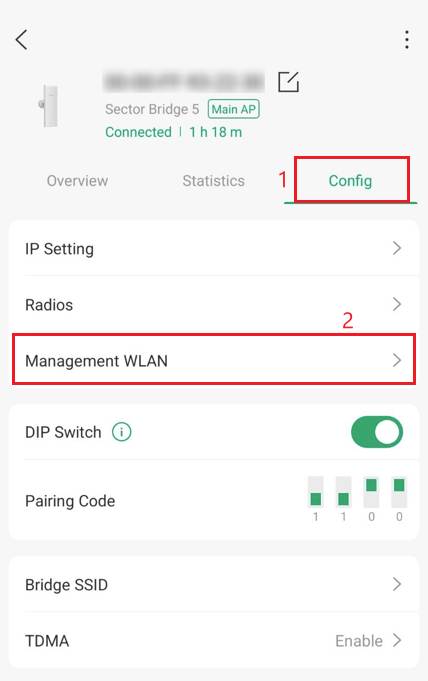
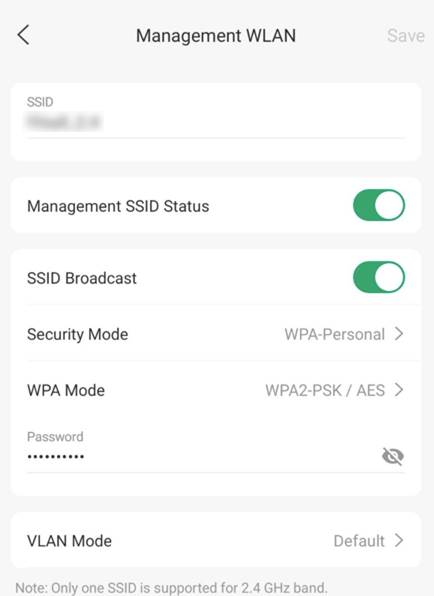
Step 3. You can change the management method of the bridge device on the Device > Config page.
DIP Switch: It is enabled by default, and the Flex Bridge 5 (client AP) can only be adopted when the pairing code is consistent with that of the main AP.
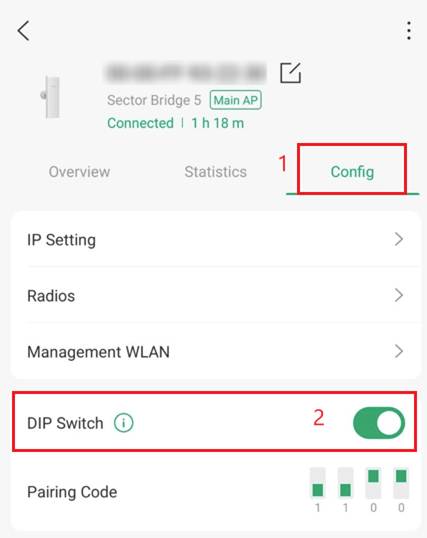
While adopting the device, if the DIP Switch is enabled and the pairing code of the Client AP does not match:
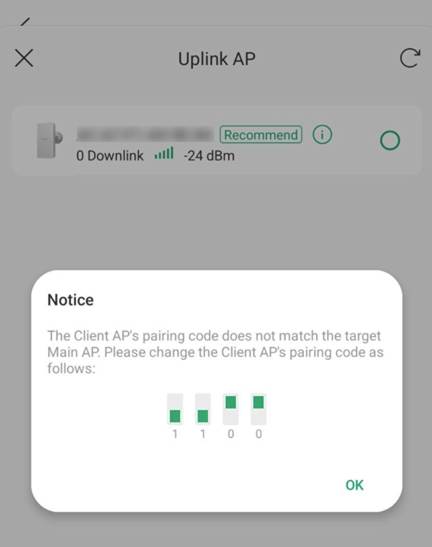
If the Pairing DIP switch is set to Disable, hardware-based pairing is deactivated. To connect the Sector Bridge 5 and Flex Bridge 5, you must configure their roles (Main/Client AP) manually and pair them via software scanning.
TDMA: TDMA can meet the requirements of bridge P2MP scenarios, efficiently scheduling each Client AP to access the Main AP in an orderly manner, thereby achieving optimal resource utilization.
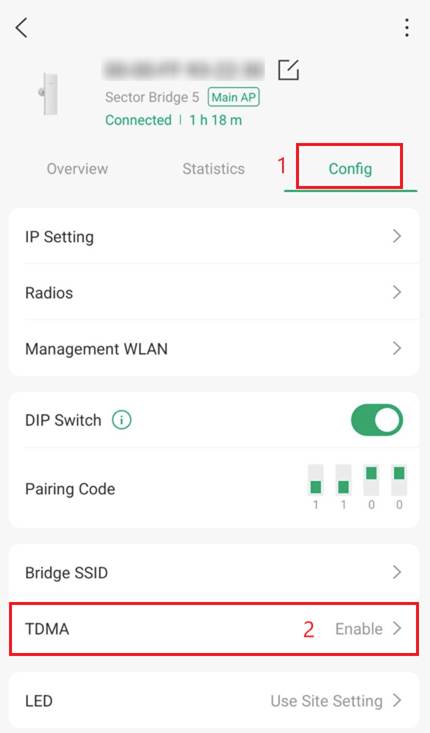
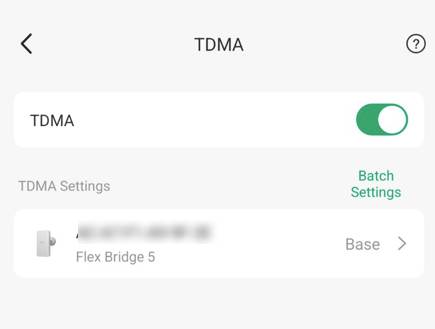
Each client AP can choose three priority levels: Low Mode, Base Mode, High Mode.
The higher the priority, the higher the average throughput of the Client AP and the lower the average latency.
Conclusion
We have successfully configured DIP Switch pairing of the Sector Bridge 5 and Flex Bridge 5 in Standalone Mode and on the Omada Controller via PC and Omada App.
To learn more about each function and configuration, please visit Support Home to download or check the manual for your product.
QA
Q1: What happens if the DIP switch pairing codes do not match?
A1: If the pairing codes don't match while the DIP switch feature is enabled, the devices will fail to form a bridge network topology and will display an error message.
Q2: Can the Flex Bridge 5 still pair with the Sector Bridge 5 if the DIP switch function is disabled?
A2: Yes, the devices can still pair by manually configuring the correct Client switch roles on the hardware of the Flex Bridge 5, though they won't be able to utilize the automated Bridge Pairing Window.
Q3: How long is the automatic adoption window when deploying in Controller Mode?
A3: After the Main AP is adopted by the Controller, the 2-hour countdown begins only after the first Client AP has successfully joined the network using the pairing code.
Q4: Should the automatically generated Management WLAN be used for regular internet traffic?
A4: No, this unencrypted SSID is designed strictly for device management and is not recommended for internet access. Note that disabling this radio will terminate all wireless management capability.
Q5: How does the TDMA feature improve Point-to-MultiPoint (P2MP) deployments?
A5: TDMA efficiently schedules when each Client AP talks to the Main AP to optimize resources. You can assign Low, Base, or High priority levels to individual clients to boost throughput and lower latency.
Q6: Can the Sector Bridge 5 be configured in Client mode?
A6: The Sector Bridge 5 can only be the Main AP to the Flex Bridge 5 and other Omada Bridge Kit devices as there are only Pairing DIP switches on the Sector Bridge 5 and no Main/Client Role Switch.
