


Configuring Bandwidth Control in Standalone Mode
Configuring Bandwidth Control in Controller Mode
Introduction
Bandwidth control allows you to effectively manage network traffic by setting rules limiting bandwidth for different data flows. This helps optimize network performance by ensuring a fair distribution of bandwidth across your network.
Requirements
-
Omada Gateways (Fully Compatible with Omada Controller v6.2)
- Omada Controller v6.2 and above
Configuration
Bandwidth control involves creating rules to limit the bandwidth for various types of network traffic. The following sections will introduce how to configure this feature in both standalone and controller modes, respectively.
Configuring Bandwidth Control in Standalone Mode
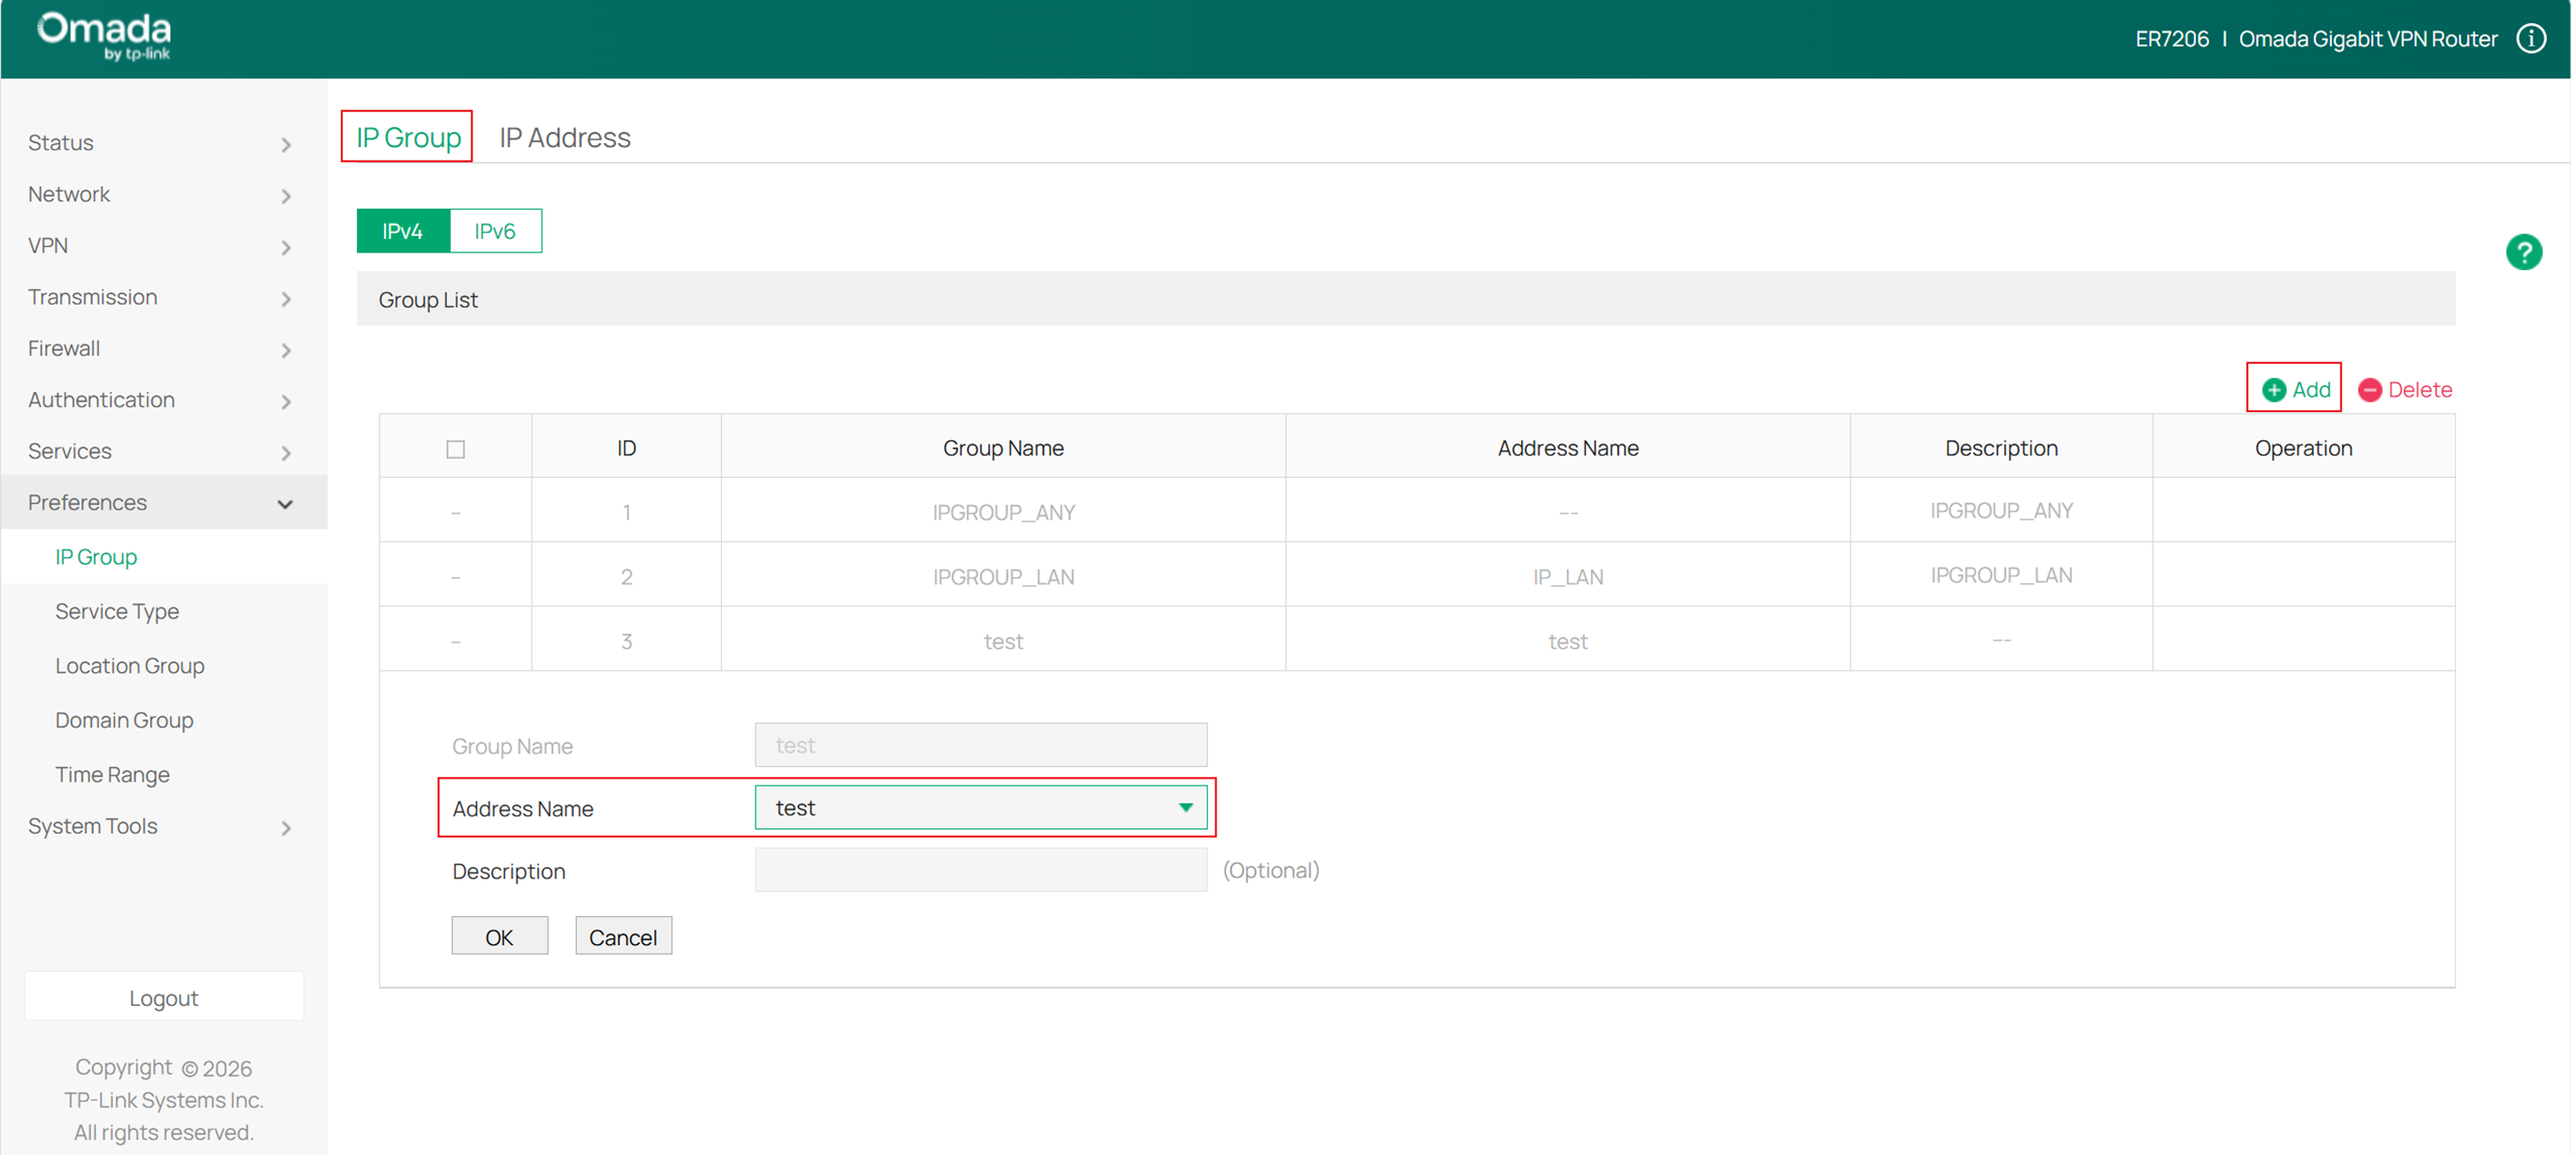
Step 1. Set Up an IP Group (optional)
This step is not mandatory. Since you need to select which LAN-side devices the bandwidth control will apply to, you can create a new IP Group and add the target device IPs to it.
First, add the IP addresses in Preferences > IP Group > IP Address.
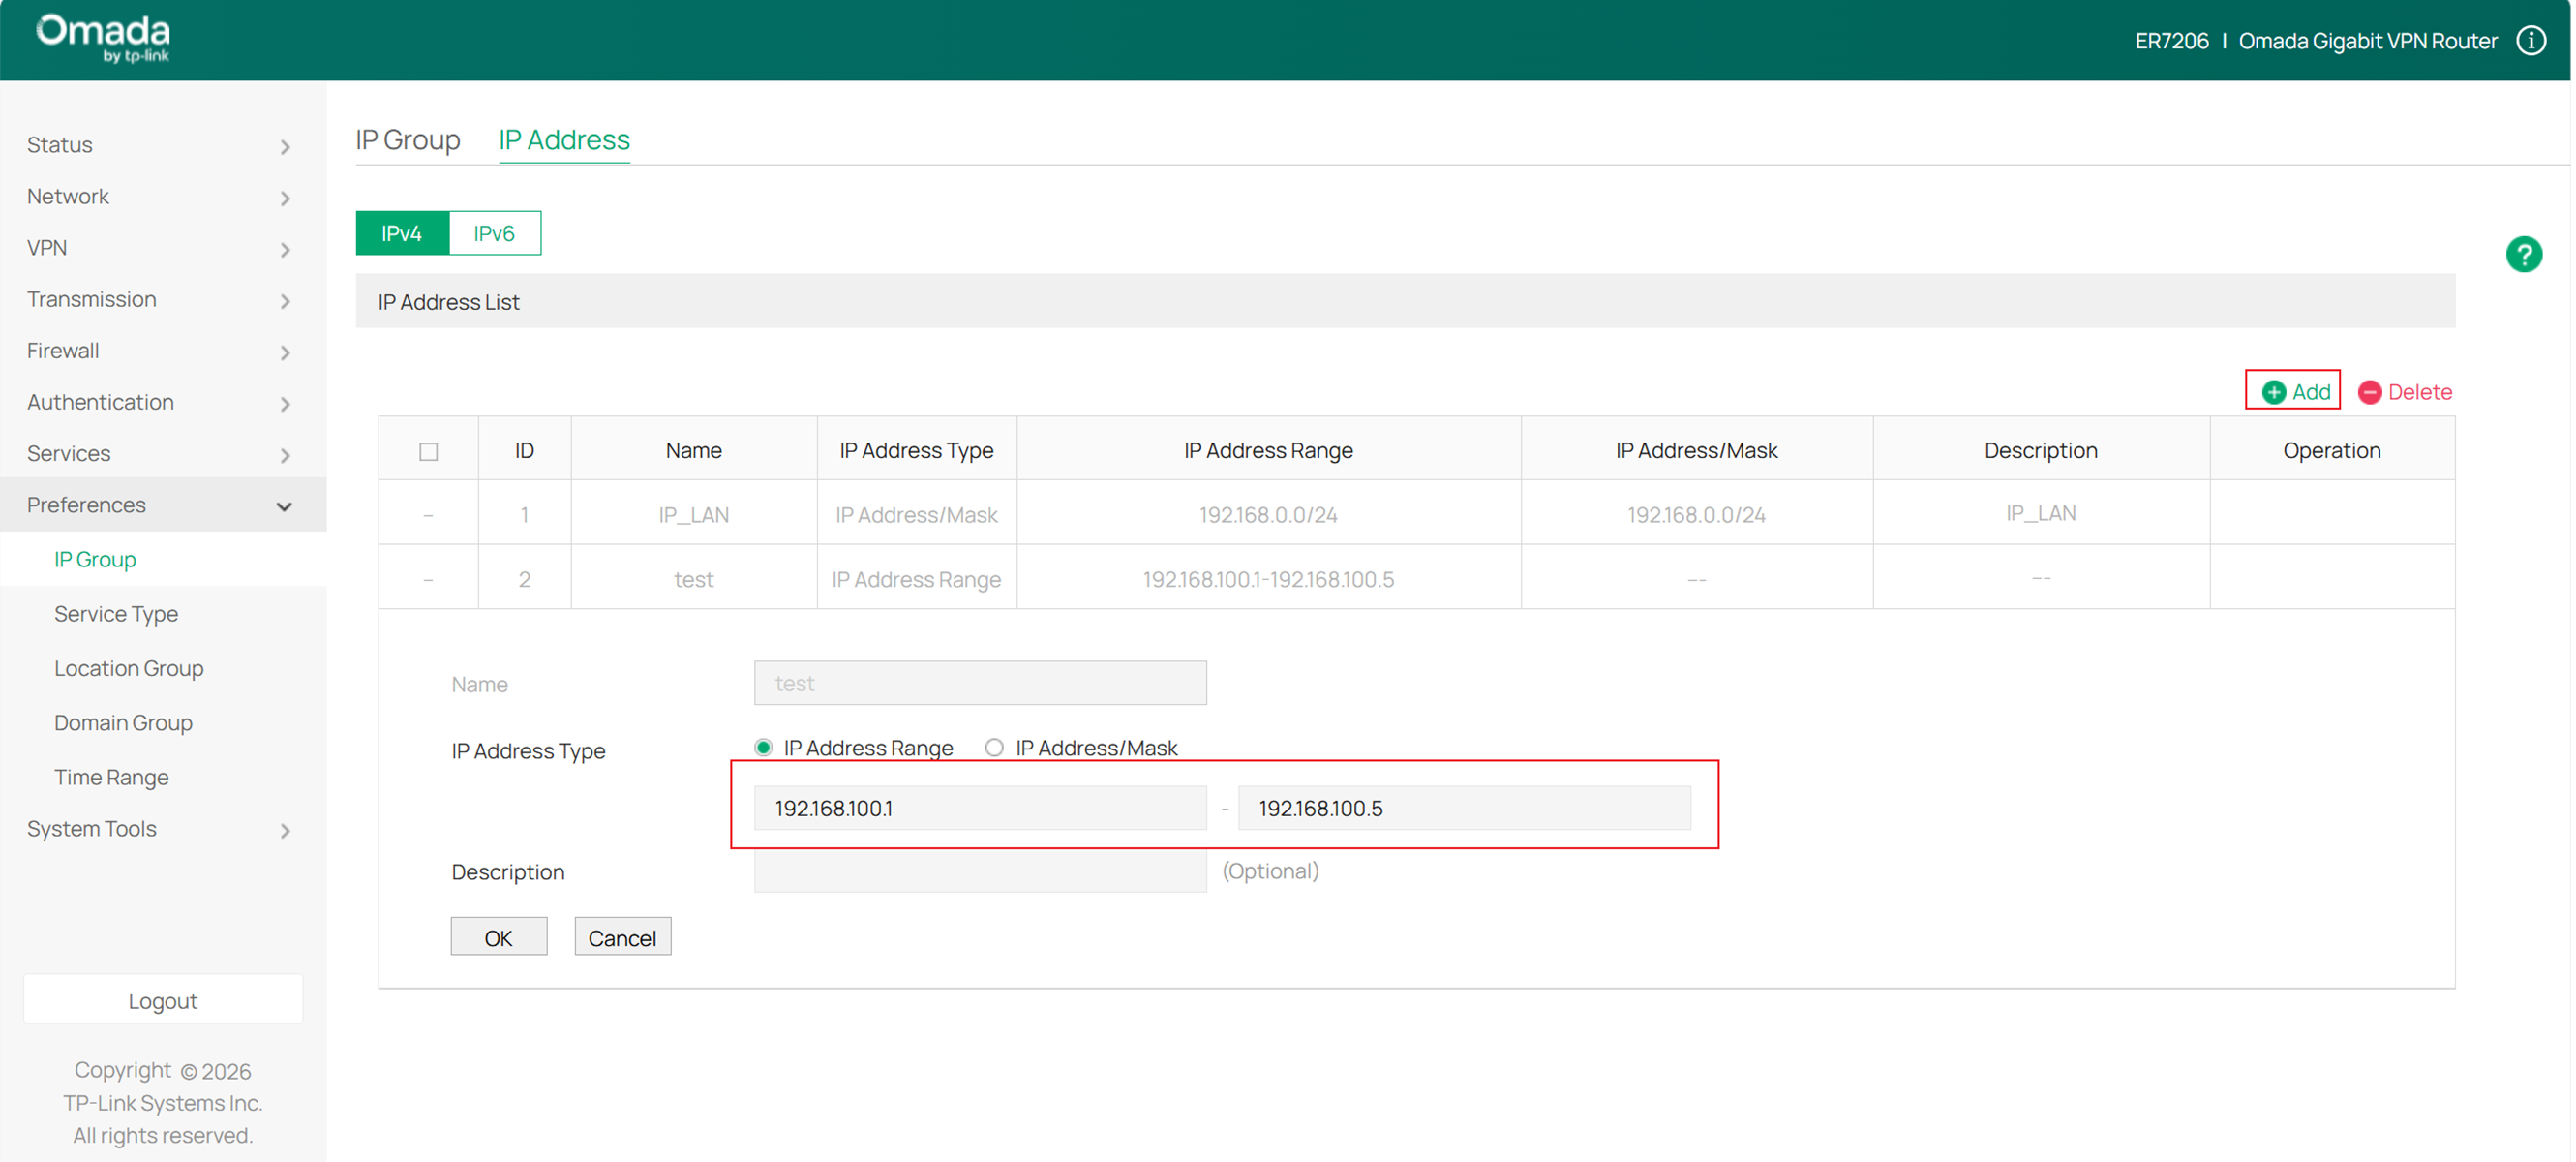
Then, in the IP Group settings, add an IP Group and select the previously created IP Address for the Address Name.
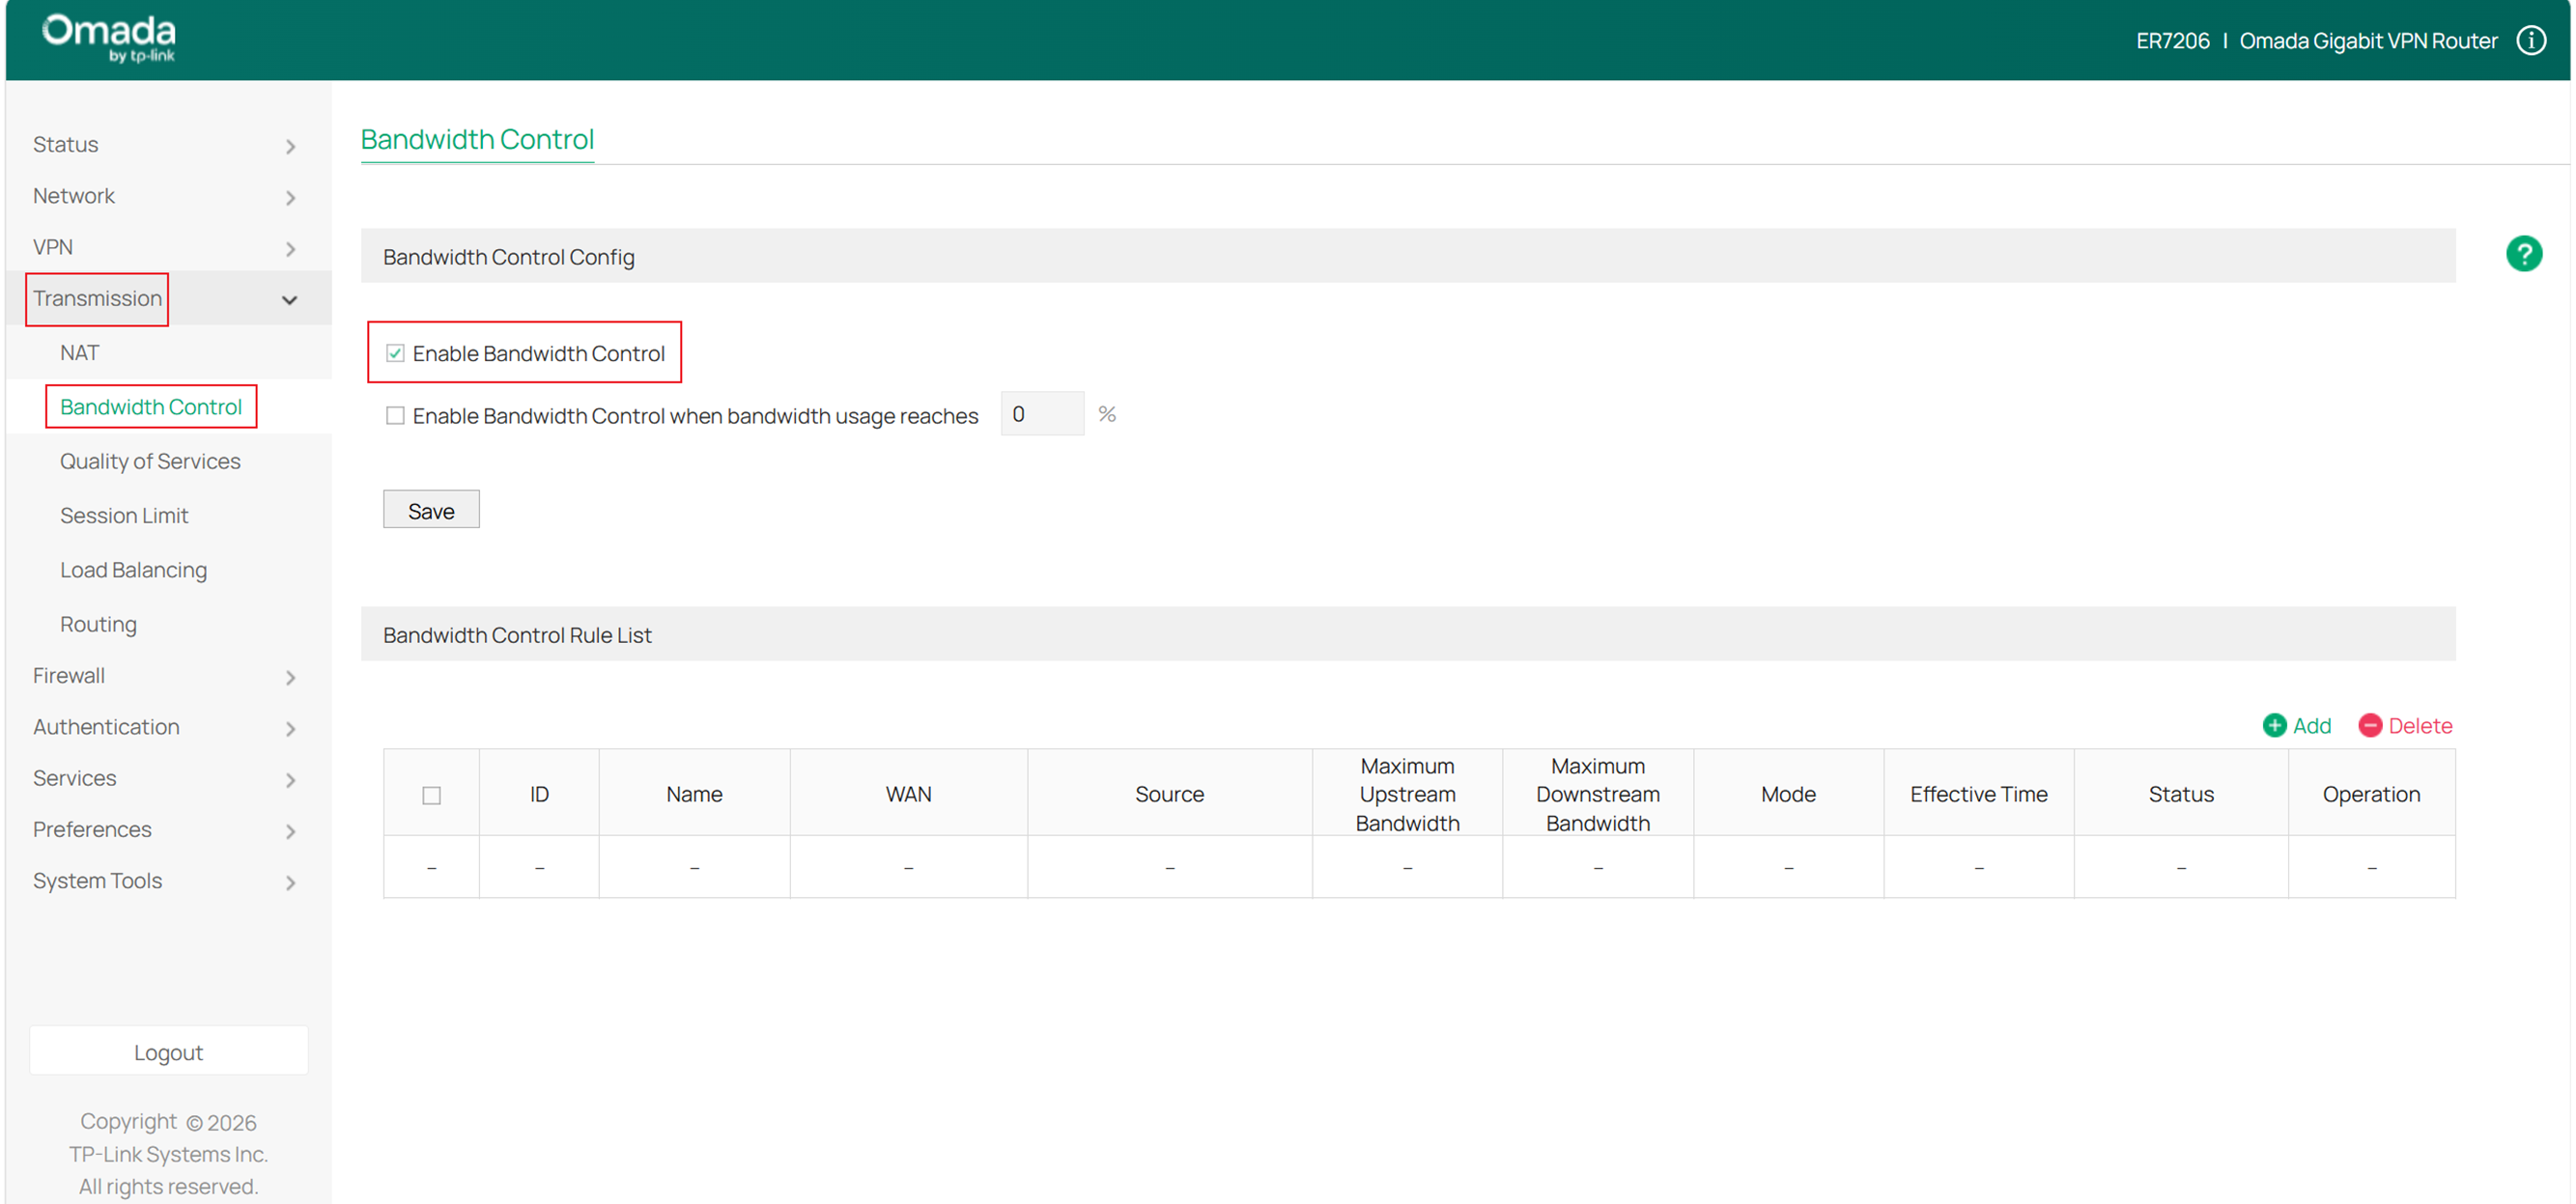
Step 2. Enable Bandwidth Control
First enable Bandwidth Control in Transmission > Bandwidth Control > Bandwidth Control Config. Here, you can also specify a percentage, and the Bandwidth Control will take effect only when the bandwidth usage reaches the percentage you specified.
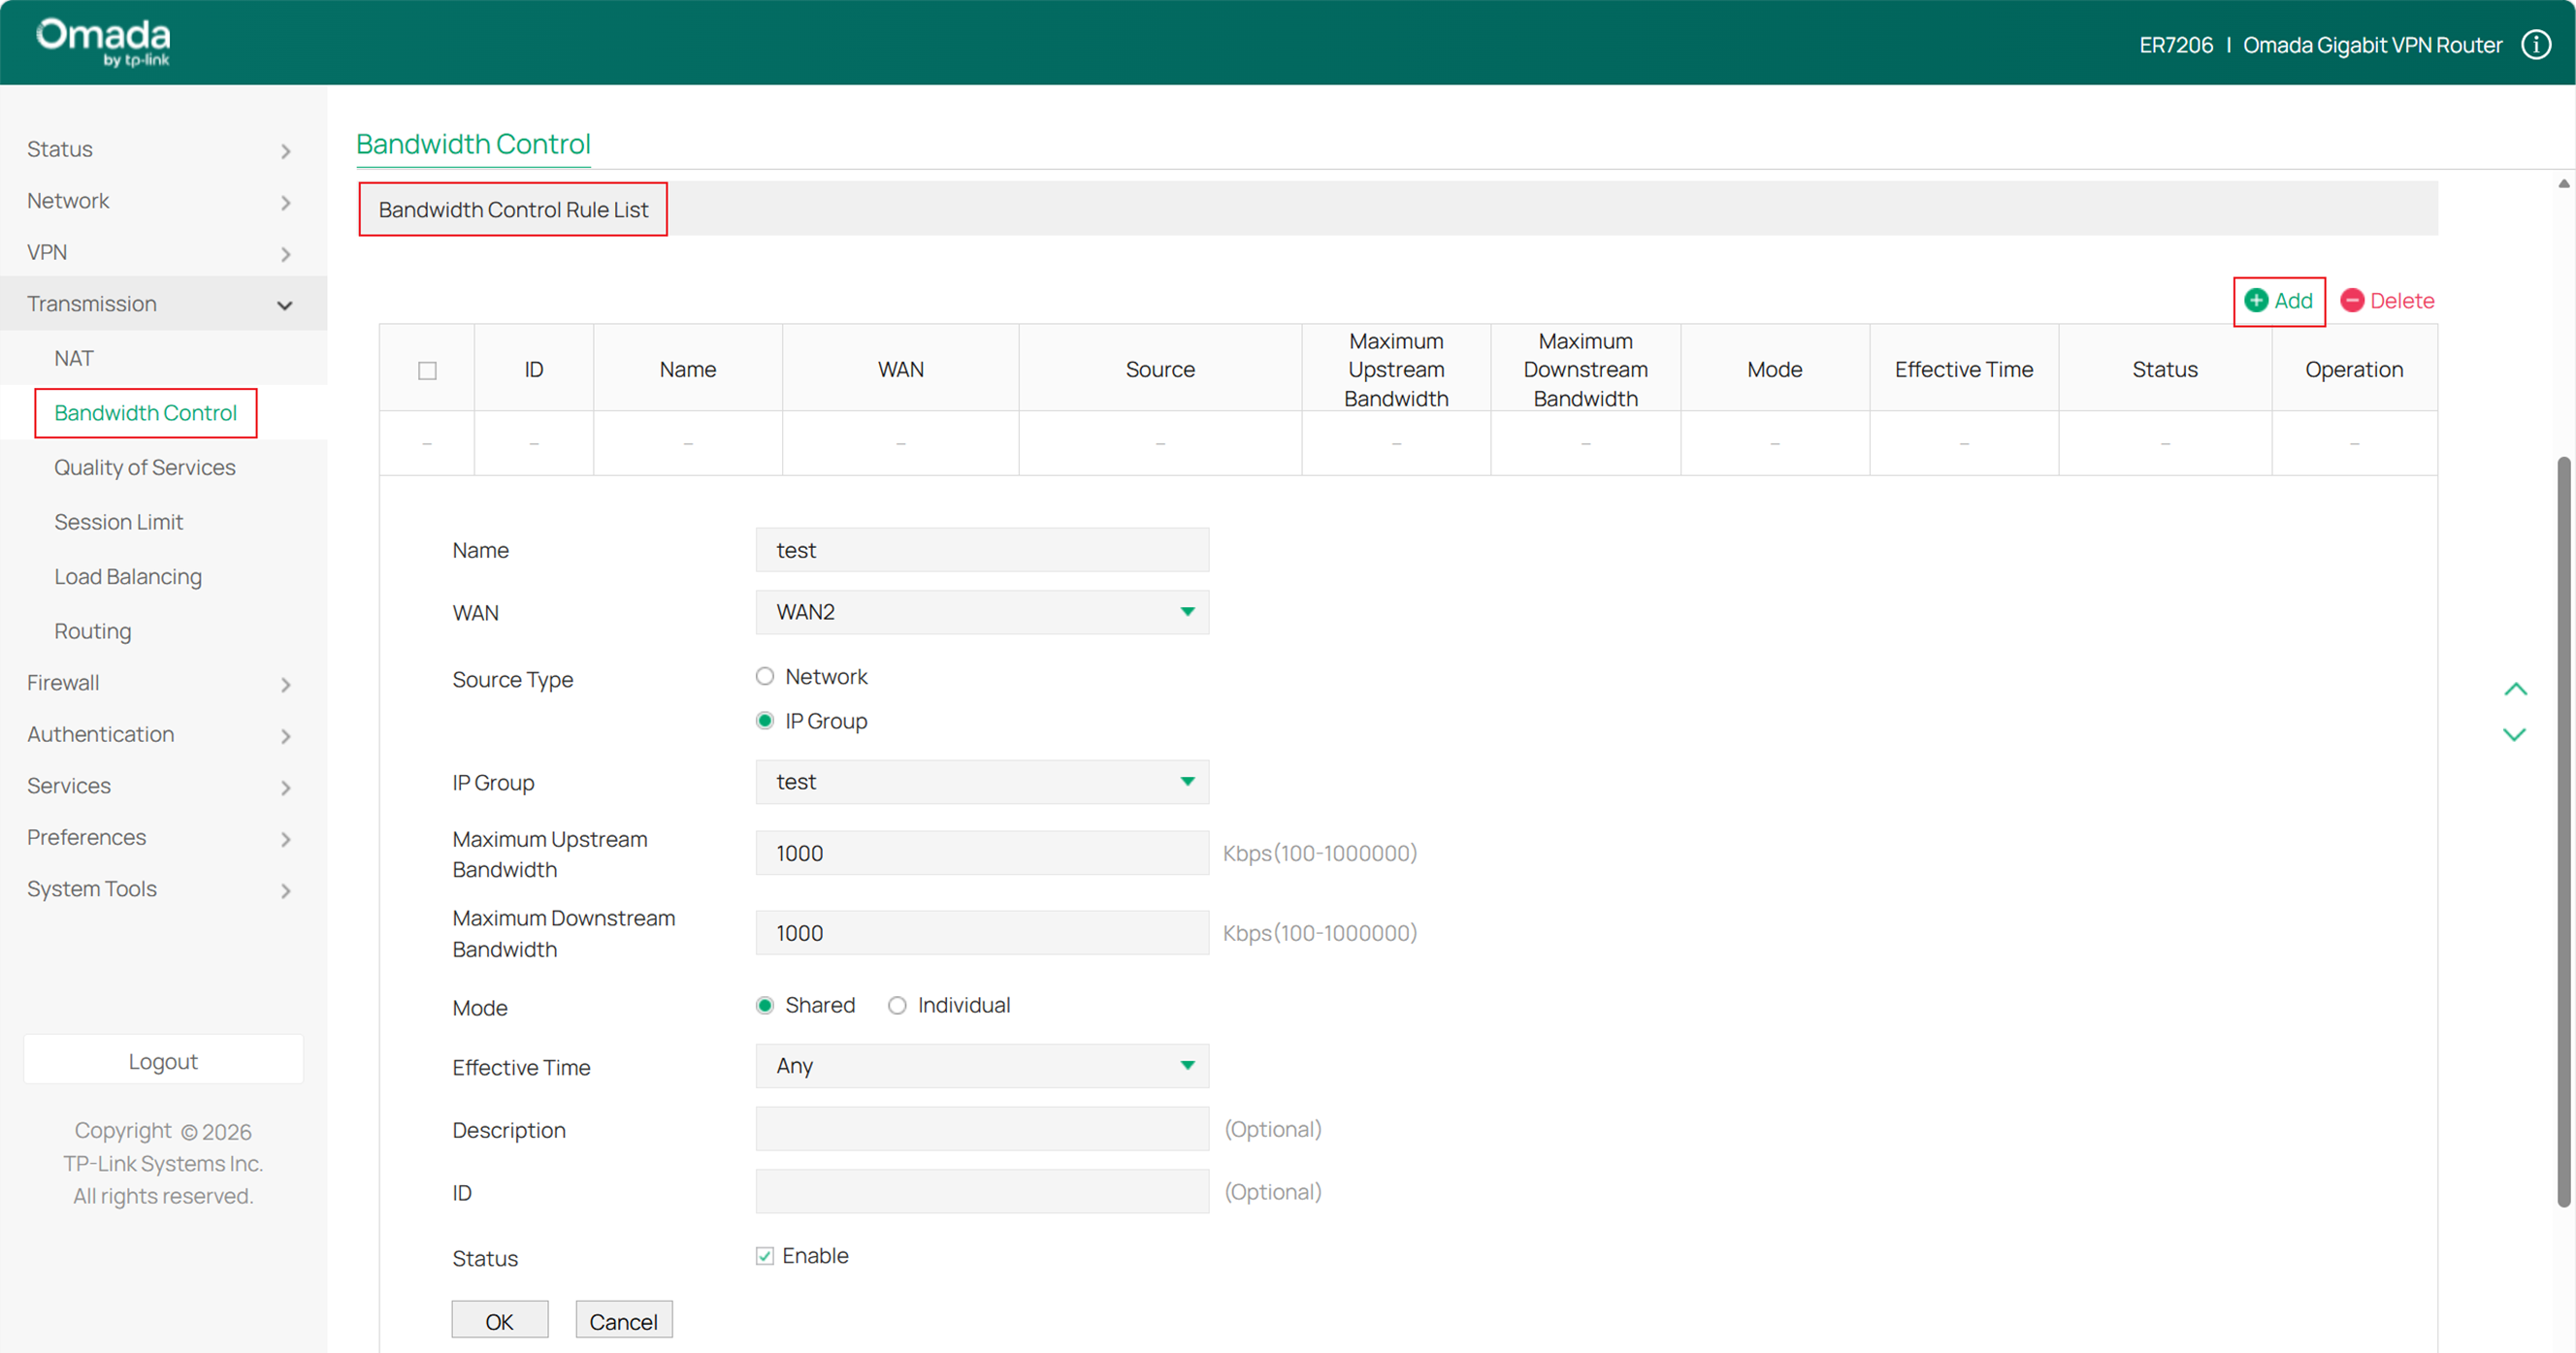
Step 3. Add a Bandwidth Control Rule
Add a new Bandwidth Control Rule in Transmission > Bandwidth Control > Bandwidth Control Rule List. Key configurations include:
WAN: Select which WAN port this rule will apply to.
Source Type: You can choose either a LAN subnet or the IP Group created in Step 1.
Mode: When Shared is selected, the bandwidth is shared among all users. When Individual is selected, the bandwidth for each user is equal to the specified value in upstream and downstream bandwidth.
Configuring Bandwidth Control in Controller Mode
Step 1. Set Up an IP Group (optional)
This step is not mandatory. Since you need to select which LAN-side devices the bandwidth control will apply to, you can create a new IP Group and add the target device IPs to it.
In the controller's Site view, click Network Config > Profiles > Groups in sequence.
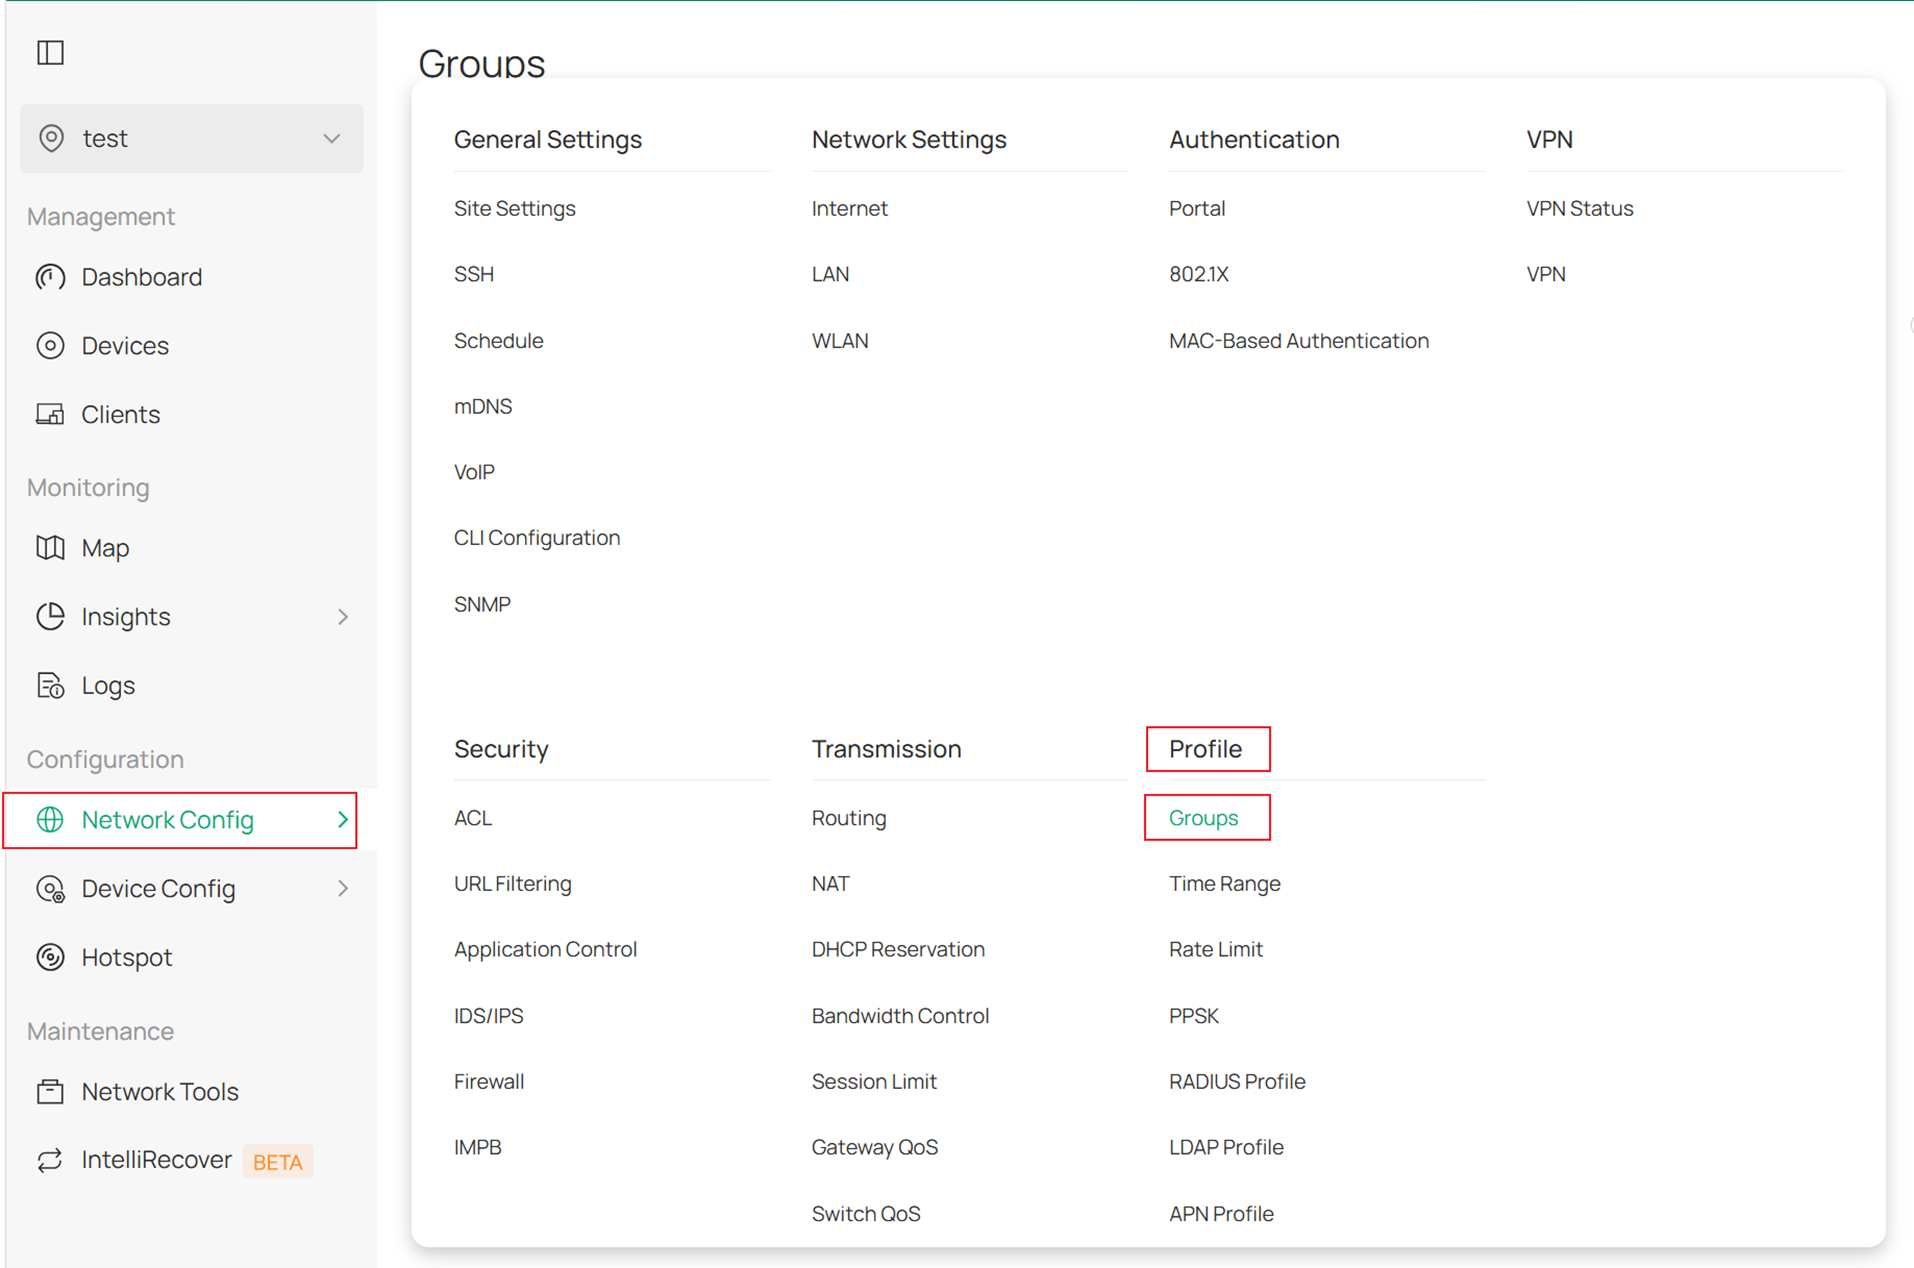
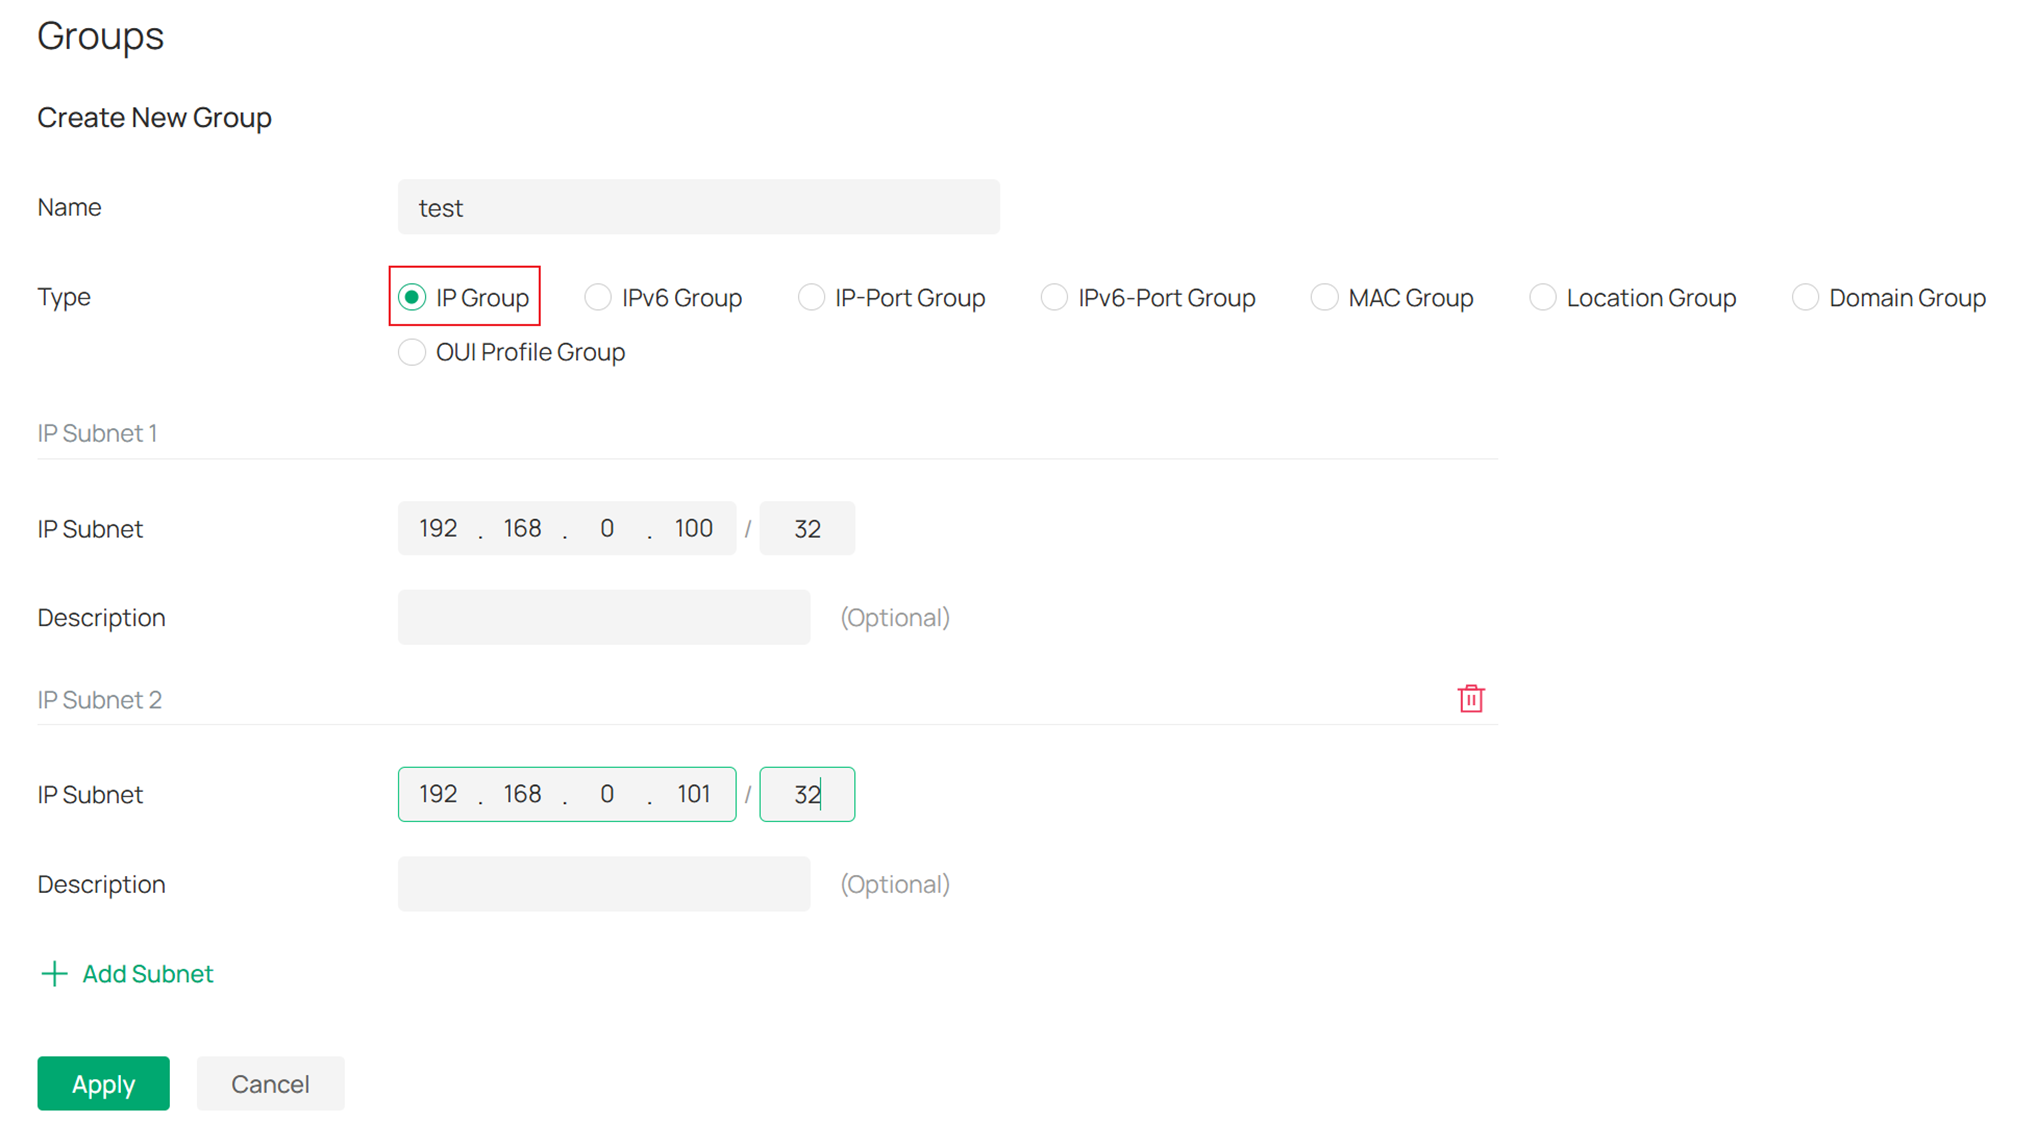
Create a New Group.
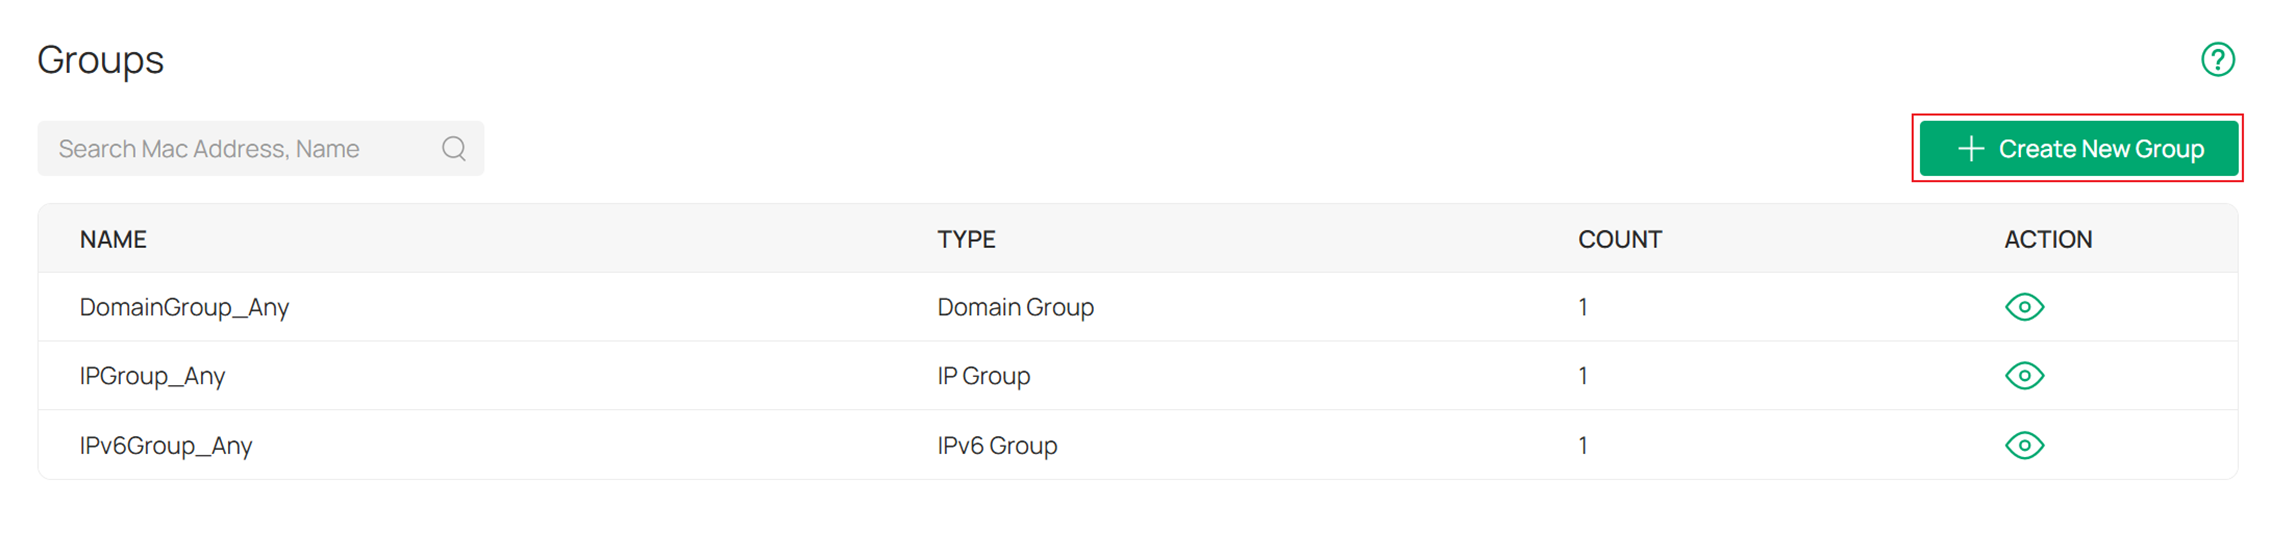
Enter the IP addresses to be added to the IP Group.
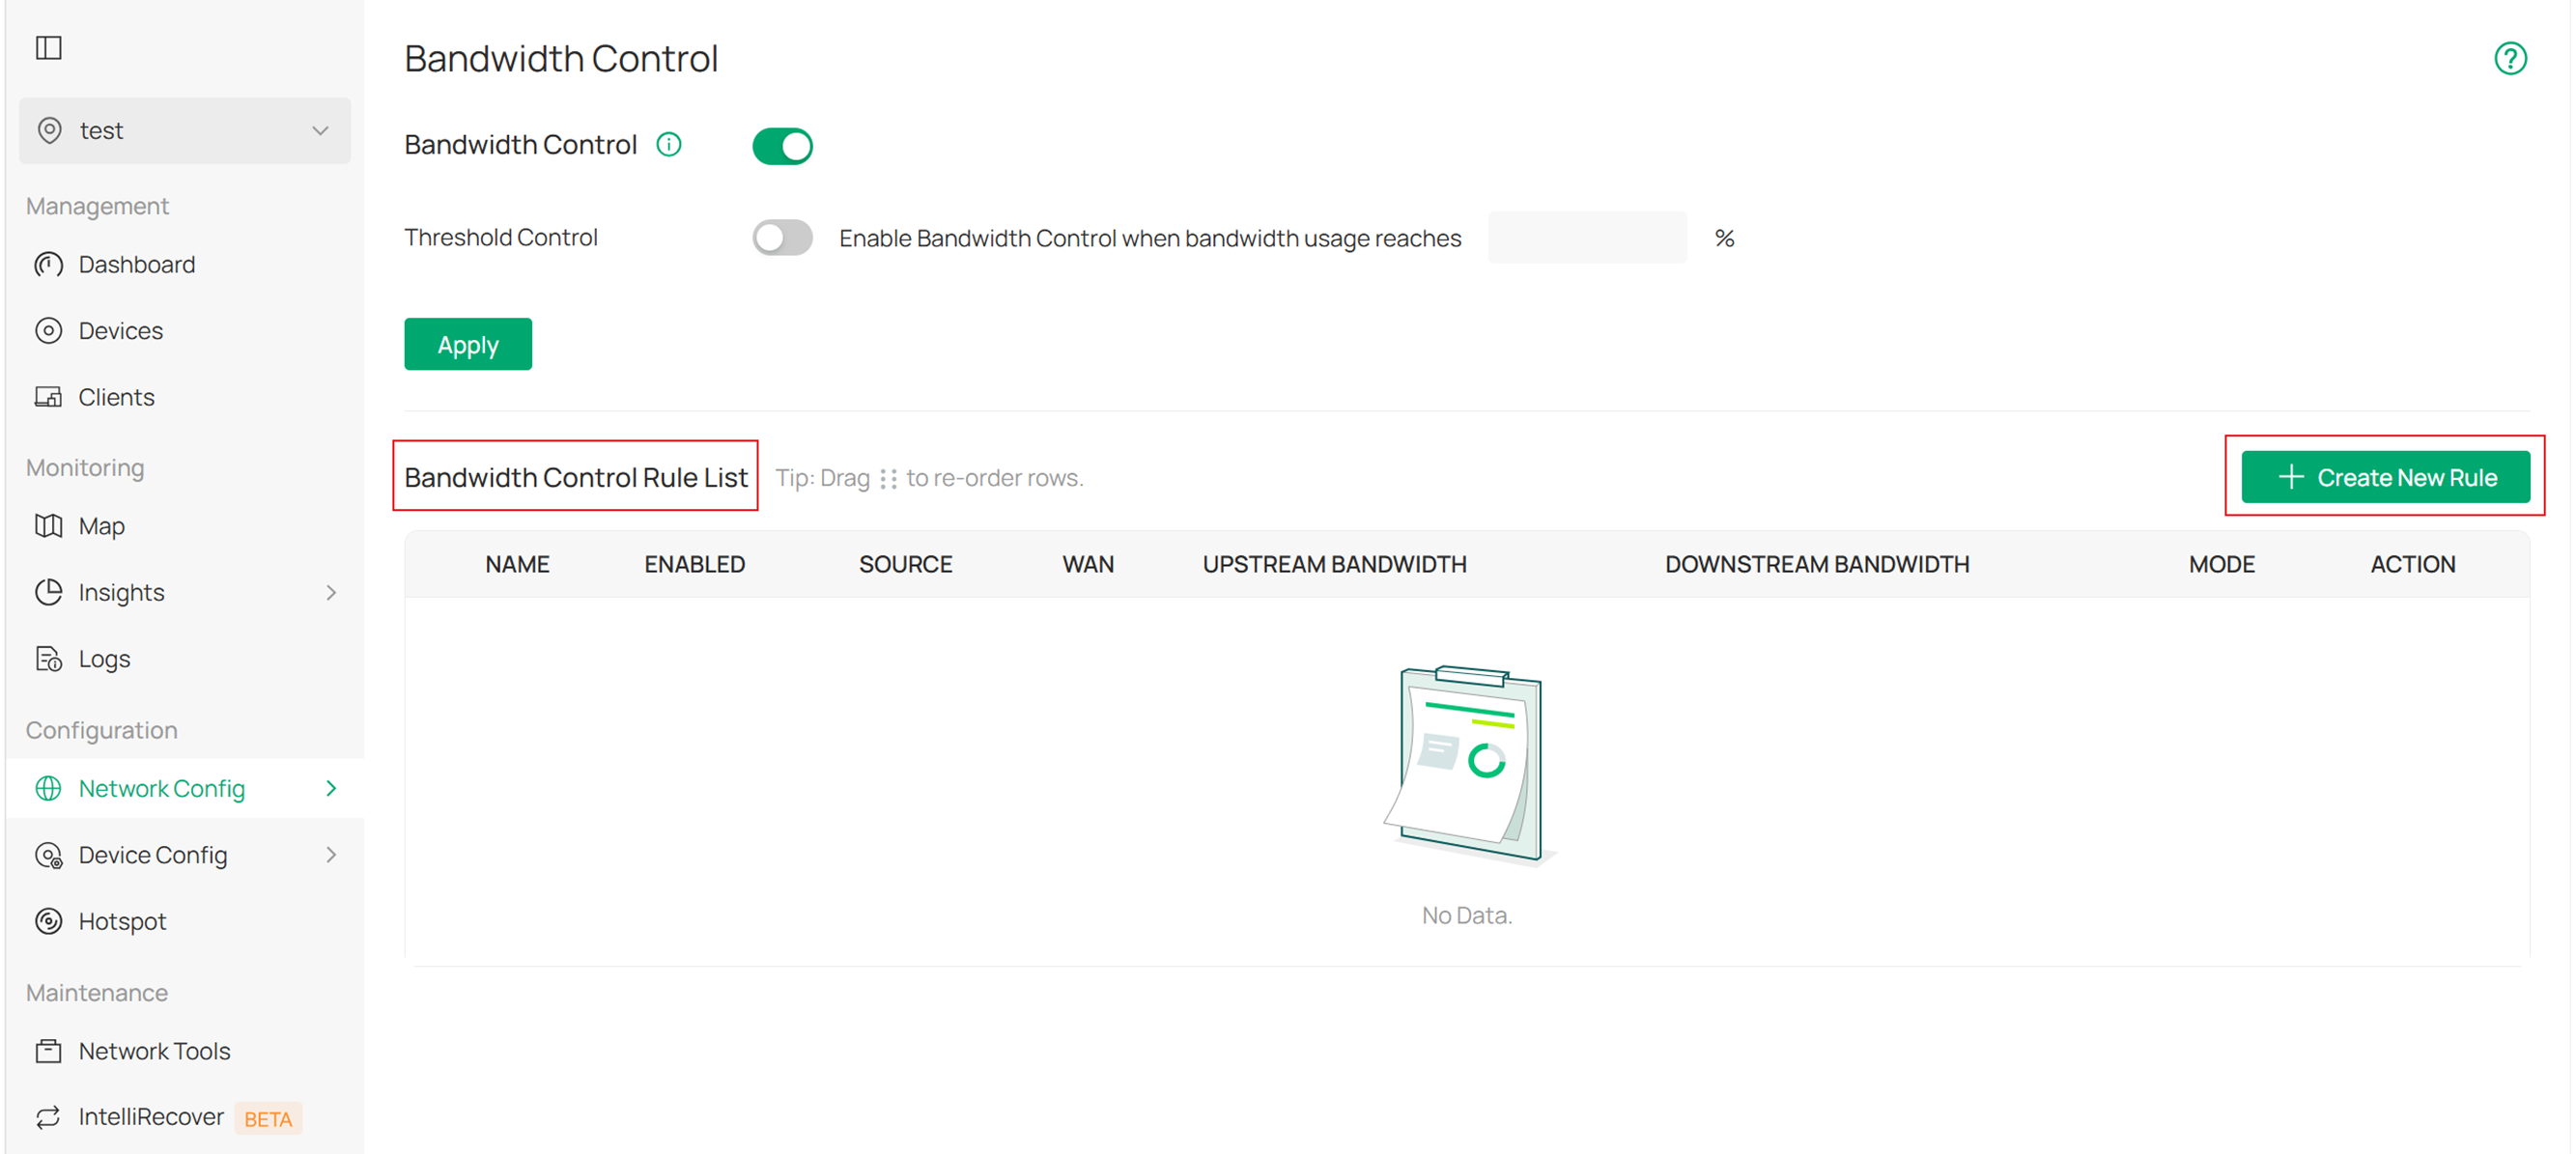
Step 2. Enable Bandwidth Control
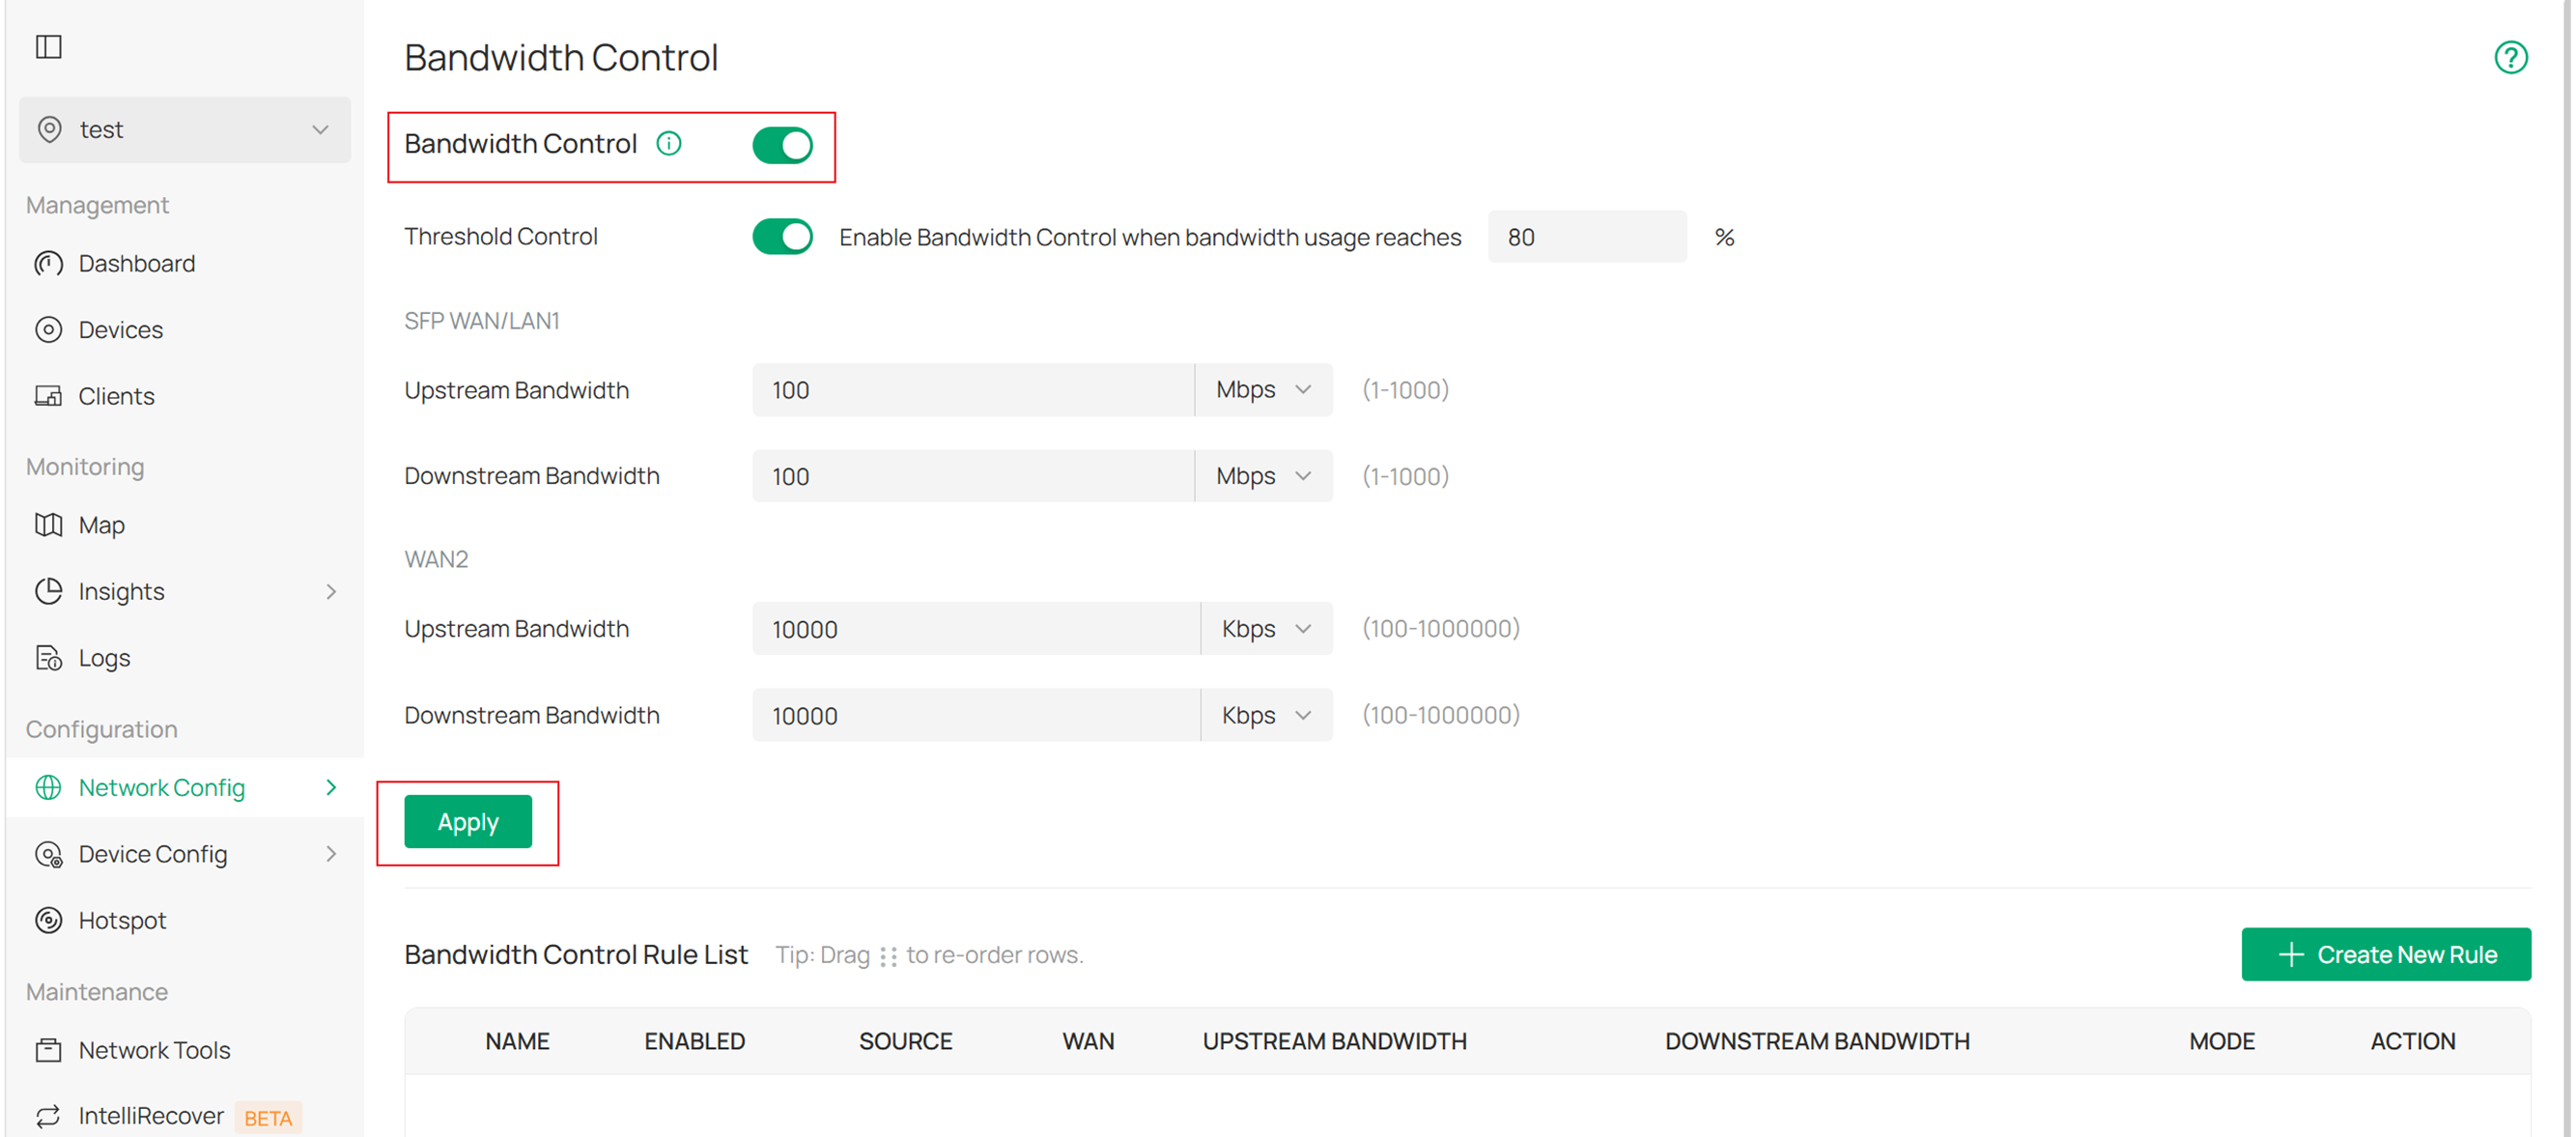
Enable Bandwidth Control in Settings > Transmission > Bandwidth Control. You can choose to enable Threshold Control as needed; with this enabled, bandwidth control takes effect only when the total bandwidth usage reaches the specified percentage.
When using Threshold Control, you can specify the total upstream and downstream bandwidth of the WAN port in the Upstream/Downstream Bandwidth section below.
Step 3. Add a Bandwidth Control Rule
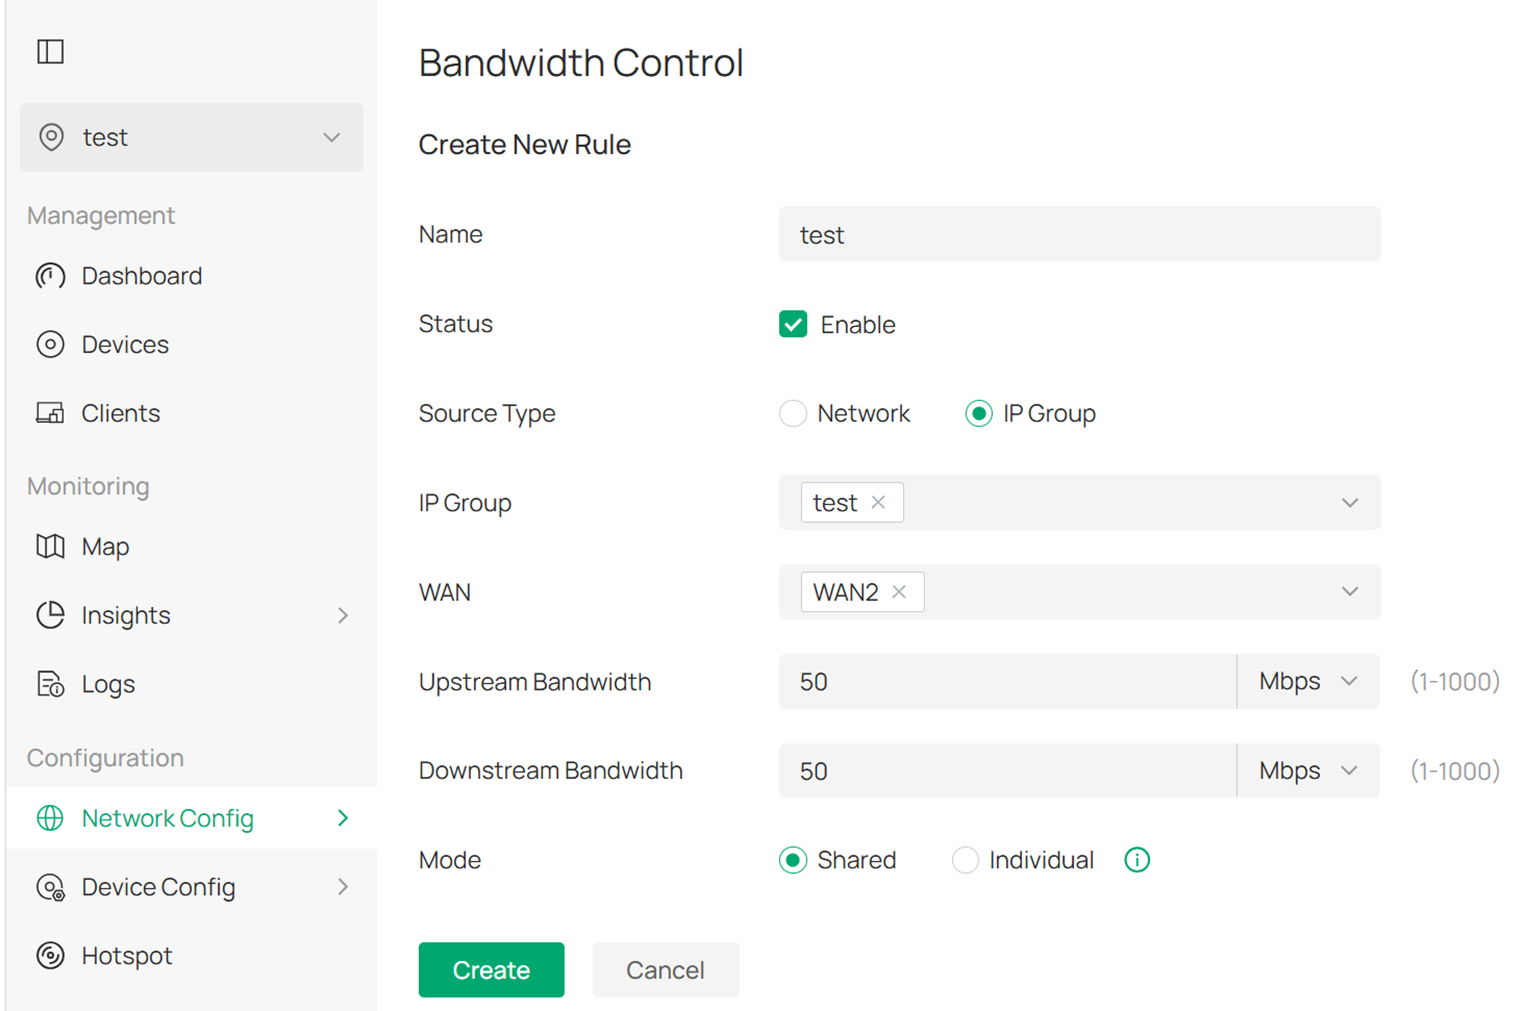
In the Bandwidth Control Rule List section, click Create New Rule.
Key configurations include:
Source Type: You can choose either a LAN subnet or the IP Group created in Step 1.
WAN: Select which WAN port this rule will apply to.
Upstream/Downstream Bandwidth: In Controller mode, the units for these two items can be changed from Kbps to Mbps.
Mode: When Shared is selected, the bandwidth is shared among all users. When Individual is selected, the bandwidth for each user is equal to the specified value in upstream and downstream bandwidth.
Verification
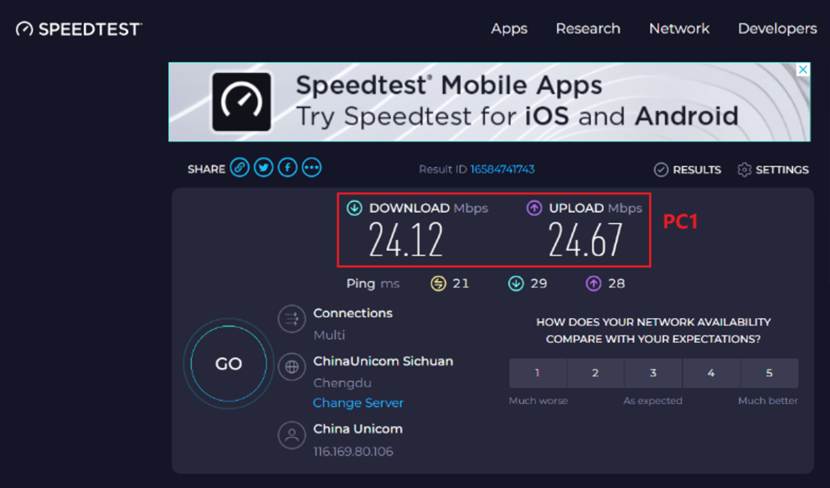
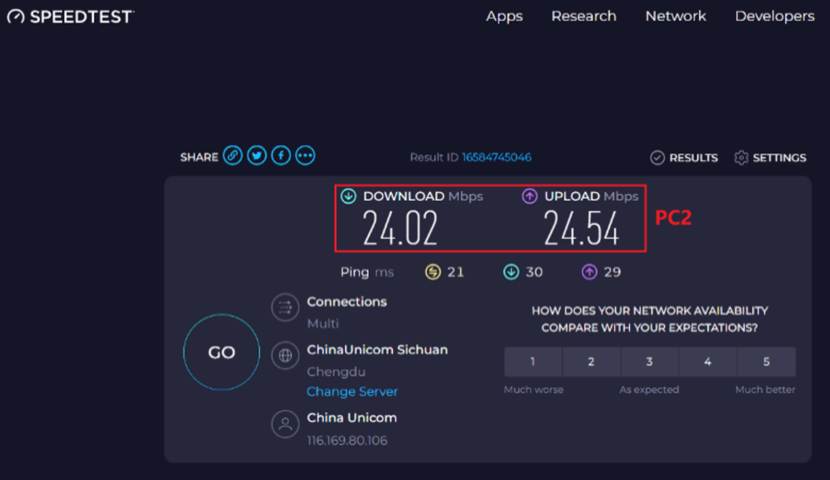
Configure the Bandwidth Control rules following Steps 1–3 for Controller mode. With only two PCs connected to the gateway (PC1 at 192.168.0.100 and PC2 at 192.168.0.101), if you run speedtest on both simultaneously, the results for both upstream and downstream should should not exceed 25 Mbps, as the Shared mode is selected.
Speedtest result for PC1.
Speedtest result for PC2.
Conclusion
This article introduces the detailed steps for configuring Bandwidth Control on the gateway in both standalone and controller modes, and includes a test designed to verify that the function is operating as expected.
Get to know more details of each function and configuration please go to Download Center to download the manual of your product.
