


Contents
Ways to upgrade Omada NVR firmware
Online/Local Upgrade via the Omada NVR's Web UI
Online/Local Upgrade via the Omada NVR GUI
Online Upgrade via the Omada Guard App
Introduction
This article explains how to upgrade the firmware of your Omada NVR through the Web UI, local GUI, and Omada Guard App. Updating the firmware helps ensure optimal performance, improved stability, security enhancements, and access to the latest features.
Requirements
- Omada NVR
- Stable Internet connection (required for online upgrade)
- A PC with a web browser (for Web UI upgrade)
- A monitor and mouse connected to the NVR (for GUI upgrade)
- Omada Guard App installed on a mobile device (for app-based upgrade)
- USB storage device and downloaded firmware file (.bin) for local upgrade
Ways to upgrade Omada NVR firmware
Online/Local Upgrade via the Omada NVR's Web UI
This section explains how to upgrade the firmware of an Omada NVR either by uploading a local firmware file or by using the online update feature available through the NVR’s web interface.
Step 1. Launch a browser and visit NVR's IP address.
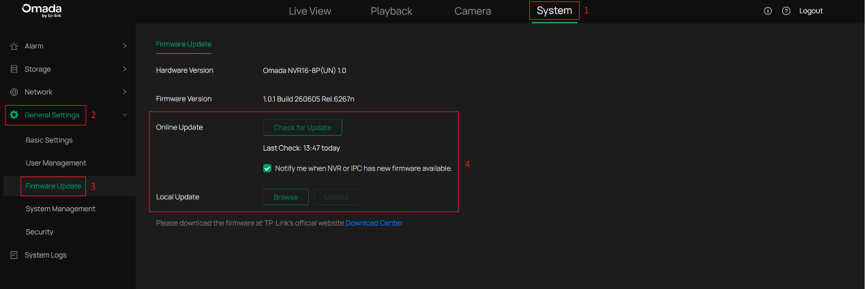
Step 2. Go to System > General Settings > Firmware Update to update the firmware.
- Online Update: Upgrade the firmware online directly. Click Check for Update to check for available updates or to initiate the upgrade process.
- Local Update: Upgrade the firmware locally with the downloaded .bin firmware file.
Note: Please download the appropriate firmware from TP-Link’s official website: Download Center. Click Browse to select the firmware file you want to upload, then click Update to start the update process.
Step 3. Wait for the upgrade to be completed. After the upgrade, the device will reboot automatically.
Step 4. After rebooting, return to the Firmware Update page and verify the Current Firmware Version to confirm that the device has been successfully upgraded to the new version.
Online/Local Upgrade via the Omada NVR GUI
This section explains how to upgrade the firmware through the Omada NVR GUI, using either the online upgrade feature or uploading a firmware file.
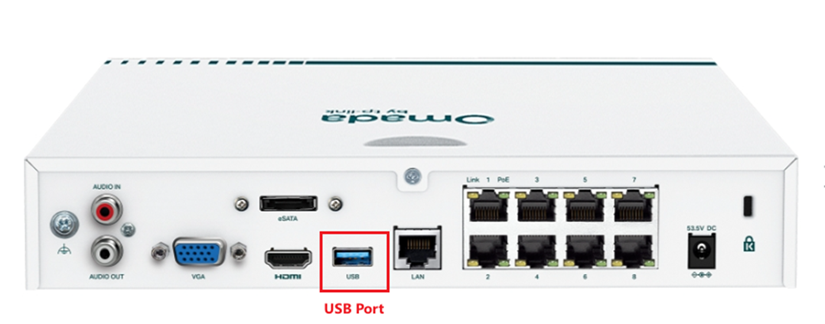
Note: Before upgrading the firmware locally via the NVR GUI, please download the corresponding firmware based on your Omada NVR’s model and hardware version from the TP-Link official website Download Center. After downloading, extract the firmware package to obtain the .bin file required for the upgrade. Copy the .bin file to a USB drive, then plug the USB drive into the Omada NVR's USB port to proceed with the upgrade.
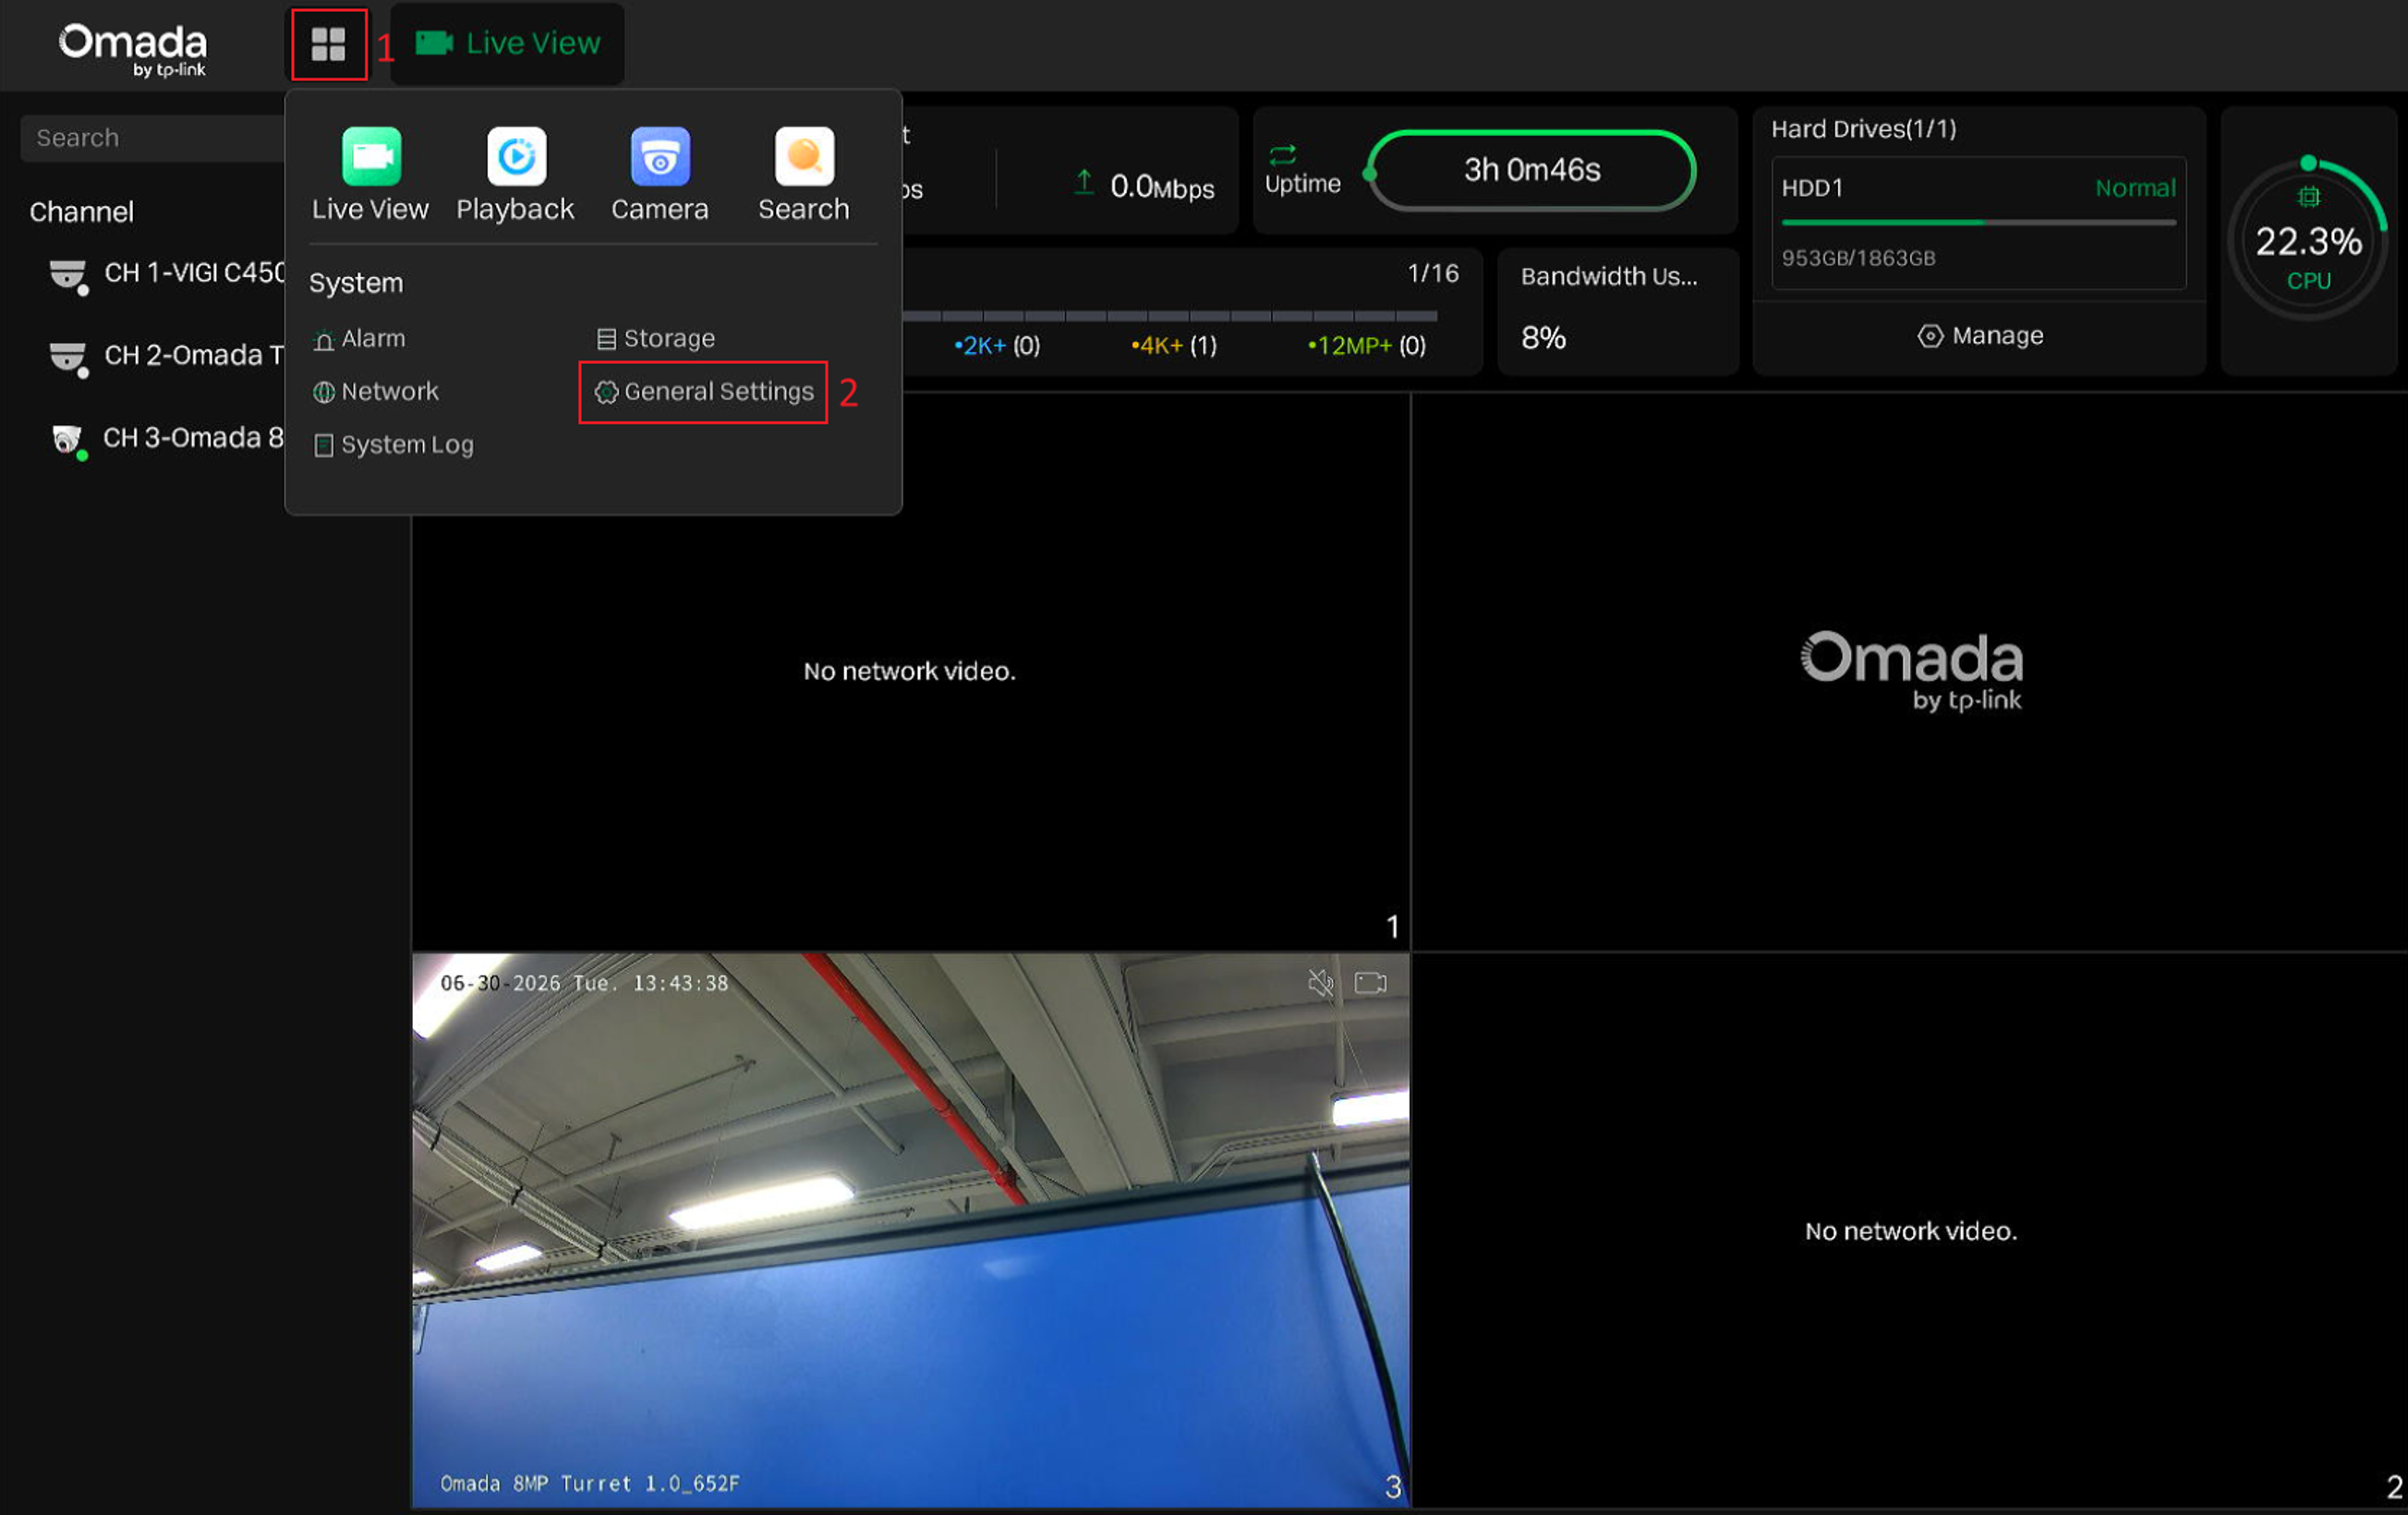
Step 1. Click the app icon above the Live View screen and select General Settings from the drop-down menu.
Step 2. Go to General Settings > Firmware Update, then choose to upgrade the firmware either locally or online.
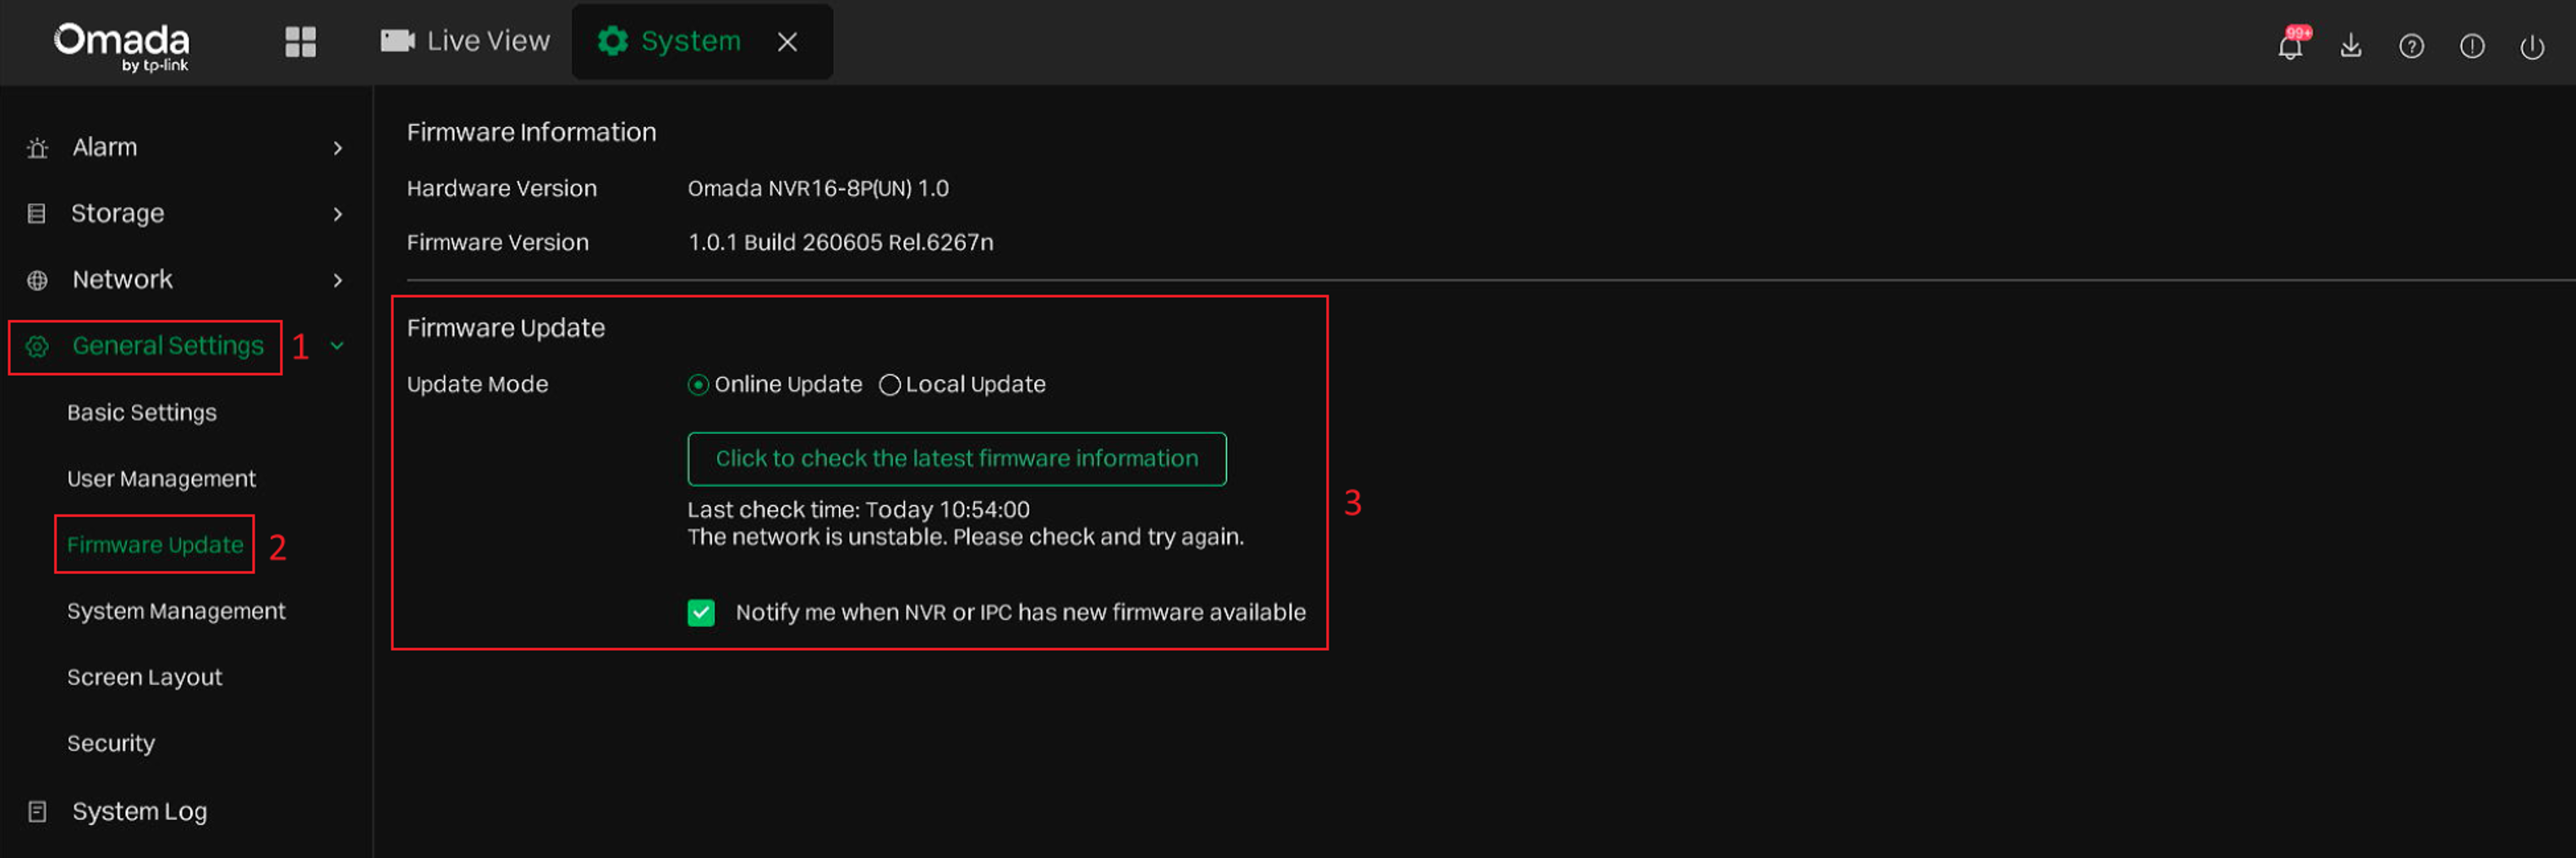
- Online Update: Upgrade the firmware online directly. Click to check the latest firmware information and see if any updates are available, or to initiate the upgrade process.
- Local Update: Upgrade the firmware locally using the downloaded firmware stored on the USB drive. Please navigate to the .bin file to upgrade.
Step 3. Wait for the upgrade to be completed. After the upgrade, the device will reboot automatically.
Step 4. After rebooting, return to the Firmware Update page and verify the Firmware Version to confirm that the NVR has been successfully upgraded to the new version.
Online Upgrade via the Omada Guard App
This section explains how to upgrade the firmware of an Omada NVR online using the Omada Guard App.
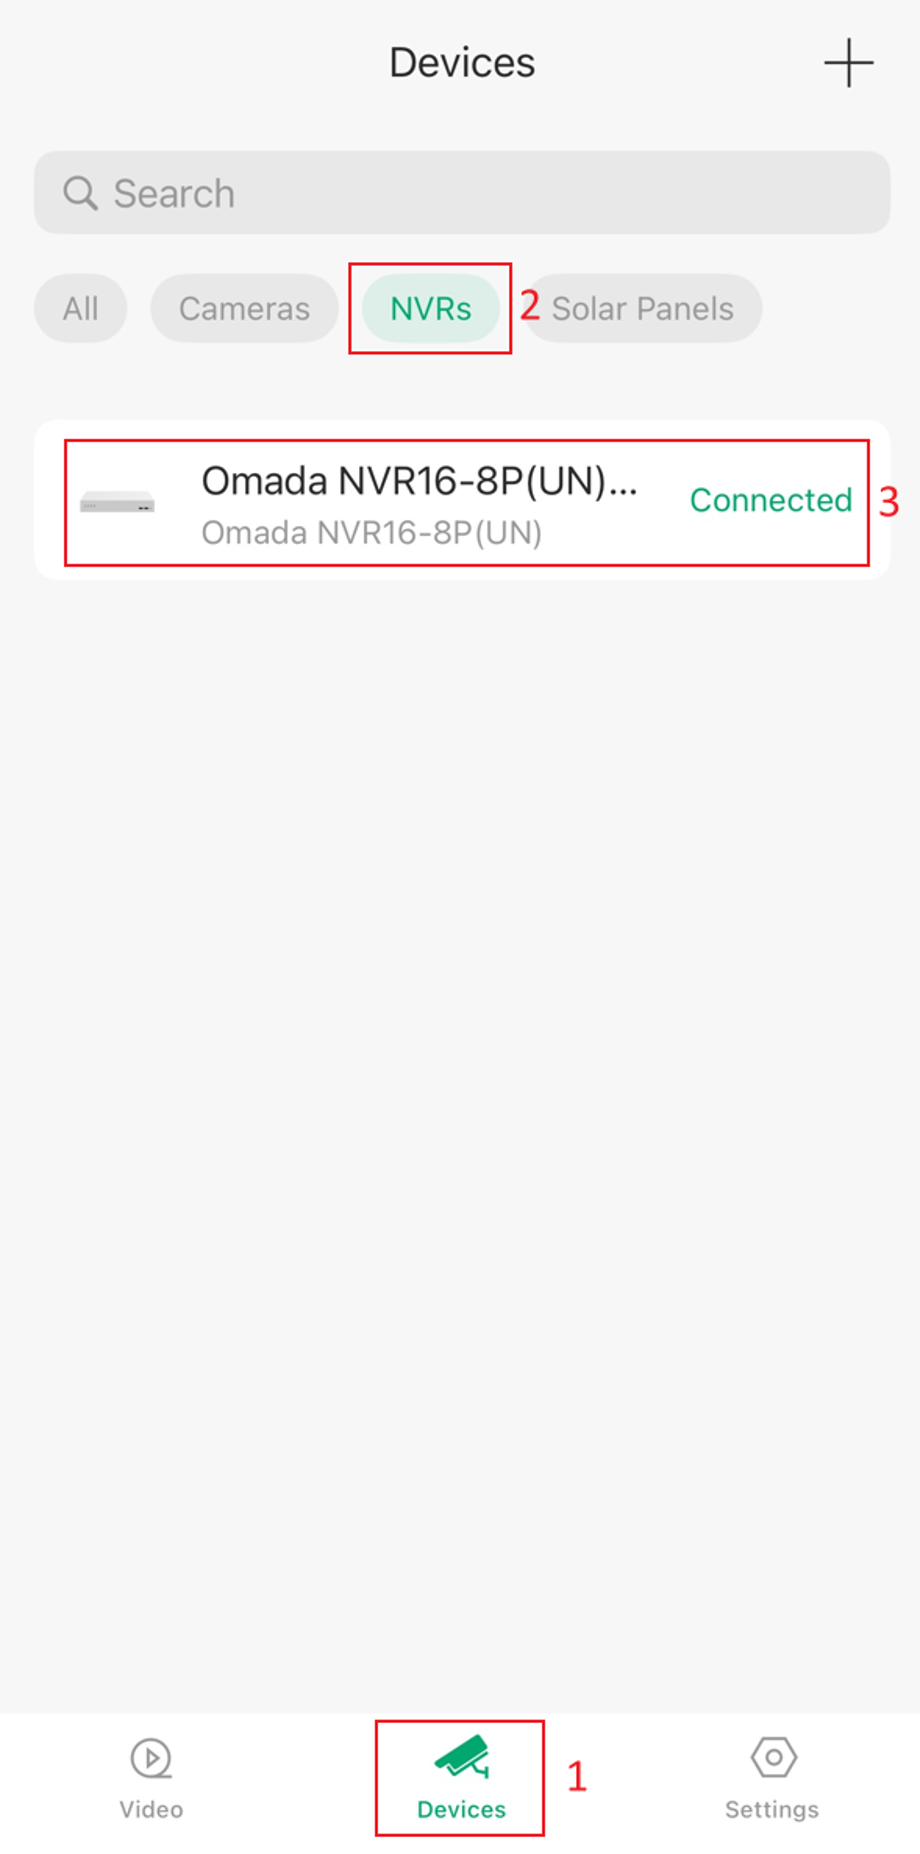
Step 1. Launch the Omada Guard App and locate the NVR.
Go to the Devices page and tap the NVRs tab. Select the target Omada NVR from the device list.
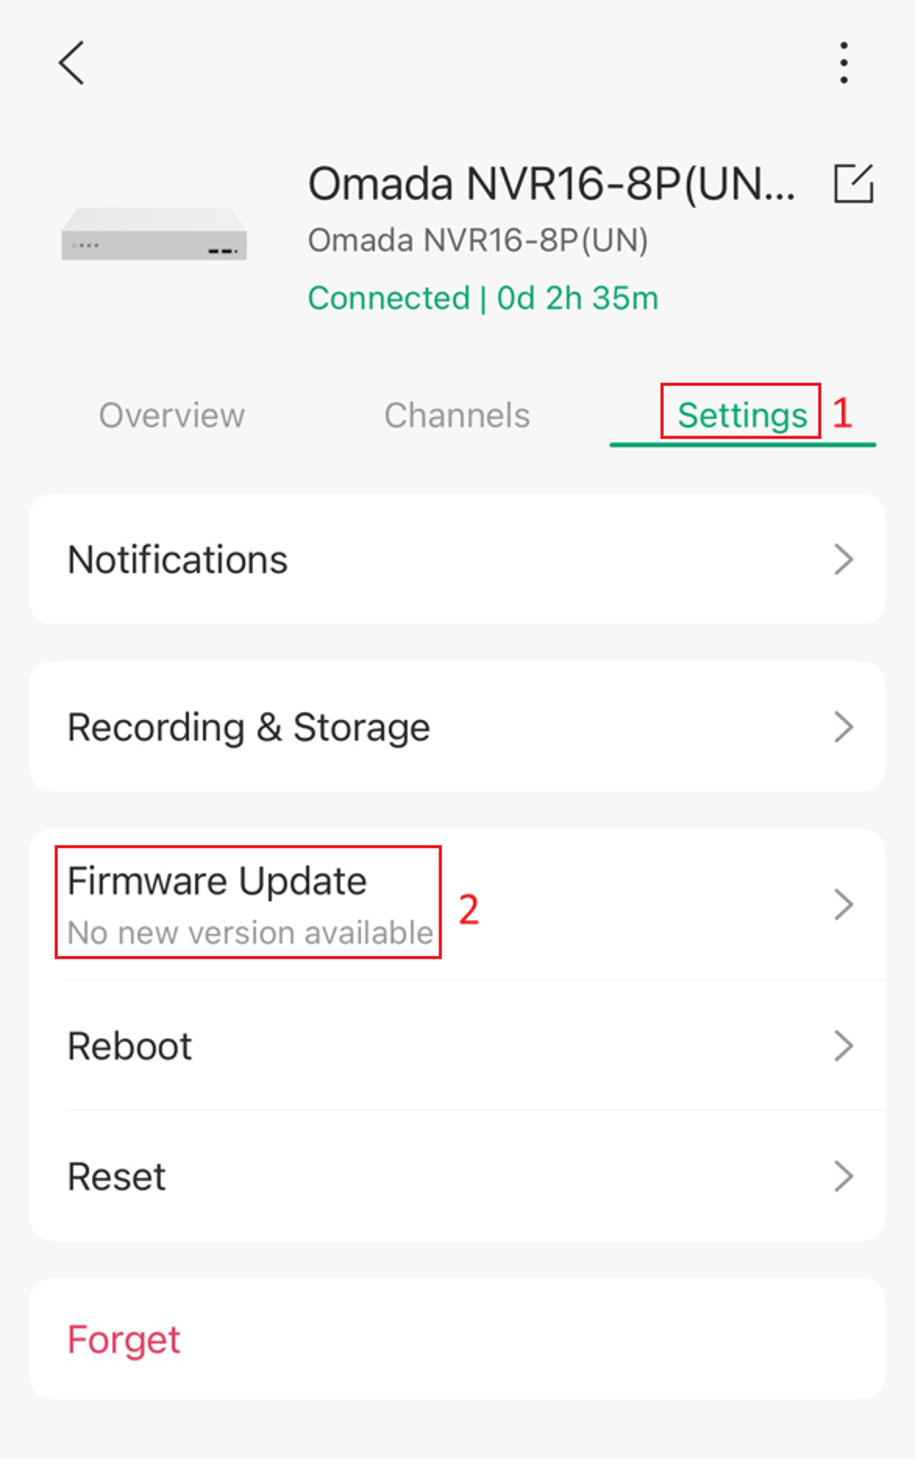
Step 2. Open the Firmware Update page.
On the NVR management page, tap Settings, then select Firmware Update.
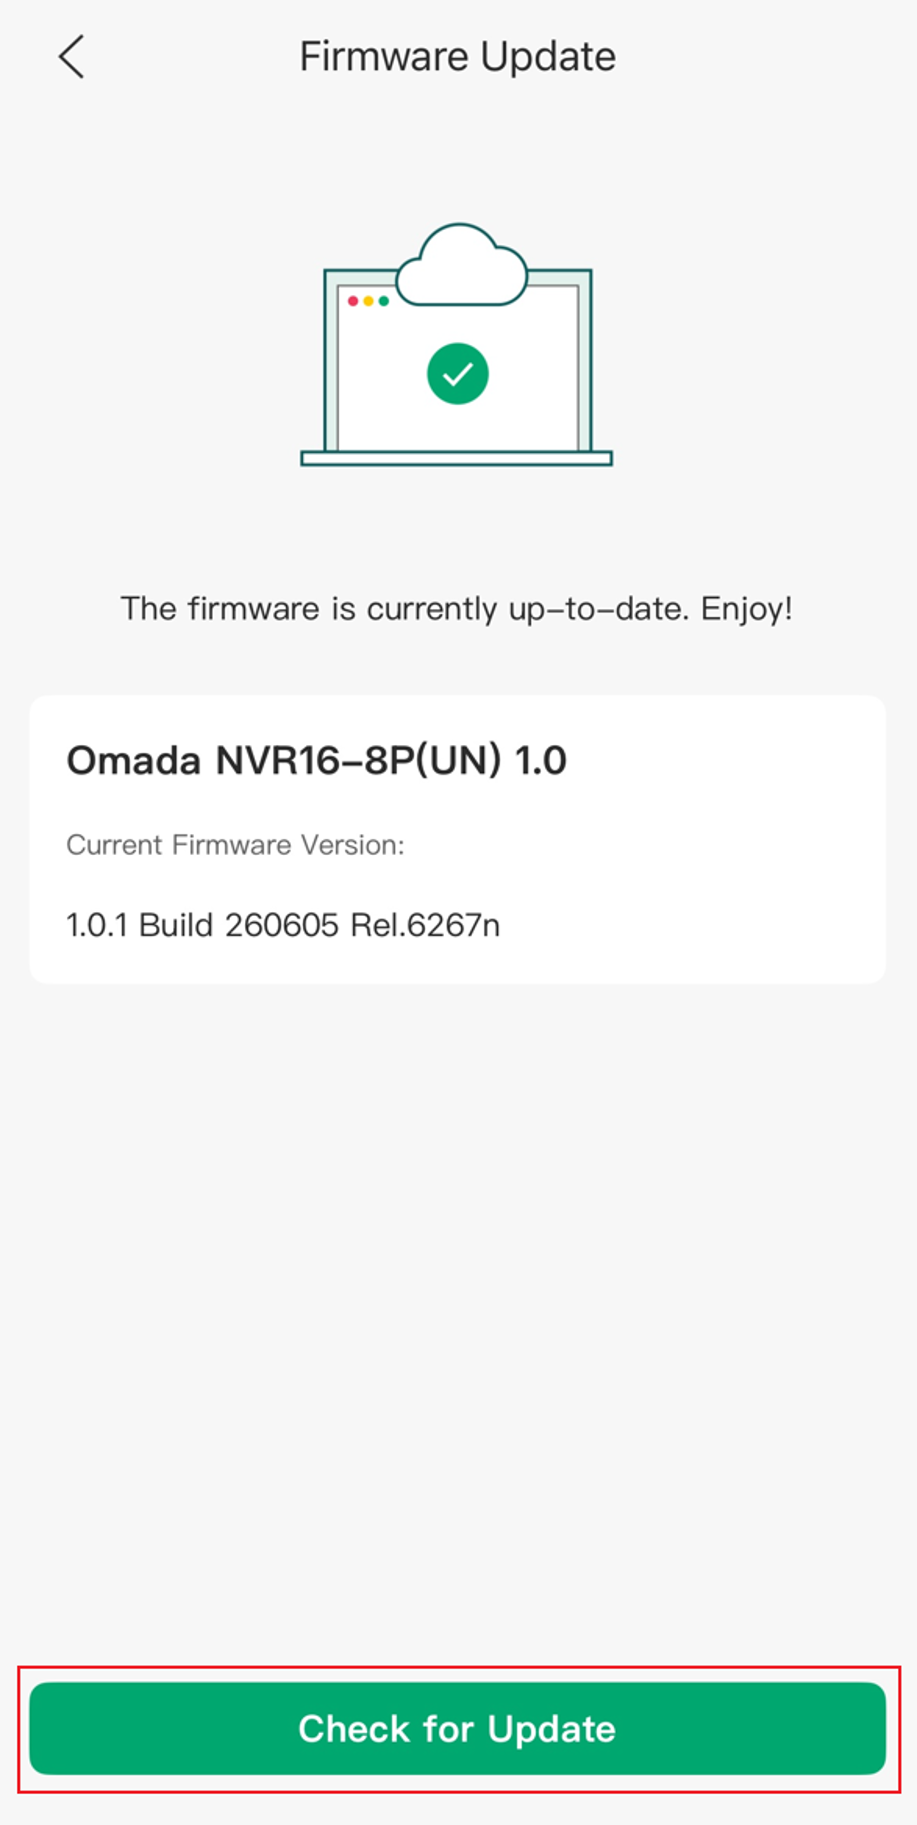
Step 3. Check for available firmware updates.
On the Firmware Update page, tap Check for Update. The app will communicate with the TP-Link update server and check whether a newer firmware version is available for the NVR.
- If a new firmware version is available, follow the on-screen prompts to start the upgrade.
- If the NVR is already running the latest firmware, the app will display a message indicating that the firmware is up to date.
Step 4. Wait for the upgrade to be completed. After the upgrade, the device will reboot automatically.
Step 5. After rebooting, return to the Firmware Upgrade page and verify the Firmware Version to confirm that the NVR has been successfully upgraded to the new version.
Conclusion
Firmware upgrades help keep your Omada NVRs up to date. Use the web UI, GUI or Omada Guard app to complete the process easily and efficiently.
To learn more about each function and configuration, please visit Support Home to download or check the manual for your product.
