


How to Use Multi-Screen Synchronized Playback on Omada Fusion Pro Gateway


Contents
Introduction
Recorded footage often needs to be reviewed from multiple cameras at the same time, especially in large surveillance deployments where incidents may involve several locations or different camera angles.
To improve investigation efficiency, Omada Guard provides Multi-Screen Synchronized Playback, allowing administrators to simultaneously review recordings from up to four IPCs within the same time period. This feature helps users track movements across different areas, compare activities from multiple viewpoints, and reconstruct events more efficiently.
This article explains how to use Multi-Screen Synchronized Playback and describes important usage notes and limitations.
Requirements
- Omada Fusion Pro Gateway.
Configuration
This section describes how to use Multi-Screen Synchronized Playback on Omada Fusion Pro Gateway. It explains how to enable multi-screen playback, add cameras to playback windows, and review recordings from multiple IPCs simultaneously. It also covers important behaviors and limitations that you should be aware of when using Multi-Screen Playback.
Enable Multi-Screen Playback
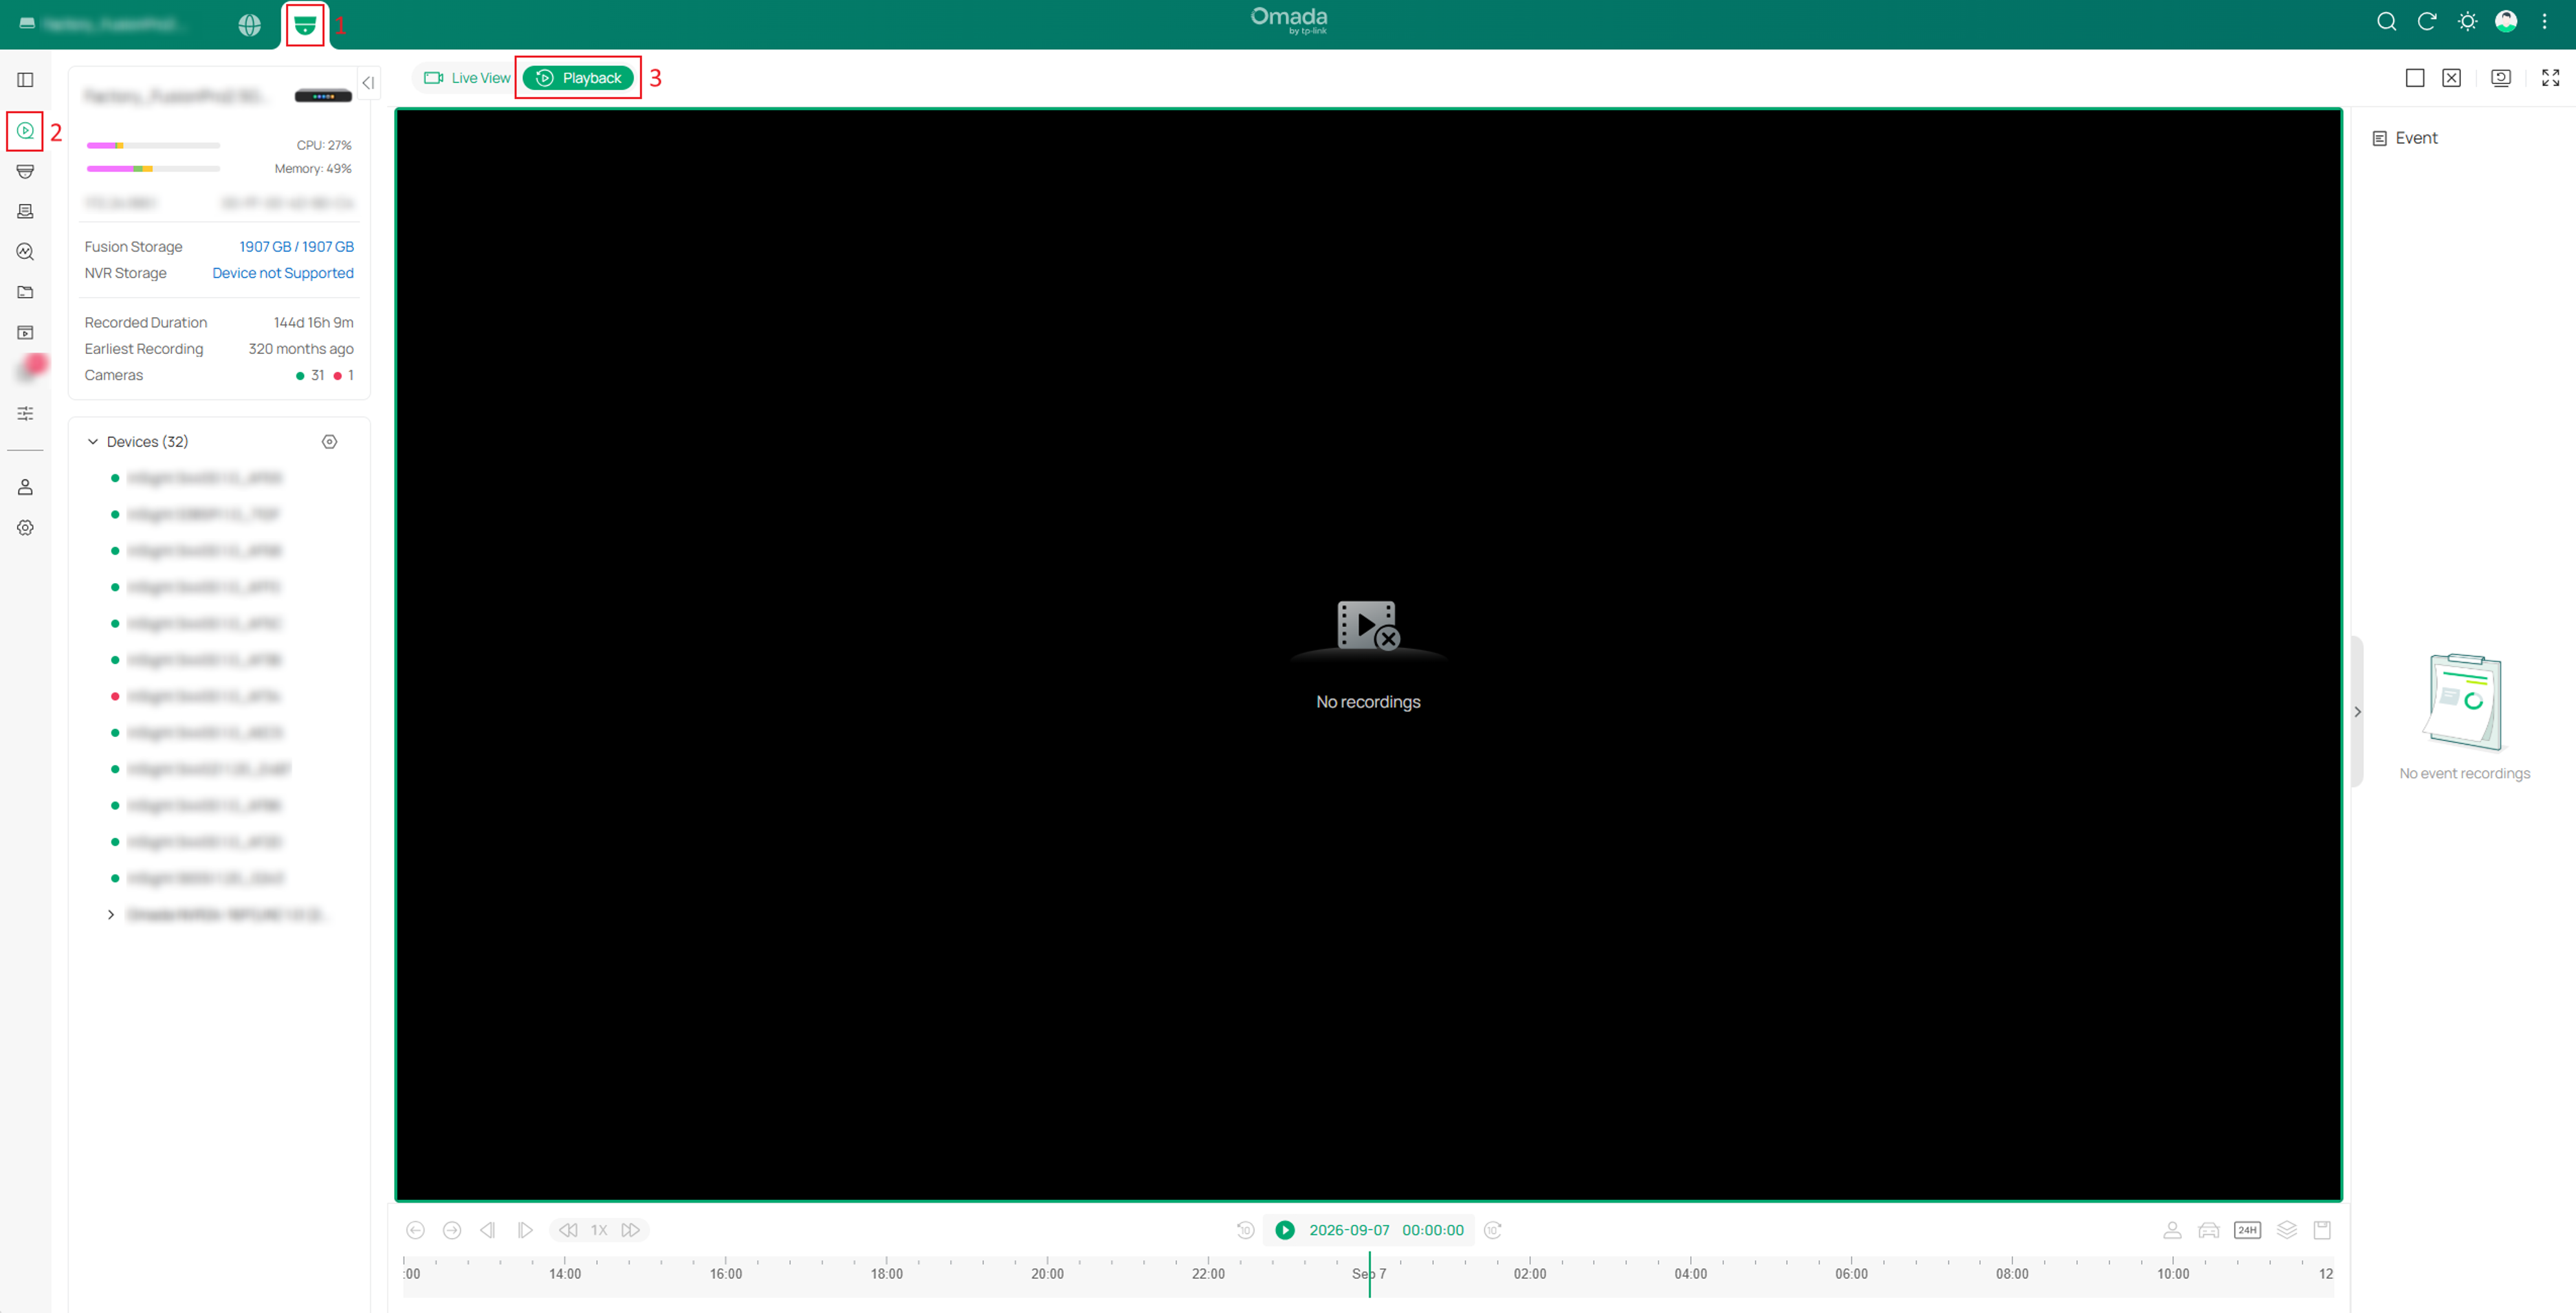
Step 1. Navigate to Guard > Video > Playback to access the playback page.
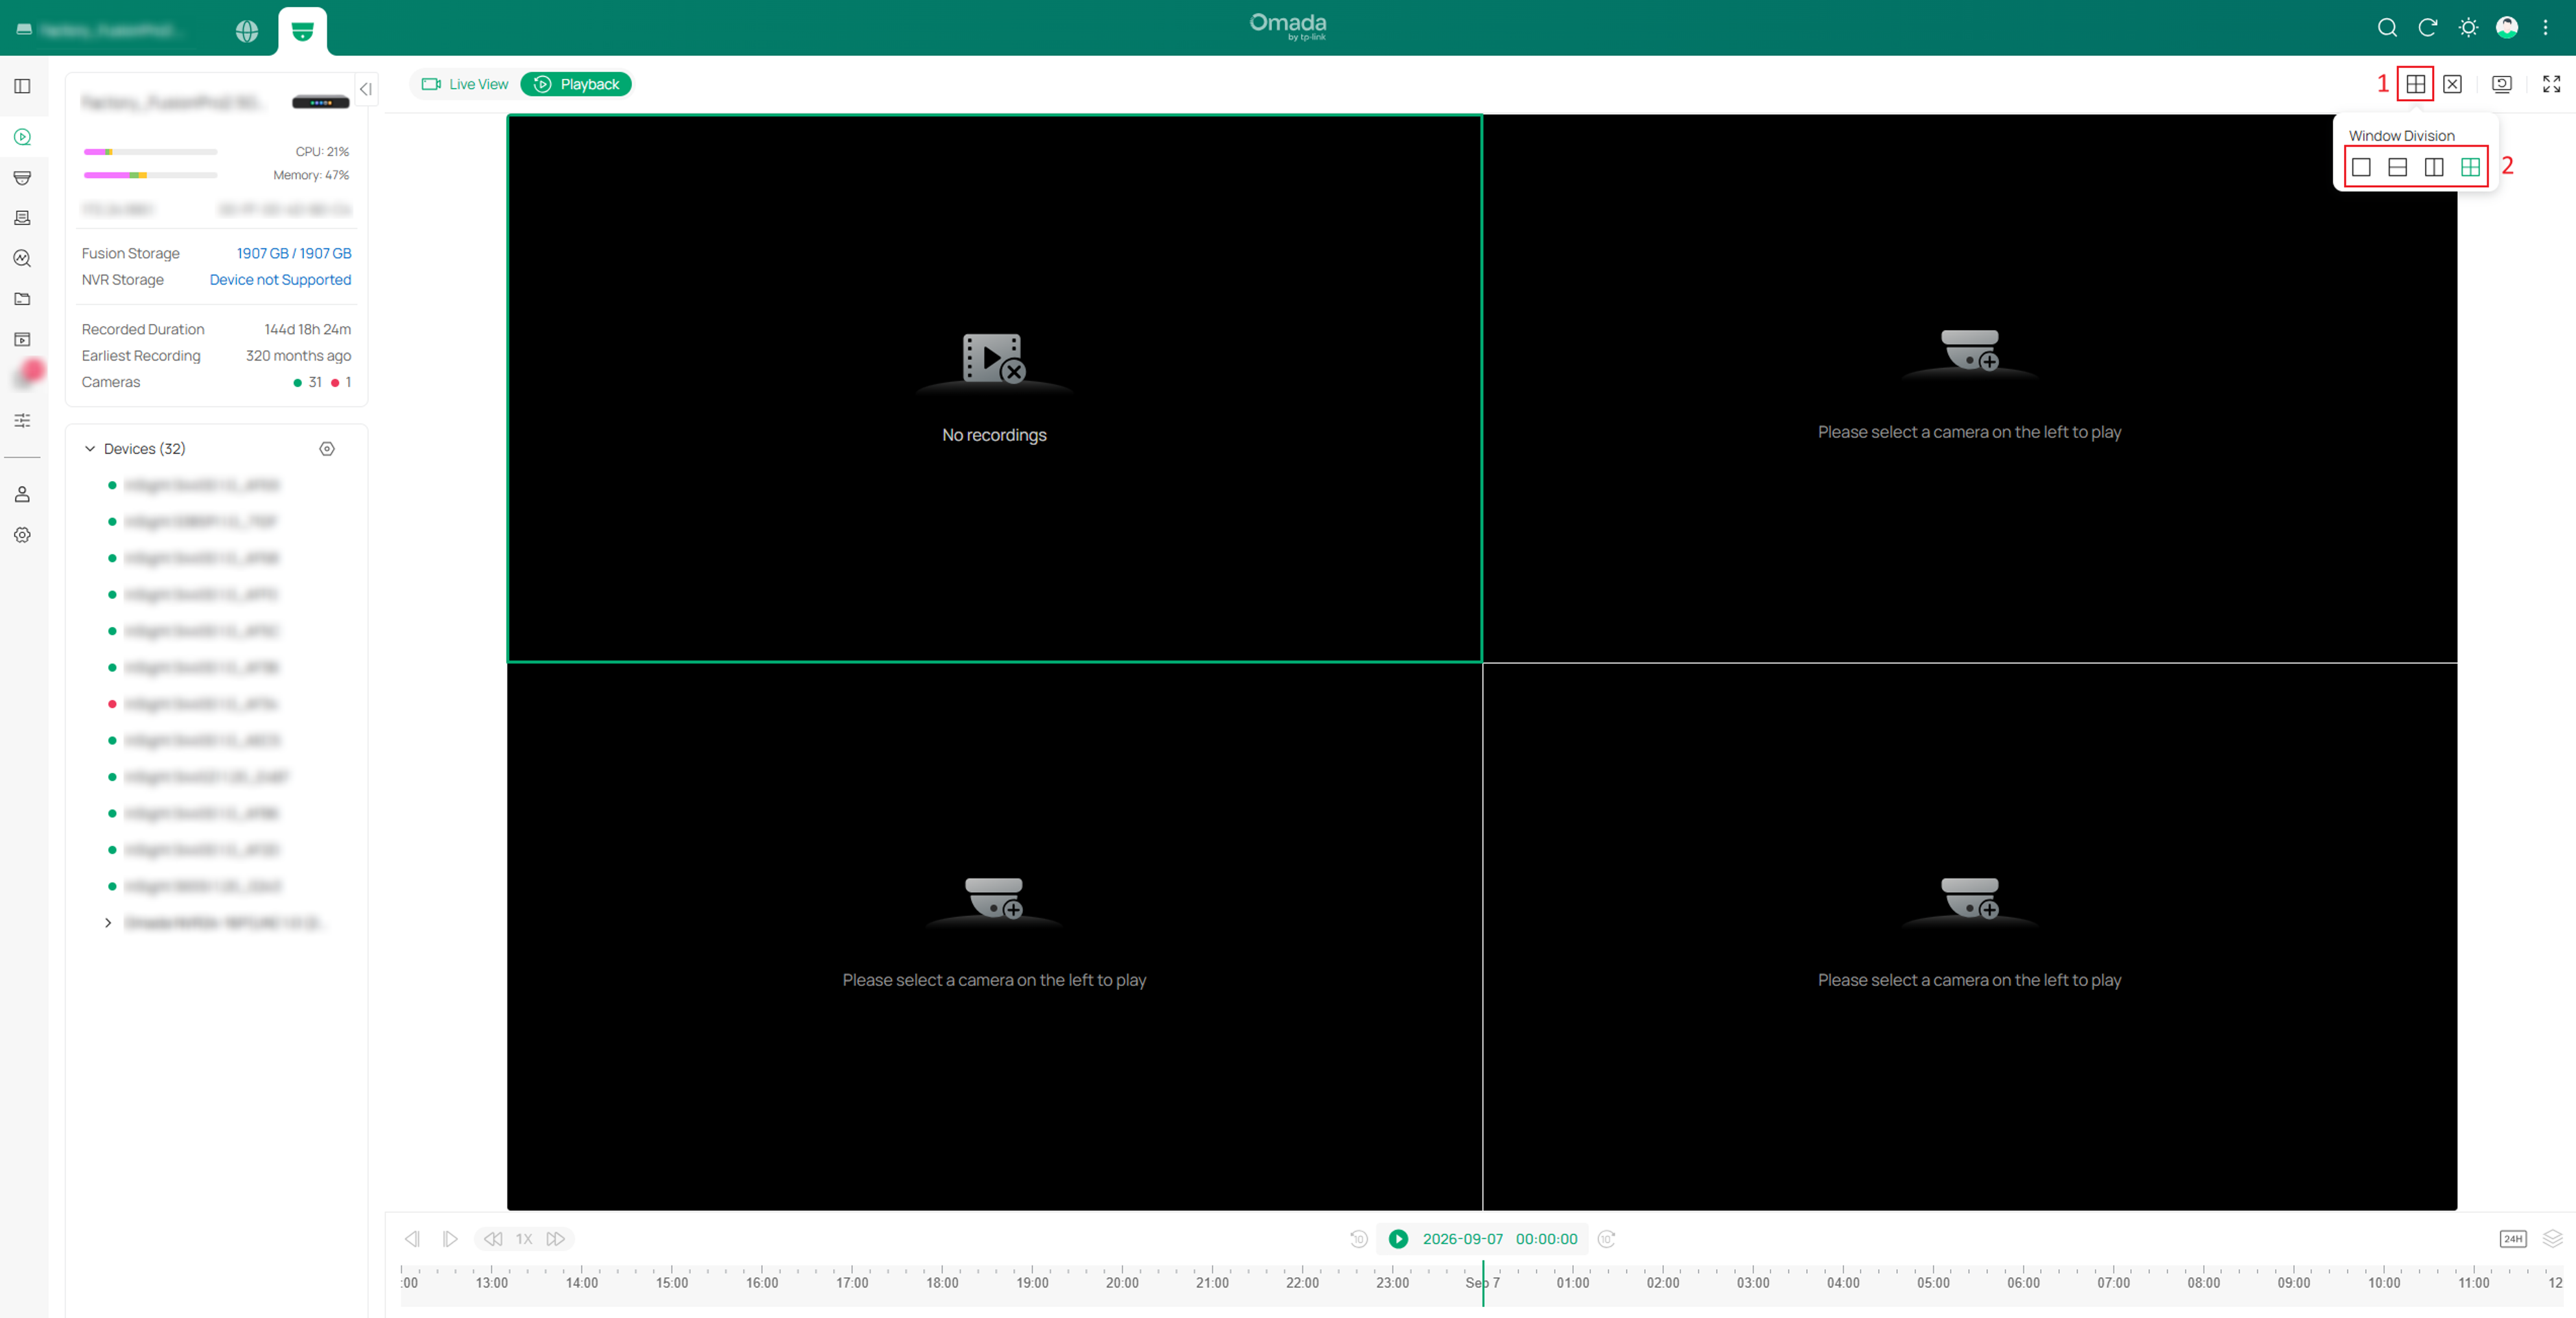
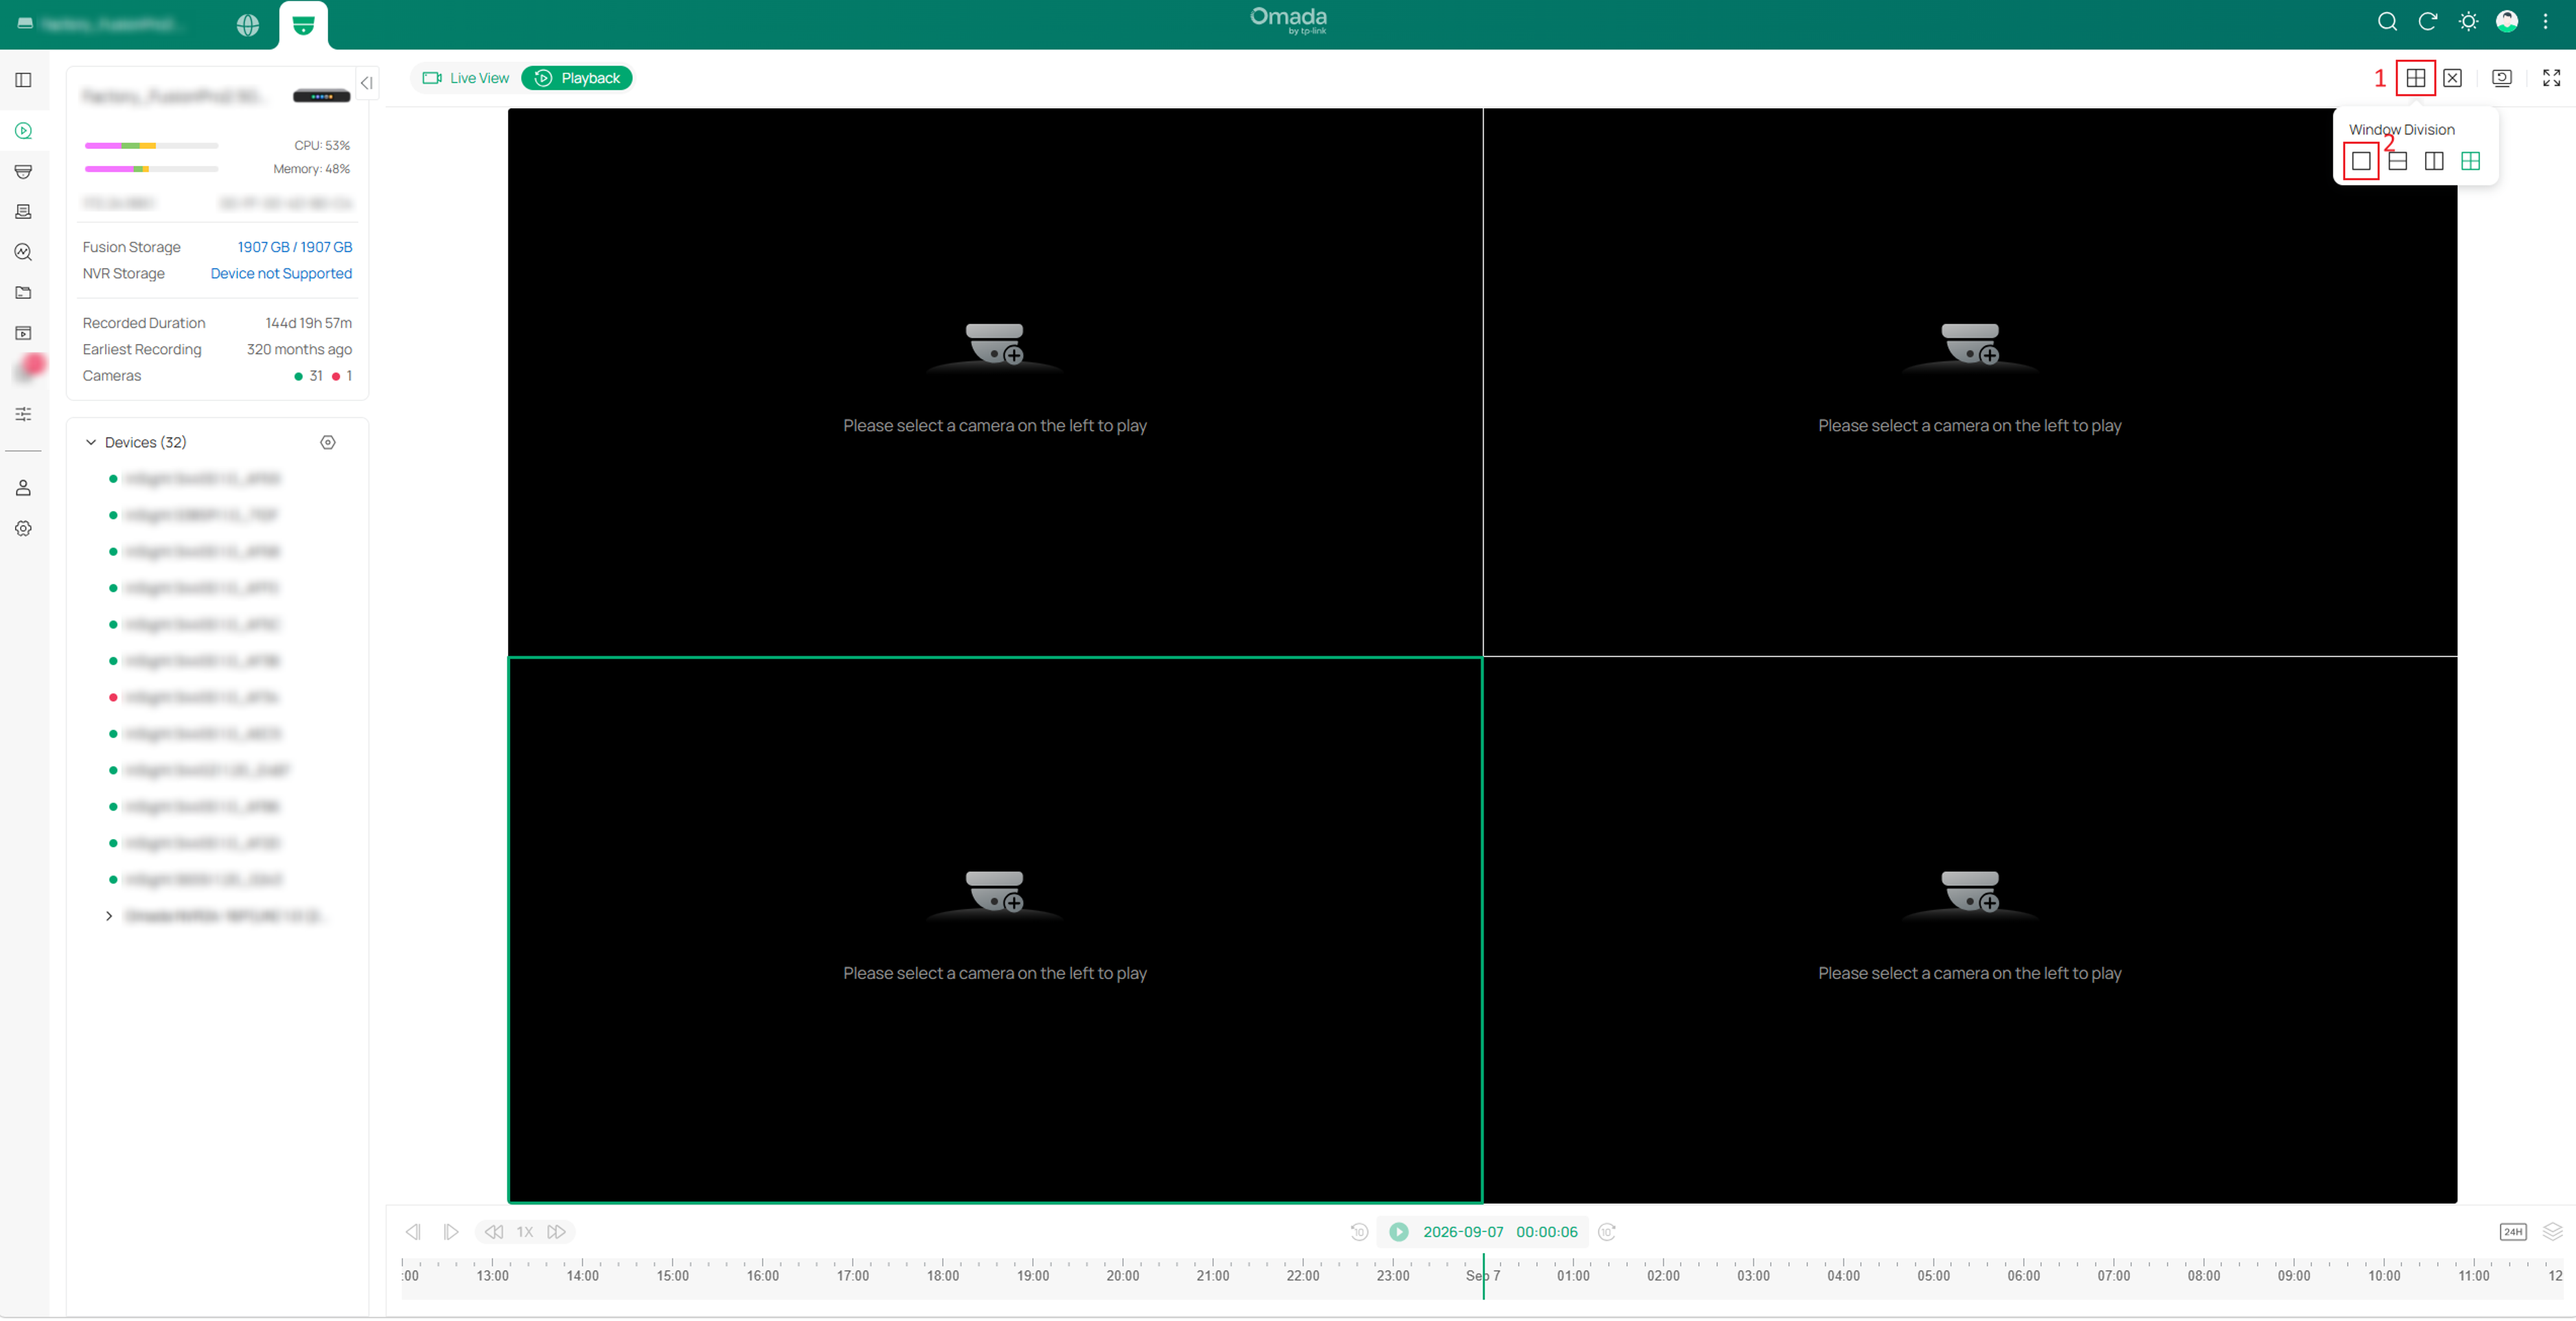
Step 2. Click the Number of Screen button in the upper-right corner of the Playback page and select the desired window layout.
Multi-screen playback supports up to four synchronized playback windows. For demonstration purposes, this article uses the four-screen layout as an example.
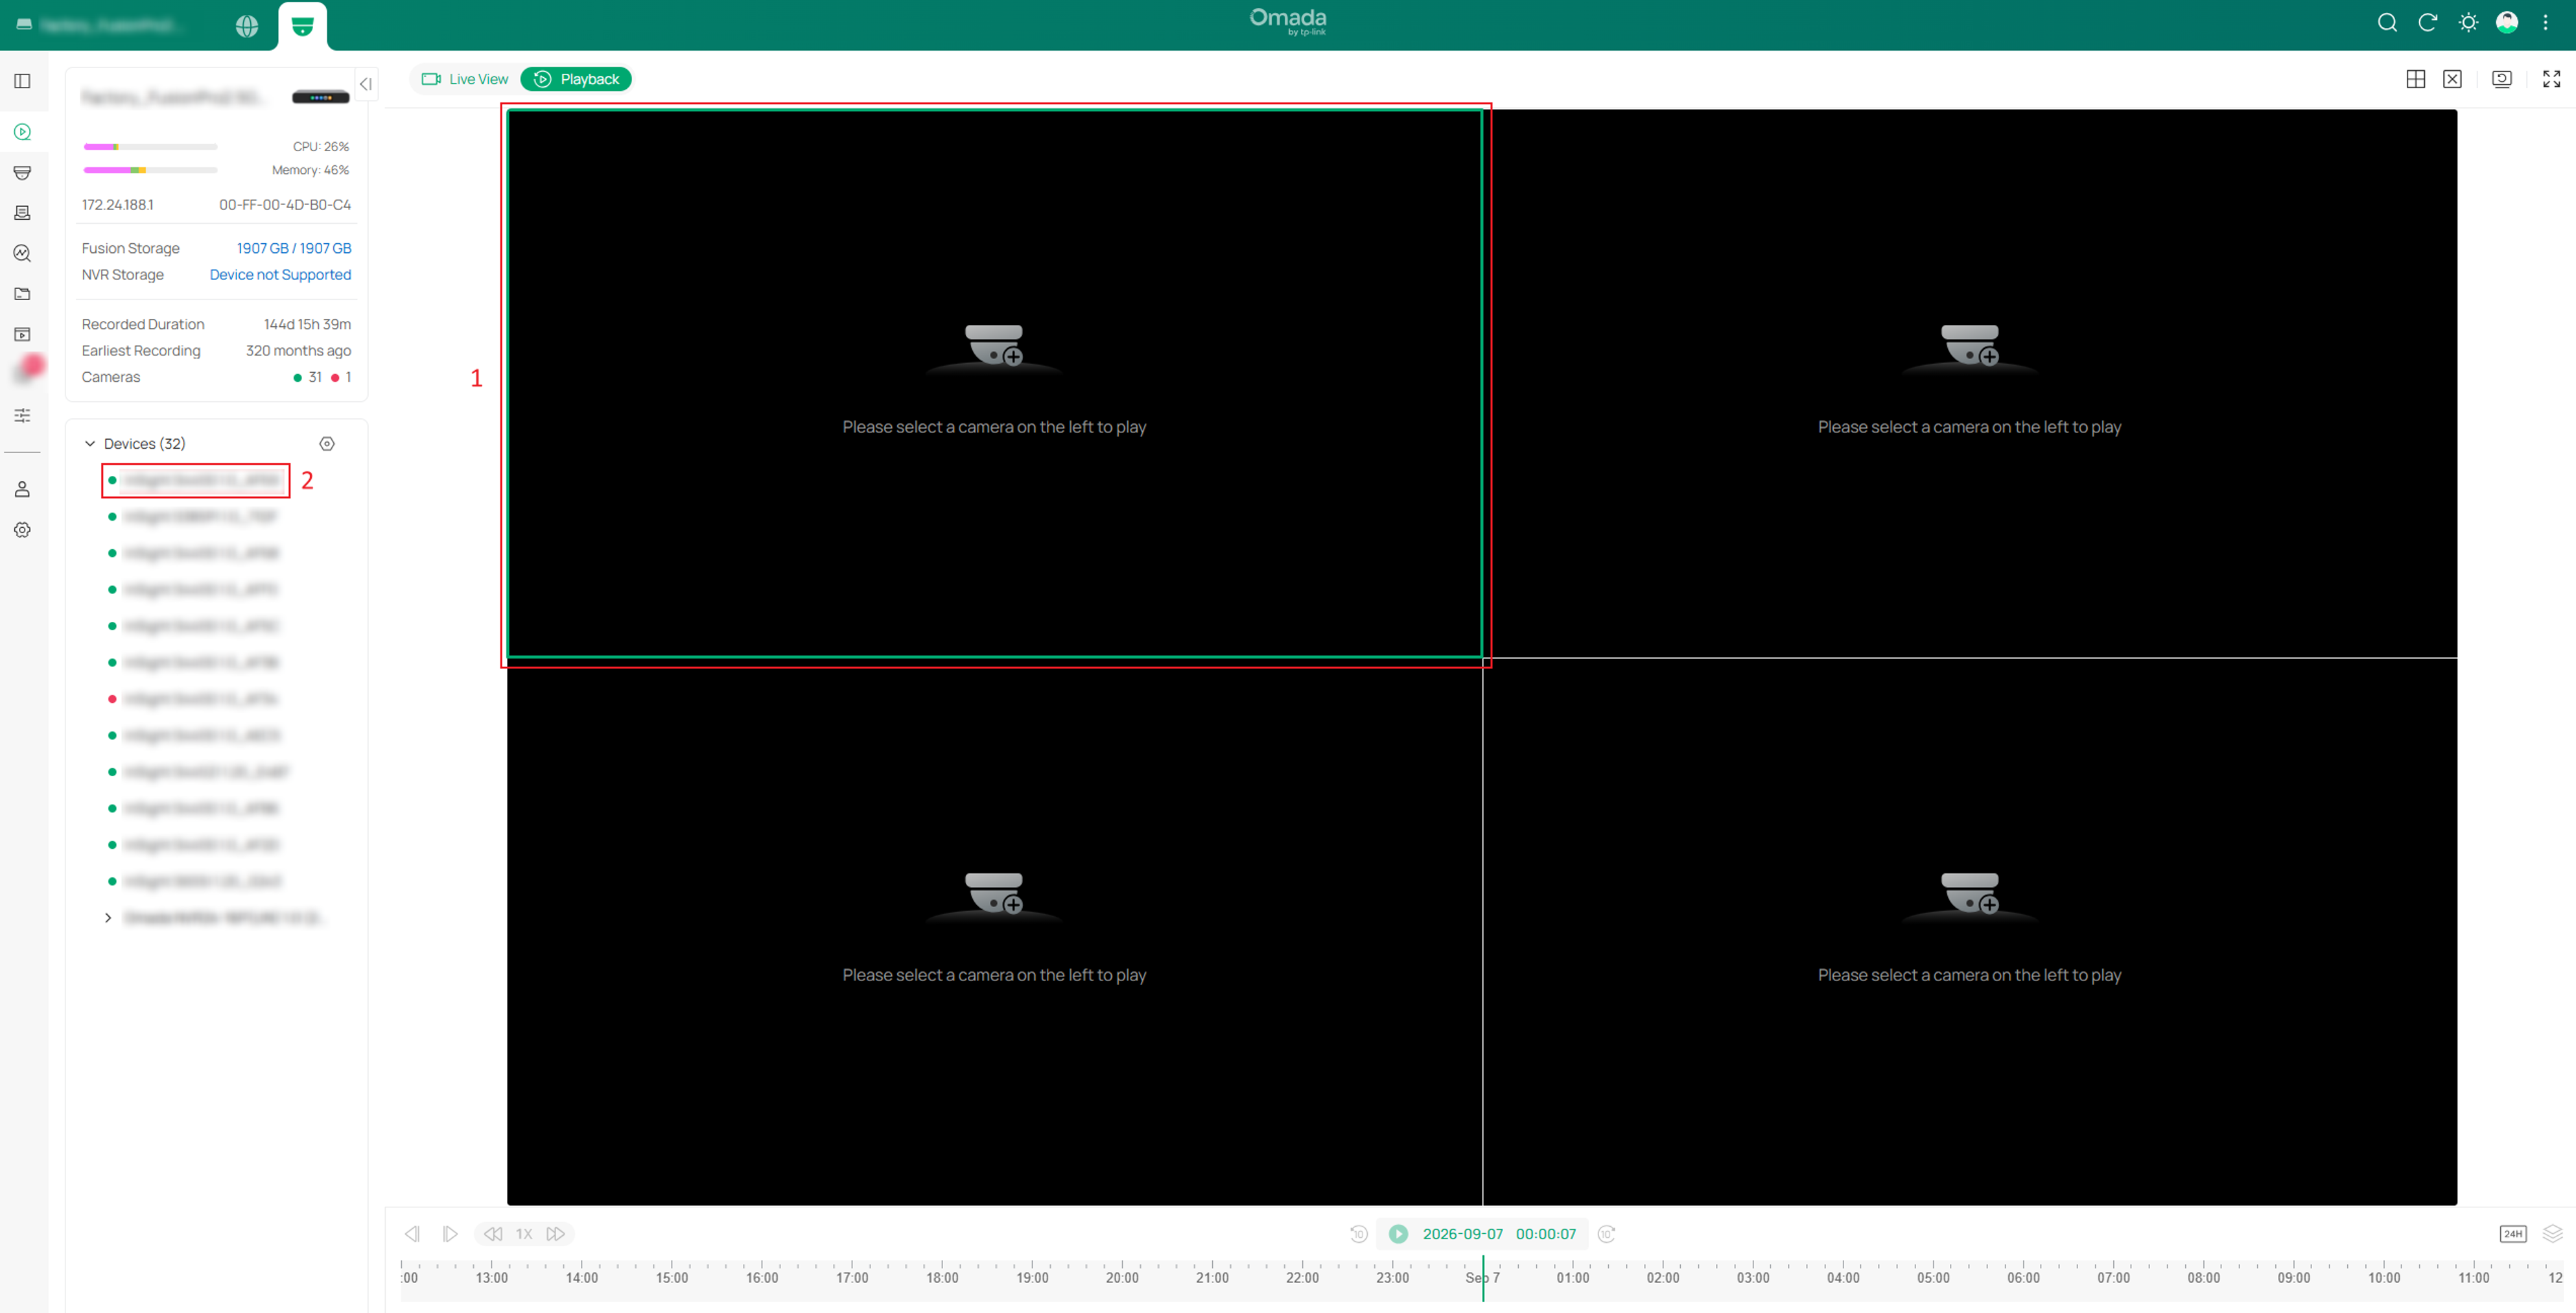
Step 3. Select the playback window where you want to display a camera. The selected window will be highlighted with a green border.
Then select a camera from the device list on the left. You can either click a camera to load it into the selected playback window or drag and drop the camera into a specified window.
Repeat this process to add cameras to the remaining playback windows. The selected cameras will start synchronized playback based on the same timeline.
Note: Multi-Screen Playback currently supports only cameras from the same recording source. Synchronized playback of recordings from different NVRs, as well as recordings from directly connected IPCs and sub-IPCs under an external NVR, is not supported. Support for these scenarios is planned for a future release.
Step 4. After the cameras are added, you can use the playback controls and timeline at the bottom of the page to navigate recordings from all selected cameras simultaneously.
Hover over a playback window to display additional camera controls, such as Resolution, Screenshot, Digital Zoom and other playback settings.
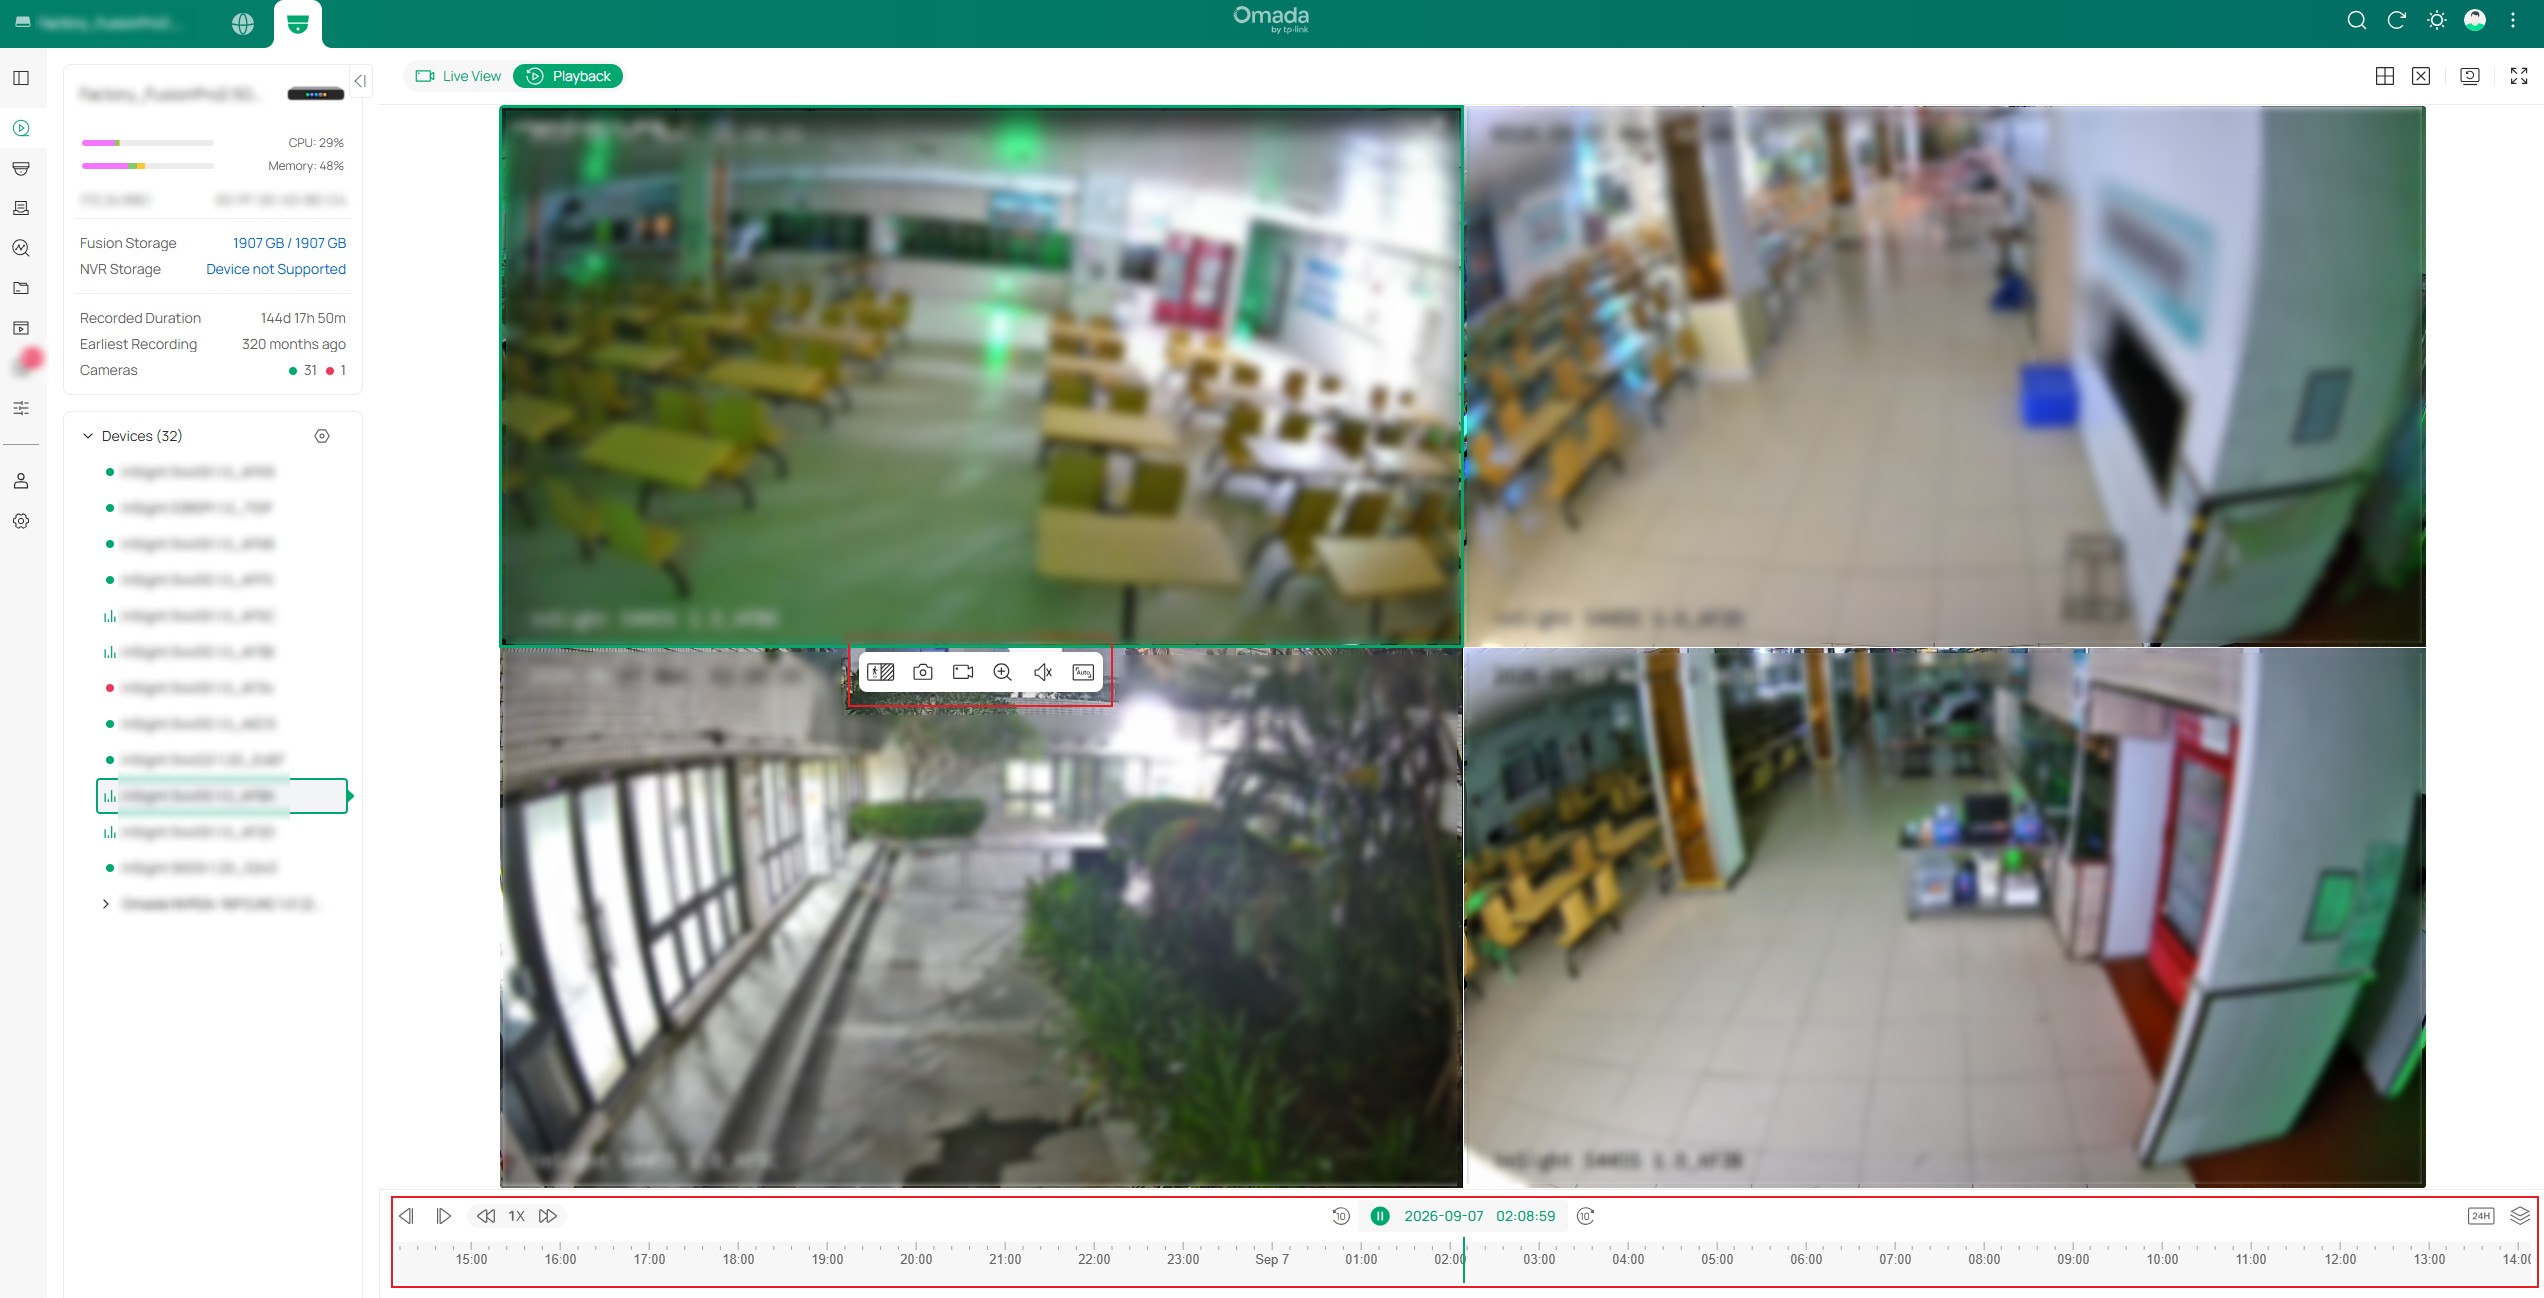
Note: In Multi-Screen Playback mode, the Event List is automatically hidden and the timeline is not rendered on the Playback page, as the focus is on synchronized playback across multiple camera views rather than event-based navigation. Playback continues to follow the synchronized timeline in the background. Human and Vehicle Search is also unavailable in this mode. These functions will be restored after returning to Single Screen mode.
Step 1. Click the Number of Screen button in the upper-right corner of the Playback page, and then select the Single Screen layout.
You can also exit Multi-Screen Playback by leaving the Playback page.
Note: In Multi-Screen Playback mode, double-clicking a playback window enters Focus Mode. Although only the selected playback window is displayed, the system remains in Multi-Screen Playback mode. To fully exit Multi-Screen Playback, switch back to the Single Screen layout or leave the Playback page.
Step 2. The Playback page will return to the normal single-screen playback interface.
Conclusion
You have now successfully learned how to use Multi-Screen Synchronized Playback on Omada Fusion Pro Gateway.
Multi-Screen Playback enables administrators to review recordings from up to four cameras simultaneously, making it easier to monitor multiple locations, compare footage from different viewing angles, and track activities across surveillance areas during the same time period. This feature helps improve the efficiency of incident investigation and video analysis.
To learn more about each function and configuration, please visit Support Home to download or check the manual for your product.
Q1: How many cameras can be played back simultaneously in Multi-Screen Playback mode?
A1: Multi-Screen Playback supports synchronized playback of up to four IPCs at the same time.
Q2: Why is the Event List no longer displayed after enabling Multi-Screen Playback?
A2: Multi-Screen Playback focuses on synchronized playback and comparison across multiple camera views instead of event-based review. As a result, the Event List is hidden in this mode. It will be restored when you return to Single Screen mode.
Q3: Does double-clicking a playback window exit Multi-Screen Playback mode?
A3: No. Double-clicking a playback window enters Focus Mode, which displays only the selected playback window. However, the system remains in Multi-Screen Playback mode. To fully exit Multi-Screen Playback, switch back to Single Screen mode or leave the Playback page.
