


Contents
A private Pre-Shared Key (PPSK for short) is a security solution in which individual client devices can be managed without much complexity. With PPSK, each user is assigned a unique passphrase for authentication. Also, it allows the binding of a passphrase, VLANs, and the device's MAC address(es), and thus only the specified device can be authenticated using the passphrase and assigned to a specific VLAN.
In PPSK, you can create the PPSK list and apply it to multiple wireless networks, saving you from repeatedly setting up the same information. And with Omada Controller 6.1 or above, in the automatically generated PPSK file, VLAN assignment could be performed automatically based on the range and interval you input.
- Omada Controller version 6.1 or above
- Omada EAPs that support the PPSK feature
When configuring PPSK, you can choose to authenticate clients through a Radius Server or via the built-in PPSK feature of Omada. This article will focus on explaining the operational steps for configuring PPSK using the built-in functionality.
Step 1. On a controller with a version higher than 6.1, adopt an EAP that supports the PPSK function. Please ensure that the wireless clients connected to this AP have connectivity within the VLAN where you intend them to communicate.
Step 2. Go to Network Config > Profile > PPSK, add a new PPSK profile.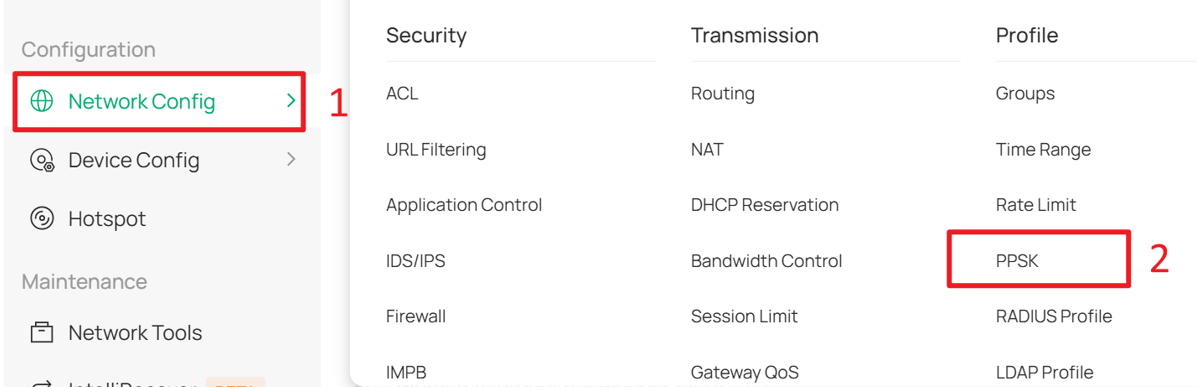
Click Create New PPSK Profile on the PPSK management page.

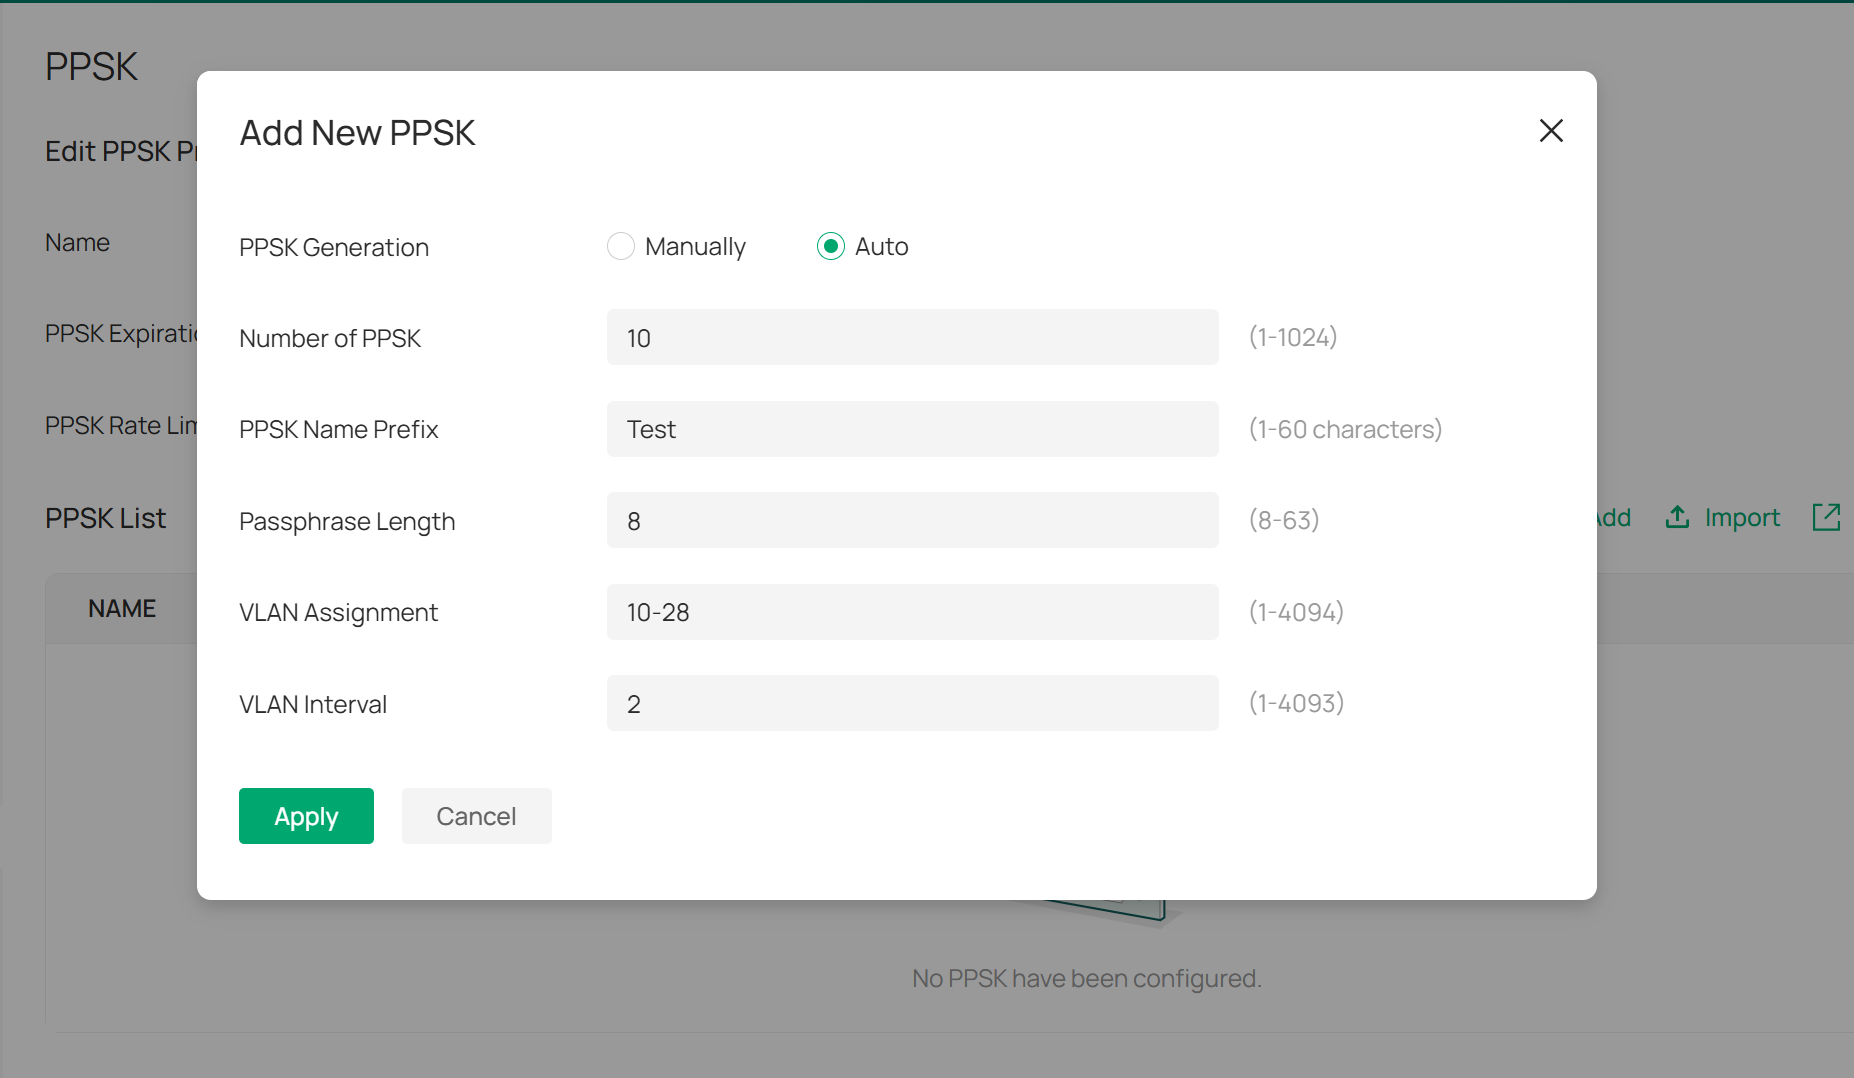
Step 3. In the PPSK editing page, choose Add or Import to create a new PPSK list. When choosing Import, you can download a template, then fill it in and upload it later. When choosing Add, you can manually set PPSK for different clients or have the Controller automatically generate them.

To automatically add the PPSK, in the adding page, choose Auto, and configure the necessary parameters required to generate the PPSK.
For example, if you want to generate 10 PPSK, you can set the Number of PPSK to 10, the VLAN Interval to 2, and the VLAN Assignment from 10 to 28. This will result in 10 unique PPSKs being generated for VLANs 10, 12, 14, and so on up to VLAN 28. When clients enter the passphrase corresponding to each generated PPSK, they will be authorized and joined to different VLANs based on the unique PPSK they use.
Note: When you enter only a single number in the VLAN Assignment field, if you do not input a VLAN Interval, the VLAN will be fixed to the number you entered. When you enter only a single number in the VLAN Assignment field and also input a VLAN Interval, the VLAN range will be from the number you entered up to the maximum of 4094, with the step size being the specified VLAN Interval.
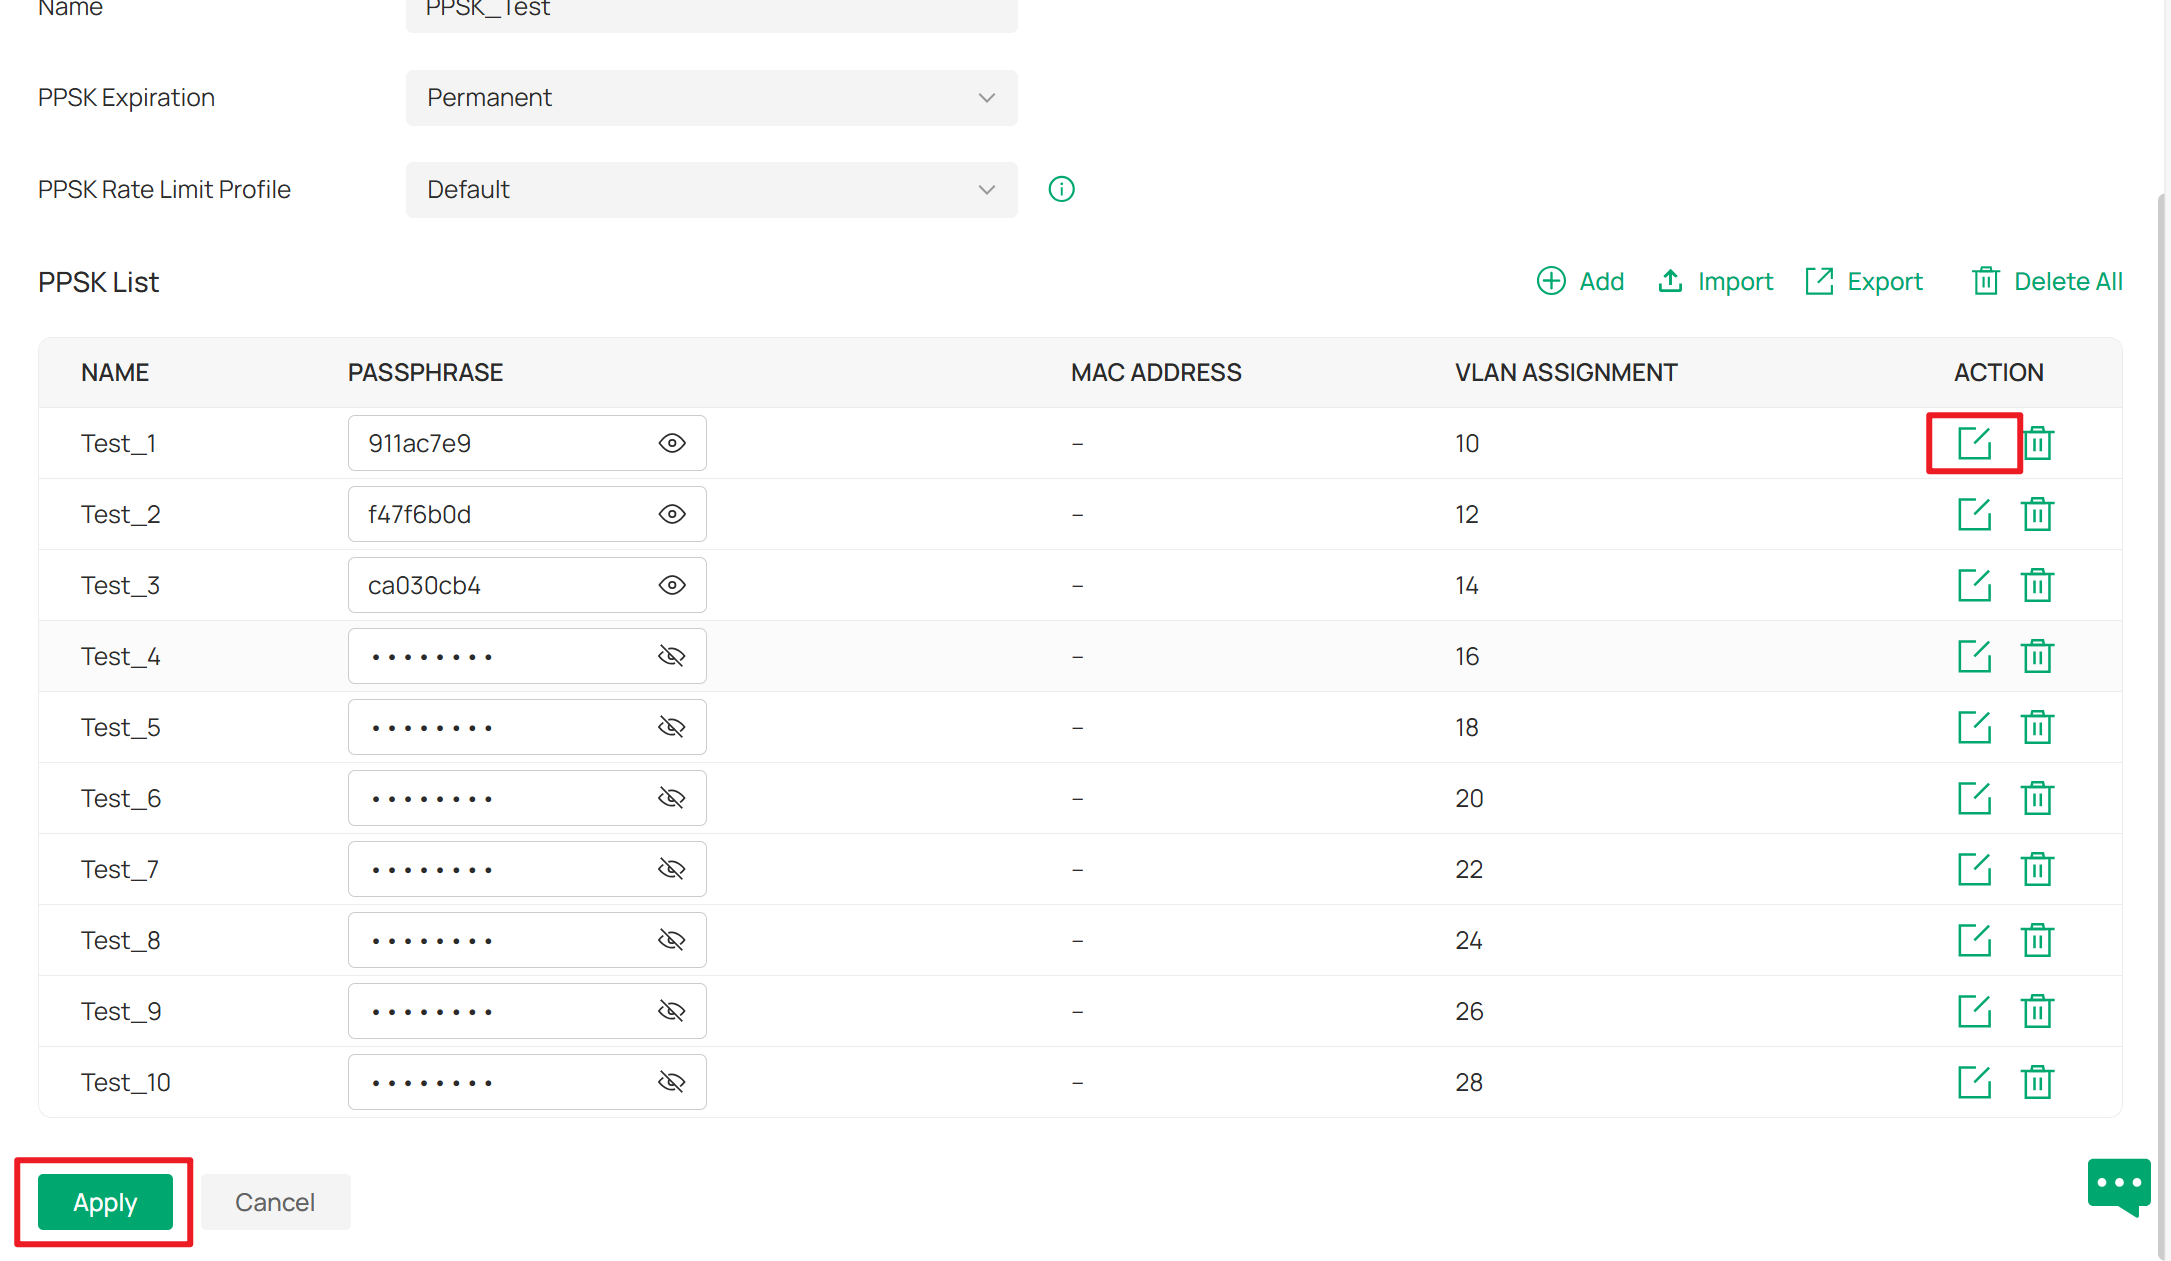
After automatically generating PPSK, you can also click on the ACTION icon to further edit or delete each PPSK. You can change the automatically generated passphrase or bind a specific MAC address to each PPSK.
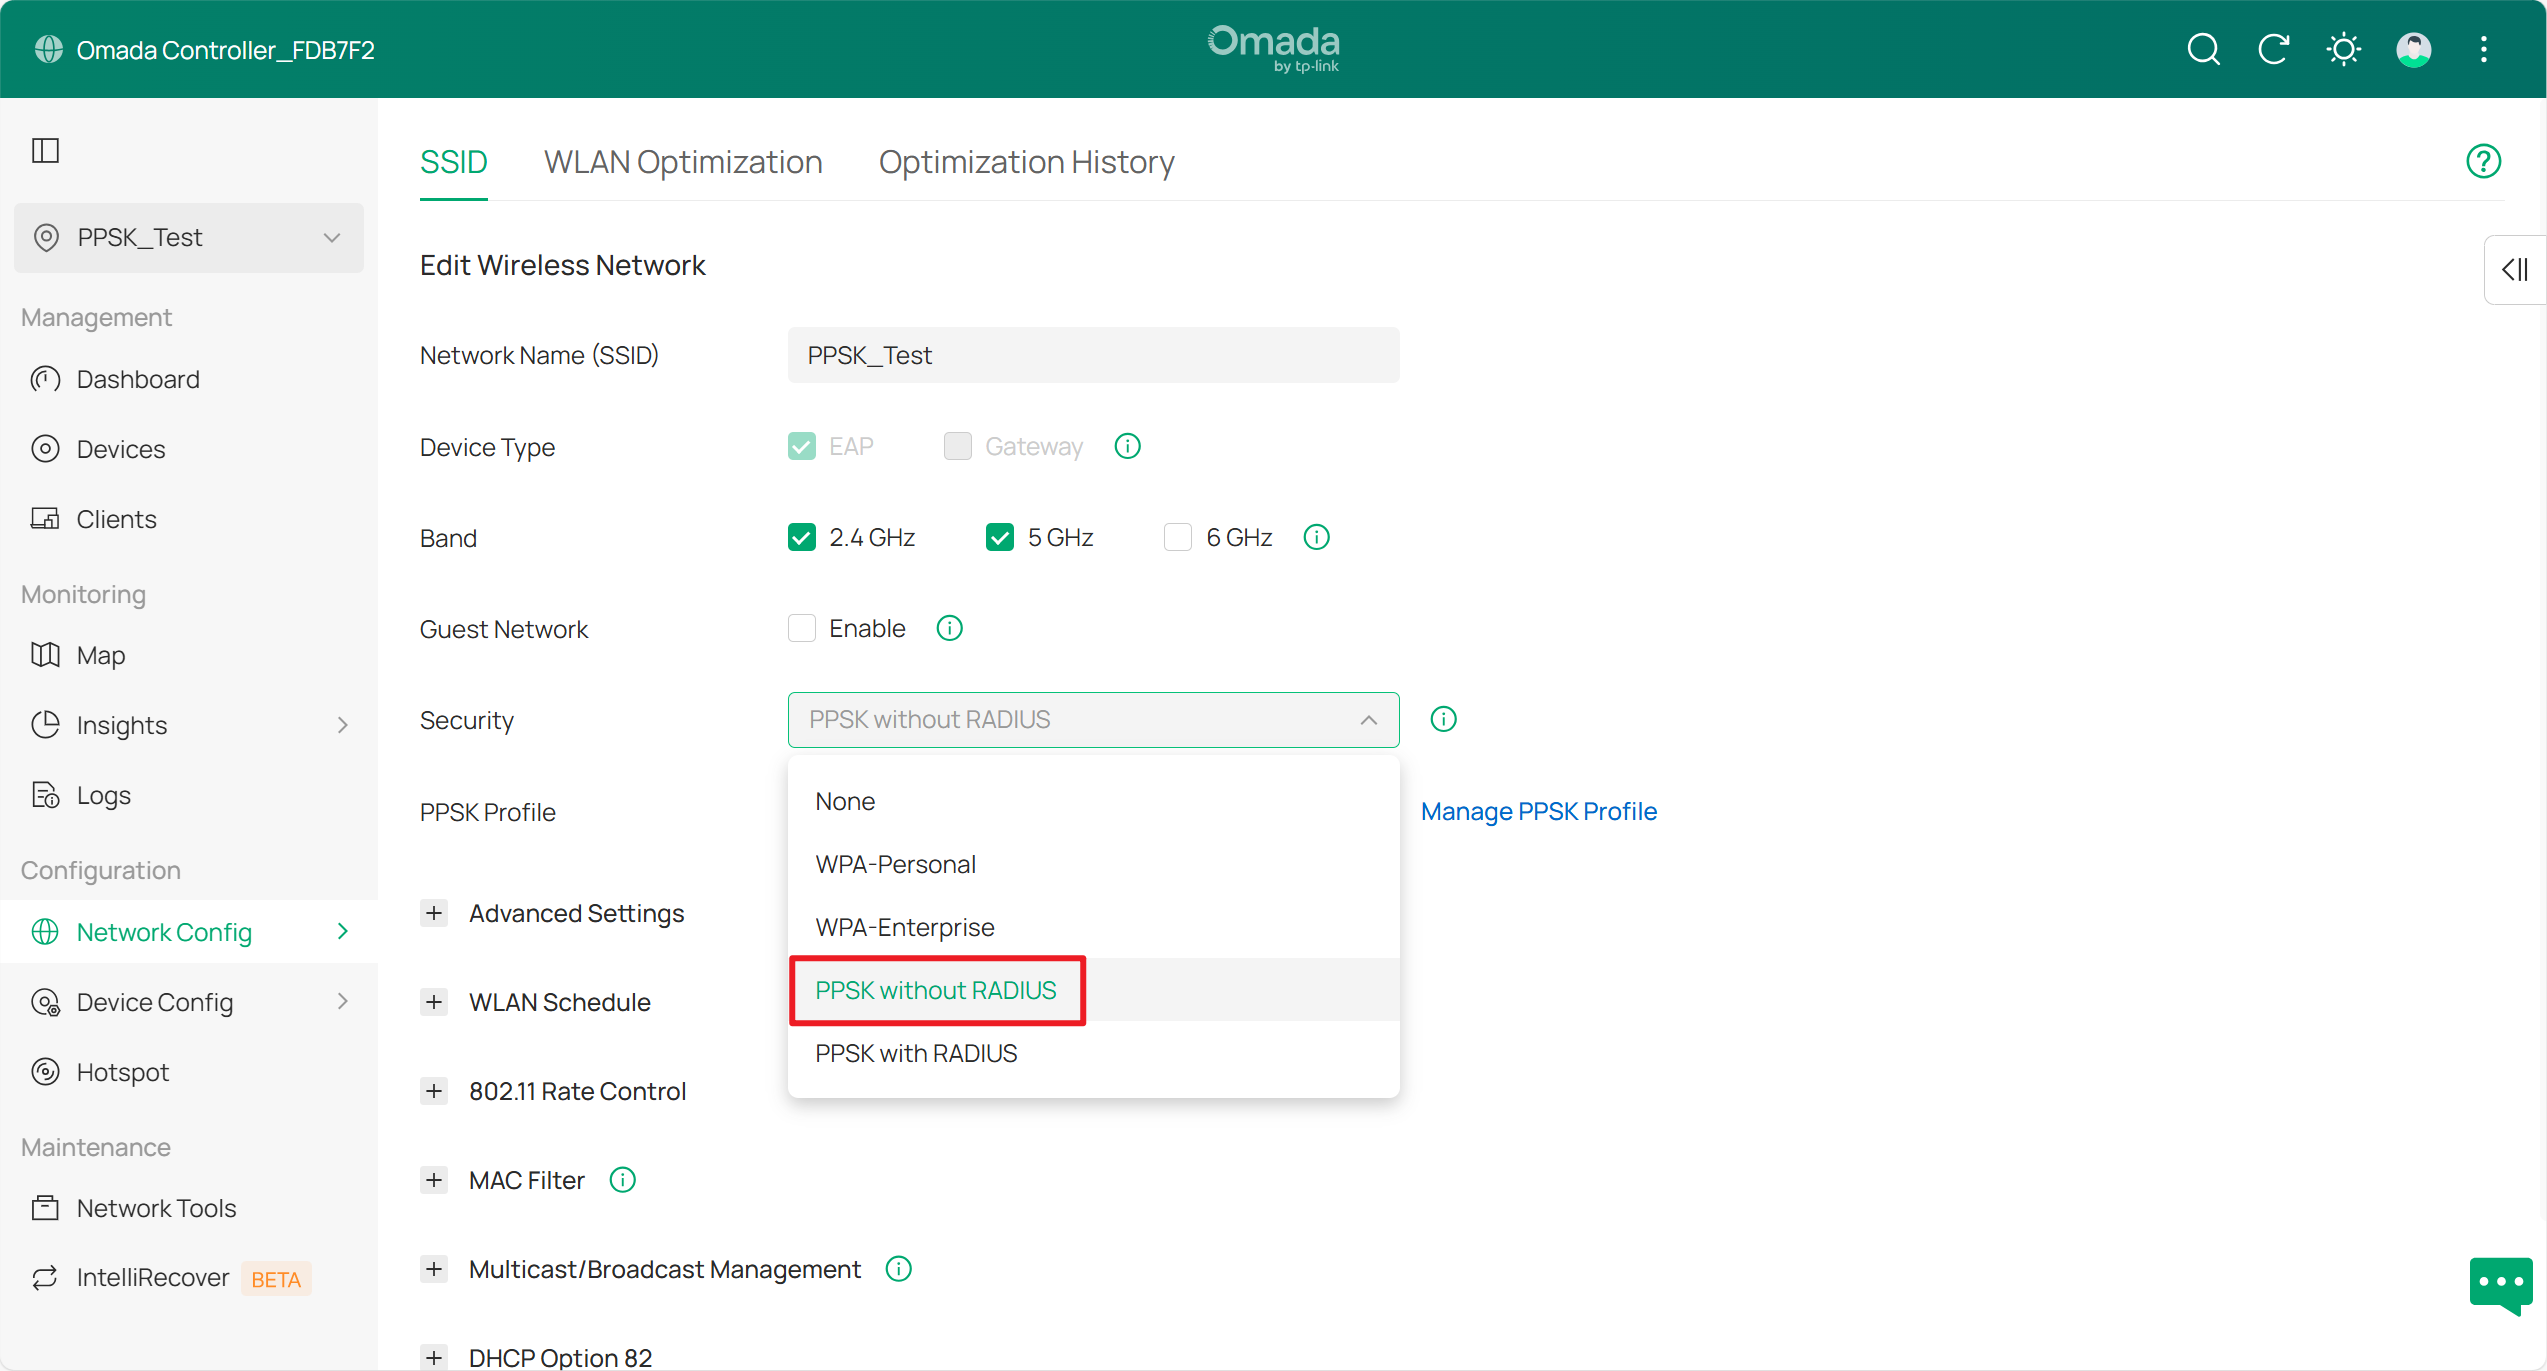
Step 4. After finishing editing the PPSK profile, you can continue to set up an SSID using the PPSK. Please go to Network Settings > WLAN, choose the Security method as PPSK without Radius, and then select the PPSK profile created before.
Note: If you want to configure PPSK using RADIUS, please select PPSK with RADIUS here and configure a correct RADIUS Server in the Controller. For more detailed information on this, you may refer to: PPSK Function with Different RADIUS Servers Configuration Guide | Omada Network Support.
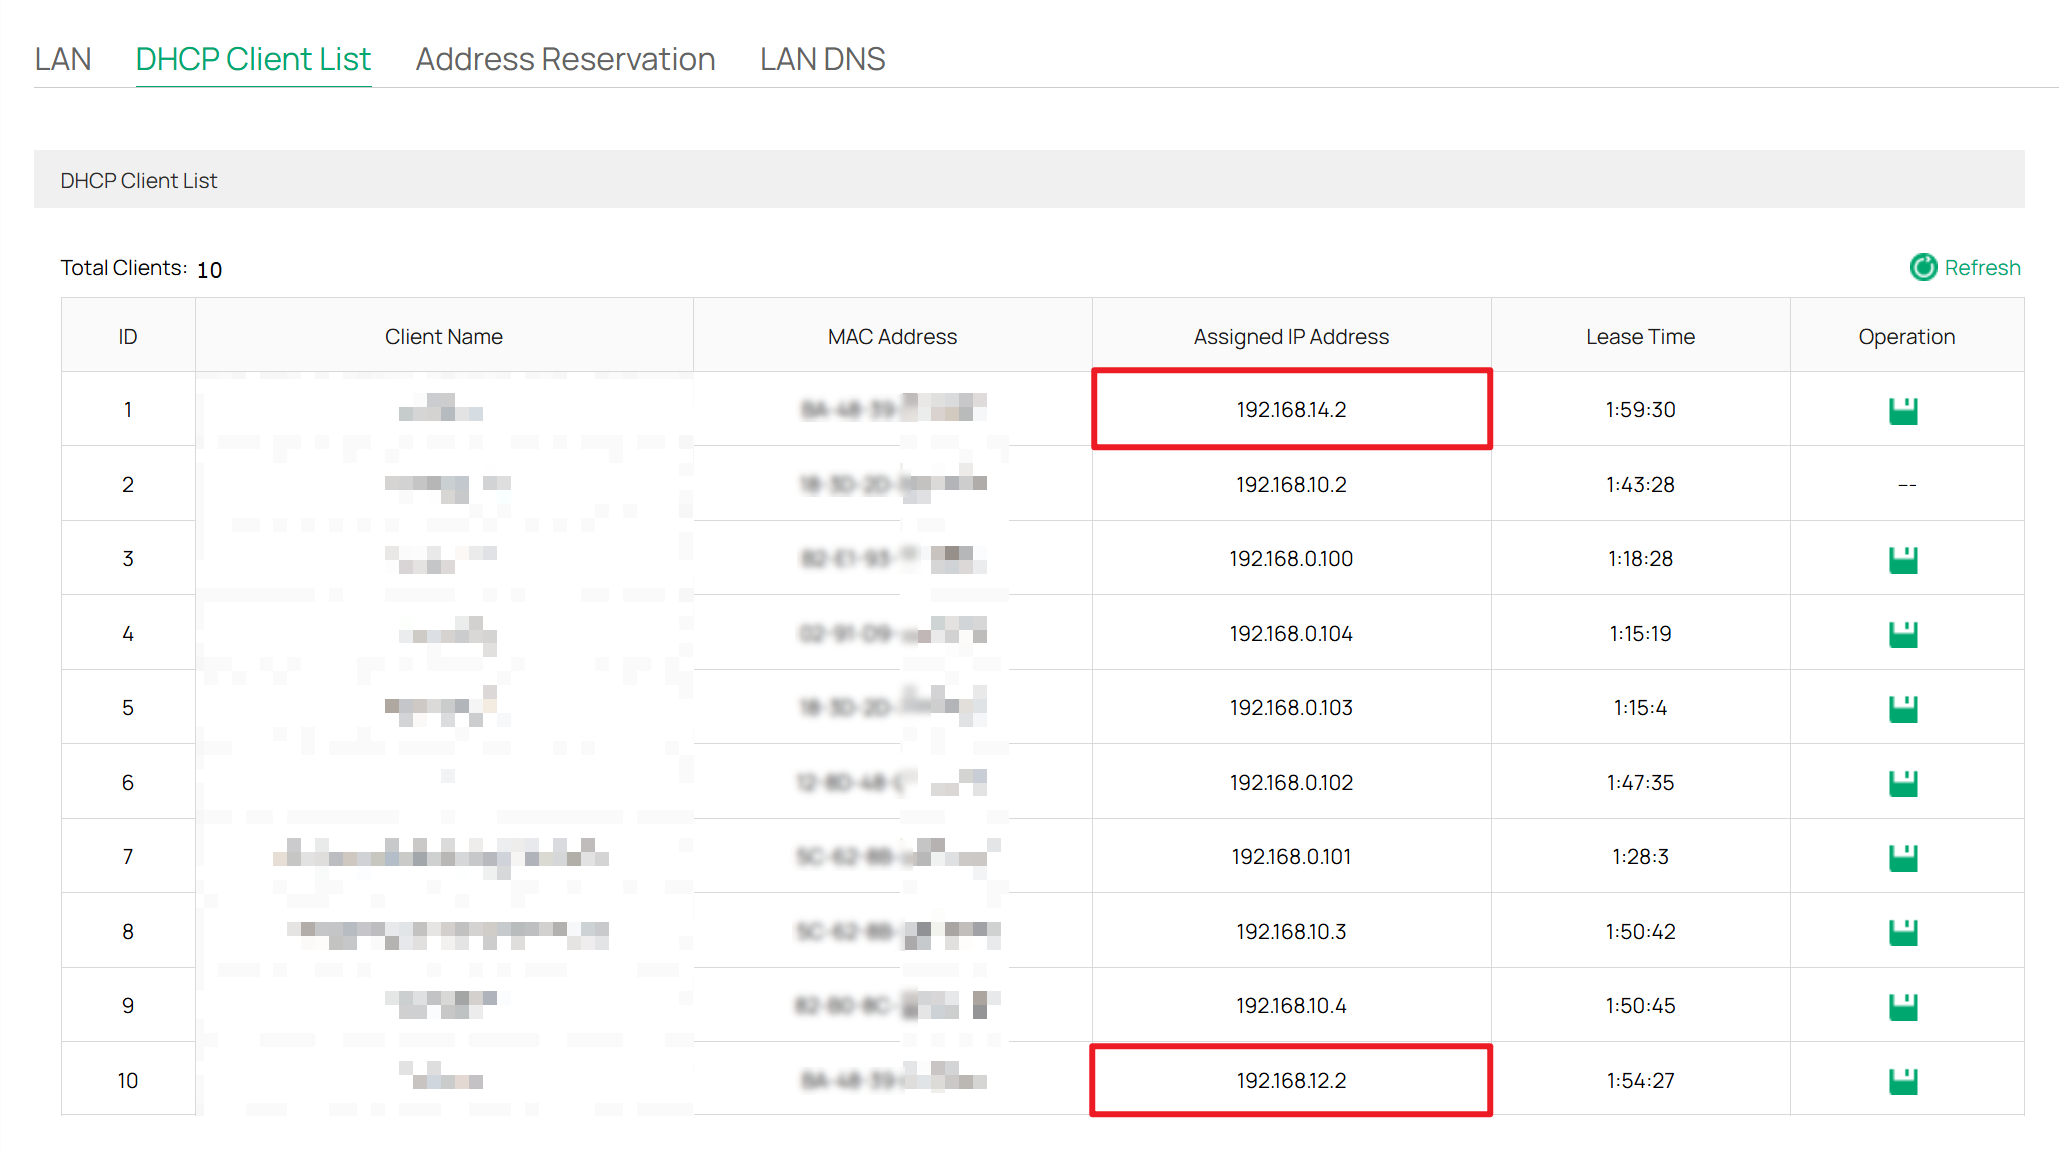
To verify whether the configuration was successful, you can connect different devices to this SSID using different passphrases and check if they are assigned to different VLANs. As shown in the figure below, when entering the passphrase corresponding to the PPSK for VLAN 12, the client joins VLAN 12, which is in the 192.168.12.x subnet. When entering the passphrase for VLAN 14, the client joins VLAN 14, which is in the 192.168.14.x subnet.
Now, you have successfully configured PPSK for clients using the Omada built-in PPSK functionality.
Get to know more details of each function and configuration, please go to Download Center to download the manual of your product.
