


Contents
Export Recording from the Playback page
Export Recording from the Recording Export page
Introduction
This article will guide you step by step through the process of exporting recordings from the PC client.
Requirements
- VIGI PC Client
- VIGI NVR
- External storage device
Configuration
Please ensure that your VIGI device is on the same network as the PC Client, or, if you are using PC Client v2.1.25 or above, verify that the device’s IP address is accessible. In either case, there is no time limit for exports.
Note: Remote cloud exports are limited to 5 minutes for non-whitelisted users and 30 minutes for whitelisted users.
To be added to the whitelist, please provide your TP-Link ID and organization details to technical support.
Export Recording from the Playback page
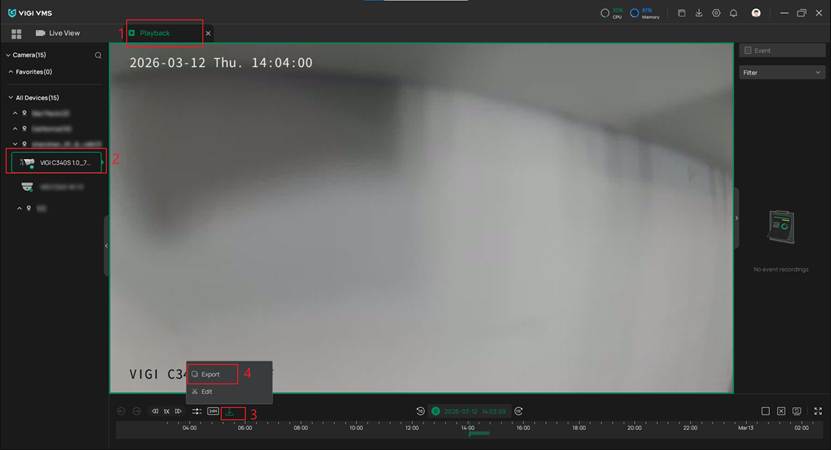
Step 1. Log in to the PC Client with your account, select the organization, and navigate to the Playback page to locate the IPC. Then, click Download to access the Export options.
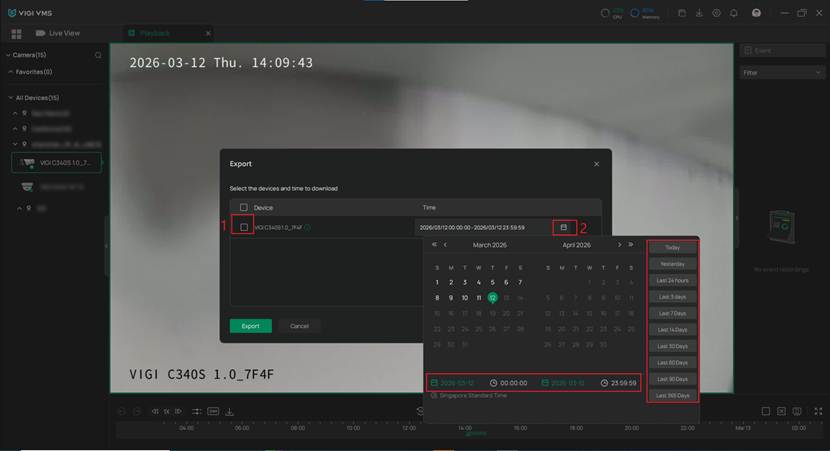
Step 2. After that, select a device, date, and time to download the recording. Click Export.
Step 3. Specify the save path for your recordings and choose the desired Export Format. Additionally, select whether to Merge Downloaded Video Files within a specified time period. Finally, select whether to Inquire when Download and Apply settings.
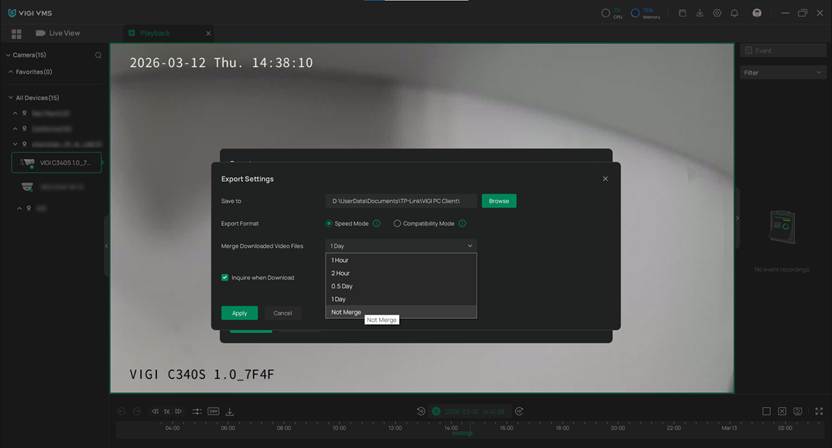
Speed Mode: The recordings will be quickly exported in the original format.
Compatible Mode: Recordings will be automatically converted to H.264 for use in a variety of digital products.
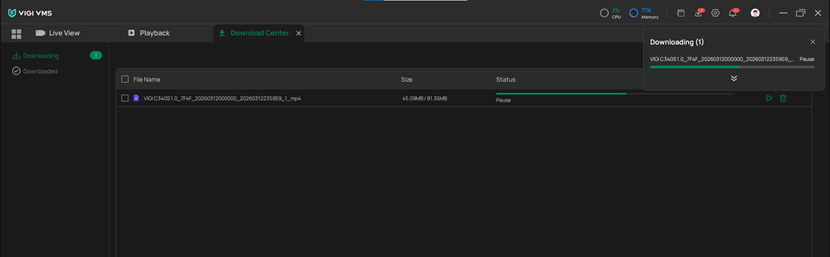
Step 4. The downloaded file will appear in the Download Center. Once the download is complete, you can view it.
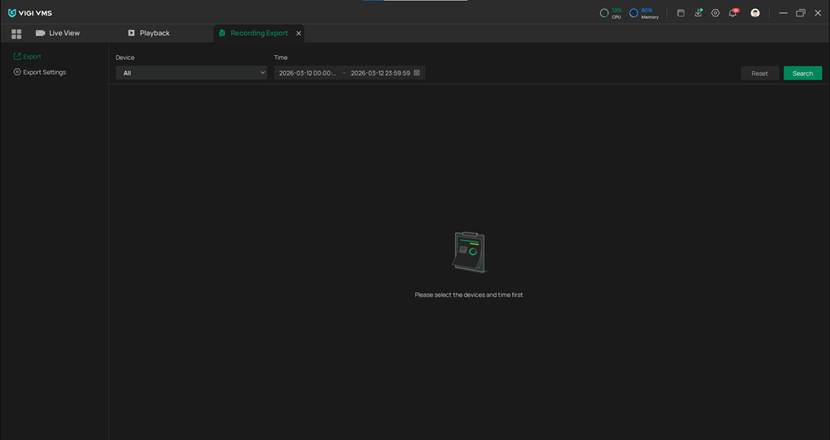
Export Recording from the Recording Export page
Step 1. Log in to the PC Client with your account, select the organization, and click Recording Export to load the following page.
Step 2. Go to the Export page to select a device, date, and time. Then click Search. The relevant recordings will be listed. Select the device and click Export.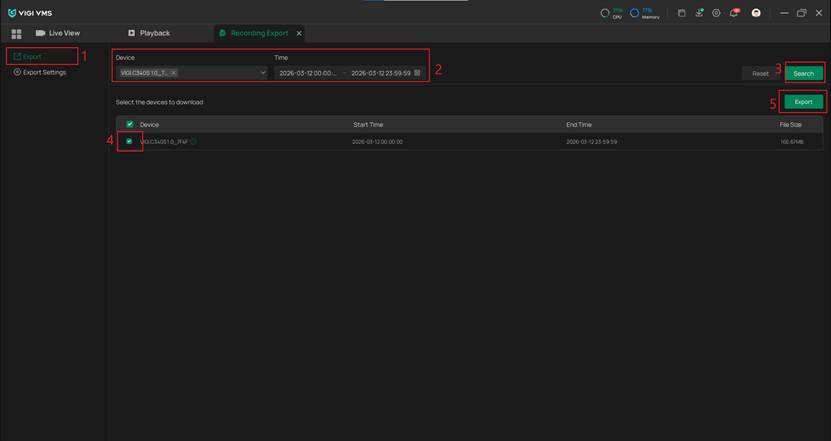
Step 3. The Export Settings page will appear. Similar to Step 3 in "Export Recording from the Playback Page”, configure the export mode and click Apply. The video file will be downloaded automatically.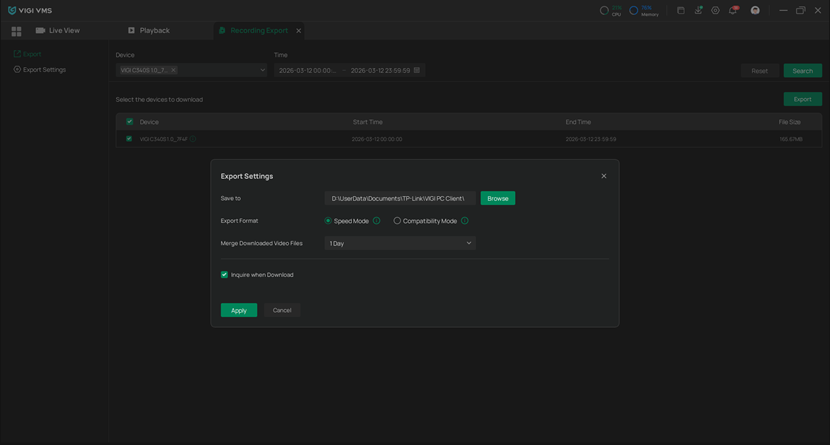
Conclusion
Now you have learned how to export recordings from the PC Client.
Get to know more details of each function and configuration please go to Download Center to download the manual of your product.
