


Package Contents
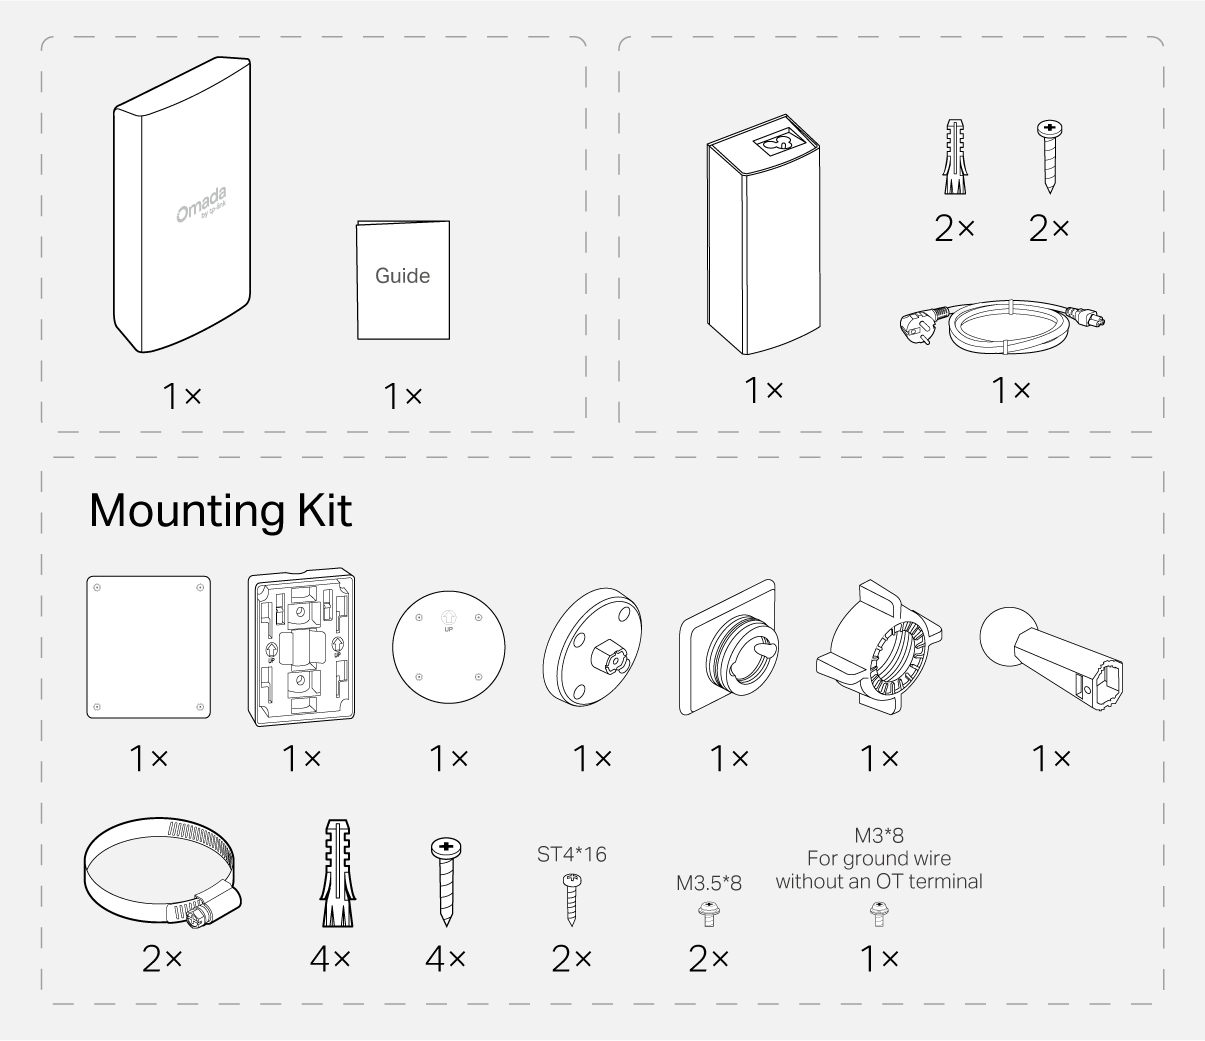
Note: Accessories may vary by region and model.
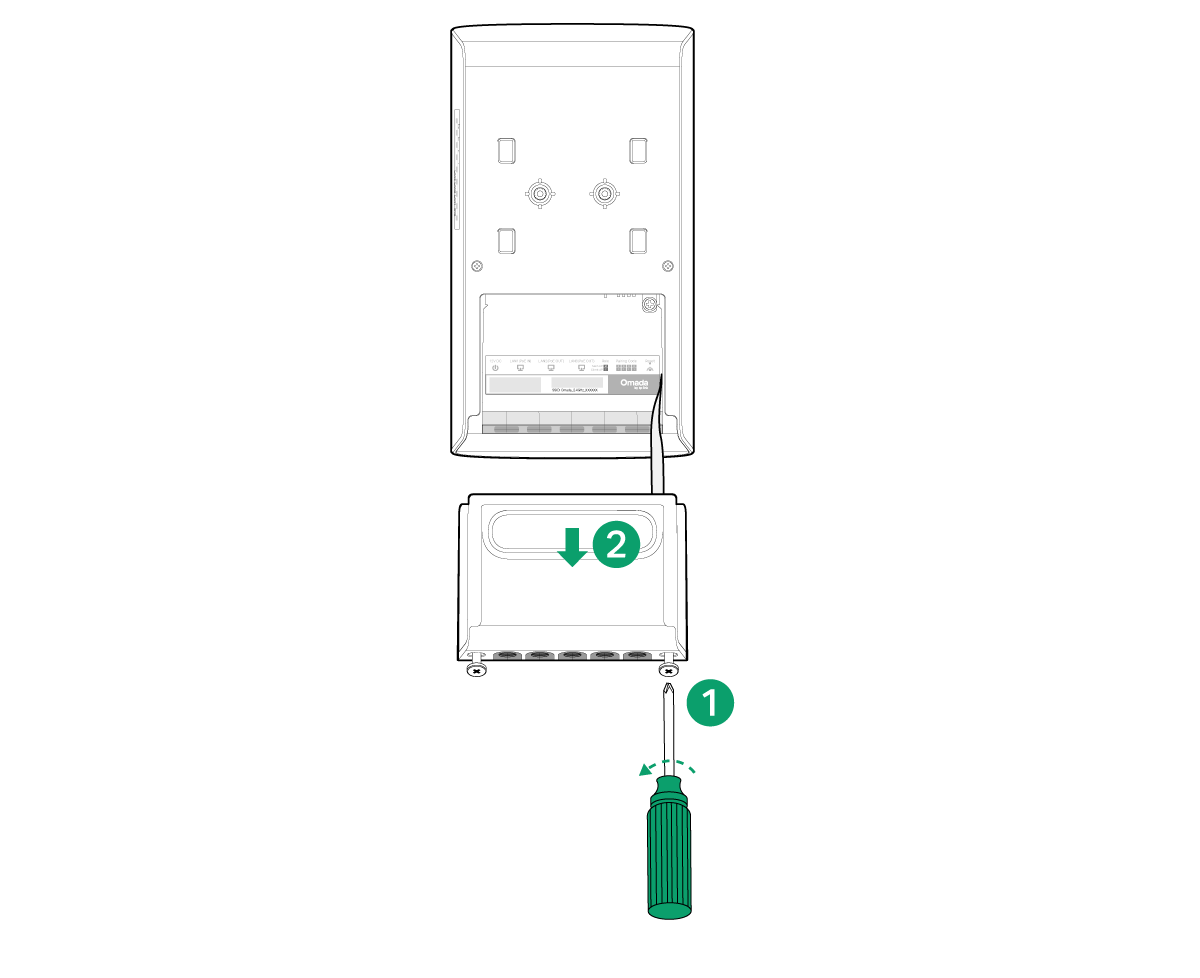
1 Open the Cover
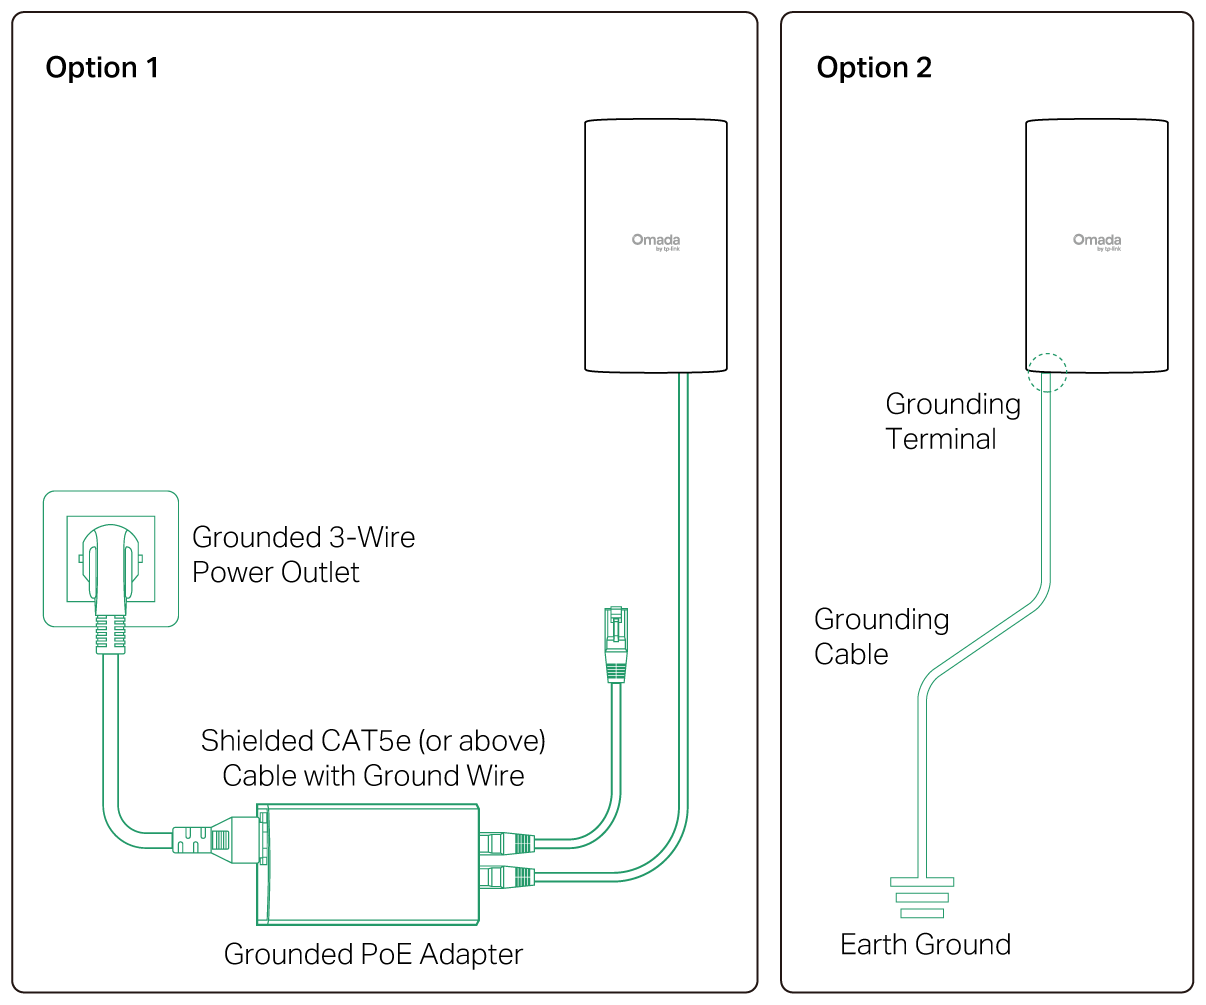
2 Grounding
3 Power On

4 Pairing
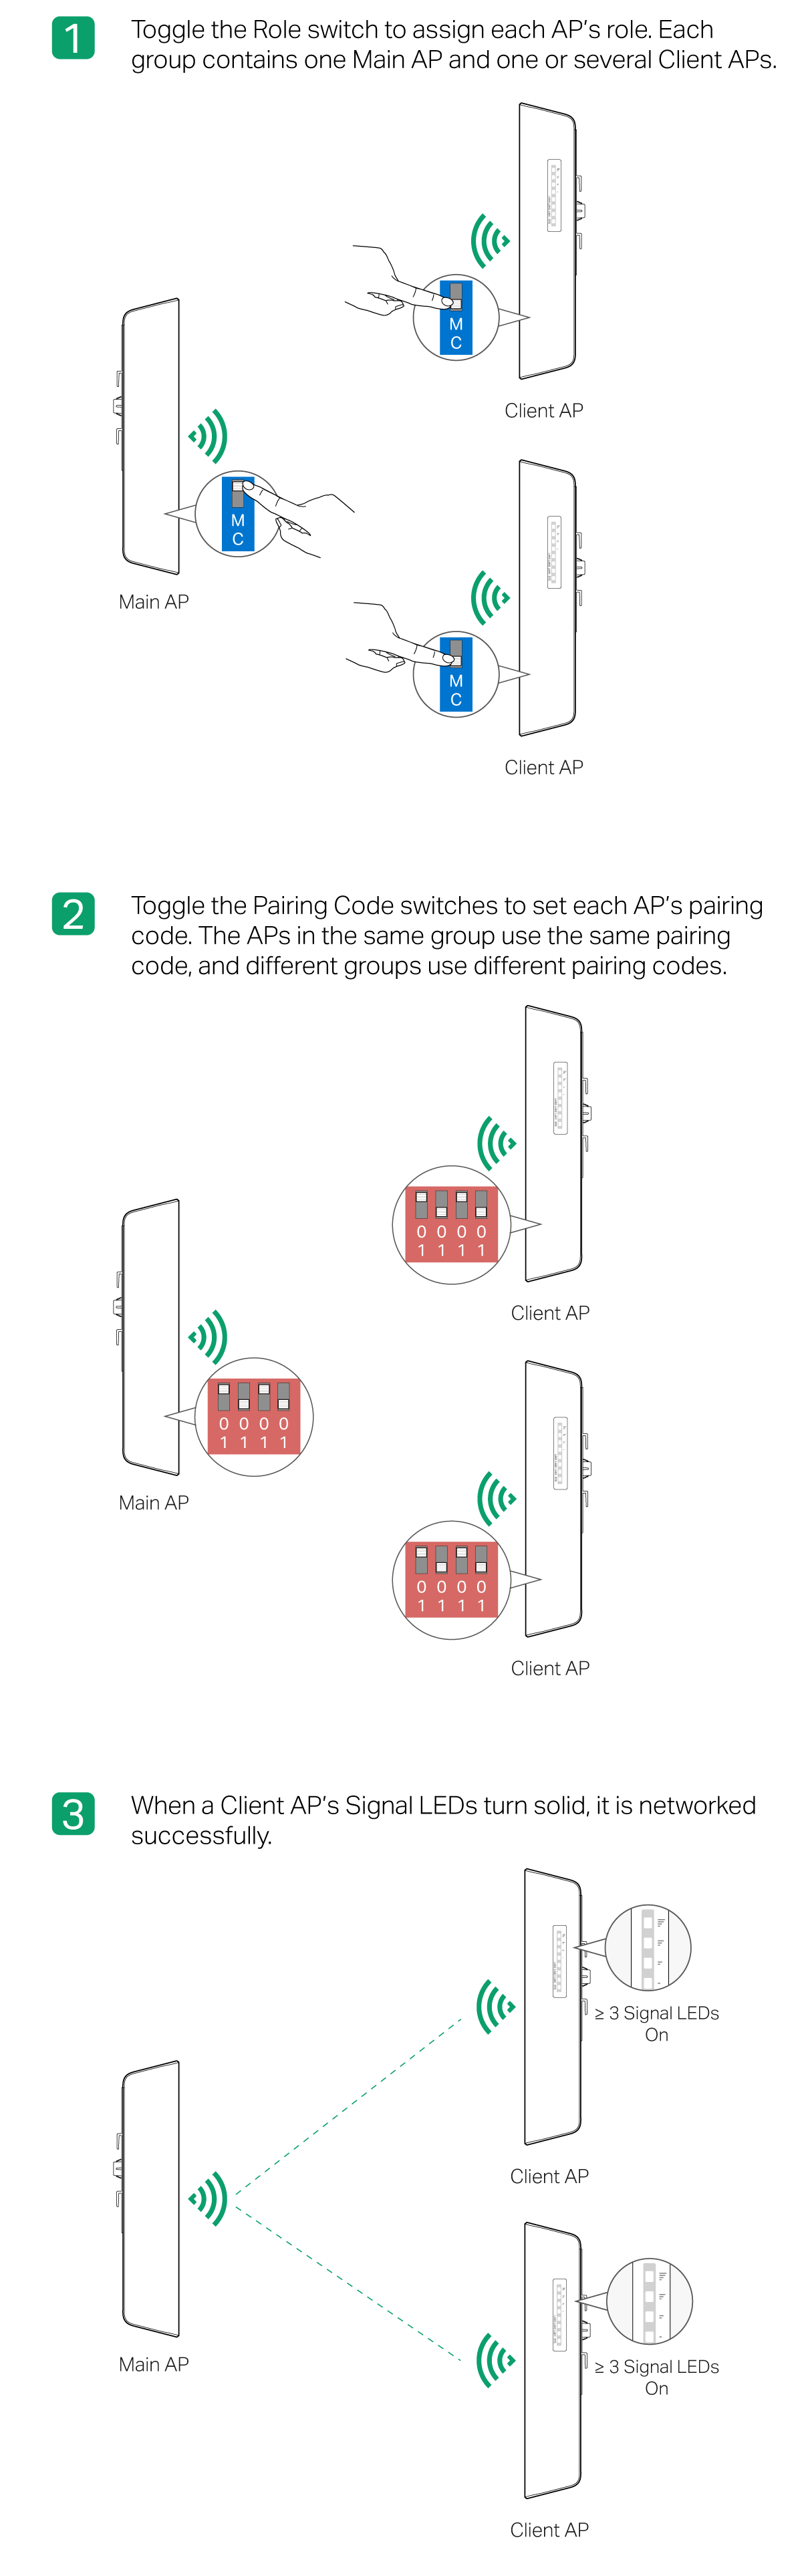
Notes:
1. Normally, the wireless bridge setup completes within 2 minutes. If the connection is not established within 10 minutes, please check the following:
• Ensure that the Pairing Code switches on the Client AP are set to the same code as the Main AP.
• Adjust the alignment and orientation of the Client AP to ensure it is properly aimed at the Main AP and receiving sufficient signal strength.
2. The Main AP’s pairing window will time out 2 hours after the first Client AP connects to it. To start the pairing window again, refer to the user manual at https://support.omadanetworks.com/document/.
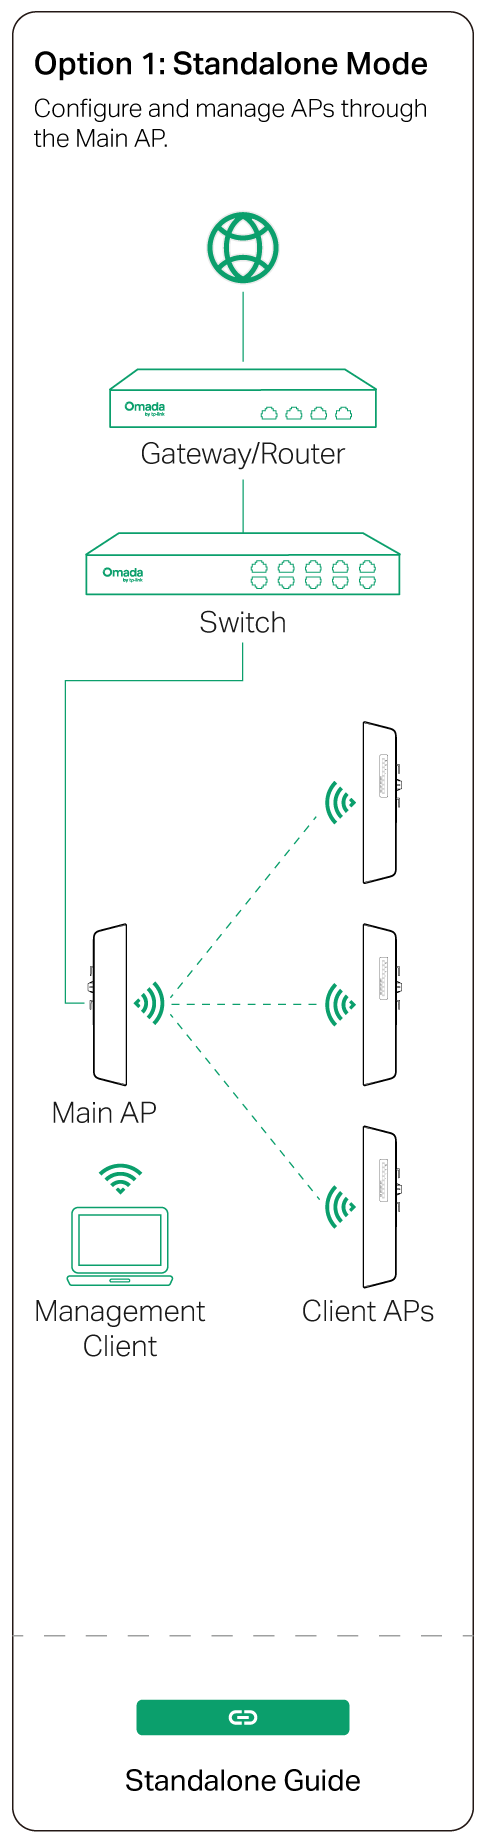
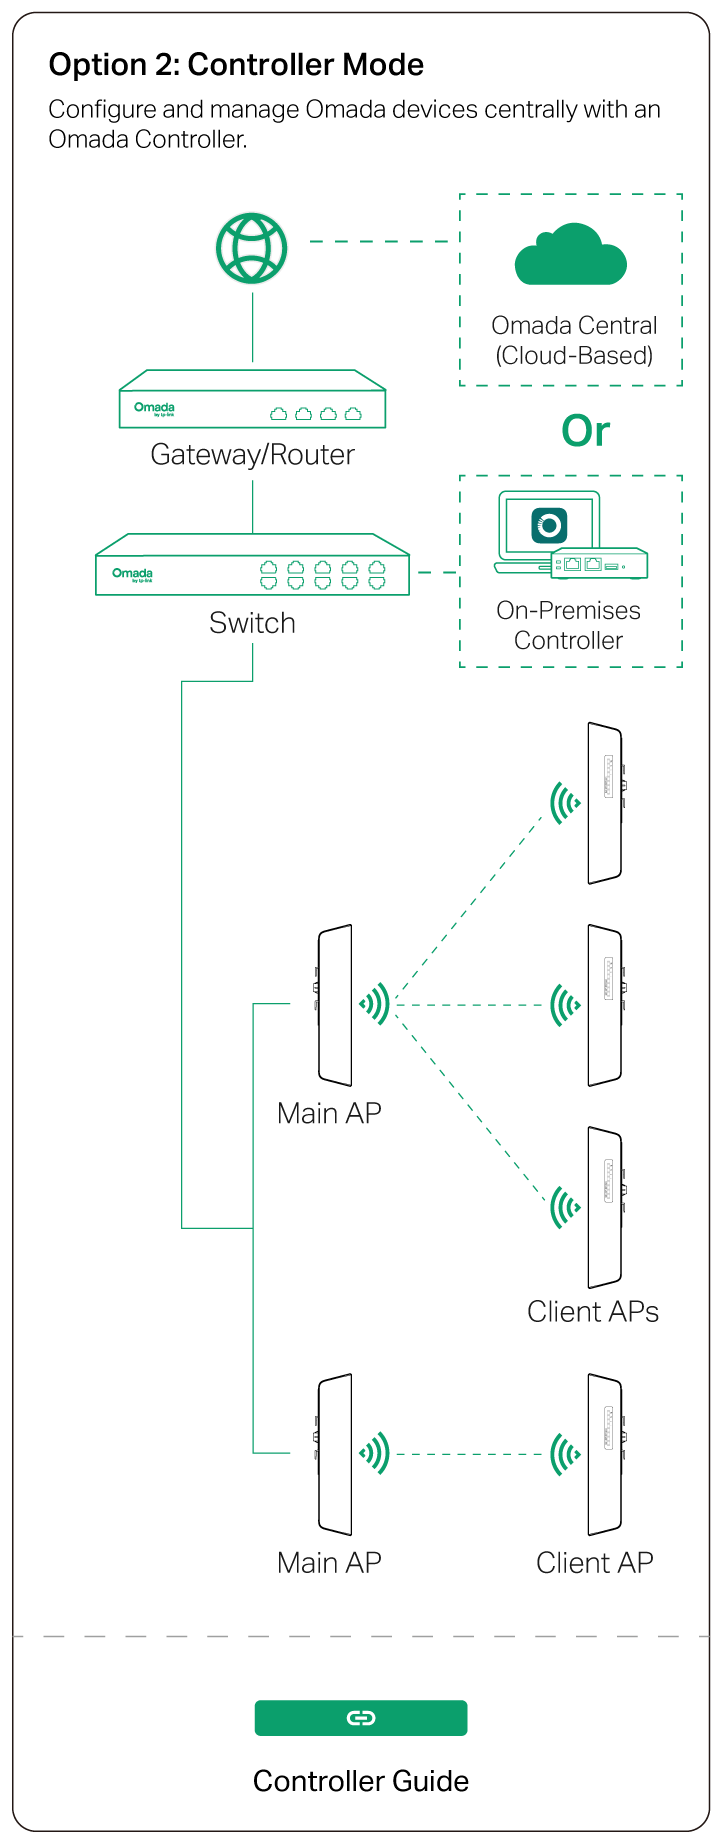
5 Typical Topology

Note:
1. The default SSID on the product is only for device access and management. If you need an SSID to access the internet and service networks, refer to the Network Management section to set up the AP.
2. In a network without a DHCP Server, the Main AP will use the DHCP fallback IP address 192.168.0.254 and assign IP addresses to Client APs.
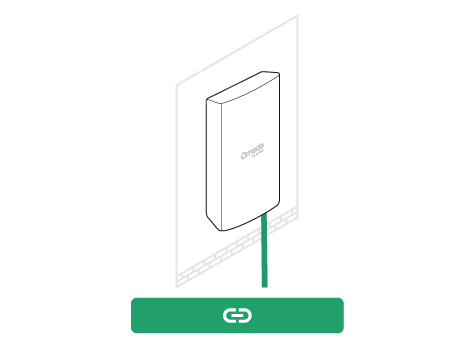
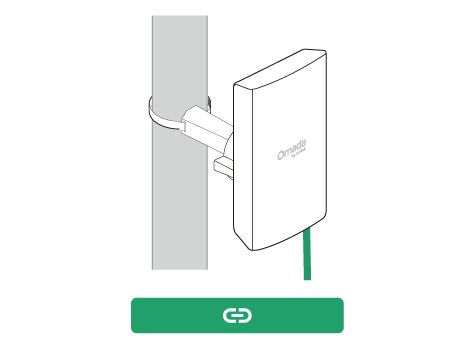
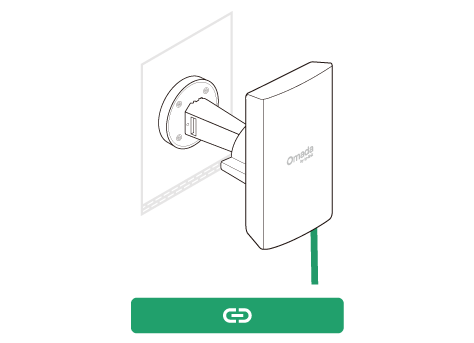
6 Mounting
Note: The product can only be installed by instructed person or skilled person.
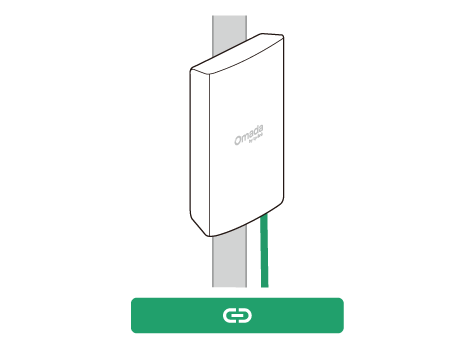
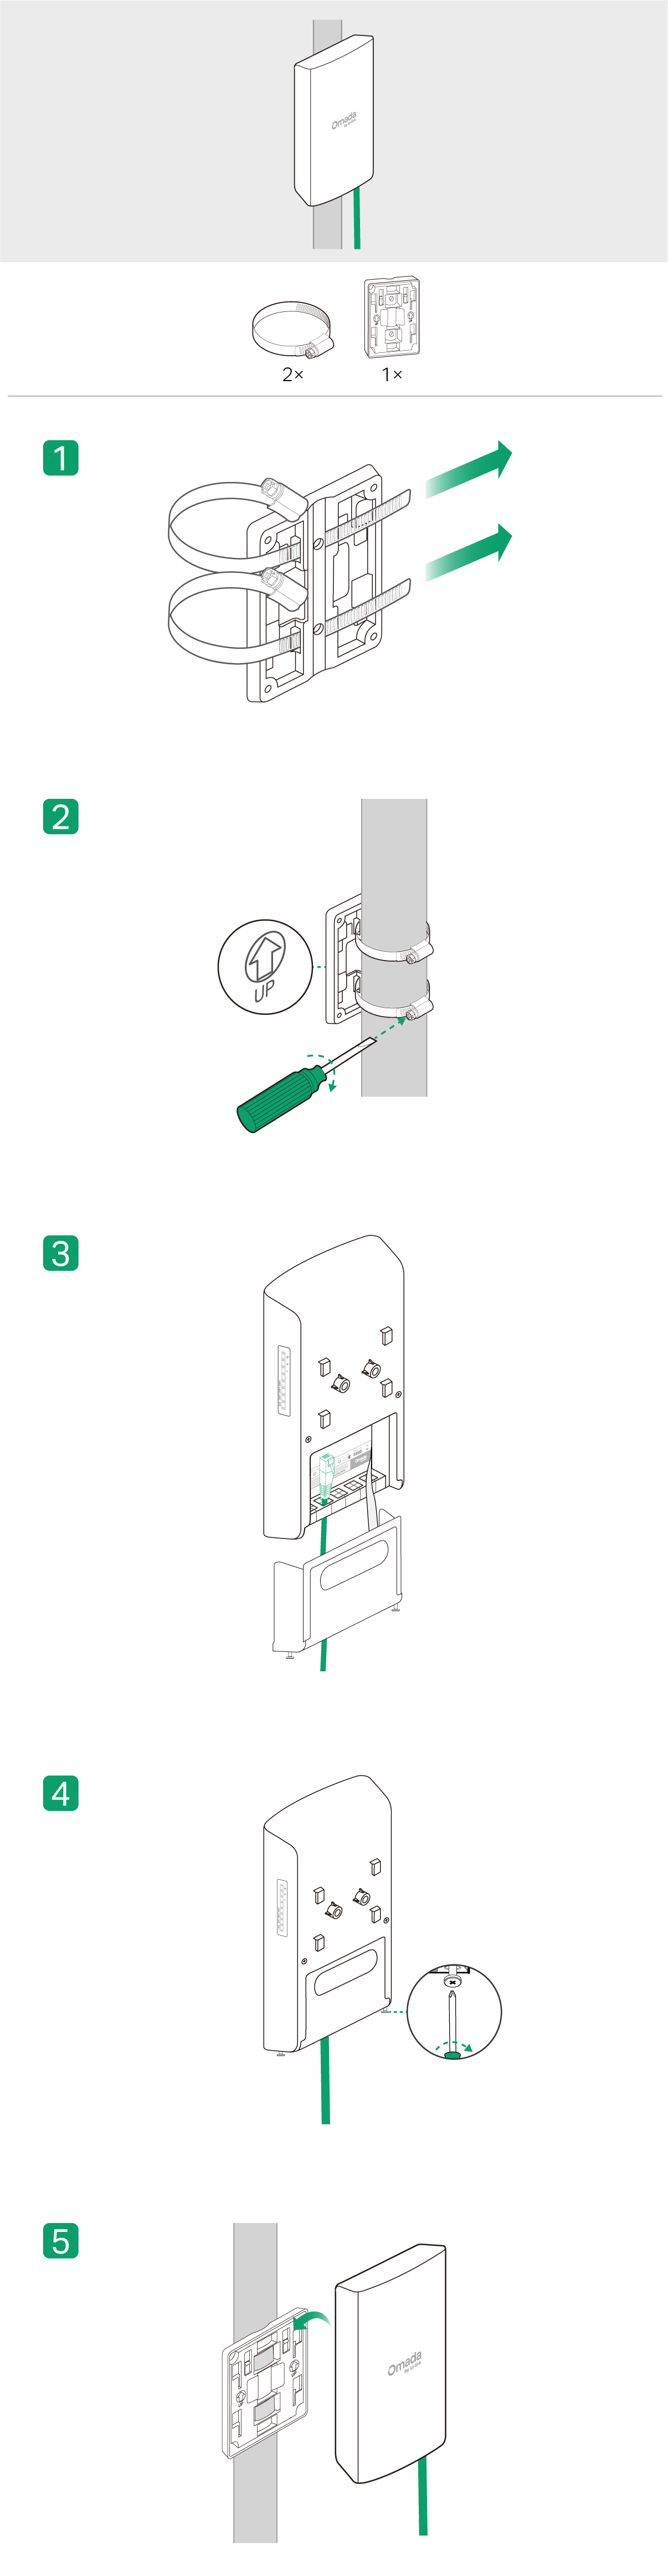
Pole Mounting (via the Bracket)
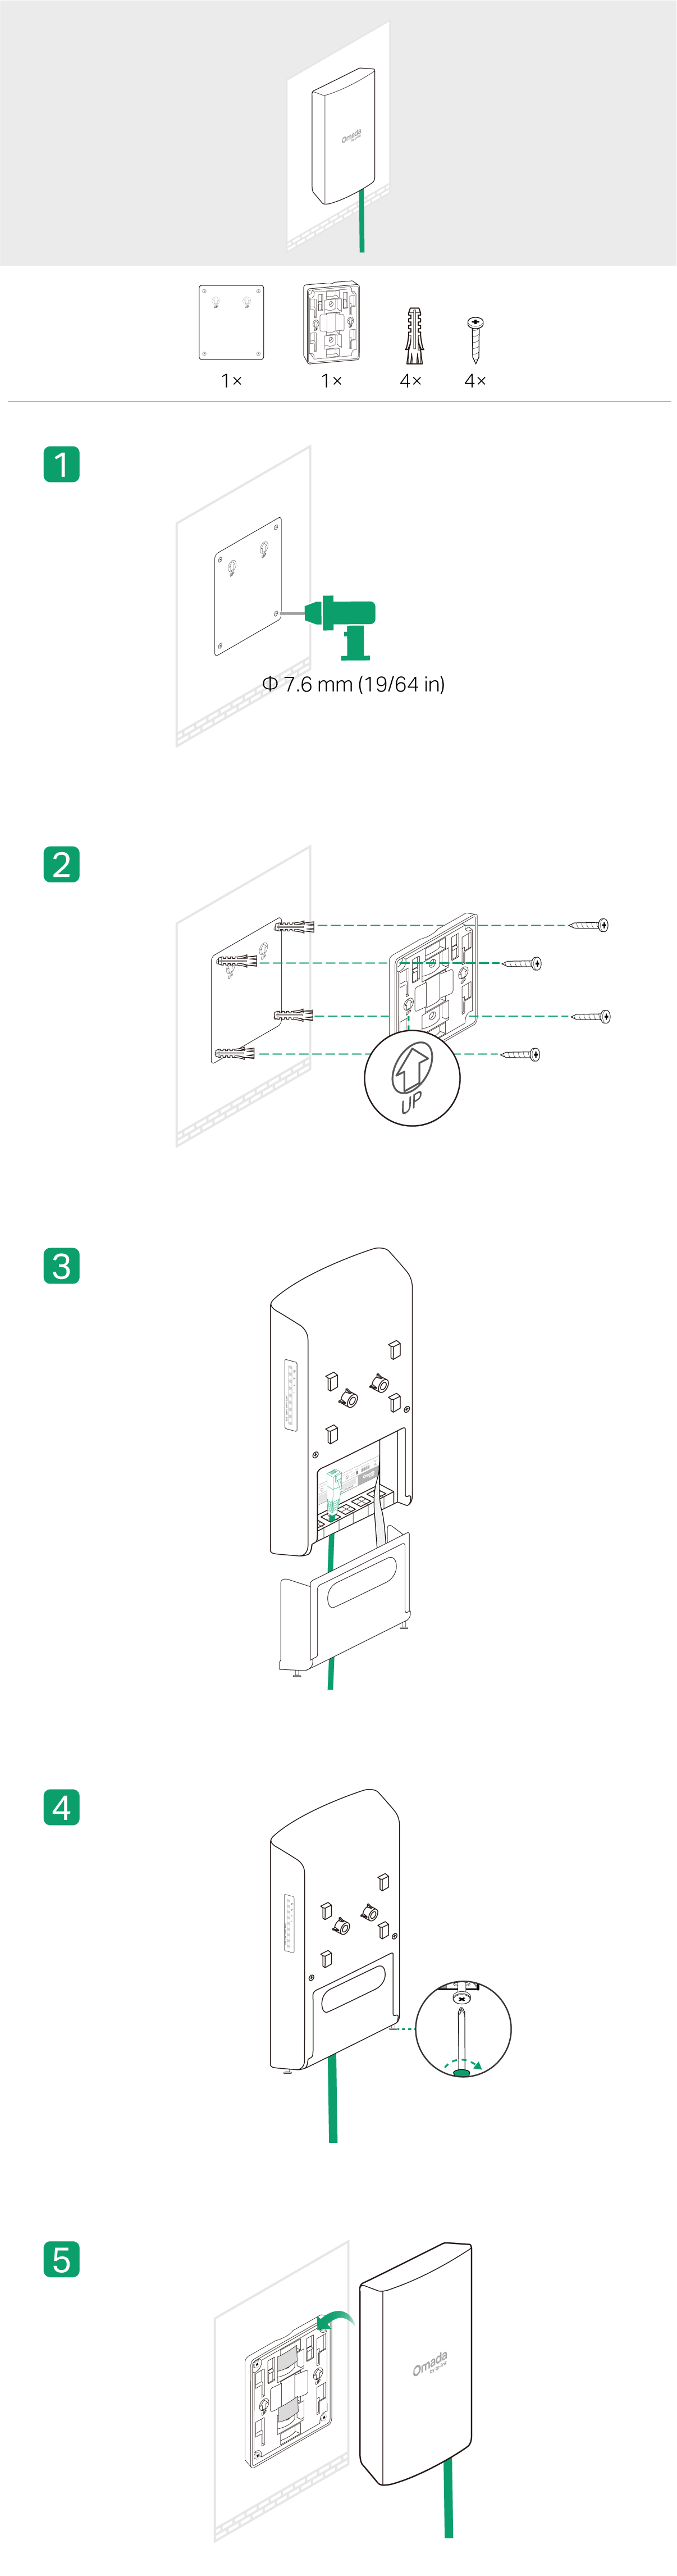
Wall Mounting (via the Bracket)
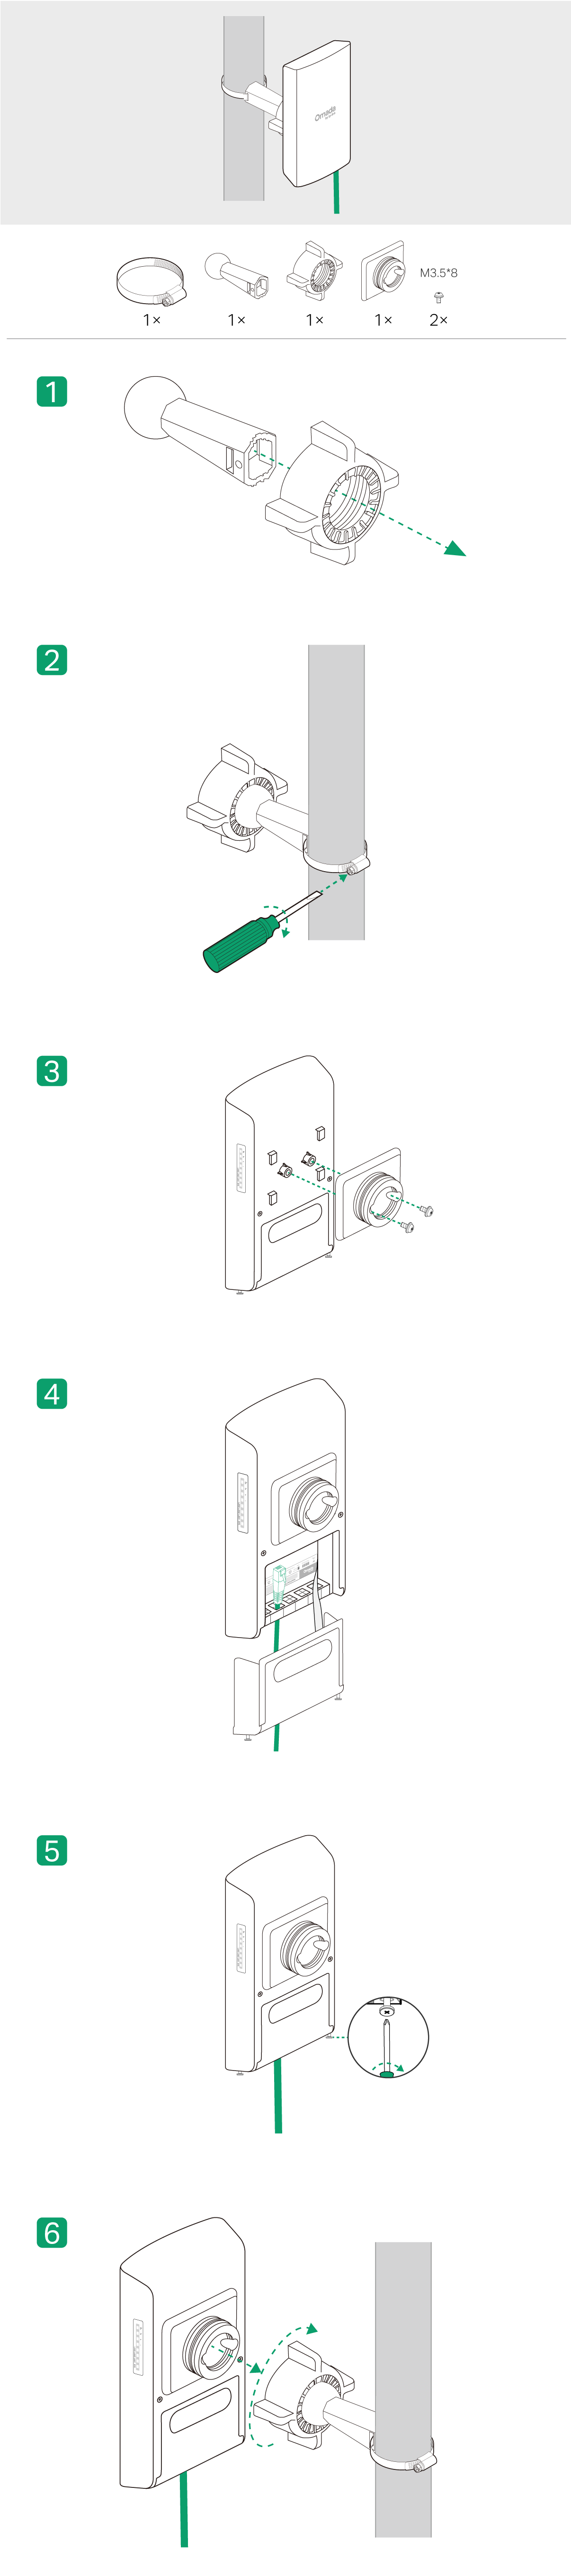
Pole Mounting (via the U-Joint)
Wall Mounting (via the U-Joint)

7 Network Management
Omada App


Mount the Power Adapter (Optional)
_画板_1_20251214044843b.png)
